![To make quick refrigerator pickled okra, you need fresh okra and some basic items from your pantry. Here’s what you will need: - 1 pound fresh okra, stems trimmed - 1 cup white vinegar - 1 cup water - 2 tablespoons sea salt - 1 tablespoon sugar Fresh okra gives your pickles a crunchy texture. The vinegar adds the tangy flavor that makes pickles pop. Water helps dilute the vinegar so it's not too strong. Seasoning is key to making flavorful pickled okra. Here are the extras you will need to enhance the taste: - 4 cloves garlic, peeled and crushed - 1 teaspoon black mustard seeds - 1 teaspoon dill seeds - 1 teaspoon red pepper flakes (adjust for spice level) - 1 bay leaf Garlic adds a nice depth of flavor. Mustard seeds and dill seeds bring a delightful crunch and aroma. Red pepper flakes let you control the heat level. The bay leaf rounds out the taste, making each bite savory. Using these ingredients, you create a tangy and crunchy snack. You can find the full recipe in the link provided. First, choose clean jars with lids. Glass jars work best because they don’t react with the brine. You can use one large jar or multiple small jars, depending on your preference. Make sure the jars are sterilized. To do this, wash them in hot, soapy water. Rinse well and then place them in a hot oven for about 10 minutes. This step keeps your pickled okra safe and fresh. Now, let’s make the brine. In a medium saucepan, combine one cup of white vinegar, one cup of water, two tablespoons of sea salt, and one tablespoon of sugar. Stir these ingredients well. Turn the heat to medium and bring the mixture to a boil. Once it boils, keep stirring until the salt and sugar dissolve. Remove the pan from the heat. Allow the brine to cool for about five to ten minutes. This cooling time is important for the okra’s crunch. While the brine cools, prepare the okra. Take one pound of fresh okra and trim the stems. Stand the okra upright in your prepared jar. This helps them pickle evenly. Next, add the crushed garlic, black mustard seeds, dill seeds, red pepper flakes, and a bay leaf. You can adjust the red pepper flakes to make it spicier or milder. Once everything is in the jar, carefully pour the warm brine over the okra. Make sure they are fully submerged. If needed, add a bit more vinegar or water to cover the okra completely. Seal the jar tightly with its lid. Let it cool to room temperature before putting it in the fridge. For the best taste, wait at least 24 hours before enjoying your crunchy pickled okra. For the full recipe, check out the [Full Recipe]. To make your pickled okra stand out, try adding a few extra flavors. You can use fresh herbs like dill or thyme. A splash of lemon juice adds brightness. If you love heat, add more red pepper flakes. Experiment with spices too. Try coriander seeds or cumin for a unique twist. Each addition changes the taste, so enjoy the fun of mixing flavors. Crunchy okra is key to a great snack. Here are some tips to keep them crisp. First, use fresh okra that is firm and bright green. Avoid soft or bruised pods. When you pack the jar, stand the okra upright. This helps them stay crunchy as they soak in the brine. Make sure the brine covers the okra completely. If not, add more vinegar or water. Avoid a few common pitfalls when making your pickled okra. First, don't skip the sterilization step. Clean jars prevent bacteria. Also, be careful with the salt. Too much can make the okra too salty. Follow the recipe closely to keep the balance. Finally, don’t rush the pickling process. Let them sit in the fridge for at least 24 hours. This time helps the flavors develop fully. For the full recipe, click here. {{image_2}} Want to kick up the heat? Add more red pepper flakes! You can use up to two teaspoons. If you love spice, try adding sliced jalapeños or habaneros to the jar. This will give your pickles a fiery twist. The spice mixes well with the tangy brine. It’s a great way to enjoy a crunchy snack with a kick! Herbs can add a fresh flavor to your pickled okra. Try adding fresh dill or cilantro to your jar. You can also use thyme or oregano. Simply place a few sprigs among the okra before adding the brine. The herbs will infuse their taste into the okra over time. This makes for a unique and tasty snack! Don’t stop at okra! Many veggies can be pickled for a tasty treat. Try cucumbers, carrots, or radishes. Cauliflower and bell peppers also work well. The same brine recipe will work for these veggies. Just adjust the pickling time based on their size. This way, you can enjoy a rainbow of crunchy, tangy snacks! For the full recipe, check out Quick and Zesty Refrigerator Pickled Okra. Each variation allows you to explore new flavors while keeping the process simple and fun! Store your pickled okra in the fridge. Use a clean, airtight jar. Keep it whole and packed tight. This way, the okra stays fresh and crunchy. Always use a clean utensil when taking some out. This helps avoid germs and keeps your snack safe. Refrigerator pickled okra can last up to 3 months. The flavors get better over time. Try to eat it within this time for the best taste. If you notice any changes, check for signs of spoilage. Check your pickled okra for any off smells. If it smells bad, throw it away. Look for any cloudiness in the jar or a change in color. If the okra is slimy or mushy, it’s time to toss it. Always trust your senses. When in doubt, don’t eat it. It takes at least 24 hours to pickle okra. The longer you wait, the more flavor you get. If you want a quick taste, you can eat them after just a few hours. However, I recommend waiting for the best crunch and tang. Yes, you can reuse the brine for another batch of pickles. Just strain it to remove any bits. Make sure it is still fresh and not cloudy. If it looks off, it’s best to make a new batch. This way, you save time and reduce waste. Pickled okra adds a zing to many dishes. It pairs great with sandwiches and salads. You can also serve it as a snack with cheese and crackers. For a fun twist, add it to tacos or burgers. The tangy flavor makes every bite better. Check out the Full Recipe for more ideas! We covered how to pickle okra, from ingredients to storage. You learned about using fresh okra and pantry staples, plus seasonings for extra flavor. I shared tips to achieve crunch and avoid common mistakes. We explored spicy variations and other veggies you can pickle. Proper storage ensures your pickles last, and I answered key questions about the process. Pickling okra can be fun and tasty. Enjoy the process and the delicious results!](https://therecipehatch.com/wp-content/uploads/2025/06/e8df0f33-cf54-4251-8cd7-da4bae15a940.webp)
Looking for a fun, crunchy snack? Quick Refrigerator Pickled Okra brings a burst of flavor to your plate! This easy recipe transforms fresh okra into a tangy treat that’s perfect for munching or adding to meals. With simple ingredients and step-by-step instructions, I’ll guide you to pickling perfection. Get ready to enjoy a snack that’s not just delicious but also packed with nutrition! Let’s dive in!
Ingredients
Fresh Okra and Pantry Staples
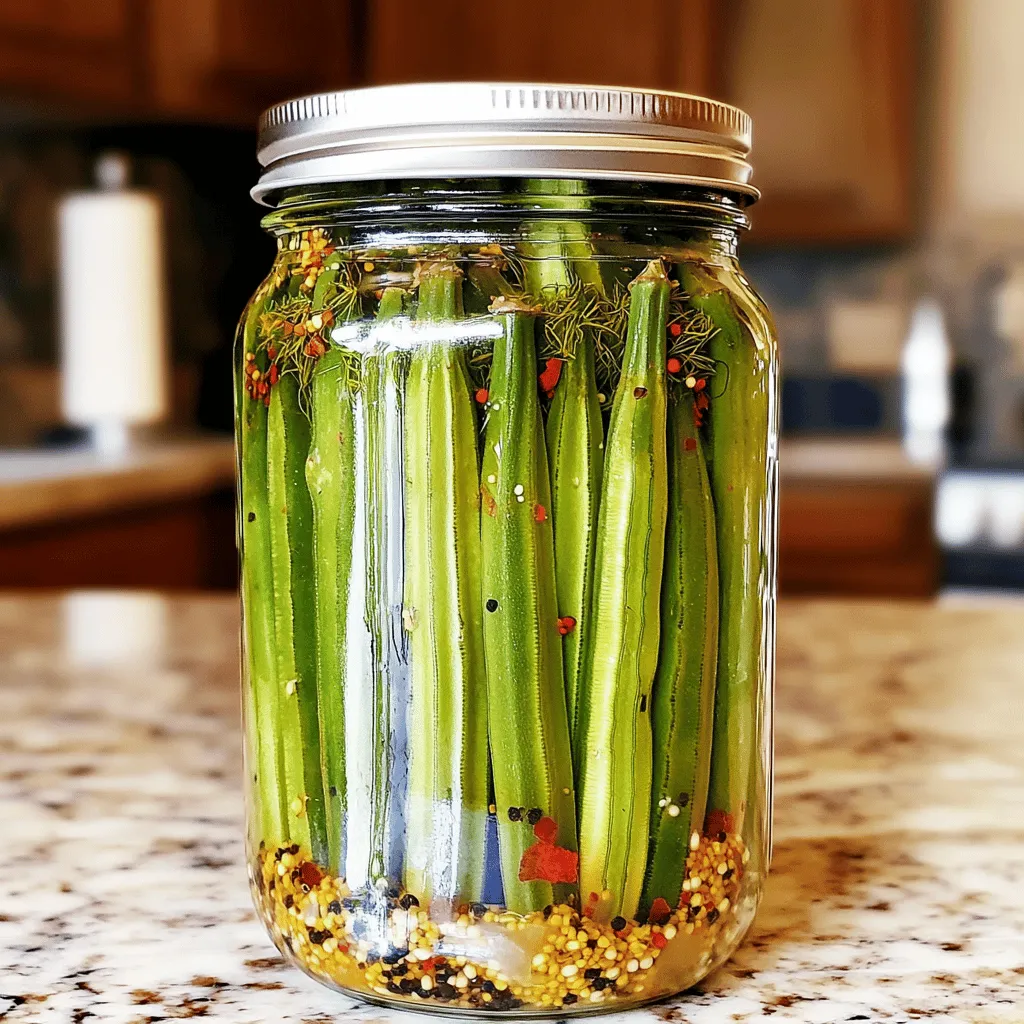
To make quick refrigerator pickled okra, you need fresh okra and some basic items from your pantry. Here’s what you will need:
– 1 pound fresh okra, stems trimmed
– 1 cup white vinegar
– 1 cup water
– 2 tablespoons sea salt
– 1 tablespoon sugar
Fresh okra gives your pickles a crunchy texture. The vinegar adds the tangy flavor that makes pickles pop. Water helps dilute the vinegar so it’s not too strong.
Seasonings and Flavor Enhancers
Seasoning is key to making flavorful pickled okra. Here are the extras you will need to enhance the taste:
– 4 cloves garlic, peeled and crushed
– 1 teaspoon black mustard seeds
– 1 teaspoon dill seeds
– 1 teaspoon red pepper flakes (adjust for spice level)
– 1 bay leaf
Garlic adds a nice depth of flavor. Mustard seeds and dill seeds bring a delightful crunch and aroma. Red pepper flakes let you control the heat level. The bay leaf rounds out the taste, making each bite savory.
Using these ingredients, you create a tangy and crunchy snack. You can find the full recipe in the link provided.
Step-by-Step Instructions
Preparing Your Jars
First, choose clean jars with lids. Glass jars work best because they don’t react with the brine. You can use one large jar or multiple small jars, depending on your preference. Make sure the jars are sterilized. To do this, wash them in hot, soapy water. Rinse well and then place them in a hot oven for about 10 minutes. This step keeps your pickled okra safe and fresh.
Making the Brine
Now, let’s make the brine. In a medium saucepan, combine one cup of white vinegar, one cup of water, two tablespoons of sea salt, and one tablespoon of sugar. Stir these ingredients well. Turn the heat to medium and bring the mixture to a boil. Once it boils, keep stirring until the salt and sugar dissolve. Remove the pan from the heat. Allow the brine to cool for about five to ten minutes. This cooling time is important for the okra’s crunch.
Packing the Okra
While the brine cools, prepare the okra. Take one pound of fresh okra and trim the stems. Stand the okra upright in your prepared jar. This helps them pickle evenly. Next, add the crushed garlic, black mustard seeds, dill seeds, red pepper flakes, and a bay leaf. You can adjust the red pepper flakes to make it spicier or milder. Once everything is in the jar, carefully pour the warm brine over the okra. Make sure they are fully submerged. If needed, add a bit more vinegar or water to cover the okra completely. Seal the jar tightly with its lid. Let it cool to room temperature before putting it in the fridge. For the best taste, wait at least 24 hours before enjoying your crunchy pickled okra.
For the full recipe, check out the [Full Recipe].
Tips & Tricks
Enhancing Flavor
To make your pickled okra stand out, try adding a few extra flavors. You can use fresh herbs like dill or thyme. A splash of lemon juice adds brightness. If you love heat, add more red pepper flakes. Experiment with spices too. Try coriander seeds or cumin for a unique twist. Each addition changes the taste, so enjoy the fun of mixing flavors.
Achieving the Perfect Crunch
Crunchy okra is key to a great snack. Here are some tips to keep them crisp. First, use fresh okra that is firm and bright green. Avoid soft or bruised pods. When you pack the jar, stand the okra upright. This helps them stay crunchy as they soak in the brine. Make sure the brine covers the okra completely. If not, add more vinegar or water.
Common Mistakes to Avoid
Avoid a few common pitfalls when making your pickled okra. First, don’t skip the sterilization step. Clean jars prevent bacteria. Also, be careful with the salt. Too much can make the okra too salty. Follow the recipe closely to keep the balance. Finally, don’t rush the pickling process. Let them sit in the fridge for at least 24 hours. This time helps the flavors develop fully.
For the full recipe, click here.
Variations
Spicy Pickled Okra
Want to kick up the heat? Add more red pepper flakes! You can use up to two teaspoons. If you love spice, try adding sliced jalapeños or habaneros to the jar. This will give your pickles a fiery twist. The spice mixes well with the tangy brine. It’s a great way to enjoy a crunchy snack with a kick!
Herb-Infused Recipes
Herbs can add a fresh flavor to your pickled okra. Try adding fresh dill or cilantro to your jar. You can also use thyme or oregano. Simply place a few sprigs among the okra before adding the brine. The herbs will infuse their taste into the okra over time. This makes for a unique and tasty snack!
Other Vegetables That Can Be Pickled
Don’t stop at okra! Many veggies can be pickled for a tasty treat. Try cucumbers, carrots, or radishes. Cauliflower and bell peppers also work well. The same brine recipe will work for these veggies. Just adjust the pickling time based on their size. This way, you can enjoy a rainbow of crunchy, tangy snacks!
For the full recipe, check out Quick and Zesty Refrigerator Pickled Okra. Each variation allows you to explore new flavors while keeping the process simple and fun!
Storage Info
Best Storage Practices
Store your pickled okra in the fridge. Use a clean, airtight jar. Keep it whole and packed tight. This way, the okra stays fresh and crunchy. Always use a clean utensil when taking some out. This helps avoid germs and keeps your snack safe.
Shelf Life of Pickled Okra
Refrigerator pickled okra can last up to 3 months. The flavors get better over time. Try to eat it within this time for the best taste. If you notice any changes, check for signs of spoilage.
How to Know If It’s Gone Bad
Check your pickled okra for any off smells. If it smells bad, throw it away. Look for any cloudiness in the jar or a change in color. If the okra is slimy or mushy, it’s time to toss it. Always trust your senses. When in doubt, don’t eat it.
FAQs
How long does it take to pickle okra?
It takes at least 24 hours to pickle okra. The longer you wait, the more flavor you get. If you want a quick taste, you can eat them after just a few hours. However, I recommend waiting for the best crunch and tang.
Can I reuse the brine?
Yes, you can reuse the brine for another batch of pickles. Just strain it to remove any bits. Make sure it is still fresh and not cloudy. If it looks off, it’s best to make a new batch. This way, you save time and reduce waste.
What dishes pair well with pickled okra?
Pickled okra adds a zing to many dishes. It pairs great with sandwiches and salads. You can also serve it as a snack with cheese and crackers. For a fun twist, add it to tacos or burgers. The tangy flavor makes every bite better. Check out the Full Recipe for more ideas!
We covered how to pickle okra, from ingredients to storage. You learned about using fresh okra and pantry staples, plus seasonings for extra flavor. I shared tips to achieve crunch and avoid common mistakes. We explored spicy variations and other veggies you can pickle. Proper storage ensures your pickles last, and I answered key questions about the process.
Pickling okra can be fun and tasty. Enjoy the process and the delicious results!
![To make quick refrigerator pickled okra, you need fresh okra and some basic items from your pantry. Here’s what you will need: - 1 pound fresh okra, stems trimmed - 1 cup white vinegar - 1 cup water - 2 tablespoons sea salt - 1 tablespoon sugar Fresh okra gives your pickles a crunchy texture. The vinegar adds the tangy flavor that makes pickles pop. Water helps dilute the vinegar so it's not too strong. Seasoning is key to making flavorful pickled okra. Here are the extras you will need to enhance the taste: - 4 cloves garlic, peeled and crushed - 1 teaspoon black mustard seeds - 1 teaspoon dill seeds - 1 teaspoon red pepper flakes (adjust for spice level) - 1 bay leaf Garlic adds a nice depth of flavor. Mustard seeds and dill seeds bring a delightful crunch and aroma. Red pepper flakes let you control the heat level. The bay leaf rounds out the taste, making each bite savory. Using these ingredients, you create a tangy and crunchy snack. You can find the full recipe in the link provided. First, choose clean jars with lids. Glass jars work best because they don’t react with the brine. You can use one large jar or multiple small jars, depending on your preference. Make sure the jars are sterilized. To do this, wash them in hot, soapy water. Rinse well and then place them in a hot oven for about 10 minutes. This step keeps your pickled okra safe and fresh. Now, let’s make the brine. In a medium saucepan, combine one cup of white vinegar, one cup of water, two tablespoons of sea salt, and one tablespoon of sugar. Stir these ingredients well. Turn the heat to medium and bring the mixture to a boil. Once it boils, keep stirring until the salt and sugar dissolve. Remove the pan from the heat. Allow the brine to cool for about five to ten minutes. This cooling time is important for the okra’s crunch. While the brine cools, prepare the okra. Take one pound of fresh okra and trim the stems. Stand the okra upright in your prepared jar. This helps them pickle evenly. Next, add the crushed garlic, black mustard seeds, dill seeds, red pepper flakes, and a bay leaf. You can adjust the red pepper flakes to make it spicier or milder. Once everything is in the jar, carefully pour the warm brine over the okra. Make sure they are fully submerged. If needed, add a bit more vinegar or water to cover the okra completely. Seal the jar tightly with its lid. Let it cool to room temperature before putting it in the fridge. For the best taste, wait at least 24 hours before enjoying your crunchy pickled okra. For the full recipe, check out the [Full Recipe]. To make your pickled okra stand out, try adding a few extra flavors. You can use fresh herbs like dill or thyme. A splash of lemon juice adds brightness. If you love heat, add more red pepper flakes. Experiment with spices too. Try coriander seeds or cumin for a unique twist. Each addition changes the taste, so enjoy the fun of mixing flavors. Crunchy okra is key to a great snack. Here are some tips to keep them crisp. First, use fresh okra that is firm and bright green. Avoid soft or bruised pods. When you pack the jar, stand the okra upright. This helps them stay crunchy as they soak in the brine. Make sure the brine covers the okra completely. If not, add more vinegar or water. Avoid a few common pitfalls when making your pickled okra. First, don't skip the sterilization step. Clean jars prevent bacteria. Also, be careful with the salt. Too much can make the okra too salty. Follow the recipe closely to keep the balance. Finally, don’t rush the pickling process. Let them sit in the fridge for at least 24 hours. This time helps the flavors develop fully. For the full recipe, click here. {{image_2}} Want to kick up the heat? Add more red pepper flakes! You can use up to two teaspoons. If you love spice, try adding sliced jalapeños or habaneros to the jar. This will give your pickles a fiery twist. The spice mixes well with the tangy brine. It’s a great way to enjoy a crunchy snack with a kick! Herbs can add a fresh flavor to your pickled okra. Try adding fresh dill or cilantro to your jar. You can also use thyme or oregano. Simply place a few sprigs among the okra before adding the brine. The herbs will infuse their taste into the okra over time. This makes for a unique and tasty snack! Don’t stop at okra! Many veggies can be pickled for a tasty treat. Try cucumbers, carrots, or radishes. Cauliflower and bell peppers also work well. The same brine recipe will work for these veggies. Just adjust the pickling time based on their size. This way, you can enjoy a rainbow of crunchy, tangy snacks! For the full recipe, check out Quick and Zesty Refrigerator Pickled Okra. Each variation allows you to explore new flavors while keeping the process simple and fun! Store your pickled okra in the fridge. Use a clean, airtight jar. Keep it whole and packed tight. This way, the okra stays fresh and crunchy. Always use a clean utensil when taking some out. This helps avoid germs and keeps your snack safe. Refrigerator pickled okra can last up to 3 months. The flavors get better over time. Try to eat it within this time for the best taste. If you notice any changes, check for signs of spoilage. Check your pickled okra for any off smells. If it smells bad, throw it away. Look for any cloudiness in the jar or a change in color. If the okra is slimy or mushy, it’s time to toss it. Always trust your senses. When in doubt, don’t eat it. It takes at least 24 hours to pickle okra. The longer you wait, the more flavor you get. If you want a quick taste, you can eat them after just a few hours. However, I recommend waiting for the best crunch and tang. Yes, you can reuse the brine for another batch of pickles. Just strain it to remove any bits. Make sure it is still fresh and not cloudy. If it looks off, it’s best to make a new batch. This way, you save time and reduce waste. Pickled okra adds a zing to many dishes. It pairs great with sandwiches and salads. You can also serve it as a snack with cheese and crackers. For a fun twist, add it to tacos or burgers. The tangy flavor makes every bite better. Check out the Full Recipe for more ideas! We covered how to pickle okra, from ingredients to storage. You learned about using fresh okra and pantry staples, plus seasonings for extra flavor. I shared tips to achieve crunch and avoid common mistakes. We explored spicy variations and other veggies you can pickle. Proper storage ensures your pickles last, and I answered key questions about the process. Pickling okra can be fun and tasty. Enjoy the process and the delicious results!](https://therecipehatch.com/wp-content/uploads/2025/06/e8df0f33-cf54-4251-8cd7-da4bae15a940-300x300.webp)