Craving a fall treat that’s creamy and easy? Look no further! These No-Bake Pumpkin Cheesecake Cups are perfect for any occasion. With just a few simple ingredients like cream cheese and canned pumpkin puree, you can whip up a delicious dessert fast. Plus, no oven needed! Get ready to impress your friends and family. Let’s dive into making this delightful and festive treat that everyone will love!
Ingredients
List of Main Ingredients
– 1 cup cream cheese, softened
– 1 cup canned pumpkin puree
– 1/2 cup powdered sugar
The main ingredients make this dessert creamy and sweet. Cream cheese gives a rich base. Canned pumpkin puree adds flavor and a lovely color. Powdered sugar sweetens the mix, making it a treat.
Optional Ingredients
– Cinnamon for dusting
– Chopped pecans for garnish
Cinnamon adds warmth and spice. It enhances the pumpkin flavor. Chopped pecans add a nice crunch. They also give a pretty look to your cups.
Ingredients for the Crust
– 1 cup graham cracker crumbs
– 1/4 cup unsalted butter, melted
The crust is simple yet tasty. Graham cracker crumbs provide a sweet, crunchy base. Unsalted butter helps bind the crumbs together. This gives the crust a nice texture.
Step-by-Step Instructions
Preparation of the Pumpkin Mixture
Start by beating the cream cheese. Use an electric mixer in a medium bowl. Mix until the cream cheese is smooth and creamy. This step is key for a good texture. Next, add pumpkin puree, powdered sugar, vanilla extract, and pumpkin pie spice. Mix until everything is well-combined. The goal is a smooth and flavorful pumpkin mixture.
Whipping the Cream
Now, let’s whip the cream. In a clean bowl, pour the heavy cream. Use a hand mixer and beat until stiff peaks form. This means the cream should hold its shape well. It may take a few minutes, so be patient. Gently fold the whipped cream into the pumpkin mixture. Be careful not to deflate it. This keeps the blend light and fluffy.
Assembling the Cheesecake Cups
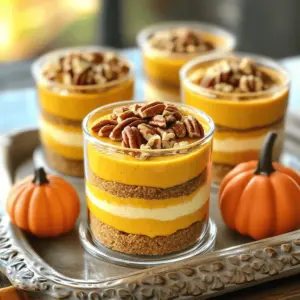
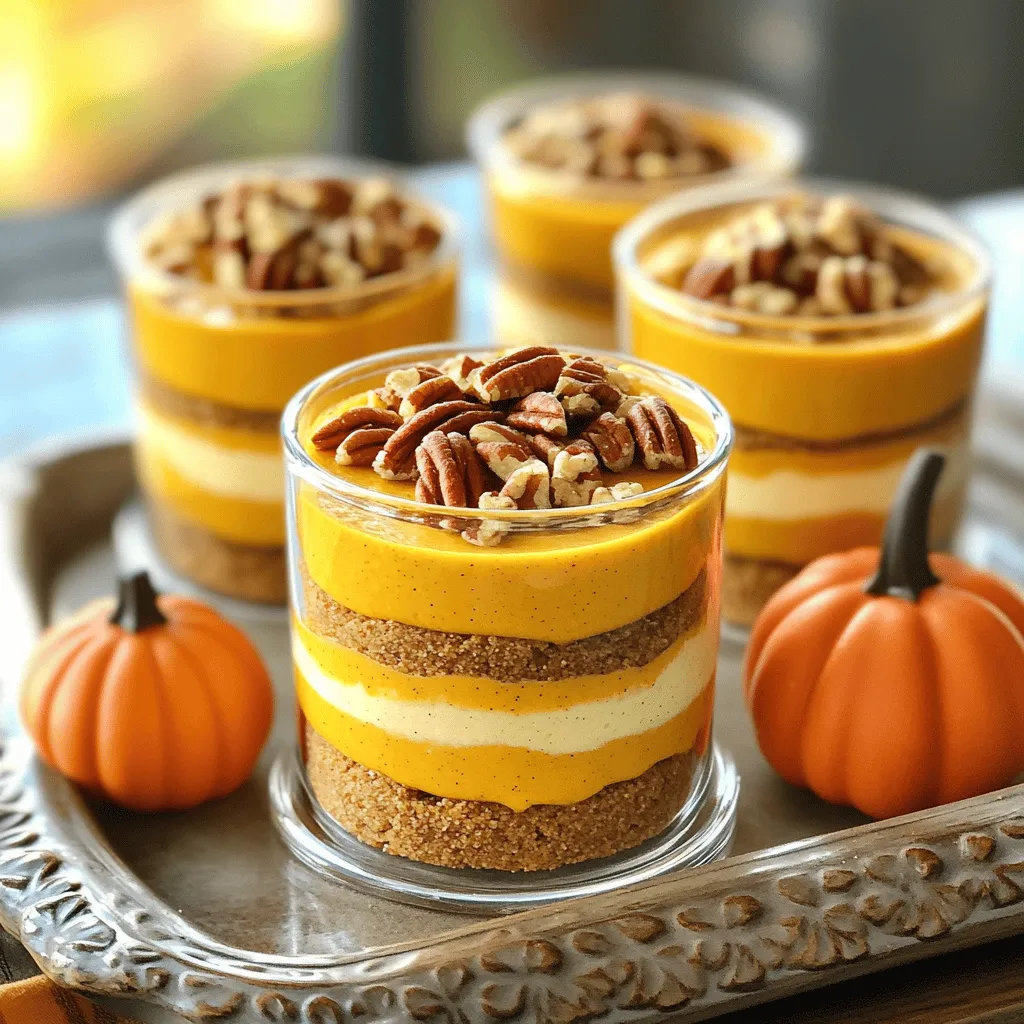
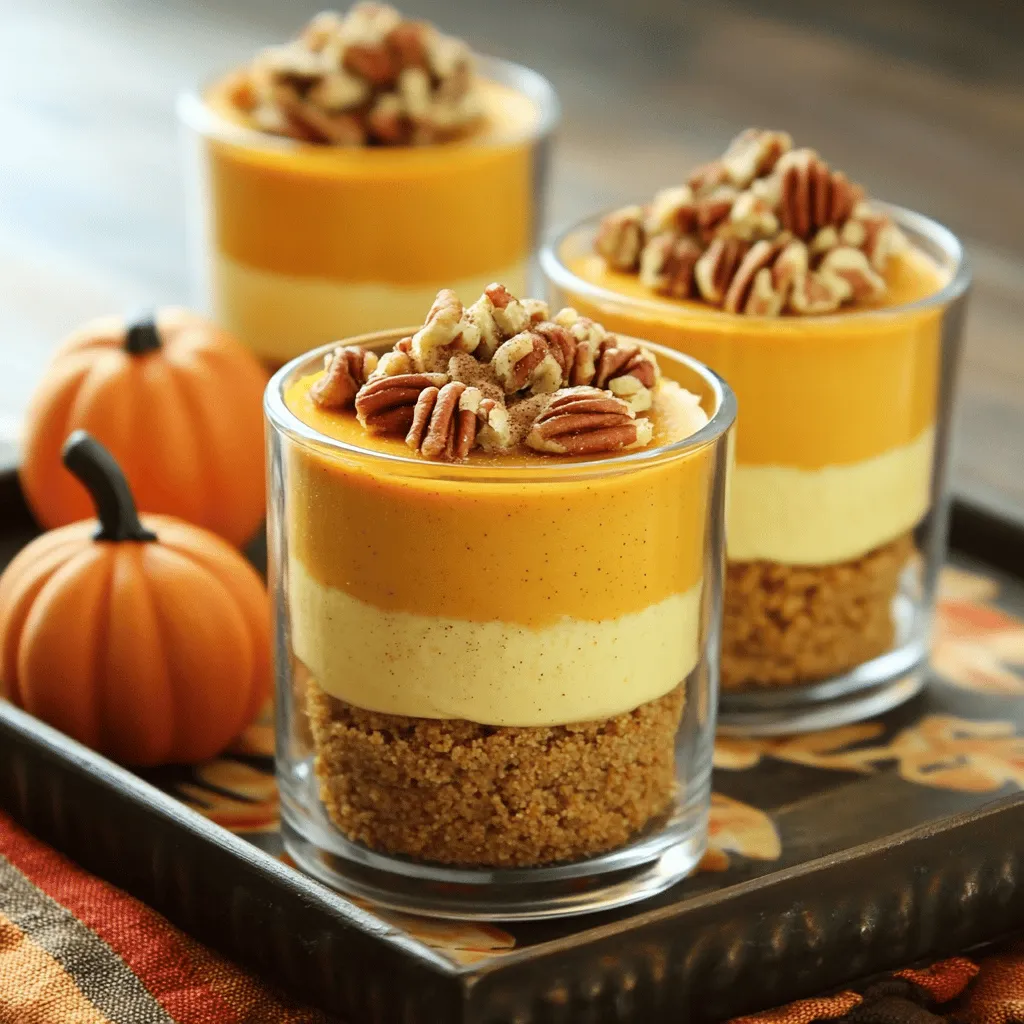
Time to assemble the cups! Take small cups or bowls. Start with a layer of graham cracker crumbs at the bottom. Press them down gently to form a solid base. Next, add a generous layer of the pumpkin cheesecake mixture on top. Repeat these layers until the cups are filled. Finish with a layer of the pumpkin mixture.
Now, refrigerate the cups for at least 2 hours. This helps them set properly. The longer they chill, the better they taste.
Tips & Tricks
Achieving the Perfect Texture
To get a creamy texture, fold the whipped cream gently into the pumpkin mix. Why? If you stir too hard, the air bubbles pop. This makes your cheesecake less fluffy. Use a spatula and lift the mixture from the bottom to the top. Be patient and keep folding until blended.
Serving Suggestions
You can serve these cups in many fun ways. Try using clear glass cups to show off the layers. Add a sprinkle of cinnamon on top for a pop of color. For a festive touch, place a small pumpkin next to the cups. You could even use mini pumpkins as cups for a unique look!
Enhancing Flavor
Want to boost the flavor? Add more spices! Try nutmeg or ginger for a warm taste. A little bit of orange zest can brighten the flavor too. Experiment with what you love. Just remember to keep it balanced, so the pumpkin shines through.
Variations
Dietary Substitutions
You can easily make this recipe dairy-free or vegan. For cream cheese, use a dairy-free cream cheese alternative. Many brands offer great flavors. Instead of heavy cream, try coconut cream. It whips up nicely and adds a hint of coconut flavor. You can also substitute powdered sugar with a vegan-friendly sweetener like agave or maple syrup.
Flavor Variations
Want to change the flavor? You can switch up the spices. Instead of pumpkin pie spice, try cinnamon or nutmeg. For a twist, add a bit of ginger or cardamom. You could also mix in some finely grated orange zest for a citrus kick. Each option adds a fun new taste to your cheesecake cups.
Altering the Crust
The crust is easy to change. If you love chocolate, use chocolate cookie crumbs instead of graham cracker crumbs. Just mix them with melted butter, as you would with the graham crackers. If you prefer a nutty flavor, try almond or pecan crumbs. These choices add variety and keep things exciting in your kitchen.
Storage Info
Best Practices for Refrigeration
To keep your No-Bake Pumpkin Cheesecake Cups fresh, store them in the fridge. Use an airtight container to prevent odors from other foods. You can also cover each cup with plastic wrap. This keeps the cheesecake moist and tasty. If you have leftovers, make sure to eat them within a few days for the best flavor.
Freezing Instructions
You can freeze these cheesecake cups if you want to save some for later. First, cover each cup with plastic wrap or foil. Then, place them in a freezer-safe bag or container. When you are ready to eat, take them out and thaw them in the fridge overnight. This way, they will stay creamy and delicious.
Shelf Life
These cheesecake cups can last in the fridge for about 3 to 4 days. If you freeze them, they can last up to 2 months. Just remember, the taste is best when they are fresh. Enjoy them while they are at their peak!
FAQs
Can I use fresh pumpkin instead of canned?
Yes, you can use fresh pumpkin. Fresh pumpkin gives a rich, natural taste. However, it requires more work. You must roast and puree it first. Canned pumpkin is easier and quicker. It is also consistent in flavor and texture. If you have fresh pumpkin, go for it! Just remember to adjust the moisture.
How long do No-Bake Pumpkin Cheesecake Cups need to set?
These cups need at least two hours to chill. Chilling helps them firm up and taste better. I recommend letting them set longer if you can. Four hours is even better! This extra time enhances the flavors and texture, making each bite more delightful.
Can I make these cups ahead of time?
Yes, you can make these cups ahead of time. They are great for meal prep! Just store them in the fridge. They stay tasty for up to three days. Just keep the lids on or cover them tightly. This way, they won’t absorb any other smells from the fridge.
In this post, we explored how to make No-Bake Pumpkin Cheesecake Cups. You learned about the main ingredients, optional additions, and how to achieve the perfect texture. I shared step-by-step instructions for preparing the mixture and assembling the cups. You can even customize the recipe with variations and storage tips.
Remember, you can make this dessert your own. Whether you add spices or change the crust, have fun with it. Enjoy every bite of your delicious creation!