Are you craving a sweet treat that’s quick and easy? You’ll love these No-Bake Oreo Peanut Butter Bars! With just six ingredients and no oven required, you can whip up this delicious snack in no time. Perfect for any occasion, this dessert combines rich peanut butter and crunchy Oreos for a flavor explosion. Let’s dive into how you can make this delightful treat today!
Ingredients
To make No-Bake Oreo Peanut Butter Bars, you need a few simple ingredients. Here’s what you will need:
– 24 Oreo cookies, crushed
– 1 cup creamy peanut butter
– 1/2 cup unsalted butter, melted
– 1 cup powdered sugar
– 1 teaspoon vanilla extract
– 1 cup semi-sweet chocolate chips
– 2 tablespoons coconut oil (optional for smoothness)
These ingredients are easy to find at any grocery store. The crushed Oreos form the base, giving a rich and sweet flavor. Creamy peanut butter adds a nice nutty taste and smooth texture. Melted butter helps bind the cookies together. Powdered sugar sweetens the mix, while vanilla extract enhances the flavor. The chocolate chips make for a delightful topping, and coconut oil, if used, makes the chocolate smooth and shiny.
Gather these ingredients before starting. It makes the process quick and fun!
Step-by-Step Instructions
Preparation of the Oreo Crust
To start, grab 24 Oreo cookies and crush them into small pieces. You can use a food processor or place them in a bag and smash them with a rolling pin. Next, melt 1/2 cup of unsalted butter. Combine the crushed Oreos and melted butter in a large bowl. Mix until it looks like wet sand. The right consistency should be crumbly but hold together when pressed.
Creating the Peanut Butter Layer
Now, let’s make the peanut butter layer. Add 1 cup of creamy peanut butter, 1 cup of powdered sugar, and 1 teaspoon of vanilla extract to the Oreo mix. Stir it well until everything blends into a smooth mixture. Make sure there are no lumps. This layer adds a rich and creamy taste to your bars.
Assembling the Bars
Next, line an 8×8-inch baking dish with parchment paper. Leave some paper hanging over the edges for easy removal. Press the Oreo peanut butter mixture into the bottom of the dish firmly. Use a spatula or the back of a measuring cup to smooth it out. Then, melt 1 cup of semi-sweet chocolate chips in a microwave-safe bowl. If you want extra smoothness, add 2 tablespoons of coconut oil. Heat in 30-second bursts, stirring each time until melted. Pour the chocolate over the peanut butter layer and smooth it out evenly.
Chilling and Serving
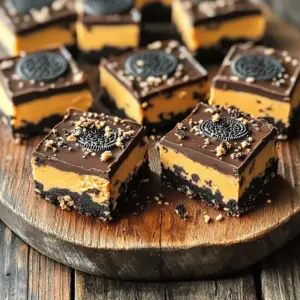
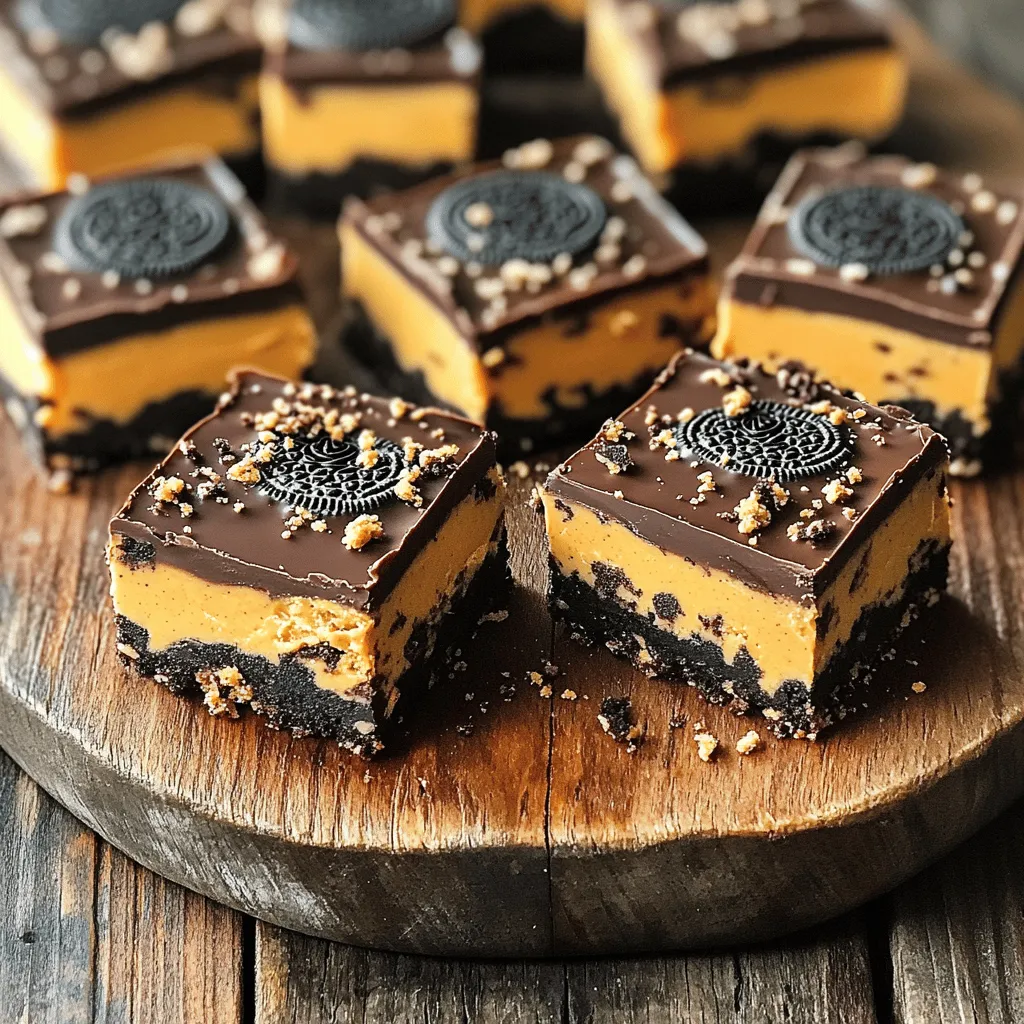
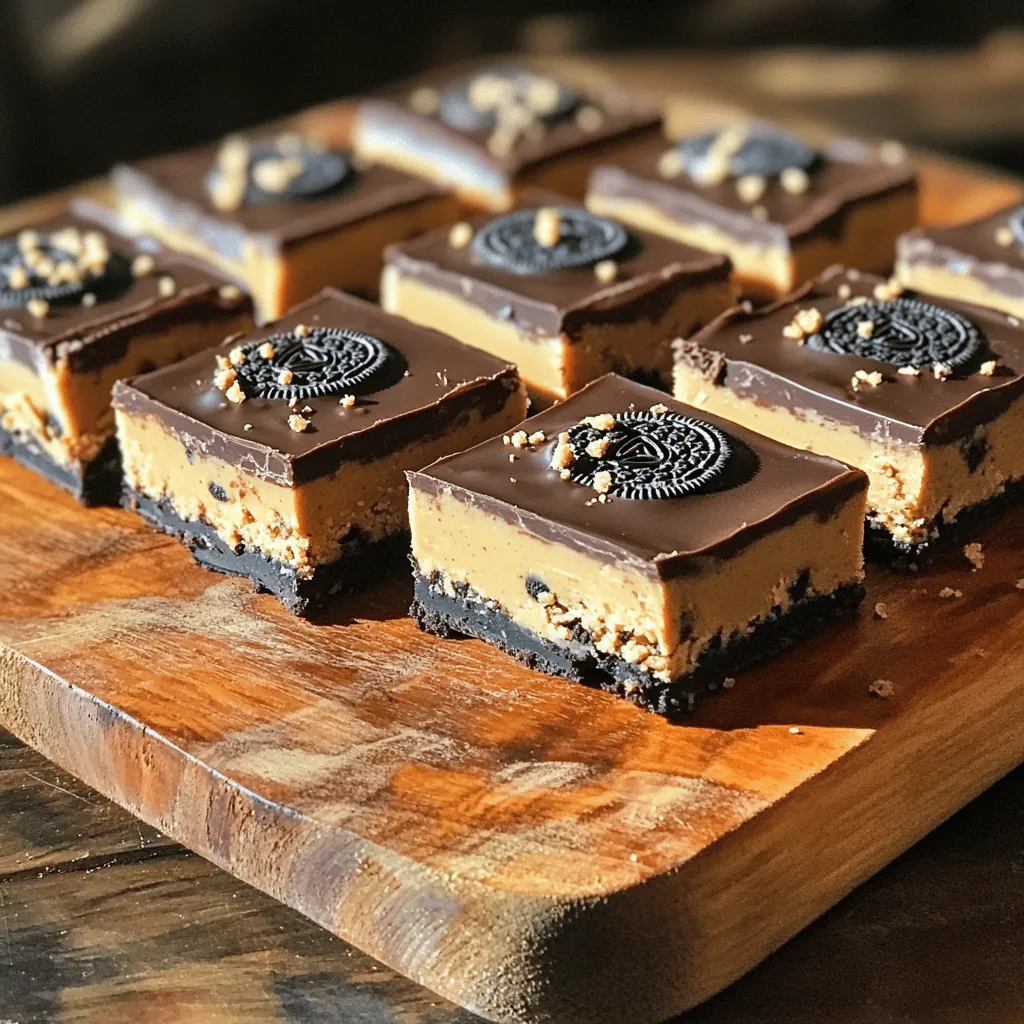
Now, it’s time to chill! Place the baking dish in the refrigerator for at least 2 hours. This helps the bars set and become firm. Once chilled, lift the bars out using the parchment paper. Cut them into squares. You can sprinkle some crushed Oreos on top for a nice touch. Enjoy your tasty treat!
Tips & Tricks
Ensuring the Best Texture
To get the best texture, fully combine your ingredients. Mix the crushed Oreos and melted butter until it looks like wet sand. This helps the crust hold together well. When you add the peanut butter, powdered sugar, and vanilla extract, stir gently. Make sure everything is smooth and mixed well.
Press the mixture firmly into the baking dish. Use a spatula or the back of a measuring cup to pack it down tightly. This step is key for a strong base. If it’s not pressed well, the bars may crumble when you cut them.
Easy Melting of Chocolate
Melting chocolate in the microwave is simple. Start by putting the chocolate chips in a microwave-safe bowl. Add coconut oil if you want a smoother finish. Heat it on high for 30 seconds. Then, take it out and stir. Repeat this until the chocolate is melted and smooth.
If you don’t have a microwave, you can use a double boiler. Fill a pot with water and bring it to a simmer. Place a heat-safe bowl on top, making sure it doesn’t touch the water. Add the chocolate chips and stir until they melt.
Serving Suggestions
Make your bars look great when serving. Cut them into squares and place them on a nice platter. You can sprinkle crushed Oreo crumbs on top for more texture. For an extra treat, drizzle melted chocolate or peanut butter over the bars. This adds flavor and makes them pop visually. Consider serving with a scoop of ice cream for a fun dessert twist!
Variations
Healthier Alternatives
You can make your No-Bake Oreo Peanut Butter Bars a bit healthier. Here are a couple of easy swaps:
– Using reduced-fat peanut butter: This option cuts some fat but keeps the great taste.
– Substituting with sugar-free Oreos: This swap lowers sugar and helps some diets.
Flavor Additions
Want to change the taste? Adding extra flavors is a fun way to customize:
– Incorporating chopped nuts or candies: Try adding peanuts or chocolate candies for crunch.
– Adjusting the chocolate type: Experiment with dark, white, or milk chocolate for a new twist.
No-Bake Oreo Peanut Butter Bars for Different Diets
These bars can fit into various diets, making them a great treat for many people:
– Vegan options available: Use plant-based butter and dairy-free chocolate for a vegan treat.
– Gluten-free adaptations: Choose gluten-free Oreos to make sure everyone can enjoy these bars.
Storage Information
Best Way to Store Bars
To keep your No-Bake Oreo Peanut Butter Bars fresh, use an airtight container. This will lock in moisture and flavor. If you don’t have one, a covered dish works too but may not be as effective. Always store the bars in the fridge. The cool temperature helps them stay firm and tasty.
Shelf Life
You can store these bars for about one week in the fridge. After that, they may start to spoil. Signs of spoilage include a change in texture or an off smell. If the bars feel sticky or look dry, it’s best to toss them. Enjoy them fresh for the best flavor!
FAQs
Can I freeze No-Bake Oreo Peanut Butter Bars?
Yes, you can freeze these bars. To freeze, cut them into squares. Wrap each square in plastic wrap or foil. Place them in an airtight container. They can last up to three months in the freezer. To thaw, take them out and leave them in the fridge for a few hours. You can also let them sit at room temperature for about 30 minutes. This makes them soft again.
How can I make the bars more chocolatey?
To boost the chocolate flavor, add more chocolate chips. Use a layer of chocolate on top and in the mix. You can melt extra chocolate and spread it on the top layer. Mixing in cocoa powder with the peanut butter layer also adds a rich taste. You can even use dark chocolate for a deeper flavor.
What can I use if I don’t have coconut oil?
If you don’t have coconut oil, you can use butter instead. Vegetable oil is another good option. Both will keep the chocolate smooth. Just use the same amount as the coconut oil. This will help your chocolate layer stay nice and glossy.
How long do these bars last in the fridge?
These bars can last up to a week in the fridge. Store them in an airtight container. Make sure they are cool before sealing. After a few days, they may lose some texture. For the best taste, enjoy them within the first few days.
These Oreo peanut butter bars are easy and fun to make. You mix crushed Oreos with butter for the crust. Then, you blend peanut butter, sugar, and vanilla for the filling. After pressing it into a dish, you melt chocolate for the topping. Chill, cut into squares, and enjoy.
Remember, you can customize these bars to fit your taste. Try different toppings or flavors. Store them well to keep them fresh. Enjoy making and sharing these tasty treats with friends and family!