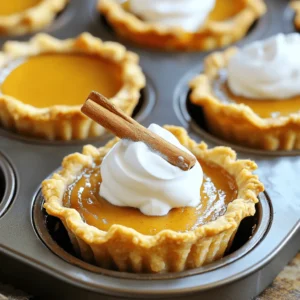
Craving a sweet treat this fall? You’re in for a delight! These Mini Pumpkin Pie Cups are simple to make and packed with flavor. Imagine tender pumpkin filling and a flaky crust, all in cute little cups. Whether you’re hosting a gathering or enjoy baking for yourself, this recipe is perfect. I’ll walk you through each easy step, so let’s get baking and bring the spirit of autumn to your kitchen!
Ingredients
Pumpkin Puree and Sweeteners
For this recipe, pumpkin puree is key. It gives the pie cups their rich flavor. You can use canned pumpkin puree or make your own. If you choose to make your own, bake or steam fresh pumpkin. Then, blend it until smooth. Pair the puree with sweeteners. I use sweetened condensed milk for creaminess. Brown sugar adds a nice depth of flavor. Together, they create a sweet and smooth filling.
Spices and Seasoning
Spices make your mini pumpkin pie cups special. Ground cinnamon is a must. It brings warmth and comfort. Nutmeg adds a hint of nutty flavor. Ginger gives a little zing. Don’t forget the salt! It balances all the sweet flavors. Using these spices creates a lovely aroma as they bake.
Pie Crust Options
You have a couple of choices for the crust. You can buy pre-made pie crusts or make your own. If you buy them, choose a high-quality brand. For homemade crust, use flour, butter, and a bit of water. Roll it out thin for a flaky texture. Press the dough into a mini muffin tin to form the cups. This step is fun and easy. You can shape them however you like. Each option leads to tasty mini pumpkin pie cups.
Step-by-Step Instructions
Preheat the Oven
First, turn on your oven. Set it to 375°F (190°C). This helps your mini pumpkin pie cups bake evenly.
Prepare the Pie Crusts
Now, let’s get the pie crust ready. Take the pre-made pie crusts out of the package. Roll them out on a floured surface. Use a round cookie cutter or a cup to cut circles. Each circle should fit into the mini muffin tin. Press the dough circles into the muffin cups to form your mini pie shells.
Mix the Pumpkin Filling
Next, it’s time to make the filling. In a mixing bowl, add these ingredients:
– 1 cup pumpkin puree
– 1/2 cup sweetened condensed milk
– 1/4 cup brown sugar
– 1 teaspoon ground cinnamon
– 1/2 teaspoon ground nutmeg
– 1/4 teaspoon ground ginger
– 1/4 teaspoon salt
– 1 large egg
Whisk these together until smooth. Make sure there are no lumps in your mixture.
Fill the Cups
Now, carefully pour the pumpkin filling into each mini pie shell. Fill them about 3/4 full. This allows room for the filling to rise while baking.
Bake and Cool
Place the muffin tin in your preheated oven. Bake for 15-20 minutes. Check if they are done by inserting a toothpick in the center. If it comes out clean, they are ready! Let them cool in the pan for 5 minutes. Then, move them to a wire rack to cool completely.
Serve and Garnish
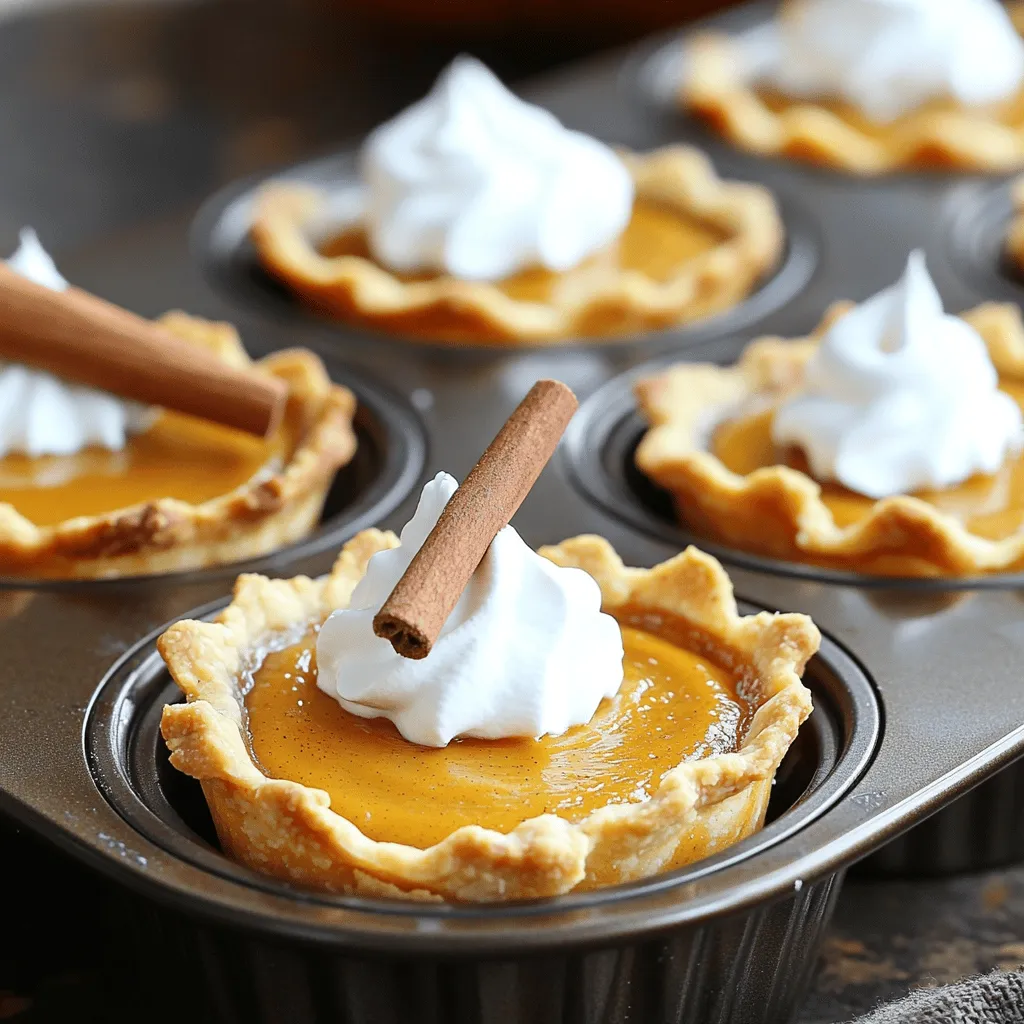
Once the mini pumpkin pie cups are cool, it’s time to serve. Top each mini pie with a dollop of whipped cream. If you want, add a cinnamon stick for a nice touch. Enjoy your delightful treat! For the full recipe, check out the ingredients and steps listed earlier.
Tips & Tricks
Ensuring a Flaky Pie Crust
To make a flaky pie crust, keep your ingredients cold. Use cold butter and cold water. This helps create layers in the dough. Be gentle while mixing. Overworking the dough can make it tough. If you use pre-made crusts, roll them out on a floured surface. Cut them into circles to fit your muffin tin. This gives a nice shape and texture.
Perfecting the Pumpkin Filling
For the best pumpkin filling, use fresh pumpkin puree if you can. It tastes richer and fresher. If using canned, choose a good brand with no added sugar. Mix the pumpkin with sweetened condensed milk for creaminess. Add spices like cinnamon, nutmeg, and ginger to enhance the flavor. These spices make your mini pies warm and cozy. Blend until smooth, and remember to taste. Adjust sweetness if needed.
Serving Suggestions for Mini Pumpkin Pie Cups
Serve your mini pumpkin pie cups warm or chilled. Top them with whipped cream for a sweet touch. A sprinkle of cinnamon adds flavor and color. You can also use a cinnamon stick as a cute garnish. For a fun twist, try serving with caramel sauce. It gives a sweet and rich flavor that pairs well with pumpkin. Enjoy your mini pies at parties or family gatherings. They are sure to impress! For the full recipe, check the earlier section.
Variations
Gluten-Free Mini Pumpkin Pie Cups
To make gluten-free mini pumpkin pie cups, use gluten-free pie crusts. You can find these in stores or make your own with gluten-free flour. The filling stays the same. Just enjoy the rich pumpkin flavor without the gluten.
Vegan Alternatives for Filling and Crust
For a vegan version, swap the sweetened condensed milk for coconut milk or almond milk. Use a flax egg instead of a regular egg. Mix one tablespoon of ground flaxseed with three tablespoons of water. Let it sit for five minutes to thicken. For the crust, choose a vegan pie crust or make one with coconut oil instead of butter.
Creative Toppings to Try
Toppings can make your mini pumpkin pie cups even better. Try adding chopped pecans or walnuts for crunch. Shredded coconut adds a nice twist too. Drizzle maple syrup on top for a sweet touch. You can also use caramel sauce for a rich flavor. Each topping gives your mini pies a unique flair.
Storage Info
How to Store Leftover Mini Pumpkin Pie Cups
To keep your mini pumpkin pie cups fresh, place them in an airtight container. You can store them at room temperature for one day. If you want them to last longer, refrigerate them. They will stay good in the fridge for up to four days. Make sure to cover them to keep the flavors intact.
Freezing Instructions
If you have more mini pumpkin pie cups than you can eat, freezing is a great option. First, let them cool completely. Then, wrap each cup in plastic wrap. Place the wrapped cups in a freezer-safe bag or container. They can last in the freezer for up to three months. When you are ready to enjoy them, just thaw them in the fridge overnight.
Reheating Tips
To reheat your mini pumpkin pie cups, you can use the oven or microwave. For the oven, preheat it to 350°F (175°C). Place the cups on a baking sheet and heat for about 10 minutes. For the microwave, heat each cup for about 20-30 seconds. Keep a close eye to avoid overheating. Reheating brings back that warm, cozy taste. Enjoy them just like fresh!
FAQs
How do I make the mini pumpkin pie cups from scratch?
To make mini pumpkin pie cups from scratch, you need simple steps. Start by preheating your oven to 375°F (190°C). Roll out pre-made pie crusts on a floured surface. Cut out circles and fit them into a mini muffin tin. Next, mix pumpkin puree, sweetened condensed milk, brown sugar, and spices in a bowl. Whisk in one egg until smooth. Pour the filling into the crusts, filling them about 3/4 full. Bake for 15-20 minutes until set. Let them cool, then top with whipped cream.
Can I use fresh pumpkin instead of canned?
Yes, you can use fresh pumpkin instead of canned. First, you need to prepare the pumpkin. Cut it into pieces and remove the seeds. Bake or steam the pumpkin until tender. Once cooked, scoop out the flesh and blend it until smooth. This fresh puree adds great flavor. Remember, fresh pumpkin may have a different texture than canned. Adjust your cooking time as needed.
What can I substitute for sweetened condensed milk?
If you need a substitute for sweetened condensed milk, you have options. You can use coconut milk with sugar, or you can mix whole milk with sugar. A common mix is to use 1 cup of milk and 1 cup of sugar, simmer until thick. You can also try mixing evaporated milk with sugar. These substitutes work well in the recipe.
How do I know when the mini pumpkin pie cups are done baking?
To check if the mini pumpkin pie cups are done, use a toothpick. Insert it into the center of a pie cup. If it comes out clean, they are ready. The filling should be set and not jiggle. You can also look for a slightly golden top. These signs mean they are baked perfectly.
You learned how to make tasty mini pumpkin pie cups. We covered key ingredients like pumpkin puree, spices, and crust options. I shared a step-by-step guide for baking and cooling. You picked up tips for a flaky crust and tasty filling. We also explored variations for different diets and creative toppings. Remember to store leftovers properly. When you follow these steps, you’ll impress family and friends. Enjoy your delicious mini pies!