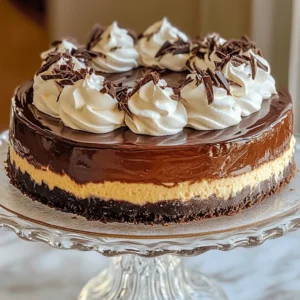
Do you love chocolate? If so, you’re in for a treat! This Decadent Death by Chocolate Cheesecake recipe is your ticket to a rich and creamy dessert that will wow your taste buds. With simple ingredients and easy steps, you’ll craft a cheesecake that feels gourmet. Let’s dive into the essentials, techniques, and tips to create this chocolate masterpiece. Get ready to indulge!
Ingredients
Essential Ingredients for Death by Chocolate Cheesecake
– 2 cups chocolate cookie crumbs
– 1/2 cup unsalted butter, melted
– 1 cup granulated sugar
– 4 (8 oz) packages cream cheese, softened
– 1 cup sour cream
– 1 teaspoon vanilla extract
– 4 large eggs
– 1 cup semi-sweet chocolate chips, melted
– 1/4 cup cocoa powder
– Whipped cream (for topping)
– Chocolate shavings or curls (for garnish)
To create this rich cheesecake, you need a mix of classic and delightful items. The chocolate cookie crumbs serve as the base, giving a perfect crunch. The melted butter binds everything together, creating a sturdy crust. Granulated sugar adds sweetness, while cream cheese and sour cream bring a creamy texture.
Vanilla extract enhances flavor, and eggs help set the cheesecake. The melted semi-sweet chocolate chips add a deep chocolate flavor, while cocoa powder intensifies it. Finally, use whipped cream and chocolate shavings to top the cake for a stunning finish.
Optional Ingredients for Extra Indulgence
– Various chocolate types (dark, milk, or white)
– Liqueurs (e.g., Kahlua or coffee liqueur)
– Fruit toppings for garnish (such as raspberries)
For those wanting to take this cheesecake to the next level, consider adding different types of chocolate. Dark chocolate boosts richness, milk chocolate makes it sweeter, and white chocolate adds creaminess. Liqueurs like Kahlua can enhance the flavor with a coffee twist. Fresh fruit toppings, such as raspberries, add a fruity brightness that balances the chocolate.
For the full recipe, check out the details above.
Step-by-Step Instructions
Preparing the Crust
Preheat your oven to 325°F (160°C). This warms the oven for baking. In a bowl, mix 2 cups of chocolate cookie crumbs with 1/2 cup of melted unsalted butter. Stir well until it looks like wet sand. Press this mixture firmly into the bottom of a 9-inch springform pan. Make sure it is even and compact. Bake the crust for 10 minutes and then let it cool slightly.
Creating the Cheesecake Filling
In a large bowl, beat 4 packages of softened cream cheese with an electric mixer. You want it to be smooth and fluffy. Gradually add 1 cup of granulated sugar while mixing. Keep beating until it is fully blended. Next, mix in 1 cup of sour cream and 1 teaspoon of vanilla extract until it is smooth.
Finalizing and Baking the Cheesecake
Add 4 large eggs to the filling one at a time. Beat on low speed after each egg until just combined. Do not overmix, as this can make the cheesecake crack. Now, gently fold in 1 cup of melted semi-sweet chocolate and 1/4 cup of cocoa powder. Pour this filling into the cooled crust. Bake for 60-70 minutes. The center should be set but still slightly jiggly when you take it out.
Cooling Process
After baking, turn off the oven and crack the door open. Let the cheesecake cool inside for about an hour. This helps prevent cracks on top. After that, move it to the fridge. Chill it for at least 4 hours or overnight for the best taste and texture. Always remember, patience is key to a great cheesecake!
Tips & Tricks
Techniques for Perfecting Texture
To avoid cracks in your cheesecake, always cool it slowly. After baking, turn off the oven. Leave the door slightly open for about an hour. This gentle cooling helps prevent sudden temperature changes.
When mixing ingredients, use a low speed on your mixer. Overmixing can add air, causing cracks. Beat until just combined. Each egg should blend in fully but avoid whipping too much.
Presentation Enhancements
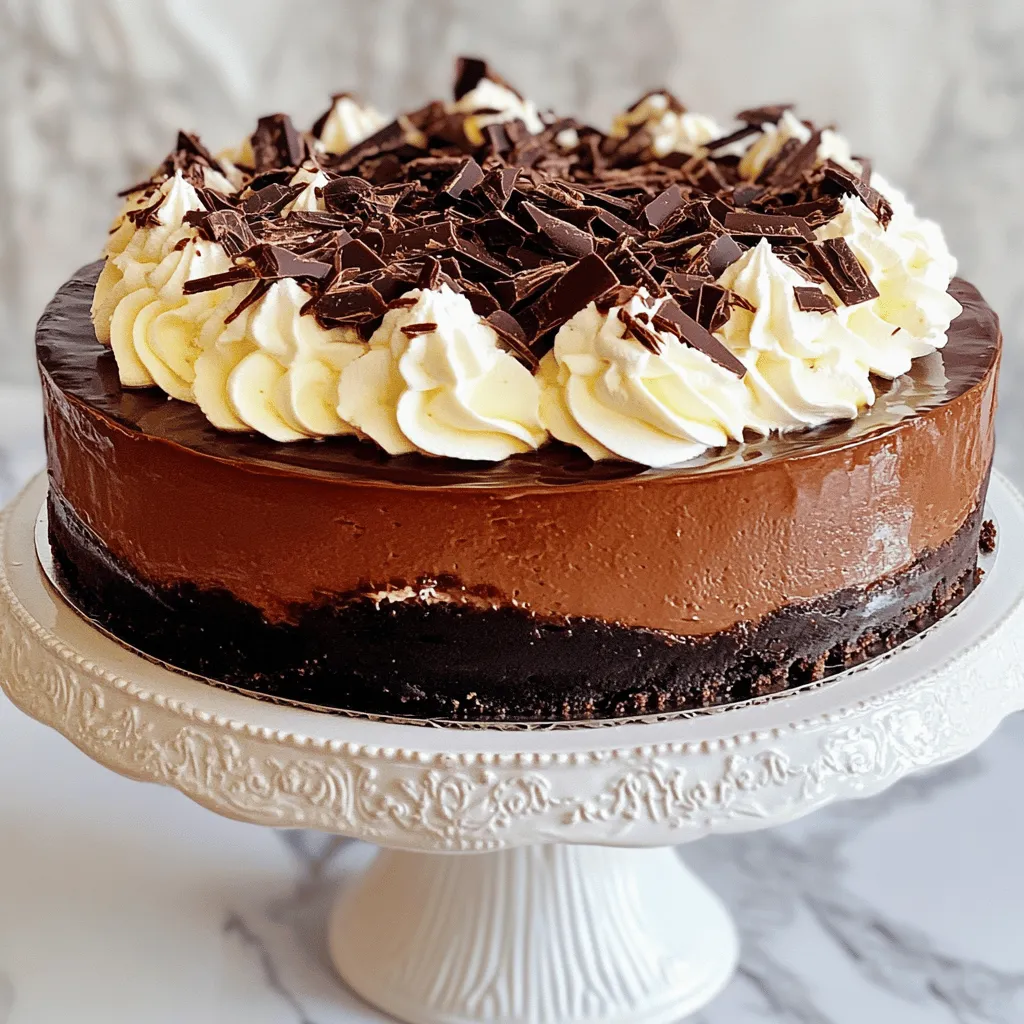
Serve your cheesecake on a lovely cake stand. This adds a special touch. For garnishing, use whipped cream on top. Add chocolate shavings or curls for extra flair. Fresh raspberries or a drizzle of chocolate sauce can brighten the plate.
Consider using clear glass dishes. They show off the rich layers of your cheesecake. A simple white plate also makes your dessert pop.
Flavor Suggestions
To boost flavor, try adding espresso powder. Just a teaspoon can enhance the chocolate taste. You might also consider a splash of coffee liqueur for depth.
Pair your cheesecake with sauces. A rich chocolate sauce or a berry compote works well. A scoop of vanilla ice cream on the side adds creaminess. This combo makes each bite even more delightful.
For more ideas, check out the Full Recipe for Death by Chocolate Cheesecake.
Variations
Gluten-Free Alternatives
You can easily make this cheesecake gluten-free. Just swap regular cookie crumbs for gluten-free cookie crumbs. Brands like gluten-free Oreos work well. The crust will taste just as good, and no one will know the difference!
Vegan and Dairy-Free Options
To make a vegan version, you can replace the cream cheese. Use soaked cashews blended with coconut milk. For eggs, use flax eggs or applesauce. Both work great! Look for dairy-free chocolate chips to keep the chocolatey goodness. Brands like Enjoy Life or Lily’s are good choices.
Seasonal Adaptations
You can spice up this cheesecake with seasonal flavors. In fall, add pumpkin puree and a bit of cinnamon. For winter, try peppermint extract and crushed candy canes. Each season brings new fun twists to this classic dessert!
Storage Info
Best Practices for Storing Cheesecake
To keep your Death by Chocolate Cheesecake fresh, follow these steps. First, let the cheesecake cool completely after baking. Once cool, cover it with plastic wrap or aluminum foil. This keeps the cheesecake moist and prevents it from absorbing other smells in the fridge. Store the cheesecake in the fridge. It can last for about 5 to 7 days.
If you have leftovers, slice the cheesecake into individual pieces. This makes it easier to grab a slice later. Place each slice in an airtight container or wrap in plastic wrap. Be sure to label the container with the date so you know when you made it!
Freezing Guidelines
Want to save some cheesecake for later? You can freeze it! Start by letting the cheesecake cool completely. Wrap it tightly in plastic wrap, then place it in a freezer-safe container. This helps protect it from freezer burn. The cheesecake can last for up to 3 months in the freezer.
When you’re ready to enjoy your cheesecake, take it out of the freezer. Move it to the fridge for a slow thaw overnight. This keeps the texture nice. If you’re in a hurry, you can also thaw it at room temperature for about 2 to 3 hours. Just remember, do not refreeze cheesecake after thawing. Enjoy your delicious treat!
FAQs
What is the best way to serve Death by Chocolate Cheesecake?
Serve this cheesecake cold. It tastes best when chilled. Use a sharp knife to cut clean slices. For a special touch, serve it on a nice cake stand. You can add fresh raspberries or a drizzle of chocolate sauce around the plate. This makes the dessert look fancy and inviting.
Can I make this cheesecake in advance?
Yes, you can make this cheesecake ahead of time. It tastes even better after a day in the fridge. Just bake it, cool it, and refrigerate it for at least four hours. You can also store it overnight. This saves you time when you want to serve it.
How do I prevent my cheesecake from cracking?
To avoid cracks, bake the cheesecake at a low temperature. Turn off the oven when it is done, and leave the door open. This helps it cool slowly. Also, make sure to mix the batter gently. Overmixing can add too much air, which leads to cracks.
What to do if my cheesecake isn’t set after baking?
If your cheesecake isn’t set, don’t panic. Check the baking time. It may need a few more minutes in the oven. If it’s still soft, let it cool in the fridge longer. If it remains unset after chilling, you can bake it again at a low temperature for a bit.
This article breaks down everything you need for the perfect Death by Chocolate Cheesecake. We covered essential and optional ingredients, detailed step-by-step instructions, and offered handy tips for texture and presentation. You can also try variations like gluten-free or vegan options. Remember, cooling is key for success. By following these tips, you’ll create a dessert that impresses everyone. Enjoy your cheesecake adventure and the joy it brings to your table!