![- 200g digestive biscuits, crushed - 100g unsalted butter, melted - 400g cream cheese, softened - 200g sour cream - 150g icing sugar - 2 teaspoons vanilla extract - 3 large eggs - 100g honeycomb, chopped into small pieces - 50g dark chocolate, grated (for garnish) - Extra honeycomb pieces for decoration When I make this Crunchy Honeycomb Cheesecake, I start with the ingredients. Each one plays a key role in the taste and texture. The digestive biscuits provide a crunchy base. I crush them finely and mix them with unsalted butter. This blend creates a rich crust that holds everything together. Next, I use cream cheese for the filling. I always choose good quality cream cheese because it makes a big difference. Sour cream adds a nice tang, balancing the sweetness. Icing sugar gives the cheesecake its sweet flavor. I like to add vanilla extract for a lovely aroma. The eggs help set the cheesecake, making it creamy and smooth. Chopped honeycomb gives this dessert its signature crunch and sweetness. I save some extra honeycomb for decoration. The dark chocolate adds depth, making the dessert even more special. - 9-inch springform pan - Electric mixer - Mixing bowls - Parchment paper I also find the right tools make a big difference. A 9-inch springform pan is perfect for this cheesecake. It allows easy removal after baking. An electric mixer speeds up the process when mixing the filling. I keep a few mixing bowls handy for different steps. Finally, parchment paper helps with cleanup and prevents sticking. All these ingredients and tools set the stage for a truly delightful dessert. If you want the full recipe, it’s a great guide to follow! 1. Preheat your oven to 160°C (320°F). This is important for even baking. 2. Take a 9-inch springform pan and line it with parchment paper. This helps with easy removal. 3. In a mixing bowl, combine 200g of crushed digestive biscuits and 100g of melted unsalted butter. Mix until it looks like wet sand. 4. Press this mixture firmly into the base of the pan to create a sturdy crust. Bake for 10 minutes, then let it cool. 1. In a large bowl, beat 400g of softened cream cheese with an electric mixer until smooth. 2. Gradually add 200g of sour cream, 150g of icing sugar, and 2 teaspoons of vanilla extract. Mix until fully combined and creamy. 3. Add 3 large eggs one by one, mixing gently after each addition. Be careful not to over-mix. 4. Fold in 100g of chopped honeycomb pieces. This adds a nice crunch and flavor. 1. Pour the cheesecake mixture over the cooled biscuit base. Smooth the top with a spatula. 2. Bake in the preheated oven for about 50-60 minutes. The edges should be set, but the center should still jiggle. 3. Turn off the oven and leave the cheesecake inside for another hour. This helps prevent cracks. 4. After that, remove the cheesecake and let it cool. Refrigerate for at least 4 hours, or overnight, before serving. For the complete recipe, check the [Full Recipe]. To get that smooth, creamy texture, avoid over-mixing the batter. Over-mixing can add air bubbles, which can lead to cracks. Mix gently and just until all the ingredients blend together. When adding eggs, incorporate them gently. This helps keep the batter light and fluffy. Cooling your cheesecake properly is key to avoiding cracks. After baking, turn off the oven and leave the cheesecake inside for an hour. This gradual cooling helps set the cake without sudden temperature changes. Also, bake with the oven door ajar for the last 10 minutes. This allows steam to escape and keeps your cheesecake from cracking. When it's time to serve, garnish your cheesecake for a stunning look. Grate dark chocolate on top, then add extra honeycomb pieces. This not only adds flair but also enhances flavor. Serve with a drizzle of honey or a scoop of vanilla ice cream for a delightful contrast. For a fun twist, try pairing it with fresh berries. They add a burst of flavor that complements the cheesecake well. For the full recipe, be sure to check out the Crunchy Honeycomb Cheesecake details above! {{image_2}} You can easily switch up the flavors of your Crunchy Honeycomb Cheesecake. - Chocolate honeycomb cheesecake: Mix in melted dark chocolate to the filling. This adds a rich taste. Use a little extra honeycomb for crunch. It makes every bite a delightful treat. - Fruit-infused honeycomb cheesecake: Add fruit puree, like raspberry or mango. This gives a fresh twist. You could also layer fresh fruit on top. It looks and tastes amazing! If you need a gluten-free version, you can simply change the crust. - Use gluten-free biscuits instead of regular ones. They will hold together well when mixed with the melted butter. This keeps the cheesecake just as delicious for everyone. For a vegan twist, you can swap out the dairy and eggs. - Substitute cream cheese with a vegan cream cheese. Use silken tofu blended smooth as an egg replacement. This keeps the texture creamy and rich. With these changes, you can enjoy a tasty vegan cheesecake. For the full recipe, check out the Crunchy Honeycomb Cheesecake. After making Crunchy Honeycomb Cheesecake, you may have some leftovers. To keep your cheesecake fresh, wrap it well. Use plastic wrap or aluminum foil to cover the entire cheesecake. You can also store it in an airtight container. This keeps moisture in and prevents it from drying out. For best results, place it in the fridge. You can freeze the cheesecake if you want to save some for later. First, let it cool completely in the fridge. Once chilled, slice it into pieces. Wrap each slice in plastic wrap. Then place the wrapped slices in a freezer-safe bag or container. This way, you can take out one piece at a time. When you're ready to eat, just move a slice to the fridge for a few hours to defrost. In the fridge, your cheesecake stays fresh for about 5 days. If you freeze it, it can last for up to 3 months. Just remember that freezing can slightly change the texture. If you want to enjoy the cheesecake at its best, eat it fresh. For the complete recipe, refer to the Full Recipe above. Yes, you can make this cheesecake ahead of time. In fact, making it a day before serving enhances its flavor. After baking, let the cheesecake cool completely. Then, refrigerate it for at least four hours or overnight. This will help it set properly. When ready to serve, simply garnish and enjoy. To check if your cheesecake is done, look for a few signs. The edges should be set, while the center remains slightly jiggly. A good test is to gently shake the pan; if it wobbles, it’s not done. Another sign is a slight golden hue around the edges. Remember, it will continue to cook as it cools. Yes, you can replace honeycomb with several other ingredients. For a similar crunch, try using crushed toffee or caramel pieces. If you want a different flavor, consider adding crushed cookies or nuts. Each alternative will change the taste and texture slightly, so choose based on your preference. We covered how to make a delicious Crunchy Honeycomb Cheesecake from scratch. You learned the key ingredients, tools you need, and step-by-step instructions. I shared tips to get the perfect texture and avoid cracks. Plus, we explored fun flavor variations and storage methods. With these simple steps, you can create a stunning cheesecake that impresses everyone. Enjoy the process and share your tasty treats!](https://therecipehatch.com/wp-content/uploads/2025/06/efc366d6-96e2-4642-844f-498b5ea7509a.webp)
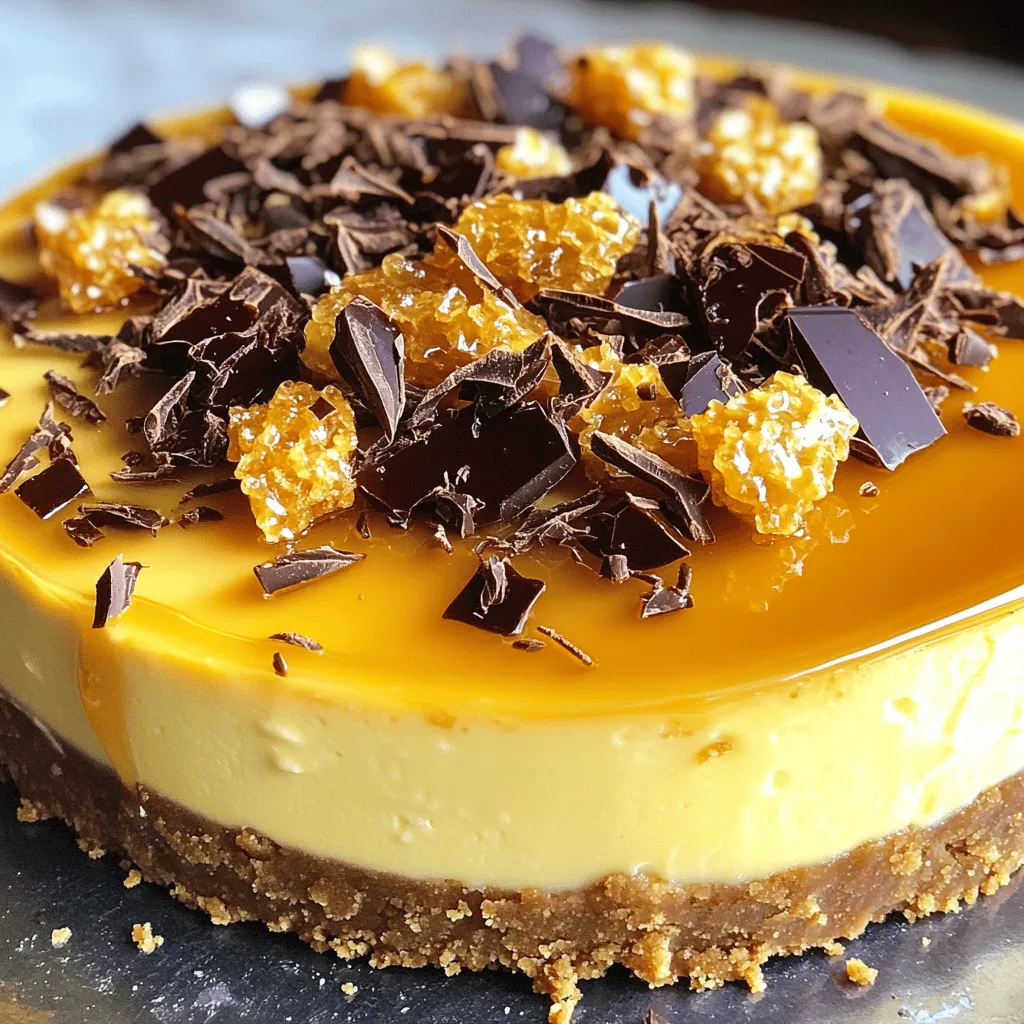
If you’re craving a dessert that combines creamy indulgence with a delightful crunch, you’re in for a treat! My Crunchy Honeycomb Cheesecake is a sweet masterpiece that will impress your family and friends. This recipe is easy to follow, filled with rich flavors, and features that irresistible honeycomb crunch. Get ready to take your dessert game to the next level and make your next gathering unforgettable! Let’s dive into the delicious details!
Ingredients
List of Ingredients
– 200g digestive biscuits, crushed
– 100g unsalted butter, melted
– 400g cream cheese, softened
– 200g sour cream
– 150g icing sugar
– 2 teaspoons vanilla extract
– 3 large eggs
– 100g honeycomb, chopped into small pieces
– 50g dark chocolate, grated (for garnish)
– Extra honeycomb pieces for decoration
When I make this Crunchy Honeycomb Cheesecake, I start with the ingredients. Each one plays a key role in the taste and texture.
The digestive biscuits provide a crunchy base. I crush them finely and mix them with unsalted butter. This blend creates a rich crust that holds everything together.
Next, I use cream cheese for the filling. I always choose good quality cream cheese because it makes a big difference. Sour cream adds a nice tang, balancing the sweetness.
Icing sugar gives the cheesecake its sweet flavor. I like to add vanilla extract for a lovely aroma. The eggs help set the cheesecake, making it creamy and smooth.
Chopped honeycomb gives this dessert its signature crunch and sweetness. I save some extra honeycomb for decoration. The dark chocolate adds depth, making the dessert even more special.
Suggested Tools and Equipment
– 9-inch springform pan
– Electric mixer
– Mixing bowls
– Parchment paper
I also find the right tools make a big difference. A 9-inch springform pan is perfect for this cheesecake. It allows easy removal after baking.
An electric mixer speeds up the process when mixing the filling. I keep a few mixing bowls handy for different steps. Finally, parchment paper helps with cleanup and prevents sticking.
All these ingredients and tools set the stage for a truly delightful dessert. If you want the full recipe, it’s a great guide to follow!
Step-by-Step Instructions
Preparation Steps
1. Preheat your oven to 160°C (320°F). This is important for even baking.
2. Take a 9-inch springform pan and line it with parchment paper. This helps with easy removal.
3. In a mixing bowl, combine 200g of crushed digestive biscuits and 100g of melted unsalted butter. Mix until it looks like wet sand.
4. Press this mixture firmly into the base of the pan to create a sturdy crust. Bake for 10 minutes, then let it cool.
Cheesecake Filling Steps
1. In a large bowl, beat 400g of softened cream cheese with an electric mixer until smooth.
2. Gradually add 200g of sour cream, 150g of icing sugar, and 2 teaspoons of vanilla extract. Mix until fully combined and creamy.
3. Add 3 large eggs one by one, mixing gently after each addition. Be careful not to over-mix.
4. Fold in 100g of chopped honeycomb pieces. This adds a nice crunch and flavor.
Baking and Cooling Steps
1. Pour the cheesecake mixture over the cooled biscuit base. Smooth the top with a spatula.
2. Bake in the preheated oven for about 50-60 minutes. The edges should be set, but the center should still jiggle.
3. Turn off the oven and leave the cheesecake inside for another hour. This helps prevent cracks.
4. After that, remove the cheesecake and let it cool. Refrigerate for at least 4 hours, or overnight, before serving.
For the complete recipe, check the [Full Recipe].
Tips & Tricks
Achieving the Perfect Cheesecake Texture
To get that smooth, creamy texture, avoid over-mixing the batter. Over-mixing can add air bubbles, which can lead to cracks. Mix gently and just until all the ingredients blend together. When adding eggs, incorporate them gently. This helps keep the batter light and fluffy.
Preventing Cracks in the Cheesecake
Cooling your cheesecake properly is key to avoiding cracks. After baking, turn off the oven and leave the cheesecake inside for an hour. This gradual cooling helps set the cake without sudden temperature changes. Also, bake with the oven door ajar for the last 10 minutes. This allows steam to escape and keeps your cheesecake from cracking.
Serving Suggestions
When it’s time to serve, garnish your cheesecake for a stunning look. Grate dark chocolate on top, then add extra honeycomb pieces. This not only adds flair but also enhances flavor. Serve with a drizzle of honey or a scoop of vanilla ice cream for a delightful contrast. For a fun twist, try pairing it with fresh berries. They add a burst of flavor that complements the cheesecake well.
For the full recipe, be sure to check out the Crunchy Honeycomb Cheesecake details above!
Variations
Flavor Variations
You can easily switch up the flavors of your Crunchy Honeycomb Cheesecake.
– Chocolate honeycomb cheesecake: Mix in melted dark chocolate to the filling. This adds a rich taste. Use a little extra honeycomb for crunch. It makes every bite a delightful treat.
– Fruit-infused honeycomb cheesecake: Add fruit puree, like raspberry or mango. This gives a fresh twist. You could also layer fresh fruit on top. It looks and tastes amazing!
Gluten-Free Option
If you need a gluten-free version, you can simply change the crust.
– Use gluten-free biscuits instead of regular ones. They will hold together well when mixed with the melted butter. This keeps the cheesecake just as delicious for everyone.
Vegan Adaptation Suggestions
For a vegan twist, you can swap out the dairy and eggs.
– Substitute cream cheese with a vegan cream cheese. Use silken tofu blended smooth as an egg replacement. This keeps the texture creamy and rich. With these changes, you can enjoy a tasty vegan cheesecake.
For the full recipe, check out the Crunchy Honeycomb Cheesecake.
Storage Info
Storing Leftovers
After making Crunchy Honeycomb Cheesecake, you may have some leftovers. To keep your cheesecake fresh, wrap it well. Use plastic wrap or aluminum foil to cover the entire cheesecake. You can also store it in an airtight container. This keeps moisture in and prevents it from drying out. For best results, place it in the fridge.
Freezing Tips
You can freeze the cheesecake if you want to save some for later. First, let it cool completely in the fridge. Once chilled, slice it into pieces. Wrap each slice in plastic wrap. Then place the wrapped slices in a freezer-safe bag or container. This way, you can take out one piece at a time. When you’re ready to eat, just move a slice to the fridge for a few hours to defrost.
Shelf Life
In the fridge, your cheesecake stays fresh for about 5 days. If you freeze it, it can last for up to 3 months. Just remember that freezing can slightly change the texture. If you want to enjoy the cheesecake at its best, eat it fresh. For the complete recipe, refer to the Full Recipe above.
FAQs
Can I make Crunchy Honeycomb Cheesecake in advance?
Yes, you can make this cheesecake ahead of time. In fact, making it a day before serving enhances its flavor. After baking, let the cheesecake cool completely. Then, refrigerate it for at least four hours or overnight. This will help it set properly. When ready to serve, simply garnish and enjoy.
How can I tell when the cheesecake is done baking?
To check if your cheesecake is done, look for a few signs. The edges should be set, while the center remains slightly jiggly. A good test is to gently shake the pan; if it wobbles, it’s not done. Another sign is a slight golden hue around the edges. Remember, it will continue to cook as it cools.
Can I replace honeycomb with another ingredient?
Yes, you can replace honeycomb with several other ingredients. For a similar crunch, try using crushed toffee or caramel pieces. If you want a different flavor, consider adding crushed cookies or nuts. Each alternative will change the taste and texture slightly, so choose based on your preference.
We covered how to make a delicious Crunchy Honeycomb Cheesecake from scratch. You learned the key ingredients, tools you need, and step-by-step instructions. I shared tips to get the perfect texture and avoid cracks. Plus, we explored fun flavor variations and storage methods.
With these simple steps, you can create a stunning cheesecake that impresses everyone. Enjoy the process and share your tasty treats!
![- 200g digestive biscuits, crushed - 100g unsalted butter, melted - 400g cream cheese, softened - 200g sour cream - 150g icing sugar - 2 teaspoons vanilla extract - 3 large eggs - 100g honeycomb, chopped into small pieces - 50g dark chocolate, grated (for garnish) - Extra honeycomb pieces for decoration When I make this Crunchy Honeycomb Cheesecake, I start with the ingredients. Each one plays a key role in the taste and texture. The digestive biscuits provide a crunchy base. I crush them finely and mix them with unsalted butter. This blend creates a rich crust that holds everything together. Next, I use cream cheese for the filling. I always choose good quality cream cheese because it makes a big difference. Sour cream adds a nice tang, balancing the sweetness. Icing sugar gives the cheesecake its sweet flavor. I like to add vanilla extract for a lovely aroma. The eggs help set the cheesecake, making it creamy and smooth. Chopped honeycomb gives this dessert its signature crunch and sweetness. I save some extra honeycomb for decoration. The dark chocolate adds depth, making the dessert even more special. - 9-inch springform pan - Electric mixer - Mixing bowls - Parchment paper I also find the right tools make a big difference. A 9-inch springform pan is perfect for this cheesecake. It allows easy removal after baking. An electric mixer speeds up the process when mixing the filling. I keep a few mixing bowls handy for different steps. Finally, parchment paper helps with cleanup and prevents sticking. All these ingredients and tools set the stage for a truly delightful dessert. If you want the full recipe, it’s a great guide to follow! 1. Preheat your oven to 160°C (320°F). This is important for even baking. 2. Take a 9-inch springform pan and line it with parchment paper. This helps with easy removal. 3. In a mixing bowl, combine 200g of crushed digestive biscuits and 100g of melted unsalted butter. Mix until it looks like wet sand. 4. Press this mixture firmly into the base of the pan to create a sturdy crust. Bake for 10 minutes, then let it cool. 1. In a large bowl, beat 400g of softened cream cheese with an electric mixer until smooth. 2. Gradually add 200g of sour cream, 150g of icing sugar, and 2 teaspoons of vanilla extract. Mix until fully combined and creamy. 3. Add 3 large eggs one by one, mixing gently after each addition. Be careful not to over-mix. 4. Fold in 100g of chopped honeycomb pieces. This adds a nice crunch and flavor. 1. Pour the cheesecake mixture over the cooled biscuit base. Smooth the top with a spatula. 2. Bake in the preheated oven for about 50-60 minutes. The edges should be set, but the center should still jiggle. 3. Turn off the oven and leave the cheesecake inside for another hour. This helps prevent cracks. 4. After that, remove the cheesecake and let it cool. Refrigerate for at least 4 hours, or overnight, before serving. For the complete recipe, check the [Full Recipe]. To get that smooth, creamy texture, avoid over-mixing the batter. Over-mixing can add air bubbles, which can lead to cracks. Mix gently and just until all the ingredients blend together. When adding eggs, incorporate them gently. This helps keep the batter light and fluffy. Cooling your cheesecake properly is key to avoiding cracks. After baking, turn off the oven and leave the cheesecake inside for an hour. This gradual cooling helps set the cake without sudden temperature changes. Also, bake with the oven door ajar for the last 10 minutes. This allows steam to escape and keeps your cheesecake from cracking. When it's time to serve, garnish your cheesecake for a stunning look. Grate dark chocolate on top, then add extra honeycomb pieces. This not only adds flair but also enhances flavor. Serve with a drizzle of honey or a scoop of vanilla ice cream for a delightful contrast. For a fun twist, try pairing it with fresh berries. They add a burst of flavor that complements the cheesecake well. For the full recipe, be sure to check out the Crunchy Honeycomb Cheesecake details above! {{image_2}} You can easily switch up the flavors of your Crunchy Honeycomb Cheesecake. - Chocolate honeycomb cheesecake: Mix in melted dark chocolate to the filling. This adds a rich taste. Use a little extra honeycomb for crunch. It makes every bite a delightful treat. - Fruit-infused honeycomb cheesecake: Add fruit puree, like raspberry or mango. This gives a fresh twist. You could also layer fresh fruit on top. It looks and tastes amazing! If you need a gluten-free version, you can simply change the crust. - Use gluten-free biscuits instead of regular ones. They will hold together well when mixed with the melted butter. This keeps the cheesecake just as delicious for everyone. For a vegan twist, you can swap out the dairy and eggs. - Substitute cream cheese with a vegan cream cheese. Use silken tofu blended smooth as an egg replacement. This keeps the texture creamy and rich. With these changes, you can enjoy a tasty vegan cheesecake. For the full recipe, check out the Crunchy Honeycomb Cheesecake. After making Crunchy Honeycomb Cheesecake, you may have some leftovers. To keep your cheesecake fresh, wrap it well. Use plastic wrap or aluminum foil to cover the entire cheesecake. You can also store it in an airtight container. This keeps moisture in and prevents it from drying out. For best results, place it in the fridge. You can freeze the cheesecake if you want to save some for later. First, let it cool completely in the fridge. Once chilled, slice it into pieces. Wrap each slice in plastic wrap. Then place the wrapped slices in a freezer-safe bag or container. This way, you can take out one piece at a time. When you're ready to eat, just move a slice to the fridge for a few hours to defrost. In the fridge, your cheesecake stays fresh for about 5 days. If you freeze it, it can last for up to 3 months. Just remember that freezing can slightly change the texture. If you want to enjoy the cheesecake at its best, eat it fresh. For the complete recipe, refer to the Full Recipe above. Yes, you can make this cheesecake ahead of time. In fact, making it a day before serving enhances its flavor. After baking, let the cheesecake cool completely. Then, refrigerate it for at least four hours or overnight. This will help it set properly. When ready to serve, simply garnish and enjoy. To check if your cheesecake is done, look for a few signs. The edges should be set, while the center remains slightly jiggly. A good test is to gently shake the pan; if it wobbles, it’s not done. Another sign is a slight golden hue around the edges. Remember, it will continue to cook as it cools. Yes, you can replace honeycomb with several other ingredients. For a similar crunch, try using crushed toffee or caramel pieces. If you want a different flavor, consider adding crushed cookies or nuts. Each alternative will change the taste and texture slightly, so choose based on your preference. We covered how to make a delicious Crunchy Honeycomb Cheesecake from scratch. You learned the key ingredients, tools you need, and step-by-step instructions. I shared tips to get the perfect texture and avoid cracks. Plus, we explored fun flavor variations and storage methods. With these simple steps, you can create a stunning cheesecake that impresses everyone. Enjoy the process and share your tasty treats!](https://therecipehatch.com/wp-content/uploads/2025/06/efc366d6-96e2-4642-844f-498b5ea7509a-300x300.webp)