Salads

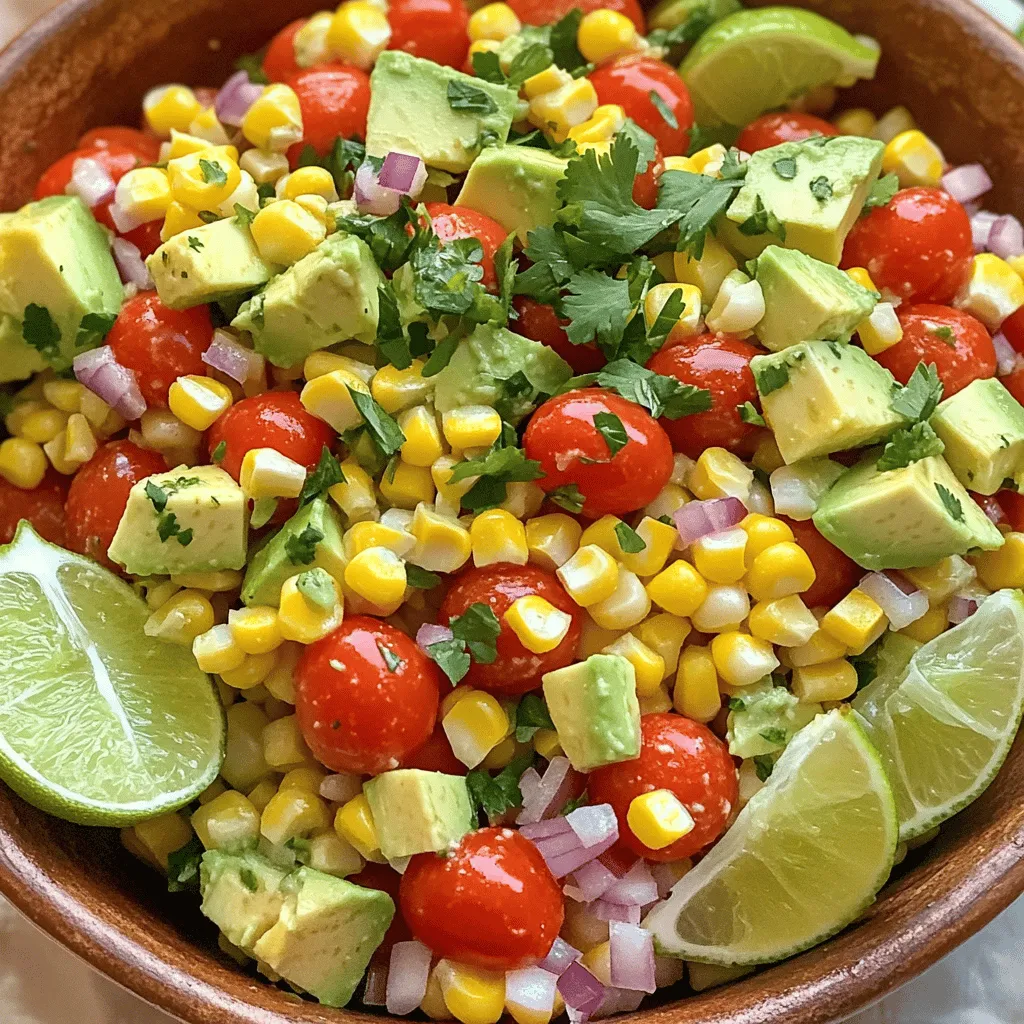
To make a tasty corn salad, you need fresh, colorful ingredients. Here is what you'll need: - 4 cups fresh corn kernels (about 6 ears of corn) - 1 cup cherry tomatoes, halved - 1 small red onion, finely chopped - 1 bell pepper (red, yellow, or orange), diced - 1 avocado, diced - 1/4 cup fresh cilantro, chopped - 2 tablespoons lime juice - 2 tablespoons olive oil - 1 teaspoon cumin powder - Salt and pepper to taste - Optional: 1/2 cup black beans, rinsed and drained These simple ingredients blend well together. They create a dish that is bright and fresh. I prefer fresh corn for this salad. Fresh corn has a sweet crunch that makes the dish shine. You can use frozen corn, but it may lose some texture. If you choose frozen corn, make sure to thaw it first. You can run it under warm water for a few minutes. This helps to remove extra moisture. After that, pat it dry with a towel. Both types work, but fresh corn is the star. For a twist, you can add optional ingredients. Black beans are a great choice. They add protein and texture. You can also toss in jalapeños for heat. Chopped cucumber gives a cool crunch. Fresh herbs like parsley or mint can enhance the flavor too. Feel free to mix and match these add-ins to make the salad your own. To make the corn salad, start with fresh corn. Bring a large pot of water to a boil. Add 6 ears of corn and blanch them for about 5 minutes. This step helps to keep the corn sweet and crisp. After boiling, transfer the corn to an ice bath. This process stops the cooking and keeps the color bright. Once the corn cools, cut the kernels off the cob and set them aside. Next, grab a large mixing bowl. Add the corn kernels, 1 cup of halved cherry tomatoes, chopped red onion, and diced bell pepper. If you want more texture, toss in 1/2 cup of rinsed black beans. They add protein and flavor. Want that perfect bite? Use fresh corn if you can. It tastes sweeter and has a better crunch. Blanching helps to lock in that freshness. Make sure not to overcook the corn. Five minutes is just right. If you use frozen corn, thaw it and drain well before adding it to your salad. Now it’s time to make the dressing. In a small bowl, whisk together 2 tablespoons of lime juice, 2 tablespoons of olive oil, 1 teaspoon of cumin powder, and salt and pepper to taste. Pour this dressing over your salad mixture and toss gently. This step is key to ensuring each ingredient gets coated. Just before serving, add 1 diced avocado and 1/4 cup of chopped cilantro. Fold gently to keep the avocado intact. For more detailed steps, check the Full Recipe. Enjoy your fresh corn salad! Choosing the right ingredients makes a big difference in flavor. I recommend fresh corn for the best taste. Look for bright yellow kernels that are plump and juicy. If fresh corn isn’t available, frozen corn can work too. Just make sure to thaw it fully before use. Cherry tomatoes add a sweet pop. They should be ripe and firm. Red onion gives a nice crunch and a bit of sharpness. You can swap it for green onions for a milder flavor. Bell peppers add color and sweetness. Seasoning is key to a tasty corn salad. Lime juice brightens the dish. It adds a zesty kick that pairs well with corn. Olive oil adds richness and helps blend the flavors. Cumin powder gives an earthy touch that enhances the corn's natural sweetness. Don’t forget to add salt and pepper to taste. Feel free to experiment with other herbs too. Fresh cilantro adds freshness. If you want a little heat, try adding diced jalapeños or a pinch of chili powder. How you serve the salad can elevate the meal. I love using a large, rustic bowl. It gives a warm, inviting feel. Garnish with extra cilantro leaves for a pop of color. Lime wedges on the side add a fresh touch and let guests add more lime juice if they want. For a fun twist, serve the salad in mason jars. This makes it easy for picnics or outdoor gatherings. Each jar looks cute and is easy to grab. You can layer the ingredients for a colorful effect too. Try these tips to make your corn salad not only tasty but also a feast for the eyes. For the full recipe, check out Sunny Zesty Corn Salad . {{image_2}} Corn salad adapts well to many local tastes. In Mexico, add fresh jalapeños for heat. Try adding crumbled queso fresco for a creamy twist. In the Southern U.S., incorporate diced cucumbers for crunch. In Asian cuisine, mix in sesame oil and rice vinegar for a unique flavor. Each region gives corn salad a fresh spin. Corn salad shines as a vegetarian dish. To make it vegan, simply skip any cheese. This salad is full of plant-based goodness. Add chickpeas for protein and texture. You can also mix in shredded carrots for color and sweetness. This keeps your meal light and healthy. Get creative with your corn salad! Swap out the bell pepper for diced mango. This adds sweetness and a tropical vibe. You can also try different herbs like basil or mint instead of cilantro. For a spicy kick, add diced chipotle peppers in adobo sauce. These twists keep your corn salad exciting and new. This corn salad recipe is adaptable and fun. Explore flavors to make it your own. For the full experience, check out the Full Recipe. When you have leftover corn salad, store it in a sealed container. Keep it in the fridge. This keeps the salad fresh and crisp. I suggest eating it within three days for the best taste. If you want to keep the avocado intact, store it separately. This helps prevent browning. Corn salad lasts about three days in the fridge. After that, it can lose its crunch and flavor. Always check for any signs of spoilage. If it looks or smells off, it's best to toss it. Remember, fresh ingredients like tomatoes and avocado can spoil faster. You can freeze some ingredients for later use. Corn kernels freeze very well. Just blanch them first and then cool in ice water. After that, pack them in a freezer bag. Remove as much air as possible to avoid freezer burn. Other ingredients like diced bell peppers can also be frozen. However, avoid freezing tomatoes and avocado as their texture changes when thawed. For more details, check the Full Recipe. Corn salad has roots in many cultures. It likely began in the Americas, where corn is a staple. Different regions make their own versions. Some use beans, while others add spices. The dish grew in popularity for its fresh taste and vibrant colors. Today, it is a favorite in summer picnics and barbecues. Yes, you can make corn salad ahead of time. It tastes great after chilling in the fridge. Prepare it a few hours before serving for the best flavor. Just be careful with the avocado. Add it right before you serve. This keeps it fresh and green. Corn salad is packed with nutrients. Corn is rich in fiber, which aids digestion. Tomatoes add vitamins A and C, great for skin health. Avocado brings healthy fats to the mix. The salad is low in calories, making it a healthy choice. Eating this salad can help you stay full and satisfied. This blog post explored making delicious corn salad. We covered ingredient choices, from fresh to frozen corn. I shared step-by-step cooking tips for perfect kernels and flavor-packed combinations. You learned about enhancing taste with seasonings and optional add-ins. We also looked at variations like vegetarian options and regional flavors. Lastly, I explained the best ways to store leftovers. Corn salad is simple, tasty, and flexible. You can easily customize it to fit your taste. Enjoy making your own corn salad today!
Corn Salad Refreshing and Easy Summer Dish
Looking for a light, vibrant dish perfect for summer? You’ve found it! This corn salad is not only refreshing, but it’s also simple to make.
- 4 cups fresh baby spinach, rinsed and dried - 1 cup strawberries, hulled and sliced - ½ cup crumbled goat cheese - ¼ cup sliced almonds, toasted - ¼ red onion, thinly sliced - 3 tablespoons balsamic vinegar - 2 tablespoons olive oil - 1 teaspoon honey - Salt and pepper to taste To create a tasty Spinach Strawberry Salad, you need fresh, vibrant ingredients. Start with baby spinach. I love using four cups of fresh spinach. Rinse it well and dry it gently. This keeps the leaves crisp and clean. Next, let's talk about strawberries. Use one cup of fresh, hulled, and sliced strawberries. Their sweet flavor pairs perfectly with the spinach. The bright red color adds a lovely touch to your salad, making it visually appealing. Now, we need some cheese and nuts for that creamy and crunchy texture. I recommend half a cup of crumbled goat cheese. Its tangy taste enhances the salad. For a nice crunch, add a quarter cup of toasted sliced almonds. Toasting brings out their nutty flavor. Lastly, we will make a balanced dressing. For this, we need a quarter of a red onion, thinly sliced. The onion adds a sharp bite that contrasts the sweet strawberries. Combine it with three tablespoons of balsamic vinegar and two tablespoons of olive oil. Add one teaspoon of honey for sweetness, and season with salt and pepper to taste. For the full recipe, be sure to check out the detailed instructions. Enjoy crafting this fresh and flavorful delight! - Step 1: Add fresh baby spinach to a large salad bowl. - Step 2: Layer with sliced strawberries, goat cheese, almonds, and onion. First, take the fresh baby spinach and place it in a big bowl. Make sure the spinach is clean and dried. This keeps the salad crisp and fresh. Then, add the sliced strawberries on top of the spinach. Their sweetness adds a nice touch. Next, sprinkle the crumbled goat cheese over the strawberries. The creamy cheese balances the fruity taste. After that, add the sliced almonds for a crunchy texture. Finally, toss in the thinly sliced red onion for a sharp flavor kick. - Step 3: Whisk together balsamic vinegar, olive oil, honey, salt, and pepper. In a small bowl, combine the balsamic vinegar, olive oil, honey, salt, and pepper. Use a whisk to mix them well. This dressing ties all the flavors together. The vinegar gives a tangy taste, while the honey adds sweetness. Make sure it is smooth and creamy. - Step 4: Drizzle dressing over the salad. - Step 5: Toss gently and serve immediately. Just before serving, drizzle the dressing over the salad. Then, toss the salad gently with tongs or spoons. This way, all the ingredients get coated in the tasty dressing. Serve the salad right away to enjoy the fresh flavors. For more details, check out the Full Recipe. When I make this salad, I always look for bright green spinach. It should feel crisp and fresh. The strawberries must be vibrant and sweet. I prefer to use fresh goat cheese for the best flavor. It adds a creamy texture that pairs well with the fruit. For the dressing, I like to experiment. Apple cider vinegar can be a fun twist. It adds a tangy taste that enhances the salad. You can also consider adding herbs like basil or mint. They bring an extra depth of flavor that makes each bite special. Presentation makes a big difference. I arrange the salad ingredients in layers. It creates a beautiful display that is hard to resist. Serving in clear bowls showcases the colorful ingredients well. The bright colors of spinach and strawberries invite everyone to dig in. If you want the full recipe, don’t forget to check it out! {{image_2}} For a fun twist on the Spinach Strawberry Salad, try these easy variations. You can make it more filling or switch up the flavors to keep things interesting. - Add grilled chicken or shrimp for a heartier salad. - Incorporate chickpeas for a vegetarian option. Adding protein can help you feel full longer. Grilled chicken works well with the fresh flavors. Shrimp adds a nice touch and cooks fast. Chickpeas bring fiber and make the salad vegan-friendly. - Replace strawberries with blueberries or mandarin oranges. - Add slices of avocado for creaminess. Different fruits can change the taste and texture of your salad. Blueberries add a sweet burst. Mandarins bring a bright citrus note. Avocado adds a creamy feel that balances the crisp greens. - Try feta or blue cheese for a different taste profile. - Use shredded Parmesan for a salty kick. The cheese you choose can change the whole salad. Feta adds a tangy bite, while blue cheese gives a stronger flavor. Parmesan offers a salty crunch that pairs well with the sweet fruits. Feel free to mix and match these ideas to make your salad unique. For the full recipe, check the details above! You should serve this salad fresh for the best taste. However, if you have leftovers, you can store it in the fridge for up to one day. Make sure to keep the dressing separate. This keeps the salad crisp and fresh until you are ready to eat. Freezing this salad is not a good idea. The ingredients do not thaw well and can become soggy. Instead, prep the individual parts in advance. You can wash and dry the spinach, slice the strawberries, and toast the almonds ahead of time. This way, you can assemble the salad easily later. If you have leftover salad, don’t throw it away! You can use it in wraps or sandwiches for a tasty lunch. You can also add it to a grain bowl the next day. Just mix it with some quinoa or rice for a filling meal. Yes, but add dressing just before serving for freshness. This keeps the greens crisp. If you mix the salad too early, the spinach may wilt. Feta cheese or ricotta can be great alternatives. Both give a lovely flavor. Feta adds a salty bite, while ricotta brings creaminess. Use a plant-based cheese and a vegan dressing substitute. You can find many options in stores today. This way, you enjoy the same taste without dairy. Yes, it’s packed with vitamins, antioxidants, and healthy fats. Spinach offers iron and fiber. Strawberries provide vitamin C, while nuts add healthy oils. Enjoy this salad knowing it’s good for you! This blog post detailed how to create a fresh and vibrant Spinach Strawberry Salad. We covered the key ingredients, from greens and fruit to cheese and nuts. I also shared step-by-step instructions, tips for choosing and storing ingredients, and various ways to customize the salad. In conclusion, making this salad allows for creativity while enjoying healthy flavors. Keep it fresh, and don’t shy away from experimenting with different ingredients. Enjoy this delightful dish and its many variations!
Spinach Strawberry Salad Fresh and Flavorful Delight
Looking for a bright and tasty dish? The Spinach Strawberry Salad is both fresh and flavorful! This delightful mix of baby spinach, juicy strawberries, and
- 2 cups cooked chicken breast, shredded - 4 slices of crispy turkey bacon, chopped - 1 cup cherry tomatoes, halved - 1 avocado, diced - 1/2 cup romaine lettuce, chopped - 1/4 cup red onion, finely chopped - 1/2 cup Greek yogurt - 2 tablespoons mayonnaise - 1 tablespoon Dijon mustard - 1 tablespoon lemon juice - Salt and pepper to taste - Fresh basil leaves for garnish Gather these fresh ingredients to make your BLT chicken salad. Each one brings flavor and nutrition. The cooked chicken breast adds protein. Turkey bacon gives a crispy texture and a savory taste. Cherry tomatoes add a sweet burst. Avocado brings creaminess, while romaine lettuce adds crunch. Red onion offers a mild bite, and the herbs brighten the flavors. You can mix Greek yogurt with mayonnaise for a tangy dressing. Dijon mustard and lemon juice add zest. Don’t forget to season with salt and pepper! These simple ingredients create a tasty, healthy meal. - Large mixing bowl - Small bowl - Measuring cups and spoons - Fork or spatula for mixing Having the right tools makes cooking easier. A large mixing bowl helps combine all the salad ingredients. Use a small bowl for the dressing to keep it separate until ready. Measuring cups and spoons ensure you use the right amounts. Finally, a fork or spatula allows for gentle mixing without smashing the ingredients. You can find this full recipe in my collection of delicious meals. - Combine shredded chicken, bacon, tomatoes, avocado, lettuce, and onion. - Gently mix to incorporate ingredients. Start by taking a large mixing bowl. Add in two cups of shredded chicken. Next, toss in four slices of crispy turkey bacon that you have chopped. The bacon adds a nice crunch. Then, add one cup of halved cherry tomatoes for sweetness. Don’t forget the avocado! Dice one avocado and add it in for creaminess. Now, chop half a cup of romaine lettuce and a quarter cup of finely chopped red onion. These add freshness and flavor. Mix everything gently but thoroughly. You want each bite to have a bit of everything. - Combine Greek yogurt, mayonnaise, mustard, lemon juice, salt, and pepper. - Whisk until smooth and creamy. In a small bowl, combine half a cup of Greek yogurt with two tablespoons of mayonnaise. The yogurt makes the dressing creamy but lighter. Add in one tablespoon of Dijon mustard for a little zing. Squeeze in one tablespoon of lemon juice for brightness. Finally, season with salt and pepper to taste. Whisk it all together until smooth and creamy. This dressing will bring your salad to life. - Pour dressing over salad mixture. - Toss gently to coat evenly. - Chill for 15 minutes before serving. Now, pour the dressing over your salad mixture. Toss gently to coat everything evenly. This is where the magic happens! Let the salad chill in the fridge for about 15 minutes. This time lets the flavors blend nicely. Before serving, give the salad one last gentle toss. You want it to look fresh and inviting. Serve it in a clear glass bowl to show off those vibrant colors. Enjoy your delicious and healthy BLT Chicken Salad! For the complete recipe, check out the Full Recipe. To make your BLT chicken salad shine, use freshly cooked chicken. This gives your salad the best texture and flavor. After mixing all the ingredients, let the salad chill in the fridge. Chilling helps the flavors meld together, making each bite taste even better. When serving your salad, consider pairing it with crusty bread or crackers. This adds a nice crunch. For a great visual impact, present the salad in a clear bowl. The colorful ingredients will look inviting and make your meal more appealing. To lighten up your salad, use low-fat Greek yogurt instead of regular yogurt. This swap cuts calories without losing creaminess. You can also substitute ingredients based on your dietary needs. For example, try bacon alternatives if you want a healthier option. These changes keep the salad delicious while catering to different diets. You can find the full recipe [here](#). {{image_2}} You can add your own twist to the BLT Chicken Salad. Try adding diced cucumbers or bell peppers for a crunch. These veggies not only boost flavor but also add color. You can also use different greens like spinach or arugula. These greens bring a fresh taste and vibrant look. The dressing is key to making this salad yummy. You can experiment with different types of mustard. Honey mustard adds sweetness, while spicy mustard gives a kick. You can also try yogurt flavors like garlic or herb for a creamy base. Adding fresh herbs like dill or cilantro can brighten the dish. These herbs add depth and fresh taste. If you need to cater to dietary needs, it’s easy to adapt. To make it gluten-free, just check your ingredient choices. Most items, like chicken and veggies, are naturally gluten-free. If you want a vegan version, use plant-based substitutes. Swap the chicken for chickpeas and the yogurt for a dairy-free option. These changes keep the salad hearty and filling. For the full recipe, check out the details above! To store your leftovers, keep them in an airtight container in the refrigerator. This helps keep the salad fresh. It’s best to eat the salad within 2-3 days. After that, the ingredients may lose their taste and texture. Freezing the salad is not a good idea. The ingredients can change texture when thawed. If you plan to freeze it, store the dressing separately. This will help maintain the salad’s taste when you serve it later. I recommend serving the BLT chicken salad cold. This keeps the flavors bright and fresh. If you must reheat it, do so gently on low heat. This method helps avoid altering the texture of the ingredients. Enjoy the crispness and taste just as they are! You can use avocado or a yogurt-based dressing as alternatives. These options keep the salad creamy and tasty. Avocado adds a rich flavor, while yogurt gives a nice tang. Both choices make the salad lighter and healthier. Plus, they keep the dish fresh and vibrant. Yes, you can prepare the salad in advance. Just remember to add delicate ingredients like lettuce and avocado just before serving. This way, they stay crisp and fresh. Preparing the chicken and bacon ahead of time saves you effort on busy days. This salad pairs well with vegetable sticks, potato chips, or a light soup. The crunch of the chips or the fresh veggies adds great texture. A bowl of soup can balance out the flavors nicely. Enjoy your meal with these simple sides! This BLT Chicken Salad recipe is a tasty and simple dish. You mix fresh ingredients and create a flavorful dressing. Remember to chill the salad for better taste. You can also switch ingredients to fit your diet. Store your leftovers well for days of enjoyment. With some tips and variations, you can keep this meal fresh and exciting. Enjoy making it your own!
BLT Chicken Salad Healthy and Tasty Meal Option
Looking for a fresh twist on a classic meal? My BLT Chicken Salad packs all the flavor you love while being healthy! With just a
To make Ensalada Navideña, you need fresh and tasty ingredients. Here’s what you will need: - 2 cups cooked and cooled quinoa - 1 cup pomegranate seeds - 1 cup diced apples (preferably Granny Smith) - 1/2 cup diced celery - 1/2 cup chopped walnuts (or pecans) - 1/2 cup dried cranberries - 1/4 cup chopped fresh parsley - 1/4 cup orange juice - 2 tablespoons olive oil - 1 tablespoon honey (or maple syrup for a vegan option) - Salt and pepper to taste You can change this salad to fit your taste. Here are some fun ideas: - Add diced bell peppers for crunch. - Toss in shredded carrots for color. - Mix in feta cheese for creaminess. - Use fresh mint for a bright twist. - Substitute apples with pears for sweetness. Using high-quality ingredients makes a big difference. Choose ripe apples for sweetness. Opt for fresh pomegranate seeds for a burst of flavor. Select walnuts that are crunchy and fresh. This salad shines with the best ingredients. Always check for freshness in your produce. Quality makes this dish festive and delicious. For the best taste, use organic ingredients when possible. To start, gather all your ingredients. You need cooked quinoa, pomegranate seeds, diced apples, diced celery, chopped walnuts, dried cranberries, and fresh parsley. Make sure to measure each ingredient accurately. This keeps your flavors balanced. Wash your fruits and chop them up. Dice your apples into small cubes. The Granny Smith apples add a nice tart taste. In a large mixing bowl, combine the cooked quinoa and all the fruits and nuts. Add the pomegranate seeds, diced apples, celery, walnuts, cranberries, and parsley. You want to mix in a gentle way. This keeps the pomegranate seeds intact. Once everything is in the bowl, it’s time to make the dressing. For the dressing, whisk together orange juice, olive oil, honey, salt, and pepper. This mix adds a sweet and tangy flavor. Pour the dressing over your salad mixture. Toss gently to coat everything well. Taste it to see if it needs more salt or pepper. Let it chill in the fridge for at least 30 minutes. This helps all the flavors blend nicely. For a lovely touch, serve your Ensalada Navideña in a festive bowl. You can garnish it with extra pomegranate seeds and parsley. Enjoy your colorful and tasty salad! For the full recipe, check the details above. You can prepare Ensalada Navideña a day ahead. This makes busy holiday days easier. Just follow these steps: 1. Mix all the salad ingredients. 2. Whisk the dressing in a separate bowl. 3. Store everything in the fridge in airtight containers. 4. Combine the salad and dressing just before serving. Texture is key for a tasty salad. Here are helpful tips: - Use crunchy apples for a fresh bite. Granny Smith works best. - Add walnuts or pecans for a nice crunch. - Dried cranberries give a chewy texture that balances the crunch. - Make sure the quinoa is fully cooled to keep it fluffy. Ensalada Navideña pairs well with many dishes. Here are some great options: - Serve with roasted turkey or ham for a festive touch. - Try it alongside grilled fish for a lighter meal. - Offer slices of crusty bread to soak up any leftover dressing. - Enjoy with a glass of sparkling water or a light wine. These tips will help you create a beautiful and tasty salad for your holiday table. For the complete recipe, check the Full Recipe section. {{image_2}} If you want a vegan version, swap honey for maple syrup. This change keeps the sweetness but makes the dish fully plant-based. You can also add extra fruits like mango or kiwi. Both fruits add a sweet twist. For creaminess, try avocado instead of nuts. Different regions have unique takes on Ensalada Navideña. In Mexico, some people add jicama or carrots. These veggies give a nice crunch. Others might include beets for color and sweetness. If you visit Central America, you might find avocado in the mix. Each region adds local flavors, making this salad special. Don’t be afraid to get creative! Try adding roasted sweet potatoes for a hearty touch. Grating some cheese on top can add richness. You can also mix in herbs like mint or cilantro for fresh flavors. Want a spicy kick? Toss in some jalapeños or chili flakes. There’s no limit to what you can do! For the full recipe, check out the detailed instructions earlier. To keep your Ensalada Navideña fresh, store leftovers in an airtight container. Make sure the container seals well to prevent air from getting in. This helps keep the salad crisp. If you have dressing left over, store it separately. This keeps the salad from getting soggy. You can freeze Ensalada Navideña, but some ingredients may change in texture. If you want to freeze it, avoid freezing apples and pomegranate seeds. Instead, freeze the quinoa mix without these items. When you’re ready to eat, thaw it in the fridge overnight. Add fresh apples and pomegranate seeds before serving. Ensalada Navideña lasts about three to five days in the fridge. After that, it may lose its flavor. Always check for signs of spoilage, such as a strange smell or slimy texture. Trust your nose! For the best taste, eat it within the first couple of days. Enjoy this colorful salad fresh for a festive touch! Ensalada Navideña is a festive salad. It is full of vibrant flavors and colors. This salad has quinoa, pomegranate seeds, apples, celery, walnuts, cranberries, and parsley. The dressing includes orange juice, olive oil, honey, salt, and pepper. Each ingredient brings a unique taste. Together, they create a joyful mix perfect for celebrations. This dish is not just tasty; it also looks beautiful on your table. To spice up your Ensalada Navideña, add fresh jalapeños. You can finely chop them for a milder kick. If you want more heat, use cayenne pepper in the dressing. Another option is to mix in some diced red onion. This will add a nice bite and depth to the flavor. Start with a small amount and taste as you go. Adjust to your heat preference. This makes the salad fun and exciting! Yes, you can use different fruits! This salad is versatile and playful. Try swapping the apples for pears or oranges. You can even add grapes or kiwi for a twist. Each fruit will bring its own flavor and texture. Just make sure to balance sweetness and tartness. This way, your Ensalada Navideña remains fresh and lively. Feel free to get creative and use what you enjoy! For the full recipe, check out the earlier section. This article covered key ingredients of Ensalada Navideña, including quality notes and options. I provided step-by-step instructions, flavor tips, and ways to make it ahead. You learned helpful tricks for texture and pairing. Variations like vegan options and creative twists offer new tastes. I shared storage tips to keep leftovers fresh. Making delicious Ensalada Navideña is easy and fun. Enjoy the tasty treats you create!
Ensalada Navideña Delicious and Festive Recipe Guide
Are you ready to dive into a festive dish that brings joy and flavor to your holiday table? Ensalada Navideña is not just any salad;
To make a fresh and tasty watermelon pineapple salad, you need: - 2 cups seedless watermelon, cubed - 2 cups pineapple, cubed - 1 cup cucumber, diced - 1/4 cup fresh mint leaves, chopped - 1/4 cup feta cheese, crumbled (optional) - 2 tablespoons lime juice - 1 tablespoon honey - Pinch of salt and pepper to taste Choosing ripe fruits is key to a great salad. For watermelon, look for a firm, heavy fruit with a smooth rind. The spot where it rested on the ground should be yellow, indicating ripeness. For pineapple, choose one that smells sweet at the base. The leaves should be green and fresh, not brown. Press the fruit gently; it should yield slightly but not feel mushy. This salad is not just delicious; it’s healthy too. Watermelon is high in vitamins A and C. It keeps you hydrated and supports skin health. Pineapple has bromelain, which aids digestion. Cucumber adds crunch and hydration. Mint is refreshing, and feta cheese adds protein and calcium. This mix makes for a nutritious dish that’s perfect for summer. Feel free to check the Full Recipe for more details on how to prepare this delightful dish! First, gather all your ingredients. You need: - 2 cups seedless watermelon, cubed - 2 cups pineapple, cubed - 1 cup cucumber, diced - 1/4 cup fresh mint leaves, chopped - 1/4 cup feta cheese, crumbled (optional) - 2 tablespoons lime juice - 1 tablespoon honey - Pinch of salt and pepper to taste Next, peel the pineapple and cube it. Cut the watermelon into bite-sized pieces. If there are seeds, make sure to remove them. Dice the cucumber into small chunks. Then, chop the fresh mint leaves finely. In a large mixing bowl, combine the cubed watermelon, pineapple, and diced cucumber. In a smaller bowl, whisk together the lime juice, honey, and a pinch of salt and pepper. Make sure everything blends well. Once the dressing is ready, pour it over the fruit mixture. Gently toss everything together. You want all the ingredients to be coated without crushing them. After that, sprinkle the chopped mint and optional feta cheese on top. For a fun presentation, serve the salad in a large, shallow bowl. You can also use individual cups for each guest. This makes it easy to grab a serving. For an extra special touch, consider using a watermelon shell as your bowl. It adds a pop of color and fun to the table! To boost the taste of your Watermelon Pineapple Salad, add fresh herbs. Mint works great with the fruity flavors. You can also try basil or cilantro for a twist. For a spicy kick, sprinkle in some chili flakes. These herbs and spices add depth and make each bite exciting. Making your salad look great is easy. Serve it in a large, shallow bowl. Add extra mint leaves on top for color. You can also use a watermelon shell as a bowl. This fun touch will wow your guests. Consider layering the fruits for a colorful display. Bright colors make your dish more inviting. Balance your salad's sweetness and acidity to fit your taste. If you like it sweeter, add more honey. For a tangy flavor, increase the lime juice. Taste as you mix to find your perfect balance. A pinch of salt can also enhance the overall flavor. Adjusting these elements lets you create a salad that matches your cravings. {{image_2}} You can make this salad even better by adding more fruits. Try berries like strawberries or blueberries for a sweet touch. Citrus fruits like oranges or mandarins add a fresh zing. Each fruit adds its own color and flavor. Mix and match until you find your favorite combo. Want a different taste? Change the dressing! A honey-lime mix makes it sweeter and tangy. For a bolder flavor, try balsamic vinaigrette. Both dressings bring new life to the salad. You can even experiment with yogurt or a spicy vinaigrette. If you want a fuller meal, add proteins. Grilled chicken makes the salad hearty and tasty. Shrimp is another great option that pairs well with the fruits. You can also use chickpeas for a plant-based twist. Adding protein makes it more filling and nutritious. This refreshing watermelon pineapple salad is versatile and fun to customize. For the full recipe, check out the [Full Recipe]. To keep your watermelon pineapple salad fresh, store it in an airtight container. This will help prevent air from getting in and drying it out. If you use a bowl, cover it tightly with plastic wrap. Always place the salad in the fridge right after serving. The cooler temperature helps keep the fruit crisp and tasty. Your salad will stay fresh for about 2 to 3 days in the fridge. After that, the fruits may start to release moisture and lose their crunch. If you notice any off smells or slimy textures, it's best to throw it away. Use your senses to check for freshness before eating. While you can freeze some fruits, I do not recommend freezing this salad. Watermelon and pineapple have high water content. When frozen, they become mushy after thawing. If you want to freeze components, consider freezing just the pineapple. Cut it into pieces and freeze them on a baking sheet before placing them in a bag. This way, you can add frozen pineapple to smoothies later. Enjoy the full recipe for more details! Yes, you can make this salad ahead of time. To prepare in advance, chop the fruits and mix them in a bowl. Keep the dressing separate until you are ready to serve. This keeps the salad fresh and prevents sogginess. If you need to store it, use an airtight container in the fridge. Serve it within a day or two for the best taste. Watermelon is hydrating and low in calories. It contains vitamins A and C, which support skin health. Pineapple is rich in bromelain, an enzyme that aids digestion. It also has vitamin C and manganese, which help with immune function. Together, they boost hydration and provide essential nutrients. Yes, you can easily make this salad vegan. Simply swap the feta cheese for a plant-based option. You can use vegan feta or even some avocado for creaminess. This keeps the salad full of flavor while catering to plant-based diets. Enjoy a tasty and vibrant dish! This blog post covered how to make a tasty Watermelon Pineapple Salad. You learned about the key ingredients, tips for picking ripe fruits, and health benefits. We also shared detailed prep steps and fun serving ideas. Remember to add herbs for flavor and adjust sweetness to your liking. You can even change up the fruits or dressings. This salad stores well, making it easy to enjoy later. Try these tips to make your salad fun and fresh!
Watermelon Pineapple Salad Refreshing Summer Delight
Looking to brighten your summer meals? My Watermelon Pineapple Salad is the perfect refreshment! Bursting with juicy fruits, crisp cucumber, and a hint of mint,
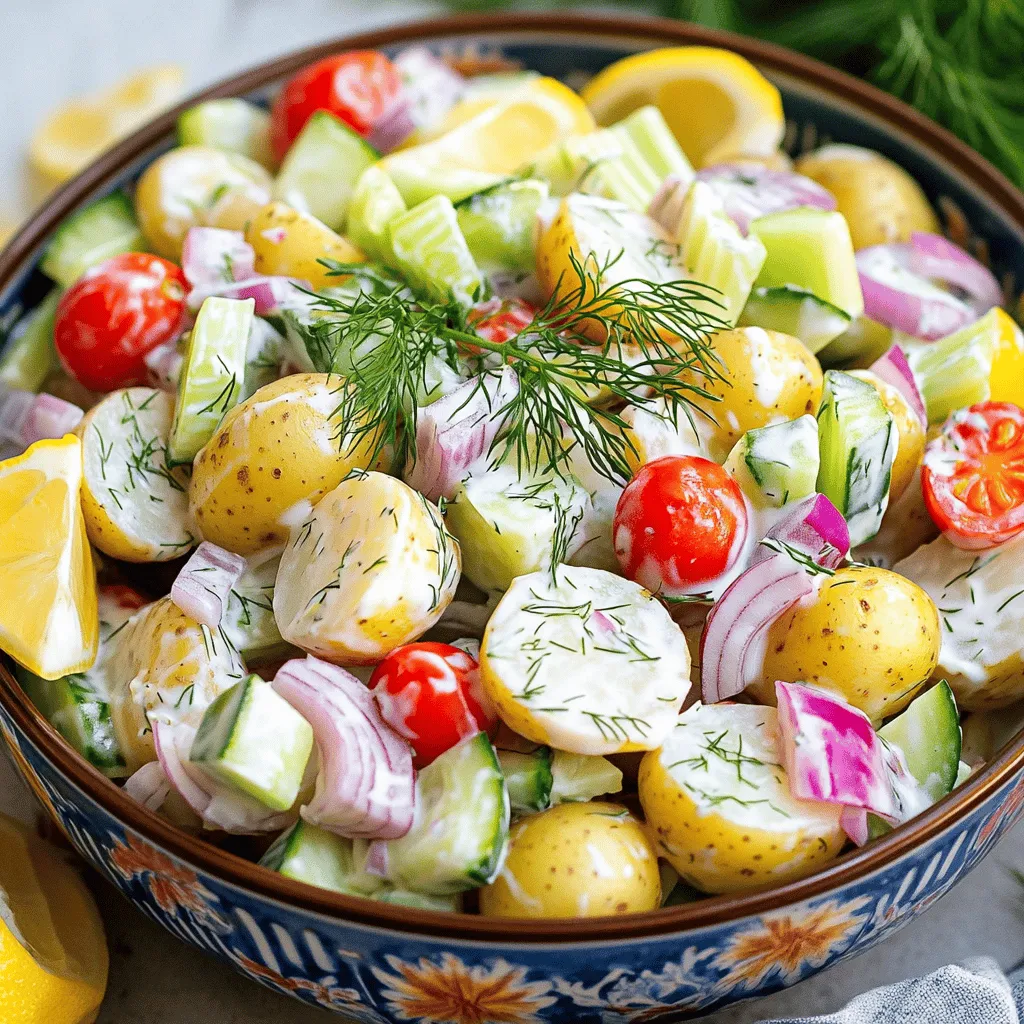
- 2 large cucumbers - 1 cup cherry tomatoes - 1 small red onion - 1/2 cup feta cheese - 1/4 cup black olives - 1/4 cup tahini - 2 tablespoons lemon juice - 1 tablespoon honey - Salt and pepper to taste - Fresh dill or parsley for garnish Caloric content per serving: The cucumber snack bowl has about 150 calories per serving. This makes it a light option. Breakdown of macronutrients: Each serving includes approximately 6 grams of protein, 10 grams of fat, and 12 grams of carbs. This balance keeps you feeling full without weighing you down. Health benefits of cucumbers: Cucumbers are low in calories and high in water. They help keep you hydrated. They also contain antioxidants that reduce inflammation. Eating cucumbers can support healthy skin and aid digestion. For the full experience, check out the Full Recipe for this delicious cucumber snack bowl. Start by washing the cucumbers under cold water. This step helps remove any dirt. Next, slice the cucumbers into 1/2-inch thick rounds. For even slices, use a sharp knife and take your time. Aim for uniformity, as this helps with presentation and texture. In a large bowl, add the cucumber slices. Then, toss in 1 cup of halved cherry tomatoes and the thinly sliced red onion. These ingredients add color and flavor. In a separate bowl, whisk together 1/4 cup tahini, 2 tablespoons lemon juice, 1 tablespoon honey, salt, and pepper. If the dressing is too thick, add a bit of water to get the right consistency. Drizzle the dressing over the cucumber mix and gently toss to coat everything well. Now it’s time to add some flair. Fold in 1/2 cup crumbled feta cheese and 1/4 cup sliced black olives. Mix carefully to keep the feta intact. Taste and adjust the salt and pepper if needed. Transfer your cucumber snack bowl to a colorful serving dish. For a beautiful finish, sprinkle fresh dill or parsley on top. You can serve this bowl with lemon wedges for a zesty kick. Enjoy your vibrant and healthy snack! For the full recipe, check out the section above. To keep cucumbers fresh, choose firm ones. Look for ones that feel heavy. Wash them just before you slice. If you want to avoid soggy cucumbers, sprinkle salt on the slices. Let them sit for ten minutes. This draws out excess water, keeping them crunchy. You can boost the taste by adding spices or herbs. Try a pinch of paprika for warmth. Fresh dill or cilantro adds a nice touch. For a spicy kick, mix in some red pepper flakes. If you prefer a tangy flavor, add a splash of vinegar or lime juice. Use bright, colorful dishes to serve your snack bowl. A clear glass bowl shows off the vibrant colors. For garnishing, sprinkle fresh herbs on top. Add lemon wedges for extra flair. Use toothpicks for easy snacking, and watch your guests enjoy! For a detailed recipe, check out the Full Recipe. {{image_2}} For a fun twist, make stuffed cucumber bowls. You need these ingredients: - 2 large cucumbers - 1 cup cooked quinoa - 1/2 cup black beans - 1/2 cup corn - 1/2 cup diced bell pepper - 1/4 cup cilantro, chopped - Juice of 1 lime - Salt and pepper to taste Steps for stuffing: 1. First, slice the cucumbers in half lengthwise. 2. Use a spoon to scoop out the seeds, creating a bowl. 3. In a bowl, mix quinoa, black beans, corn, bell pepper, cilantro, lime juice, salt, and pepper. 4. Fill each cucumber half with the mixture. 5. Serve cold for a refreshing snack. You can also create a quick cucumber salad bowl. Try these ingredients: - 2 large cucumbers, diced - 1 cup cherry tomatoes, halved - 1/2 cup feta cheese, crumbled - 1/4 cup red onion, diced - 1/4 cup olives, sliced - 1/4 cup olive oil - 2 tablespoons red wine vinegar - Salt and pepper to taste Quick salad bowl instructions: 1. In a large bowl, mix diced cucumbers, tomatoes, feta, onion, and olives. 2. In a small bowl, whisk olive oil, vinegar, salt, and pepper. 3. Pour the dressing over the salad and toss gently. 4. Serve chilled. Pair your cucumber snack bowl with tasty dips. Here are some recommended dips: - Hummus - Tzatziki - Guacamole - Salsa Pairing ideas: - Serve the snack bowl with toothpicks for easy dipping. - Offer a variety of dips to please all your guests. - Mixing dips can create unique flavors. For the full recipe, check out the Crispy Cucumber Snack Bowl! To keep your cucumbers fresh, store them in the fridge. Wrap each cucumber in a paper towel. This will absorb moisture and prevent sogginess. Keep them in a plastic bag to protect them. For leftovers, put them in an airtight container. This will help maintain their crunch and flavor. Freezing cucumbers is not a great idea. They lose their crispness when thawed. Instead, consider pickling them for long-term storage. Pickling adds flavor and extends their shelf life. You can also store cucumbers in vinegar or brine for a tasty treat. Fresh cucumbers last about one week in the fridge. Keep an eye on them for any signs of spoilage. If they feel mushy or have dark spots, it’s time to toss them. Cherry tomatoes last about five days, while feta cheese can last up to a week once opened. Always check for freshness to enjoy your cucumber snack bowl fully. To make a cucumber snack bowl, start with fresh cucumbers. Slice the cucumbers into rounds. Then, add halved cherry tomatoes and thinly sliced red onion to a bowl. In a separate bowl, mix tahini, lemon juice, honey, salt, and pepper. Drizzle this dressing over the veggies and toss gently. Finally, fold in crumbled feta and sliced olives. Garnish with dill or parsley. The full recipe will guide you through each step. Yes, you can swap in many different vegetables. Try bell peppers, carrots, or radishes. You can even add corn or zucchini for a new twist. Just remember to keep the crunch for the best texture. Mixing colors will also make your bowl look more appealing. You can find pre-made cucumber snack bowls at local grocery stores or health food shops. Many meal services offer fresh snack bowls, too. Check your favorite delivery apps for options. This is a great choice if you're short on time! This blog post covers how to make a fresh cucumber dish that’s easy and tasty. You learned about the key ingredients, like cucumbers, tomatoes, and feta, along with a simple dressing. We shared tips to keep your cucumbers fresh and ideas for fun variations. You can enjoy this dish as a snack or a side. Fresh ingredients and easy steps make healthy eating fun. Now, get in the kitchen and try these ideas yourself! Enjoy making your own cucumber dishes.
Cucumber Snack Bowl Fresh and Wholesome Treat
Are you looking for a fresh, healthy snack? The Cucumber Snack Bowl is your answer! This vibrant dish is packed with crisp cucumbers, juicy tomatoes,
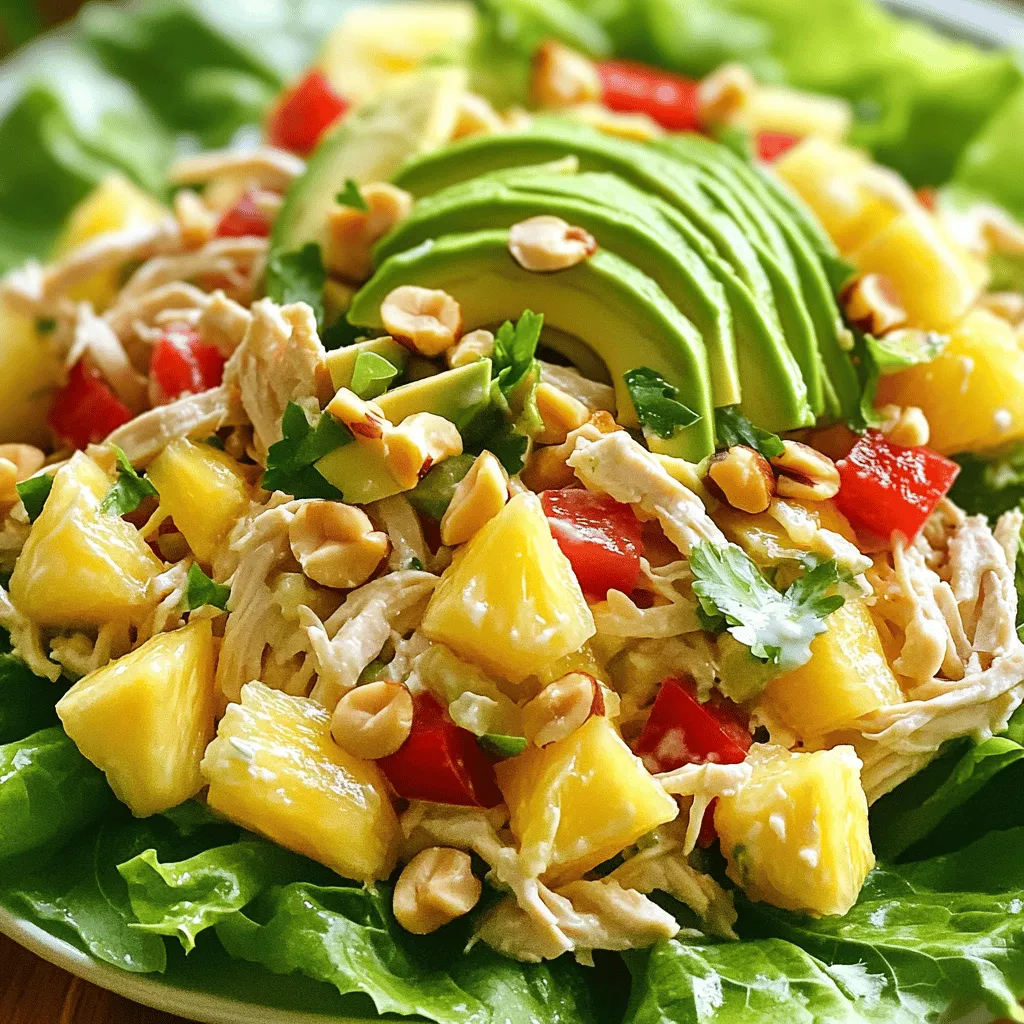
- 2 cups cooked chicken breast, shredded - 1 cup corn (canned or fresh) - 1 cup black beans, rinsed and drained - 1 red bell pepper, diced - 1 avocado, diced - 1/2 cup cherry tomatoes, halved - 1/4 cup red onion, finely chopped - 1/2 cup cilantro, chopped - Tortilla strips or crushed tortilla chips for garnish - 1 lime, juiced - 3 tablespoons olive oil - 1 teaspoon cumin - 1 teaspoon chili powder - Salt and pepper to taste For this zesty Southwest chicken salad, you need fresh and simple ingredients. The chicken gives a great base. The corn and black beans add good texture and flavor. The colorful veggies make it pop. I love how the red bell pepper and cherry tomatoes look. The creamy avocado balances the crunch. You can use either fresh or canned corn. The beans should be rinsed to remove extra salt. For the dressing, lime juice and olive oil bring a bright taste. Cumin and chili powder add warmth. Adjust salt and pepper based on your taste. I like to use fresh cilantro for a burst of flavor. This mix of ingredients creates a tasty salad, perfect for lunch or dinner. Check the Full Recipe for complete details on how to make it. Combining Ingredients First, grab a large bowl. In it, mix 2 cups of shredded chicken, 1 cup of corn, and 1 cup of black beans. Add 1 diced red bell pepper, 1 diced avocado, and 1/2 cup of halved cherry tomatoes. Toss in 1/4 cup of finely chopped red onion and 1/2 cup of chopped cilantro. This mix gives the salad a fresh and colorful look. Whisking the Dressing In a small bowl, squeeze the juice from 1 lime. Add 3 tablespoons of olive oil, 1 teaspoon of cumin, and 1 teaspoon of chili powder. Season with a pinch of salt and pepper. Whisk these ingredients together until they blend well. This dressing adds zesty flavor to the salad. Tossing and Serving the Salad Pour the dressing over the chicken and veggie mix. Gently toss everything to coat it well with the dressing. Taste the salad and adjust with more salt, pepper, or lime juice if needed. Let the salad sit for about 10 minutes so the flavors blend. Serve it topped with crunchy tortilla strips or crushed tortilla chips for extra texture. For the full recipe, check out the Zesty Southwest Chicken Salad. Choosing the Right Chicken Use chicken breast for a lean option. Cook your chicken simply with salt and pepper. Shred it once it cools. You can also use rotisserie chicken for speed. Just remove the skin and bones before shredding. Enhancing Flavor with Seasonings Use cumin and chili powder for a warm kick. These spices boost the salad's zestiness. Don’t forget to season with salt and pepper. Fresh lime juice adds a tangy touch. Mix well to ensure all flavors combine. Serving Suggestions for Best Presentation Serve on a large platter for a colorful display. Add tortilla strips on top for crunch. Use a clear bowl to show off the vibrant colors. Garnish with extra cilantro for a fresh look. This salad looks great and tastes even better. For the complete recipe and more details, check the Full Recipe. {{image_2}} Adding Different Proteins You can switch up the protein in this salad. Try using grilled shrimp or spicy turkey. These options bring new flavors to the dish. If you want a richer taste, add some pulled pork. Each choice adds a fun twist to the classic recipe. Vegetarian Alternatives For a vegetarian option, skip the chicken. Instead, use chickpeas or quinoa. Both add protein and texture. You can also mix in roasted sweet potatoes for a sweet touch. This keeps the salad tasty and filling without meat. Unique Dressing Ideas While lime and olive oil work well, feel free to get creative. Try a creamy avocado dressing for smoothness. A cilantro-lime vinaigrette adds a fresh kick. For a zesty touch, mix in some salsa or yogurt. These dressings can change the whole vibe of your salad. You can find the full recipe for Zesty Southwest Chicken Salad [Full Recipe]. When you have leftover Zesty Southwest Chicken Salad, store it right. Here are some tips to keep it fresh. - Refrigeration Best Practices Place the salad in an airtight container. It will stay fresh for up to three days. Keep it in the fridge, away from strong-smelling foods. The cool temperature helps keep the flavors vibrant. - Freezing Recommendations You can freeze this salad, but some ingredients may change. The avocado and tomatoes might get mushy. If you want to freeze it, leave out these ingredients. Store the rest in a freezer-safe container. It should last for about three months. - How to Revive Leftovers After storing, the salad may lose some crunch. To revive it, add fresh lime juice and a little olive oil. Toss in some fresh herbs or diced veggies for extra flavor. This will bring it back to life and make it delicious again. You can find the full recipe for Zesty Southwest Chicken Salad above. Enjoy your meal! Can I use pre-cooked chicken? Yes, you can use pre-cooked chicken. It saves time and works great. Just shred it into bite-sized pieces. This makes it easy for you to mix with other ingredients. What can I substitute for black beans? If you don’t have black beans, use pinto beans or kidney beans. They add a nice texture and flavor, too. You can even try corn or chickpeas for a twist. How long does the salad last in the fridge? The salad lasts about 3 days in the fridge. Keep it in a sealed container to keep it fresh. However, the avocado may brown over time. You can add the avocado just before serving for best results. For the full recipe, please refer to the earlier section. This blog post covered every step to make a Zesty Southwest Chicken Salad. We went through key ingredients, preparation steps, and expert tips. I shared fun variations to make the recipe your own. Finally, we discussed how to store leftovers safely and addressed common questions. With simple methods, you can enjoy a fresh and tasty salad anytime. Use these ideas to create your perfect dish. Happy cooking!
Zesty Southwest Chicken Salad Fresh and Flavorful Dish
Looking for a fresh and flavorful meal? This Zesty Southwest Chicken Salad is your answer! Packed with bright veggies, tender chicken, and a tangy dressing,
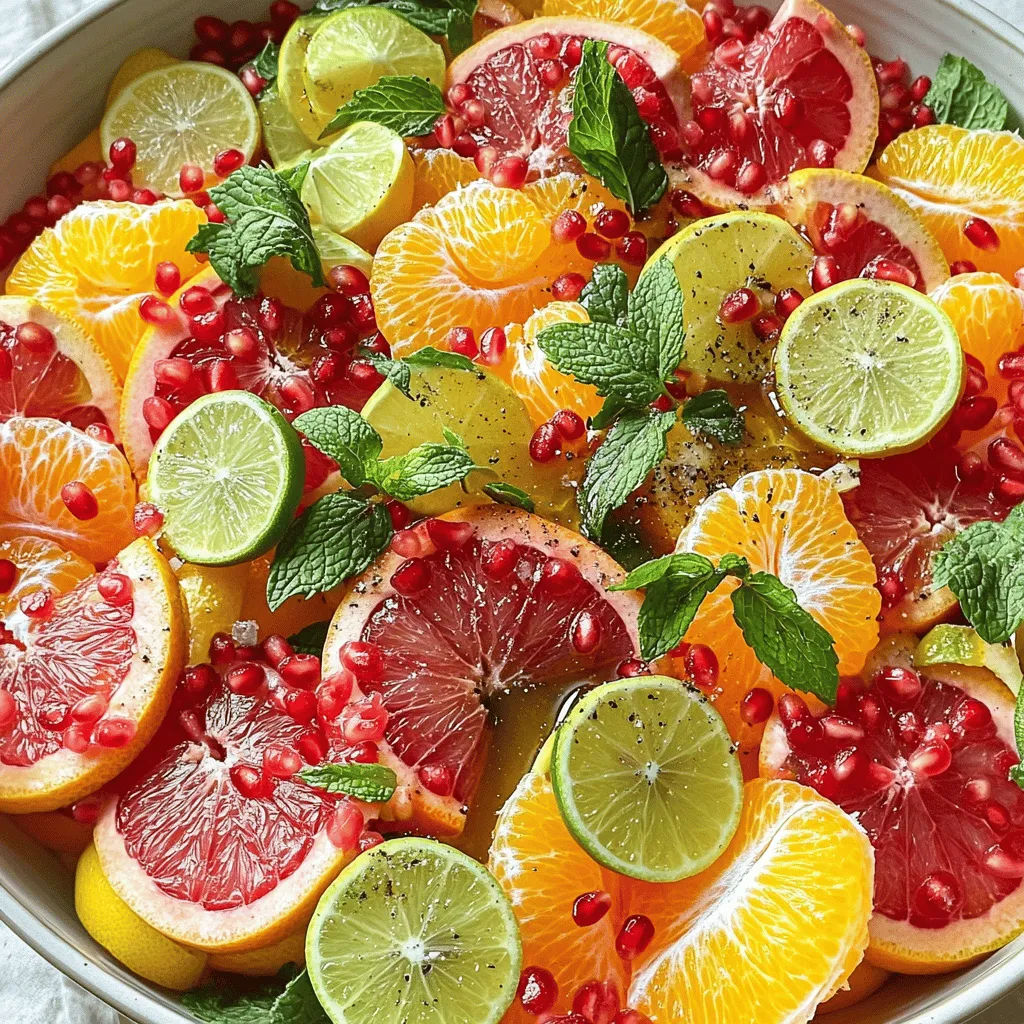
- 2 ripe peaches, sliced - 1 cup strawberries, hulled and halved - 1 cup blueberries - 1 cup raspberries - 1 tablespoon fresh mint, chopped - 2 tablespoons honey - 1 tablespoon lemon juice - Pinch of sea salt Start with the peaches. Wash them well and slice them into wedges. Place the slices in a large mixing bowl. Next, prepare the berries. Hull the strawberries and cut them in half. Add the strawberries, blueberries, and raspberries to the bowl with the peaches. In a small bowl, whisk together the honey, lemon juice, and a pinch of sea salt. Mix until they combine well into a smooth dressing. Drizzle the honey dressing over the fruit. Toss everything gently to coat the fruit evenly. Let the salad sit for about 10 minutes. This allows the flavors to meld beautifully. You can find the full recipe for Peach Berry Fruit Salad at the end of the article. Let the salad sit for about 10 minutes. This helps the fruit soak up the honey and lemon juice. Ripe fruit makes a big difference in taste. Choose peaches that are soft and fragrant. Fresh berries should be plump and bright. When you use the best fruit, your salad shines. Serve the fruit salad in a clear glass bowl. This lets the colors pop and makes it eye-catching. For a fancy touch, use individual bowls. You can add a mint sprig on top for extra flair. This small detail makes a big impact. Pair the salad with yogurt or cottage cheese for a creamy twist. This adds protein and makes it more filling. You can also use the salad as a topping for pancakes or waffles. It brings a fresh taste to breakfast. Enjoy your Peach Berry Fruit Salad with these ideas for a fun twist! You can switch up the fruit in your salad. Instead of peaches, use nectarines. They taste great and add a nice crunch. When berries are in season, add them in. Think of juicy blackberries or tart cherries for a fun twist. These changes keep your salad fresh and exciting! Want to keep it vegan? Just swap honey for agave syrup. It tastes sweet and works well in the dressing. If you want more texture, toss in some nuts or seeds. Chopped almonds or sunflower seeds bring extra crunch and healthy fats. For a tropical twist, add pineapple and mango. This gives your salad a fun, sunny vibe. You can also try a berry mix. Use only strawberries, blueberries, and raspberries for a bold berry flavor. Each variation can change your salad experience! For the full recipe, check out the details above. {{image_2}} To store leftovers in the fridge, use an airtight container. Place your Peach Berry Fruit Salad inside and seal it well. This keeps the fruit fresh and prevents odors. It’s best to eat the salad within two days for the best taste and texture. If you notice any excess liquid, drain it before eating. Can this salad be frozen? I do not recommend freezing this salad. Freezing can change the texture of the fruit. However, you can freeze individual fruits. For instance, freeze peaches, strawberries, or berries for smoothies later. Tips for freezing fruit properly include washing and slicing the fruit first. Lay the fruit on a baking sheet in a single layer. Freeze it for about an hour. Once frozen, transfer the fruit to a freezer bag. This method prevents clumping. Got extra salad? You can blend it into a smoothie. Just toss the leftover fruit salad with some yogurt and ice. Blend until smooth for a refreshing drink. Another idea is to use it in desserts or breakfast bowls. Top your oatmeal or yogurt with the salad for extra flavor. You can also add it to pancakes or waffles for a fruity twist. Yes, you can use canned fruit instead of fresh. Canned fruit is convenient and saves time. However, fresh fruit has better taste and texture. Canned fruit often has added sugar and preservatives. This can change the flavor and healthiness of your salad. If you choose canned fruit, look for options packed in juice, not syrup. Rinse the fruit well to reduce excess sugar. To keep your salad fresh and bright, prevent oxidation. Lemon juice is your best friend here. Its acidity slows down browning. Toss your cut fruit with a bit of lemon juice right after slicing. This keeps the peaches and apples looking fresh. You can also use a splash of orange juice. Another tip is to cover the salad tightly with plastic wrap. This reduces air exposure. Serving Peach Berry Fruit Salad is fun and easy! Use a large, clear glass bowl. This shows off the vibrant colors of the fruit. For parties, consider individual cups. They make great, easy servings. Add a sprig of fresh mint on top for a nice touch. You can also serve with a side of yogurt or whipped cream. This adds creaminess and boosts flavor! For a potluck, make it colorful and inviting. The Peach Berry Fruit Salad is easy to make and fun to eat. Here’s what you need: - 2 ripe peaches, sliced - 1 cup strawberries, hulled and halved - 1 cup blueberries - 1 cup raspberries - 1 tablespoon fresh mint, chopped - 2 tablespoons honey - 1 tablespoon lemon juice - Pinch of sea salt Here’s how to make it: 1. Wash the peaches and slice them into wedges. Place them in a big bowl. 2. Add strawberries, blueberries, and raspberries to the bowl. Mix them well. 3. In a small bowl, whisk honey, lemon juice, and a pinch of sea salt. 4. Drizzle this mixture over the fruit. Toss gently to coat. 5. Sprinkle chopped mint over the salad and toss again. 6. Let it sit for about 10 minutes. This helps the flavors mix well. This full recipe makes enough for four servings. For a pretty look, serve in a clear glass bowl. You can also put it in single bowls and add mint on top for style. Enjoy your refreshing and healthy delight! In this blog post, we explored a delightful Peach Berry Fruit Salad. You learned how to prepare fresh fruit, mix a tasty dressing, and combine it all for a perfect dish. Remember, using ripe fruit and letting the salad sit boosts flavor. Feel free to try seasonal fruits or dietary swaps for your needs. This salad is versatile for snacks, parties, or breakfast. Enjoy your fruity creation and share it with friends for a refreshing treat!
Peach Berry Fruit Salad Refreshing and Healthy Delight
If you’re craving a sweet and healthy treat, you need to try this Peach Berry Fruit Salad! Packed with fresh peaches, juicy berries, and a
- 1 medium head of cauliflower, cut into small florets - 4 slices of turkey bacon, cooked until crispy and crumbled - 1 cup cherry tomatoes, halved The star of this salad is definitely cauliflower. It adds a great crunch and absorbs flavors well. I love using fresh cauliflower for its crispness. Turkey bacon gives this dish that smoky taste, making it feel like a classic BLT. The cherry tomatoes add a burst of sweetness and color. - 1/4 cup mayonnaise - 1 tablespoon apple cider vinegar - 1 teaspoon Dijon mustard The dressing ties everything together. Mayonnaise gives it creaminess, while apple cider vinegar adds a tangy kick. Dijon mustard enhances the flavor, making it more exciting. This blend is simple yet so tasty. - 1/2 cup green onions, finely chopped - 1/2 cup shredded lettuce (iceberg or romaine) - Fresh parsley for garnish (optional) Garnishes are fun and add freshness. Green onions bring a mild onion flavor, and shredded lettuce adds more crunch. Fresh parsley is great for a pop of color and extra flavor. You can choose any or all of these to make your salad even better. For the full recipe, just follow the steps, and you’ll have a delicious dish ready to enjoy! Blanching the Cauliflower Start with a large pot of salted water. Heat it until it boils. Add the cauliflower florets. Cook them for 3-4 minutes. They should be tender but still crunchy. Drain the florets and rinse them with cold water. This stops the cooking. Pat them dry with a paper towel. Cooking the Turkey Bacon Next, take your turkey bacon. Cook it in a pan over medium heat. Crisp it up until it’s golden brown. Then, remove it from the heat and let it cool. Once cool, crumble the bacon into small pieces. Combining Salad Components In a big mixing bowl, add the blanched cauliflower, crumbled turkey bacon, halved cherry tomatoes, green onions, and shredded lettuce. Mix these ingredients well to blend the flavors. Preparing the Dressing For the dressing, grab a separate bowl. Whisk together the mayonnaise, apple cider vinegar, Dijon mustard, salt, and pepper. Keep whisking until it's smooth and creamy. Tossing the Salad Now, pour the dressing over the salad mix. Toss everything gently to coat all the ingredients. This ensures that every bite is full of flavor. Allowing Flavors to Meld Taste the salad and adjust the seasoning if needed. Let it sit for 10-15 minutes before serving. This resting time helps the flavors meld together beautifully. You can garnish with fresh parsley if you want. For the full recipe, check out the section above. - Cooking Time Recommendations To get the best crunch, cook the cauliflower for 3-4 minutes. You want it tender, not mushy. Overcooking will ruin the salad's texture. - Cooling Techniques After cooking, rinse the cauliflower in cold water. This stops the cooking process. Then, pat it dry with a paper towel to remove excess water. - Adjusting Seasoning Taste the salad after mixing. You may need to add more salt or pepper. Each ingredient has its own flavor. Adjust to your liking. - Adding Extra Ingredients Try adding diced avocado for creaminess or jalapeños for heat. These can make your salad more exciting and full of flavor. - Ideal Dish Pairings This salad pairs well with grilled chicken or fish. It makes a great side for summer barbecues. Try it with a cold drink for a refreshing meal. - Presentation Tips Serve in a clear bowl to show off the bright colors. Garnish with fresh parsley or extra cherry tomatoes. This makes the dish look more appealing and fun. For the full recipe, check out the BLT Cauliflower Salad section above. {{image_2}} Substituting Bacon Options You can easily make this salad vegetarian. Instead of turkey bacon, use crispy tempeh or smoked coconut. Both options add that nice crunch and flavor. They keep the spirit of a classic BLT alive. Adding Protein Alternatives If you want more protein, try adding chickpeas or black beans. These beans give a hearty feel to the salad. They also pack a punch of nutrients. You can also toss in some diced avocado for creaminess. Different Dressings to Try Feel free to switch up the dressing. A tangy ranch dressing works great. You can also use a lemon vinaigrette for a fresh taste. Experimenting with flavors keeps the dish exciting. Adding Nuts or Seeds Adding nuts or seeds can enhance the crunch. Sliced almonds or sunflower seeds are great choices. They add both texture and healthy fats. Just sprinkle them on top before serving. Incorporating Seasonal Vegetables Use seasonal veggies to change the salad vibe. In spring, add peas or asparagus for a fresh twist. In the summer, you might include bell peppers or cucumbers. These additions bring color and flavor. Adjustments for Different Holidays For holidays, think about festive flavors. In the fall, add roasted butternut squash. In winter, try pomegranate seeds for a pop of color. These variations give the salad a unique touch for any occasion. Check out the Full Recipe to create your own delicious BLT Cauliflower Salad! To keep your BLT cauliflower salad fresh, use airtight containers. Glass containers work best. They help reduce odors and keep the salad crisp. Make sure to let the salad cool before sealing. This prevents moisture build-up, which can make the salad soggy. Store it in the fridge right after serving. Eating this salad cold is best, but you can heat it if you want. Use the microwave for a quick warm-up. Heat it in short bursts of 20 seconds. This helps keep the texture nice. Check it often to avoid overcooking. You want the bacon to stay crunchy and the cauliflower firm. Your salad can last up to four days in the fridge. After that, it may spoil. Signs of spoilage include a sour smell, wilted greens, or slimy texture. If you notice any of these, it’s best to throw it away. Always trust your nose and eyes when checking for freshness. Enjoy your BLT cauliflower salad while it’s still delicious! You can use Greek yogurt or avocado instead of mayo. Both options add creaminess. Greek yogurt gives a tangy taste, while avocado adds a rich flavor. For a lighter choice, try hummus. It works well and adds a nice texture. You can also blend silken tofu for a vegan option. Each substitute makes the salad creamy and delicious. Yes, you can make this salad ahead of time. Prepare it a few hours before serving. Just keep the dressing separate until you are ready to eat. This helps the salad stay crisp and fresh. If you want to make it a day ahead, store it in the fridge. Just mix it well before serving. Yes, this recipe is gluten-free. The main ingredients, like cauliflower and turkey bacon, do not contain gluten. Always check the labels on any packaged items, like the bacon. Some brands may add gluten ingredients. If you want extra safety, choose gluten-free mayonnaise to keep it safe and tasty. This blog post covered a tasty BLT Cauliflower Salad. We discussed the essential ingredients like cauliflower, turkey bacon, and cherry tomatoes. I shared step-by-step instructions for making the salad, tips for perfect texture, and ideas for variations. You can even adapt it to make it vegetarian. Remember, store leftovers properly to keep them fresh. Try this salad for a fresh meal that suits many diets. Enjoy the burst of flavor while keeping it healthy and fun!
BLT Cauliflower Salad Crunchy and Flavorful Dish
Looking for a fresh and tasty twist on a classic? This BLT Cauliflower Salad is here to impress! Packed with crunchy cauliflower, turkey bacon, and
To make the Honeycrisp Apple and Feta Salad, gather these main ingredients: - 2 Honeycrisp apples, thinly sliced - 4 cups mixed greens (such as arugula, spinach, and kale) - 1 cup crumbled feta cheese - 1/2 cup walnuts, roughly chopped - 1/4 cup dried cranberries These ingredients give the salad its fresh and crisp flavor. You can add extra toppings to enhance the salad. Here are some tasty options: - Sliced pears for added sweetness - Toasted pumpkin seeds for crunch - Fresh herbs like basil or mint for brightness Feel free to mix and match according to your taste. For the perfect dressing, use these ingredients: - 1/4 cup olive oil - 2 tablespoons apple cider vinegar - 1 tablespoon honey - Salt and pepper to taste This dressing balances the sweetness of the apples and the saltiness of the feta. You can find the full recipe in the earlier section. First, wash your Honeycrisp apples well. This step helps remove any dirt or wax. Next, slice the apples thinly. Keep the skins on for extra flavor and crunch. Now, rinse the mixed greens. You can use arugula, spinach, or kale. Dry them with a salad spinner or a clean towel. Then, chop the walnuts roughly. This will add a nice crunch. Lastly, crumble the feta cheese into small pieces. This will help it blend well in the salad. Grab a large salad bowl. Place the mixed greens at the bottom. Then, layer the sliced Honeycrisp apples on top. Spread them out evenly for a pretty look. Next, sprinkle the crumbled feta cheese over the apples. Add the chopped walnuts for texture. Finally, toss in the dried cranberries. These add a lovely sweet touch and color to the salad. In a small bowl, combine olive oil, apple cider vinegar, and honey. Use a whisk to mix them well. Add salt and pepper to taste. This will enhance the flavors. Pour the dressing over the salad just before serving. This keeps the greens fresh and crisp. Gently toss the salad to mix all the ingredients. Serve immediately to enjoy the bright flavors. For the full recipe, check out the detailed instructions above. To get the best slices of Honeycrisp apples, start with a sharp knife. Thin slices show off the apple's color and shape. Cut the apple into quarters, removing the core. Place the flat side down for safety. Then, slice each quarter thinly. You want pieces that are about 1/8 inch thick. This size helps them mix well in the salad. To keep your greens fresh, wash them right before use. Use cold water to rinse them well. Then, spin them dry in a salad spinner. If you don’t have one, pat them dry with a clean towel. Store the greens in a sealed bag with a paper towel. This helps absorb moisture. Keep them in the fridge until you're ready to serve. For the dressing, blend olive oil, apple cider vinegar, and honey well. Use a whisk to combine them. Taste the dressing and adjust with salt and pepper. To enhance the flavor, let the dressing sit for a few minutes. This allows the ingredients to mix better. Drizzle it over the salad just before serving for the best taste. You can find the Full Recipe for more details. {{image_2}} You can swap out Honeycrisp apples for other fruits. Try using pears for a soft, sweet bite. Granny Smith apples add a tart flavor. Berries like strawberries or blueberries also work well. Each fruit brings a unique taste and texture to your salad. You can mix and match to find your favorite combo. If you want a vegan version, leave out the feta cheese. You can use avocado for creaminess instead. Another great option is to use nutritional yeast for a cheesy flavor. You can also try a vegan cheese that melts well. It adds flavor without dairy. To make this salad heartier, add protein. Grilled chicken or shrimp adds a nice touch. You could also use chickpeas for a plant-based option. Tofu works well too, especially if grilled or sautéed. Nuts, like almonds or pistachios, add crunch and protein too. Each option makes the salad filling and satisfying. For the full recipe, check out the complete ingredient list and steps. To keep your leftover Honeycrisp apple and feta salad fresh, store it in an airtight container. Make sure to separate the dressing from the salad. This helps the greens stay crisp. You can store it in the fridge for up to two days. If the salad gets soggy, it’s best to toss it out. Dressings can change the texture of your salad. Always add the dressing right before serving. If you have leftover dressing, store it in a sealed jar in the fridge. It can last for a week. Shake it well before using it again. This keeps your salad fresh and tasty. Fresh ingredients have different shelf lives. Honeycrisp apples can last about three weeks in the fridge. Mixed greens should be used within a week for the best flavor. Feta cheese can last up to two weeks if stored correctly. Check the expiration dates on your ingredients to ensure quality. Yes, you can use other apples if you want. Some good choices are Fuji, Gala, or Granny Smith. Each type brings its flavor and crunch. Fuji apples are sweet, while Granny Smith adds a nice tartness. Experiment and see which ones you like best! This salad stays fresh for about two days in the fridge. Keep it in an airtight container. The apples might brown a bit, but the taste will still be good. For best results, eat it right after making it. This way, you enjoy the crisp apples and greens. If you can’t find feta, try goat cheese or blue cheese. Both have a nice creaminess and flavor. You can also use a dairy-free cheese if you want a vegan option. Just choose one that crumbles well for a similar texture. For the full recipe, check the details above! This blog post covered how to make a tasty salad. We discussed main ingredients, optional toppings, and great dressings. I shared steps for preparing, assembling, and creating the dressing. You learned tips to slice apples, keep greens fresh, and enhance flavor with dressings. I also shared variations, storage tips, and answered common questions. Salad-making can be fun and simple. With these ideas, you can create your own delicious versions. Enjoy your fresh, tasty salads!
Honeycrisp Apple and Feta Salad Fresh and Crisp Dish
Are you ready to taste something fresh and crisp? This Honeycrisp Apple and Feta Salad is a perfect mix of sweet and savory. Packed with