Salads
Minute Lemon Parmesan Salad Fresh and Tasty Dish
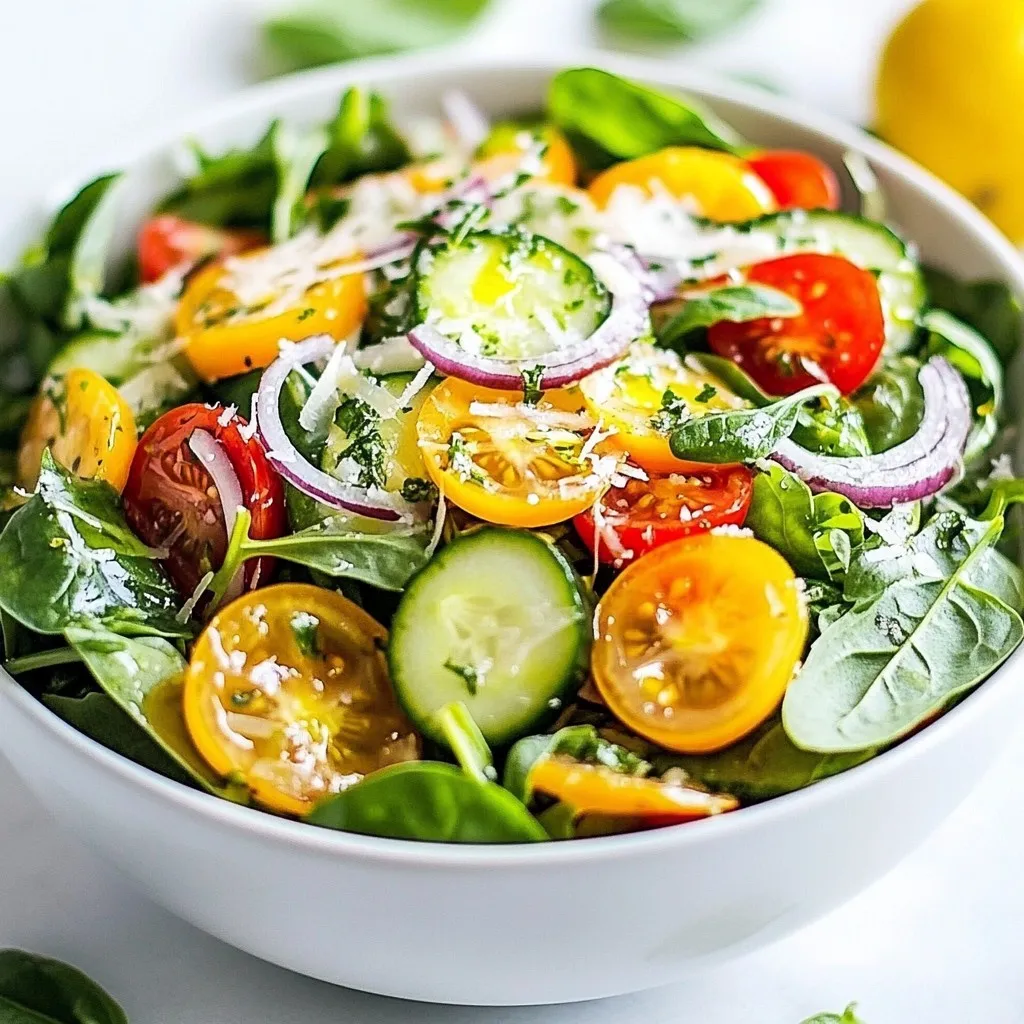
If you want a fresh and quick meal, try my Minute Lemon Parmesan Salad. Packed with greens, cherry tomatoes, and a zesty dressing, this dish

Flavorful Make-Ahead Zucchini Side for Easy Meals
Looking for a quick side dish that’s tasty and easy to make? Try my flavorful make-ahead zucchini side! This dish is perfect for busy weeknights

Japanese Steakhouse Hibachi Zucchini Flavor Explosion
Ready to experience a flavor explosion with Japanese Steakhouse Hibachi Zucchini? You’ll love this easy dish that packs a punch. It’s packed with sweet, tender
. Enjoy cooking! Start by gathering your ingredients. You need fresh asparagus and zucchini. Trim the asparagus to remove the tough ends. Slice the zucchinis into half-moons. Aim for even sizes. This helps them cook at the same time. Rinse the vegetables under cold water. Pat them dry with a clean towel. This step removes dirt and helps oil stick better. In a large mixing bowl, add the asparagus and zucchini. Drizzle olive oil over them. Next, add minced garlic, lemon zest, smoked paprika, salt, and pepper. Use your hands to toss the veggies. Make sure each piece gets coated. This mix adds a lot of flavor. You can also add Parmesan cheese if you like. Preheat the oven to 425°F (220°C). Spread the seasoned veggies in a single layer on a baking sheet. Avoid crowding the pan. Give them space to roast evenly. Roast for 15-20 minutes. Check for tenderness and slight crispiness. For added flavor, sprinkle Parmesan cheese during the last 5 minutes. Once done, garnish with chopped parsley. Enjoy your flavorful asparagus with zucchini! For the complete recipe, check out the Full Recipe section. To roast asparagus and zucchini perfectly, start with fresh, bright vegetables. Trim the ends of the asparagus to remove any tough parts. Slice the zucchini into even half-moons to ensure they cook at the same rate. Preheat your oven to 425°F (220°C) to get a nice crisp. Spread the veggies in a single layer on the baking sheet. This allows hot air to circulate and gives you that lovely, caramelized finish. Adding flavors is key to bringing out the best in your veggies. I love using garlic for its strong aroma. It complements the natural sweetness of asparagus and zucchini. Lemon zest brightens the dish and adds a refreshing touch. Try using smoked paprika for a hint of warmth and smokiness. If you enjoy cheese, sprinkle grated Parmesan on top near the end of roasting for a savory finish. Fresh parsley adds color and a fresh taste when you serve it. One common mistake is overcrowding the baking sheet. This causes steaming instead of roasting. Always give the veggies enough space. Another mistake is not preheating the oven. Roasting in a hot oven is crucial for that perfect texture. Also, don’t forget to toss the vegetables in oil and spices. This step ensures even coating and flavor throughout. Finally, keep an eye on the timer. Overcooking can lead to mushy veggies, so check them frequently. For more details, check the Full Recipe. {{image_2}} You can easily boost the protein in this dish. Chicken and shrimp work very well here. For chicken, use boneless, skinless breasts or thighs. Cut them into bite-sized pieces. Season them with the same spices. Then, roast them with the vegetables. For shrimp, use large, peeled shrimp. Toss them in with the veggies in the last five minutes of cooking. Both options add flavor and make this dish more filling. If you want to add more veggies, go for it! Bell peppers, carrots, or cherry tomatoes add color and taste. You can also use mushrooms for an earthy flavor. Just chop them into similar sizes as the asparagus and zucchini. Mix them in with the original recipe. This way, you keep everything balanced and tasty. Each veggie brings its own twist to the dish. To change the flavor, play with herbs and spices. Fresh basil or thyme can brighten up the dish. Dried oregano or rosemary gives a warm touch. You can also try a pinch of red pepper flakes for some heat. Just add a little at a time. Taste as you go to find your perfect mix. Experimenting with flavors makes this dish unique every time you cook it. For more ideas, check out the Full Recipe. To keep your leftover flavorful asparagus with zucchini fresh, place it in an airtight container. This will help prevent moisture loss and keep the veggies crisp. Store it in the fridge. It will stay good for up to three days. You can also wrap it tightly in plastic wrap if you prefer that method. When you are ready to enjoy the leftovers, avoid the microwave. It can make your veggies soggy. Instead, heat a skillet over medium heat. Add a splash of olive oil and toss in the asparagus and zucchini. Stir them for about five minutes until they are warm. This method helps keep the veggies crispy and flavorful. If you want to save your dish for later, freezing is a great option. Start by letting the veggies cool completely. Then, pack them into freezer bags, removing as much air as possible. Label the bags with the date. Your flavorful asparagus with zucchini can last about three months in the freezer. When you are ready to eat, thaw in the fridge overnight and reheat as mentioned above. For the full recipe, check out the instructions earlier in the article. Yes, you can use frozen asparagus or zucchini. Just note that the texture may change. Frozen veggies often hold more water. This can make them soggy when cooked. If you use frozen, try roasting them a bit longer. This helps them crisp up. You can serve this dish with many options. Grilled chicken or fish pairs well. Quinoa or rice adds a nice base. You can also enjoy it on pasta. Try it alongside a fresh salad for a balanced meal. You can tell the veggies are done by looking at their color and feel. Asparagus should be bright green and tender. Zucchini should turn golden and soft. You can poke them with a fork. If they feel soft but not mushy, they are ready. For the best results, check around 15 minutes into roasting. This is when they start to get crispy. Enjoy creating this flavorful asparagus with zucchini! For the full recipe, check out the details above. This blog post explored how to make flavorful asparagus with zucchini. We looked at essential ingredients, tools, and step-by-step instructions for cooking. I shared tips for roasting, flavoring, and variations like adding chicken or veggies. I also covered proper storage and answered frequently asked questions. Remember, using fresh ingredients and the right techniques makes a big difference. Enjoy making this dish your own, and have fun experimenting with flavors!](https://therecipehatch.com/wp-content/uploads/2025/07/f3bb7a0e-693a-45db-8128-0e9f0d1b8b3f.webp)
Flavorful Asparagus with Zucchini Easy Veggie Dish
Looking to brighten up your weekly meals? This Flavorful Asparagus with Zucchini Easy Veggie Dish is the answer! Packed with fresh flavors and simple steps,

Quick Pickled Vegetables Easy and Tasty Recipe
Are you ready to add crisp, tangy flavor to your meals? Quick pickled vegetables are a fast and fun way to elevate your dishes. In
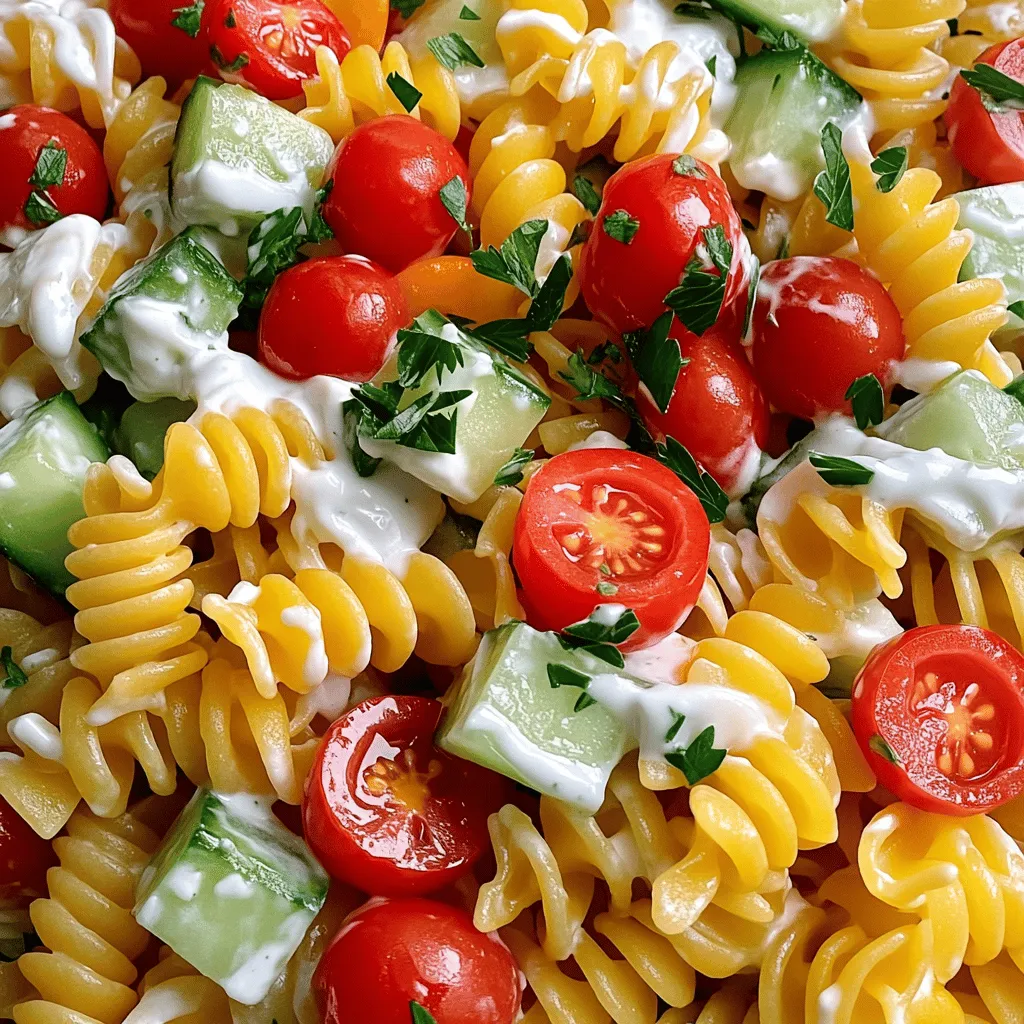
Creamy Pasta Salad Flavorful Twist for Summer Meals
Summer is here, and what better way to celebrate than with a creamy pasta salad? This dish packs a punch of flavor and can be
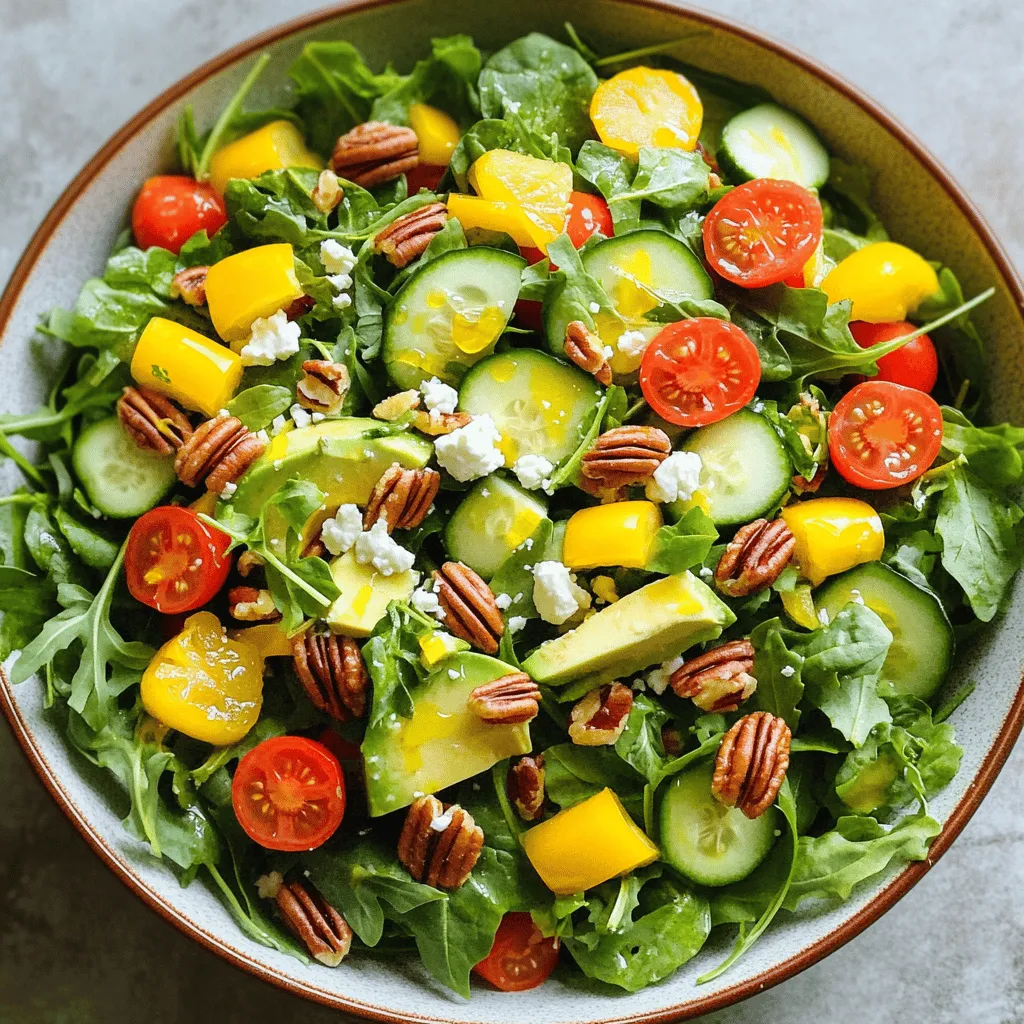
Sunshine Salad Energizing and Fresh Summer Dish
Looking for a bright and tasty dish to freshen up your summer meals? Let me introduce you to the Sunshine Salad! This colorful mix of
 for ideas to use up ingredients! The best ways to cook chicken for salad are grilling and poaching. Grilling adds a nice smoky flavor. I often marinate the chicken for an hour before grilling. Poaching keeps the chicken moist and tender. Just simmer the chicken in water or broth until cooked through. Yes, chicken salad can be made ahead of time. I suggest making it up to a day before serving. Just keep it in the fridge. If you add avocado, wait until just before serving to keep it fresh. Chicken salad can be healthy. It has protein from the chicken and nutrients from the veggies. A typical serving has around 300-400 calories. You can adjust the dressing to lower the calories if needed. Adding more greens helps boost fiber too. For a party, serve chicken salad in a large bowl or in individual cups. You can scoop it onto crackers or lettuce leaves. To make it pretty, garnish with herbs, citrus slices, or nuts. This adds color and makes it look nice. Chicken salad pairs well with many sides. Popular choices include fresh fruit, chips, or a light soup. A crisp white wine or iced tea also makes a great drink choice. Try serving it with a side of crusty bread for a full meal. This article covered everything you need for chicken salad. We explored key ingredients and their benefits. You learned about substitutions and delicious dressings. I provided steps for prep and storage tips, too. Use the tips for flavor and presentation to make your dish shine. With these insights, you're ready to create a chicken salad everyone will love. Enjoy experimenting and making it your own!](https://therecipehatch.com/wp-content/uploads/2025/06/ad2e51f1-33f9-4711-b4c2-a4607b22211a.webp)
Savory Chicken Salad Easy and Delicious Recipe
Are you ready to whip up a savory chicken salad that’s both easy and delicious? This recipe will help you create a dish packed with
![- 2 cups cooked chicken, shredded - 1 cup dill pickles, finely chopped - 1/2 cup Greek yogurt or mayonnaise - 1/4 cup red onion, finely diced - 1/4 cup celery, finely diced - 2 tablespoons fresh dill, chopped - 1 tablespoon Dijon mustard - Salt and pepper to taste - Optional: 1 tablespoon lemon juice When making Dill Pickle Chicken Salad, you need fresh ingredients. Start with cooked chicken. I often use rotisserie chicken for flavor and ease. Shredding it gives a nice texture. Next, chop up dill pickles. They bring a tangy crunch that makes this salad pop. For creaminess, I like Greek yogurt, but mayonnaise works too. The creaminess balances the pickles. Then, add red onion and celery for a bit of crunch. They brighten the salad and add freshness. Fresh dill is key for that herby taste we love in this dish. To kick it up a notch, mix in Dijon mustard. It adds depth and a bit of spice. Don't forget to season with salt and pepper. You can add lemon juice if you want extra zing. All these ingredients come together to create a tasty and fresh delight. For the full recipe, check out the [Full Recipe]. Start by combining the chicken and pickles. In a large mixing bowl, add 2 cups of shredded chicken. I like using rotisserie chicken for its great taste. Next, chop 1 cup of dill pickles finely and mix them in with the chicken. This adds a nice crunch and tang. Now, let’s add some vegetables. Dice 1/4 cup of red onion and 1/4 cup of celery. Toss these in the bowl. Stir them well so all the ingredients mix together. Next, we’ll make the dressing. In a small bowl, combine 1/2 cup of Greek yogurt or mayonnaise. You can pick whichever you prefer based on your taste. Add in 2 tablespoons of chopped fresh dill and 1 tablespoon of Dijon mustard. If you want a bit more zing, add 1 tablespoon of lemon juice. Mix all these together until smooth. This dressing will bring all the flavors together. Now, pour this yogurt mixture over the chicken and veggie blend. Gently fold it in. Make sure everything gets nicely coated. Season to taste. Add salt and pepper as you like. You can adjust any ingredients to fit your taste. Now, refrigerate the salad. Let it chill for at least 30 minutes. This helps all the flavors meld together. Enjoy your Dill Pickle Chicken Salad! For more details, check the Full Recipe. To make the best dill pickle chicken salad, start with chicken. You can use rotisserie chicken for ease. It adds great flavor and saves time. If you prefer, poach your chicken for a fresh touch. This gives you control over the taste and texture. Adjusting the ingredient ratios is easy. If you love pickles, add more! If you want less tang, reduce the pickles. You can also play with the yogurt or mayo. Some like it creamier, while others prefer it lighter. Taste as you go to find your perfect mix. Pair your dill pickle chicken salad with sides like crackers or fresh veggies. These add crunch and freshness to your meal. You can serve it on a bed of lettuce for a light option. Another fun idea is to put it in a sandwich or wrap. This turns it into a tasty lunch on the go. Get creative with how you enjoy the salad. You can add it to a grain bowl or serve it with tortilla chips. The options are endless! To add more crunch, consider incorporating nuts or seeds. Chopped walnuts or sunflower seeds work great. They add a nice texture and healthy fats. For extra zest, try adding spices. A bit of cayenne pepper or paprika can elevate the flavor. You could also squeeze in some lemon juice for brightness. Small changes can make a big difference in taste! Remember, these tips will make your dill pickle chicken salad unique and delicious! For the full recipe, check out the detailed instructions above. {{image_2}} You can change the base of your salad. Greek yogurt is a great swap for mayonnaise. It adds creaminess and a tangy taste. If you want a richer flavor, keep the mayonnaise. You can also switch up your pickles. Bread and butter pickles add sweetness. Dill pickles give that classic taste. You can even try spicy pickles for a kick. Fresh herbs can change the flavor too. Basil or parsley can bring a new twist. If you want a low-carb or keto version, use shredded chicken and skip the yogurt or mayonnaise. Instead, try an avocado mash. It adds creaminess without carbs. For a vegan option, replace chicken with chickpeas. They add protein and texture. Use vegan mayonnaise for the dressing. This makes a delicious plant-based salad. Adding fruits can make your salad sweet. Diced apples or grapes can create a nice balance. They add crunch and taste. You can also play with dressings. A ranch or honey mustard dressing can change the flavor. Just mix it in with the other ingredients. Experiment to find what you love best. This recipe allows for so much creativity! To keep your Dill Pickle Chicken Salad fresh, store it in an airtight container. This helps lock in flavors and moisture. Refrigerate the salad right after serving. It stays good for about 3 to 4 days. Always check for any signs of spoilage before eating. If it looks or smells off, throw it away. You can freeze chicken salad, but it may change the texture. Freezing can make the chicken and vegetables mushy. If you want to freeze it, follow these steps: 1. Place the salad in a freezer-safe container. 2. Leave some space on top for expansion. 3. Seal it tightly and label with the date. When you’re ready to eat it, thaw it in the fridge overnight. Dill Pickle Chicken Salad is best served cold. If you want to enjoy it warm, gently heat it in a pan. Aim for a temperature of about 165°F to ensure it's safe to eat. However, I recommend enjoying it chilled for the best taste and crunch. You can enjoy Dill Pickle Chicken Salad with many side dishes. Here are some great options: - Fresh garden salad - Crispy potato chips - Soft bread rolls - Crackers for crunch - Veggie sticks like carrots or cucumbers These sides complement the salad's tangy flavor. They also add variety to your meal. Dill Pickle Chicken Salad stays fresh for about 3 to 5 days in the fridge. Store it in a tight container. This keeps it cool and tasty. If you notice any change in smell or color, it’s best to toss it out. Yes, using leftover rotisserie chicken is a great idea! Rotisserie chicken saves time and adds flavor. The spices on the chicken enhance the salad's taste. Plus, it makes the dish even easier to prepare. Dill Pickle Chicken Salad can be quite healthy. It offers protein from the chicken and probiotics if you use Greek yogurt. Pickles add crunch and a burst of flavor, too. Just watch the amount of mayonnaise you use. This helps keep it lighter and healthier. Absolutely! You can add a few spices to kick up the heat. Try adding: - A pinch of cayenne pepper - Some diced jalapeños - A splash of hot sauce These options will give your salad a nice spicy twist without losing its freshness. For the full recipe, including step-by-step instructions, check out the [Full Recipe]. Dill pickle chicken salad is a tasty twist on a classic dish. Using cooked chicken, pickles, and yogurt creates a creamy blend. You can boost flavors with onion, celery, and fresh dill. Don’t forget to season it well. Try swapping ingredients to suit your taste. Whether you prefer it low-carb or vegan, there's a version for you. Store leftovers properly to enjoy later. This salad is not just simple; it's also a crowd-pleaser that you can make your own.](https://therecipehatch.com/wp-content/uploads/2025/06/a90925a9-5784-4012-8a32-634f38360870.webp)
Dill Pickle Chicken Salad Tasty and Fresh Delight
Are you ready to whip up a refreshing dish that combines tangy flavors and tasty chicken? This Dill Pickle Chicken Salad is a delightful treat
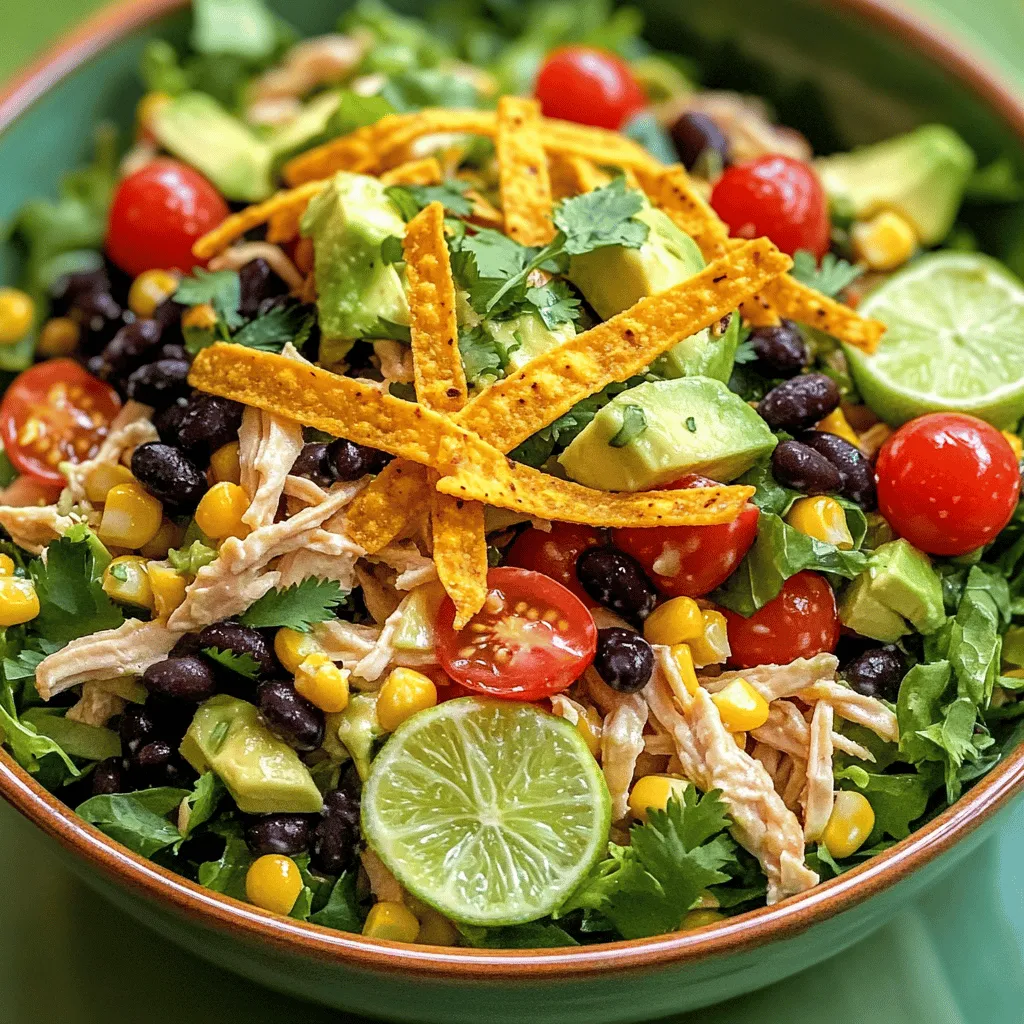
Zesty Southwest Chicken Salad Quick and Flavorful Dish
Looking for a dish that’s quick, packed with flavor, and easy to make? My Zesty Southwest Chicken Salad is just what you need! This salad