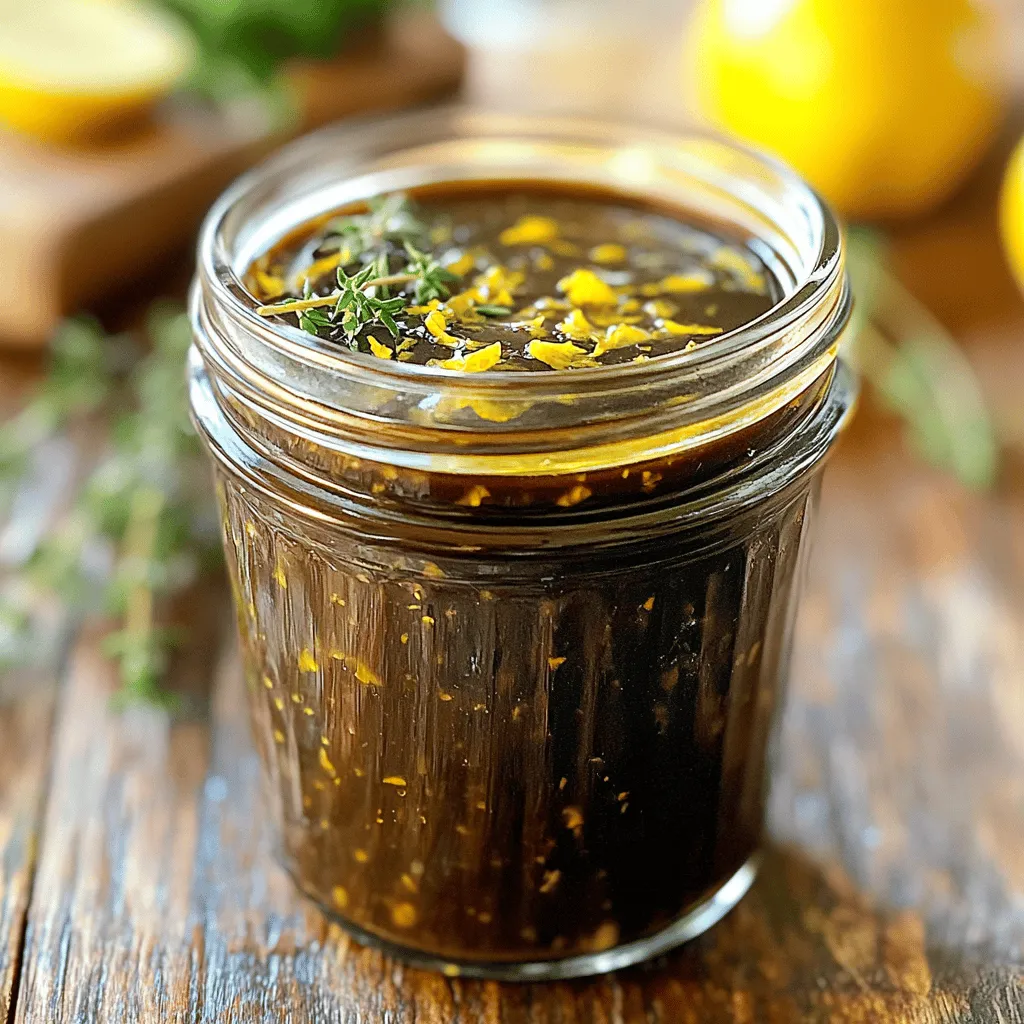
Salads

- 1 cup fresh strawberries, hulled and halved - 1 tablespoon honey (or maple syrup for a vegan option) - 2 tablespoons apple cider vinegar Fresh strawberries bring a sweet and bright flavor to the vinaigrette. Choose ripe berries for the best taste. You can also use honey for sweetness, or maple syrup if you prefer a vegan option. Apple cider vinegar adds a tangy kick that balances the sweetness. - 1 teaspoon Dijon mustard - 1/3 cup extra virgin olive oil - Salt and pepper to taste Dijon mustard acts as a thickener and gives a nice depth. Extra virgin olive oil adds a rich, smooth texture. Salt and pepper help enhance all the flavors in this vinaigrette. This strawberry vinaigrette is simple to make and a great way to add a burst of flavor to salads. For the full recipe, check out the detailed instructions on how to prepare this tasty dressing. To start, you need fresh strawberries. First, hull them by removing the green tops. Then, cut the strawberries in half. This makes them easier to blend. You want ripe, sweet berries for the best flavor. Use about one cup of hulled and halved strawberries for this recipe. Next, it's time to blend! Place the halved strawberries in your blender. Add one tablespoon of honey or maple syrup if you like it sweet. Then, pour in two tablespoons of apple cider vinegar for tang. Don't forget to add one teaspoon of Dijon mustard. This will enhance the flavor. Blend all the ingredients until they are smooth. Now, let's create that smooth texture. With the blender still running, slowly drizzle in one-third cup of extra virgin olive oil. This step is key for a creamy vinaigrette. The oil helps emulsify the mixture, making it thick and rich. Stop blending once it’s well combined. Taste the vinaigrette and add salt and pepper to your liking. Blend again briefly to mix. You can find the full recipe in the instructions above. To make your strawberry vinaigrette extra tasty, you can play with sweetness. You can use honey for a rich flavor. If you want a vegan option, maple syrup works well too. Just add a little at a time, and taste as you go. This lets you find the right balance for your taste buds. The sweetness should not overpower the tang from the vinegar. It should blend nicely to create a bright, vibrant flavor. A good vinaigrette needs to mix well. If it separates, it can look unappealing. To avoid this, add the olive oil slowly while blending. This helps create a smooth, creamy texture. Another trick is to start with the mustard. It acts as an emulsifier. It helps hold the vinaigrette together. If the texture still isn’t right, you can blend it a bit longer. The goal is to have a well-mixed dressing that stays together. To keep your strawberry vinaigrette fresh, store it in a clean jar with a tight lid. It lasts about a week in the fridge. Always shake it well before use. If you notice any separation, just give it a quick mix. This ensures the flavors stay bright and tasty. For longer storage, you might consider freezing it. However, freezing may change the texture. Use the vinaigrette within a week for the best flavor. For the full recipe, check out the earlier section. {{image_2}} You can switch strawberries with other berries. Raspberries, blueberries, or blackberries work well. Each berry gives a unique taste. Raspberries add a tart kick, while blueberries bring sweetness. Use the same amount as in the recipe. Blend them just like the strawberries for a fresh twist. Herbs can enhance your vinaigrette flavor. Try adding fresh basil or mint. These herbs bring a nice freshness to the mix. Use about one tablespoon of chopped herbs. Blend them in with the other ingredients. This will give your vinaigrette a vibrant taste. This vinaigrette is easy to adapt. For a vegan option, use maple syrup instead of honey. It keeps the sweet taste while being plant-based. If you need it gluten-free, just check your mustard. Most Dijon mustards are safe, but always read the label. This way, everyone can enjoy your homemade vinaigrette. For more details, see the Full Recipe. To keep your homemade strawberry vinaigrette fresh, use a clean glass jar or bottle. Mason jars work great because they seal well and let you see the bright color. A squeeze bottle is also handy for easy pouring. Make sure the container has a tight lid to prevent air from spoiling the vinaigrette. You can store your strawberry vinaigrette in the fridge for up to one week. To keep the flavors fresh, remember to shake the jar before using it again. The oil may separate, but a quick shake will fix that. Keep an eye out for any changes in smell or color. If you notice anything off, it’s best to discard it. You can freeze strawberry vinaigrette, but it may change in texture. To freeze, pour the vinaigrette into an ice cube tray. Once frozen, transfer the cubes to a freezer bag. This way, you can pull out just the amount you need later. When ready to use, thaw in the fridge overnight. Yes, you can use frozen strawberries. They work well, but the texture changes. Frozen strawberries may make the vinaigrette a bit watery. This can affect the thickness. For best results, thaw and drain them first. Fresh strawberries offer a brighter flavor and better texture. Homemade vinaigrette lasts about a week in the fridge. Store it in a clean jar with a tight lid. Shake well before each use. If it separates, just shake it again. Always check for off smells or changes in color. Discard if you notice anything unusual. Strawberry vinaigrette adds a sweet twist to many salads. It pairs great with fresh greens, like spinach or arugula. Try it on a mixed green salad with nuts and cheese. It also works well with fruit salads. Consider adding nuts for crunch and feta for creaminess. Absolutely! Making it ahead gives flavors time to blend. Prepare it a day before and store it in the fridge. This way, you have a tasty dressing ready to go. Just remember to shake it well before serving. Enjoy the fresh taste without the last-minute rush! In this post, I shared how to make a delicious strawberry vinaigrette. You need fresh strawberries, honey or maple syrup, and apple cider vinegar. I explained how to blend these ingredients properly and achieve a nice texture. I also gave tips on enhancing flavors and proper storage. Finally, you can customize your vinaigrette by using different fruits or herbs. Enjoy experimenting with your own recipes! Making vinaigrette at home is fun and rewarding.
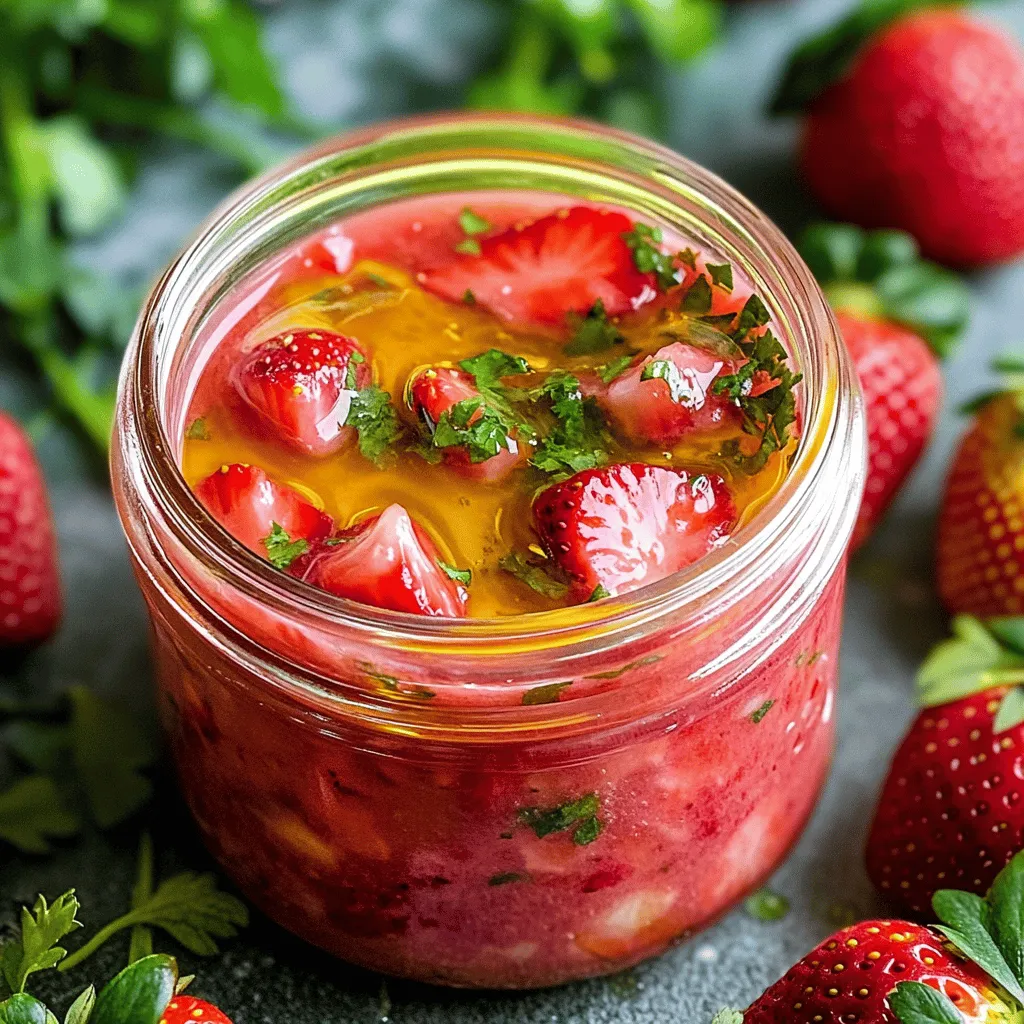
Homemade Strawberry Vinaigrette Easy Flavor Boost
Are you ready to elevate your salads with a burst of fresh flavor? This Homemade Strawberry Vinaigrette is simple, delicious, and made with just a
- 4 cups kale, stems removed and chopped - 2 medium beets, peeled and diced - 1 medium carrot, grated - 1/2 cup feta cheese, crumbled - 1/4 cup walnuts, toasted and roughly chopped - 1/4 cup dried cranberries - 1/4 cup extra virgin olive oil - 2 tablespoons balsamic vinegar - 1 teaspoon honey - Salt and pepper to taste When making this kale salad, using fresh and quality ingredients is key. I always choose the best kale I can find. Look for kale that is bright green and has firm leaves. Avoid wilted or yellowing kale. Fresh kale adds a crisp bite to the salad. Beets bring sweetness and color to your dish. I prefer medium-sized beets because they roast evenly. When picking beets, choose ones that are firm and smooth. The skin should be free from blemishes. For carrots, select vibrant orange ones that are firm and crunchy. They add a nice crunch to the salad. Feta cheese should be creamy and crumbly. I love using a high-quality feta for its rich flavor. Walnuts can add a lovely crunch. Toast them lightly to enhance their taste. Dried cranberries bring a sweet contrast to the savory flavors in this dish. When it comes to olive oil and balsamic vinegar, quality matters. Use extra virgin olive oil for a rich flavor. Choose a good balsamic vinegar for a tangy kick. Honey adds a touch of sweetness to balance the salad. Lastly, salt and pepper enhance all the flavors. - Selecting the best kale: Look for vibrant, crisp leaves with no brown spots. - Choosing the right beets: Pick firm, smooth beets that feel heavy for their size. - Organic vs. conventional produce: Organic options often have better flavor and fewer pesticides. First, preheat your oven to 400°F (200°C). This temperature ensures the beets roast well. Next, prepare a baking sheet by lining it with parchment paper. This helps with easy cleanup. Now, take your diced beets and place them on the sheet. Drizzle them with 1 tablespoon of olive oil. Sprinkle a pinch of salt and pepper over the beets. This simple seasoning brings out their natural sweetness. Roast the beets for 25-30 minutes. Be sure to stir them halfway through. Once they are tender, remove them from the oven and set them aside to cool. In a large bowl, combine the chopped kale, grated carrot, roasted beets, feta cheese, walnuts, and dried cranberries. Each ingredient adds a unique flavor and texture. For the dressing, whisk together the remaining olive oil, balsamic vinegar, honey, and a dash of salt and pepper in a small bowl. This dressing balances the earthy flavors of the beets and the bitterness of the kale. Drizzle the dressing over the salad mixture. Toss gently to coat everything well. This step ensures each bite is flavorful. Let your salad sit for about 10 minutes. This resting time helps the flavors meld together. Taste the salad and adjust the seasoning if needed. For a beautiful presentation, serve the salad in a large wooden bowl. Garnish with extra walnuts and feta on top. This adds visual appeal and makes the dish inviting. You can also plate individual servings with a slice of lemon on the side for a pop of color. For the complete recipe, check out the Full Recipe. To get even cooking for your beets, cut them into similar sizes. This helps them roast at the same rate. Spread them out in a single layer on the baking sheet. Give them space so they can roast, not steam. If you want to save time, consider using pre-cooked beets. They are easy to find in stores and save you roasting time. Just slice them and add them to your salad. Don't be afraid to try different dressings. A simple lemon vinaigrette can brighten the flavors. You can also switch balsamic for apple cider vinegar for a fruity twist. For added flavor, try mixing in fresh herbs like parsley or dill. They can take your salad from good to great. Adding protein boosts the salad's nutrition. Grilled chicken, chickpeas, or quinoa are great options. You can also increase fiber by adding more veggies like bell peppers or avocado. These simple changes make your salad not only tasty but also filling. For the full recipe, check the [Full Recipe] section. {{image_2}} You can change up this salad based on what’s fresh. Try adding: - Roasted sweet potatoes for a sweet touch. - Shredded Brussels sprouts for a crunchy bite. - Sliced apples for a crisp flavor. Dressing can also vary with the seasons. Use a lemon vinaigrette in spring. For fall, try a maple mustard dressing. If you want a vegan salad, swap feta cheese for avocado. Creamy avocado gives a rich texture. You can also use nutritional yeast for a cheesy flavor. For dressings without honey, try maple syrup or agave nectar. These options keep the sweetness but stay plant-based. Adding grains like quinoa or farro makes the salad heartier. They give extra protein and fiber, making it more filling. Quinoa cooks quickly and adds a nutty flavor. Farro has a chewy texture and enhances the salad's depth. Both grains boost nutrition and make the dish more satisfying. Store any leftover salad in an airtight container. This keeps it fresh and crisp. Place it in your refrigerator. The salad stays good for about 2-3 days. After this, the kale may wilt. The beets can lose their texture, too. You can make this salad ahead of time. Just store each part separately. Keep the kale, beets, and dressing in different containers. This helps keep everything fresh. Use glass containers for best results. They help prevent odors and stains. You might wonder if you can reheat the salad. I recommend against it. The salad is best when fresh and cool. If you want a warm dish, try warming the beets before mixing. Just heat them gently in a pan and add to your salad. Remember to check out the Full Recipe for more tips! To reduce the bitterness of kale, try massaging it. Take the chopped kale and drizzle a little olive oil on it. Use your hands to gently rub the leaves for a few minutes. This softens the leaves and makes them taste sweeter. You can also add a bit of salt or lemon juice while massaging. Both help to cut the bitterness. Yes, you can use frozen beets! They are often already cooked and ready to use. Thaw them before adding to your salad. If they are not pre-cooked, steam or boil them for a few minutes until they are tender. Using frozen beets can save time and add convenience to your cooking. Feel free to get creative with your salad! You can add sliced apples for sweetness or avocado for creaminess. Adding chickpeas or grilled chicken boosts the protein. You can also toss in seeds like pumpkin or sunflower for a crunchy texture. Experiment with your favorite flavors! For the full recipe, check out the vibrant Kale Salad with Roasted Beets. In this blog post, we explored a tasty salad packed with fresh ingredients like kale, beets, and walnuts. We covered roasting the beets, assembling the salad, and enhancing its flavor. You learned tips for perfecting your beets and tried different dressings. Remember, you can swap in seasonal veggies or grains to keep it exciting. With the right storage and prep tips, you can enjoy this healthy dish several times. Now, it's time to enjoy your delicious salad and feel good about what you eat.
Kale Salad with Roasted Beets Fresh and Flavorful Dish
Welcome to your new favorite dish: Kale Salad with Roasted Beets! This vibrant salad is not just colorful; it’s full of flavor and nutrients. I
For this flavorful balsamic chicken caprese salad, you'll need: - 2 boneless, skinless chicken breasts - 1 cup cherry tomatoes, halved - 1 cup fresh mozzarella balls - 2 cups fresh basil leaves These main ingredients create a colorful and tasty dish. The chicken adds protein, while the tomatoes and mozzarella bring freshness. The basil leaves add a fragrant touch. To dress the salad, gather: - 3 tablespoons balsamic vinegar - 2 tablespoons olive oil - Salt and pepper to taste This dressing ties the salad together with a tangy and rich flavor. Balsamic vinegar provides a nice zing, while olive oil adds smoothness. For seasoning, you will need: - 1 teaspoon garlic powder - 1 teaspoon dried oregano These spices enhance the chicken's taste. Garlic powder gives a savory depth, and oregano adds a classic Italian flavor. You can find the full recipe for extra details and specific steps. Start by marinating the chicken. This step adds flavor and keeps the meat juicy. Season the chicken breasts with: - 1 teaspoon garlic powder - 1 teaspoon dried oregano - Salt and pepper to taste Mix these spices together. Rub this mixture over the chicken. Let it sit for at least 15 minutes. This allows the flavors to soak in. For cooking, I prefer a skillet. Heat 1 tablespoon of olive oil in a large skillet over medium heat. Once the oil is hot, add the seasoned chicken. Cook it for about 6-7 minutes on each side. The chicken should reach an internal temperature of 165°F (75°C). To check for doneness, use a meat thermometer or cut the chicken to see if the juices run clear. Once done, remove the chicken from the skillet and let it rest for a few minutes. This helps keep it tender when you slice it. Now, it’s time to combine the salad ingredients. In a large bowl, mix together: - 1 cup cherry tomatoes, halved - 1 cup fresh mozzarella balls - 2 cups fresh basil leaves Next, make the dressing. In a small bowl, whisk together: - 3 tablespoons balsamic vinegar - 2 tablespoons olive oil - Salt and pepper to taste Now, slice the rested chicken and add it to the salad bowl. Drizzle the balsamic dressing over everything. Gently toss to mix all the ingredients. Your flavorful balsamic chicken caprese salad is now ready to serve! Enjoy it fresh and colorful. For further details, check the Full Recipe. To make your chicken juicy, start with good seasoning. I use garlic powder and dried oregano. After seasoning, heat olive oil in a skillet. Cook the chicken on medium heat. This usually takes about 6-7 minutes on each side. Always check the internal temperature. It should reach 165°F (75°C). This ensures that the chicken is safe and juicy. Let it rest for a few minutes. This keeps the juices locked inside. When mixing your salad, add the chicken last. This way, you keep the tomatoes and mozzarella intact. Gently toss the ingredients to avoid mashing them. To enhance flavors, use fresh basil leaves. They add a nice aroma and taste. You can also sprinkle a bit of salt over the salad just before serving. This makes everything pop. You can make your balsamic dressing with just two ingredients: balsamic vinegar and olive oil. If you want something richer, try adding a bit of honey or mustard. Homemade dressing usually tastes better, but store-bought can save time. Just check the label for quality. High-quality ingredients make a big difference. For the full recipe, check the link. {{image_2}} You can easily change the protein in this salad. If you want a lighter option, use tofu. Tofu absorbs flavors well and can make the dish vegan. Shrimp is another tasty choice. It cooks quickly and pairs nicely with the salad. For cheese, fresh mozzarella is classic. However, you can try feta or goat cheese for a tangy flavor. These cheeses add a unique twist and change the taste profile. Seasonal produce can elevate this dish. In summer, use ripe peaches or strawberries for a sweet touch. In fall, add roasted butternut squash or apples for warmth. These fruits bring freshness and color to the salad. You can also adapt this salad for special occasions. For a festive touch, add pomegranate seeds during the holidays. They add crunch and a burst of flavor. If you need a gluten-free dish, this salad is perfect as is. All ingredients are naturally gluten-free. Just double-check your balsamic vinegar for any hidden gluten. For a vegan version, swap the chicken for chickpeas or lentils. Both add protein and texture. Omit the mozzarella or use a plant-based cheese. These changes keep the salad delicious while meeting dietary needs. With these variations, you can make the flavorful balsamic chicken caprese salad suit any taste or occasion. Don’t forget to check the Full Recipe for detailed steps! To keep your Flavorful Balsamic Chicken Caprese Salad fresh, refrigerate it within two hours of serving. Use an airtight container to prevent moisture loss. Glass containers work well. They keep the salad fresh and let you see the colorful layers. You can freeze the salad, but it’s best to freeze the chicken alone. This will help maintain the quality of the other ingredients. Cut the chicken into pieces and place it in a freezer-safe bag. Remove as much air as possible before sealing. For reheating, thaw the chicken overnight in the fridge. Warm it in a skillet on low heat. Avoid microwaving, as it can dry out the chicken. In the fridge, your salad can last about three days. After that, the ingredients may begin to spoil. Look for signs like a sour smell or slimy texture. If the basil turns brown or the mozzarella looks off, it’s time to toss it. Enjoy your salad while it’s still fresh for the best flavor! For the complete recipe, check out the [Full Recipe]. To make chicken tasty, start with a good marinade. Use balsamic vinegar, olive oil, and spices. Let the chicken soak for at least 30 minutes. Garlic powder and dried oregano add great flavor. Salt and pepper are key too. Rub the spices directly on the chicken for more taste. Cooking the chicken on medium heat helps keep it juicy. Yes, you can prepare this salad ahead. Chop the chicken and veggies, then store them separately. Keep the balsamic dressing in a jar. When you’re ready to eat, mix everything. This keeps the salad fresh and crunchy. You can store the salad in the fridge for up to two days. This salad pairs well with many dishes. Try serving it with crusty bread or garlic knots for a filling meal. A side of roasted vegetables is great too. You can also serve it alongside a light soup. These sides complement the flavors of the salad nicely. For a drink, a glass of iced tea or sparkling water works well. For the full recipe, check out the detailed instructions above. This balsamic chicken Caprese salad is a crowd-pleaser. You learned about key ingredients like chicken and fresh basil. I shared step-by-step instructions for marinating and cooking the chicken. After that, we assembled our salad with flavor-packed dressing. Perfectly cooking chicken keeps it juicy. Don’t forget to store leftovers correctly, so they last longer. You can even swap ingredients based on the season or diet needs. This salad is easy to customize and fun to make. Enjoy creating your own version!
Flavorful Balsamic Chicken Caprese Salad Recipe
Are you ready to elevate your salad game? This Flavorful Balsamic Chicken Caprese Salad combines juicy marinated chicken, bright cherry tomatoes, creamy mozzarella, and fresh
- 2 medium zucchinis, sliced into half-moons - 3 medium carrots, julienned - 1 red bell pepper, thinly sliced - 1 small red onion, thinly sliced - 3 cloves garlic, minced - 2 tablespoons olive oil - 1 teaspoon dried thyme - 1/2 teaspoon smoked paprika - Salt and pepper, to taste - Fresh parsley, chopped (for garnish) - Zest of 1 lemon You can easily adjust this recipe. If you have more zucchini, add it! You can swap the red bell pepper for yellow or green. Use yellow onion instead of red for a milder taste. If you want a spicy kick, add a pinch of red pepper flakes. For a fresh twist, try using fresh herbs like basil or oregano instead of dried thyme. Each serving of sautéed carrots and zucchini has about: - Calories: 150 - Protein: 2g - Fat: 8g - Carbohydrates: 20g - Fiber: 5g - Sugar: 4g This dish is low in calories but high in vitamins. You get a good dose of vitamin A from carrots and vitamin C from zucchini and bell peppers. Eating it helps you feel full and satisfied while keeping things light. For the full recipe, check out the complete dish details. First, gather all your ingredients. You will need: - 2 medium zucchinis, sliced into half-moons - 3 medium carrots, julienned - 1 red bell pepper, thinly sliced - 1 small red onion, thinly sliced - 3 cloves garlic, minced - 2 tablespoons olive oil - 1 teaspoon dried thyme - 1/2 teaspoon smoked paprika - Salt and pepper, to taste - Fresh parsley, chopped (for garnish) - Zest of 1 lemon Make sure to wash the carrots and zucchinis. Slice them thinly for even cooking. Julienne the carrots into long strips. This makes them soft yet crunchy when cooked. Heat the olive oil in a large skillet over medium heat. Once hot, add the sliced red onion. Cook for about 2 minutes until it starts to soften. Next, add the minced garlic and stir for 1 minute until fragrant. After that, add the carrots to the skillet. Cook them for 3 to 4 minutes, stirring often. They should become tender but still hold their shape. Now it’s time to mix in the zucchini and red bell pepper. Sauté these for another 5 to 7 minutes. You want the veggies to be tender but not mushy. Now, it’s time to add flavor. Sprinkle in the dried thyme, smoked paprika, salt, and pepper. Stir everything well to combine the flavors. After you remove the skillet from the heat, add the lemon zest. This will brighten the dish. Toss the veggies gently to keep them intact. Transfer the sautéed vegetables to a serving dish and garnish with fresh parsley. For more details, check the Full Recipe. Enjoy your colorful sautéed carrots and zucchini! To keep your vegetables crunchy, use high heat. Heat the olive oil until it shimmers. Then, add the onions and garlic. Sauté them quickly to avoid overcooking. When you add the carrots, stir them often but don't let them sit too long. This keeps them firm. Add the zucchini later. It cooks faster, so it should join the mix after a few minutes. Season your dish well to bring out the best taste. I love using thyme and smoked paprika. They add a warm, earthy flavor. Don’t forget salt and pepper. A sprinkle of lemon zest at the end brightens all the flavors. You can also try fresh herbs like basil or cilantro for a different twist. Each herb changes the taste, so feel free to experiment! One common mistake is cooking the veggies too long. They should be tender yet crisp. Another mistake is not seasoning enough. Taste as you go, and adjust your spices. Also, overcrowding the pan can lead to steaming instead of sautéing. Cook in batches if necessary. These tips will help you create a perfect dish. For the complete recipe, check the Full Recipe. {{image_2}} You can mix in other veggies to make this dish more colorful and tasty. Try adding bell peppers, snap peas, or even broccoli. Each vegetable brings its own flavor and texture. Toss in some spinach at the end for a fresh touch. Make sure to adjust the cooking time so all veggies cook evenly. You can change the taste of your sautéed carrots and zucchini easily. Add soy sauce or ginger for an Asian twist. For a Mediterranean vibe, sprinkle in some feta cheese and olives. If you like heat, add red pepper flakes while cooking. Each change will give your dish a new life, so feel free to experiment with herbs and spices. This dish pairs well with many meals. Serve it alongside grilled chicken or fish for a complete plate. It also works great with pasta or rice. You can even add it to a salad for extra crunch. If you want to impress, serve it on a bed of quinoa with a drizzle of balsamic glaze. For more ideas, check out the Full Recipe. To keep your sautéed carrots and zucchini fresh, place them in an airtight container. Allow the dish to cool to room temperature before sealing it. Store the container in the fridge. This way, your veggies will stay crisp for up to three days. When you’re ready to enjoy your leftovers, reheat them gently. Use a skillet over medium heat. Add a splash of olive oil to help revive the flavor. Stir the veggies for about 3-5 minutes until they are warm. This method keeps them from becoming mushy. If you want to freeze your sautéed carrots and zucchini, it’s best to do so right after cooking. Let them cool, then place them in freezer-safe bags. Remove as much air as you can before sealing. These can last up to three months in the freezer. When you’re ready to eat, thaw them in the fridge and reheat as described above. Enjoy your colorful dish anytime! For the full recipe, check the earlier sections. Yes, you can use frozen carrots and zucchini. They are convenient and quick. However, frozen veggies might release more water. This can make your dish a bit soggier. To fix this, cook them longer until they soften. Keep in mind, fresh vegetables give a better crunch and flavor. Sautéed carrots and zucchini pair well with many dishes. You can serve them with grilled chicken or fish. They also go nicely with quinoa or brown rice. For a full meal, add a side salad with lemon dressing. This helps balance the flavors while keeping it light and healthy. Yes, this recipe is great for meal prep. You can make a big batch and store it. Just let the veggies cool before putting them in containers. They will stay fresh in the fridge for up to three days. Reheat them gently before serving. This way, you enjoy tasty meals all week. For the full recipe, check back at the beginning! In this post, we explored the recipe for sautéed carrots and zucchini. You learned the key ingredients, preparation steps, and cooking tips. We also discussed how to enhance flavor and avoid common mistakes. You can experiment with variations and discover new combinations. Remember to store leftovers and use freezing options to keep them fresh. With this guide, you can enjoy tasty, crunchy vegetables at home. Sautéing these veggies adds color and nutrients to your meals. Try it out and enjoy the flavors!
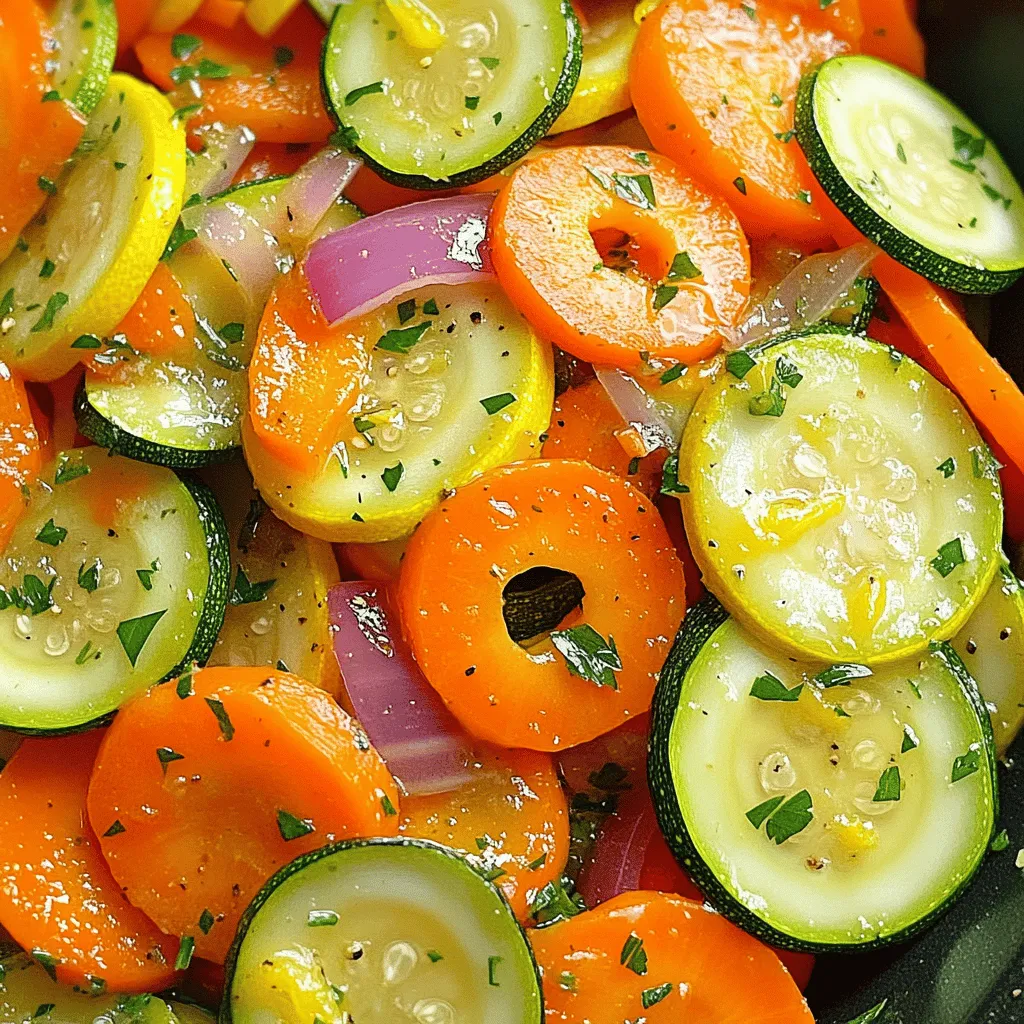
Sautéed Carrots and Zucchini Flavorful Healthy Dish
Looking for a quick, healthy dish that bursts with flavor? Sautéed Carrots and Zucchini is your answer! I’ll guide you through the simple steps to
To make this tasty dish, gather these ingredients: - 2 medium zucchinis, sliced into rounds - 2 medium summer squashes, sliced into rounds - 1 red bell pepper, diced - 1 yellow bell pepper, diced - 3 tablespoons olive oil - 1 teaspoon garlic powder - 1 teaspoon onion powder - 1 teaspoon smoked paprika - Salt and pepper to taste - 2 tablespoons fresh parsley, chopped (for garnish) - Zest of 1 lemon - Juice of 1 lemon This dish is healthy and full of flavor. Each serving has about: - 120 calories - 7 grams of fat - 10 grams of carbs - 3 grams of fiber - 2 grams of protein It is low in calories and high in nutrients. The colorful veggies give you vitamins A and C. You will also enjoy some fiber that helps with digestion. When picking fresh zucchini and summer squash, look for these signs: - Choose firm and smooth vegetables. - Check for bright color without spots or bruises. - The ends should feel fresh and moist, not dry. - Ask about local produce at markets for the best flavors. Fresh veggies taste better and make your dish shine. You can use these tips to find the best ingredients for the Full Recipe. Start by washing the zucchinis and summer squashes well. Slice them into rounds about half an inch thick. This size helps them cook evenly. Next, wash the bell peppers. Remove the seeds and stems, then dice them into small pieces. Gather all your sliced veggies in a large mixing bowl. In a small bowl, mix the garlic powder, onion powder, smoked paprika, salt, and pepper. These spices give the dish a nice flavor. Drizzle three tablespoons of olive oil over the veggies in the mixing bowl. Next, sprinkle the spice mix on top. Toss everything together so the vegetables are well coated in oil and spices. Preheat your oven to 425°F (220°C). Spread the veggie mix on a baking sheet lined with parchment paper. Make sure they are not crowded. This helps them roast well. Bake for 20-25 minutes, stirring halfway through for even browning. The veggies should be tender and slightly caramelized when done. When they come out of the oven, sprinkle lemon zest and juice over them. Toss gently to mix. Transfer them to a serving platter and garnish with fresh parsley. For the full recipe, refer to the detailed instructions provided earlier. Roasting zucchini and summer squash is simple. First, always cut your veggies into even pieces. This helps them cook evenly. Make sure to spread them out on the baking sheet. If they pile up, they will steam instead of roast. Preheat your oven to a high temperature, around 425°F (220°C). This gives your veggies a nice golden color. To get the best taste, use good quality olive oil. It adds depth and richness. Don’t skip the lemon zest and juice. They brighten the dish and add freshness. Experiment with herbs like thyme or rosemary for added flavor. Garlic powder and smoked paprika also bring warmth and depth. Toss your veggies well to coat them in oil and spices. This ensures every bite is full of flavor. Once your roasted zucchini and summer squash are ready, serve them hot. They make a great side dish for grilled meats or fish. You can also toss them into salads or pasta. For a light meal, add some cooked quinoa or couscous. Sprinkle fresh parsley on top for color and taste. You can find the full recipe in the article to guide you through this tasty dish. {{image_2}} You can mix in other veggies for more flavor. Try bell peppers, carrots, or eggplant. These veggies roast well and add nice colors. You can also use asparagus or cherry tomatoes. Each new vegetable brings its own taste. To boost flavors, add fresh herbs or spices. Basil, oregano, and thyme work great. You can also try rosemary for a bold taste. For a kick, sprinkle some red pepper flakes. These small changes can make your dish pop with flavor. This dish already fits vegan and gluten-free diets. Just check your spice labels. Some brands may add gluten or dairy. Feel free to add your favorite veggies to make it your own. Enjoy this recipe guilt-free and delicious! For the complete guide, check the Full Recipe. After enjoying your roasted zucchini and summer squash, let the leftovers cool. Place them in an airtight container. Store them in the fridge for up to three days. This keeps them fresh and tasty for your next meal. To reheat, use the oven for the best taste. Preheat your oven to 350°F (175°C). Spread the vegetables on a baking sheet. Heat them for about 10 minutes or until warm. You can also microwave them. Just heat in short bursts to avoid sogginess. If you have more leftovers, freezing is a great option. Cool the veggies completely. Spread them on a baking sheet and freeze for one hour. Once frozen, transfer them to a freezer bag. They can last for up to three months. When you want to use them, thaw overnight in the fridge before reheating. It takes about 20 to 25 minutes to roast zucchini and summer squash. I preheat the oven to 425°F (220°C). Then, I spread the vegetables on a baking sheet. I stir them halfway through for even cooking. The outside should be golden, and the inside should feel soft. Yes, you can use other types of squash. Butternut and acorn squash work well. Just cut them into small, even pieces. This helps them roast at the same rate as zucchini and summer squash. Feel free to mix in your favorites for more flavor. You know the vegetables are done when they are tender and slightly caramelized. A fork should easily pierce them. The edges look golden and crisp. If they look too soft or mushy, they may have cooked too long. Roasted zucchini and summer squash go well with many dishes. They pair nicely with grilled meats, fish, or tofu. You can serve them as a side or toss them into pasta. They also work well in salads or grain bowls. For the full recipe, check out the Zesty Roasted Zucchini & Summer Squash Medley. This guide covered key points on roasting zucchini and summer squash. We discussed ingredients, prep steps, and maximum flavor tips. Remember to choose fresh veggies and explore variations to suit your taste. Proper storage keeps your leftovers tasty. With this knowledge, you can create delicious meals easily. Enjoy your cooking, and share the joy of food with others!
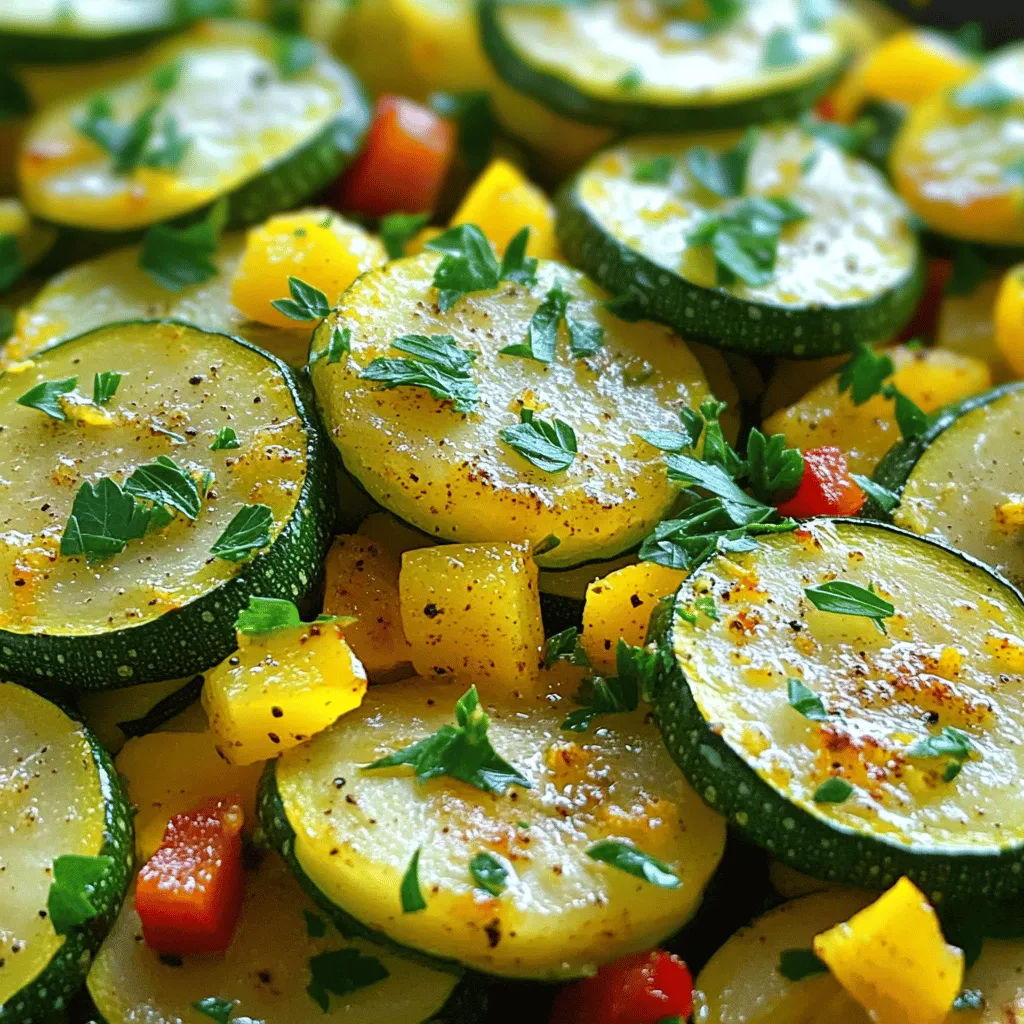
Roasted Zucchini and Summer Squash Flavorful Dish
Looking for a tasty way to enjoy zucchini and summer squash? This roasted dish is packed with flavor and super easy to make. You’ll learn
- 3 medium zucchinis, thinly sliced - 1 teaspoon sea salt - 1/4 cup extra virgin olive oil - 1/4 cup red wine vinegar or apple cider vinegar - 1 tablespoon honey or maple syrup - 1 teaspoon garlic powder - 1 teaspoon dried oregano - 1/2 teaspoon black pepper - 1/4 cup fresh parsley, chopped - 1/4 cup cherry tomatoes, halved - 1/4 cup feta cheese, crumbled (optional) To make a great marinated zucchini salad, you need fresh and simple ingredients. Start with three medium zucchinis. Thinly slice them to ensure they soak up all the flavors. The salt helps draw moisture from the zucchini. It makes the texture crisp. You will use one teaspoon of sea salt for this. Next, grab a quarter cup of extra virgin olive oil. This will add a rich flavor to the salad. Use either red wine vinegar or apple cider vinegar, also a quarter cup. Both give a nice tangy taste. For sweetness, one tablespoon of honey works well. If you prefer, you can swap it for maple syrup. For seasoning, add one teaspoon each of garlic powder and dried oregano. These spices bring out the best in the zucchini. Don't forget the half teaspoon of black pepper to add some heat. Finally, for freshness, you will need a quarter cup of chopped parsley and a quarter cup of halved cherry tomatoes. If you like, sprinkle some feta cheese on top for a creamy touch. These ingredients combine to create a vibrant and tasty dish. Check out the Full Recipe for detailed steps on preparation and marination! To start, thinly slice your zucchinis. Use a sharp knife for clean cuts. Place the slices in a colander. Sprinkle one teaspoon of sea salt over the zucchini. This step helps draw out moisture. Let the zucchini sit for about 30 minutes. After that, rinse the slices under cold water. Pat them dry with a paper towel. This keeps your salad crisp and fresh. Now it’s time to make the marinade. In a large mixing bowl, add 1/4 cup of extra virgin olive oil. Next, pour in 1/4 cup of red wine vinegar. You can use apple cider vinegar for a sweeter taste. Add one tablespoon of honey or swap it for maple syrup for a vegan option. Mix in one teaspoon of garlic powder and one teaspoon of dried oregano. Finally, add 1/2 teaspoon of black pepper. Whisk everything together until well combined. Add the dried zucchini slices to the bowl with the marinade. Toss gently to coat each slice well. Let the zucchini marinate for at least 15 minutes at room temperature. If you have time, marinate it in the fridge for up to 2 hours for a stronger flavor. After marinating, add 1/4 cup of chopped parsley and 1/4 cup of halved cherry tomatoes to the zucchini. Gently toss everything together. If you like, sprinkle some crumbled feta cheese on top before serving. This adds a creamy and salty touch. For the full recipe, check out the details above. For the best flavor, I suggest marinating your zucchini for at least 15 minutes. If you have more time, let it sit for up to 2 hours in the fridge. This longer marination brings out bold tastes. To make your salad look great, serve it in a large bowl or on individual plates. Drizzle extra marinade over the top for added flavor. Garnish with fresh parsley for a pop of color. You can also sprinkle some crumbled feta cheese on top if you like. This marinated zucchini salad is light and healthy. One serving has about 150 calories, depending on toppings. Zucchini is low in calories but high in vitamins A and C. It also contains fiber, which is good for digestion. Enjoy this salad for a fresh and nutritious meal! {{image_2}} You can make your marinated zucchini salad even better with different veggies. Try adding bell peppers, cucumbers, or carrots for extra color and crunch. These veggies pair well with zucchini and bring different flavors. If you want it vegan and gluten-free, skip the feta cheese or use a vegan cheese instead. You can also swap honey for maple syrup to keep it plant-based. To boost flavor, consider adding fresh herbs like basil or mint. These herbs add freshness and aroma. You can also try spices like cumin or chili flakes for a kick. For added crunch, toss in some nuts or seeds. Sunflower seeds or slivered almonds work great. They give the salad a nice texture and extra nutrients. Using seasonal fruits and vegetables makes this salad shine throughout the year. In summer, add fresh corn or diced tomatoes. In fall, try thinly sliced apples or pears for a sweet touch. Seasonal ingredients not only taste better but also support local farmers. Always choose what’s fresh and in season to enhance your dish. For the full recipe, check out the preparation steps and enjoy creating a fresh and flavorful dish! To keep your marinated zucchini salad fresh, store it in the fridge. Use an airtight container to prevent air from getting in. This helps the salad stay crisp and tasty. It can last for about 3 to 5 days in the fridge. If you notice any liquid, drain it before serving. This keeps the salad from becoming soggy. You can freeze the salad, but be aware it may lose some texture. If you want to freeze it, do so right after marinating. Place it in a freezer-safe bag or container. Remove as much air as you can before sealing. The salad can last up to 2 months in the freezer. When you are ready to eat, thaw it in the fridge overnight. After storage, your salad may need some love. If it looks a bit sad or watery, try adding fresh ingredients. Chop up some extra parsley or add more cherry tomatoes. A splash of olive oil or vinegar can also help. Mix everything gently, and your salad will taste fresh again. Enjoy the bright flavors! Yes, you can! Feel free to swap in bell peppers, cucumbers, or carrots. These veggies add color and crunch. They also absorb flavors well, just like zucchini. Try mixing different types for a fun twist. Marinated zucchini salad stays fresh for about three days in the fridge. Store it in an airtight container to keep it crisp. After three days, the salad may become soggy. If you see any changes in smell or color, it's best to toss it. Absolutely! Making it a few hours before serving is a great idea. The flavors deepen as it sits. Just remember to keep it in the fridge. If you want to serve it later, add the tomatoes and feta just before serving. Serve it in a large bowl or on individual plates. Drizzle some extra marinade over the top for more flavor. Garnish with fresh parsley for a vibrant touch. You can also serve it as a side dish or a light main course. Check out the Full Recipe for more tips! In this post, we explored how to make a delicious marinated zucchini salad. We covered the ingredients, tools, and step-by-step instructions. Plus, I shared tips on serving and customizing the dish. Marinated zucchini is a great way to enjoy fresh veggies with tasty flavors. Remember, you can mix and match ingredients based on your taste. Preparing this salad is easy and rewarding, whether you eat it right away or store it for later. Enjoy your healthy dish and share it with friends!
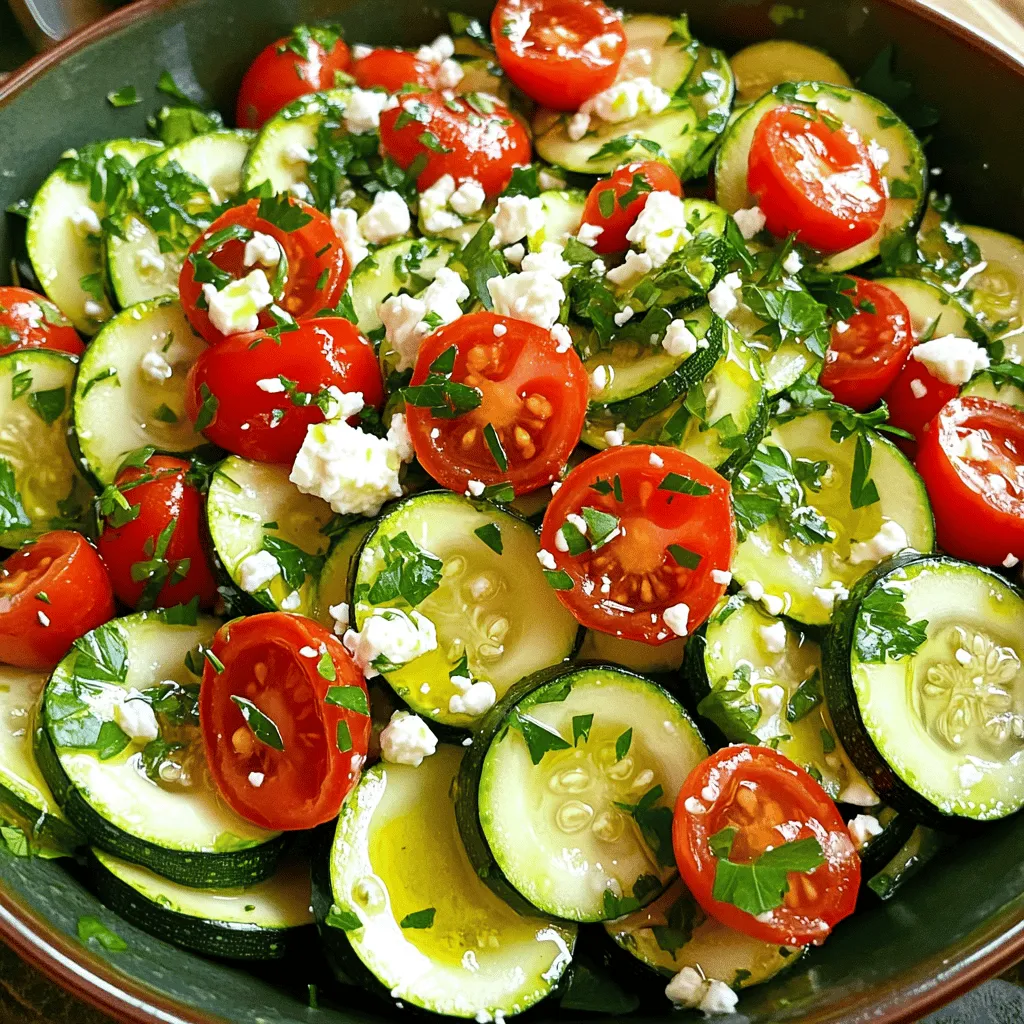
Marinated Zucchini Salad Fresh and Flavorful Dish
Are you ready for a fresh and tasty dish that bursts with flavor? This Marinated Zucchini Salad is an easy and vibrant addition to any
This zesty roasted zucchini medley brings life to any meal. You can make it ahead. It saves time and adds flavor to your table. You can pair it with grilled meats or grains. - 4 medium zucchinis, sliced into half-moons - 1 red bell pepper, diced - 1 yellow bell pepper, diced - 1 small red onion, thinly sliced - 3 cloves garlic, minced - 3 tablespoons olive oil - 1 teaspoon dried oregano - 1 teaspoon smoked paprika - ½ teaspoon red pepper flakes (optional for heat) - Salt and pepper to taste - Fresh parsley, chopped (for garnish) - Zest of 1 lemon Add fresh herbs like thyme or basil for more taste. You can also try different peppers for a unique twist. A sprinkle of cheese like feta can add creaminess. Use lemon juice for a tangy kick. These options make the dish more personal and fun! To start, gather all your ingredients. You will need: - 4 medium zucchinis, sliced into half-moons - 1 red bell pepper, diced - 1 yellow bell pepper, diced - 1 small red onion, thinly sliced - 3 cloves garlic, minced - 3 tablespoons olive oil - 1 teaspoon dried oregano - 1 teaspoon smoked paprika - ½ teaspoon red pepper flakes (optional for heat) - Salt and pepper to taste - Fresh parsley, chopped (for garnish) - Zest of 1 lemon Now, preheat your oven to 425°F (220°C). In a large bowl, mix the sliced zucchinis, diced bell peppers, and sliced onion. Add the minced garlic next. Drizzle the olive oil over the veggies. Then, sprinkle in the dried oregano, smoked paprika, red pepper flakes, salt, and pepper. Toss everything well. Make sure each piece gets coated. Spread the mixed veggies on a baking sheet lined with parchment paper. Lay them out in a single layer. This helps them roast evenly. Place the baking sheet in the oven and roast for 20-25 minutes. Halfway through, stir the veggies to help them cook evenly. You want them to be tender and slightly caramelized. Once done, take the baking sheet out of the oven. Sprinkle your fresh lemon zest and chopped parsley on top. This adds bright flavor and color. Let the medley cool a bit. If you made this ahead, transfer it to an airtight container for storage. You can serve warm or at room temperature. This flavorful zucchini side pairs well with grilled chicken or fish. It also works great in a grain bowl topped with feta cheese or hummus. For a nice touch, serve it in a colorful bowl. Enjoy this easy, tasty dish from the Full Recipe. To boost the taste of your zucchini, use simple spices. I love dried oregano and smoked paprika. They add warmth and depth. A touch of red pepper flakes gives some heat if you like it spicy. Always use fresh garlic too. It makes a big difference. The zest of a lemon adds brightness and freshness. For an even bolder flavor, try adding a splash of balsamic vinegar before roasting. This creates a lovely balance. Roasting zucchini needs just the right timing. Preheat your oven to 425°F (220°C). Roast your veggies for 20-25 minutes. Check them at 15 minutes to toss. This helps them cook evenly. You want them tender and slightly caramelized. If you like a little crunch, check them at 20 minutes. Each oven is unique, so watch your veggies closely. This roasted zucchini medley is versatile. Serve it as a side with grilled chicken or fish. It also shines in grain bowls. Add some feta cheese or hummus for protein. You can also serve it warm or at room temperature. For a lovely look, use a colorful bowl and add more parsley and lemon zest on top. This dish makes any meal feel special. Try it with your favorite main dish! {{image_2}} You can easily make this dish vegan. Just skip any cheese or creamy additions. The base recipe, using only veggies and olive oil, suits all diets. You can also add plant-based protein, like chickpeas or lentils, for more substance. These additions blend well with the roasted flavors. Feel free to mix in other veggies. Carrots, asparagus, or broccoli work great. Each veggie brings a different taste and texture. Try to cut them to similar sizes, so they roast evenly. This adds color and nutrients to your dish. You can also use seasonal vegetables for a fresh twist. Want more heat? Add extra red pepper flakes or a dash of hot sauce. For a milder dish, reduce the red pepper flakes. You can also try different spices, like cumin or curry powder, to change the flavor profile. Experimenting with spices can lead to exciting new tastes. After making the zesty roasted zucchini medley, let it cool down. This step helps keep your dish fresh. Store your cooled medley in an airtight container. It can last in the fridge for about 4 to 5 days. For best flavor, eat it within the first few days. Keep the dish in a single layer if you can. This method helps keep the veggies from getting mushy. To reheat your roasted zucchini medley, use an oven or stovetop. If using the oven, preheat it to 350°F (175°C). Spread the medley on a baking sheet. Heat for about 10-15 minutes, or until warm. For stovetop reheating, place the medley in a skillet over medium heat. Stir occasionally until it is hot enough for your taste. You can add a splash of olive oil for extra flavor. When meal prepping, consider making a double batch of this medley. It works well with various meals. Store it in single servings for easy use during the week. Add the roasted zucchini medley to salads, grain bowls, or as a side to proteins. For extra flavor, mix in fresh herbs or a squeeze of lemon juice just before serving. This simple step brightens the dish and makes it even more appealing. Check out the Full Recipe for more details on how to create this delicious side dish. Yes, you can freeze roasted zucchini. After roasting, let it cool completely. Then, place it in a freezer-safe bag or container. Remove as much air as possible to prevent freezer burn. It can last for up to three months in the freezer. When you’re ready to eat it, thaw overnight in the fridge. Reheat in the oven or skillet for the best texture. To avoid soggy zucchini, follow these tips: - Choose firm zucchinis: Look for ones that feel heavy and firm. - Slice evenly: Cut your zucchini into similar sizes to ensure even cooking. - Dry before cooking: Pat them dry with a paper towel after slicing. - Don’t overcrowd the pan: Give the pieces space on the baking sheet. This helps them roast, not steam. - Use high heat: Roast at 425°F (220°C) for a nice caramelization. You can pair zucchini with many dishes. Here are some ideas: - Grilled chicken or fish: The flavors complement each other well. - Quinoa or rice bowls: Add some protein like chickpeas or feta cheese. - Pasta dishes: Toss with your favorite pasta for a veggie boost. - Wraps or sandwiches: Use as a filling for a fresh touch. Try the Full Recipe for a tasty and easy zucchini side! In this post, we covered everything about making a tasty roasted zucchini medley. We discussed the key ingredients, step-by-step cooking methods, and helpful tips. You learned about variations for different diets and how to store leftovers properly. Remember, cooking can be fun and creative. Try different flavors and make this dish your own. Enjoy your delicious roasted zucchini medley alongside your favorite meals!
Flavorful Make-Ahead Zucchini Side for Easy Meals
Looking for a quick side dish that’s tasty and easy to make? Try my flavorful make-ahead zucchini side! This dish is perfect for busy weeknights
- Zucchini details and preparation You will need 2 medium zucchinis. Slice them into half-moons. This shape helps them cook evenly. Fresh zucchini gives the best taste and texture. - Seasoning ingredients and their roles Use 1 tablespoon of sesame oil for rich flavor. It adds a nice nutty taste. Add 1 tablespoon of soy sauce for saltiness. It boosts the overall flavor. Include 1 teaspoon of minced garlic and 1 teaspoon of grated ginger. These give a fragrant kick. Season with salt and pepper to your liking. - Optional garnish and enhancement ingredients Enhance your dish with 2 chopped green onions. They add color and a fresh bite. Sprinkle 1 tablespoon of toasted sesame seeds on top for crunch. For brightness, add a squeeze of fresh lemon juice. This step is optional but highly recommended. You can find the full recipe to create this tasty dish. To make hibachi zucchini, start by heating your skillet or hibachi grill. Set the heat to medium-high. Add 1 tablespoon of sesame oil and wait about 1 minute until it looks shiny. This oil brings a nutty flavor to the dish. Next, it's time to sauté the aromatics. Add 1 teaspoon of minced garlic and 1 teaspoon of grated ginger to the hot oil. Cook them for about 30 seconds. You want to smell their sweet aroma but be careful not to burn them. They add a deep flavor to the zucchini. Now, let’s cook the zucchini. Slice 2 medium zucchinis into half-moons. Toss them into the skillet and stir well. Make sure the zucchini gets coated in the garlic and ginger mixture. Drizzle in 1 tablespoon of soy sauce, and sprinkle salt and pepper to taste. Stir-fry for about 5 to 7 minutes. You want the zucchini tender but still slightly crunchy. Just before you finish, toss in 2 chopped green onions and stir for another minute. If you like a zesty touch, add a squeeze of fresh lemon juice. This brightens the flavors. Finally, remove the skillet from the heat and sprinkle 1 tablespoon of toasted sesame seeds on top. Your hibachi zucchini is ready to serve! For the full recipe, check out the complete instructions above. To cook zucchini perfectly, follow these tips. First, slice your zucchini evenly. This helps them cook at the same rate. Aim for half-moon shapes, about a quarter-inch thick. Next, heat your skillet or hibachi grill well. A hot surface sears the zucchini. This adds flavor and keeps them crisp. Use sesame oil, as it gives a rich taste. For the best stir-fry, keep moving the zucchini. Stir often to coat them in the garlic and ginger mix. This ensures every bite is full of flavor. Recommended cooking tools include a large spatula for flipping and a sharp knife for slicing. A sturdy skillet or hibachi grill is essential for even cooking. You can enhance flavor profiles by trying different sauces. Swap soy sauce for tamari for a gluten-free option. Add a dash of chili sauce for heat. A sprinkle of balsamic vinegar can add a sweet twist. Finally, don’t forget the garnishes! Green onions and sesame seeds brighten the dish. A squeeze of fresh lemon juice adds brightness. You can find the full recipe to make this delicious dish at home. {{image_2}} You can easily mix things up with hibachi zucchini. Here are some fun ideas. Adding proteins: You can add shrimp, chicken, or tofu to your dish. They bring extra flavor and texture. Just cook them first, then add the zucchini. This way, you have a hearty meal that satisfies. Incorporating additional vegetables: Try adding bell peppers, mushrooms, or carrots. They add color and crunch. Mix them in with the zucchini for a tasty veggie medley. You can use what you have at home. Spicy variations for heat lovers: If you like heat, add red pepper flakes or sriracha. Start with a little, then taste and adjust. This will give your dish a nice kick. You can also try adding jalapeños for extra spice. Feel free to explore these variations in the full recipe. Each twist will make your hibachi zucchini unique and exciting! To keep your hibachi zucchini fresh, start by storing leftovers in an airtight container. This method helps maintain its taste and crunch. You can keep it in the fridge for up to three days. When it comes to reheating, I recommend using a skillet. Just heat it on medium for a few minutes. This way, your zucchini stays tasty and doesn’t turn mushy. Stir it gently to warm evenly. If you want to freeze zucchini dishes, slice the zucchini before cooking. Blanch the slices in boiling water for about one minute. This step helps keep the color and flavor. Then, cool them in ice water, drain, and pack in freezer bags. They can last up to three months. To thaw, move the bag to the fridge overnight. You can also use the microwave but be careful. The zucchini can become too soft. Enjoy your hibachi zucchini at its best! What is the best way to cut zucchini for stir-frying? Cutting zucchini into half-moons works best for stir-frying. This shape allows for even cooking. Slice the zucchini in half lengthwise, then cut each half into thin half-moons. Keep the pieces similar in size to ensure they cook evenly. Can I use other vegetables in this recipe? Yes, you can use other vegetables! Bell peppers, mushrooms, and carrots all add flavor and color. Just remember to cut them into similar sizes as the zucchini. This way, they cook at the same rate and create a nice mix. How can I make this dish vegan-friendly? Making this dish vegan is easy! Just stick to the veggies and replace the soy sauce with a vegan alternative. You can also add tofu for protein. This keeps the dish tasty and plant-based. Why is sesame oil important in this recipe? Sesame oil brings a rich, nutty flavor to the zucchini. It enhances the taste of garlic and ginger, creating a flavor explosion. Using sesame oil also adds depth, making the dish feel special and satisfying. For the complete details, check out the Full Recipe. This article covered how to make Japanese Steakhouse Hibachi Zucchini. We explored the key ingredients and their roles, along with easy step-by-step cooking instructions. I shared tips for perfecting your stir-frying and suggested variations to keep it fresh. Proper storage techniques help maintain flavor, while answering your common questions ensures success. Now, get ready to create a delicious dish that impresses. Enjoy cooking and experimenting with flavors!
Japanese Steakhouse Hibachi Zucchini Flavor Explosion
Ready to experience a flavor explosion with Japanese Steakhouse Hibachi Zucchini? You’ll love this easy dish that packs a punch. It’s packed with sweet, tender
To make this tasty dish, you need a few key ingredients. Here’s what you will need: - 1 bunch of fresh asparagus, trimmed - 2 medium zucchinis, sliced into half-moons - 2 tablespoons olive oil - 3 cloves garlic, minced - 1 teaspoon lemon zest - 1 teaspoon smoked paprika - Salt and pepper to taste These ingredients work perfectly together. The asparagus adds a nice crunch, while the zucchini softens as it cooks. The garlic and lemon zest brighten the dish, and smoked paprika adds depth. You can add a few optional ingredients to boost the taste even more: - 2 tablespoons grated Parmesan cheese (optional) - Fresh parsley, chopped for garnish Parmesan cheese gives a rich flavor that elevates the dish. Chopped parsley adds a fresh touch. You can mix and match these as you like! Using the right tools can make cooking easier. Here are what I recommend: - A large mixing bowl - A baking sheet - A sharp knife for chopping - A cutting board - A measuring spoon These tools help you prepare your veggies quickly. A good knife will make slicing the zucchini easier. A baking sheet allows for even roasting, giving you that perfect texture. For the full recipe, you can find it [here](#). Enjoy cooking! Start by gathering your ingredients. You need fresh asparagus and zucchini. Trim the asparagus to remove the tough ends. Slice the zucchinis into half-moons. Aim for even sizes. This helps them cook at the same time. Rinse the vegetables under cold water. Pat them dry with a clean towel. This step removes dirt and helps oil stick better. In a large mixing bowl, add the asparagus and zucchini. Drizzle olive oil over them. Next, add minced garlic, lemon zest, smoked paprika, salt, and pepper. Use your hands to toss the veggies. Make sure each piece gets coated. This mix adds a lot of flavor. You can also add Parmesan cheese if you like. Preheat the oven to 425°F (220°C). Spread the seasoned veggies in a single layer on a baking sheet. Avoid crowding the pan. Give them space to roast evenly. Roast for 15-20 minutes. Check for tenderness and slight crispiness. For added flavor, sprinkle Parmesan cheese during the last 5 minutes. Once done, garnish with chopped parsley. Enjoy your flavorful asparagus with zucchini! For the complete recipe, check out the Full Recipe section. To roast asparagus and zucchini perfectly, start with fresh, bright vegetables. Trim the ends of the asparagus to remove any tough parts. Slice the zucchini into even half-moons to ensure they cook at the same rate. Preheat your oven to 425°F (220°C) to get a nice crisp. Spread the veggies in a single layer on the baking sheet. This allows hot air to circulate and gives you that lovely, caramelized finish. Adding flavors is key to bringing out the best in your veggies. I love using garlic for its strong aroma. It complements the natural sweetness of asparagus and zucchini. Lemon zest brightens the dish and adds a refreshing touch. Try using smoked paprika for a hint of warmth and smokiness. If you enjoy cheese, sprinkle grated Parmesan on top near the end of roasting for a savory finish. Fresh parsley adds color and a fresh taste when you serve it. One common mistake is overcrowding the baking sheet. This causes steaming instead of roasting. Always give the veggies enough space. Another mistake is not preheating the oven. Roasting in a hot oven is crucial for that perfect texture. Also, don’t forget to toss the vegetables in oil and spices. This step ensures even coating and flavor throughout. Finally, keep an eye on the timer. Overcooking can lead to mushy veggies, so check them frequently. For more details, check the Full Recipe. {{image_2}} You can easily boost the protein in this dish. Chicken and shrimp work very well here. For chicken, use boneless, skinless breasts or thighs. Cut them into bite-sized pieces. Season them with the same spices. Then, roast them with the vegetables. For shrimp, use large, peeled shrimp. Toss them in with the veggies in the last five minutes of cooking. Both options add flavor and make this dish more filling. If you want to add more veggies, go for it! Bell peppers, carrots, or cherry tomatoes add color and taste. You can also use mushrooms for an earthy flavor. Just chop them into similar sizes as the asparagus and zucchini. Mix them in with the original recipe. This way, you keep everything balanced and tasty. Each veggie brings its own twist to the dish. To change the flavor, play with herbs and spices. Fresh basil or thyme can brighten up the dish. Dried oregano or rosemary gives a warm touch. You can also try a pinch of red pepper flakes for some heat. Just add a little at a time. Taste as you go to find your perfect mix. Experimenting with flavors makes this dish unique every time you cook it. For more ideas, check out the Full Recipe. To keep your leftover flavorful asparagus with zucchini fresh, place it in an airtight container. This will help prevent moisture loss and keep the veggies crisp. Store it in the fridge. It will stay good for up to three days. You can also wrap it tightly in plastic wrap if you prefer that method. When you are ready to enjoy the leftovers, avoid the microwave. It can make your veggies soggy. Instead, heat a skillet over medium heat. Add a splash of olive oil and toss in the asparagus and zucchini. Stir them for about five minutes until they are warm. This method helps keep the veggies crispy and flavorful. If you want to save your dish for later, freezing is a great option. Start by letting the veggies cool completely. Then, pack them into freezer bags, removing as much air as possible. Label the bags with the date. Your flavorful asparagus with zucchini can last about three months in the freezer. When you are ready to eat, thaw in the fridge overnight and reheat as mentioned above. For the full recipe, check out the instructions earlier in the article. Yes, you can use frozen asparagus or zucchini. Just note that the texture may change. Frozen veggies often hold more water. This can make them soggy when cooked. If you use frozen, try roasting them a bit longer. This helps them crisp up. You can serve this dish with many options. Grilled chicken or fish pairs well. Quinoa or rice adds a nice base. You can also enjoy it on pasta. Try it alongside a fresh salad for a balanced meal. You can tell the veggies are done by looking at their color and feel. Asparagus should be bright green and tender. Zucchini should turn golden and soft. You can poke them with a fork. If they feel soft but not mushy, they are ready. For the best results, check around 15 minutes into roasting. This is when they start to get crispy. Enjoy creating this flavorful asparagus with zucchini! For the full recipe, check out the details above. This blog post explored how to make flavorful asparagus with zucchini. We looked at essential ingredients, tools, and step-by-step instructions for cooking. I shared tips for roasting, flavoring, and variations like adding chicken or veggies. I also covered proper storage and answered frequently asked questions. Remember, using fresh ingredients and the right techniques makes a big difference. Enjoy making this dish your own, and have fun experimenting with flavors!
Flavorful Asparagus with Zucchini Easy Veggie Dish
Looking to brighten up your weekly meals? This Flavorful Asparagus with Zucchini Easy Veggie Dish is the answer! Packed with fresh flavors and simple steps,
You can use many vegetables for quick pickles. Here are my favorites: - 1 cup thinly sliced cucumbers - 1 cup thinly sliced radishes - 1 cup julienned carrots - 1 cup thinly sliced bell peppers (mix of colors) These veggies add bright colors and crunch. They also soak up flavors well. The pickling liquid is key for taste. This mix gives your pickles a zing. You'll need: - 1 cup white vinegar - 1 cup water - 2 tablespoons sugar - 1 tablespoon salt The vinegar adds tartness. Sugar balances it out. Salt helps preserve and enhance flavors. You can make your pickles unique with other spices. Here’s what I like to add: - 1 teaspoon mustard seeds - 1 teaspoon coriander seeds - 1 teaspoon crushed red pepper flakes (adjust for spice preference) - Fresh dill sprigs for garnish These spices add depth. They give your pickles a special twist. Feel free to experiment with your favorites! For the complete recipe, check out the Full Recipe section. First, gather your veggies. You will need cucumbers, radishes, carrots, and bell peppers. Wash them well. Thinly slice each cucumber and radish. Julienning the carrots gives nice texture. Slice the bell peppers, mixing colors for a fun look. Place all the sliced veggies in a large mixing bowl. Toss them gently to ensure they mix evenly. Now, let’s make the brine. In a saucepan, combine one cup of white vinegar, one cup of water, two tablespoons of sugar, and one tablespoon of salt. Add one teaspoon of mustard seeds and one teaspoon of coriander seeds for flavor. If you like heat, include one teaspoon of crushed red pepper flakes. Heat this mixture over medium heat. Stir until it simmers and the sugar dissolves. Once your brine is ready, pour it over the veggies in the bowl. Ensure all the vegetables are submerged. Let the mixture cool at room temperature for about 20-30 minutes. After that, transfer everything to a sterilized jar or airtight container. Seal it tightly and place it in the fridge. For the best taste, let the veggies pickle overnight. You can serve them chilled, garnished with fresh dill sprigs. Enjoy your zesty rainbow quick pickles! Check the Full Recipe for more details. To make the best quick pickles, always use fresh vegetables. Fresh veggies taste better and crunchier. Slice them evenly for uniform pickling. Thin slices allow the flavors to soak in quickly. Try to use a mix of colors for a vibrant look. This makes them fun to eat and pretty on the plate. Keep your jars clean and sterilized to avoid spoilage. Adding spices boosts the flavor of your pickles. Mustard seeds and coriander seeds add a warm taste. For extra heat, use crushed red pepper flakes, adjusting to your liking. Fresh dill sprigs give a nice herbal touch. You can also try garlic cloves for a punchy flavor. Experiment with different herbs to find your favorite mix. Using a bit of sugar balances the vinegar's tartness. One common mistake is skimping on the pickling liquid. Make sure your veggies are fully submerged. If not, they will not pickle evenly. Don’t rush the cooling process. Allow the brine to cool before pouring it over the vegetables. This helps preserve the crunch. Avoid using old or wilted vegetables. They won’t give you the best taste or texture. Always taste your brine before adding it to the veggies. Adjust the seasoning if needed. {{image_2}} You can mix and match many vegetables for quick pickles. Try using: - Cauliflower florets - Thinly sliced red onions - Shredded cabbage - Baby carrots These choices work well with the zesty brine. Each veggie adds its own taste and crunch. You can even use leftover vegetables from your fridge. Be creative! To make your quick pickles stand out, add unique flavors. Here are some ideas: - Fresh garlic cloves - Ginger slices - Bay leaves - Lemon zest These additions change the taste and make the pickles special. Experiment with flavors that you enjoy. Seasonal vegetables can enhance your pickling experience. In spring, use: - Asparagus - Radishes In summer, try: - Green beans - Zucchini In fall, pick: - Beets - Brussels sprouts Using seasonal vegetables not only tastes great but also supports local farms. For the full recipe, make sure to check out the zesty rainbow quick pickles. Store your quick pickled vegetables in a clean, airtight jar. Glass jars work best. Make sure the vegetables stay submerged in the brine. This keeps them fresh and tasty. Always use a lid that seals well to avoid air exposure. Quick pickles can last about 1 to 2 weeks in the fridge. For the best taste, eat them within a week. Keep the jar in the fridge right after pickling. Do not leave them out at room temperature. This helps prevent spoilage. If you want to keep them longer, think about canning. Canning may extend their shelf life up to a year. Check for signs of spoilage. If the color changes or the pickles smell bad, toss them out. Look for mold or off textures. If you see bubbles in the jar that weren't there before, that’s a red flag too. Always trust your senses to keep your food safe. Quick pickled vegetables can last for about 2 to 4 weeks in the fridge. The vinegar helps preserve them. Always check for any signs of spoilage, like off smells or changes in color. Store them in a clean, tight jar to keep them fresh. Yes, you can use many vegetables for pickling. Some favorites include cauliflower, green beans, and red onions. Just remember to slice them thinly for the best results. Mixing different veggies adds fun colors and flavors to your pickles. Pickled vegetables are tasty and nutritious. They often contain probiotics, which are good for gut health. Pickles can add vitamins and minerals to your meals. They also make great low-calorie snacks, helping you stay full longer. Yes, heating the pickling liquid helps dissolve the sugar and salt. This step also ensures the veggies absorb the flavors better. Just bring the mixture to a simmer, then pour it over your veggies. You can reuse pickling brine for a second batch. Just remember to add fresh vegetables. However, the flavor may decrease after the first use. If the brine looks cloudy or smells off, it’s best to make a new batch. For the full recipe, check out the Zesty Rainbow Quick Pickles. In this post, we explored how to quick pickle vegetables. We covered essential ingredients, step-by-step instructions, and helpful tips. You now know how to prep vegetables, create a tasty brine, and store pickles safely. Pickling lets you enjoy fresh flavors all year. Experiment with different veggies and spices. With practice, your pickling skills will shine. Enjoy your crunchy, tangy creations!
Quick Pickled Vegetables Easy and Tasty Recipe
Are you ready to add crisp, tangy flavor to your meals? Quick pickled vegetables are a fast and fun way to elevate your dishes. In