Dinner
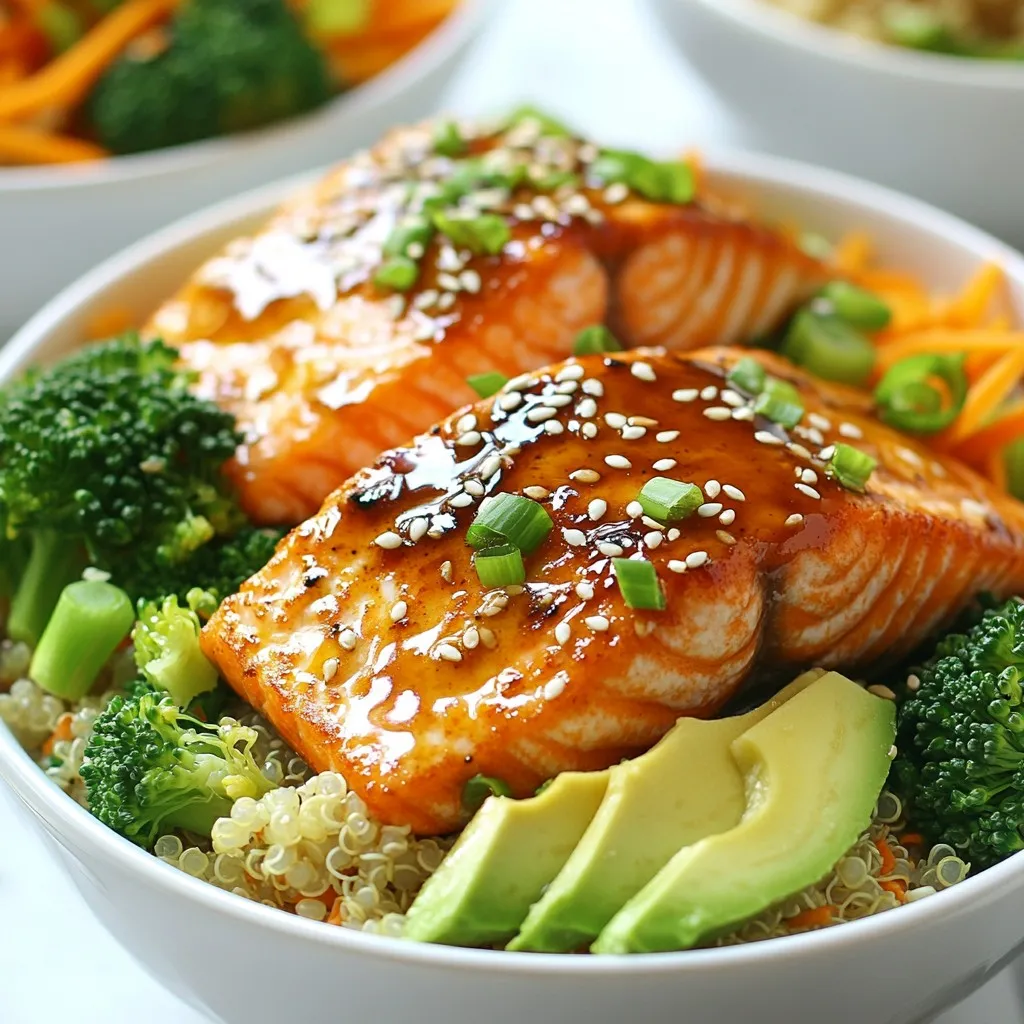
Honey Garlic Salmon Bowls Simple and Healthy Recipe
Are you ready to delight your taste buds with a simple and healthy recipe? Honey Garlic Salmon Bowls provide a delicious blend of flavors and
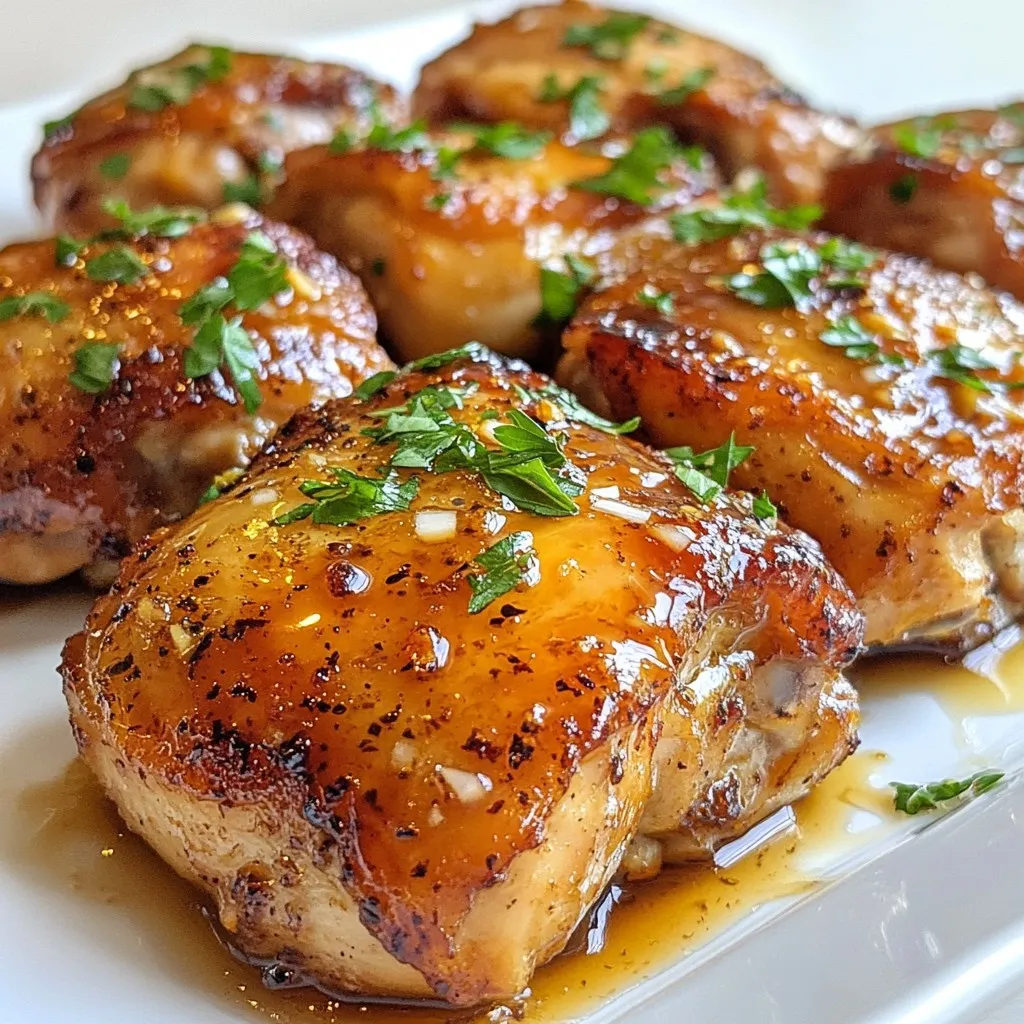
Five Minute Air Fryer Maple Chicken Delight Recipe
Are you ready to whip up a quick and tasty dinner? My Five Minute Air Fryer Maple Chicken Delight Recipe makes cooking easy and delicious!
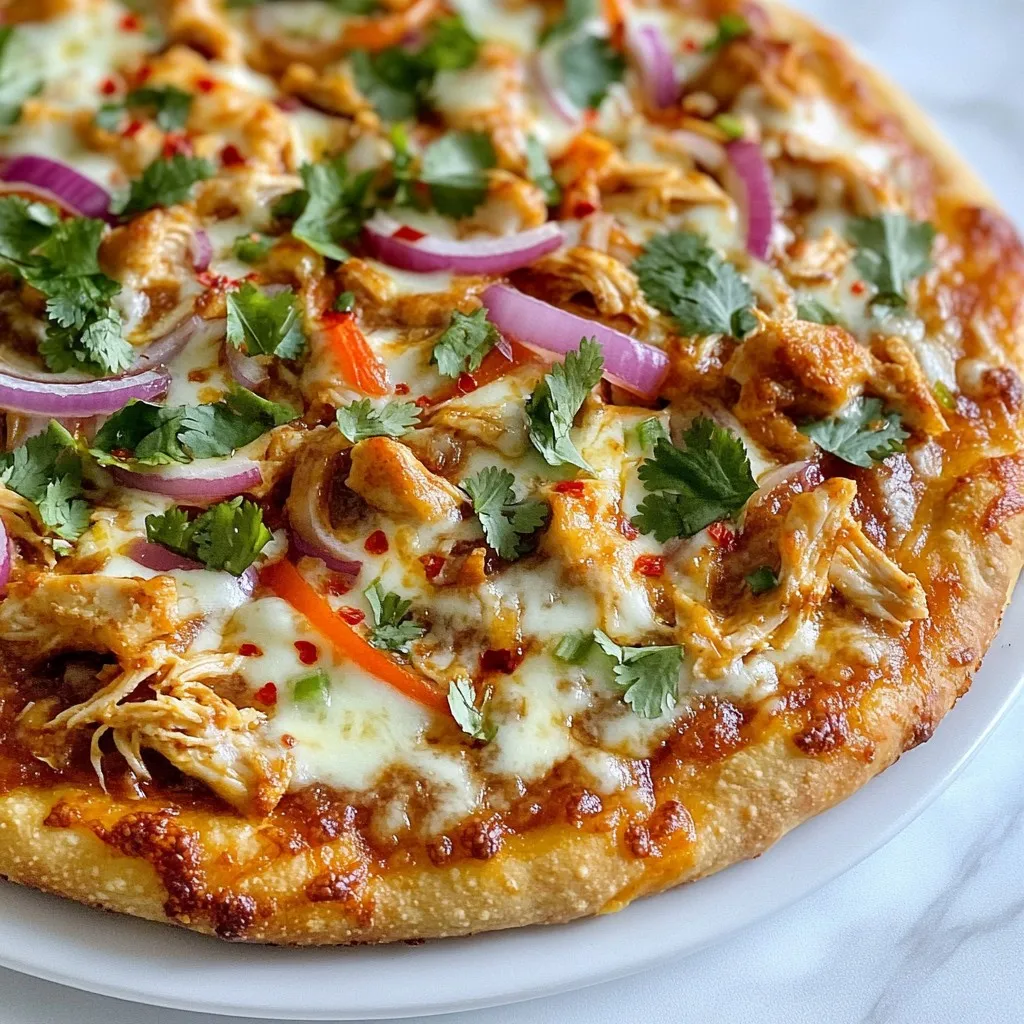
Chili Garlic Chicken Pizza Tasty and Simple Recipe
Are you ready to spice up your pizza night? This Chili Garlic Chicken Pizza is a game changer! With bold flavors and simple ingredients, you

Copycat Outback Potato Soup Flavorful and Creamy Dish
If you love the bold, creamy taste of Outback Potato Soup, you’re in for a treat! I’m about to share my copycat recipe that makes
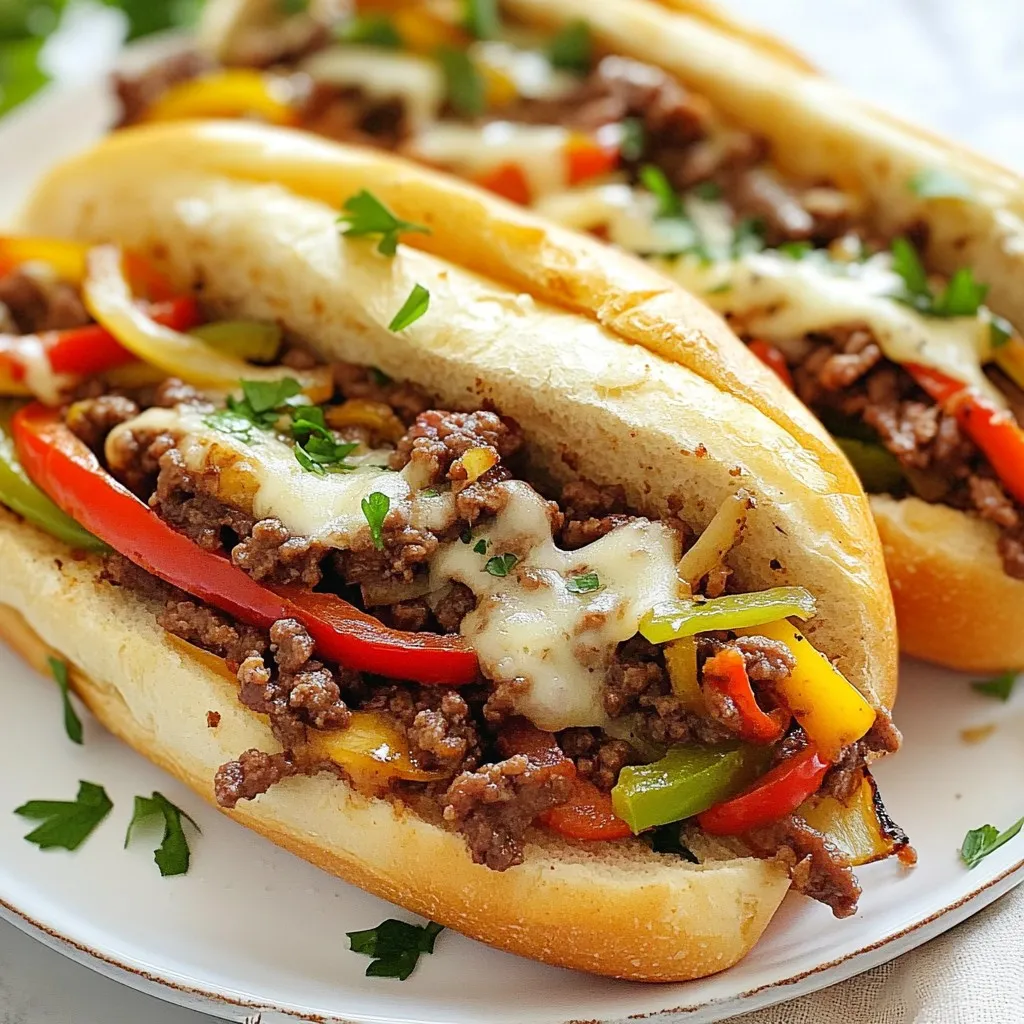
Ground Beef Philly Cheesesteaks Tasty and Easy Meal
Craving a delicious meal that’s quick to make? Ground Beef Philly Cheesesteaks are your answer! These hearty sandwiches burst with flavor and are super easy
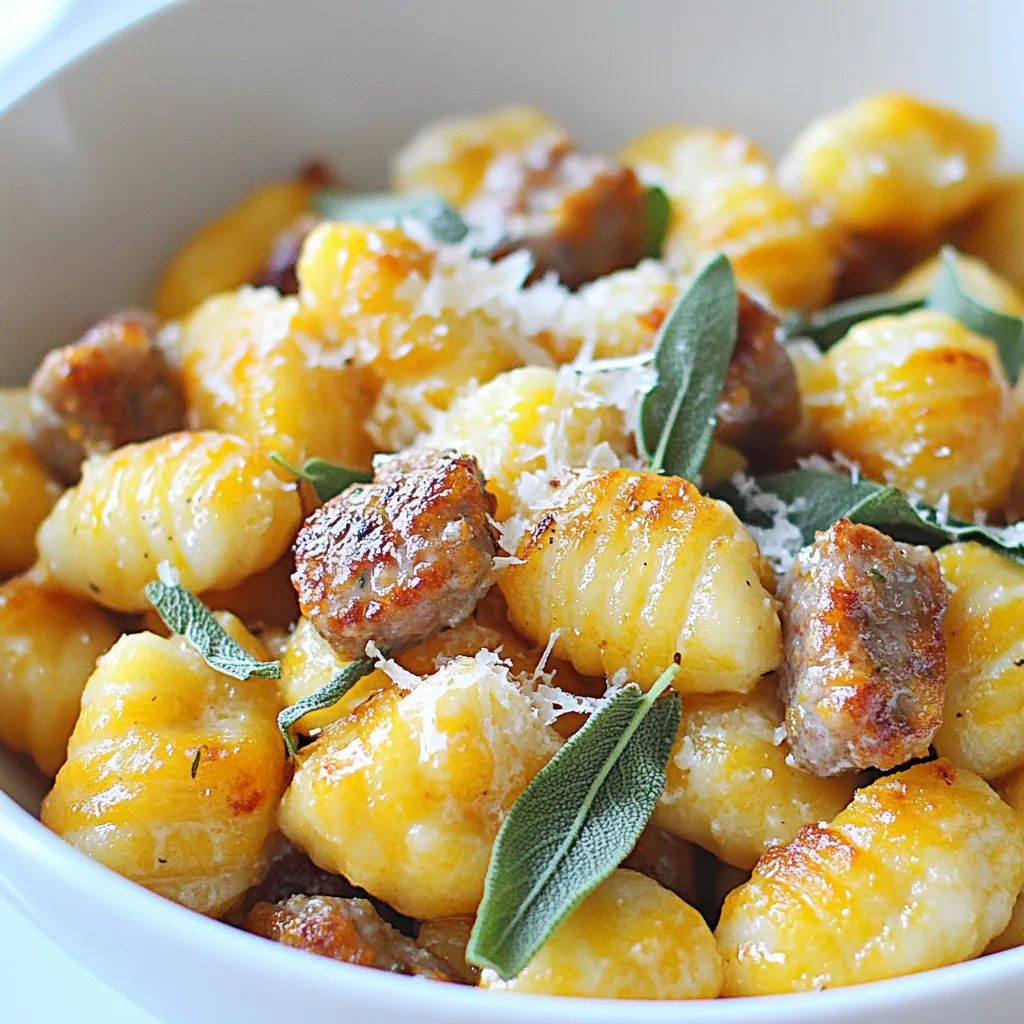
Butternut Squash Gnocchi with Sausage Delight
Get ready to impress your family and friends with my Butternut Squash Gnocchi with Sausage Delight! This dish brings together tender gnocchi and savory sausage,
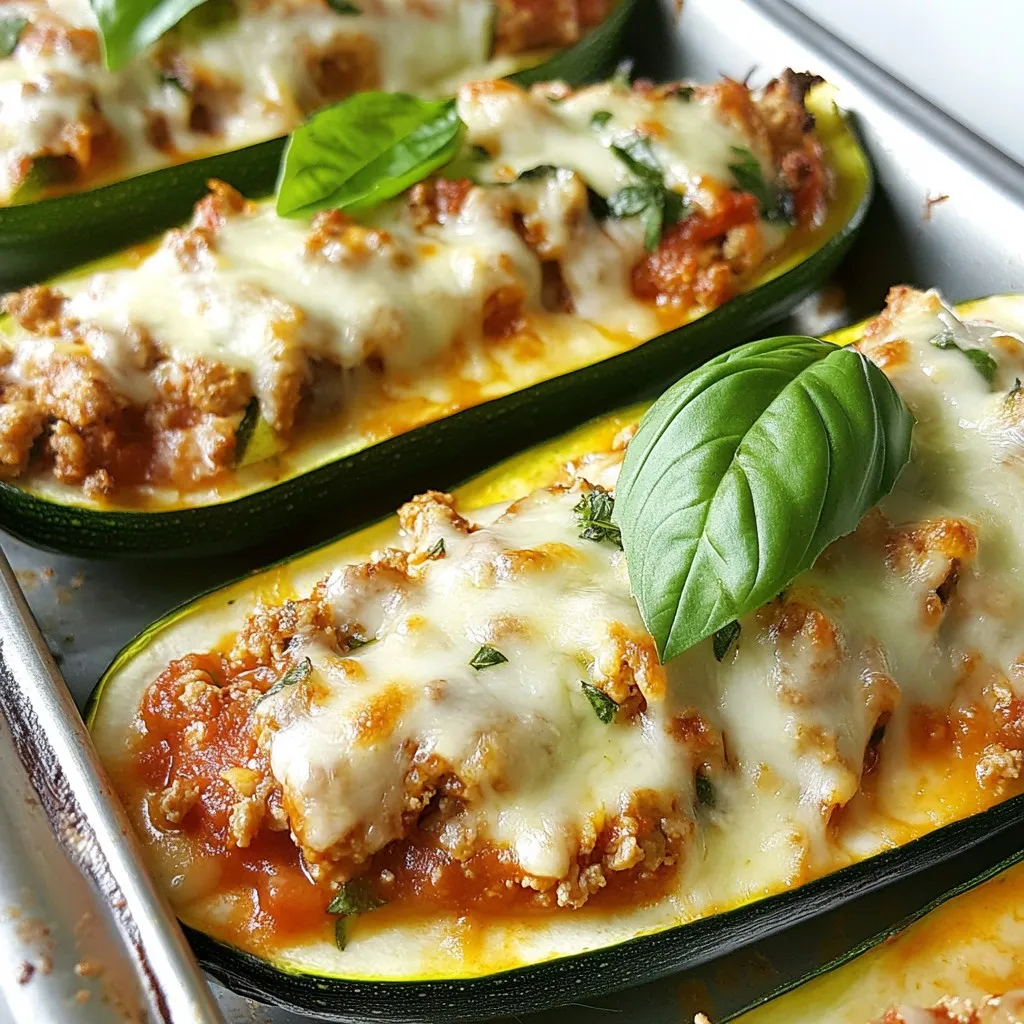
Savory Chicken Parmesan Stuffed Zucchini Boats Recipe
Are you ready to dive into a delicious and healthy meal? My Chicken Parmesan Stuffed Zucchini Boats are not just tasty; they are easy to
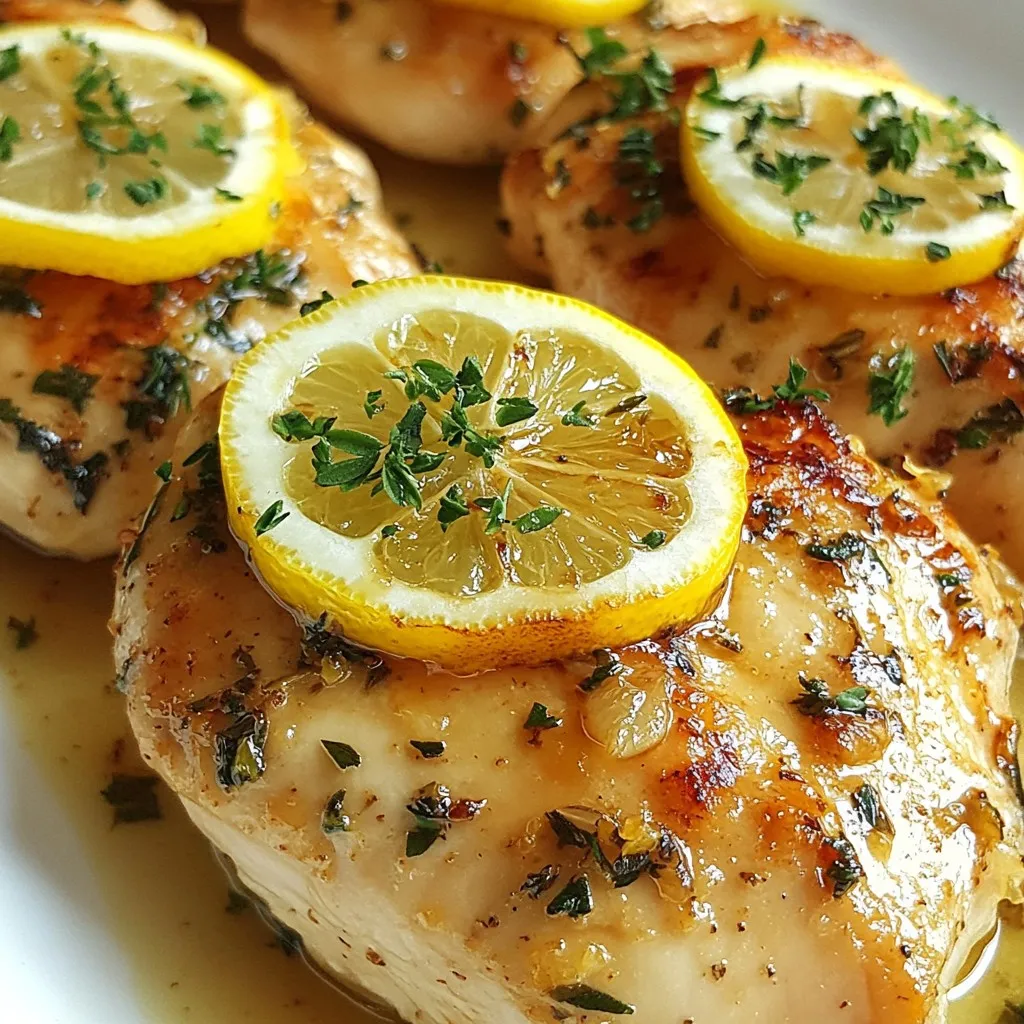
Lemon Baked Chicken Simple and Flavorful Dish
Are you ready to impress your family with a simple yet tasty dish? Lemon Baked Chicken is just what you need! This recipe brings together
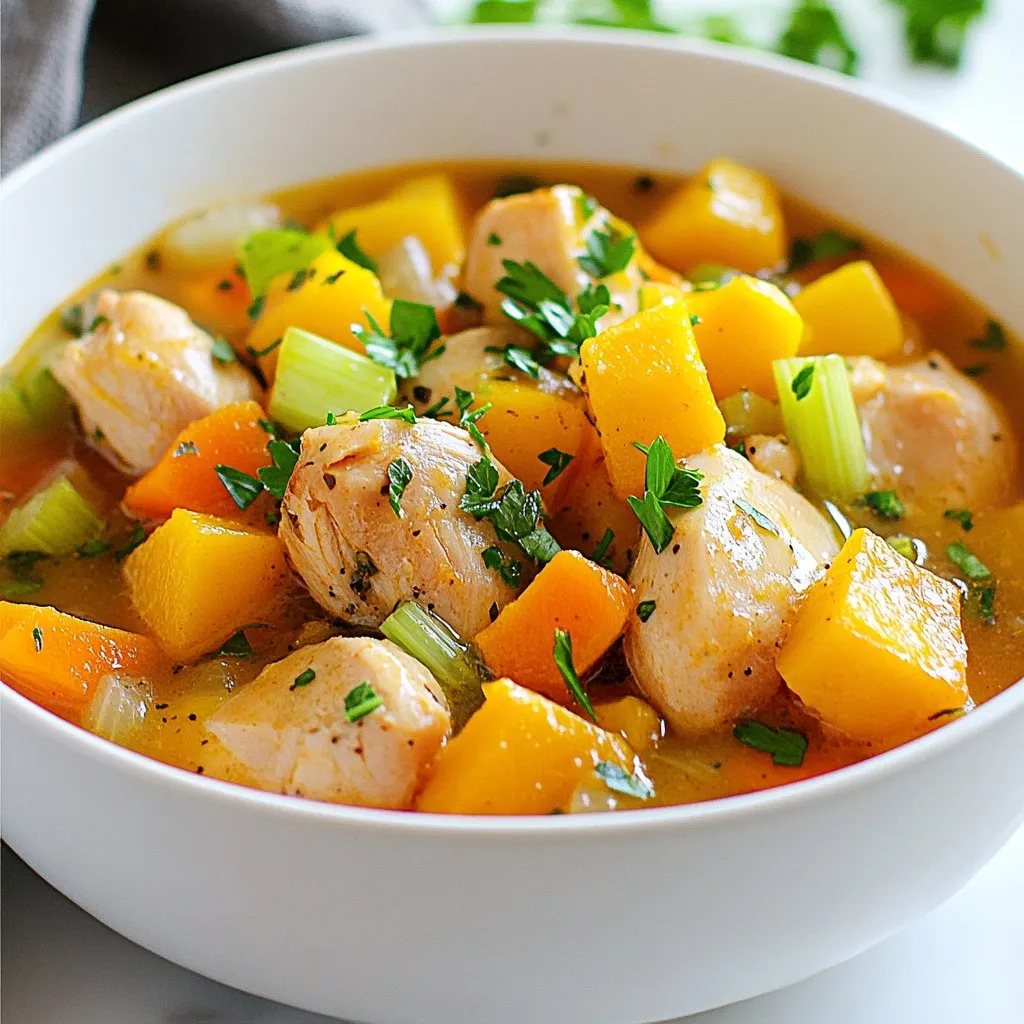
Crockpot Butternut Squash Chicken Stew Hearty Comfort Food
Welcome to your new favorite comfort food: Crockpot Butternut Squash Chicken Stew! This dish is easy to make and packed with flavors. You’ll enjoy tender
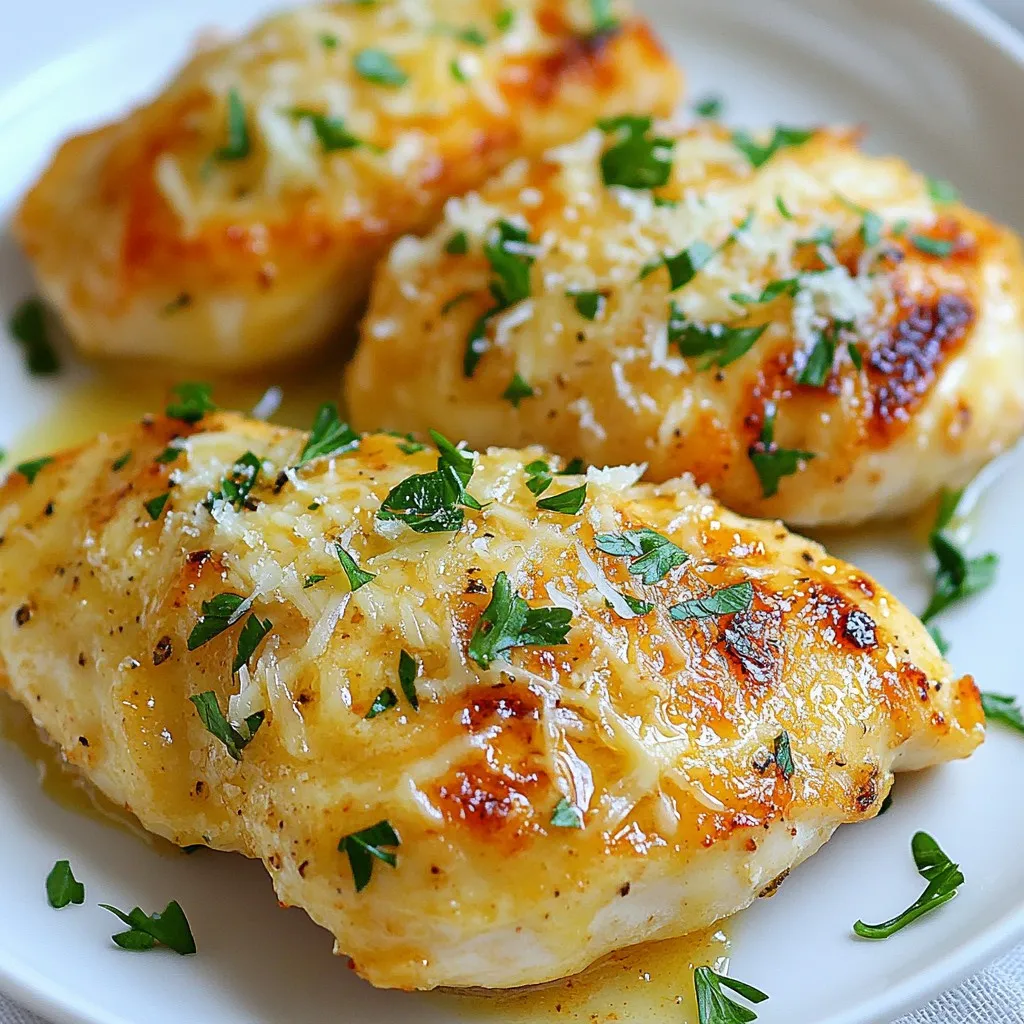
Minute Garlic Parmesan Chicken Quick and Easy Meal
Are you ready for a tasty meal that’s quick and simple? I’m excited to share my Minute Garlic Parmesan Chicken recipe with you! This dish