Dinner

To make these easy chicken and rice bowls, gather the following items: - 2 cups cooked brown rice - 1 lb chicken breast, diced - 1 tablespoon olive oil - 1 small onion, chopped - 2 cloves garlic, minced - 1 bell pepper (any color), diced - 1 cup corn (canned or frozen) - 1 teaspoon cumin - 1 teaspoon paprika - Salt and pepper to taste - 1 avocado, sliced - Fresh cilantro, chopped (for garnish) - Lime wedges (for serving) These ingredients work together to create a balanced meal. The chicken provides protein, while the rice gives you carbs. The veggies add fiber and color. You can change some ingredients to fit your taste or needs. Use quinoa instead of brown rice for a nutty flavor. If you like spice, use a spicy pepper instead of a bell pepper. You can replace chicken with tofu or beans for a vegetarian option. For a creamy twist, add Greek yogurt instead of avocado. If you want less fat, skip the oil and cook with broth instead. Each bowl packs a punch! Here’s a quick look at the basics: - Calories: About 450 per serving - Protein: 30g - Carbohydrates: 50g - Fat: 15g - Fiber: 6g This meal is not just tasty; it’s also filling and good for you. Enjoy your meal while knowing you are nourishing your body! For the full recipe, check the link above. First, gather your ingredients. You will need: - 2 cups cooked brown rice - 1 lb chicken breast, diced - 1 tablespoon olive oil - 1 small onion, chopped - 2 cloves garlic, minced - 1 bell pepper (any color), diced - 1 cup corn (canned or frozen) - 1 teaspoon cumin - 1 teaspoon paprika - Salt and pepper to taste - 1 avocado, sliced - Fresh cilantro, chopped (for garnish) - Lime wedges (for serving) Start by heating the olive oil in a large skillet over medium heat. Once hot, add the chopped onion. Sauté it until it turns soft and clear, which takes about 3-4 minutes. Next, add the minced garlic and cook for an extra minute. This step makes the kitchen smell amazing! Now, toss in the diced chicken breast. Season it with cumin, paprika, salt, and pepper. Stir everything well and cook for 5-7 minutes. Ensure the chicken turns white and is cooked through. It should not be pink anymore. After that, add the diced bell pepper and corn. Cook for another 3-4 minutes. This will make the peppers tender and warm the corn. Making this dish is easy, but a few tips help. Always cut the chicken into even pieces. This way, they cook at the same speed. If you want more flavor, marinate the chicken in spices for a few minutes before cooking. Fluff the cooked brown rice with a fork before serving. This keeps it light and airy. When serving, divide the rice evenly among bowls. 1. Heating Oil: Start with the olive oil in a skillet. 2. Sautéing Onion: Cook until the onion is clear. 3. Adding Garlic: Stir in the garlic for a fragrant aroma. 4. Cooking Chicken: Add chicken with spices and stir. 5. Adding Veggies: Toss in bell peppers and corn. 6. Serving: Layer rice then chicken mix, topped with avocado and cilantro. By following these steps, you will create a vibrant and tasty meal. For the complete details, refer to the Full Recipe. To cook chicken perfectly, start with even-sized pieces. This helps them cook at the same rate. Always use a hot skillet with oil. I like to keep the heat at medium. This way, the chicken gets a nice sear. Cook it until it’s no longer pink inside. A meat thermometer helps. Aim for 165°F for safety. Herbs and spices can make your chicken burst with flavor. I love using cumin and paprika in this dish. They add warmth and depth. Fresh herbs like cilantro or parsley can brighten the meal. You can also add a squeeze of lime juice for a zesty kick. Don't shy away from experimenting. Each spice can change the taste in fun ways! Presentation matters when serving your chicken and rice bowls. Use colorful bowls to make your meal pop. Start with a base of rice. Layer your chicken and veggies on top. I like to arrange them neatly for a pretty look. Finish with sliced avocado and a sprinkle of cilantro. Add lime wedges on the side for a fresh touch. This makes the meal look inviting and tasty! {{image_2}} You can change the sauce to boost flavor in your chicken and rice bowls. Soy sauce adds a salty taste, while teriyaki sauce brings a hint of sweetness. If you love spice, try sriracha or chili garlic sauce. These sauces mix well with the savory chicken. You can also use a creamy dressing, like ranch or Caesar, for a unique twist. Want to make your meal more colorful and healthy? Add more veggies! Broccoli, zucchini, or carrots work great in this dish. Just chop them small so they cook fast. You can stir them in with the chicken or serve them on top. You’ll get more vitamins, and it makes the meal look pretty. If you like heat, you can easily spice up your chicken and rice bowls. Add diced jalapeños or a sprinkle of red pepper flakes while cooking. For a smoky flavor, try chipotle powder. You can also serve hot sauce on the side for those who want extra kick. Adjust the spice level to suit your taste, and enjoy the heat! For the full recipe, check out the Savory Chicken & Rice Bowls. To keep your chicken and rice bowls fresh, let them cool first. Use airtight containers for storage. Place the leftovers in the fridge. They will last up to three days. Make sure to separate the rice and chicken if possible. This keeps the rice from getting soggy. When you're ready to eat, reheating is easy. You can use a microwave or a skillet. If using a microwave, cover the bowl with a damp paper towel. This keeps the moisture in. Heat for about one to two minutes. Stir halfway to ensure even warming. If you're using a skillet, add a splash of water to the pan. Heat on low, stirring until warm. To freeze your chicken and rice bowls, use freezer-safe containers. Portion them out for easy meals later. Make sure to leave some space at the top of the container. Food expands when frozen. They can last up to three months in the freezer. When ready to enjoy, thaw in the fridge overnight. Then, reheat as mentioned above. This makes it easy to have a tasty meal ready at any time! For the complete recipe, check the Full Recipe section. To make Easy Chicken & Rice Bowls from scratch, you need simple steps. First, cook your rice. I recommend brown rice for health. Next, sauté onion and garlic in olive oil. Add diced chicken, spices, and vegetables. Cook until the chicken is done. Serve the chicken mix over rice and top with avocado and cilantro. You can find the full recipe above for more details. Yes, you can use brown rice instead of white rice. Brown rice adds fiber and nutrients. It also has a nutty flavor that pairs well with chicken. Cooking time for brown rice is longer, so plan accordingly. You can use various proteins in this recipe. Try diced turkey or pork for a change. Shrimp also works well if you like seafood. Tofu is a great vegetarian option too. Just cook it until golden and add it to your bowls. To make this dish vegetarian or vegan, swap the chicken for tofu or tempeh. Use vegetable broth for extra flavor. You can add more veggies like zucchini or spinach. This keeps the meal filling and tasty without meat. Many side dishes pair nicely with chicken and rice bowls. A fresh salad adds crunch and color. Steamed broccoli or green beans offer a healthy touch. You can also serve warm tortillas for extra fun. We discussed bold ingredients and easy steps to make chicken and rice bowls. Substitutions help if you lack something. We also covered storage and reheating tips to keep your meal fresh. Remember, you can spice things up with different sauces and veggies. Have fun with flavors and make it your own. Enjoy your cooking!
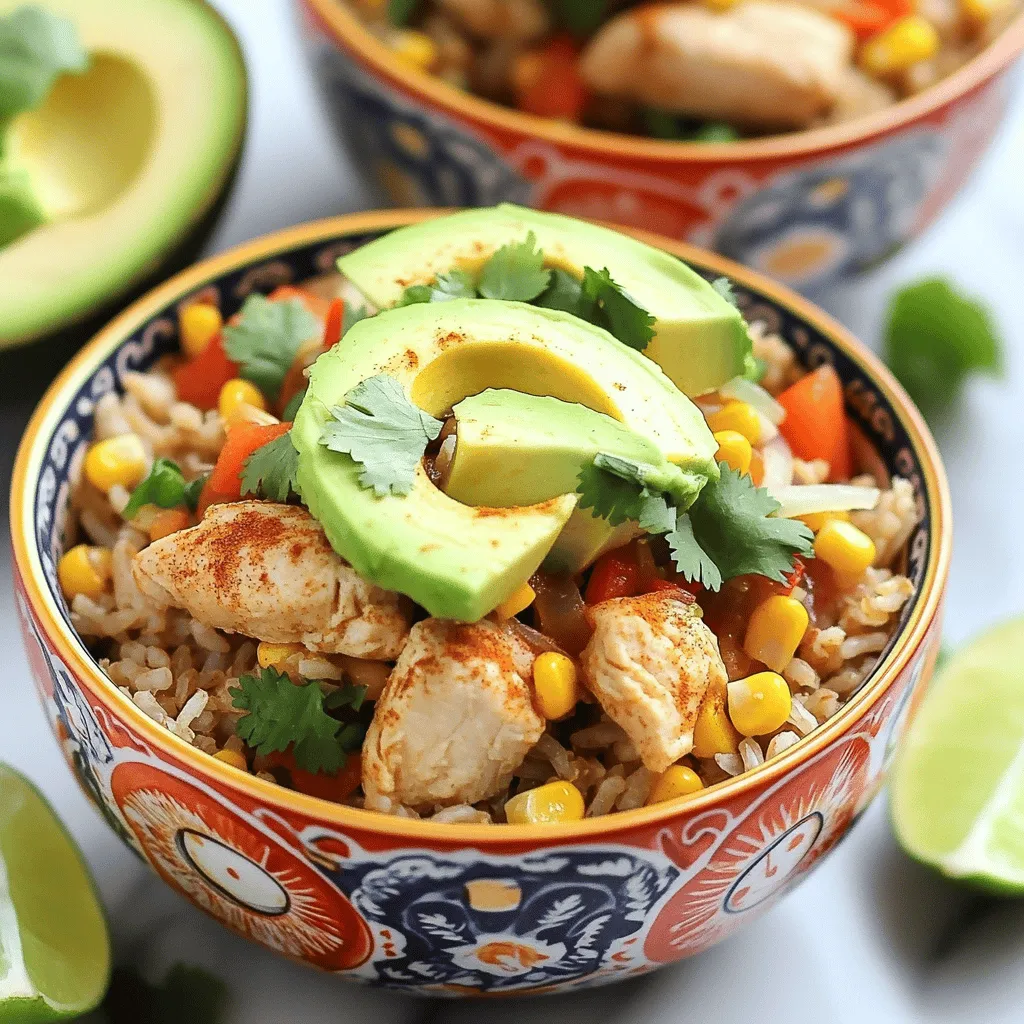
Easy Chicken & Rice Bowls Tasty Meal Made Simple
Looking for a quick, tasty meal? These Easy Chicken & Rice Bowls are perfect for you! Packed with flavor and ready in no time, this
- 1 lb ground beef or turkey - 1/2 cup breadcrumbs - 1/4 cup grated Parmesan cheese - 1 large egg - 1 cup barbecue sauce - 2 cups cooked rice To make these bowls, you need ground beef or turkey. This gives the meatballs their taste and texture. Breadcrumbs add fluffiness. Parmesan cheese gives a nice, salty flavor. You’ll also need a large egg to help bind the mixture. Barbecue sauce is key for that sweet, smoky taste. Finally, cooked rice acts as a bed for the meatballs. - 1 cup cherry tomatoes, halved - 1 large avocado, sliced - Fresh parsley, for garnish - Fresh cilantro, for garnish Toppings make your dish pop. Cherry tomatoes add sweetness and color. Sliced avocado gives creaminess. Sprinkle fresh parsley to brighten the dish. Lastly, cilantro adds a fresh taste. These toppings not only look great but also enhance the flavors of your meal. {{ingredient_image_2}} Set your oven to 400°F (200°C). Preheating is key for baking meatballs right. In a large bowl, add these ingredients: - 1 lb (450 g) ground beef or turkey - 1/2 cup (50 g) breadcrumbs - 1/4 cup (25 g) grated Parmesan cheese - 1 large egg - 2 tablespoons fresh parsley, finely chopped - 1 tablespoon garlic powder - 1 teaspoon onion powder - 1/2 teaspoon black pepper Mix these items well, but do it gently. Use your hands or a spatula. Too much mixing makes meatballs tough. Roll the mixture into 1-inch (2.5 cm) meatballs. Place them on a baking sheet lined with parchment paper. Keep some space between each ball. This helps them cook evenly. Now, bake the meatballs for about 20 minutes. They should be fully cooked and look golden-brown. To check, you can cut one open; it should be hot and not pink inside. Once done, take them out. Brush each meatball with barbecue sauce. Make sure they are well-coated. Put them back in the oven for 5-10 minutes. This will make the sauce sticky and delicious. To get the perfect meatball, mix the ingredients gently. Overmixing can make them tough. I combine ground meat, breadcrumbs, Parmesan, egg, parsley, garlic powder, onion powder, and black pepper in a bowl. Use your hands or a spatula for mixing. Just mix until everything is combined. This keeps your meatballs tender and juicy. For the best flavor, glaze the meatballs with barbecue sauce. Brush it on after the meatballs bake for about 20 minutes. This gives the sauce time to soak in. Return the meatballs to the oven for 5 to 10 more minutes. This extra time allows the sauce to caramelize, creating a sticky, delicious glaze. Make your Barbecue Meatball Bowls eye-catching. After placing rice in the bowl, add the meatballs on top. Arrange halved cherry tomatoes and avocado slices around the meatballs for color. A sprinkle of fresh cilantro adds flair. Drizzle extra barbecue sauce over the top for shine. Using colorful bowls can make your meal look even more appealing. Enjoy the vibrant presentation! Pro Tips Choose the Right Meat: Using ground turkey makes for a leaner option, while ground beef provides more flavor and richness. Select based on your dietary preferences! Don’t Overmix: Mix the meatball ingredients just until combined. Overmixing can lead to dense, tough meatballs. Aim for a gentle touch! Experiment with Sauces: Feel free to try different barbecue sauces or even homemade versions to customize the flavor of your meatballs. A spicy sauce can add a nice kick! Garnish for Freshness: Adding fresh herbs like cilantro not only enhances the visual appeal but also elevates the dish's flavor profile. Don’t skip this step! {{image_4}} You can switch up the meat in your barbecue meatball bowls. Ground turkey works well if you want a leaner option. If you prefer a plant-based meal, try using lentils or chickpeas. Both options offer great flavor and texture. Just mash them well and mix in the same ingredients. This way, you still get tasty meatballs that fit your diet. If you're watching carbs, consider using cauliflower rice instead of regular rice. Cauliflower rice is a great alternative. It adds texture without the carbs. You can find it pre-made in stores or make your own by grating cauliflower. Just steam it lightly before adding to your bowl. This keeps it tender and flavorful. To make your barbecue meatball bowls pop, add more veggies or spices. You can toss in finely chopped bell peppers or zucchini for added nutrition. Spices like smoked paprika or cayenne pepper can give your dish extra zing. Feel free to experiment and find your favorite combination. The more colorful your bowl, the more fun it is to eat! To store leftovers, let them cool first. Then, place the meatball bowls in airtight containers. Make sure to separate rice and toppings if you want them fresh. You can keep them in the fridge for up to three days. When ready to eat, reheat in the microwave or oven until warm. To freeze, let the meatball bowls cool completely. Then, wrap them tightly in plastic wrap or place them in freezer bags. Label them with the date. You can freeze the bowls for up to three months. To reheat, thaw in the fridge overnight. Then, warm in the oven or microwave until hot throughout. This way, you enjoy a tasty meal later! To check if meatballs are done, use a meat thermometer. The inside should reach 165°F (74°C). If you don't have a thermometer, cut one in half. The meat should be brown, not pink. The juices should run clear. This ensures they are safe to eat and juicy. Yes, you can use homemade barbecue sauce. Making your own allows you to control flavors. Use your favorite spices and sweeteners. A mix of ketchup, brown sugar, and vinegar works well. Just ensure it's thick enough to coat the meatballs. This adds a personal touch to your dish. You can serve several tasty sides with your meatball bowls. Here are some ideas: - Coleslaw for crunch and creaminess - Grilled corn for a sweet touch - Garlic bread for a savory option - Steamed broccoli for a healthy balance - A fresh green salad for extra veggies Feel free to mix and match! This blog post shared a simple and tasty recipe for barbecue meatball bowls. We covered the key ingredients, from meat and breadcrumbs to fresh toppings. Step-by-step instructions made cooking easy, and tips helped improve texture and flavor. We explored variations, like different proteins and rice alternatives. Lastly, storage info provided ways to keep leftovers fresh. In closing, trying this recipe can bring fun and flavor to your meals. Happy cooking!
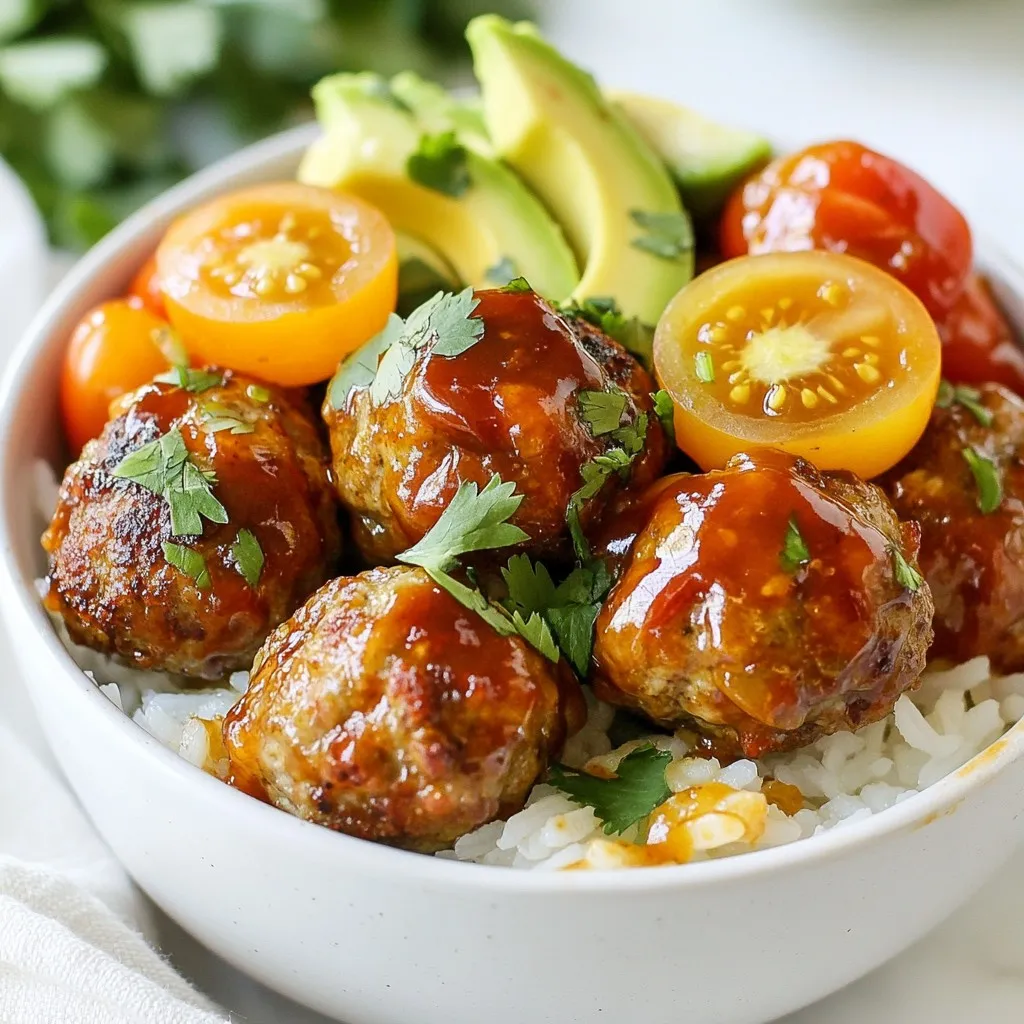
Barbecue Meatball Bowls Savory and Satisfying Meal
Craving a dish that’s both hearty and delicious? Barbecue Meatball Bowls are the answer! Packed with juicy meatballs, savory barbecue sauce, and fresh toppings, this
- 4 boneless, skinless chicken thighs - 1 cup jasmine rice, rinsed - 2 cups chicken broth - 1/2 cup honey - 1/3 cup BBQ sauce - 1 tablespoon soy sauce - 1 teaspoon garlic powder - 1 teaspoon onion powder - 1 teaspoon smoked paprika - 1/2 teaspoon black pepper - Salt to taste - 1 cup mixed bell peppers, diced - 1/2 cup green onions, chopped for garnish When I cook One-Pan Bold Honey BBQ Chicken Rice, I always gather my ingredients first. It makes cooking smoother and more fun. Start with the chicken thighs. They are juicy and perfect for this dish. Then, you need jasmine rice. Rinsing it helps remove excess starch, making it fluffy. Chicken broth adds great flavor, while honey and BBQ sauce give a sweet twist. For seasoning, I use garlic powder, onion powder, and smoked paprika. These spices create a nice depth of flavor. A touch of black pepper adds warmth, and don’t forget salt to taste. The colorful bell peppers add crunch and brightness. I like using red, yellow, and green for a vibrant look. Finally, green onions sprinkled on top bring freshness. You can find the full recipe to make this delicious meal, and I promise it will impress everyone at your table! - First, I season the chicken thighs with salt, black pepper, garlic powder, onion powder, and smoked paprika. This step adds great taste to the chicken. - Next, I heat a drizzle of oil in a large skillet over medium-high heat. Once the oil is hot, I add the seasoned chicken thighs. I sear them for about 5-7 minutes on each side. They should turn golden brown. After searing, I remove the chicken from the skillet and set it aside. - In the same skillet, I add the diced bell peppers. I sauté them for about 3-4 minutes until they start to soften. This step brings out their sweet flavor. - Then, I reduce the heat to medium and add the rinsed jasmine rice to the skillet. I stir the rice to mix it well with the peppers. The rice will soak up all the flavors. - In a bowl, I whisk together the honey, BBQ sauce, soy sauce, and chicken broth. This mixture creates a tasty sauce that will bring the dish together. - Now, I pour this sauce over the rice and peppers in the skillet. I bring it to a gentle boil. Once boiling, I return the seared chicken thighs to the skillet, nestling them into the rice. - I cover the skillet and reduce the heat to low. I let it simmer for 20-25 minutes until the rice is tender and the chicken is cooked through. - After cooking, I remove the skillet from heat and let it sit for a few minutes. Then, I fluff the rice with a fork and adjust the seasoning with salt if needed. - Finally, I garnish the dish with chopped green onions before serving. For the full recipe, check out the details above. To make your One-Pan Bold Honey BBQ Chicken Rice even better, choose a great BBQ sauce. I love using brands like Sweet Baby Ray's or Stubbs. They add rich flavor and balance the honey's sweetness. If you want more heat, try adding a pinch of cayenne pepper or some chili flakes. For extra depth, smoked paprika works wonders. Feel free to mix and match spices to suit your taste. Letting the rice rest after cooking is key. This helps the grains fluff up. After you take the skillet off the heat, wait a few minutes before serving. Also, check that your chicken is cooked through. The internal temperature should reach 165°F (75°C). Cutting into a piece can help you see if it's fully cooked. Garnishing makes your dish pop. Chopped green onions add a nice color and crunch. Place them on top right before serving. For a complete meal, pair this dish with a simple green salad or steamed veggies. This adds freshness and balances the rich flavors. You can also serve it in bowls to make it more inviting. Enjoy the process, and don’t forget to check the Full Recipe for all the details! {{image_2}} You can easily swap chicken for shrimp or tofu in this recipe. Shrimp cooks fast and adds a nice twist. Tofu is great for a plant-based choice. Just make sure to marinate your tofu for extra flavor. You can use soy sauce, honey, and garlic for a tasty marinade. If you want to change the rice, try basmati or brown rice. Basmati has a nice aroma and fluffy texture. Brown rice is heartier and full of nutrients. You can also use quinoa as a gluten-free option. Quinoa cooks quickly and adds a nutty flavor to your dish. You can add different vegetables to mix it up. Try corn, zucchini, or broccoli for color and crunch. A sweet and spicy BBQ sauce mix can also boost the flavor. Use your favorite BBQ sauce and add a pinch of cayenne pepper for heat. This will make your dish exciting and unique. For the full recipe, you can refer back to the main article. To store leftovers properly, let the dish cool down first. Place it in an airtight container. This helps keep the flavors fresh. You can store it in the fridge for about three days. After that, the taste may fade. For freezing, use a freezer-safe container. Make sure to leave some space for expansion. It is best to freeze the dish within two days of cooking. When you want to eat it, thaw it overnight in the fridge. Reheat it on the stove or in the microwave until hot. You can prepare this meal in advance for busy days. Cook a larger batch and divide it into smaller portions. This lets you grab a serving when needed. It’s great for lunch or dinner. You can also add different veggies or grains when you serve it. It keeps mealtime fun and varied. Check the Full Recipe for additional tips on prep! Yes, you can use other rice types. Some good substitutes are: - Basmati rice: It has a fragrant aroma and cooks well. - Brown rice: It offers a nutty flavor and is more nutritious. - Long-grain rice: It stays fluffy and separate when cooked. Each type will change the texture a bit. Just adjust the cooking time and liquid amount based on the rice you choose. To add heat, you can try these tips: - Use spicy BBQ sauce: Pick one with chili or chipotle flavors. - Add red pepper flakes: Sprinkle them into the sauce for extra kick. - Mix in diced jalapeños: Sauté with the bell peppers for fresh heat. - Use hot sauce: Drizzle it on top before serving for a spicy boost. These options let you customize the heat level to your taste. Pair this dish with tasty sides like: - A fresh garden salad: It adds crunch and freshness. - Coleslaw: The creaminess balances the bold flavors. - Grilled vegetables: They provide a smoky flavor and color. - Cornbread: It complements the sweetness of the honey BBQ sauce. These sides will enhance your meal and make it even more delightful. You can find the Full Recipe to get started! In this blog post, we explored a delicious One-Pan Bold Honey BBQ Chicken Rice recipe. We discussed the main ingredients, seasoning, cooking steps, and helpful tips. You learned about variations, storage, and answered common questions. This dish is simple, tasty, and versatile. You can switch proteins, grains, and flavors to fit your taste. Try it for a quick dinner or meal prep. Enjoy making this satisfying meal that’s sure to impress!
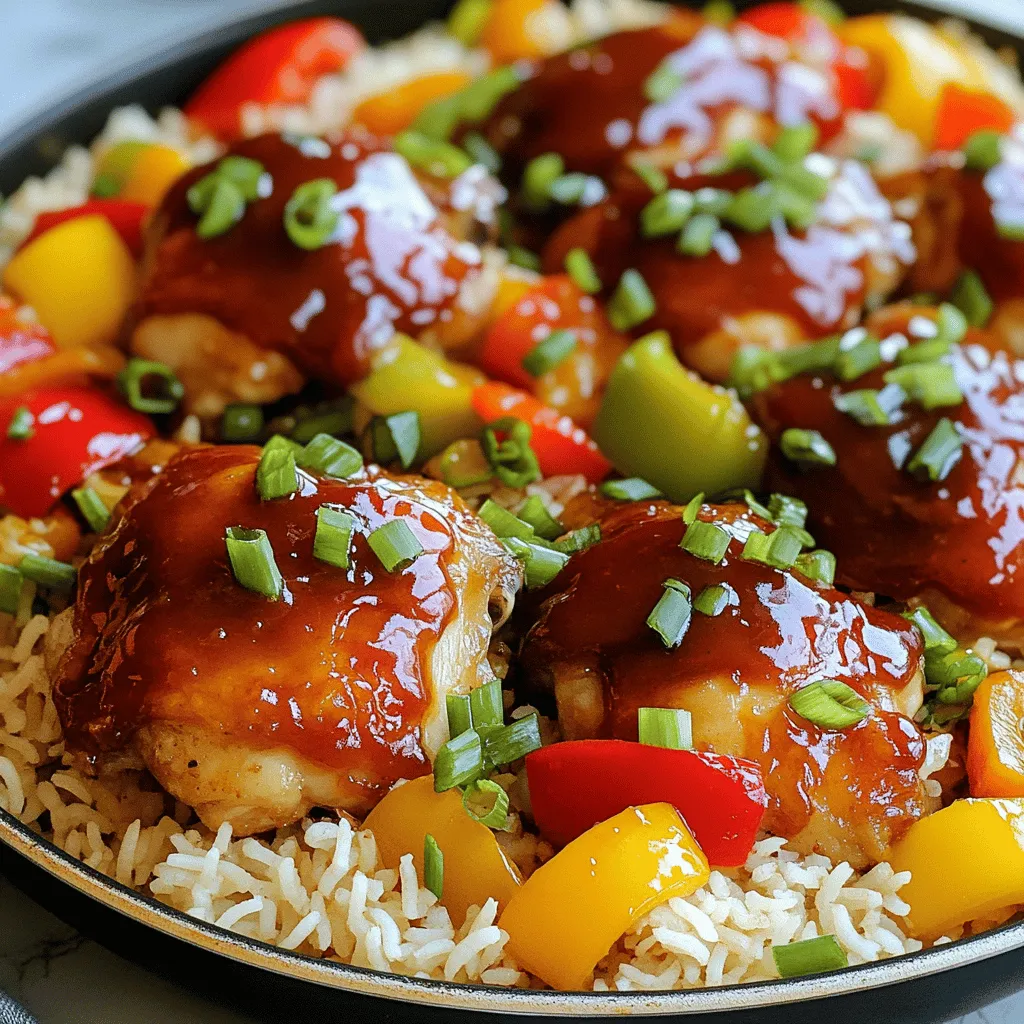
One-Pan Bold Honey BBQ Chicken Rice Delightful Meal
Get ready to jazz up your dinner with One-Pan Bold Honey BBQ Chicken Rice! This delightful meal is not just easy to make; it bursts
To make Cheesy Garlic Chicken Wraps, you'll need a few key ingredients: - 2 chicken breasts, cooked and shredded - 1 cup shredded mozzarella cheese - 1/2 cup cream cheese, softened - 3 cloves garlic, minced - 1 teaspoon garlic powder - 1 teaspoon Italian seasoning - 4 large flour tortillas - 1 cup fresh spinach leaves - 1/2 cup diced tomatoes - Salt and pepper to taste - Olive oil for cooking These ingredients come together to create a rich and tasty wrap. The chicken provides protein, while the cheeses add creaminess. Garlic gives a bold flavor that makes each bite special. You can add more fun to your wraps with optional ingredients: - Chopped bell peppers for crunch - Avocado slices for creaminess - Cooked bacon for a smoky taste - Grilled shrimp for a seafood twist These add-ins boost nutrition and flavor. They let you customize each wrap to your liking. Choosing the right tortilla is key: - Flour tortillas are soft and pliable. They are great for this recipe. - Whole wheat tortillas offer a nutty taste and more fiber. - Gluten-free options, like corn tortillas, work well for those with gluten issues. Each tortilla type changes the wrap's flavor and texture. You can pick based on your taste and dietary needs. For the full recipe, check out the main section. To start, we need to prep the chicken. Use two cooked chicken breasts. Shred them into small pieces. This makes it easy to mix with other ingredients. Next, we will mix the filling. In a medium bowl, combine the shredded chicken, one cup of shredded mozzarella cheese, and half a cup of softened cream cheese. Then, add three minced garlic cloves, one teaspoon of garlic powder, and one teaspoon of Italian seasoning. Don’t forget to season with salt and pepper. Mix everything well until it forms a thick filling. Now it’s time to assemble the wraps. Lay a large tortilla flat on your clean surface. Place a quarter of the chicken mixture in the center. Then, add a small handful of fresh spinach leaves and a sprinkle of diced tomatoes. To fold the wrap, first, fold the sides of the tortilla over the filling. Then, roll the tortilla tightly from the bottom up. Make sure the filling stays inside. Repeat this for all tortillas and filling. For cooking, heat a skillet over medium heat. Add a little olive oil to the skillet. Place the wraps seam side down in the skillet. Cook them for about two to three minutes on each side. You want them to be golden brown and crispy. Once they are done, remove them from the skillet. Let them cool slightly before slicing them in half. Enjoy your cheesy garlic chicken wraps! You can find the full recipe to follow along. To keep your wraps from getting soggy, avoid overfilling them. Use a thin layer of filling. This helps the tortilla stay crisp. Cook your wraps in a hot skillet. A medium heat works best. Using too low a heat can make them soft instead of crispy. To achieve that nice golden finish, add a little olive oil to the pan. Once the oil is hot, place the wraps seam-side down. Cook each side for 2-3 minutes. This will help them crisp up nicely. You can try different seasonings to boost flavor. A pinch of paprika adds a lovely kick. For more zing, consider a dash of cayenne pepper. Fresh herbs like cilantro or parsley also work well. They brighten the dish. For dips, salsa is a top choice. You can also serve ranch or garlic aioli. These dips complement the cheesy chicken perfectly. One mistake is overstuffing the wraps. This can make them hard to fold and eat. Keep the filling to a quarter of the tortilla size. Another common issue is cooking at the wrong temperature. If your skillet is too hot, the outside burns while the inside stays cold. Always test with a small piece first. Adjust the heat as needed to get it just right. {{image_2}} You can easily change the cheese in this recipe. Try using cheddar or pepper jack for a fun twist. Each cheese adds a unique taste. You can also mix cheeses for more flavor. Adding herbs makes a big difference. Fresh basil or cilantro gives a nice touch. Dried oregano or thyme works well too. For a low-carb option, use lettuce leaves instead of tortillas. This keeps the wrap light and fresh. You can also find low-carb tortillas at stores. If you're vegan, substitute chicken with chickpeas or tofu. Use vegan cheese and cream cheese to keep it plant-based. There are many great options for everyone. You can take these wraps around the world. Add salsa for a Mexican vibe. Try tzatziki sauce for a Greek style. For an Italian twist, include pesto and sun-dried tomatoes. You can also serve your wraps with side dishes from different cultures. Think about adding rice or a fresh salad. The wraps are so versatile, allowing you to explore various cuisines. Check out the full recipe for more fun ideas! To keep your cheesy garlic chicken wraps fresh, store them in the fridge. Use an airtight container or wrap each one tightly in plastic wrap. This helps keep moisture in and air out, so your wraps stay tasty. You can refrigerate them for up to three days. If you want to save some wraps for later, freezing works great. Wrap each one in foil or plastic wrap, then place them in a freezer bag. This way, they can last up to three months. Just remember to label the bag with the date! When you're ready to eat, reheating is key to keeping the wraps yummy. The best method is using an oven. Preheat it to 350°F (175°C). Place the wraps on a baking sheet and cover them with foil. Heat for about 15-20 minutes until warm. If you're in a hurry, you can use the microwave. Place a wrap on a plate and cover it with a damp paper towel. Heat for one minute, then check if it's warm. If not, heat in 30-second intervals. The microwave may make the wrap less crispy, but it's quick! These cheesy garlic chicken wraps can last in the fridge for about three days. If you freeze them, they can last up to three months. Always check for signs of spoilage. If the wraps smell off or the tortilla looks dry or hard, it's best to toss them. Enjoy your meals fresh and tasty! For the full recipe, check the original instructions. You can make Cheesy Garlic Chicken Wraps ahead of time with some easy steps. First, prepare the filling as per the recipe. After mixing the chicken, cheese, and spices, store it in the fridge for up to two days. This keeps the flavors fresh. When ready to eat, just assemble the wraps and cook them. You can also wrap them tightly in foil or plastic wrap and store them in the fridge. If you freeze them, they can last up to three months. Just remember to thaw them before cooking. Yes, using leftover rotisserie chicken is a great idea! It saves time and adds rich flavor. The chicken is already cooked and seasoned, making it easy to mix with cheese and spices. Just shred the rotisserie chicken and add it to your filling. This method gives you a tasty wrap with minimal effort and lets you enjoy your meal faster. You can serve many tasty sides with Cheesy Garlic Chicken Wraps. Here are some ideas: - Fresh salad: A simple green salad adds crunch. - Vegetable sticks: Carrots and celery with dip make a fun side. - Chips: Tortilla chips with salsa or guacamole pair well. - Rice: A side of rice can fill you up. - Soup: A warm bowl of soup can balance the meal. Feel free to mix and match these sides to make your meal even better! You now have all the steps to make delicious Cheesy Garlic Chicken Wraps. Start with fresh chicken and tasty cheese, then pick your favorite tortillas. Remember to add veggies or proteins for extra nutrition. Follow the cooking tips to avoid common mistakes and enjoy perfect wraps every time. With these ideas, you can create many variations too. Store any leftovers properly. These wraps last well and heat up nicely. Enjoy making your wraps and sharing them with friends!
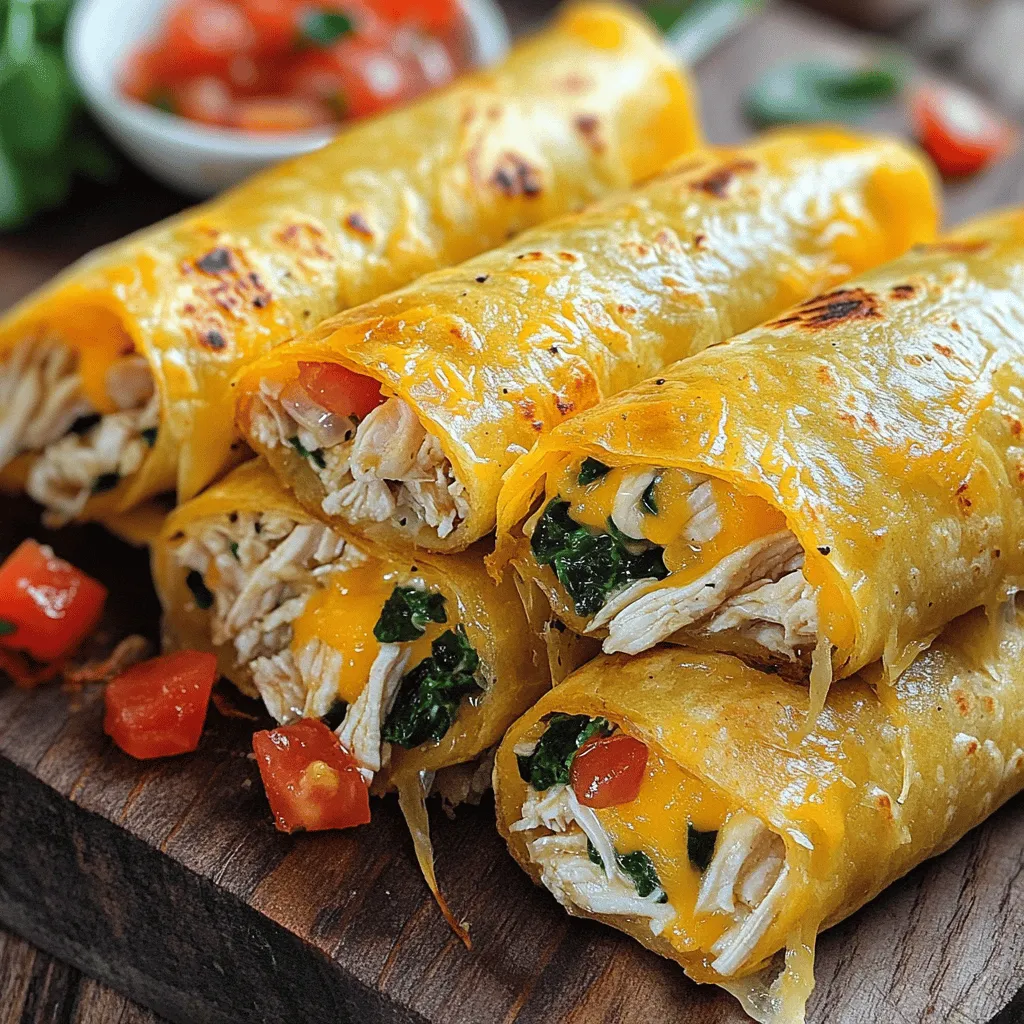
Cheesy Garlic Chicken Wraps Flavorful and Easy Meal
Looking for a quick and tasty meal? Cheesy Garlic Chicken Wraps are your answer! These wraps combine juicy chicken and gooey cheese, perfect for busy
To make Cowboy Butter Steak, you need some key ingredients. Each one plays a big role in flavor and texture. Here’s what you’ll need: - Ribeye steaks: Use two steaks, about one inch thick. This cut is juicy and full of flavor. - Seasoning: Use salt and freshly cracked black pepper for a simple yet tasty base. - Cowboy butter components: - 4 tablespoons unsalted butter, softened - 2 cloves garlic, minced finely - 1 tablespoon fresh parsley, chopped - 1 tablespoon fresh chives, chopped - 1 tablespoon Dijon mustard - 1 teaspoon smoked paprika - 1 teaspoon Worcestershire sauce - Zest of 1 lemon - Optional garnishes: You can add more fresh herbs for color and taste. These ingredients work together to make a rich and flavorful steak. The ribeye gives a great base while the cowboy butter adds a burst of flavor. Make sure to gather them before you start cooking. {{ingredient_image_2}} First, you need to preheat your grill or skillet. Set it to medium-high heat. Wait until it gets hot. This helps create a nice sear on the steak. Aim for a temperature around 400°F to 450°F. You can test it by holding your hand above the grill. If you can keep it there for only 2-3 seconds, it’s ready. Next, season the ribeye steaks well. Use salt and freshly cracked black pepper. Sprinkle it evenly on both sides. This step is key for flavor and helps form a crust. For a better crust, let the steaks sit for about 15 minutes after seasoning. This will help the salt absorb into the meat. Now, let’s make the cowboy butter. In a bowl, combine 4 tablespoons of softened butter, 2 minced garlic cloves, 1 tablespoon of chopped parsley, and 1 tablespoon of chopped chives. Add 1 tablespoon of Dijon mustard, 1 teaspoon of smoked paprika, and 1 teaspoon of Worcestershire sauce. Finally, grate the zest of 1 lemon into the mix. Stir well until all ingredients blend into a creamy, smooth butter. Once the grill or skillet is hot, place the steaks on it. Avoid moving them for 4-5 minutes. This will help form that perfect crust. After that, use tongs to flip the steaks. Cook the other side for another 4-5 minutes for medium-rare. Adjust the time if you prefer a different doneness. Use a meat thermometer for best results. Aim for 130°F for medium-rare. After cooking, it’s important to let the steaks rest. Place them on a cutting board for 5 minutes. This time lets the juices settle back into the meat. Skipping this step can make your steak dry. To serve, place the warm steak on a rustic wooden cutting board. Add a generous dollop of cowboy butter on top of each steak. Watch it melt and soak into the meat. This adds a rich flavor and a beautiful look. For a final touch, garnish with more chopped herbs if you like. Enjoy your delicious Cowboy Butter Steak! To get that lovely crust on your steak, start with heat. Preheat your grill or skillet until it is very hot. This heat helps lock in juices and flavor. Use tongs to flip the steak. A meat thermometer can help you check the doneness. Aim for 450°F to 500°F for the right sear. Cooking times depend on how you like your steak. For medium-rare, cook for about 4-5 minutes per side. If you want it medium, add a minute or two to each side. Factors like steak thickness and grill temperature can change the time. Always check the internal temperature for best results. Cowboy butter adds a lot of taste. You can mix in extra herbs like thyme or rosemary for more flavor. Spices like chili powder or cumin can also work well. Serve your steak with sides like corn on the cob or a fresh salad. A nice red wine pairs perfectly with the richness of the steak. Pro Tips Rest the Meat: Always let your steaks rest for a few minutes after cooking. This allows the juices to redistribute, resulting in a more tender and flavorful steak. Use High Heat: For the best sear, ensure your grill or skillet is preheated to a high temperature before adding the steaks. This helps to lock in flavors and create a delicious crust. Experiment with Herbs: Feel free to mix and match different fresh herbs in your cowboy butter to customize the flavor. Thyme, rosemary, or even oregano can add a unique twist. Check Doneness with a Thermometer: For perfectly cooked steaks, use a meat thermometer. Aim for an internal temperature of 130°F for medium-rare to ensure they are cooked to your liking. {{image_4}} You can use different cuts of steak for Cowboy Butter Steak. Ribeye is great, but try these: - Sirloin: Leaner, cooks fast. It needs about 3-4 minutes per side. - T-bone: A mix of tenderloin and strip. Cook for 5-6 minutes each side. - Flank: Thin and flavorful. Cook quickly, about 2-3 minutes per side. Each cut has a unique taste and texture. Adjust your cooking time based on the thickness of the meat. Adding spices can change the flavor of your Cowboy Butter. Here are some ideas: - Chili powder: For heat. - Cumin: Adds an earthy tone. - Chipotle: Gives a smoky kick. Try regional styles too. A Texas twist? Add jalapeños to the butter. You can also switch up the herbs based on what's fresh. Use basil or thyme for a different vibe. Side dishes make your meal complete. Here are some great options: - Grilled corn on the cob: Sweet and crunchy. - Roasted potatoes: Crispy outside, soft inside. - Coleslaw: Fresh and crunchy for contrast. Pair your Cowboy Butter Steak with a good drink. A bold red wine, like Cabernet Sauvignon, works well. Or go for a cold lager for a refreshing taste. Enjoy your meal! To keep your leftover Cowboy Butter Steak fresh, follow these steps: - Let the steak cool to room temperature. - Wrap it tightly in plastic wrap or foil. - Place it in an airtight container. - Store it in the refrigerator for up to three days. If you want to freeze the leftover steak: - Wrap the steak in plastic wrap, then in foil. - Use a vacuum sealer if you have one. - Label the date and place it in the freezer. - It can last up to three months in the freezer. Reheating steak can be tricky. You don't want to dry it out. Here are some great methods: - Oven Method: Preheat the oven to 250°F. Place the steak on a baking sheet. Heat for about 20-30 minutes, or until warm. - Stovetop Method: Heat a skillet over low heat. Add a bit of butter or oil. Cook the steak on each side for 2-3 minutes. To keep your steak moist: - Add a splash of beef broth or water when using the stovetop. - Cover the steak with foil while reheating in the oven. These methods will help you enjoy your Cowboy Butter Steak again, just as tasty as before! Cowboy butter is a rich, flavorful sauce made from butter and spices. It has roots in cowboy cooking, where simple, hearty meals are key. The sauce blends fresh herbs, garlic, and a bit of zest. You can use cowboy butter on many dishes. It works well with seafood, grilled veggies, and bread. Yes, you can try different butter types! Each butter brings a unique taste. For a richer flavor, use cultured butter. For a lighter profile, use whipped butter. If you need dairy-free options, try vegan butter or olive oil. Both can bring a nice twist to your cowboy butter. To check if your steak is done, use a meat thermometer. For medium-rare, aim for 130°F to 135°F. For medium, go for 140°F to 145°F. Visual cues also help. Look for a nice brown crust on the outside. The inside should feel springy but firm when you press it. This blog post covered how to make a delicious Cowboy Butter Steak. We went through the right ingredients, how to season and cook the steak, and the importance of resting it. I shared tips for achieving the perfect sear and suggested ways to customize flavors. Remember, the right cooking time and methods make all the difference. Enjoy your meal with great sides or a nice drink. Cowboys knew good food; follow these steps to taste that tradition. Your delicious steak is just a grill or skillet away.
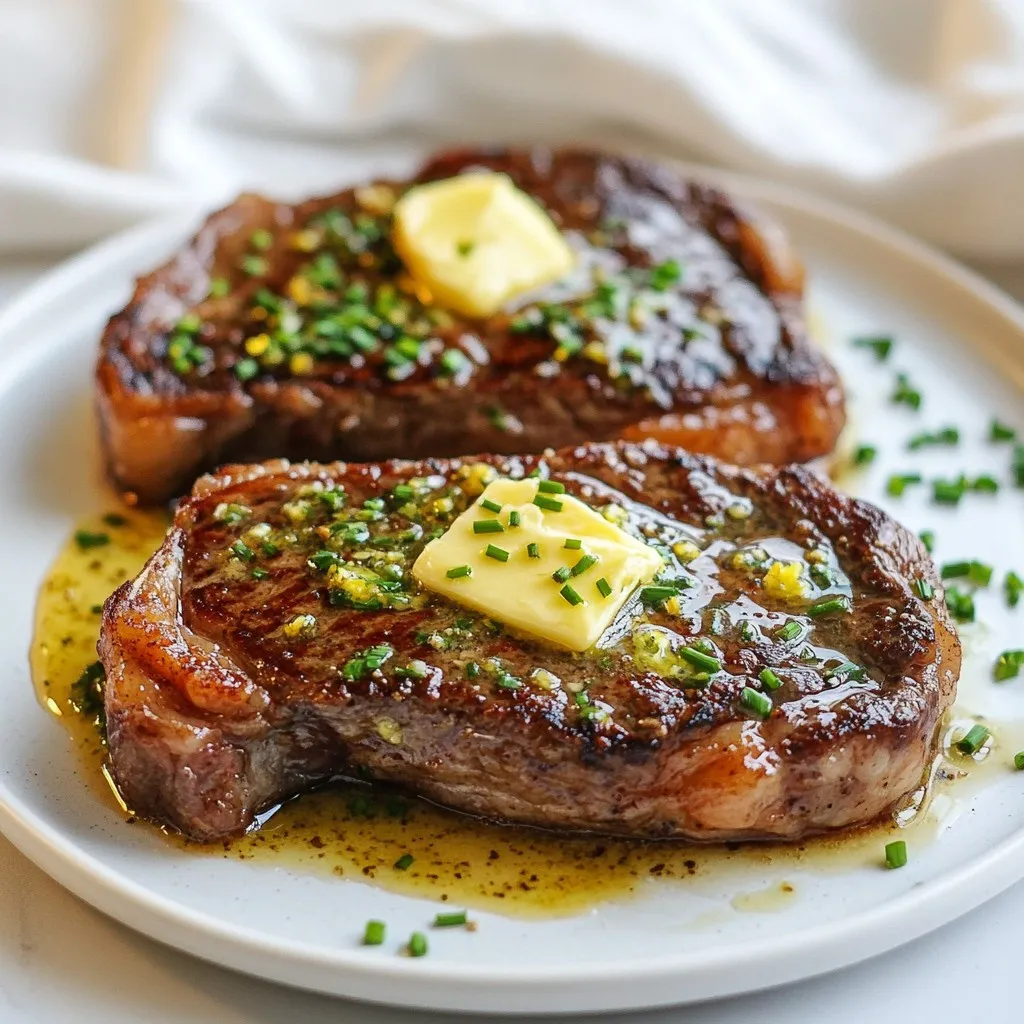
Cowboy Butter Steak Grilled to Perfection Every Time
Are you ready to take your grilling game to the next level? In this article, I’ll show you how to make Cowboy Butter Steak that
- Shredded chicken - Buffalo sauce - Onions, bell peppers, and mushrooms - Hoagie rolls and mozzarella cheese - Olive oil, salt, and pepper - Fresh parsley for garnish To make a great Buffalo Chicken Cheesesteak, you need just a few simple ingredients. First, start with shredded chicken. You can use leftover chicken or cook fresh chicken breasts. Next, grab some buffalo sauce. This gives the dish its iconic spicy kick. You will also need onions, bell peppers, and mushrooms. These veggies add flavor and texture. Choose fresh, colorful options for the best taste. For the base, hoagie rolls are key. They hold everything together. Finally, don't forget mozzarella cheese. It melts beautifully and adds creaminess. You will also want olive oil, salt, and pepper for cooking. These basic ingredients enhance all the flavors. To finish, fresh parsley adds a pop of color and freshness. With these ingredients, you can create a dish that is both flavorful and fun to eat. For the complete cooking process, check out the Full Recipe. Start by heating olive oil in a large skillet over medium heat. Add sliced onion, bell pepper, and mushrooms. Sauté them for 5 to 7 minutes. You want the veggies to soften and get a little caramelized. This adds great flavor to your cheesesteak. In another pan, mix shredded chicken with buffalo sauce. Heat this mixture on low. It should take about 3 to 5 minutes until everything is warmed through. This step is key because it gives the chicken a spicy kick that works great with the veggies. Next, prepare your hoagie rolls. Slice them lengthwise but don’t cut all the way through. Place them in a baking dish. Now, evenly distribute the buffalo chicken and vegetable mix into each roll. Don’t forget to top them with a generous layer of shredded mozzarella cheese. Finally, bake the sandwiches in a preheated oven at 350°F (175°C) for 10 to 12 minutes. You want the cheese to melt and become bubbly. Once done, take them out and garnish with fresh parsley for a nice touch. Enjoy your delicious Buffalo Chicken Cheesesteak! For the full recipe, check the earlier section. To make your buffalo chicken cheesesteak taste great, choose a good buffalo sauce. I like Frank's RedHot or Anchor Bar. These brands provide a nice kick and flavor. When seasoning your chicken, mix the sauce well. You can adjust the amount of sauce based on your taste. If you want extra flavor, try adding garlic powder or onion powder. You can change the heat level to fit your taste. If you want more spice, add more buffalo sauce or cayenne pepper. For a milder flavor, use less sauce. Cheese is also flexible! While I love mozzarella, you can use cheddar or pepper jack for a twist. You can even mix cheeses for more depth. This sandwich pairs well with a few sides. Try serving it with crispy fries or a fresh salad. You can also add some celery sticks with ranch or blue cheese dressing. For garnishing, sprinkle fresh parsley on top. It adds a nice color and fresh taste. Enjoy your meal with friends and family! For the full recipe, check out the details above. {{image_2}} You can switch things up by making a BBQ chicken cheesesteak. Just swap buffalo sauce for your favorite BBQ sauce. This change adds a sweet and smoky flavor. You can also mix in some diced pickles for extra crunch. If you want, use pulled chicken instead of shredded chicken. This will give your sandwich a different texture. For a meatless version, try a vegetarian buffalo cheesesteak. Use plant-based chicken or grilled tofu instead of chicken. You can still use buffalo sauce to keep that spicy kick. Add in some sautéed zucchini or eggplant for extra veggies. This way, you keep the flavor while making it healthy. Different places have their own takes on the cheesesteak. In some areas, they add jalapeños for a spicy twist. Others might use different cheeses, like cheddar or pepper jack. In the Midwest, you might find a version with ranch dressing, giving it a creamy finish. These local influences make each bite exciting and unique. For the full recipe, check out the details above. After enjoying your Buffalo Chicken Cheesesteak, store leftovers in an airtight container. Keep the sandwiches in the fridge for up to three days. If you want to save them longer, freeze the filling separately. Wrap it well in plastic wrap and then place it in a freezer-safe bag. This method helps keep the flavors fresh. To enjoy your leftovers, you can use different methods. For the microwave, place your sandwich on a microwave-safe plate. Heat for 1-2 minutes, or until warm. If you prefer the oven, preheat it to 350°F (175°C). Place the sandwich on a baking sheet and heat for about 10 minutes. For stovetop reheating, use a skillet on low heat. Cover it with a lid to melt the cheese. This keeps the bread soft while warming the filling. Each ingredient has its own shelf life. Here’s a quick guide to help you keep everything fresh: - Cooked shredded chicken: 3-4 days in the fridge or 2-6 months in the freezer. - Buffalo sauce: Check the label, but usually lasts 6 months in the fridge after opening. - Onions, bell peppers, and mushrooms: Fresh veggies last about 1 week in the fridge. - Hoagie rolls: Best eaten within a few days, but can be frozen for 3 months. - Shredded mozzarella cheese: 5-7 days in the fridge, or 2-3 months in the freezer. By following these tips, you can enjoy your Buffalo Chicken Cheesesteak for days to come! Buffalo chicken has a spicy, tangy flavor. It comes from the buffalo sauce mixed with chicken. A cheesesteak, on the other hand, is savory and rich. It features thinly sliced beef and melted cheese. The two dishes mix these flavors to create a unique taste. Buffalo Chicken Cheesesteak combines the heat of buffalo chicken with the hearty nature of a cheesesteak. You get the best of both worlds in every bite. Yes, you can make this dish ahead of time. First, prepare the buffalo chicken mixture and sauté the veggies. Let them cool, then store them in an airtight container. Keep it in the fridge for up to three days. When you're ready to eat, just reheat the mixture. Fill the hoagie rolls and bake them. This way, you can enjoy a fresh meal without a lot of fuss. Pair your Buffalo Chicken Cheesesteak with tasty sides. Some good options are: - Crispy French fries - Coleslaw for a crunchy contrast - Sweet potato fries for a hint of sweetness - A simple green salad to balance flavors For drinks, try a light beer or iced tea. Both will enhance your meal without overpowering it. Enjoy the mix of flavors with these fun sides! This blog post shared a simple guide to making Buffalo Chicken Cheesesteaks. We covered all the key ingredients, steps for cooking, and tips for great flavor. You can customize your sandwich and try tasty variations. I also included how to store leftovers and answered common questions. I hope you find this recipe fun and easy to follow. Enjoy making your own delicious Buffalo Chicken Cheesesteak!
Buffalo Chicken Cheesesteak Flavorful and Easy Recipe
Craving a spicy twist on a classic? This Buffalo Chicken Cheesesteak is flavorful and easy to make. With tender shredded chicken slathered in zesty buffalo
- 4 chicken thighs, skin-on and bone-in - 1 tablespoon olive oil - 1 cup mushrooms, sliced - 1 medium onion, diced - 2 cloves garlic, minced - 1 cup chicken broth - 1 tablespoon tomato paste - 1 teaspoon dried thyme - 1 teaspoon dried rosemary - 1 tablespoon fresh parsley, chopped (for garnish) - Salt and pepper to taste I love using chicken thighs for this recipe. They stay moist and full of flavor. The skin adds a nice crunch too. You can use olive oil for cooking, but other oils work too. Olive oil gives a nice taste. Mushrooms and onions are key ingredients. They add depth to the sauce. Make sure to slice the mushrooms thinly for even cooking. Dice the onion small so it cooks well. Garlic brings out the taste in all the ingredients. Use fresh garlic for the best flavor. Chicken broth is the base of the sauce. It adds richness. If you want, you can use vegetable broth or beef broth instead. Tomato paste gives a slight sweetness. The dried thyme and rosemary add earthy notes. For the final touch, sprinkle fresh parsley on top. This adds color and a fresh taste. Don’t forget to season with salt and pepper. It brings all the flavors together. - Chicken thighs vs. breast: Chicken breast can work, but it may dry out. - Fresh herbs vs. dried herbs: You can use fresh herbs if you have them. Just use more if they’re fresh. - Alternative broth options: Any broth will work. Make sure it matches your taste. - Calories per serving: About 350 calories. - Breakdown of macronutrients: Each serving has protein, fats, and carbs. - Dietary considerations: This dish is gluten-free and can fit many diets. For the full recipe, check the details above. Enjoy making Chicken Chasseur! - Preheating the oven Start by preheating your oven to 375°F (190°C). This ensures the chicken cooks evenly. - Searing chicken thighs In a large skillet, heat 1 tablespoon of olive oil over medium-high heat. Place 4 chicken thighs skin-side down in the pan. Sear for about 4-5 minutes until the skin turns golden brown. Flip the chicken and cook for another 3-4 minutes. Remove the chicken and set it aside. - Sautéing vegetables In the same skillet, add 1 diced onion and 1 cup of sliced mushrooms. Sauté for about 5 minutes. The onions should be soft and look translucent. - Adding broth and seasoning Stir in 2 minced garlic cloves and cook for 1 more minute. Then, add 1 cup of chicken broth, 1 tablespoon of tomato paste, 1 teaspoon of dried thyme, 1 teaspoon of dried rosemary, and salt and pepper to taste. Mix well and bring to a simmer. - Nestling chicken into the sauce Now, nestle the seared chicken thighs back into the skillet, skin-side up. Spoon some of the sauce over the chicken to keep it moist. - Ideal cooking temperature and time Transfer the skillet to your preheated oven. Bake for 25-30 minutes, or until the chicken reaches an internal temperature of 165°F (74°C). This step ensures your chicken is safe to eat and juicy. For the full recipe, check out the Chicken Chasseur Delight section above. Enjoy this hearty dish! Resting your chicken is key. After cooking, let it sit for 5-10 minutes. This time helps the juices spread throughout the meat. Checking the internal temperature is also important. Aim for 165°F (74°C) for safety. Use a meat thermometer for accuracy. To boost flavor, try adding herbs like basil or tarragon. A splash of white wine can add depth too. Cooking with wine gives a nice acidity. If you choose broth, pick one that adds more flavor. Homemade broth is often richer than store-bought. Avoid overcrowding the pan. This can lead to steaming instead of browning. Give each piece space to get that crispy skin. Also, don’t rush the browning phase. Allow the chicken to brown well before flipping. This step enhances the taste in your dish. {{image_2}} You can easily make Chicken Chasseur vegetarian. Just swap the chicken for tofu or mushrooms. Tofu is a great choice because it absorbs flavors well. For a heartier dish, use portobello mushrooms. These mushrooms have a meaty texture. Cook them just like you would the chicken. This way, you keep the dish rich and tasty. If you need gluten-free options, check your sauces and stocks. Some chicken broths contain gluten. Look for brands that say "gluten-free." You can also make your own broth from scratch. Just use bones, water, and veggies. This way, you control what goes in. Your Chicken Chasseur will be safe and still delicious. Chicken Chasseur pairs well with many sides. You can serve it over rice, pasta, or with crusty bread. Rice soaks up the sauce nicely. Pasta adds a nice texture, too. Crusty bread helps you enjoy every bit of the sauce. Try all three to see what you like best! For the full recipe, check [Full Recipe]. To store leftover Chicken Chasseur, first let it cool down. Place it in an airtight container. Make sure to eat it within three days for the best taste. If you want to keep it longer, freezing is a great option. To freeze Chicken Chasseur, let it cool completely. Then, transfer it to a freezer-safe container or a heavy-duty freezer bag. Be sure to remove as much air as possible. Label the bag with the date. You can freeze it for up to three months. To defrost, move the container from the freezer to the fridge. This should take about 24 hours. For quick reheating, you can use the microwave. Heat it in short bursts, stirring in between. Alternatively, warm it on the stove over low heat. Stir often until hot. Enjoy this hearty dish again! For the complete recipe, check the Full Recipe. Chicken Chasseur is a classic French dish. It means "hunter's chicken." The dish has roots in rustic cooking. It features chicken, mushrooms, and fresh herbs in a rich sauce. Traditionally, cooks used what they had on hand. This dish is special because it brings together simple flavors. It warms you up and fills you up after a long day. Yes, you can prepare Chicken Chasseur in advance. Cook it fully, then cool it down. Store it in the fridge for up to three days. When ready to serve, reheat it gently on the stove. Add a splash of chicken broth if the sauce is too thick. This can save time on busy nights. To make Chicken Chasseur in a slow cooker, start by searing the chicken thighs. This adds flavor and color. Place the chicken in the slow cooker. Add sliced mushrooms, diced onions, and minced garlic. Pour in the chicken broth, tomato paste, thyme, and rosemary. Cook on low for about 6 hours or high for 3 hours. The chicken will be tender and full of flavor. Chicken Chasseur can be healthy when made with fresh ingredients. Chicken thighs provide protein and iron. The mushrooms and onions add vitamins and minerals. Using low-sodium broth can help reduce salt intake. You can also serve it with veggies for a well-rounded meal. Enjoying this dish in moderation is key to a balanced diet. In this blog post, I covered the ingredients, steps, and tips for making Chicken Chasseur. You'll learn how to create this delicious dish using simple methods and ingredients. Remember, cooking is all about experimenting and making it your own. By understanding substitutions and storage options, you can enjoy Chicken Chasseur anytime. Whether you stick to the classic recipe or try a variation, you can savor every bite without stress. Happy cooking!
Chicken Chasseur Flavorsome and Hearty Dinner Recipe
Welcome to a feast for your senses with Chicken Chasseur— a flavorsome and hearty dinner recipe that’s sure to impress. This mouthwatering dish combines tender
- 4 boneless, skinless chicken thighs - 1 cup long-grain white rice - 2 cups chicken broth - 1 cup heavy cream - 1 medium onion, chopped - 3 cloves garlic, minced - 1 tablespoon olive oil - 1 teaspoon paprika - 1 teaspoon garlic powder - 1 teaspoon onion powder - Salt and pepper to taste - Fresh parsley, chopped (for garnish) - 1 cup frozen peas The main ingredients are simple yet essential. The chicken thighs provide rich flavor and tenderness. Long-grain white rice cooks up fluffy and pairs well with the creamy sauce. Chicken broth adds depth, while heavy cream creates that luscious texture we crave. Aromatics like onion and garlic bring warmth and depth. Olive oil helps brown the chicken and sauté the aromatics. Paprika, garlic powder, and onion powder are key seasonings that enhance the dish’s flavor. Don’t forget salt and pepper; they balance and highlight all the tastes. For garnishes, fresh parsley adds color and a hint of freshness. Frozen peas bring a sweet pop of flavor and a splash of green. You can check out the Full Recipe for more details. - Heat olive oil over medium heat in a large skillet. - Season the chicken thighs with salt, pepper, paprika, garlic powder, and onion powder. - Cook the chicken thighs for about 5-7 minutes on each side until they turn golden brown and are fully cooked. - Remove the chicken from the skillet and set it aside. - Add the chopped onion and minced garlic to the same skillet. - Sauté for about 3-4 minutes, until the onion becomes translucent and fragrant. - Stir in 1 cup of long-grain white rice. Allow it to absorb the flavors from the skillet for 1-2 minutes. - Pour in 2 cups of chicken broth and bring the mixture to a boil. - Stir in 1 cup of heavy cream and 1 cup of frozen peas, then return the chicken to the skillet. - Cover and let everything simmer for another 5-7 minutes until the sauce turns creamy. To make your creamy smothered chicken rich, let it simmer long enough. Simmering allows the flavors to blend well. If you want it creamier, add more heavy cream. The cream adds a nice smoothness that makes this dish comforting. For extra flavor, try adding herbs like thyme or rosemary. These herbs bring a fresh taste that brightens the dish. A squeeze of lemon juice also works wonders. It adds a zing that cuts through the creaminess. Use a meat thermometer to check if the chicken is done. It should reach 165°F for safe eating. Browning the chicken in batches gives it a nice crust. This step helps keep the chicken juicy and delicious. For the full recipe, check out the details above. {{image_2}} You can easily change some ingredients for different flavors. Use brown rice instead of white for health benefits. Brown rice adds fiber and nutrients, making your meal more wholesome. If you prefer chicken, swap thighs for breasts or drumsticks. Each part has unique flavors and textures, so try what you like best. Adding vegetables makes this dish even better. You can incorporate bell peppers or carrots for added nutrition. They bring color and crunch to your meal. Fresh greens like spinach or kale are also great choices. They cook down nicely and add vitamins to your dish. You can adjust this recipe to fit your diet. Create a dairy-free version using coconut cream. It gives a rich taste without dairy. For those on plant-based diets, suggest vegan alternatives. Use tofu or chickpeas instead of chicken for a hearty, satisfying meal. These swaps keep the dish delicious while meeting your needs. For the full recipe, check out the detailed instructions provided above. After a delicious meal, you may have leftovers. First, let the dish cool down. This helps keep the flavors fresh. Once cool, transfer the creamy chicken and rice to airtight containers. This will keep your food safe and tasty. Be sure to leave some space at the top. This allows for expansion if you freeze it. You can freeze portions for meal prep. Divide the chicken and rice into single servings. Place them in freezer-safe containers or bags. Make sure to remove as much air as possible. This prevents freezer burn. When you're ready to enjoy, thaw in the fridge overnight. For best flavor and texture, reheat in a skillet over low heat. Add a splash of chicken broth to keep it creamy. To maintain quality, eat leftovers within 3-4 days if stored in the fridge. If frozen, aim to consume them within 2-3 months. This way, you can enjoy your creamy smothered chicken and rice at its best! For more details, check the Full Recipe. Yes, you can prepare this dish in advance. To do this, follow these steps: - Cook the chicken and rice as per the recipe. - Allow the dish to cool completely. - Store it in an airtight container in the fridge for up to three days. When ready to eat, reheat it gently on the stove or in the microwave. Add a splash of chicken broth to keep it creamy. Absolutely! To adapt this recipe for slow cooking: - Brown the chicken thighs in a skillet first to enhance flavor. - Place them in the slow cooker with the rice, broth, onion, and garlic. - Cook on low for about 4-5 hours or high for 2-3 hours. - Stir in the cream and peas during the last 30 minutes of cooking. To keep the chicken juicy, pay attention to these tips: - Cook the chicken thighs to an internal temperature of 165°F. - Avoid overcooking, as this can dry them out. - Let the chicken rest for a few minutes after cooking. This helps retain moisture. Yes, you can use other rice varieties. Here are some options: - Brown rice adds more fiber but will take longer to cook. - Jasmine rice offers a floral aroma and cooks similarly to white rice. - Basmati rice can be used, but adjust the cooking time to avoid mushiness. Each type of rice may change the dish's texture slightly. In this blog post, we explored a simple yet delicious creamy smothered chicken and rice recipe. We covered key ingredients, cooking steps, and helpful tips to enhance flavor and texture. You can easily customize it with vegetables or different rice types. Remember, the goal is a comforting meal that satisfies. Enjoy making this dish, and don't hesitate to experiment with your favorite flavors. With practice, you'll become a pro at creating this creamy delight.
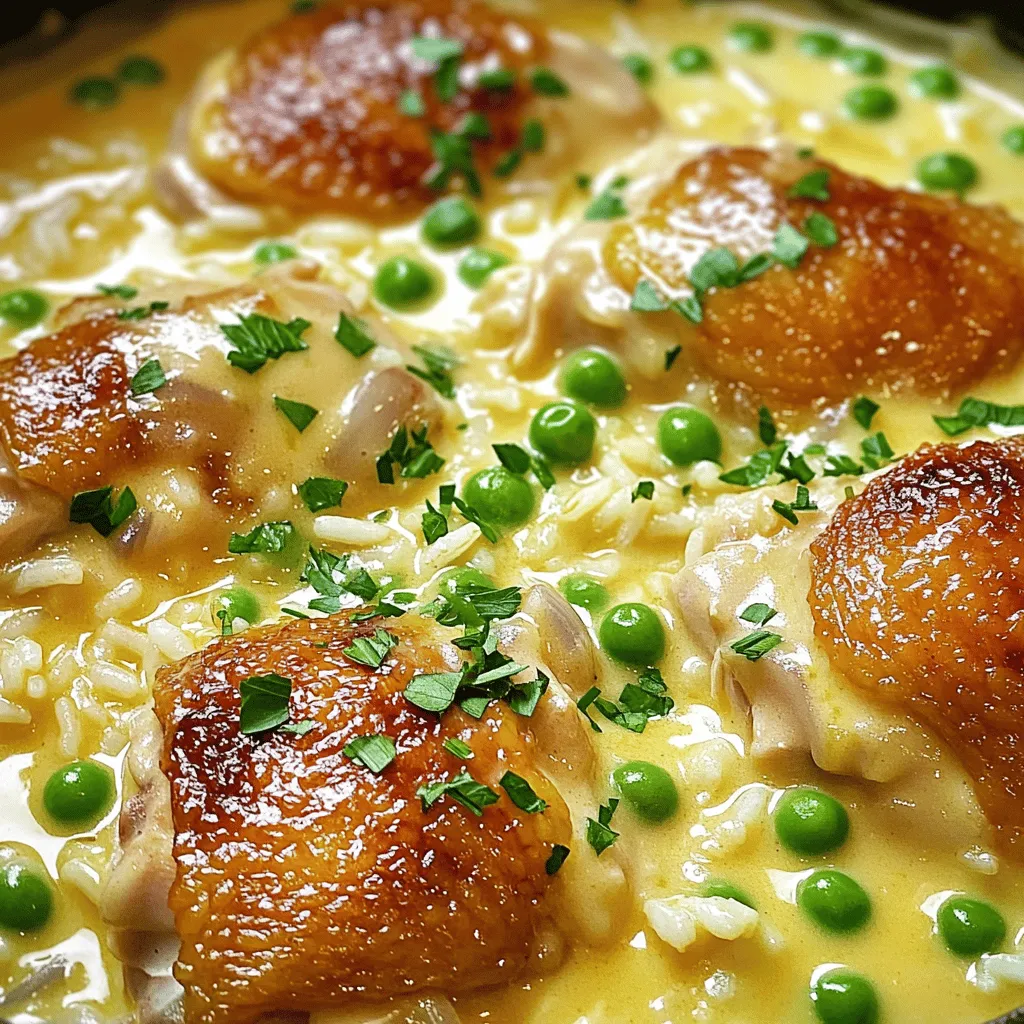
Creamy Smothered Chicken and Rice Hearty Dinner Dish
Looking for a hearty dinner that’s simple yet packed with flavor? Creamy Smothered Chicken and Rice is your answer! This dish combines tender chicken thighs,
The Chicken Buttered Noodles recipe is simple and quick. It takes about 25 minutes and serves four. The dish combines tender chicken, creamy sauce, and egg noodles. This meal is perfect for busy weeknights or cozy weekends. Here are the main ingredients you will need: - 8 oz egg noodles - 2 tablespoons unsalted butter - 1 pound boneless, skinless chicken breast, diced - 2 cloves garlic, minced - 1 cup heavy cream - 1 cup grated Parmesan cheese - 1 cup frozen peas - 1 teaspoon Italian seasoning - Salt and pepper to taste - Fresh parsley, chopped (for garnish) These ingredients create a rich, creamy dish that warms your soul. The chicken adds protein, while the peas give a pop of color and flavor. You can easily change this recipe. Here are some optional ingredients: - Sliced mushrooms for extra flavor - Spinach for added nutrients - Red pepper flakes for heat - Different cheeses like mozzarella or cheddar Feel free to mix and match these extras. They can make your Chicken Buttered Noodles unique each time you cook it. First, grab a large pot. Fill it with water and add a pinch of salt. Bring the water to a boil. Once it’s boiling, add 8 oz of egg noodles. Cook them according to the package until they are al dente. This usually takes about 6-8 minutes. When they are ready, drain the noodles and set them aside. Now, take a large skillet and heat it on medium. Add 2 tablespoons of unsalted butter. Let it melt and bubble. Next, add 1 pound of diced, boneless chicken breast. Cook the chicken for about 6-8 minutes. Stir often until it is nice and golden. Season with salt, pepper, and 1 teaspoon of Italian seasoning while it cooks. With the chicken cooked, it's time to add flavor. Toss in 2 cloves of minced garlic. Sauté for about 1 minute until it smells great. Then, pour in 1 cup of heavy cream. Bring it to a gentle simmer. Stir in 1 cup of grated Parmesan cheese. Keep stirring until it melts and the sauce thickens, about 3-4 minutes. Add in the cooked noodles and 1 cup of frozen peas. Mix well to coat everything in that creamy sauce. Cook for another 2-3 minutes until the peas are warm. Taste it and add more salt or pepper if needed. Now you have a delicious dish ready to serve! For more details, check the Full Recipe. To make the best chicken for your buttered noodles, start with fresh chicken. Cut the chicken into small, even pieces. This helps it cook evenly. Heat a skillet over medium heat and add butter. Once the butter melts, add the chicken. Cook it for about 6-8 minutes. The chicken should be a lovely golden brown. Make sure to season it with salt and pepper. This simple step builds great flavor. To boost the taste, add garlic when the chicken is nearly done. Garlic adds a rich aroma and taste. I also like using Italian seasoning. It gives a nice herby flavor that pairs well with the cream sauce. Don’t forget to taste the dish before serving. If it needs more salt or pepper, add a pinch. This final step makes all the difference. Serve your Chicken Buttered Noodles in a big bowl. I like to sprinkle extra Parmesan cheese on top. It adds a cheesy kick that everyone loves. For a pop of color, add some chopped parsley or pea sprouts. This not only looks nice but also adds freshness. You can enjoy this dish with a side salad or crusty bread. It makes for a comforting meal that's hard to resist. {{image_2}} You can boost the nutrition of chicken buttered noodles by adding vegetables. Try mixing in some fresh spinach, broccoli, or bell peppers. These veggies add color and crunch. Simply sauté them with the chicken for a few minutes. This keeps them bright and tender. You can also add frozen peas, which are already in the recipe. They cook quickly and add sweetness. If you want to change the protein, you have options. Shrimp or ground turkey can work well. For a vegetarian dish, use mushrooms or tofu instead of chicken. Cook them just like you would the chicken. Each option gives a new twist to the dish. Experiment with different flavors to find your favorite. To make this dish gluten-free, switch out the egg noodles. Use gluten-free pasta instead. Many brands taste great and cook well. Be sure to read the package instructions for cooking times. You can also check that your broth and seasonings are gluten-free. This way, everyone can enjoy a comforting bowl of chicken buttered noodles. You can store Chicken Buttered Noodles in the fridge. Place them in an airtight container. They will stay fresh for about three days. When you are ready to eat, check for any off smells before reheating. If you want to freeze the dish, let it cool first. Then, put it in a freezer-safe container. It can last up to three months in the freezer. Be sure to label the container with the date. This way, you remember when you made it. To reheat, first thaw in the fridge overnight. After that, heat it in a skillet over low heat. You might need to add a splash of milk or more cream. This helps bring back the creamy texture. Stir often until it is hot. Enjoy your tasty comfort food again! For the complete recipe, check out the Full Recipe section. You can use milk mixed with butter. For each cup of heavy cream, use 3/4 cup milk and 1/4 cup melted butter. This mix gives a similar rich taste. Another option is cashew cream. Blend soaked cashews with water until smooth. Use it in the same amount as heavy cream. You can also try coconut cream for a different flavor. Add red pepper flakes to the sauce for heat. Start with a pinch and add more if you like it spicy. You can also mix in diced jalapeños or hot sauce. These ingredients will give your dish a nice kick. For a smoky flavor, try some chipotle powder. Yes, this recipe is great for meal prep! You can cook it ahead of time. Store it in an airtight container in the fridge. It lasts up to three days. To reheat, warm it on the stove over low heat. You may need to add a splash of water or milk to loosen the sauce. Enjoy your tasty Chicken Buttered Noodles any day! In this post, we covered the main ingredients and step-by-step instructions for a creamy chicken dish. You learned how to cook chicken, make a rich sauce, and perfectly prepare noodles. I also shared tips to boost flavor and variations to keep the meal fresh. Plus, you got storage tips to keep leftovers tasty. Overall, this dish is simple and fun to make, offering room for creativity in the kitchen. Enjoy cooking and share this with others who love great food.
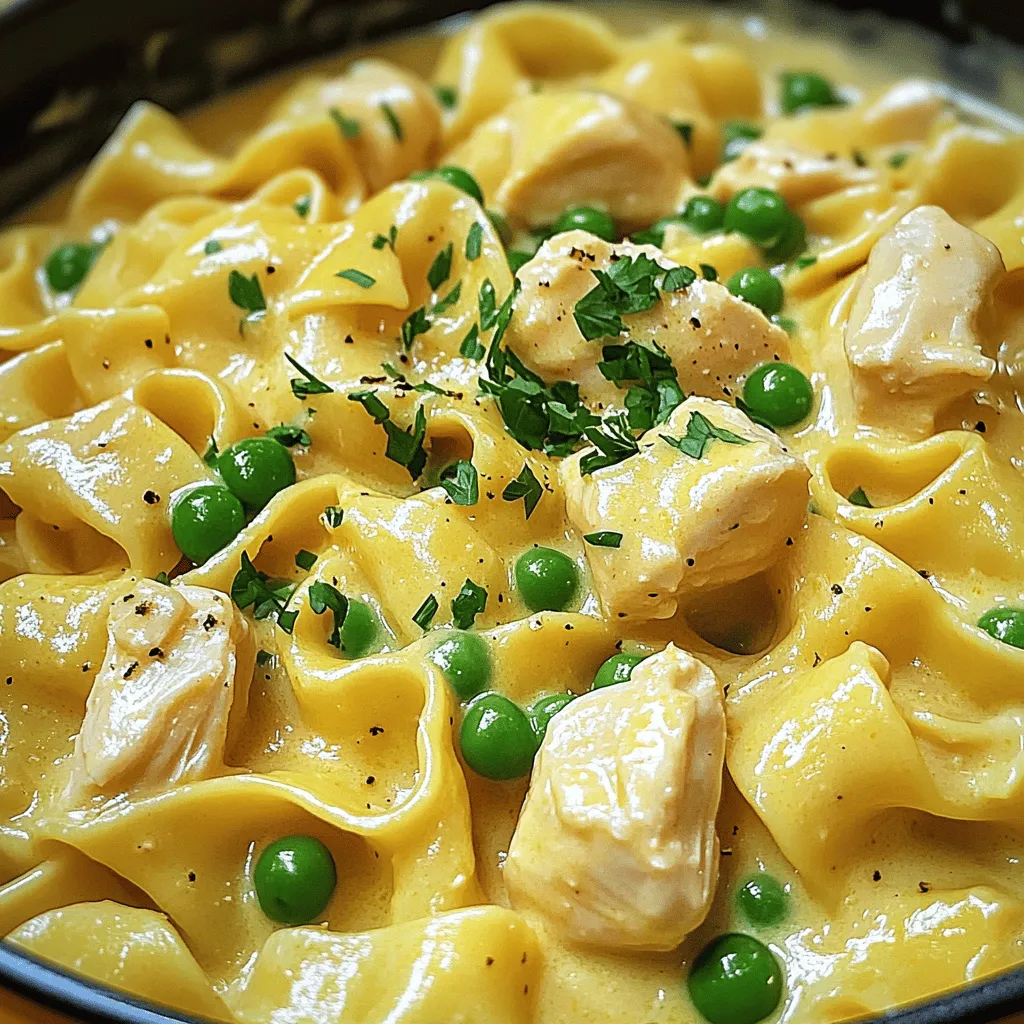
Chicken Buttered Noodles Tasty Comfort Food Recipe
If you crave a warm, tasty dish, look no further than Chicken Buttered Noodles. This easy recipe combines tender chicken and creamy noodles in a
- 2 cups cooked jasmine rice - 1 pound boneless, skinless chicken thighs - 1/2 cup honey - 1/4 cup BBQ sauce - 2 tablespoons soy sauce - 2 cloves garlic, minced - 1 tablespoon ginger, minced - 1 tablespoon vegetable oil - 1/2 teaspoon black pepper - 1/2 teaspoon salt - 1/4 cup chopped green onions - 1/4 cup sesame seeds In this dish, chicken thighs bring a nice richness. They stay juicy and tender. Honey adds sweetness, while BBQ sauce gives a smoky kick. Soy sauce adds depth and umami. The garlic and ginger enhance the flavor. They give a warm and aromatic touch to the chicken. For garnishes, green onions add freshness. They also offer a nice crunch. Sesame seeds give a nutty flavor and look great on top. You can find the full recipe at the end. Enjoy making this tasty meal! To create the marinade, start by mixing these ingredients in a large bowl: - 1/2 cup honey - 1/4 cup BBQ sauce - 2 tablespoons soy sauce - 2 cloves garlic, minced - 1 tablespoon ginger, minced - 1/2 teaspoon black pepper - 1/2 teaspoon salt Stir well until everything blends smoothly. This mix gives the chicken a sweet and tangy flavor. Next, add 1 pound of chopped chicken thighs to the marinade. Mix well to coat each piece. Cover the bowl and let it marinate. You can leave it for at least 30 minutes or up to 2 hours in the fridge. The longer you marinate, the more flavor your chicken will have. Now, heat 1 tablespoon of vegetable oil in a large skillet over medium heat. Remove the chicken from the marinade, letting the excess drip off. Place the chicken in the skillet and cook for about 6-8 minutes. Turn the chicken occasionally until it's golden brown and fully cooked. After that, lower the heat and add any remaining marinade to the skillet. Let it simmer for 2-3 minutes to thicken the sauce. While the chicken is cooking, prepare 2 cups of jasmine rice according to the package instructions. This rice provides a nice base for your dish and absorbs the flavors of the chicken. Once everything is cooked, serve the chicken over the jasmine rice. Drizzle any sauce left in the skillet over the top for extra flavor. For a nice touch, garnish with 1/4 cup of chopped green onions and 1/4 cup of sesame seeds. This adds a bit of crunch and color to your meal. Enjoy your delicious Honey BBQ Chicken Rice! For the complete recipe, check out the Full Recipe. To get the best taste from your chicken, marinate it longer. Aim for at least 30 minutes, but go for 2 hours if you can. This time allows the honey and BBQ sauce to soak in deep. The chicken will taste better, making your meal more enjoyable. Keep an eye on the cooking time. Cook the chicken for about 6-8 minutes. You want it to be golden brown and fully cooked. This caramelization adds a rich flavor to your dish. If you see a nice brown color, that means you are on the right track. Pair your Honey BBQ Chicken Rice with fresh side dishes. Some good options include steamed broccoli or a crisp garden salad. You can also serve it with corn on the cob for added sweetness. These sides balance the flavors well and make your meal complete. For the full recipe, check the link above. {{image_2}} You can switch up the protein in this dish for variety. Shrimp adds a sweet, tender bite. Tofu is a great choice for a plant-based meal. You could also use chicken breasts if you prefer leaner meat. Just make sure to adjust the cooking time as needed. Each option brings a unique taste and texture to the meal. While jasmine rice shines in this dish, other rice types work well, too. Brown rice adds a nutty flavor and more fiber. Cauliflower rice is perfect for a low-carb option. It cooks quickly and absorbs flavors nicely. Experiment with these grains for a fun twist on the classic recipe. Want to elevate the taste? Try adding spices like smoked paprika or cayenne for heat. A splash of lime juice can brighten the dish. You can also drizzle extra BBQ sauce on top for a more robust flavor. Mixing in toasted nuts or fresh herbs can give your meal a crunchy or fresh boost. These simple tweaks can turn a good dish into a great one. After you enjoy your Honey BBQ Chicken Rice, store leftovers in the fridge. Use an airtight container to keep it fresh. This will help the dish stay tasty for up to 3 days. Before you refrigerate, let the meal cool down. This stops condensation, which can make the rice soggy. If you want to save it for later, freezing is a good option. Portion the chicken and rice into freezer-safe containers. Make sure to leave some space at the top for expansion. You can freeze it for up to 3 months. When you are ready to eat it, just thaw it in the fridge overnight. To reheat, you have a few choices. The best way is to use the stove. Add a splash of water or broth in a skillet. Heat on low, stirring often until it's warm. This helps keep the rice fluffy. You can also use the microwave. Cover your dish with a damp paper towel, and heat it in short bursts. Stir in between to ensure even heating. To make Honey BBQ Chicken Rice healthier, you can adjust a few key ingredients. Start by using less honey. You can also substitute some of the BBQ sauce with a sugar-free version. Choose skinless chicken breast instead of thighs to cut down on fat. Additionally, you can add more veggies like bell peppers or broccoli to boost nutrition. This adds fiber and vitamins without many extra calories. Yes, you can make this dish in advance. Cook the chicken and rice, then store them separately in airtight containers. Keep the chicken in the fridge for up to three days. When ready to eat, reheat the chicken and rice in the microwave or on the stove. This makes meal prep easy and saves time on busy nights. Yes, you can adapt this recipe for a slow cooker. First, mix the marinade as stated in the recipe. Then, add the chicken to the slow cooker with the marinade. Cook on low for 4-6 hours or on high for 2-3 hours. Once cooked, shred the chicken with two forks and serve over rice. This method gives the chicken a tender texture and deep flavor. You can serve this dish with various sides. A fresh salad with a light vinaigrette works well. Steamed vegetables like green beans or carrots also pair nicely. For drinks, try iced tea or a light lemonade. These options balance the sweet and savory flavors of the chicken, making a complete meal. In this blog post, I shared a simple recipe for Honey BBQ Chicken Rice. We covered the key ingredients, step-by-step instructions, helpful tips, and even variations to keep things fresh. Remember, marinating the chicken boosts flavor, and don’t shy away from trying different proteins or rice types. This dish is perfect for meal prep and pairs nicely with many sides. Enjoy making this dish your own, and bring your family together over a tasty meal. Your kitchen will be the heart of happy moments!
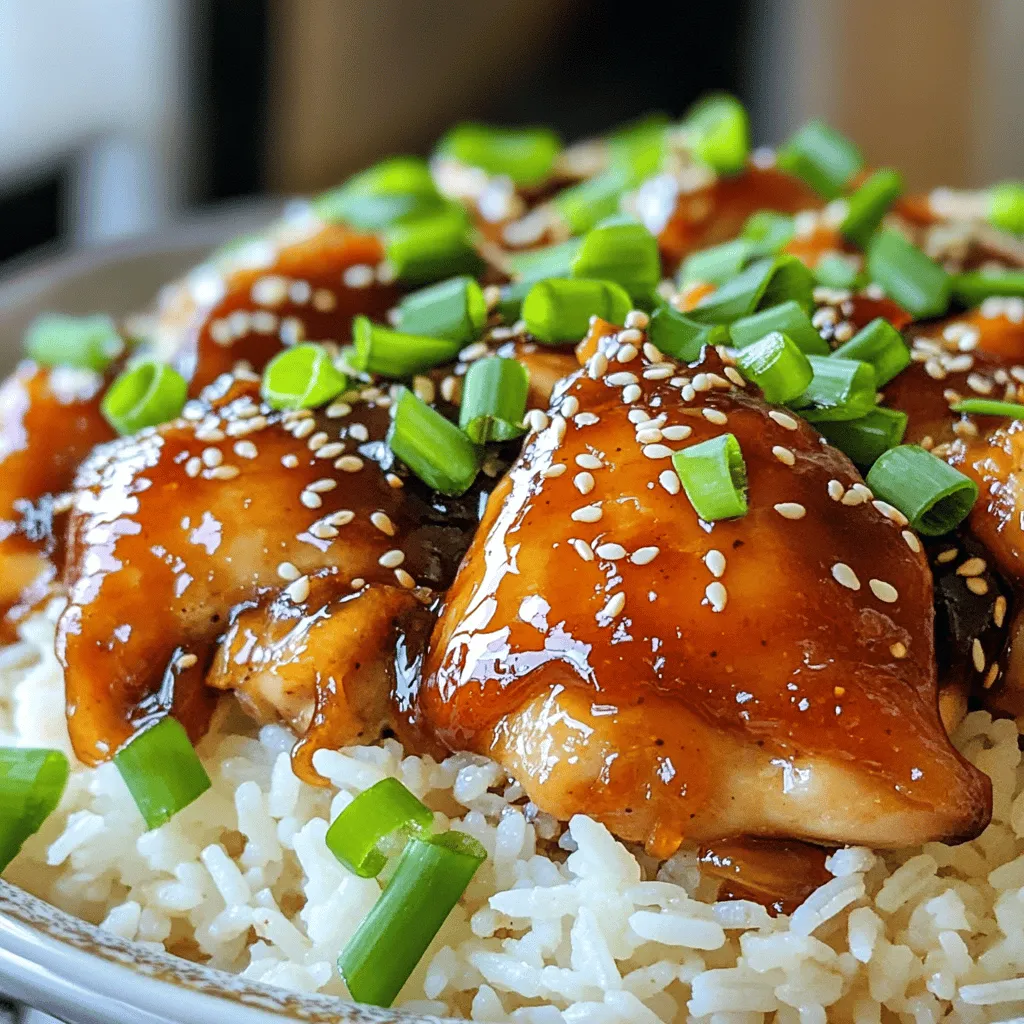
Honey BBQ Chicken Rice Flavorful and Easy Meal Guide
Are you ready for a meal that’s both tasty and easy to make? Honey BBQ Chicken Rice is the perfect dish! With tender chicken marinated