Dinner
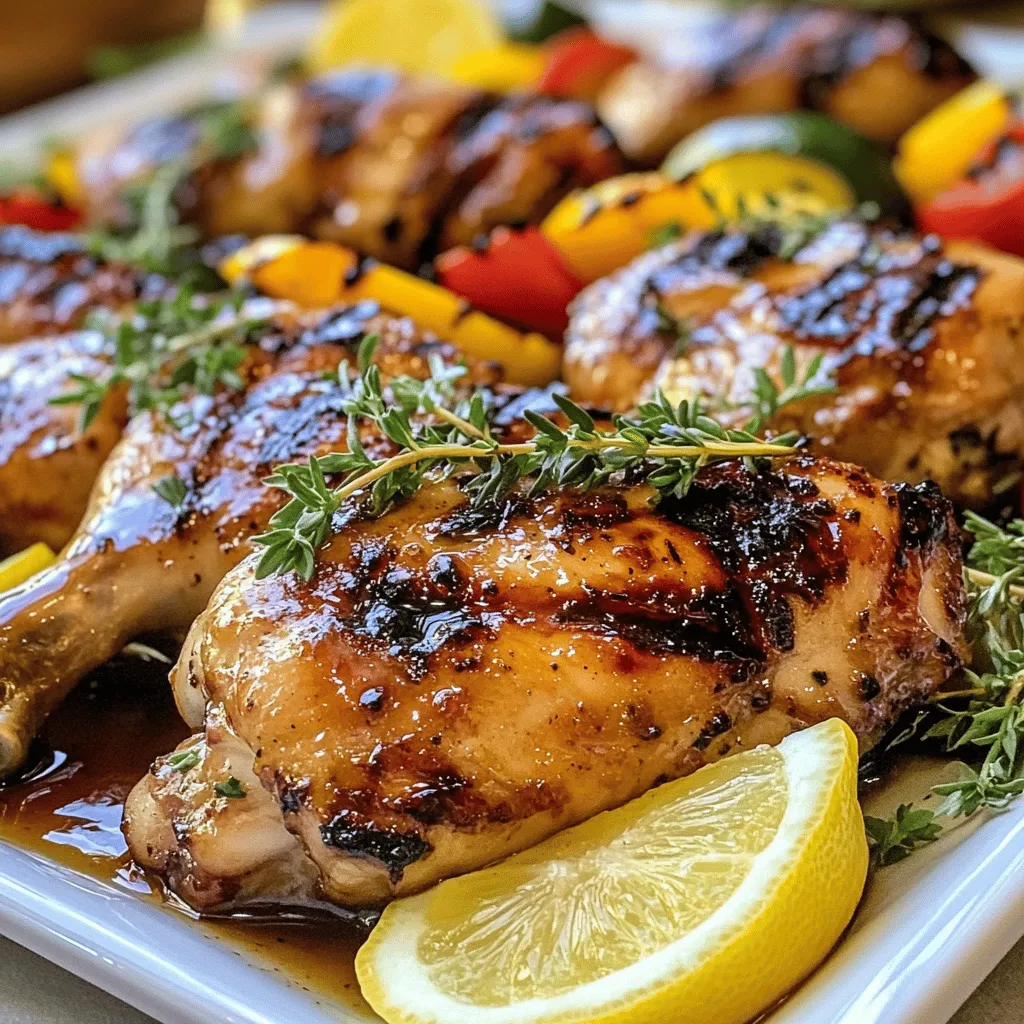
7UP Grilled Chicken Flavorful and Simple Recipe
Are you ready to fire up the grill for a dish that’s both fun and delicious? This 7UP Grilled Chicken recipe is the perfect blend
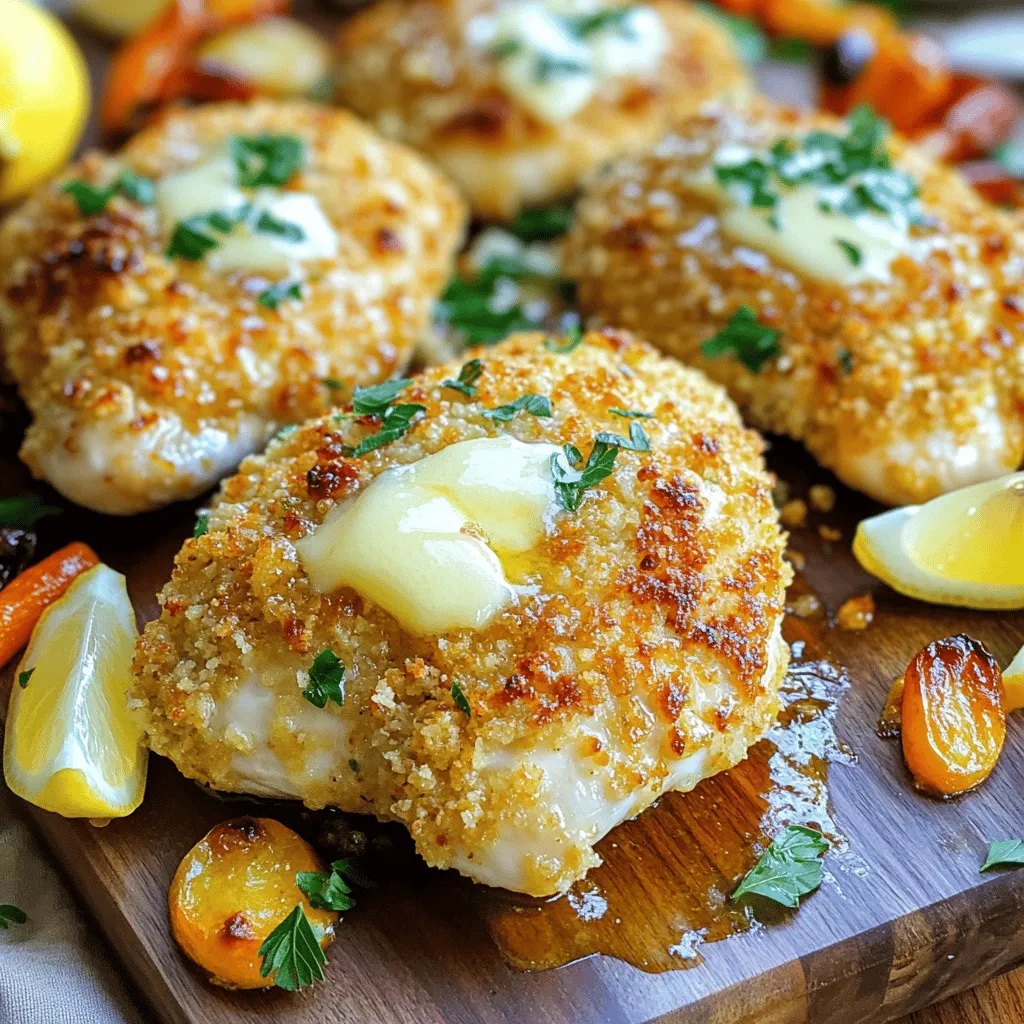
![To create a delicious Cheesy Chicken Bake, you need a few simple ingredients. Each one plays a key role in making this dish creamy and tasty. Here’s what you’ll need: - 2 cups cooked chicken, shredded - 1 cup cooked quinoa - 1 cup broccoli florets, steamed - 1 cup cheddar cheese, shredded - ½ cup cream cheese, softened - ½ cup Greek yogurt - 2 cloves garlic, minced - 1 teaspoon paprika - ½ teaspoon salt - ½ teaspoon black pepper - 1 tablespoon olive oil - ¼ cup green onions, chopped (for garnish) These ingredients mix together to bring out rich flavors. The chicken gives you protein, while the quinoa adds texture. Broccoli packs in nutrients, and cheese brings the gooey goodness that everyone loves. For the full recipe, visit the [Full Recipe]. - Preheat your oven to 375°F (190°C). - In a large bowl, mix the cooked chicken, quinoa, and steamed broccoli. - In another bowl, blend the cream cheese, Greek yogurt, minced garlic, paprika, salt, and black pepper until smooth. - Pour the cream cheese mixture over the chicken and quinoa mix. Stir well to coat everything. - Grease a baking dish with olive oil. Then, transfer the chicken mixture into the dish and spread it evenly. - Top the mixture with the remaining shredded cheddar cheese. - Bake for 25-30 minutes until the cheese is bubbly and golden brown. - Once done, take it out and let it cool for 5 minutes. - Garnish with chopped green onions before serving. For the complete details, check the Full Recipe. Enjoy your cheesy chicken bake! To achieve the right cheese consistency, use freshly shredded cheese. Pre-shredded cheese has additives that can change the melt. Grate your cheese right before using it. This keeps it creamy and gooey. For shredding chicken easily, try using two forks. Pull the chicken apart while it’s still warm. If you have a stand mixer, a paddle attachment works well too. Just mix on low speed for a minute, and your chicken will be perfectly shredded. Ovens can vary in heat. Always check your bake at the minimum time. If your cheese isn’t bubbly after 25 minutes, give it a few more minutes. This way, you avoid overcooking your dish. Managing portion sizes also matters. Use a standard measuring cup to scoop out servings. This helps everyone enjoy the dish without overeating. It also makes it easier to store leftovers. Pair your Cheesy Chicken Bake with a fresh salad. A side of roasted vegetables adds color and nutrition. You can also serve it with garlic bread for a comforting meal. For plating, use a white dish to show off the colors. Garnish with green onions for a pop of color. This makes your meal look fancy and inviting. For the complete recipe, refer to [Full Recipe]. {{image_2}} You can switch up the chicken in many ways. If you want to use turkey, that works great. For a lighter option, try using shredded rotisserie chicken. You can even use tofu for a unique twist. As for cheese, feel free to mix it up too! Try mozzarella for a milder taste. For a sharper bite, use pepper jack. Each swap brings a new flavor to the dish. Making this cheesy chicken bake gluten-free is simple. Just choose gluten-free quinoa or rice instead of regular. For a vegan version, skip the chicken and cheese. Use chickpeas or lentils for protein. Swap cream cheese with vegan cream cheese and Greek yogurt with a plant-based yogurt. You can still enjoy a hearty meal with these changes. To boost the taste, add fresh herbs like thyme or parsley. Sprinkle in some oregano for an Italian twist. You can also kick it up with spices like cayenne or chili powder. Adding veggies like bell peppers or spinach can make it more colorful and nutritious. Each enhancement helps create a dish that’s not just cheesy, but also bursting with flavor. To store leftovers correctly, let the cheesy chicken bake cool first. Then, place it in an airtight container. This keeps it fresh and prevents drying out. For long-term storage, consider freezing. Cut the bake into portions, wrap them tightly in plastic wrap, then place them in a freezer-safe bag. This way, you can enjoy this tasty dish later! For optimal reheating, use an oven. Preheat it to 350°F (175°C). Place the cheesy chicken bake in a baking dish and cover it with foil. Heat for about 20 minutes or until warm. This method keeps the texture and flavor intact. You can also microwave it. Use a microwave-safe dish and heat in short bursts, stirring in between. Just be careful not to overheat, or the cheese may become rubbery. In the fridge, your cheesy chicken bake lasts about 3 to 4 days. Keep an eye on any signs of spoilage, such as off smells or mold. If you see these signs, it’s best to toss it out. Storing it correctly helps ensure you enjoy every bite of this delicious dish! For the full recipe, visit the recipe section. Can I make this dish ahead of time? Yes, you can prepare the cheesy chicken bake in advance. Just mix all the ingredients and store them in the fridge. When you're ready to bake, just pop it in the oven. This makes it perfect for busy nights. Is this recipe suitable for meal prep? Absolutely! This dish is great for meal prep. You can divide it into individual servings. Just reheat each portion when you need it. It tastes just as good, even after a few days. Can I use frozen vegetables? Yes, frozen vegetables work well in this dish. They save time and are just as nutritious. Just thaw them before mixing to ensure even cooking. What kind of chicken works best? Any cooked chicken is great for this recipe. You can use rotisserie chicken or leftovers from another meal. Shredded chicken blends perfectly with the other ingredients. Can I cook it in an air fryer? You can make this dish in an air fryer! Just adjust the temperature to 350°F (175°C) and cook for about 20 minutes. Check for bubbly cheese before serving. How to adjust cooking time for different ovens? Oven temperatures can vary. Always check your dish a few minutes early. If the cheese isn't bubbly yet, add a few more minutes. This way, you'll get the perfect cheesy chicken bake every time. This cheesy chicken bake is easy and fun to make. You start with basic ingredients like chicken, quinoa, and broccoli, then mix them with creamy cheese. I shared tips for perfecting your bake and ways to store it well. You can switch ingredients for different flavors and healthier options. Overall, this dish is great for meals and leftovers. You can get creative with your sides and plates. Enjoy your cooking adventure, and don’t hesitate to try new variations that suit your taste!](https://therecipehatch.com/wp-content/uploads/2025/06/b34af384-4c68-49d0-ba26-0b26b004b710.webp)
Cheesy Chicken Bake Simple and Delicious Recipe
Craving comfort food that’s easy to make? You’re in the right place! This Cheesy Chicken Bake is simple, delicious, and packed with flavor. With just
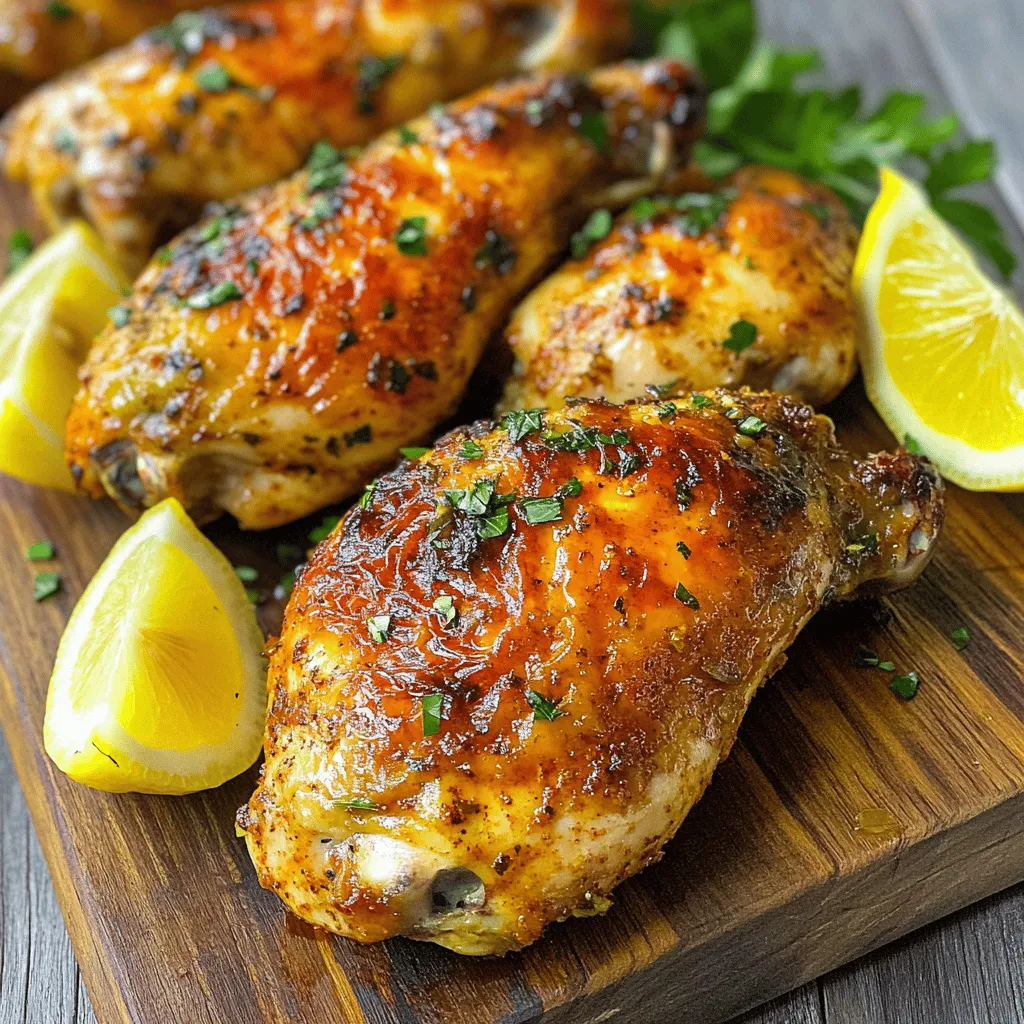
Honey Garlic Chicken Breasts Easy and Flavorful Dish
Are you ready to impress your family with a dish that’s both simple and packed with flavor? Honey Garlic Chicken Breasts is your answer! This
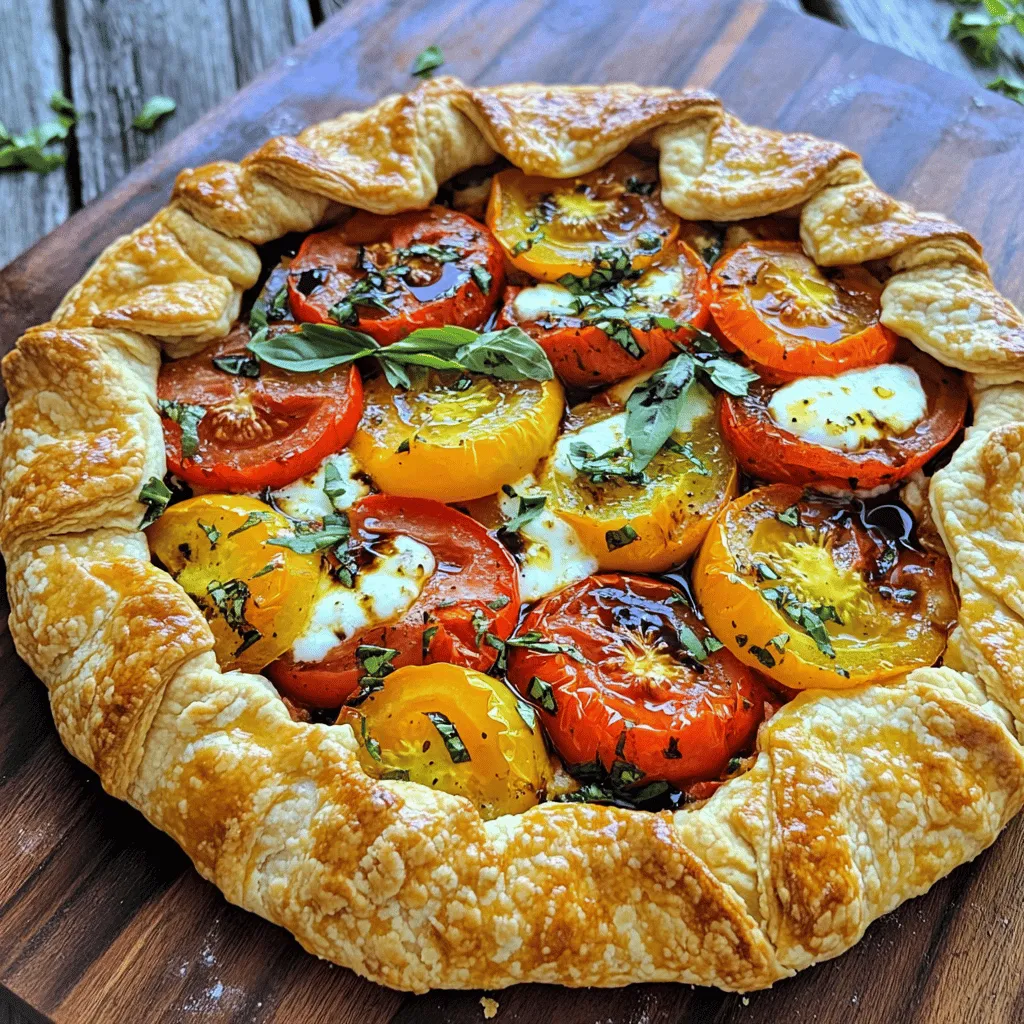
Easy Tomato Galette Flavorful and Simple Delight
Are you ready to impress your friends with an Easy Tomato Galette? This flavorful dish is simple to make, and it highlights fresh ingredients beautifully.
15-Minute Garlic Parmesan Chicken Quick and Easy Meal
Are you ready for a quick meal that’s delicious and easy? This 15-Minute Garlic Parmesan Chicken is your solution! With just a few ingredients, you
Juicy Oven Baked Chicken Breast Easy and Flavorful Recipe
Looking for a simple way to cook juicy, flavorful chicken breasts? You’ve found it! This easy oven-baked chicken breast recipe is packed with taste and
![- 4 bone-in chicken thighs, skin-on - 2 cups vegetable broth - 1 onion, sliced - 4 cloves garlic, minced - 2 cups cherry tomatoes, halved - 2 tablespoons balsamic vinegar - 1 teaspoon dried thyme - 1 teaspoon smoked paprika - 2 cups quinoa or rice (for serving) - Fresh basil or parsley for garnish This recipe is all about simple, fresh ingredients. The chicken thighs add rich flavor and texture. The vegetable broth keeps everything moist and savory. You will love the sweet burst of cherry tomatoes. Balsamic vinegar adds a wonderful tang. For herbs and spices, dried thyme and smoked paprika bring warmth. You can use quinoa or rice as a base. They soak up the sauce well. Garnishing with fresh basil or parsley adds color and freshness. By using these ingredients, you create a delightful dish. It is not just hearty but also easy to prepare. Check the [Full Recipe] for details on cooking. Enjoy the process and the tastes! 1. Preheat your oven to 350°F (175°C). This step helps cook the chicken evenly. 2. In a large oven-proof pot, heat a drizzle of olive oil over medium heat. 3. Season the chicken thighs with salt and pepper. Sear them skin-side down for 4-5 minutes until golden brown. 4. Flip the chicken and cook for another 4 minutes. Remove the chicken and set aside. 1. In the same pot, add sliced onion. Sauté for 2-3 minutes until it softens. 2. Add minced garlic and stir for about 1 minute until it smells great. 3. Stir in halved cherry tomatoes, balsamic vinegar, vegetable broth, thyme, and smoked paprika. Mix everything well to combine flavors. 1. Nestle the chicken thighs back into the vegetable mixture. Ensure the skin stays on top. 2. Cover the pot with a lid and place it in the preheated oven. 3. Bake for 1 hour until the chicken is tender and full of flavor. This simple process creates a hearty meal that warms the soul. For a complete guide, refer to the Full Recipe. To get a great sear on your chicken, start with hot oil. Heat your pot over medium heat and add a drizzle of oil. Place the chicken thighs skin-side down. Cook them for about 4-5 minutes until they turn golden brown. This step gives the chicken a nice flavor and texture. Flip the chicken and cook for another 4 minutes. Timing is key to keep the chicken tender. After searing, cover your pot and bake it in the oven for one hour. This slow cooking makes the chicken juicy and full of flavor. Serve your Forgotten Chicken in shallow bowls. This helps show off the beautiful colors of the dish. Place the chicken on a fluffy bed of quinoa or rice. Spoon some of the sauce around the chicken for a rustic look. Garnishing with fresh herbs adds a pop of color. Basil or parsley works well. This small touch makes your meal look professional and inviting. Want to boost the flavor? Try adding spices like cumin or oregano. They bring a new twist to the dish. You can also use fresh herbs for a stronger taste. Consider alternative vinegars, like red wine vinegar, for a different flavor. You can also swap the vegetable broth for chicken broth. This gives your dish a richer taste. {{image_2}} You can swap out the chicken thighs for bone-in chicken breasts. This change keeps the dish juicy, but it may cook faster. Keep an eye on the time to avoid dryness. You can also use turkey or other poultry. Turkey thighs work well too. They offer a similar richness that pairs nicely with the sauce. If you're looking for a meat-free option, try using tofu or tempeh instead of chicken. Both options soak up the flavors well. For a vegetarian broth, simply replace the vegetable broth with a homemade or store-bought vegetable base. This will keep the taste rich and satisfying. Feel free to change the sauce by adding different vegetables. Bell peppers, zucchini, or spinach can add new tastes and colors. You can also add cream or cheese for a rich finish. A splash of cream can make the sauce extra creamy and comforting. These tweaks help you create a meal that fits your mood and taste. For the full recipe, check out the [Full Recipe]. To keep your Forgotten Chicken fresh, cool it to room temperature. Place the chicken and sauce in an airtight container. Store it in the fridge for up to four days. This method keeps it safe and tasty for your next meal. When it's time to eat the leftovers, you have two great options. For the oven, preheat to 350°F (175°C). Place the chicken in a baking dish and cover with foil. Heat for about 20 minutes. In the microwave, use a microwave-safe plate. Cover the chicken loosely with a damp paper towel. Heat in short bursts of one minute until warm. Always check that the chicken is hot throughout. This helps keep it moist and delicious. You can freeze Forgotten Chicken for later. First, let it cool completely. Then, place it in a freezer-safe bag or container. Remove as much air as possible to prevent freezer burn. It can last up to three months in the freezer. When ready to eat, take it out and let it thaw overnight in the fridge. Reheat by following the oven or microwave tips above. Enjoy the flavors just like when you first made it! For the full recipe, check out the earlier section. Forgotten Chicken is a warm and hearty dish. It comes from home cooks who want easy meals. The name suggests that you can put it in the oven and forget about it. This dish uses bone-in chicken thighs, tomatoes, and spices. The slow cooking makes the chicken tender and juicy. It’s perfect for busy nights or cozy weekends. Yes, you can use boneless chicken thighs or breasts. Boneless cuts will cook faster, so check them often. Adjust the cooking time to about 35-40 minutes. This way, the chicken stays moist and tasty. It still works well with the sauce, so don’t worry! Many sides complement Forgotten Chicken. Here are some great options: - Quinoa or rice to soak up the sauce - Steamed veggies like broccoli or green beans - A fresh salad with greens and a light dressing - Crusty bread for dipping in the sauce These sides add color and balance to your meal, making it even better. This blog post detailed how to create Forgot Chicken using simple ingredients like chicken thighs, broth, and vegetables. We covered each step, from preparation to cooking, along with tips for perfecting flavors and presentation. You can modify the dish to fit your taste or dietary needs. Storing and reheating leftovers is also crucial for future meals. Use this recipe to enjoy a delicious and rewarding dish. It’s easy to make and sure to impress!](https://therecipehatch.com/wp-content/uploads/2025/06/a2918e0b-f8f6-4bc9-aabe-d7b4e72e51c2.webp)
Forgotten Chicken Delight Simple and Hearty Recipe
Are you tired of the same old dinner options? Let me introduce you to Forgotten Chicken! This simple and hearty recipe transforms basic ingredients into
Melt In Your Mouth Chicken Simple Comfort Dish
Are you ready to enjoy a dish that truly delivers comfort? Melt In Your Mouth Chicken is not just a meal; it’s a tender, flavorful
![- 4 chicken thighs (bone-in, skin-on) - 1 cup plain Greek yogurt - 2 tablespoons Dijon mustard - 2 tablespoons honey - 1 teaspoon garlic powder - 1 teaspoon onion powder - 2 cups panko breadcrumbs - ½ cup all-purpose flour - Cooking spray or olive oil for misting To make my oven fried chicken, I start with the right ingredients. First, I choose 4 chicken thighs. Bone-in and skin-on keep the meat juicy. Then, I grab 1 cup of plain Greek yogurt. This yogurt acts as a perfect marinade base. I also need 2 tablespoons of Dijon mustard, which adds a tangy kick. Next, I focus on my seasoning. I use 2 tablespoons of honey for sweetness. It pairs well with the mustard. I add 1 teaspoon of garlic powder and 1 teaspoon of onion powder for extra flavor. These spices enhance the overall taste. Now, for the coating, I need 2 cups of panko breadcrumbs. They make the chicken extra crispy. I mix this with ½ cup of all-purpose flour for a nice crunch. Lastly, I have cooking spray or olive oil to mist the chicken before baking. This step helps give it that golden brown color. For the full recipe and detailed steps, you can check out the [Full Recipe]. - Preheat the oven to 425°F (220°C). - In a large bowl, mix Greek yogurt, Dijon mustard, honey, garlic powder, onion powder, smoked paprika, dried thyme, salt, and black pepper to create a flavorful marinade. - Coat the chicken thighs in the marinade. Make sure they are well covered. - Cover the bowl and refrigerate. Let the chicken marinate for at least 1 hour, but overnight is best for deep flavor. - In a shallow dish, combine panko breadcrumbs and all-purpose flour. Mix them well. - Remove the chicken from the marinade, letting any extra drip off. Dredge each piece in the panko-flour mix. Press gently to make sure the breadcrumbs stick. - Place the coated chicken on a baking sheet. Leave space between each piece. Lightly mist with cooking spray or drizzle olive oil on top to help it crisp up. For the full recipe, follow these steps closely to enjoy a crunchy, delicious meal! Preheat your oven to 425°F (220°C). This step is key for crispiness. A hot oven helps the chicken cook evenly. It also makes the crust golden and crunchy. Mist the chicken lightly with oil or cooking spray. This adds a bit of fat and helps the breadcrumbs brown nicely. Marinate the chicken for at least 1 hour. For a richer flavor, let it sit overnight. This allows the spices to soak in well. You can adjust spice levels to fit your taste. If you like it spicy, add more paprika or a dash of cayenne pepper. Serve the chicken on a large platter for a nice look. Garnish with fresh herbs like parsley or thyme. This adds color and freshness. Ideal sides include coleslaw or potato salad. These dishes complement the chicken's flavor perfectly. Check out the Full Recipe for more serving ideas! {{image_2}} You can change the flavor of your oven fried chicken easily. Try a spicy marinade for heat. Use hot sauce or cayenne pepper to bring the fire. A tangy option can include lemon juice or vinegar for brightness. You can also switch up the chicken parts. While thighs are juicy, chicken breasts or drumsticks work well too. Each part gives a different taste and texture. Choose what you and your family enjoy. If you need a gluten-free option, use almond flour or chickpea flour. These flours give a nice crunch without gluten. For breadcrumbs, you have choices too. You can use regular store-bought breadcrumbs or make your own. Just toast bread and crush it into small pieces. This adds a homemade touch to your dish. You can make oven fried chicken in an air fryer as well. Preheat your air fryer to 400°F (200°C). Cook the chicken for about 20-25 minutes. This method gives a nice crisp without using much oil. Grilling is another option. It adds a smoky flavor that is hard to beat. Just marinate the chicken as you would for baking. Grill it over medium heat, turning until fully cooked. It will have a lovely char and great taste. Try these variations to keep your meals exciting. For a full recipe, check out the Crunchy Honey Mustard Oven Fried Chicken. Store any leftover oven fried chicken in the fridge. Make sure it cools down first. Use airtight containers to keep it fresh. This will help the chicken stay juicy. I recommend glass containers for easy reheating and less odor transfer. When reheating, I prefer the oven over the microwave. The oven helps keep the chicken crispy. Preheat your oven to 375°F (190°C). Place the chicken on a baking sheet. Heat for about 15-20 minutes. If you use the microwave, cover the chicken with a damp paper towel. This keeps it moist but may not keep it crispy. Yes, you can freeze cooked oven fried chicken! Just make sure it cools completely. Wrap each piece in plastic wrap, then place it in a freezer bag. This keeps it safe from freezer burn. When ready to eat, thaw the chicken in the fridge overnight. Reheat it in the oven for the best texture. Enjoy your dish anytime without losing flavor! For the full recipe, refer back to the instructions above. Oven fried chicken is a healthier way to enjoy crispy chicken. Instead of frying, you bake it. You use a mix of panko breadcrumbs and flour to create the crunchy coating. This method cuts down on oil and calories. Plus, it still gives you that great crunch! You get tasty chicken without the guilt. To make your chicken super crispy, use panko breadcrumbs. They are lighter and flakier than regular breadcrumbs. Coat the chicken well, pressing the breadcrumbs on firmly. Lightly mist the chicken with cooking spray or drizzle with olive oil before baking. This extra step helps create a golden, crunchy exterior. Bake at a high heat of 425°F (220°C) for the best results. Yes, you can use skinless chicken. However, the chicken may not be as juicy. The skin helps keep moisture in during cooking. If you prefer skinless, you can brine the chicken first. This will add flavor and moisture. Keep in mind, the texture will differ from using skin-on pieces. Oven fried chicken pairs well with many sides. Classic choices include coleslaw, potato salad, or baked beans. You can also serve it with a fresh salad or roasted veggies. For a fun twist, try it with sweet potato fries. These sides add color and flavor to your meal. For good flavor, marinate chicken for at least 1 hour. If you can, let it sit overnight. This longer time lets the flavors soak in deeply. Just remember to cover the bowl in the fridge. This keeps your chicken safe while it marinates. This blog post guided you through making delicious oven-fried chicken. You learned about the right ingredients, from chicken thighs to marinades and coating mixtures. We covered simple steps for preparation, marination, and baking for that perfect crispiness. I shared tips to enhance flavor and ideas for variations to suit your taste. Remember, with a few tweaks, you can make this dish your own. Enjoy your cooking and make every meal memorable!](https://therecipehatch.com/wp-content/uploads/2025/06/19291803-1386-4f69-9d3e-92fea8ce026d.webp)
Oven Fried Chicken Crispy and Flavorful Delight
Are you craving that crispy, crunchy goodness of fried chicken but want a healthier twist? Oven Fried Chicken is your answer! With a few key

Alice Springs Chicken Flavorful and Easy Recipe
Are you ready to impress your family with a delicious meal? Alice Springs Chicken is both flavorful and easy to make. In this article, I’ll