Dinner

To make this bread, you need key items that create its rich flavor and texture: - 2 cups grated zucchini (about 2 medium zucchinis) - 1 cup all-purpose flour - 1 teaspoon baking powder - 1/2 teaspoon baking soda - 1/2 teaspoon salt - 1/4 teaspoon black pepper - 1/2 teaspoon garlic powder - 1/2 cup shredded cheddar cheese - 1/4 cup grated Parmesan cheese - 1/4 cup olive oil - 2 large eggs The grated zucchini gives moisture. The flour and leavening agents help it rise. The cheeses add a creamy, savory taste that you’ll love. You can customize your zucchini bread with optional items: - 1/4 cup fresh herbs (like parsley or chives), chopped - Red pepper flakes for heat Adding fresh herbs brings brightness. You can also mix in different cheeses for fun flavors. For spice lovers, red pepper flakes kick it up a notch. If you’re looking for swaps, consider: - Using gluten-free flour - Replacing eggs with flaxseed meal for vegan needs This flexibility makes it easy to adapt to your taste and diet. You can find the Full Recipe to guide you through making this delicious bread. 1. Preheat your oven to 350°F (175°C). Grease your loaf pan well with olive oil. This helps the bread come out easily. 2. In a large mixing bowl, add the grated zucchini, flour, baking powder, baking soda, salt, black pepper, and garlic powder. Stir everything together until it is well mixed. 1. Next, pour the olive oil and crack in the eggs. Mix until just combined. Do not overmix; it’s okay if some lumps remain. 2. Now, fold in the shredded cheddar cheese, grated Parmesan cheese, and your choice of fresh herbs. If you like heat, sprinkle in some red pepper flakes. 1. Pour the batter into your prepared loaf pan. Smooth the top with a spatula for an even bake. 2. Bake in the oven for 45-50 minutes. To check if it's done, insert a toothpick in the center. If it comes out clean, your bread is ready. 3. Let the bread cool in the pan for about 10 minutes. Then, transfer it to a wire rack to cool completely. Enjoy this delightful recipe! Choosing the right zucchini makes a big difference. Look for firm zucchinis that feel heavy for their size. The skin should be shiny and smooth. Avoid zucchinis with soft spots or blemishes. Moisture content in zucchini is key. Too much moisture can make your bread soggy. To reduce moisture, grate your zucchini and then squeeze it gently in a clean cloth. This step helps you achieve a great texture in your bread. Achieving the perfect texture comes from proper mixing. Mix your dry ingredients well before adding wet ones. This ensures even flavor throughout. Do not overmix the batter after adding wet ingredients. A few lumps are okay! For even baking, place your loaf pan in the center of the oven. This allows heat to circulate around it. Rotate the pan halfway through baking for an even rise and color. When serving, slice the bread while it’s warm. This makes it easy to cut. A sprinkle of fresh herbs on top adds color and flavor. Pair it with creamy yogurt or herb-infused butter for extra delight. Garnishing your bread not only enhances flavor but also adds visual appeal. Consider adding a few thin slices of zucchini or a sprig of parsley on top. This small touch transforms your dish into a beautiful centerpiece. Check out the Full Recipe for more details. {{image_2}} When you make One Bowl Cheesy Zucchini Bread, you can play with the recipe. Here are some fun ideas. You can switch up the cheese for different tastes. Try mozzarella for a milder flavor. Feta can add a salty zing. For a smoky twist, use gouda. If you need gluten-free options, replace the flour with almond or coconut flour. These swaps change the taste but keep it yummy. You can add more veggies to your bread. Grate some carrots or bell peppers for extra color and crunch. Spinach also works well and adds great nutrients. For a herby version, mix in fresh herbs like dill or basil. This gives your bread a fresh taste that’s perfect for summer. Spices can change the flavor of your zucchini bread. Add a pinch of chili powder for heat. For a sweet twist, try cinnamon or nutmeg. You can even mix sweet and savory by adding both types of spices. This lets you create a unique loaf every time. Be sure to check out the Full Recipe for the basic steps. Enjoy experimenting with these ideas to find your favorite version! To keep your leftover zucchini bread fresh, let it cool completely first. Wrap the cooled bread tightly in plastic wrap or aluminum foil. You can also place it in an airtight container. This keeps moisture in and prevents it from drying out. Storing it in a cool, dark place works best. If you want to save zucchini bread for later, freezing is a great option. First, wrap the bread slices in plastic wrap. Then, place them in a freezer bag. Make sure to squeeze out any air. This helps prevent freezer burn. For best results, eat the frozen bread within three months. When you’re ready to enjoy it, take a slice out and let it thaw at room temperature. You can also warm it in the oven for a few minutes for a freshly baked taste. In the fridge, your zucchini bread will last about five to seven days. Always check for signs of spoilage. Look for any mold or off smells. If the bread feels too dry or hard, it may have gone bad. If you notice any of these signs, it’s best to throw it away. Enjoy your One Bowl Cheesy Zucchini Bread while it’s fresh! How do I know if my zucchini bread is done? You can check if the zucchini bread is done by using a toothpick. Insert it into the center of the bread. If it comes out clean, your bread is ready. If there is batter on the toothpick, bake it a little longer. The top should also be golden brown and firm to the touch. Can I make this recipe vegan? Yes, you can make this recipe vegan. Simply replace the eggs with a mix of flaxseed meal and water. Use 1 tablespoon of flaxseed meal mixed with 2.5 tablespoons of water for each egg. This will help bind the ingredients together just like eggs do. Calories per slice of zucchini bread Each slice of this cheesy zucchini bread has about 150 calories. This can vary based on the exact ingredients you use, such as the type of cheese or the amount of oil. Health benefits of the ingredients used Zucchini is low in calories and high in vitamins. It adds moisture to the bread without extra fat. Cheddar and Parmesan add protein and calcium. Olive oil provides healthy fats, while fresh herbs add flavor and nutrients. This bread is a great way to enjoy veggies! What’s the best way to grate zucchini? The best way to grate zucchini is to use a box grater or a food processor. Choose the large holes for a nice texture in your bread. After grating, make sure to squeeze out excess moisture. This helps keep the bread from getting soggy. Can this recipe be made without eggs? Yes, you can make this recipe without eggs. As mentioned, use the flaxseed meal mixture as a substitute. You can also use applesauce or mashed banana for moisture and binding. Just keep in mind that this may change the flavor slightly. One Bowl Cheesy Zucchini Bread is a fun, easy recipe. We covered the key ingredients, plus variations to suit your taste. Remember to pick the best zucchini and check the bread while baking. Don't shy away from trying different cheeses or spices. With simple steps and smart tips, you'll bake a delicious loaf. Store it well for later enjoyment. This recipe brings flavor and nutrition together, making it a smart choice. Enjoy your baking adventure!
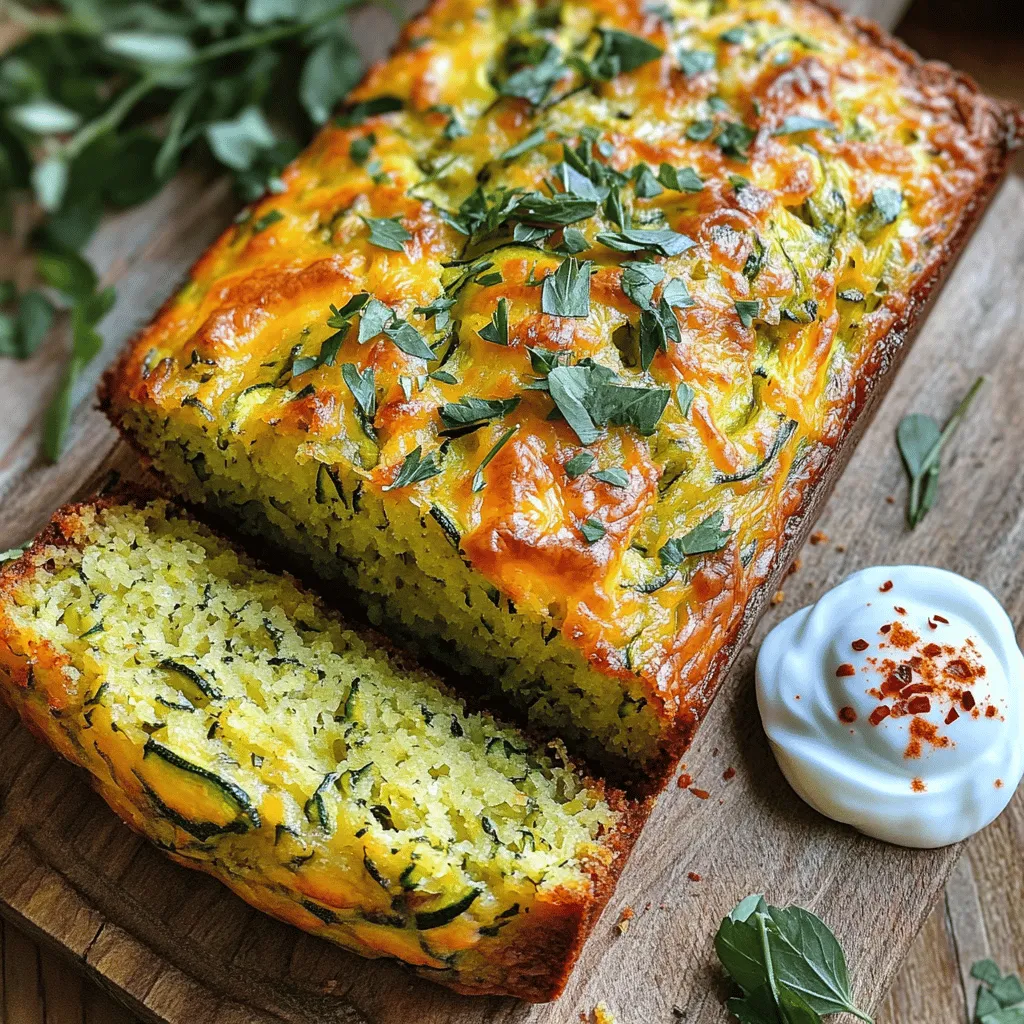
One Bowl Cheesy Zucchini Bread Delightful Recipe
Are you looking for a simple yet delicious recipe to impress family and friends? Look no further! My One Bowl Cheesy Zucchini Bread is quick
- 4 boneless, skinless chicken thighs - 2 tablespoons olive oil - 2 teaspoons smoked paprika - 1 teaspoon garlic powder - 1 teaspoon onion powder - 1 teaspoon dried oregano - 1 teaspoon chili powder - Salt and pepper to taste - Juice of 1 lemon - Fresh parsley for garnish You need chicken thighs for this recipe. They are juicy and cook well in the air fryer. Olive oil adds a nice richness and helps the spices stick. The spices are key to making the chicken flavorful. Smoked paprika gives a lovely smoky taste. Garlic powder and onion powder add depth. Dried oregano introduces a hint of earthiness. Chili powder brings a little heat. Salt and pepper round out the flavor. I like to squeeze fresh lemon juice over the chicken. It brightens the dish and balances the richness. Lastly, fresh parsley adds a touch of color and freshness as a garnish. This combination makes the chicken taste amazing. - Air fryer - Mixing bowl - Whisk and tongs To make this dish, you need a few simple tools. An air fryer is essential for cooking the chicken quickly and evenly. A mixing bowl is important for combining the marinade. Use a whisk to mix the ingredients well. Tongs are handy for flipping the chicken in the air fryer. With these tools, you will create a delicious meal with ease. For the full recipe, check out the detailed instructions to get started on your air fryer grilled chicken. Start by making the marinade. In a large bowl, combine 2 tablespoons of olive oil and your spices. Use 2 teaspoons of smoked paprika, 1 teaspoon of garlic powder, 1 teaspoon of onion powder, 1 teaspoon of dried oregano, and 1 teaspoon of chili powder. Add salt and pepper to taste. Next, whisk all the ingredients until they blend well. This step makes the chicken flavorful and juicy. Now, it’s time to add the chicken thighs. Place 4 boneless, skinless chicken thighs into the bowl with the marinade. Make sure each piece is well-coated. Cover the bowl with plastic wrap. Refrigerate the chicken for at least 30 minutes. If you have more time, marinate it for up to 2 hours. This will give the chicken more flavor. Before cooking, preheat your air fryer to 380°F (190°C) for about 5 minutes. Once heated, place the marinated chicken thighs in the air fryer basket in a single layer. Cook for 10 minutes, then flip each piece over. Cook for another 8 to 10 minutes. Check the internal temperature; it should reach 165°F (75°C). The chicken will be golden brown and ready to serve. To make your air fryer grilled chicken shine, try different spices. I love using smoked paprika for its rich flavor. Garlic powder adds a nice kick, while onion powder brings depth. You can also use dried oregano for an earthy taste. Don’t shy away from chili powder if you want a bit of heat. Fresh herbs can take your chicken to the next level. Consider adding thyme or rosemary for a fragrant touch. You might even try mixing in some fresh basil for a hint of sweetness. Experiment with what you like best! Crispy skin is all about the right heat and time. Set your air fryer to 380°F (190°C). This temperature gives the chicken a nice sear. Cooking time matters too. Aim for about 10 minutes on one side, then flip and cook for another 8-10 minutes. Don't overcrowd the air fryer basket. Leave space between each piece of chicken. This allows hot air to flow freely, ensuring even cooking. If you stack the chicken, some pieces may not get crispy. Serving your grilled chicken well can impress anyone. Place the chicken on a large platter. Add fresh parsley and lemon wedges for color. This makes your dish pop! For side dishes, pair your chicken with a fresh garden salad or steamed veggies. This not only looks good but also adds nutrition. You can find the full recipe for air fryer grilled chicken in the recipe section. {{image_2}} I love to mix things up with marinades. An Italian herb marinade adds a fresh touch. You can use: - 2 tablespoons olive oil - 1 tablespoon balsamic vinegar - 1 teaspoon dried basil - 1 teaspoon dried thyme - 1 teaspoon garlic powder - Salt and pepper to taste For a spicy kick, try a spicy marinade. This one packs heat: - 2 tablespoons olive oil - 1 tablespoon hot sauce - 1 teaspoon smoked paprika - 1 teaspoon cayenne pepper - 1 teaspoon garlic powder - Salt and pepper to taste You can use boneless chicken breasts or thighs. Chicken thighs stay juicy and tender. Breasts are leaner but can dry out if overcooked. For chicken breasts, cook them for about 10-12 minutes. Thighs take about 8-10 minutes. Always check the internal temperature. It should reach 165°F (75°C). Adjust the time based on the thickness of the cut. If you want a meatless option, air fryer tofu makes a great substitute. Press the tofu first to remove excess water. Then, marinate it just like you would chicken. Grilled vegetables are also a tasty option. Use bell peppers, zucchini, and mushrooms. Toss them with olive oil and seasoning. Cook them in the air fryer for about 10-15 minutes. This way, you get a colorful and healthy side dish. For the complete recipe, check out the Full Recipe section. To store cooked chicken, let it cool first. Place it in an airtight container. This helps keep the chicken fresh. Store the container in the fridge. Cooked chicken lasts about 3 to 4 days in the fridge. If you want it to last longer, consider freezing it. The best way to reheat grilled chicken is in the air fryer. Set the air fryer to 350°F (175°C). Heat the chicken for about 5 to 7 minutes. This keeps the chicken juicy. To avoid dryness, add a bit of water to the air fryer basket. This helps steam the chicken as it reheats. To freeze grilled chicken, wrap it tightly in plastic wrap. Then place it in a freezer bag. Be sure to remove as much air as possible. This prevents freezer burn. When you want to cook it, thaw the chicken in the fridge overnight. This makes it easier to cook evenly. Cooking time in an air fryer varies by chicken size. For boneless, skinless chicken thighs, cook for about 18-20 minutes at 380°F (190°C). Flip them halfway through for even cooking. If you use chicken breasts, they may need around 20-25 minutes. Always check the internal temperature. It should reach 165°F (75°C) to be safe to eat. You can use frozen chicken in the air fryer. However, cooking times will change. Add about 5-10 minutes to the cooking time. Ensure the chicken cooks evenly. It's best to check the internal temperature often. This way, you avoid undercooked chicken. Take care to season the chicken well after thawing. If your chicken isn’t crispy, check a few things. First, ensure you coat it well in oil. The oil helps achieve that crispy texture. Second, avoid overcrowding the basket. This allows hot air to circulate. Lastly, consider increasing the cooking time slightly. If needed, use a bit more heat for the last few minutes. This blog post covered a simple air fryer chicken recipe, focusing on key ingredients, equipment, and steps. You learned how to marinate chicken, cook it perfectly, and enhance flavors. I shared tips for crispy skin and creative variations, like vegetarian options. Remember, the right techniques and careful preparation lead to tasty results. Whether you’re a novice or a pro, you can enjoy delicious air-fried chicken. Now, get started and savor every bite!
Air Fryer Grilled Chicken Flavorful and Juicy Recipe
Ready to transform your chicken game? In this post, I’ll guide you through making flavorful and juicy air fryer grilled chicken that will wow your
To create a burst of flavor in your dish, you need some key items. Here’s the list: - 4 medium zucchinis, spiralized - 3 tablespoons sesame oil - 4 cloves garlic, minced - 1 teaspoon red pepper flakes (adjust to taste) - 2 tablespoons soy sauce (or tamari for gluten-free) - 1 tablespoon rice vinegar - 1/2 teaspoon ginger, grated - 3 green onions, chopped - 1/4 cup roasted peanuts, crushed - Fresh cilantro for garnish - Salt and pepper to taste These ingredients work together to give you a rich, spicy, and savory taste. The zucchini noodles are light, while the garlic and sesame oil add depth. You can take your zucchini noodles up a notch with some optional ingredients. Consider adding: - A splash of lime juice for brightness - Sliced bell peppers for sweetness - Fresh basil or mint for an herbal twist - Sriracha or chili paste for extra heat These additions can personalize your dish and make it your own. If you have specific dietary needs, I have ideas for swaps: - Use olive oil instead of sesame oil for a different flavor. - Swap soy sauce with coconut aminos for a soy-free option. - Replace peanuts with sunflower seeds for nut allergies. - Use zucchini ribbons if you don’t have a spiralizer. These substitutions help make the dish fit various diets while keeping the taste intact. To start, gather your ingredients. Wash the zucchinis under cold water. Use a spiralizer or a peeler to create long, thin strips. Set the zucchini noodles aside in a bowl. This process takes about 10 minutes. The noodles should look like pasta, making them fun to eat. Heat sesame oil in a large skillet over medium heat. Add minced garlic, stirring for about one minute. The garlic should smell great! Next, add red pepper flakes and grated ginger. Cook these for 30 seconds. This step brings out their flavors. Now, toss in the zucchini noodles. Stir them to coat with garlic and spices. Sauté for 2-3 minutes until they are tender yet still crunchy. You want that nice bite! Pour in soy sauce and rice vinegar. Mix well, letting the noodles soak up the sauce. Cook for another 1-2 minutes to warm everything through. Remove the skillet from the heat. Season with salt and pepper to taste. Stir in chopped green onions and crushed peanuts for extra crunch. For a fresh touch, garnish with cilantro. Serve your Spicy Garlic Chinese Zucchini Noodles hot. The colors and textures will impress anyone at your table. For the complete recipe, check out Full Recipe. To make perfect zucchini noodles, pick firm zucchinis. Look for ones that feel heavy for their size. Wash them well to remove dirt. Cut off both ends before spiralizing. Use a spiralizer for even noodles. If you don’t have one, a peeler works too. Just slice into thin strips. Aim for long strands to mimic traditional noodles. This adds a fun texture to your dish. Spice is key in this dish. Start with one teaspoon of red pepper flakes. If you enjoy heat, add more as you cook. Taste along the way. You can always add more, but it’s tough to take it out. For a milder version, skip the flakes. Instead, try a pinch of black pepper. You can also add a splash of coconut milk for creaminess without heat. Pair your spicy garlic zucchini noodles with protein. Grilled chicken, shrimp, or tofu work great. Add some crunch with chopped nuts or seeds. Fresh herbs like cilantro or basil brighten the dish. Serve it with a side of rice for a heartier meal. For extra flavor, drizzle sesame oil on top before serving. For the full recipe, check the details above! {{image_2}} You can make Spicy Garlic Chinese Zucchini Noodles even heartier by adding protein. Cooked chicken, shrimp, or tofu work great. Just sauté your choice in sesame oil before adding the garlic. For a quick option, use pre-cooked shrimp. Toss it in just before serving. This adds flavor and makes the dish filling. Adding more veggies boosts nutrition and flavor. Consider bell peppers, carrots, or spinach. Slice them thin and toss them in while cooking the zucchini noodles. They cook quickly and keep the dish colorful. Try adding broccoli florets for a nice crunch. More veggies equal more vitamins, making the meal healthier. This dish is already low-carb, but you can enhance that. Use tamari instead of soy sauce for gluten-free needs. You can also swap zucchini with other low-carb veggies like spaghetti squash or eggplant. These options give you a different taste and texture. No matter what you choose, it will still be delicious. For the full experience, check out the Full Recipe for Spicy Garlic Chinese Zucchini Noodles . To store leftover spicy garlic Chinese zucchini noodles, first let them cool. Place them in an airtight container. You can keep them in the fridge for up to three days. Make sure to separate the noodles from any sauce to keep them fresh. This way, they stay crisp and tasty when you enjoy them again. If you want to store them longer, freezing is a great option. Pack the noodles in freezer-safe bags or containers. Remove as much air as possible. You can freeze them for up to a month. Keep in mind that the texture may change slightly after thawing. But they will still taste good. When you are ready to eat your noodles, thaw them in the fridge overnight. To reheat, use a skillet over medium heat. Add a splash of sesame oil to keep them moist. Stir until heated through, about 3-5 minutes. This helps bring back the bold flavors. Enjoy every bite just like the first time! You can make zucchini noodles without a spiralizer. Just grab a vegetable peeler. Slice the zucchini into long, thin strips. Keep turning it to get more noodles. You can also use a box grater. Shred the zucchini lengthwise to create flat, noodle-like strands. Both methods work great! Yes, you can use other noodles! Rice noodles or whole wheat noodles are good choices. They add a different texture and flavor. You can also try gluten-free varieties. Just be sure to cook them according to package instructions. This way, they will pair well with the spicy garlic sauce. If you have a peanut allergy, don't worry! You can use sunflower seeds or pumpkin seeds instead. These seeds add a nice crunch and flavor. For a nut-free option, try crispy chickpeas. They will give you a similar texture and taste. You can still enjoy the dish safely! For the complete recipe, head to the Full Recipe section. Making spicy garlic Chinese zucchini noodles is fun and easy. We explored key ingredients, cooking steps, and useful tips. You learned how to spiralize zucchini and adjust spice levels. I shared tasty variations and how to store leftovers for later. Remember, cooking is all about being creative and adapting to your needs. Enjoy trying new flavors and making this dish your own!
Spicy Garlic Chinese Zucchini Noodles Flavor Burst
Craving a dish that packs a punch with bold flavors? Look no further! My Spicy Garlic Chinese Zucchini Noodles offer a delightful twist on classic
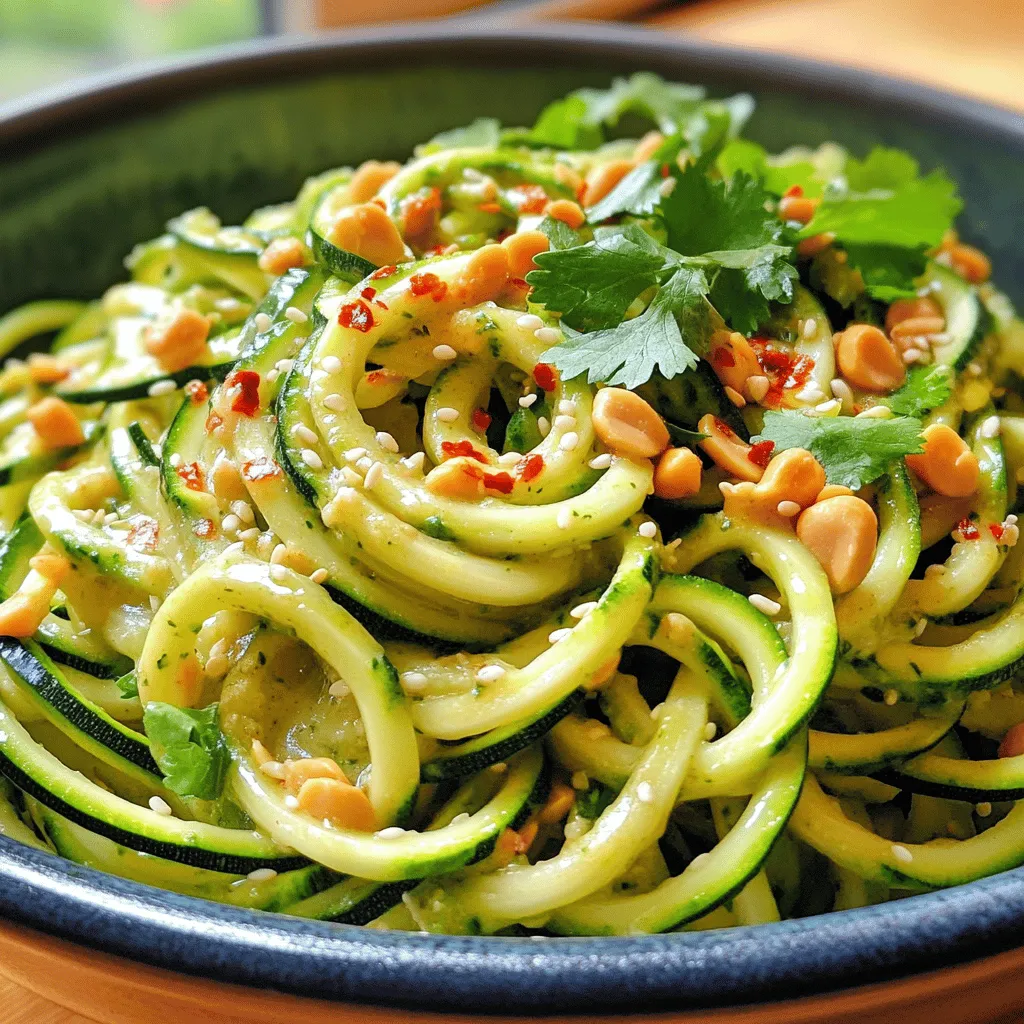
Here is what you need for Zucchini Noodles with Tomato and Basil: - 4 medium zucchinis - 2 cups cherry tomatoes, halved - 1 cup fresh basil leaves, roughly chopped - 3 cloves garlic, minced - 2 tablespoons olive oil - 1 teaspoon red pepper flakes (optional) - Salt and pepper to taste - 1/4 cup grated parmesan cheese (optional) Gathering these ingredients is easy. Zucchini is the star. It gives a fresh taste and light texture. Cherry tomatoes add sweetness and color. Fresh basil brings a lovely aroma. Garlic adds depth to the dish. Olive oil helps bring everything together. If you like a bit of heat, add red pepper flakes. Adjust salt and pepper to suit your taste. Lastly, parmesan cheese can be a nice touch for creaminess. You can find the full recipe in the earlier section. Enjoy the process as you prepare this simple, tasty dish! To start, you need to create your noodles. You can use a spiralizer for this task. If you don’t have one, grab a vegetable peeler. Simply peel the zucchini into long strips. After you make your noodles, place them in a colander. Sprinkle a pinch of salt over them and let them sit for 15 minutes. This draws out extra moisture, making them crispier. Next, let’s cook the garlic. Heat olive oil in a large skillet over medium heat. Add minced garlic and red pepper flakes, if you like a bit of spice. Sauté for about one minute. Keep a close eye to avoid burning the garlic. Now, add the halved cherry tomatoes to the skillet. Cook them for 5 to 7 minutes. You want them to soften and burst, releasing their juices. Stir them occasionally to keep them from sticking. Now it's time to bring everything together. Gently fold the zucchini noodles into the skillet with the cooked tomatoes. Cook for an additional 2 to 3 minutes. Be careful not to overcook the noodles; you want them warm but still firm. After that, remove the skillet from the heat. Stir in the fresh basil and season with salt and pepper to taste. If you want, sprinkle on some grated parmesan cheese. This will add a creamy finish to your dish. You can find the complete recipe in the [Full Recipe]. To make great zucchini noodles, you need to avoid sogginess. Here are key tips: - Salt the noodles: After spiralizing, sprinkle salt on the zucchini noodles. Let them sit in a colander for 15 minutes. This draws out excess moisture. - Choose firm zucchinis: Select zucchinis that feel firm and heavy. Avoid soft or wrinkled ones for the best texture. You can brighten the taste of your dish easily. Here’s how: - Add lemon juice: A splash of fresh lemon juice lifts the flavor. It adds brightness that complements the tomatoes. - Explore herbs and spices: Consider using oregano, thyme, or crushed red pepper. These can add depth to your dish. How you serve your zucchini noodles can make a difference. Here are ideas: - Pair with protein: Serve the noodles with grilled chicken or shrimp. This adds a hearty touch. - Think about presentation: Use a large bowl to show off the vibrant colors. Top with extra basil and parmesan for a beautiful finish. For a complete guide on making this dish, refer to the Full Recipe. {{image_2}} You can switch zucchini for other veggies. Try using squash, carrots, or sweet potatoes. These options add unique flavors and colors. Spiralize them just like zucchini for fun shapes. Each veggie brings its own taste and texture. This makes your dish more vibrant and exciting. You can enjoy this dish without cheese or animal products. Just skip the parmesan in the recipe. Use nutritional yeast for a cheesy flavor. It’s vegan and gluten-free. Pair it with a squeeze of lemon for extra zest. This keeps the dish light and fresh while still being tasty. For a heartier meal, add shrimp, chicken, or beans. These proteins boost flavor and nutrition. Cook them in the pan before adding the zucchini noodles. This way, they absorb all the tasty juices. Mix and match to find your favorite combo. You can make this dish your own with these easy add-ins. To keep your zesty zucchini noodles fresh, first refrigerate them. Place leftovers in an airtight container. This keeps moisture in and helps the flavors last. Eat them within three days for the best taste. You can also freeze zucchini noodles. Start by blanching them in boiling water for two minutes. This process helps to preserve the texture. After blanching, drain them and cool them in ice water. Once cooled, pack the noodles in freezer bags. Remember to remove as much air as possible. Frozen zucchini noodles last up to three months. When it's time to reheat, the stovetop method works best. Heat a skillet on medium-low. Add a splash of olive oil to keep the noodles moist. Stir the noodles gently until they warm up. This way, they maintain their texture. If you want to get creative, repurpose your leftovers. Toss the noodles into a salad for a fresh crunch. You can also mix them with eggs for a healthy breakfast scramble. The flavors of the tomato and basil will shine through in new ways. For the full recipe and more ideas, check out the [Full Recipe]. Zucchini noodles last about 3 to 5 days in the fridge. Store them in an airtight container. If you notice extra water, drain it. Yes, you can freeze zucchini noodles. Blanch them for 1 to 2 minutes before freezing. This helps keep their color and texture. Place them in freezer bags, removing as much air as you can. You can use a vegetable peeler. Peel long strips from the zucchini. Keep peeling until you reach the seeds. Another option is a box grater; just grate the zucchini lengthwise. Yes, zucchini noodles are healthier than regular pasta. They have fewer carbs and calories. They also provide more vitamins and fiber. Plus, they can help you feel full with fewer calories. Zucchini noodles are a tasty, healthy choice. You learned how to prepare them and combine fresh flavors. We've covered ways to enhance taste and texture while offering creative serving ideas. Don't forget the variations and easy add-ins for more options. Store your leftovers properly for a fresh taste later. Enjoy your cooking journey with zucchini noodles!
Zucchini Noodles with Tomato and Basil Flavorful Dish
Are you ready to make a colorful and tasty dish? Zucchini noodles with tomato and basil are easy and fun to prepare! This simple recipe
- 4 boneless, skinless chicken breasts - 1 cup grated Parmesan cheese - 4 cloves of garlic, minced - 1/2 cup breadcrumbs (preferably panko) - Olive oil and seasonings To create Savory Garlic Parmesan Chicken, you need a few key ingredients. First, you will use four boneless, skinless chicken breasts. These pieces make a great base because they cook evenly. Next, grab a cup of grated Parmesan cheese. This cheese adds rich flavor and a nice crust. You will also need four cloves of minced garlic. Fresh garlic gives the dish a wonderful aroma and taste. Then, have half a cup of breadcrumbs ready, preferably panko. Panko breadcrumbs are light and crispy, which gives the chicken a perfect crunch. Finally, don’t forget olive oil and your favorite seasonings. I recommend using dried oregano, thyme, salt, and pepper. These spices will bring everything together and enhance the flavor. For the full recipe, you can follow the detailed steps in the earlier section. This combination of ingredients will ensure your chicken is juicy and full of flavor. - Preheat the oven and prepare the baking dish First, set your oven to 400°F (200°C). This heat helps the chicken cook evenly. Lightly grease a baking dish with cooking spray or a bit of olive oil. This keeps the chicken from sticking. - Mix the cheese and seasoning coating In a small bowl, combine 1 cup of grated Parmesan cheese, 4 minced garlic cloves, 1 teaspoon of dried oregano, 1 teaspoon of dried thyme, 1 teaspoon of salt, and 1/2 teaspoon of black pepper. Add 1/2 cup of panko breadcrumbs for extra crunch. Stir until it blends well. - Prepare the chicken for baking Use paper towels to pat 4 boneless, skinless chicken breasts dry. This step is key for getting a crisp coating. Drizzle 1 tablespoon of olive oil over both sides of each chicken breast. This adds flavor and helps the coating stick. - Coat the chicken in the mixture Press each chicken breast into the cheese and breadcrumb mixture. Make sure they are well-coated on all sides. Place the coated chicken breasts in your greased baking dish. This helps create a tasty crust once baked. - Bake the chicken and ensure it reaches the right temperature Put the baking dish in the preheated oven. Bake for 25-30 minutes. Use a meat thermometer to check if the chicken reaches 165°F (75°C). This guarantees it is fully cooked and safe to eat. - Resting and garnishing before serving Once baked, remove the chicken from the oven. Let it rest for 5 minutes. This keeps the juices in the meat. Before serving, garnish with 1/4 cup of freshly chopped parsley. Pair with lemon wedges for a fresh burst of flavor. Enjoy your Savory Garlic Parmesan Chicken! You can find the Full Recipe at the beginning of this article. To keep your chicken juicy, use a meat thermometer. Cook the chicken until it hits 165°F. This ensures it's safe to eat while remaining tender. Brining the chicken in saltwater for a few hours can also help. The salt adds moisture, making each bite delightful. For the best baking time, set your oven to 400°F. Bake the chicken for 25 to 30 minutes. Check for a golden brown crust on top. Let it rest for five minutes after taking it out. This step allows the juices to settle, giving you moist, flavorful chicken. If you want a different cheese flavor, try asiago or mozzarella. Both melt well and add a nice twist. For fresh herbs, basil or thyme can work in place of oregano. They add a unique aroma and taste. If you need a gluten-free option, use gluten-free breadcrumbs. They are easy to find in stores. You can also crush gluten-free crackers as a substitute. This keeps the dish tasty while meeting your dietary needs. Try my Full Recipe for detailed steps and full ingredient lists. {{image_2}} You can spice up your Savory Garlic Parmesan Chicken in fun ways. Adding spices like cayenne pepper or red pepper flakes brings heat. A little goes a long way, so start small. If you want a creamy dish, try adding heavy cream or cream cheese to your sauce. This change makes the dish richer and more comforting. You can also stir in cooked pasta for a hearty one-dish meal. You have options when cooking this chicken. Grilling gives it a smoky flavor that many love. Just be sure to check the internal temperature. Baking is easier for busy nights and keeps the chicken moist. You can also use a slow cooker. Just season the chicken and cook on low for several hours. This method ensures the chicken is tender and juicy. For the complete experience, check out the Full Recipe. To store cooked Savory Garlic Parmesan Chicken, let it cool first. Place the chicken in an airtight container. You can also use a zip-top bag. Make sure to remove as much air as possible. This keeps the chicken fresh. Store it in the fridge for up to three days. If you want to keep it longer, freeze it. In the freezer, it lasts about three months. To reheat without drying out the chicken, use the oven. Preheat it to 350°F (175°C). Place the chicken in a baking dish. Add a splash of broth or water to keep it moist. Cover the dish with foil to trap steam. Heat for about 15-20 minutes. You can also use a microwave. Place the chicken on a microwave-safe plate. Add a damp paper towel over it to keep moisture in. Heat in short bursts of one minute. Check often to avoid overcooking. Enjoy your juicy leftovers! You can prep this chicken ahead. First, coat the chicken breasts in the garlic and cheese mix. Place them in a baking dish, cover, and store in the fridge for up to 24 hours. When you are ready to cook, just pop it in the oven. This saves time and keeps the flavors fresh. Yes, you can freeze cooked Savory Garlic Parmesan Chicken. Let it cool completely, then wrap each piece tightly in plastic wrap. Place the wrapped chicken in a freezer bag. It can stay fresh for up to three months. To enjoy, thaw it in the fridge overnight before reheating. This chicken pairs well with many sides. I recommend serving it with sautéed vegetables, a fresh green salad, or creamy mashed potatoes. You can also add lemon wedges for a zesty touch. For a complete meal, consider a side of pasta or rice to soak up the delicious flavors. For the full recipe, check out the details above. You now have everything you need to make Savory Garlic Parmesan Chicken. Remember the key ingredients: chicken breasts, cheese, garlic, and breadcrumbs. Stick to the steps for a tasty bake. Use the tips to keep the chicken juicy and explore variations for extra flavor. Don’t forget about proper storage for leftovers. You can enjoy this dish anytime. With this guide, you can impress anyone at your table. Enjoy your cooking and happy eating!
Savory Garlic Parmesan Chicken Juicy and Flavorful Dish
Are you ready to elevate your dinner game? This Savory Garlic Parmesan Chicken is juicy and flavorful, making it a perfect dish for any night
- 2 cups cooked and pureed butternut squash - 2 cups all-purpose flour - 1 cup shredded sharp cheddar cheese For this herb and cheddar squash bread, the main ingredients create a rich and flavorful base. The butternut squash adds moisture and a natural sweetness. All-purpose flour gives the bread its structure. Sharp cheddar cheese provides a bold flavor that pairs well with the squash. - 1/4 cup unsalted butter, softened - 2 large eggs - 1/4 cup milk These additional ingredients enhance the bread's texture. The unsalted butter adds richness. Large eggs help bind the mixture, while milk adds moisture. Together, they create a soft and tender loaf. - 1/4 cup fresh parsley, chopped - 1 tablespoon fresh thyme, chopped - 1 teaspoon baking powder - 1/2 teaspoon baking soda - 1 teaspoon salt - 1/2 teaspoon black pepper Herbs and seasoning bring life to the bread. Fresh parsley adds a bright flavor. Thyme gives an earthy note. Baking powder and baking soda ensure the bread rises. Salt enhances all the flavors, and black pepper adds a touch of warmth. For the full recipe, check out the instructions that guide you step by step. 1. First, preheat your oven to 350°F (175°C). This step is key for even baking. 2. Next, grease and flour a 9x5-inch loaf pan. This helps the bread come out easily. 3. In a large bowl, mix the cooked and pureed butternut squash, softened butter, eggs, and milk. Stir until well combined. 4. In a different bowl, whisk together the flour, baking powder, baking soda, salt, and black pepper. Make sure there are no lumps. 1. Gradually add the dry ingredients to the wet mixture. Stir gently until just combined. Avoid overmixing to keep the bread light. 2. Now, fold in the shredded cheddar cheese, chopped parsley, and thyme. Mix gently so the cheese and herbs are evenly spread. 1. Pour the batter into the prepared loaf pan. Smooth the top with a spatula for a nice finish. 2. Bake in the preheated oven for 50-60 minutes. To check doneness, insert a toothpick into the center. It should come out clean. 3. After baking, remove the bread from the oven. Let it cool in the pan for about 10 minutes. Then transfer it to a wire rack to cool completely. For the full recipe, refer to the earlier sections. Enjoy your delicious Herb and Cheddar Squash Bread! To get the best texture, do not overmix your batter. Mixing too much can make the bread dense. Once you add the dry ingredients, mix just until you see no flour. This keeps the bread light and fluffy. Also, make sure your squash is well pureed. This adds moisture and flavor. If your bread is too dry, try adding a little more milk. This can help keep your bread moist and delicious. You can change up the cheese to add new flavors. Instead of sharp cheddar, try using gouda or mozzarella. These cheeses melt well and give a great taste. For extra flavor, add spices like garlic powder or paprika. Fresh herbs can also enhance the taste. Consider using basil or rosemary for a fresh twist. Mixing in some crushed red pepper can give it a nice kick! Use a thermometer to check your oven temperature. This helps ensure even baking. If your oven runs hot or cold, it can affect your bread. Cooling your bread properly is key. After baking, let it sit in the pan for 10 minutes. Then, move it to a wire rack. This allows air to flow around the bread and keeps it from getting soggy. For more details, check out the Full Recipe. {{image_2}} If you need gluten-free options, use a gluten-free flour blend. This swap works well and keeps the texture nice. You can also try almond flour or coconut flour for a unique twist. For those avoiding dairy, dairy-free cheese options are available. Look for brands that melt well, like cashew or coconut-based cheese. These will keep your bread flavorful and rich. To add more crunch, consider adding nuts or seeds. Walnuts, sunflower seeds, or pumpkin seeds work great in this bread. They bring a nice texture and an extra layer of flavor. You can also use different squash varieties to change the taste. Zucchini or acorn squash can add new notes. Each type brings its unique flavor and texture, making this bread fun to experiment with. Herb and Cheddar Squash Bread pairs well with soups or salads. A warm bowl of tomato soup makes a perfect match. You can also serve it with a fresh garden salad for a balanced meal. For a creative twist, try using it for sandwiches. This bread makes a great base for a grilled cheese or a turkey sandwich. The flavors blend well and create a tasty lunch option. To store leftover Herb and Cheddar Squash Bread, wrap it tightly in plastic. This keeps the bread moist and fresh. You can also place it in an airtight container. Store it at room temperature for up to three days. If you want to keep it fresh longer, store the bread in the fridge. Just remember that the cold can dry it out. To enjoy it at its best, reheat slices in the oven or microwave. For long-term storage, freezing is your best option. Slice the bread first. Wrap each slice in plastic wrap, then place it in a freezer bag. This way, you can take out just what you need. To thaw, simply remove a slice from the freezer. Leave it at room temperature for about 30 minutes. You can also use the microwave for a quick thaw. Heat it on low for 15-20 seconds. For reheating, pop the slice back in the oven at 350°F for a few minutes to regain its warmth and texture. Herb and Cheddar Squash Bread lasts about three days at room temperature. If stored in the fridge, it can last up to a week. In the freezer, it stays good for about three months. Just make sure to keep it well-wrapped to avoid freezer burn. To check if your bread is done, use a toothpick. Insert it into the center of the loaf. If it comes out clean, the bread is ready. You can also look at the color. It should be golden brown on top. The sides may pull away from the pan slightly. If the center feels wet or gummy, it needs more time. Bake in 5-minute increments and keep checking. Yes, you can swap cheddar for other cheeses. Some great options are mozzarella or gouda. Both melt well and add rich flavor. You can also try feta for a tangy twist. Just use the same amount of cheese as the recipe calls for. Experiment with your favorites to find the best taste for you. One common mistake is overmixing the batter. This can make your bread tough. Mix just until everything is combined. Another mistake is not measuring your squash correctly. Too much or too little can change the texture. Lastly, don’t skip the cooling time. Letting it cool helps the flavors blend. Enjoy your freshly baked bread without rushing! This article covers everything you need for delicious Herb and Cheddar Squash Bread. We explored main ingredients like butternut squash and cheese, plus helpful steps for baking. I shared tips to enhance flavor and achieve the best texture. You'll also find ways to store this bread and variations to try. In the end, this bread offers warmth and flavor, perfect for any meal. Happy baking!
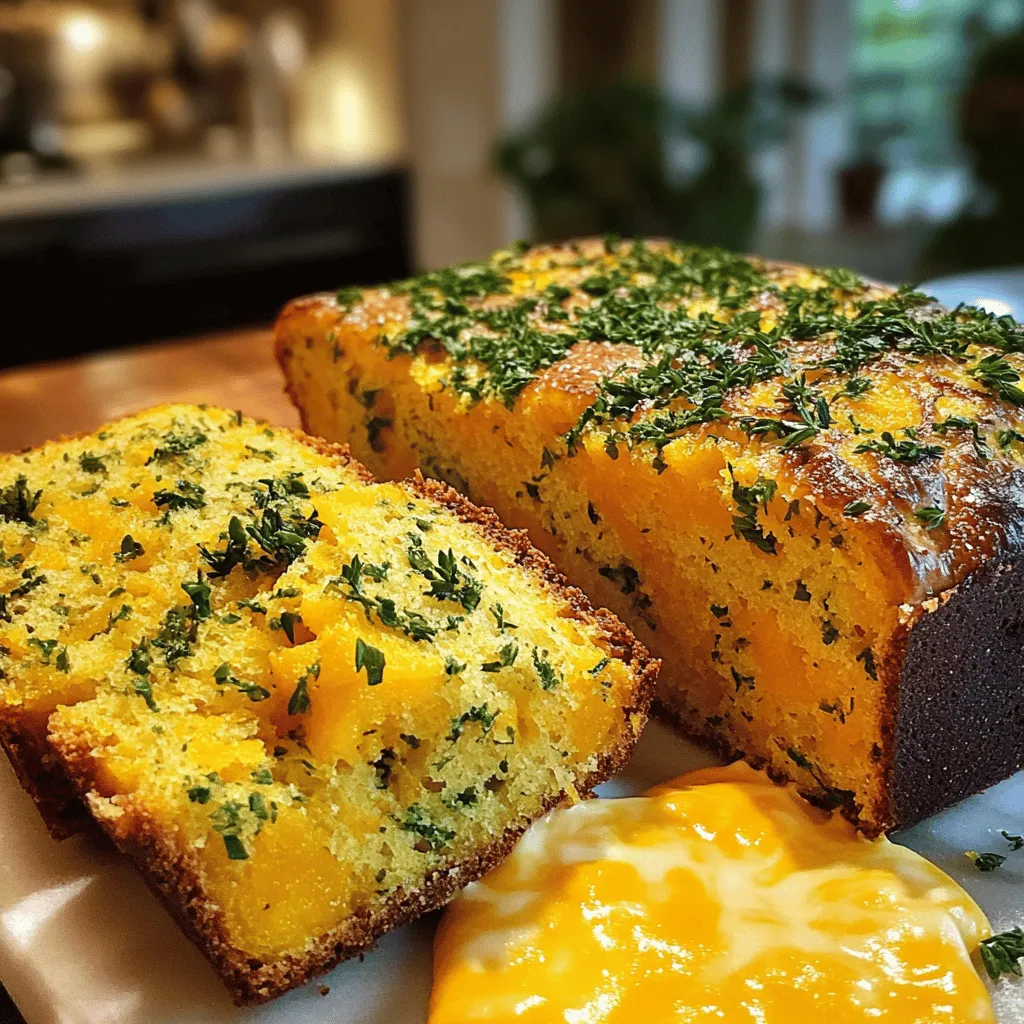
Herb and Cheddar Squash Bread Simple and Tasty Recipe
Get ready to delight your taste buds with my simple and tasty Herb and Cheddar Squash Bread recipe! Packed with the warm flavors of butternut
- 4 boneless, skinless chicken breasts - 3 tablespoons olive oil - 4 garlic cloves, minced - Juice and zest of 1 large lemon - 1 teaspoon black pepper - 1 teaspoon salt The main ingredients are simple but key. Chicken breasts provide the base. Olive oil adds richness. Garlic gives a strong flavor. Lemon juice and zest bring bright notes. Black pepper and salt enhance everything. - 1 teaspoon dried oregano - 1 teaspoon dried thyme - ½ teaspoon red pepper flakes (optional) - Fresh parsley, chopped for garnish Herbs and seasonings make the dish shine. Oregano and thyme add depth. Red pepper flakes give heat, but it's optional. Fresh parsley looks great and adds freshness. This blend of flavors elevates the chicken. For the full recipe, you can check out the details above. Enjoy cooking! 1. Preheat the oven: Start by setting your oven to 400°F (200°C). This step is key to ensure even cooking. 2. Prepare the marinade: In a small bowl, mix together: - 3 tablespoons olive oil - 4 minced garlic cloves - Juice and zest of 1 large lemon - 1 teaspoon black pepper - 1 teaspoon salt - 1 teaspoon dried oregano - 1 teaspoon dried thyme - ½ teaspoon red pepper flakes (optional) Stir well to combine all the flavors into a tasty marinade. 3. Marinate the chicken: Take 4 boneless, skinless chicken breasts and place them in a large resealable bag or a shallow dish. Pour the marinade over the chicken. Make sure each piece is well coated. Seal the bag or cover the dish. Place it in the fridge for at least 30 minutes. If you can wait, marinate up to 2 hours for more flavor. 1. Arrange chicken on a baking sheet: After marinating, take the chicken out and place it on a baking sheet lined with parchment paper. Ensure the pieces do not touch. This helps them cook evenly. 2. Bake until cooked through: Put the baking sheet in the preheated oven. Bake for 25-30 minutes. The chicken is ready when it reaches an internal temperature of 165°F (75°C). 3. Rest and garnish before serving: Once cooked, let the chicken rest for about 5 minutes. This keeps it juicy. Before serving, sprinkle freshly chopped parsley on top for a pop of color and freshness. Enjoy your flavorful delight! For the best flavor, marinate the chicken for at least 30 minutes. If you have time, marinating for 2 hours gives great taste. Use a large resealable plastic bag or a shallow dish for marinating. This keeps the chicken well coated in the marinade. To check if your chicken is done, use a meat thermometer. It should read 165°F (75°C) in the thickest part. To avoid dry chicken, do not overbake it. Keep an eye on the time and check doneness early. Serve your Baked Garlic Lemon Pepper Chicken on a large platter. Add lemon wedges and fresh parsley for color. For a full meal, pair it with roasted vegetables or a fresh salad. This makes the dish look and taste even better. {{image_2}} You can change the taste of Baked Garlic Lemon Pepper Chicken by adding herbs. Try rosemary or basil for a fresh twist. These herbs work well with the lemon and garlic. You can also mix in other citrus fruits. Lime or orange can add a sweet and tangy flavor. Just replace some lemon juice with lime or orange juice to switch things up. If you want a low-sodium version, use less salt or a salt substitute. You can still enjoy the rich flavors without the extra sodium. For gluten-free needs, ensure all ingredients are gluten-free. Most spices and oils are safe, but check labels to be sure. You can grill or bake the chicken. Grilling gives it a smoky flavor and nice grill marks. Baking is easier and keeps the chicken juicy. If you want to use a slow cooker, just add the marinated chicken to it. Cook on low for about 6 hours or high for 3 hours. This method makes the chicken very tender and full of flavor. For the full recipe, check out Baked Garlic Lemon Pepper Chicken. To keep your baked garlic lemon pepper chicken fresh, first cool it down. Wrap it in plastic wrap or place it in an airtight container. This helps seal in the flavor. You can store it in the fridge for up to three days. If you want to keep it longer, consider freezing it. Frozen chicken can last up to three months. When it's time to eat your leftovers, reheat the chicken safely. The best way is to use the oven. Preheat it to 350°F (175°C) and place the chicken in a baking dish. Cover it with foil to keep it moist. Heat for about 15-20 minutes or until warm. You want to avoid the microwave, as it can dry out the chicken. Keeping the flavor and moisture is key to a tasty meal. For the full recipe, check out the Baked Garlic Lemon Pepper Chicken section. How long does it take to bake chicken at 400°F? It takes about 25 to 30 minutes to bake chicken at 400°F. Check the chicken's internal temperature. It should reach 165°F for safe eating. Can I use chicken thighs instead of breasts? Yes, you can use chicken thighs. They are juicier and have more flavor. Adjust baking time slightly. Thighs may need an extra 5 minutes. What can I serve with Baked Garlic Lemon Pepper Chicken? You can serve this chicken with many sides. Try roasted vegetables, a fresh salad, or rice. Lemon wedges add a nice touch too. Is this recipe suitable for meal prep? Yes, this recipe is great for meal prep. Make a few batches and store them in the fridge. They stay tasty for up to four days. Can I freeze the marinated chicken? Absolutely! You can freeze the marinated chicken. Just place it in a freezer bag. It stays good for up to three months. How do I adjust the recipe for larger servings? To serve more people, simply double or triple the ingredients. Ensure that you have enough baking space. Bake in batches if needed for even cooking. For the full recipe, check out the Baked Garlic Lemon Pepper Chicken section. This blog post covered how to make Baked Garlic Lemon Pepper Chicken. We discussed the main ingredients, herbs, and seasonings. You learned step-by-step how to prepare and bake the chicken. We shared tips for marination, cooking, and presentation. You also found flavor variations, dietary options, and storage tips. In summary, this recipe is simple and tasty. Feel free to experiment with flavors and adjust as needed. Enjoy your cooking!
Baked Garlic Lemon Pepper Chicken Flavorful Delight
Are you ready to spice up your dinner routine? Baked Garlic Lemon Pepper Chicken is a delicious, easy dish that’s bursting with flavor. You only
- 1 medium butternut squash, peeled and cubed - 3 tablespoons olive oil - 3 tablespoons honey - 1 teaspoon ground cinnamon - 1 teaspoon ground nutmeg - Salt and pepper to taste - 1/2 cup dried cranberries - 1/2 cup pecans, roughly chopped - Fresh parsley, for garnish - Large mixing bowl - Baking sheet - Spatula or tongs When I make my Sweet and Savory Honey Roasted Butternut Squash, I love to gather all the ingredients. First, I pick a medium butternut squash. I peel it and cube it into bite-sized pieces. This squash is the star of the dish. Next, I grab my olive oil and honey. These add a rich flavor and sweetness. I also use ground cinnamon and nutmeg. These spices bring warmth and depth. Don't forget to sprinkle salt and pepper to taste. If you want to elevate the dish, I suggest adding dried cranberries and chopped pecans. They add a nice touch of texture and taste. Lastly, fresh parsley makes a great garnish. For tools, you need a large mixing bowl to combine everything. A baking sheet helps the squash roast evenly. A spatula or tongs comes in handy for flipping the squash. With this setup, you're ready to create a delightful dish. For the full recipe, refer to the earlier section. To start, grab your butternut squash. First, you need to peel it. Use a sharp peeler to remove the skin. Make sure to press firmly but carefully. Once peeled, place the squash on a cutting board. Cut the squash in half lengthwise to remove the seeds. Then, chop the squash into small cubes, about one inch each. This size helps it cook evenly. When cutting, keep your fingers curled under. This protects them from the knife. Use a stable surface to avoid slips. If the squash feels tough, you can microwave it for a minute to soften. Next, let’s mix our ingredients. In a large bowl, combine the cubed butternut squash with olive oil and honey. Add ground cinnamon, nutmeg, salt, and pepper. Use a spatula to toss everything together. Make sure each piece of squash gets coated well. This step is key for the sweet and savory flavor. Now, it’s time to roast! Preheat your oven to 400°F (200°C). This step ensures the squash cooks evenly. Once the oven is ready, spread the coated squash on a large baking sheet. Make sure the pieces are in a single layer. This helps them roast properly without steaming. Check the squash after 25 minutes. It should be soft and golden brown. Flip the squash halfway through. This step helps every side get crispy. In the last five minutes, add dried cranberries and pecans. This will give them a nice toast and plump the cranberries. Once done, take it out and let it cool for a few minutes. Then, transfer it to a serving dish. You can garnish with fresh parsley for extra color. Enjoy the sweet and savory honey roasted butternut squash! For the complete recipe, check out the [Full Recipe]. To achieve the right sweetness, you can adjust the honey. If you like it sweeter, add more honey. For less sweetness, reduce the amount. You can also swap honey for maple syrup for a different taste. Spices can change the dish’s flavor. For a warm touch, use cinnamon and nutmeg. If you prefer a kick, try adding a pinch of cayenne. For a fresh twist, herbs like thyme or rosemary work well too. For crispy roasted squash, cut the pieces into even cubes. This helps them cook evenly. A hot oven is key, so preheat to 400°F (200°C). Flipping the squash halfway through roasting is vital. This step helps both sides brown nicely. It gives you that perfect texture and adds a bit of crunch. Pair this dish with roasted chicken or grilled fish for a complete meal. It also works great in salads, adding a sweet touch. Leftovers can be used in many ways. Toss them in a salad or mix them into a grain bowl. You could also blend them into a soup for a warm and cozy dish. For the full recipe, check out the details above. {{image_2}} You can switch honey for other sweeteners. Maple syrup offers a rich flavor. Agave syrup works well too, for a milder taste. If you need a sugar-free option, try monk fruit or stevia. They add sweetness without the sugar. Consider adding more veggies to your dish. Brussels sprouts mix well with butternut squash. Carrots add a nice crunch and color. You can also include proteins. Chicken makes it heartier. Chickpeas are a great plant-based choice, rich in protein. To boost the taste, try different herbs. Rosemary adds a woodsy note. Thyme gives a fresh twist to the dish. Spices can change the flavor profile too. A sprinkle of cayenne adds heat. Smoked paprika gives a deep, smoky flavor. Feel free to explore these variations in the Full Recipe for Sweet and Savory Honey Roasted Butternut Squash. Each change can create a new dish! To keep your roasted butternut squash fresh, store it in an airtight container. Make sure to cool it completely before sealing. This way, it will stay tasty and safe to eat. Roasted squash lasts about 3 to 5 days in the fridge. If you want to save some for later, freezing is a great option. Here’s how to do it: 1. Let the roasted squash cool completely. 2. Spread the pieces on a baking sheet in a single layer. 3. Freeze for about an hour until they are firm. 4. Transfer the squash to a freezer bag and remove as much air as possible. 5. Label the bag with the date. Frozen squash keeps well for 3 to 6 months. For reheating, simply thaw the squash in the fridge overnight. Heat it in the oven at 350°F (175°C) until warm. You can also use a microwave for a quick option. When reheating, avoid losing that nice texture. To do this, use the oven. Spread the squash out on a baking sheet and reheat at 350°F (175°C) for 10 to 15 minutes. Leftovers can be reinvented easily! Toss the squash in a salad for added flavor. You can also blend it into soups for a creamy texture. It’s a fun way to keep your meals exciting. Don’t forget to check the Full Recipe for more ideas! You can tell when butternut squash is done roasting by checking its color and softness. - Look for a golden-brown color. This shows it is caramelizing well. - Pierce the squash with a fork. It should feel tender and soft. - If it is easy to scoop with a fork, it's ready to enjoy! You want to flip the squash halfway through roasting. This helps it brown evenly. Yes, you can use frozen butternut squash! It saves time and is easy to find. - Pros: Frozen squash is pre-cut and ready to cook. It can save you prep time. - Cons: The texture may be softer than fresh squash. It may not caramelize as well. If you use frozen squash, adjust roasting time. It might take a bit longer to cook through. Sweet and Savory Honey Roasted Butternut Squash pairs well with many dishes. Here are some ideas: - Serve it alongside roasted chicken or turkey for a filling meal. - Add it to salads for a sweet touch. - Pair it with grains like quinoa or rice for a hearty side. You can also enjoy it as a snack. The flavors are so good, you might want to eat it straight from the bowl! For the full recipe, check out the Sweet and Savory Honey Roasted Butternut Squash. In this blog post, I shared a simple recipe for sweet and savory honey roasted butternut squash. You learned about key ingredients, helpful steps, and expert tips. This dish is not only easy to make, but it also offers room for personal touches. Experimenting with flavors and additions can elevate your meal. Remember, the best part is that leftovers are just as good. Enjoy making this tasty dish, and feel free to share your creations!
Sweet and Savory Honey Roasted Butternut Squash Delight
Are you ready to elevate your dinner game? My Sweet and Savory Honey Roasted Butternut Squash Delight is here to tantalize your taste buds! This
To make Mexican zucchini boats, you need these ingredients: - 4 medium zucchinis - 1 cup cooked quinoa - 1 can (15 oz) black beans, drained and rinsed - 1 cup corn kernels (fresh or frozen) - 1 cup diced tomatoes (canned or fresh) - 1 red bell pepper, diced - 1 teaspoon cumin - 1 teaspoon chili powder - 1 teaspoon garlic powder - Salt and pepper to taste - 1 cup shredded cheese (cheddar or Mexican blend) - Fresh cilantro for garnish - Lime wedges for serving These ingredients bring flavor and color to your dish. The quinoa adds protein and fiber, while the black beans give it a hearty feel. The spices really make the flavors pop. You can mix things up with these optional ingredients: - Chopped onions for extra crunch - Jalapeños for heat - Avocado for creaminess - Salsa for added zest Feel free to get creative! Adding different toppings or ingredients makes each meal unique. You can cater to your taste and spice levels. Each serving has healthy nutrients. Here’s a quick look: - Calories: Approximately 350 - Protein: 15 grams - Carbohydrates: 50 grams - Fiber: 10 grams - Fat: 10 grams This dish is not only tasty but also good for you. It’s balanced and can fit well into a healthy diet. Enjoy every bite of these colorful boats! For the full recipe, check the complete details above. To start, preheat your oven to 375°F (190°C). This step warms the oven for baking. Next, take your zucchinis and slice them in half lengthwise. Use a spoon to scoop out the center. This creates a boat shape for your filling. Save the scooped-out flesh; you will use it later. Now, grab a large mixing bowl. Add the cooked quinoa, black beans, corn, diced tomatoes, and diced red bell pepper. Toss in the reserved zucchini flesh, cumin, chili powder, garlic powder, salt, and pepper. Mix everything well. You want all the flavors to combine. This filling is colorful and packed with nutrients. Once your filling is ready, spoon it into each zucchini boat. Pack it generously to avoid gaps. Place the filled zucchini boats in a baking dish lined with parchment paper. Sprinkle the shredded cheese on top. This will melt and add flavor. Cover the dish with aluminum foil. Bake for 25 minutes. After 25 minutes, remove the foil and bake for another 10 minutes. The cheese should be melted and bubbly. Carefully take the dish from the oven. Let it cool for a few minutes. Top with fresh cilantro and serve with lime wedges. Enjoy your colorful Mexican Zucchini Boats! For the full recipe, check out the detailed instructions above. To scoop zucchini, start with a sharp knife. Cut the zucchini in half lengthwise. Use a spoon to remove the soft center. Be gentle to avoid breaking the shell. You want a nice boat shape. Save the scooped-out flesh; you can mix it into the filling. This adds flavor and helps reduce waste. Choosing cheese can elevate your zucchini boats. I love using shredded cheddar or a Mexican blend. These cheeses melt well and give a great taste. You can also use pepper jack for a spicy kick. If you prefer a lighter option, try crumbled feta or goat cheese. These will add a tangy flavor that pairs well with the filling. To reheat your zucchini boats, place them in the oven at 350°F (175°C). Bake for about 10-15 minutes until warm. You can also use the microwave for a quick option. Just cover with a wet paper towel to keep them moist. Serve with lime wedges and fresh cilantro on top. These add a nice touch and brighten the dish. For a fun twist, pair them with a side of guacamole or salsa. For complete details on making this dish, refer to the Full Recipe. {{image_2}} You can easily make this dish vegetarian or vegan. To do this, skip the cheese or use a vegan cheese alternative. You can also add more veggies. Try mushrooms, spinach, or zucchini flesh. These additions boost flavor and nutrients. They make the dish even more colorful and fun. If you want more protein, add cooked chicken or turkey. Shred or dice the meat and mix it into the filling. This adds great flavor and makes the meal heartier. You can use leftover rotisserie chicken or ground turkey. Just make sure it is cooked before adding it to the mix. To adjust the spice level, think about your taste. For mild flavors, keep the spices light. You can skip the chili powder or use less. If you like heat, add jalapeños or more chili powder. You can also try hot sauce on top before serving. This makes your Mexican zucchini boats truly your own. For the full recipe, check out the detailed steps above. After you enjoy your Mexican zucchini boats, store leftovers in the fridge. Use an airtight container to keep them fresh. They will last for about 3 to 4 days. Make sure to let them cool before sealing. This helps keep the taste and texture intact. You can freeze these zucchini boats for later. To do this, first, let them cool completely. Wrap each boat in plastic wrap, then place them in a freezer bag. They will stay good for about 2 to 3 months. When ready to eat, thaw them in the fridge overnight. To reheat, you have a few options. You can use the oven for the best taste. Preheat the oven to 350°F (175°C). Place the zucchini boats on a baking tray and cover with foil. Heat for about 15-20 minutes. You can also use a microwave. Just place a boat on a plate and heat for 1-2 minutes. Remember, the oven makes them taste fresher, while the microwave is faster. Enjoy them hot! You can use rice or couscous as a substitute for quinoa. Both work well. If you prefer a gluten-free option, try using cauliflower rice. It offers a light texture and absorbs flavors nicely. Just make sure to cook it first for better taste. To keep zucchini firm, salt the insides after scooping. Let them sit for 10 minutes. This draws out excess moisture. Then, pat them dry with a paper towel. You can also bake them briefly before adding the filling. This step helps to set the shape and texture. Yes, you can prepare the zucchini boats ahead of time. Assemble them and store in the fridge for up to 24 hours. Just cover them tightly with plastic wrap. When ready to cook, bake straight from the fridge, adding a few extra minutes to the cooking time. Enjoy a quick and tasty meal! Mexican zucchini boats are fun to make and eat. We learned how to prepare them step-by-step, from scooping zucchini to baking the filling. You can customize flavors with different ingredients, cheese types, and spice levels. Remember to store leftovers properly to keep them fresh. This dish is easy to adapt, so make it your own! Enjoy this tasty meal that fits many diets and tastes. Keep experimenting and have fun in the kitchen!
Mexican Zucchini Boats Flavorful and Fun Recipe
Are you ready to make dinner fun and flavorful? My Mexican Zucchini Boats recipe is just that! These tasty boats are packed with spices and
- 2 cups grated zucchini (packed) - 1 cup all-purpose flour - 1 cup shredded cheddar cheese - 1/2 cup grated Parmesan cheese - 1/4 cup scallions, finely chopped - 2 large eggs - 1/4 cup olive oil - 1 teaspoon baking powder - 1/2 teaspoon baking soda - 1 teaspoon garlic powder - 1 teaspoon onion powder - 1/2 teaspoon salt - Freshly ground black pepper to taste Gather these ingredients for your savory cheesy zucchini quick bread. Fresh, grated zucchini gives the bread a moist texture and great flavor. You can use any cheese you like, but I love the combination of sharp cheddar and nutty Parmesan. The scallions add a nice bite, while the dry ingredients help it rise and add depth. This recipe is simple, and you can find the full recipe online for precise measurements and steps. - Preheat the oven to 350°F (175°C). - Grate the zucchini and sprinkle with a pinch of salt. Let it sit for 10 minutes. This will help pull out extra moisture. After that, squeeze the zucchini to remove even more liquid. Place the dry zucchini in a large bowl. - Add the eggs and olive oil to the bowl with the zucchini. Whisk them together until mixed well. - In another bowl, whisk together the flour, baking powder, baking soda, garlic powder, onion powder, salt, and black pepper. This combines all the dry ingredients. - Gradually mix the dry ingredients into the wet mixture. Stir gently until everything is just combined. - Fold in the cheddar cheese, Parmesan, and chopped scallions. Make sure they are evenly mixed but avoid over-mixing. - Pour the batter into a greased 9x5-inch loaf pan. Spread it out evenly. - Bake for 45-50 minutes. Check with a toothpick; it should come out clean when done. - Let the bread cool in the pan for 10 minutes before moving it to a wire rack. Enjoy your savory cheesy zucchini quick bread! For the full recipe, check the earlier section. To make your savory cheesy zucchini quick bread great, squeeze out excess moisture. Zucchini holds a lot of water. If you skip this step, your bread may turn out soggy. After grating the zucchini, let it sit with salt for ten minutes. This draws out extra liquid. Then, squeeze it with your hands or use a clean cloth. This will help keep the bread light and fluffy. Next, avoid over-mixing your batter. Mix just until you can’t see dry flour anymore. Over-mixing can make your bread dense. Gently fold in cheese and scallions for the best texture. You can add herbs or spices to awaken flavors. Try mixing in fresh basil or thyme. Garlic or onion powder can also boost taste. These small changes can make a big difference. You can even add a pinch of red pepper flakes for some heat. For dips, serve your bread with olive oil or a creamy dip. Hummus or tzatziki pairs well. The richness of the dip balances the bread's savory flavors. Slice your bread after it cools for about ten minutes. Use a serrated knife for clean cuts. Serve warm for the best flavor. Drizzle with olive oil or add a dollop of sour cream. These toppings enhance the taste and add visual appeal. You can also sprinkle extra scallions or fresh herbs on top. This not only adds color but also freshness. Serve it as a side or a snack. Your guests will love the look and taste of your savory cheesy zucchini quick bread! For the full recipe, check out the detailed instructions above. {{image_2}} You can switch up the cheese in this quick bread. Feta brings a tangy flavor. Mozzarella adds a nice melt and stretch. If you prefer a plant-based option, vegan cheese works well, too. Just pick one that melts nicely. This way, you can enjoy a cheesy bite without dairy. Feel free to get creative with add-ins. Diced bell peppers add color and crunch. Corn can lend a sweet flavor. You might also like to add nuts or seeds. Chopped walnuts or sunflower seeds add a nice texture. These ingredients can make your bread even tastier and more fun. If you want a gluten-free version, you can use gluten-free flour. Almond flour or oat flour are great choices. They help keep the bread moist and fluffy. Just remember to check the brand for best results. Adding a bit of xanthan gum can help with the texture. It keeps the bread from being too crumbly. To keep your savory cheesy zucchini quick bread fresh, follow these steps: - Refrigerate: Wrap the bread tightly in plastic wrap or foil. Store it in the fridge for up to 5 days. - Freeze: For longer storage, slice the bread and place it in a freezer bag. Remove as much air as possible. It can last up to 3 months in the freezer. When you want to enjoy your bread again, here’s how to reheat it: - Oven Method: Preheat your oven to 350°F (175°C). Wrap the bread in foil and heat for about 10-15 minutes. - Microwave Method: Place a slice on a microwave-safe plate. Heat for 20-30 seconds. - Moisture Tips: To keep the bread moist, cover it with a damp paper towel when using the microwave. How long does this bread stay fresh? - In the fridge, it lasts about 5 days. - In the freezer, expect it to stay good for up to 3 months. Look for signs of spoilage: - A sour smell or mold tells you it’s time to toss it. - Dry or crumbly texture also means it’s past its prime. For the full recipe, check the link provided earlier. Yes, you can use frozen zucchini! Just remember to thaw it first. Here’s how: - Take the frozen zucchini out of the freezer. - Let it sit in the fridge overnight or for a few hours. - Once it's thawed, squeeze out the excess water. This helps avoid a soggy bread. Using frozen zucchini can still yield a tasty quick bread! You can make this bread vegan by replacing eggs. Here are some good options: - 1/4 cup applesauce per egg. - 1/4 cup mashed banana per egg. - 1 tablespoon ground flaxseed mixed with 2.5 tablespoons water. Let it sit for about 5 minutes before adding. These swaps work well and keep the bread moist. To check if your bread is done, look for these signs: - The top should be golden brown. - It should spring back when lightly touched. You can also use a toothpick or skewer: - Insert it into the center of the bread. - If it comes out clean, your bread is ready! These methods help ensure you bake it just right. This blog post covered all the steps to make delicious zucchini bread. You learned about the main and dry ingredients, plus how to prepare, mix, and bake. I shared helpful tips for the best texture and flavor too. Remember, you can customize this recipe to fit your taste. You can switch up the cheese, add veggies, or try gluten-free options. Enjoy making your zucchini bread, and share it with friends and family. Simple adjustments can lead to tasty results!
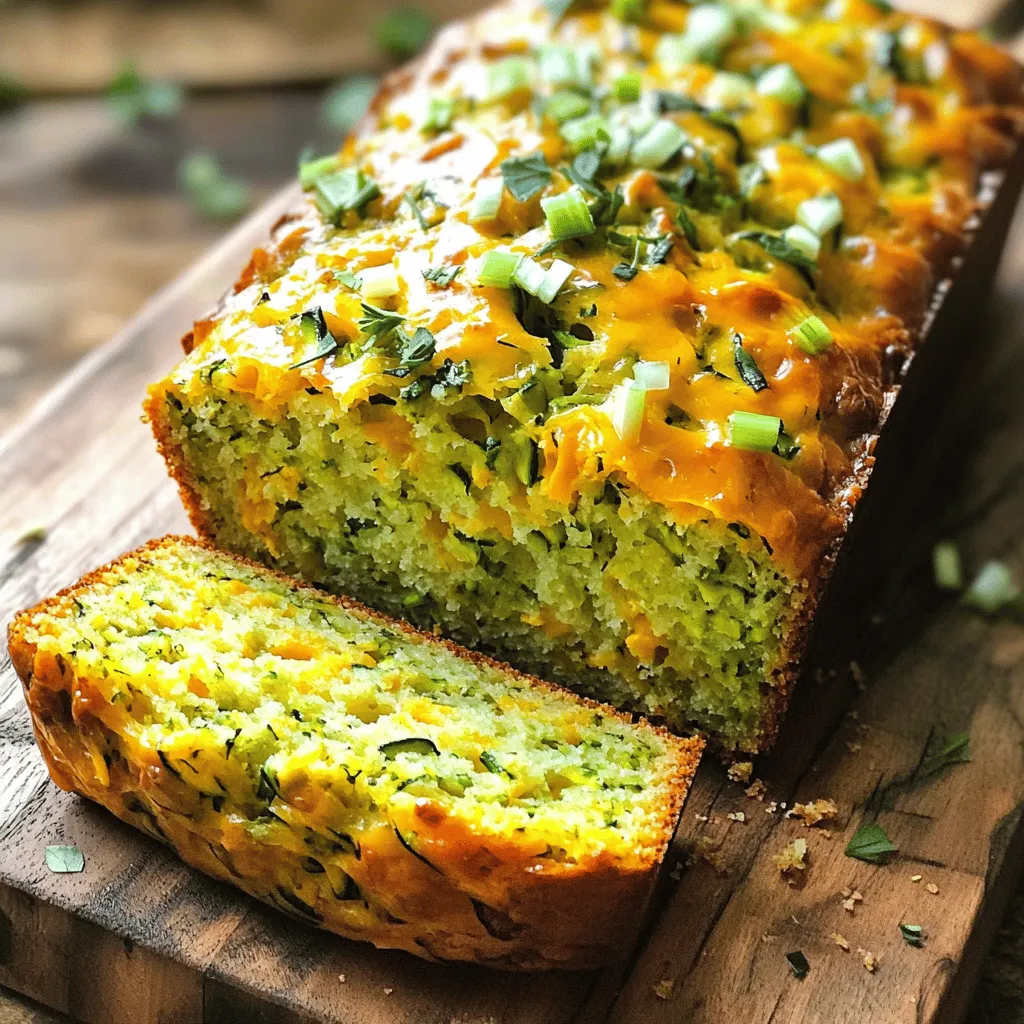
Savory Cheesy Zucchini Quick Bread Easy Baking Recipe
If you’re craving something warm and cheesy, look no further! My Savory Cheesy Zucchini Quick Bread is a simple recipe that bursts with flavor. Packed