Dinner

- 4 bone-in, skin-on chicken thighs - 4 tablespoons unsalted butter, melted - 6 cloves garlic, minced - 1 teaspoon fresh rosemary, chopped - 1 teaspoon fresh thyme, chopped - 1 teaspoon paprika - Salt and pepper to taste - Juice of 1 lemon - Fresh parsley, chopped for garnish This recipe starts with bone-in, skin-on chicken thighs. These cuts stay juicy and tender. The skin crisps up nicely in the oven. I love using unsalted butter, as it lets you control the salt. Fresh garlic adds a strong flavor that blends well with the herbs. Rosemary and thyme bring a nice herbal note. Paprika gives the dish a warm color and a bit of spice. Don’t forget salt and pepper to enhance all the flavors. A squeeze of lemon juice brightens the dish, making it more vibrant. - Additional herbs for flavor - Lemon alternatives - Side dish suggestions Feel free to add more herbs for extra flavor. Basil or oregano can work well too. If you don’t have lemon, try lime or vinegar for a tangy taste. For side dishes, roasted veggies or rice make great options. They soak up the yummy garlic butter sauce. For the full recipe, check the section above. 1. Preheating the oven: Start by setting your oven to 400°F (200°C). This step is key to getting juicy chicken. 2. Mixing the garlic butter: In a small bowl, combine melted butter, minced garlic, chopped rosemary, thyme, paprika, lemon juice, salt, and pepper. Stir until well mixed. This garlic butter will give the chicken its great flavor. 3. Preparing the chicken: Pat the chicken thighs dry with paper towels. This helps the skin get crispy. Place them in a large baking dish. 1. Pouring and coating the chicken: Pour the garlic butter mixture over the chicken. Make sure some gets under the skin too. This step adds lots of flavor. 2. Baking process: Bake the chicken in the preheated oven for 35-40 minutes. Check that it reaches an internal temperature of 165°F (74°C). The skin should look golden. 3. Broiling for crispy skin: For extra crispy skin, broil the chicken for 2-3 minutes at the end. Keep an eye on it to avoid burning. 1. Resting the chicken: After baking, let the chicken rest for a few minutes. This helps the juices stay inside. 2. Garnishing tips: Before serving, sprinkle fresh chopped parsley on top. It adds color and freshness. 3. Plating ideas: Serve the chicken on a large platter with lemon wedges. This adds a nice touch and looks great on the table. Enjoy your garlic butter baked chicken! For the full recipe, check the details above. To get more flavor under the skin, gently lift it with your fingers. This lets the garlic butter mix seep in. For marinating, let the chicken sit in the garlic butter for at least 30 minutes. This gives the chicken time to absorb all the yummy flavors. You can also marinate it overnight for even stronger taste. For tenderness, use a meat thermometer. Cook the chicken until it hits 165°F (74°C). This keeps it juicy. One common mistake is not cooking the chicken long enough. Always check your cooking times and ensure you bake at 400°F (200°C). Seasoning errors happen when you forget salt or pepper. Make sure to taste your garlic butter before pouring it on the chicken. Overcooking is another issue. Keep an eye on the chicken so that it does not dry out. If it looks golden but feels tough, it may be overcooked. {{image_2}} You can cook garlic butter baked chicken in several ways. Each method gives a unique taste. - Oven vs. air fryer: The oven gives a nice, even cook. It creates juicy meat and crispy skin. The air fryer cooks faster. It also makes the skin crispy and keeps the meat moist. I often choose the air fryer for weeknight meals. - Grilling options: Grilling adds a smoky flavor. Marinate the chicken in garlic butter first. Then, grill it over medium heat until fully cooked. This gives a nice char and is perfect for summer. - Slow cooker adaptation: The slow cooker is great for tender chicken. Mix the garlic butter and pour it over the chicken in the slow cooker. Cook on low for 6-8 hours. You will enjoy a flavorful, fall-off-the-bone result. Spice up your garlic butter baked chicken with these ideas. - Spicy garlic butter chicken: Add red pepper flakes to the garlic butter mix. This will give your chicken a nice kick. Adjust the amount based on your taste. - Herbal twists with different spices: Experiment with spices like oregano or basil. They can enhance the flavor of the chicken. You can also try fresh herbs like dill or cilantro for a fresh taste. - Lemon herb variations: Add lemon zest for a bright flavor. You can mix it with the garlic butter. This adds a fresh taste and pairs well with the chicken. These variations take the classic recipe to new heights and offer something for every palate. For the full recipe, check the earlier section. Store any leftover garlic butter baked chicken in the fridge. Use an airtight container. This keeps the chicken fresh and juicy. Aim to eat it within three days for the best taste. To reheat in the oven, set it to 350°F (175°C). Place the chicken on a baking sheet. Cover it with foil to keep it moist. Heat for about 20 minutes or until warm. For microwave options, place the chicken on a safe microwave plate. Cover it with a damp paper towel. Heat in short bursts, 1-2 minutes at a time. Check often to avoid overcooking. You can freeze garlic butter baked chicken for later. Wrap each piece in plastic wrap. Then, place them in a freezer bag. Remove as much air as possible to prevent freezer burn. To thaw, move the chicken to the fridge overnight. For quick thawing, use the microwave's defrost setting. Cook immediately after thawing to ensure safety. How long do I bake garlic butter baked chicken? You bake garlic butter baked chicken for 35-40 minutes. Set your oven to 400°F (200°C). Check the chicken for a golden brown color. Always look for an internal temperature of 165°F (74°C). Can I use chicken breasts instead of thighs? Yes, you can use chicken breasts. They cook faster, so check them around 25-30 minutes. Keep an eye on the temperature to ensure they don't dry out. What can I serve with garlic butter baked chicken? Garlic butter baked chicken goes well with many sides. Try mashed potatoes or steamed veggies. A fresh salad also pairs nicely for a colorful meal. Can I use frozen chicken for this recipe? You can use frozen chicken, but it will take longer to bake. Thawing first is best for even cooking. If cooking from frozen, add about 20-30 minutes to the bake time. How do I know when the chicken is done? Use a meat thermometer. Insert it into the thickest part of the chicken. It should read 165°F (74°C) to ensure it's safe to eat. What are some substitutes for garlic? If you need a garlic substitute, try garlic powder or garlic salt. You can also use shallots for a nice flavor twist. Keep in mind that the taste will differ slightly. This post outlined how to make garlic butter baked chicken. You learned about the key ingredients, along with your options for extras. I provided easy steps for prep and cooking, plus tips to boost flavor. You now know common mistakes to avoid and variations to try. Don't forget about proper storage for leftovers. With this information, you can create a delicious meal that impresses. Enjoy making your perfect garlic butter chicken!
Garlic Butter Baked Chicken Juicy and Flavorful Dish
If you’re craving a dish that bursts with flavor and is super easy to make, you’re in for a treat! Garlic Butter Baked Chicken gives
To make a tasty Baked Zucchini Spinach and Feta Casserole, you’ll need these simple ingredients: - 3 medium zucchinis, sliced - 2 cups fresh spinach, chopped - 1 cup crumbled feta cheese - 1 cup Greek yogurt - 3 eggs - 1/2 cup grated Parmesan cheese - 1 cup breadcrumbs (preferably whole wheat) - 2 garlic cloves, minced - 1 teaspoon dried oregano - 1/2 teaspoon salt - 1/2 teaspoon black pepper - 2 tablespoons olive oil - Fresh parsley for garnish (optional) These fresh ingredients create a vibrant and healthy dish. Zucchini adds moisture and texture. Spinach brings a lovely color and nutrients. Feta cheese adds a creamy, tangy flavor that complements the veggies well. Greek yogurt makes the casserole rich and helps it set nicely. I love using whole wheat breadcrumbs for a little crunch. Garlic, oregano, salt, and pepper give it that extra kick. Don't forget the olive oil to sauté the veggies. Finally, parsley is a nice touch for color and freshness. You can find the full recipe for the casserole at the end of this article. - Preheat the oven and prepare the baking dish: Start by setting your oven to 350°F (175°C). Grease a 9x9-inch baking dish to prevent sticking. - Sauté garlic, zucchini, and spinach: In a large skillet, heat 2 tablespoons of olive oil over medium heat. Add 2 minced garlic cloves and sauté for about 1 minute. Then, toss in 3 sliced zucchinis and 2 cups of chopped spinach. Cook this mixture for 5-7 minutes. Stir often until the veggies soften, then remove from heat and let them cool. - Mix wet and dry ingredients separately: In a bowl, whisk together 3 eggs, 1 cup of Greek yogurt, 1 teaspoon of dried oregano, 1/2 teaspoon of salt, and 1/2 teaspoon of black pepper. This will be your wet mix. - Incorporate vegetables into egg mixture: Once the veggie mix cools, fold it into your wet mixture. Add 1 cup of crumbled feta cheese and mix until everything is well combined. - Prepare breadcrumb topping: In another bowl, combine 1 cup of breadcrumbs with 1/2 cup of grated Parmesan cheese. This topping will add a nice crunch to your casserole. - Assemble and bake the casserole: Pour the veggie and egg mixture into your greased baking dish. Spread the breadcrumb topping evenly over the top. Bake for 30-35 minutes until the top turns golden brown and the casserole sets. - Cooling and garnishing tips: After baking, let the casserole cool for a few minutes. This helps it firm up for slicing. If you like, garnish with fresh parsley for a pop of color. Enjoy this delicious dish warm! For the full recipe, check out the details above. To make your casserole great, avoid a watery mix. Squeeze excess moisture from the zucchini and spinach. Use a clean kitchen towel or paper towel to do this. This step helps keep the casserole firm. If you need a feta substitute, try goat cheese or ricotta. Both options bring a creamy texture. They also add a unique taste to the dish. For sautéing vegetables, use medium heat. Start with olive oil and garlic for flavor. Add zucchini and spinach next. Stir them often for even cooking. Cook until they are just soft but still bright. To ensure even cooking, spread the mixture evenly in the baking dish. A 9x9-inch dish works best. Check the casserole halfway through baking. This way, you can rotate it for even browning. For more tips, check the Full Recipe. Enjoy your cooking! {{image_2}} You can easily add protein to your baked zucchini spinach and feta casserole. Incorporating chicken or turkey brings a heartier feel. Simply cook and shred the meat before mixing it in. This adds great flavor and makes the dish more filling. For a vegetarian option, consider using chickpeas or lentils. They provide protein and texture without meat. Just rinse and add them to the mixture. This keeps the dish rich and satisfying. Enhancing flavor is simple with spices and herbs. Try adding a pinch of red pepper flakes for heat. Fresh herbs like basil or dill can also brighten the dish. Feel free to experiment with your favorite spices. You can also swap out feta cheese for other cheeses. Goat cheese or ricotta will give a different taste. Each cheese adds its own unique flavor profile. Customize it to suit your taste buds and enjoy the variety. For the full recipe, check out the details above. Baked Zucchini Spinach and Feta Casserole keeps well in the fridge. You can store it for up to 3 days. To keep it fresh, let the casserole cool completely. Once cool, cover it tightly with plastic wrap or aluminum foil. You can also use an airtight container for better results. If you want to save leftovers, freezing works well too. Cut the casserole into portions. Wrap each piece tightly in plastic wrap, then place them in a freezer-safe bag. Be sure to label the bag with the date. It will stay good for up to 3 months. When you’re ready to eat, thaw it overnight in the fridge. To reheat, place it in the oven at 350°F (175°C) for about 20-25 minutes. This will ensure it heats evenly without drying out. For more details, check out the Full Recipe for tips on preserving that delicious flavor! Can I use frozen spinach instead of fresh? Yes, you can use frozen spinach. Make sure to thaw and drain it well. Frozen spinach can save time. Just be cautious of excess moisture, as it might make your casserole watery. What can I serve with Baked Zucchini Spinach and Feta Casserole? This casserole pairs well with a crisp green salad. You can also serve it with whole-grain bread or grilled chicken for more protein. Roasted vegetables are another great option. How do I know when the casserole is fully cooked? Check for a golden brown top. The casserole should be firm and not jiggle when you shake it gently. A toothpick inserted in the center should come out clean. How to make a gluten-free version To make this casserole gluten-free, swap breadcrumbs with gluten-free breadcrumbs or crushed nuts. This will keep the texture while keeping it safe for those avoiding gluten. Can I halve the recipe for smaller servings? Yes, you can easily halve the recipe. Use a smaller baking dish and adjust the cooking time. Keep an eye on it as it cooks, since smaller amounts may cook faster. Best side dishes to complement the casserole Serve it with a light salad with lemon vinaigrette. Grilled asparagus or steamed broccoli also pair nicely. For a heartier meal, try quinoa or brown rice on the side. Ideas for healthy toppings You can sprinkle fresh herbs like basil or dill on top. A dollop of Greek yogurt adds creaminess and tang. For a crunchy touch, add toasted nuts or seeds right before serving. For the full recipe, check out the details above! This blog post guided you through making a tasty Baked Zucchini Spinach and Feta Casserole. We covered the key ingredients and detailed steps. You learned how to mix, bake, and even store this dish. Remember to try different variations and cooking tips for the best results. In the end, this casserole is flexible and rewarding. You can enjoy it fresh or save it for later. So, get cooking and let your kitchen fill with delicious smells!
Baked Zucchini Spinach and Feta Casserole Delight
Welcome to a tasty adventure! Today, I’ll share my favorite recipe for Baked Zucchini Spinach and Feta Casserole. This dish is not just healthy; it’s
- 2 medium summer squashes, diced - 1 cup fresh or frozen corn kernels - 1 medium onion, chopped - 2 cloves garlic, minced - 4 cups vegetable broth - 1 cup coconut milk - 1 tablespoon olive oil - 1 teaspoon thyme (fresh or dried) - Salt and pepper to taste - Fresh basil for garnish Gathering all these fresh and vibrant ingredients makes cooking feel like a celebration. Summer squashes are bright and sweet. Corn adds a lovely crunch. You will enjoy the onion and garlic's savory aroma as they cook. The vegetable broth gives the chowder depth of flavor. Coconut milk adds creaminess without dairy. The thyme brings a hint of earthiness. Don't forget to season with salt and pepper to enhance all those tastes. Use fresh basil as a garnish. It adds color and a burst of freshness. This dish shines when you use quality ingredients. You can find the full recipe for Sunny Summer Squash & Corn Chowder at the end for more details! Start by dicing the summer squashes into small, even pieces. This helps them cook well. Use two medium squashes for great flavor. Next, chop one medium onion. Make sure the pieces are small. Then, mince two cloves of garlic until fine. This adds a nice aroma. Lastly, measure one cup of corn kernels. You can use fresh or frozen corn. Also, grab four cups of vegetable broth for the base. In a large pot, heat one tablespoon of olive oil over medium heat. Once hot, add the chopped onion. Sauté the onion for about five minutes until it looks translucent. Stir in the minced garlic and let it cook for one minute. The smell will be wonderful! Now, add the diced summer squash and corn to the pot. Stir everything well. Season with one teaspoon of thyme, salt, and pepper. Let this cook for three to four minutes to soften. Pour in the vegetable broth and bring the mix to a simmer. Let it cook for about 15 minutes. The squash should be tender. For blending, you can use an immersion blender. Blend until smooth but keep some chunks for texture. If you don’t have an immersion blender, pour half into a regular blender. Blend and then return it to the pot. After blending, stir in one cup of coconut milk. Heat for another five minutes. Taste and adjust seasoning if needed. Enjoy your creamy, tasty chowder! For the full recipe, check out Sunny Summer Squash & Corn Chowder. To sauté vegetables perfectly, start with a hot pan. Add olive oil and let it heat. Once it shimmers, add onions. Cook them until they turn clear. Then, add garlic and stir for one minute. This method gives great flavor. When using corn, fresh corn has a sweet taste. If you use frozen corn, let it thaw first. It saves time and cooks evenly. Both options work well, but fresh corn shines in summer. An immersion blender makes blending easy. Just dip it into the pot and blend until smooth. This keeps cleanup quick and easy. If you don’t have one, use a regular blender. Carefully pour half of the chowder into it. Blend and return it to the pot for a nice texture. Garnishing adds fun and flavor to your chowder. Try fresh basil leaves for a pop of color and taste. A drizzle of coconut milk on top makes it look fancy too. For a crunch, add croutons or chopped nuts. These toppings make your dish even better. For the full recipe, refer to the Sunny Summer Squash & Corn Chowder. {{image_2}} You can switch up the vegetables in your chowder. Try using zucchini or bell peppers for a fresh twist. Carrots can also add a lovely sweetness. For a heartier chowder, consider adding potatoes. If you want a dairy-free option, use almond or oat milk instead of coconut milk. You can also skip the milk entirely for a lighter soup. Just add more broth to keep the soup from being too thick. To spice things up, add a pinch of cayenne pepper or smoked paprika. These spices bring a nice kick to the chowder. You could also try some curry powder for a unique flavor twist. Herbs can elevate your chowder's taste. Fresh parsley or dill gives a bright flavor. You can also add a bay leaf while cooking for deeper notes. Just remember to remove it before serving. Serve your chowder hot, topped with a drizzle of coconut milk. A sprinkle of fresh basil adds a nice touch. You can also pair it with crusty bread for a complete meal. For side dishes, a simple green salad works well. You could also try grilled vegetables for a colorful plate. Cornbread is another tasty option that complements the chowder perfectly. For the full recipe, check out Sunny Summer Squash & Corn Chowder! To store leftovers safely, let the chowder cool first. Place it in an airtight container. This helps keep it fresh and tasty. Glass or plastic containers work well. Be sure to label the container with the date. This way, you will know when you made it. Freezing chowder is easy. First, let it cool completely. Then, pour it into freezer-safe bags or containers. Remove as much air as you can to prevent freezer burn. To reheat, thaw it in the fridge overnight. Heat it slowly on the stove over low heat. Stir often for the best results. In the fridge, chowder lasts about 3 to 4 days. In the freezer, it can last for up to 3 months. Always check for signs of spoilage. If you see mold, a bad smell, or an unusual color, throw it out. Keeping an eye on freshness helps ensure a great meal every time. To make Summer Squash and Corn Chowder, follow these steps: 1. Heat olive oil in a large pot over medium heat. 2. Add chopped onion and sauté for about 5 minutes until it is soft. 3. Stir in minced garlic and cook for one more minute. 4. Add diced summer squash and corn, stirring well. 5. Season with thyme, salt, and pepper, cooking for 3-4 minutes. 6. Pour in vegetable broth and bring to a simmer. Cook for 15 minutes until the squash is tender. 7. Blend the soup until smooth, but keep some chunks for texture. 8. Stir in coconut milk and heat for about 5 minutes. Adjust seasoning if needed. 9. Remove from heat and add fresh basil before serving. For the complete step-by-step recipe, check the Full Recipe section. Yes, you can use different types of squash in this chowder. Here are some great options: - Zucchini: It has a mild taste and cooks quickly. - Butternut squash: It adds a sweet flavor and creamy texture. - Acorn squash: This squash has a nutty taste and works well when roasted first. Feel free to mix and match these squashes for unique flavors and textures. You can enjoy your chowder with several tasty side dishes. Here are some ideas: - A fresh garden salad: It adds crunch and lightness. - Crusty bread: Perfect for dipping into the chowder. - Grilled cheese sandwiches: A warm, cheesy treat that pairs well. - Cornbread: Sweet and crumbly, it complements the chowder's flavors. These sides make your meal complete and satisfying. This blog post covered how to make a tasty summer squash and corn chowder. We detailed the ingredients, preparation steps, cooking process, and blending techniques. Tips for garnishing and variations added extra flavor. You can enjoy delicious options while learning how to store it properly. Making this chowder is fun and easy. You can adjust flavors to fit your taste. Try different veggies for a new spin. Enjoy every comforting spoonful!
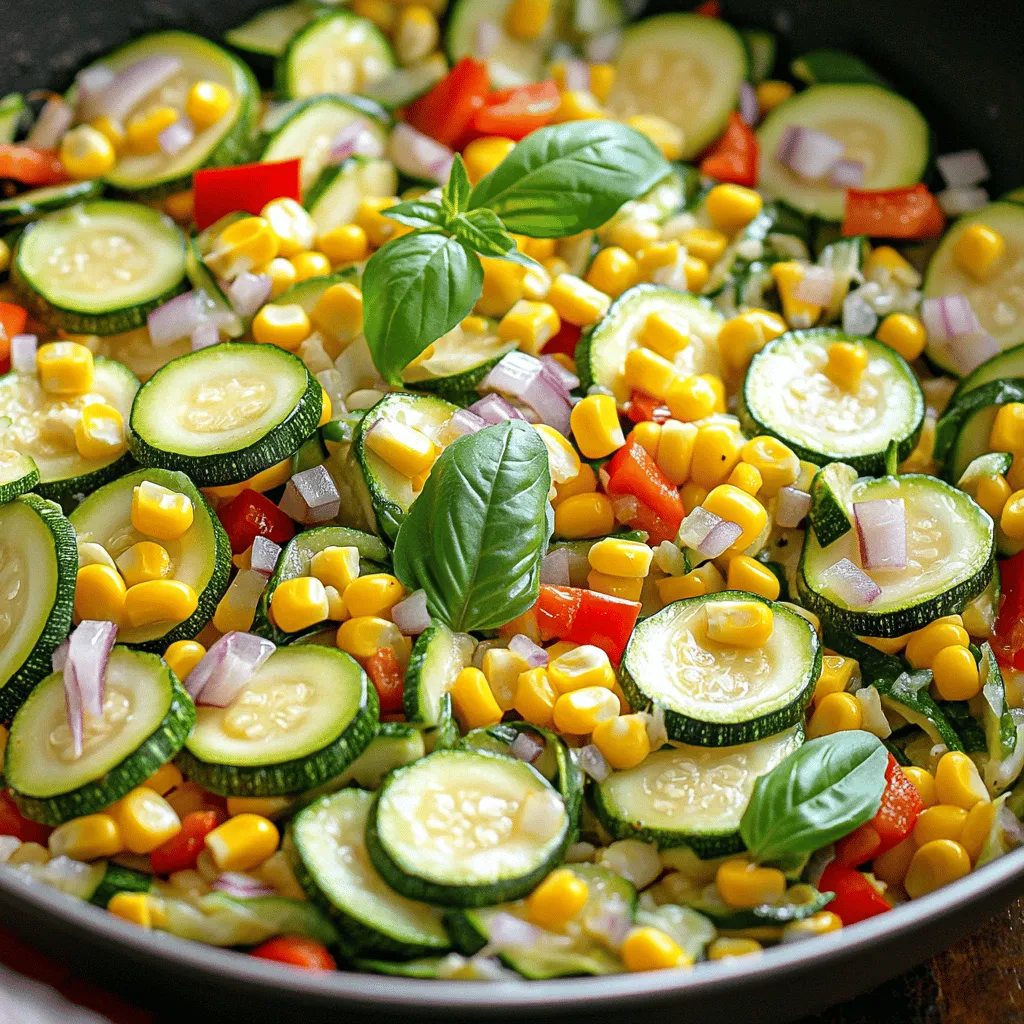
Summer Squash and Corn Chowder Simple and Tasty Meal
When summer hits, I crave fresh flavors that celebrate the season. That’s where my Summer Squash and Corn Chowder comes in. This simple and tasty
- 2 medium zucchinis, sliced into rounds - 8 ounces of cremini mushrooms, sliced - 2 tablespoons olive oil - 3 cloves garlic, minced - 1 teaspoon dried thyme - 1 teaspoon fresh lemon juice - Salt and pepper to taste - ¼ cup grated Parmesan cheese (optional) - Fresh parsley, chopped (for garnish) The key to this dish is the fresh veggies. Zucchini and mushrooms bring a nice balance of flavors. The olive oil gives a rich taste, while garlic adds a nice punch. You can adjust the salt and pepper to your liking. You will need: - Zucchini: Use 2 medium-sized zucchinis. This amount gives a good texture. - Mushrooms: 8 ounces of cremini mushrooms work best for a deep flavor. - Olive oil: Just 2 tablespoons will coat the veggies nicely. - Garlic: 3 cloves are enough to infuse the dish with warmth. - Thyme: 1 teaspoon of dried thyme adds a lovely earthiness. - Lemon juice: 1 teaspoon brightens the flavors. - Salt and pepper: Add to taste for the perfect seasoning. - Parmesan cheese: Use ¼ cup if you want that extra creaminess. If you don’t have mushrooms, you can use bell peppers or spinach. Both add great flavor and color. For seasoning, try herbs like oregano or basil instead of thyme. You can even add a pinch of red pepper flakes for some heat. Experiment with what you have on hand! For the full recipe, check out the [Full Recipe]. To make sautéed zucchini and mushrooms, start by slicing the vegetables. - Cut the zucchinis into rounds, about ¼ inch thick. - Slice the cremini mushrooms into thin pieces for even cooking. Next, prepare your skillet. - Choose a large skillet for even heat distribution. - Heat it on medium heat and add 2 tablespoons of olive oil. Now it's time to sauté! - Begin by adding the sliced mushrooms to the skillet. - Cook them for about 5 minutes. They should soften and release juices. After that, add the zucchini and minced garlic. - Stir everything together and cook for 5 to 7 minutes. - The zucchini should be tender but still have some crunch. Once the veggies are cooked, add your seasonings. - Mix in 1 teaspoon of dried thyme and 1 teaspoon of fresh lemon juice. - Season with salt and pepper to taste. If you like, sprinkle ¼ cup of grated Parmesan cheese on top. - Let it melt slightly before serving. For a nice finish, garnish with chopped fresh parsley. Serve it warm in a dish, and enjoy! For the full recipe, check out the details above. To get the perfect sauté, start with a hot skillet. Heat olive oil over medium heat. Once the oil shimmers, add the mushrooms first. They take longer to soften. Sauté them for about five minutes. Stir them often. Then, add zucchini and garlic. Cook for five to seven more minutes. This keeps the zucchini tender yet crisp. To avoid mushy vegetables, don’t overcrowd the pan. If you have too many, cook them in batches. Also, cut your zucchini into even rounds. This ensures they cook at the same rate. Boost flavor with fresh herbs and spices. Thyme works great in this dish. You can also try basil or oregano. Adding lemon juice at the end brightens the whole dish. If you want a hint of sweetness, consider a small drizzle of honey. A splash of balsamic vinegar can add a nice tang too. Pair sautéed zucchini and mushrooms with proteins like grilled chicken or fish. They also go well with steak. For side dishes, consider serving rice or quinoa. Crusty bread is perfect for soaking up the juices. If you want to impress, try serving it with a sprinkle of Parmesan cheese. For the full recipe, check the section above! {{image_2}} You can change the dish with seasonal ingredients. Try using summer squash, which has a similar texture to zucchini. It adds a nice twist. You can also add other vegetables, like bell peppers or asparagus, for more color and flavor. Fresh herbs boost the taste too. Use basil, oregano, or chives for a delightful touch. This dish is easy to adapt for different diets. If you are vegetarian, it fits perfectly. For vegans, just skip the cheese or use a plant-based option. This dish is also gluten-free. All the ingredients are naturally free of gluten, so enjoy this dish without worry. You can make this dish even better with creative twists. Add proteins like chicken or shrimp for a heartier meal. They cook quickly and bring extra flavor. You can also try different types of cheese. Goat cheese adds creaminess, while feta gives a tangy kick. These options keep the dish exciting and new. For the full recipe, check out the details above. To keep your sautéed zucchini and mushrooms fresh, place them in the fridge. Use an airtight container to prevent moisture loss. If you make a big batch, divide it into smaller portions. This way, you can grab just what you need later. Make sure the dish cools down before sealing it. When reheating, the oven works best for texture. Preheat the oven to 350°F (175°C). Spread the veggies on a baking sheet. Heat for about 10 minutes, stirring halfway. This keeps them crispy. If you use a microwave, be careful. Heat for 30 seconds at a time. Stir in between to avoid sogginess. Cooked sautéed zucchini and mushrooms last about 3 to 5 days in the fridge. If you see any signs of spoilage, it’s best to toss them. Look for a slimy texture or an off smell. These signs mean the dish is no longer safe to eat. Enjoy your leftovers while they are still fresh! To keep zucchini firm, use a few simple tricks. First, slice the zucchini and sprinkle it with salt. Let it sit for about 10 minutes. This draws out excess water. After that, pat the zucchini dry with a paper towel. When cooking, use medium heat and avoid overcrowding the pan. This helps zucchini cook evenly and stay crisp. Absolutely! You can add bell peppers, onions, or carrots for color and flavor. Broccoli and asparagus also work well. Each vegetable brings its unique taste and texture. Just make sure to cut them into similar sizes for even cooking. Sautéed zucchini and mushrooms pair nicely with many dishes. For a light meal, serve them with grilled chicken or fish. You can also add them to pasta or rice for a hearty dish. Try serving with crusty bread to soak up the flavors. These options make for a balanced and tasty meal. For the full recipe, check out the details above! In this blog post, we covered how to make a delicious dish with zucchini and mushrooms. You learned about key ingredients, measurements, and tasty alternatives. We detailed the cooking steps, tips for perfect textures, and ways to boost flavor. Plus, we shared variations, storage information, and answered common questions. Remember, cooking is all about experimenting. Enjoy the process and make it your own! Happy cooking!
Sautéed Zucchini and Mushrooms Flavorful Easy Dish
Are you ready to take your side dishes to the next level? My Sautéed Zucchini and Mushrooms dish is simple, delicious, and full of flavor.
To make Juicy Baked Chicken Breast, you need: - 2 large chicken breasts, boneless and skinless - 2 tablespoons olive oil - 1 teaspoon garlic powder - 1 teaspoon onion powder - 1 teaspoon smoked paprika - 1 teaspoon dried oregano - 1 teaspoon dried thyme - Salt and pepper to taste - Juice of 1 lemon - Fresh parsley, chopped (for garnish) Using fresh ingredients makes a big difference. Fresh chicken tastes better and stays juicy. Fresh herbs add vibrant flavors. When you pick fresh spices, they pack more punch. Always check the expiration dates. Fresh foods give your dish the best taste and nutrition. Accurate measurements help you cook well. Use standard measuring spoons for spices. For liquids, use a clear measuring cup. Level off dry ingredients with a knife for even amounts. If you have a kitchen scale, use it for chicken. This helps you avoid guessing. Proper measuring leads to great results every time. First, preheat your oven to 400°F (200°C). This step warms the oven and helps the chicken cook evenly. While the oven heats up, pat the chicken breasts dry with paper towels. Dry chicken helps the seasonings stick and promotes a nice brown color. Next, mix the garlic powder, onion powder, smoked paprika, oregano, thyme, salt, and pepper in a small bowl. This blend adds great flavor. Rub the chicken breasts with olive oil. Then, sprinkle the spice mix evenly on both sides. Make sure you cover all parts for the best taste. Finally, squeeze the lemon juice over the chicken for a fresh kick. Now, place the seasoned chicken breasts in a baking dish. Bake them in the preheated oven for 20-25 minutes. Use a meat thermometer to check if they reach an internal temperature of 165°F (75°C). Once done, take them out and let the chicken rest for 5 minutes. Resting keeps the juices inside the meat. Finally, garnish with fresh parsley before serving. For the full recipe, see the details above. To keep your chicken juicy, start with high-quality meat. Use fresh, boneless, and skinless chicken breasts. Pat them dry with paper towels before seasoning. This step helps the spices stick better. Rub both sides with olive oil to lock in moisture. Use a meat thermometer to check the internal temperature. Aim for 165°F (75°C) for safe, juicy chicken. Resting the chicken after baking is key. Let it sit for five minutes before slicing. This time allows the juices to redistribute. If you slice too early, the juices run out. You end up with dry meat. A little patience here goes a long way in flavor and texture. Using the right tools makes cooking easier. Here are some must-haves: - A sharp chef's knife for slicing - A cutting board for prep - A meat thermometer for checking doneness - A baking dish for cooking - Parchment paper for easy cleanup With these tools, you’ll have a smooth cooking experience. Remember to follow the Full Recipe for the best results! {{image_2}} You can change the flavor of your chicken with different spice blends. For a zesty kick, use taco seasoning. If you love heat, add cayenne pepper. For an Italian twist, try basil and rosemary. Mix and match spices to find what you like best. This way, you can enjoy a new taste each time. Baking is great, but grilling and sautéing can also give you juicy chicken. Grilling adds a smoky flavor and crispy edges. Simply season your chicken and grill for about 6-7 minutes on each side. Sautéing is quick and easy too. Cook seasoned chicken in a hot pan with some olive oil for about 5-6 minutes per side. Both methods keep the chicken juicy and tasty. Pair your juicy chicken with delicious sides. Rice, quinoa, or roasted veggies work well. For a fresh touch, serve with a salad. You can also add sauces to enhance flavor. A tangy lemon sauce or creamy garlic sauce adds a great twist. Try different combinations to find what you love. Enjoy experimenting with your juicy baked chicken breast! Check out the Full Recipe for more ideas. To keep your juicy baked chicken breast fresh, store it in the fridge. Place it in an airtight container. This helps avoid moisture loss and keeps flavors intact. It is best to refrigerate chicken within two hours of cooking. Cooked chicken can last up to four days. Always check for any signs of spoilage. If you want to save leftovers, freezing is a great option. First, let the chicken cool completely. Wrap the chicken tightly in plastic wrap or foil. Then, place it in a freezer bag. Remove as much air as possible before sealing. Frozen chicken can maintain its quality for up to six months. When you’re ready to use it, thaw it in the fridge overnight. To reheat your chicken without drying it out, use the oven or a skillet. If using the oven, preheat it to 350°F (175°C). Place the chicken in a baking dish with a splash of broth or water. Cover it with foil to lock in moisture. Heat for about 15-20 minutes, or until warmed through. If using a skillet, add a little oil and heat over medium. Cook for a few minutes on each side until hot. These methods keep your chicken juicy and delicious. To keep chicken breast juicy, start with high-quality meat. Use boneless and skinless chicken breasts for the best results. Before cooking, pat them dry with paper towels. This helps the spices stick better. Rub the chicken with olive oil to lock in moisture. Finally, let the chicken rest after baking. This allows the juices to redistribute. The safe internal temperature for baked chicken breast is 165°F (75°C). Use a meat thermometer for accuracy. Insert it into the thickest part of the chicken. This ensures it cooks evenly and stays juicy. Yes, marinating chicken can add flavor and moisture. Marinate it for at least 30 minutes or up to several hours. Use a mix of olive oil, lemon juice, and spices. This will enhance the taste and keep the chicken tender. Bake chicken breasts at 400°F (200°C) for 20-25 minutes. If baking at 350°F (175°C), it may take 25-30 minutes. For lower temperatures like 325°F (160°C), bake for 30-35 minutes. Always check the internal temperature to ensure doneness. The full recipe for Juicy Baked Chicken Breast includes: - 2 large chicken breasts, boneless and skinless - 2 tablespoons olive oil - 1 teaspoon garlic powder - 1 teaspoon onion powder - 1 teaspoon smoked paprika - 1 teaspoon dried oregano - 1 teaspoon dried thyme - Salt and pepper to taste - Juice of 1 lemon - Fresh parsley, chopped (for garnish) Follow the instructions for perfect results! In this article, we covered key steps to bake juicy chicken breast. We explored essential ingredients and measuring tips. Preparing and seasoning your chicken is crucial for great taste. Remember to rest the chicken after cooking for the best texture. Explore variations like spice blends and various cooking methods. Store your chicken properly for freshness. Always check internal temperatures to ensure it’s safe. These tips will help you create a delicious meal every time. Enjoy your cooking journey with juicy, flavorful chicken!
Juicy Baked Chicken Breast Easy Cooking Guide
Looking for a simple way to make the juiciest baked chicken breast? You’ve come to the right place! In this easy cooking guide, I’ll share
When preparing Skillet Zucchini, Corn, and Peppers, the quality of your ingredients matters. Here’s what you need: - 2 medium zucchinis, sliced into half-moons - 1 cup corn kernels (fresh or frozen) - 1 red bell pepper, diced - 1 yellow bell pepper, diced - 1 small red onion, finely chopped - 2 cloves garlic, minced - 2 tablespoons olive oil - 1 teaspoon smoked paprika - 1 teaspoon dried thyme - Salt and pepper to taste - Fresh basil leaves for garnish Each ingredient plays a key role in the dish. The zucchinis add a mild flavor and a crunchy texture. Corn brings sweetness and pops of color. The bell peppers give it a vibrant look and crisp texture. Red onion and garlic provide depth and aroma. Using fresh herbs like basil at the end adds a burst of freshness. This dish is not only colorful but also packed with nutrients. For the full recipe, check out the detailed cooking steps. - Heat olive oil in a skillet. Start with medium heat to warm it up. - Sauté onion and garlic. Cook them for about three minutes. This makes the house smell great! - Add bell peppers and cook. Stir them in, and let them soften for four to five minutes. - Stir in zucchini and cook until tender. This should take about five minutes. The zucchini should stay a bit crisp. - Mix in corn and seasonings. Add corn, smoked paprika, and thyme. Season with salt and pepper. Cook for two to three minutes. - Final garnishing and serving tips. Remove from heat and add fresh basil for a pop of flavor. Serve it warm for the best taste. Check out the Full Recipe for detailed instructions! - How to perfectly sauté vegetables: Start with a hot skillet. Heat olive oil until it shimmers. Add onions and garlic first. This builds a flavor base. Stir often for even cooking. Add other veggies in stages. Softer ones go in first. This keeps everything crisp and bright. - Time-saving preparation methods: Wash and chop all ingredients before cooking. Use a food processor for quick chopping. You can also prep veggies a day ahead. Store them in airtight containers. This way, you save time during cooking. - Suggested tools and equipment: A large skillet is key. Use one with a non-stick surface for easy cooking. A good knife and cutting board help with prep. A spatula is great for stirring and flipping veggies. - Recommended herbs and spices: Fresh basil adds a bright note. Smoked paprika gives a nice depth. Dried thyme is perfect for earthiness. For a kick, consider adding red pepper flakes. Just a pinch can elevate the dish. - Combining with proteins for a balanced meal: Pair this dish with grilled chicken or shrimp. Beans or lentils offer a great plant-based protein. Adding these makes it a complete meal. You can also serve it over rice or quinoa for extra fiber. If you want a light option, enjoy it alongside a fresh salad. {{image_2}} For this dish, feel free to switch up the veggies. You can use: - Broccoli florets instead of zucchini - Chopped carrots for a sweet crunch - Green beans for a fresh taste If you want a dairy-free or vegan option, skip the cheese if you add any. Instead, try nutritional yeast for a cheesy flavor without dairy. Using seasonal produce can make your dish even better. In summer, fresh corn and zucchini shine. In fall, consider using: - Butternut squash for sweetness - Kale for added nutrients For colder weather, you can roast the veggies instead of sautéing them. This will enhance their flavors and warmth. Adjust your recipe to match the seasons for the best taste. To keep your Skillet Zucchini, Corn, and Peppers fresh, store leftovers in an airtight container. Place them in the fridge. This will help keep them tasty for about 3 to 4 days. You can also freeze this dish. First, let it cool completely. Then, transfer it to a freezer-safe bag. Remove as much air as possible. This way, it stays fresh for up to 2 months. Reheating should be gentle to keep the flavors intact. The best method is to use a skillet. Heat it over medium-low heat. Add a splash of olive oil if needed. Stir occasionally until warm. If you're short on time, use a microwave. Heat in short bursts, stirring in between. Storage duration guidelines say you can keep it in the fridge for 3 to 4 days. If frozen, thaw in the fridge overnight before reheating. Enjoy every bite! How can I make Skillet Zucchini, Corn, and Peppers spicier? You can add red pepper flakes or diced jalapeños. Both options bring heat. Try mixing in a bit of hot sauce for extra flavor. Can I use canned corn instead of fresh or frozen? Yes, you can use canned corn. Just drain it first and add it at the end. This keeps it crisp and tasty. Is it possible to make this dish ahead of time? Absolutely! You can prep the veggies in advance. Cook them right before serving for the best taste and texture. What can I pair with Skillet Zucchini, Corn, and Peppers for a complete meal? This dish pairs well with grilled chicken or fish. You can also serve it with rice or quinoa for a filling meal. Is this dish suitable for meal prep? Yes, it is great for meal prep. Store it in airtight containers. It keeps well in the fridge for up to three days. What nutritional benefits do these ingredients provide? Zucchini is low in calories and high in water. Corn adds fiber and vitamins. Bell peppers are rich in antioxidants. This dish is both healthy and colorful. For the full recipe, check the earlier section. This blog post covers how to make a delicious Skillet Zucchini, Corn, and Peppers dish. We reviewed the key ingredients and important steps for preparation. You learned tips to enhance flavor and make healthy swaps. Additionally, we discussed how to store and reheat leftovers effectively. In conclusion, this dish is easy to make and adaptable. Enjoy experimenting with different veggies or spices to find your favorite combo. Happy cooking!
Skillet Zucchini, Corn, and Peppers Flavor Boost
Looking for a quick and tasty way to brighten up your meals? My Skillet Zucchini, Corn, and Peppers is a vibrant dish packed with flavor.
To make a delicious Greek beef and zucchini rice bowl, you need some key ingredients: - 1 lb ground beef - 1 large zucchini, diced - 1 cup basmati rice These ingredients create a solid base for your dish. The ground beef gives the meal its hearty flavor. Zucchini adds a lovely texture and freshness. Basmati rice serves as a fluffy backdrop for all those tasty elements. You can enhance your dish with these optional ingredients: - Fresh parsley - Feta cheese - Cherry tomatoes Adding fresh parsley gives your bowl a nice pop of color. Feta cheese adds a creamy, salty touch that complements the beef. Cherry tomatoes bring sweetness and a burst of flavor. You will also need some common pantry items: - Olive oil - Dried oregano - Ground cumin - Paprika - Salt and pepper These staples boost the flavor of your dish. Olive oil helps cook the beef and veggies. Dried oregano and ground cumin add a warm, earthy taste. Paprika gives a mild smokiness, while salt and pepper round out all the flavors. For the complete step-by-step process, refer to the Full Recipe. 1. Rinse and drain basmati rice: Rinse one cup of basmati rice under cold water. Keep rinsing until the water is clear. This step helps remove extra starch. After rinsing, drain the rice and set it aside. 2. Sauté onions and garlic: In a medium saucepan, heat one tablespoon of olive oil over medium heat. Add one small chopped onion. Sauté it until it becomes soft and translucent, about three to four minutes. Next, add two minced garlic cloves. Cook for an additional thirty seconds until the garlic is fragrant. 1. Browning the ground beef: In a large skillet, heat the other tablespoon of olive oil over medium-high heat. Add one pound of ground beef to the skillet. Use a spatula to break it apart. Cook the beef until it is browned, about five to seven minutes. Season it with one teaspoon of dried oregano, one teaspoon of ground cumin, and half a teaspoon of paprika. Add salt and pepper to taste. Stir well. 2. Adding zucchini and tomatoes: Chop one large zucchini into small pieces and halve one cup of cherry tomatoes. Add both to the skillet with the beef. Sauté for about five minutes, until the zucchini is tender. 1. Fluffing rice and mixing with beef: Once the rice is cooked and the liquid is absorbed, fluff it with a fork. Then, divide the rice into serving bowls. Top each bowl with the beef and zucchini mixture. 2. Plating the dish: Finish your dish by sprinkling half a cup of crumbled feta cheese and some fresh parsley over the top. You can also add a wedge of lemon on the side for a zesty touch. For full details and additional tips, check the Full Recipe. How to properly sauté vegetables To sauté vegetables well, use medium heat. Heat olive oil in your pan. Add onions first; cook until they turn soft. This usually takes about three to four minutes. Then, add zucchini and cook until tender. Stir often to prevent sticking. This method keeps your veggies crisp and full of flavor. Achieving the best texture for rice For the best rice texture, rinse basmati rice under cold water. This removes excess starch, which makes the rice less sticky. After rinsing, drain the rice well. When cooking, use a 2-to-1 ratio of vegetable broth to rice. This gives the rice a rich flavor. Simmer it gently to let it absorb the liquid fully. Balancing flavors with spices Use dried oregano and ground cumin for a classic Greek taste. They add warmth and depth to the beef. Start with a teaspoon of each. You can adjust these spices according to your taste. Try adding a pinch of paprika for a hint of smokiness. Adjusting seasoning to taste Always taste your dish as you cook. If it needs more flavor, add salt and pepper. This simple step helps you achieve a balanced taste. Remember, you can always add more, but you can't take it out. Garnishing with feta and parsley To make your bowl look inviting, sprinkle crumbled feta cheese on top. The creamy cheese pairs well with the beef. Fresh parsley adds a pop of color. Use a generous handful for a bright look. Serving suggestions for a colorful plate Use colorful bowls to enhance your dish's appeal. Add a lemon wedge on the side for a fresh touch. This not only looks good but also adds a zesty flavor when squeezed over the bowl. Enjoy your Greek Beef and Zucchini Rice Bowl with these fun and easy tips! {{image_2}} You can make this dish healthier by changing a few key ingredients. Instead of ground beef, try ground turkey or chicken. These options are leaner and lower in fat. They still offer great flavor. If you prefer plant-based meals, swap the beef for lentils or chickpeas. Both options add protein and fiber. They also soak up the spices well, giving your bowl a tasty twist. To elevate the flavors, add fresh herbs like dill or mint. These herbs can brighten the dish and add depth. You can also mix in other vegetables. Some great choices include bell peppers, spinach, or roasted eggplant. They add color and more nutrition. For a different base, serve your Greek beef and zucchini mixture over quinoa or cauliflower rice. Both options are nutritious and add a unique texture. Pair it with a side salad for a balanced meal. A simple green salad with olive oil and lemon dressing works well. It adds freshness and crunch to your plate. For the full recipe, check out the complete instructions! To keep your Greek Beef and Zucchini Rice Bowl fresh, store leftovers in an airtight container. This will help maintain flavor and texture. It stays good in the fridge for about three to four days. When you're ready to eat, just reheat it on the stove or in the microwave. You can freeze the Greek Beef and Zucchini Rice Bowl for longer storage. Portion it into freezer-safe containers. Make sure to leave some space at the top, as the rice may expand. It’s best to use it within three months. When you’re ready to enjoy it, thaw it in the fridge overnight. Reheat on the stove for the best flavor. For easy meal prep, cook the beef and rice in advance. You can also chop the zucchini and tomatoes beforehand. Store these ingredients separately to keep them fresh. This way, you can mix and match when you’re ready to eat. It makes meal time quick and easy, with minimal effort! For the full recipe, check out the [Full Recipe]. Can I make this dish ahead of time? Yes, you can prep this dish ahead. Cook the beef and rice separately. Store them in the fridge. This way, you save time and enjoy fresh meals. What can I substitute for basmati rice? You can use jasmine rice or quinoa instead of basmati rice. Both options cook well and will taste great in this dish. How many calories are in each serving? Each serving has around 450 calories. This can vary with portion sizes and added toppings. Is this recipe suitable for special diets? Yes, it's flexible! You can use lean beef for lower fat. For gluten-free diets, skip the broth with gluten. How do I make the beef less greasy? To reduce grease, use lean ground beef. Drain excess fat after cooking. This keeps the dish light and healthy. What should I do if my rice is too sticky? If your rice is sticky, try rinsing it before cooking. Also, fluff it gently with a fork after cooking. This helps separate the grains. For the full recipe, check out the detailed guide. In this blog post, we explored how to make a Greek Beef and Zucchini Rice Bowl. We covered essential and optional ingredients, tips for cooking, and variations to try. You can customize flavors and textures based on your preference. Remember, meal prep can save time, and proper storage keeps leftovers fresh. Cooking at home with these simple steps can boost your meals and encourage healthy eating. Enjoy creating your dish and make it your own. Happy cooking!
Greek Beef and Zucchini Rice Bowl Flavorful Meal Idea
Looking for a tasty meal that’s simple to make? You’ll love this Greek Beef and Zucchini Rice Bowl! It combines ground beef, fresh zucchini, and
- Zucchini: Choose firm zucchinis with smooth skin. Look for bright green color. Avoid any with soft spots. Wash them well, and slice into half-moons. This shape helps them cook evenly. - Mushrooms: I love using cremini or button mushrooms. Both add rich flavor. Clean them gently with a damp cloth. Slice them thin for the best texture. They will brown nicely and give a wonderful taste. - Seasonings: Garlic adds depth to this dish. Mince it finely to release its flavor. Fresh thyme brings a hint of earthiness. Dried thyme works great too. Red pepper flakes give a kick, but use them only if you like some heat. Salt and pepper enhance all the flavors, so don’t skip these. You can find the complete recipe [Full Recipe] to guide you through each step. Start by preparing your zucchini and mushrooms. First, wash the zucchinis well. Then, slice them into half-moons. Aim for even pieces, so they cook at the same rate. Next, clean the mushrooms with a damp cloth. Slice them thinly for best results. Mincing garlic is key for flavor. To do this, peel the cloves and chop off the ends. Use a knife to smash each clove gently. This helps release more flavor. Then, chop the garlic into tiny pieces. Try to keep them uniform for even cooking. Heat your skillet over medium heat. Add olive oil and let it warm up. You want the oil hot but not smoking. Once hot, add the minced garlic. Sauté for about 30 seconds. You will notice a fragrant smell as it cooks. Now, add the sliced mushrooms. Cook them for 4-5 minutes. Stir occasionally, watching for browning and moisture release. The mushrooms should look golden and tender. After that, add the sliced zucchini. Sprinkle thyme, red pepper flakes, salt, and pepper over the veggies. Sauté again for another 4-5 minutes. The zucchini should be tender but still crisp. Balsamic vinegar adds depth to this dish. Drizzle it over the sautéed veggies and stir well. Cook for one more minute to let the flavors meld. Finally, transfer the mixture to a serving dish. Garnish with freshly chopped parsley. This step not only adds color but also a burst of flavor. Your sautéed zucchini and mushrooms are now ready to impress! For the complete recipe, check out the Full Recipe. To keep zucchini from getting soggy, first, slice it thin. Thin slices cook faster and stay firm. You can also salt the slices for 10 minutes before cooking. This draws out extra water. Pat them dry before cooking. This simple step makes a huge difference. Heat control is key for a great sauté. Start with medium heat for the oil. Once hot, add garlic for flavor. Then, add mushrooms first. They need more time to brown. Cook them until they lose moisture. After that, add zucchini. Sauté it just until tender. This keeps the zucchini crisp. Sautéed zucchini and mushrooms pair well with many dishes. Try serving them with grilled chicken or fish. They also go great with pasta or rice. A fresh salad on the side adds crunch. Serve this dish warm, right from the pan. It tastes best fresh. A good portion size is about one cup. This serves as a side or a light main dish. Use the Full Recipe to impress your guests with this easy, tasty meal. {{image_2}} You can swap vegetables in this dish to keep it fresh. Try bell peppers or asparagus for a twist. If you prefer a heartier option, add in some broccoli or carrots. These choices bring unique flavors and textures to your meal. For dairy-free and vegan options, skip any cheese and use nutritional yeast instead. It adds a nice cheesy taste without dairy. Also, ensure that your balsamic vinegar is vegan-friendly if that’s your choice. To boost flavor, consider adding cheese or nuts. Feta or goat cheese crumbles add creaminess. If you like crunch, toss in some toasted pine nuts or walnuts. They add texture and richness to the dish. Spice it up with herbs and seasonings. Fresh basil or oregano can enhance the taste. You can also use lemon zest for a fresh kick. Experiment with different spices like cumin or smoked paprika for a unique flavor profile. For the full recipe, check out Sautéed Zucchini & Mushrooms Delight. To keep sautéed zucchini and mushrooms fresh, put them in an airtight container. Make sure to cool them first. Store the container in the fridge for up to three days. This helps the flavors stay nice. When you reheat, use a skillet. Heat it on medium-low. Add a splash of olive oil to keep the dish moist. Stir gently to avoid mushiness. Yes, you can freeze sautéed vegetables! To freeze, let the dish cool completely. Then, transfer it to a freezer-safe bag or container. Remove as much air as possible to prevent freezer burn. You can store them for up to three months. When you want to use them, take the bag out of the freezer. Place it in the fridge overnight to thaw. Once thawed, reheat in a skillet on low heat. Add a drizzle of olive oil and stir until heated through. This keeps your zucchini and mushrooms tasty! For the full recipe, check out the details above. It takes about 10 minutes to sauté zucchini and mushrooms. First, cook the mushrooms for 4-5 minutes until they brown. Then, add the zucchini and cook for another 4-5 minutes. You want the veggies to be tender but still crisp. You can use frozen zucchini or mushrooms, but fresh is best. Frozen veggies can lose texture. If you use frozen, add them to the skillet while still frozen. Cook them a bit longer to ensure they are heated through. The best way to cut zucchini is into half-moons. Slice it lengthwise and then cut it into half-moon shapes. This size helps the zucchini cook evenly and gives a nice bite. To make this dish spicier, add more red pepper flakes. You can also mix in some chopped fresh chili peppers. Start with a little and taste as you go, so it suits your heat level. This blog post covered how to sauté zucchini and mushrooms perfectly. We explored key ingredients, preparation steps, and cooking tips. You learned about the right types of vegetables, how to prevent sogginess, and the magic of seasonings. In my view, sautéing these ingredients opens up endless meal options. With simple tweaks, you can customize the dish to fit your taste. Enjoy experimenting and creating your own delicious versions!
Sautéed Zucchini with Mushrooms Flavorful and Easy Dish
If you’re searching for a vibrant, easy dish to brighten your meals, look no further! Sautéed zucchini with mushrooms offers a burst of fresh flavor
- 4 boneless, skinless chicken breasts - 1 tablespoon olive oil - 4 cloves garlic, minced - 1 cup chicken broth - 1 cup heavy cream - 1 teaspoon dried thyme - 1 teaspoon dried rosemary - Salt and pepper to taste - ½ cup grated Parmesan cheese - Fresh parsley, chopped (for garnish) To make creamy garlic chicken, you need simple yet tasty ingredients. Choose fresh chicken breasts for the best flavor. Olive oil helps brown the chicken and adds richness. Garlic is the star here, giving that delicious aroma and taste. Chicken broth adds moisture and depth to the sauce. Heavy cream makes the sauce creamy and rich. Dried thyme and rosemary bring herbal notes that complement the dish well. Don't forget salt and pepper to enhance all the flavors. The Parmesan cheese adds a salty, nutty finish, while parsley brightens the dish with color and freshness. - Additions like sun-dried tomatoes or spinach - Suggested side dishes (e.g., pasta, rice, or vegetables) For a twist, consider adding sun-dried tomatoes or spinach. These ingredients add color and extra flavor. You can serve creamy garlic chicken with pasta, rice, or fresh vegetables. Each option makes the meal more enjoyable. Experiment with different sides to find your favorite pairings. The full recipe gives you all the steps to make this delicious dish. To start, flatten the chicken breasts. Use a meat mallet to pound them to an even thickness. This step helps the chicken cook evenly. Next, season both sides with salt and pepper. This simple seasoning enhances the flavor of the chicken. Heat a large skillet over medium heat. Add the olive oil. Once the oil is hot, place the chicken breasts in the skillet. Sear each side for about 6-7 minutes. You want them golden brown. Make sure the internal temperature reaches 165°F (75°C). After cooking, remove the chicken from the skillet and set it aside. In the same skillet, add the minced garlic. Sauté it for about a minute until it smells great. Be careful not to burn the garlic. Next, pour in the chicken broth. Scrape any brown bits from the bottom of the skillet. Let it simmer for 2-3 minutes. Now, reduce the heat to low. Stir in the heavy cream, dried thyme, and dried rosemary. Let this mixture simmer for about 5 minutes. Keep stirring occasionally. The sauce will thicken slightly. Finally, mix in the grated Parmesan cheese. Stir until it melts and blends well. Taste the sauce and adjust with salt and pepper if needed. Return the cooked chicken breasts to the pan. Coat them well with the creamy garlic sauce. Let it cook for another 2-3 minutes to heat through. Serve your creamy garlic chicken with the sauce drizzled on top. Garnish with chopped parsley for a fresh touch. This dish is not just easy to make; it is also a delight to eat. For more details, check the Full Recipe. Proper seasoning is key for juicy chicken. Always season both sides with salt and pepper. This step enhances flavor and keeps the meat moist. Use a meat thermometer to check doneness. Chicken should reach 165°F (75°C) inside. This ensures a safe and tasty meal. To adjust the sauce thickness, simmer it longer to reduce. If you want a lighter sauce, try using half-and-half instead of heavy cream. You can also add a bit of chicken broth to thin it out. Taste your sauce as you go. This way, you can add more garlic or herbs if needed. Pair creamy garlic chicken with simple sides like pasta or rice. Vegetables like steamed broccoli or green beans also work well. For a lovely presentation, serve the chicken on a plate, drizzled with sauce. Sprinkle fresh parsley on top for a pop of color. This makes your dish look even more delicious. {{image_2}} You can easily swap chicken for other proteins. Turkey works well in this recipe. It has a mild flavor that pairs nicely with the garlic sauce. Shrimp is another great option. Shrimp cooks fast and adds a nice texture. Just make sure to adjust the cooking time to avoid overcooking. If you want a vegetarian option, mushrooms are a fantastic choice. Use hearty varieties like portobello or cremini. They soak up the creamy garlic sauce beautifully. Just sauté them until golden before adding the sauce. You can change the flavor of the sauce with different herbs and spices. Try adding paprika for a smoky taste. A pinch of red pepper flakes gives a nice kick. Fresh herbs like basil or parsley can brighten the dish. For a spicy twist, add hot sauce or diced jalapeños to the sauce. This makes the dish exciting for those who love heat. You can experiment until you find your favorite flavor combination. Ready to try these variations? Check out the Full Recipe for more ideas! To store creamy garlic chicken, wait for it to cool first. Place leftovers in an airtight container. This keeps the chicken fresh and safe. You can store it in the fridge for up to three days. If you want to keep it longer, consider freezing it. Use a freezer-safe container or a heavy-duty freezer bag. Make sure to remove as much air as possible. When you reheat creamy garlic chicken, avoid drying it out. The best method is to use the stove. Heat it over low to medium heat in a skillet. Add a splash of chicken broth or cream to keep it moist. Stir it often until it's hot. You can also use a microwave for reheating. Place the chicken on a microwave-safe plate. Cover it loosely with a damp paper towel. Heat in short bursts of 30 seconds. Check the warmth after each burst. This way, it heats evenly without losing moisture. Yes, you can use frozen chicken breasts. Just make sure to thaw them first. This will help them cook evenly. You can thaw them in the fridge overnight or use the microwave. Cooking from frozen may take longer, so check the internal temperature to ensure it reaches 165°F. If you need a substitute for heavy cream, use half-and-half or whole milk mixed with butter. For a lighter option, try plain Greek yogurt or coconut milk. Each choice will give a different flavor but can work well in the recipe. Creamy garlic chicken lasts about 3 to 4 days in the fridge. Store it in an airtight container to keep it fresh. Be sure to let it cool before placing it in the fridge. Absolutely! You can make creamy garlic chicken a day before. Just cook it and store it in the fridge. When you are ready to eat, reheat it gently on the stove. This will keep the chicken tender and the sauce creamy. Creamy garlic chicken pairs well with many side dishes. Here are a few great options: - Pasta, like fettuccine or linguine - Rice, either white or brown - Steamed vegetables, such as broccoli or green beans - Mashed potatoes for a comforting touch This creamy garlic chicken dish is a quick and tasty meal. You only need about 30 minutes to prepare and cook it. The prep time is just 10 minutes, which is great for busy nights. You can find the Full Recipe with all the details [here](#). Feel free to customize this dish to fit your taste. You can add sun-dried tomatoes, spinach, or even a sprinkle of chili flakes for some heat. The creamy sauce is versatile, so you can pair it with rice, pasta, or a fresh salad. Cooking should be fun and personal, so let your creativity shine in the kitchen! In this article, I shared how to make a delicious creamy garlic chicken dish. We explored the needed ingredients, from chicken breasts to savory herbs. I provided simple instructions for cooking and tips to ensure your chicken is juicy. You can try variations with different proteins and flavors, plus, I covered how to store and reheat leftovers. Cooking can be fun and creative. I hope you enjoy making this meal as much as I do. Your kitchen will smell amazing, and the taste will wow everyone!
Creamy Garlic Chicken Flavorful and Easy Dinner Delight
Looking for an easy and delicious dinner idea? You’re in the right place! This Creamy Garlic Chicken recipe combines tender chicken breasts with a rich,
Zucchini Cornbread Casserole is a tasty dish. It mixes fresh zucchini and sweet corn. This dish works well for lunch or dinner. It is both savory and simple, making it great for busy days. You will enjoy how fast it comes together. Follow the Full Recipe for full details. - 2 medium zucchinis, grated - 1 cup sweet corn (fresh or frozen) - 1 cup cornmeal - 1 cup milk - 2 large eggs - 1 teaspoon baking powder - 1 teaspoon baking soda - 1 teaspoon salt - 1 teaspoon chili powder (optional) - 1 cup shredded cheddar cheese - 1/2 cup green onions, chopped - 1/2 cup red bell pepper, diced - 2 tablespoons olive oil - Fresh cilantro for garnish (optional) You can swap some ingredients for your taste. Use yellow squash instead of zucchini for a twist. If you want to make it dairy-free, try almond milk or oat milk. Use flax eggs instead of real eggs for a vegan option. You can also change the cheese to feta or leave it out. Each change can give the casserole a new flavor. Start by gathering all your ingredients. You need two medium zucchinis, grated. Grate them using a box grater or a food processor. Next, measure one cup of sweet corn. You can use fresh corn or thawed frozen corn. Dice half a red bell pepper and chop half a cup of green onions. In a big bowl, combine the grated zucchini, corn, and diced red bell pepper. Mix well. In another bowl, whisk together the cornmeal, milk, eggs, baking powder, baking soda, salt, and chili powder. Make sure there are no lumps. Slowly pour the wet mix into the veggie bowl. Stir gently until everything is well mixed. Add the shredded cheddar cheese and chopped green onions. Fold them in carefully. Preheat your oven to 350°F (175°C). Grease a 9x13-inch baking dish with cooking spray or olive oil. Pour the entire mixture into the dish and spread it out evenly. Drizzle some olive oil on top for more flavor. Bake in the oven for 35-40 minutes. The top should turn golden brown. When done, use a toothpick to check the center. If it comes out clean, it's ready. Let it cool for about 10 minutes before you slice and serve. Enjoy your delicious Zucchini Cornbread Casserole! For the complete recipe, refer to the Full Recipe. When preparing zucchini, choose firm, medium-sized ones. Wash them well. Grate the zucchinis using a box grater. This method breaks them down well for the casserole. Squeeze out excess moisture using a clean cloth or paper towel. This step helps prevent a soggy casserole. To get the best texture, ensure you mix the wet and dry ingredients just until combined. Overmixing will lead to a tough casserole. Aim for a thick, creamy batter. This texture supports the zucchini and corn. Letting the mixture sit for a few minutes before baking allows flavors to meld. For added flavor, consider using fresh herbs like basil or thyme. They pair well with zucchini. You can also use spices like smoked paprika or cumin for a different kick. Adding a bit of garlic powder or onion powder can enhance the overall taste. Experiment with toppings like crumbled feta or a sprinkle of chili flakes before baking for extra zest. {{image_2}} Zucchini Cornbread Casserole offers a great base for vegetarian and vegan meals. For a vegetarian version, simply skip the cheese or use a plant-based alternative. To make it vegan, replace eggs with flaxseed meal. Mix one tablespoon of flaxseed meal with three tablespoons of water. Let it sit for five minutes to thicken, then add it to the batter. You can also swap regular milk for almond or oat milk to keep it dairy-free. You can easily change the flavors of your casserole by swapping in different ingredients. Try using different types of cheese, like pepper jack for a spicy kick or feta for a tangy twist. Instead of red bell pepper, you can use diced jalapeños for heat or spinach for a green touch. If you want a sweeter dish, add chopped jalapeños or diced apples. This flexibility allows you to create a unique dish each time. Seasonal ingredients can give your casserole a fresh twist. In summer, add diced tomatoes or fresh herbs like basil. In fall, consider adding pumpkin puree or roasted butternut squash. During winter, you can throw in some chopped kale or roasted root vegetables. These changes not only enhance flavor but also keep the casserole exciting. Remember to check the [Full Recipe] for the base you can adapt! After you enjoy your Zucchini Cornbread Casserole, store leftovers properly. Let it cool to room temperature first. Then, cover it tightly with plastic wrap or foil. You can also place it in an airtight container. This way, it stays fresh for up to four days in the fridge. If you want to save it for later, freezing works well too. Cut the casserole into individual portions. Wrap each piece in plastic wrap, then place them in a freezer bag. Squeeze out as much air as you can before sealing. You can freeze it for up to three months. To reheat, take the casserole out of the fridge or freezer. If frozen, let it thaw in the fridge overnight. Preheat your oven to 350°F (175°C). Place the casserole in an oven-safe dish and cover it with foil. Heat for about 20-25 minutes if it's cold. If it’s frozen, it may take 30-40 minutes. Enjoy your meal warm! Don't forget to check the Full Recipe when you make it. Yes, you can use frozen zucchini. Just make sure to thaw and drain it first. Frozen zucchini has more water than fresh. This extra moisture can change your casserole's texture. To avoid this, press the thawed zucchini in a clean cloth. This helps remove the excess water. Once drained, you can mix it right in with the other ingredients. Check the casserole after 35 minutes of baking. Look for a golden brown top. Insert a toothpick in the center. If it comes out clean, your casserole is done. If not, bake for a few more minutes. Keep an eye on it to avoid overbaking. The edges should pull away from the dish slightly too. Pair this casserole with a fresh salad for a light meal. A simple green salad adds crunch and color. You can also serve it with grilled chicken or fish for protein. Another option is to add some salsa or guacamole for extra flavor. This dish works well as a side for barbecues or family gatherings. For a fun twist, enjoy it with a dollop of sour cream! You learned about making a great Zucchini Cornbread Casserole. We covered the essential ingredients, some fun swaps, and step-by-step instructions. I shared tips for perfect texture and flavor boosts, too. Remember, you can mix it up with vegetarian or seasonal options. Proper storage keeps leftovers fresh, and reheating is easy. Embrace creativity in your cooking. Enjoy the journey of making this dish and share it with others. Happy cooking!
Zucchini Cornbread Casserole Savory and Simple Meal
Are you ready to delight your taste buds with a dish that’s both savory and simple? My Zucchini Cornbread Casserole is the perfect meal that