Dinner

- 4 boneless, skinless chicken breasts - 1 cup fresh parsley, chopped - 1/2 cup fresh cilantro, chopped - 4 cloves garlic, minced - 1/2 cup olive oil - 2 tablespoons red wine vinegar (or apple cider vinegar as a substitute) Chimichurri sauce is the star here. It adds bright flavors to your chicken. Fresh parsley and cilantro give it a nice green color. Garlic adds depth, while olive oil makes it rich. The vinegar brings acidity, balancing the dish perfectly. - 1 teaspoon red pepper flakes - Zest and juice of 1 lemon - Salt and pepper to taste Red pepper flakes add a bit of heat. Use lemon zest and juice for freshness. Don't forget to season with salt and pepper. These simple ingredients make your dish sing! - Grill or stovetop grill pan - Mixing bowl and whisk - Resealable plastic bag or shallow dish Using the right tools is key. A grill or pan gives your chicken those lovely grill marks. A mixing bowl helps in making the chimichurri sauce. A resealable bag or dish is perfect for marinating. You can find the full recipe to guide you through making this dish. To start, grab a medium bowl. Add the following ingredients: - 1 cup fresh parsley, chopped - 1/2 cup fresh cilantro, chopped - 4 cloves garlic, minced - 1/2 cup olive oil - 2 tablespoons red wine vinegar - 1 teaspoon red pepper flakes - Zest and juice of 1 lemon - Salt and pepper to taste Mix all these together well. You want a bright green sauce that smells amazing. Taste it and adjust the salt and pepper if needed. This sauce packs a punch! Next, take the chicken breasts. Place them in a large resealable plastic bag or a shallow dish. Pour half of your chimichurri sauce over the chicken. Make sure each piece is well-coated. Seal the bag or cover the dish. For the best flavor, marinate the chicken for at least 30 minutes. If you have time, let it marinate for up to 2 hours. This gives the chicken a deep taste. When you're ready to cook, preheat your grill to medium-high heat. This step is key for nice grill marks. Take the chicken out of the marinade and throw away the leftover marinade. Grill the chicken for about 6-7 minutes on each side. You want it to reach an internal temperature of 165°F (75°C) to be safe to eat. Once cooked, place the chicken on a serving platter. Drizzle the remaining chimichurri sauce over the top for a vibrant finish. Enjoy your meal! To make your Vibrant Chimichurri Chicken shine, marination is key. Use half of your chimichurri sauce to coat the chicken. Seal it in a bag or dish. Let it marinate for at least 30 minutes. For the best flavor, aim for 2 hours. This allows the herbs and spices to soak in deeply. When cooking, keep an eye on the time. Grill each side for 6-7 minutes. You want juicy chicken, so check the internal temp. It should reach 165°F (75°C) for safety. A vibrant dish delights the eyes. After cooking, transfer the chicken to a platter. Drizzle the remaining chimichurri sauce over the top. This adds color and flavor. For an extra touch, sprinkle chopped parsley or cilantro on top. It brightens the dish and enhances the fresh taste. Serve with colorful sides like grilled vegetables or a fresh salad for a stunning meal. One mistake is over-marinating. If you let the chicken sit too long, it can become mushy. Stick to the recommended marination time for the best texture. Another common error is not checking the chicken's internal temperature. This step is crucial. If undercooked, chicken can be unsafe to eat. Use a meat thermometer to ensure it’s done right. Enjoy your delicious and safe meal! {{image_2}} You can swap herbs in this chimichurri recipe. For a twist, use oregano or basil instead of parsley and cilantro. These herbs will change the flavor while still keeping it fresh. You might even like the new taste! You can also try different proteins. Steak is a great choice if you want a rich flavor. Shrimp can add a nice seafood touch and cooks quickly. Both options are delicious and pair well with chimichurri. Spice it up with different seasonings in your chimichurri sauce. Add chili powder or cayenne for heat. You can also play with citrus flavors. Try using lime or orange juice instead of lemon. Each change can brighten the dish in a new way. You can cook this chicken in different ways. Grilling gives it a smoky flavor. However, you can also oven-bake it if you prefer. Just preheat the oven to 400°F (200°C) and bake for about 25-30 minutes. Air frying is another good option. This method can make the chicken crispy without much oil. It’s a great way to enjoy a healthy meal while keeping the flavors intact. For the complete recipe, check out the Full Recipe section! To keep your Vibrant Chimichurri Chicken fresh, store it in the fridge. Place leftover chicken and chimichurri sauce in airtight containers. This helps prevent drying out. Use shallow containers for faster cooling. Let the chicken cool to room temperature before sealing. This ensures it cools evenly. You can freeze leftover chicken and chimichurri for later use. First, slice the chicken into pieces for easy use. Place the chicken in freezer bags. Make sure to remove as much air as possible. For chimichurri, transfer it to a separate container. Label the bags with the date. For best quality, use them within three months. To thaw, place them in the fridge overnight. This method keeps flavors intact. Reheat your chicken carefully to keep it juicy. You can use an oven or stovetop. Preheat the oven to 350°F (175°C). Place the chicken on a baking sheet and cover it with foil. Heat for about 15-20 minutes. On the stovetop, use a skillet on medium heat. Add a splash of water or broth to keep moisture. Heat until warm, about 5-7 minutes. Aim for an internal temperature of 165°F (75°C) for safety. Enjoy the flavors of your chimichurri chicken again! You can find the full recipe [here](#). Yes, you can use chicken thighs. Thighs have more fat, making them juicier. They also take a bit longer to cook. Grill them for about 8-9 minutes per side. The internal temperature should still reach 165°F. This will ensure they are safe to eat while remaining tender. You can marinate the chicken for 30 minutes to 2 hours. If you want a strong flavor, go for the longer time. The marinade infuses the chicken with vibrant taste. Just don't exceed 2 hours; it can become mushy. For a balanced meal, serve with: - Grilled vegetables like zucchini and bell peppers - A fresh salad with mixed greens - Quinoa or rice for a hearty side These options complement the flavors of the chicken well. If you want to skip vinegar, try using lemon juice or lime juice instead. You can also use yogurt for creaminess. Mix these options with the herbs and oil. This gives the sauce a nice tang and depth. Yes, you can prepare the chimichurri sauce ahead of time. Store it in the fridge for up to three days. Marinate the chicken the night before. Just remember to grill it fresh for the best taste. This blog post covered the key ingredients, tools, and methods to create Vibrant Chimichurri Chicken. You learned about the marination process, cooking tips, and variations to try. Don't forget to store leftovers properly and reheat them well for the best taste. Exploring this dish can bring fresh flavors to your table. Embrace the endless ways to customize it. Your kitchen adventures await!
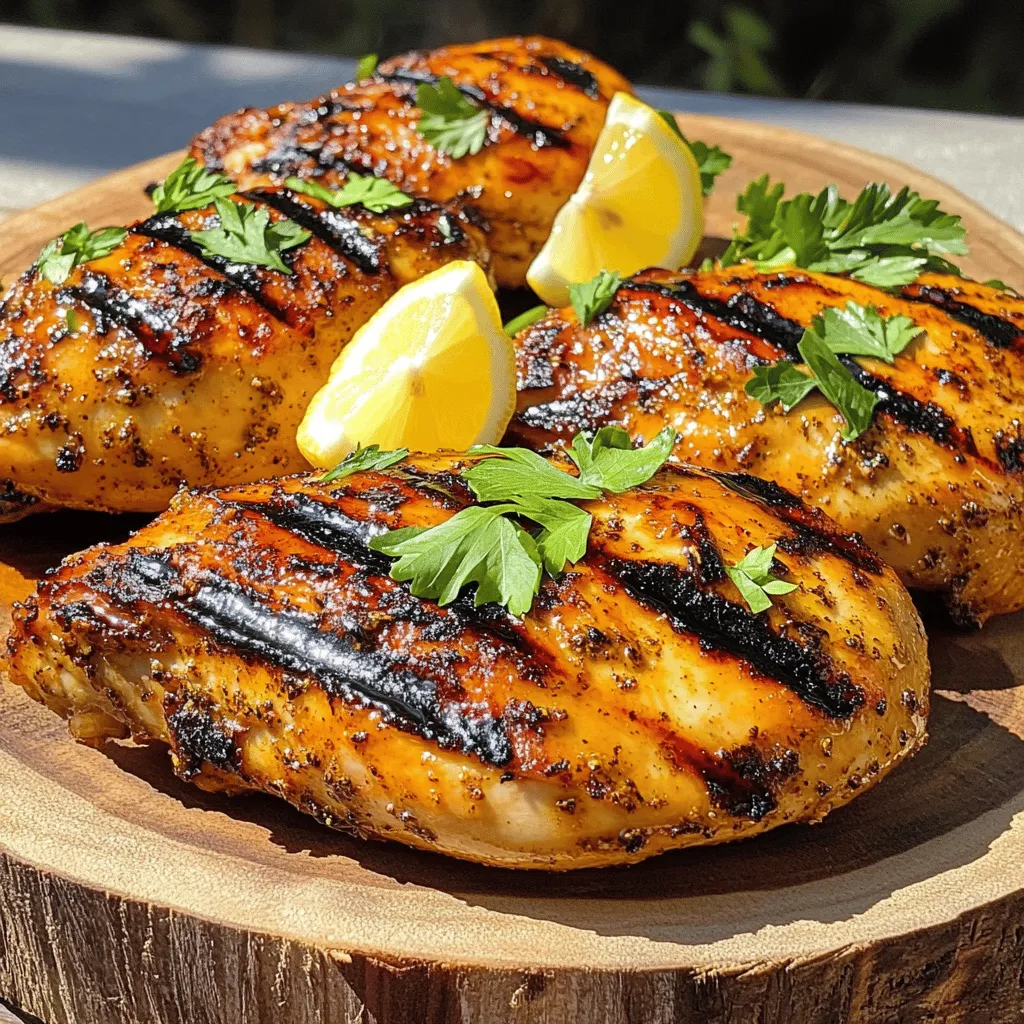
Vibrant Chimichurri Chicken Flavorful Grilling Recipe
Ready to spice up your grilling routine? This Vibrant Chimichurri Chicken recipe is the answer! With fresh herbs, zesty flavors, and simple steps, you’ll create
One-Pot Rosemary Garlic Chicken is a simple dish that packs big flavor. You can make it in about 50 minutes. This meal serves four and is perfect for busy weeknights. - 4 chicken thighs, bone-in and skin-on - 2 tablespoons olive oil - 4 cloves garlic, minced - 1 tablespoon fresh rosemary, chopped - 1 teaspoon paprika - Salt and pepper to taste - 1 cup chicken broth - 1 lemon, zested and juiced - 1 cup baby potatoes, halved - 1 cup green beans, trimmed - Fresh rosemary sprigs for garnish These ingredients come together to create a warm and tasty meal. The chicken thighs give you juicy meat, while the potatoes and green beans add a nice crunch. Feel free to mix things up! You can add your favorite veggies. Carrots or bell peppers work well. If you want more spice, add red pepper flakes. For a creamy twist, stir in some heavy cream at the end. This dish is all about making it your own! Start by gathering all your ingredients. This makes cooking easier and faster. Heat 2 tablespoons of olive oil in a large pot over medium-high heat. Season the chicken thighs with salt, pepper, and paprika. Place the thighs skin-side down in the pot. Sear the chicken for about 5-7 minutes. This makes the skin golden and crispy. Flip the chicken and cook for 3-4 more minutes. Then, take the chicken out and set it aside. Next, add 4 cloves of minced garlic and 1 tablespoon of chopped rosemary to the pot. Sauté for about 30 seconds until it smells great. Now pour in 1 cup of chicken broth, along with the zest and juice of 1 lemon. Use a wooden spoon to scrape up any browned bits from the bottom. This adds flavor. Return the chicken to the pot. Nestle 1 cup of halved baby potatoes around the chicken. Bring the liquid to a gentle simmer. Cover the pot and place it in the oven preheated to 400°F (200°C). Bake for 20 minutes. After that, take the pot out and add 1 cup of trimmed green beans. Stir gently, cover again, and return to the oven for another 15-20 minutes. The chicken should be cooked through, and the veggies tender. Finally, take the pot out of the oven. Let it rest for a few minutes. Garnish with fresh rosemary sprigs before serving. Enjoy your one-pot meal! To get that perfect sear, make sure your pot is hot. The oil should shimmer but not smoke. Place the chicken skin-side down and don’t move it around. Let it sit for those few minutes. This helps the skin crisp up nicely. If the chicken sticks, it’s not ready to flip. Also, remember to season well. Salt and pepper are key to great flavor. Roasting veggies is easy in one pot. Cut them into similar sizes for even cooking. Add them at the right time. For this dish, add the green beans after 20 minutes of cooking the chicken. This way, they stay crisp. Toss them gently with the other ingredients. This allows them to soak up flavors without getting mushy. The goal is tender but firm veggies that add color and taste to your meal. One-pot meals save time and clean-up. Here are some tips to make it easier: - Prep Ingredients First: Chop all veggies and season the chicken before you start cooking. - Use a Large Pot: A wider pot gives more space for browning and cooking. - Layer Ingredients: Place harder vegetables, like potatoes, at the bottom. They need more time to cook. - Don’t Overcrowd the Pot: Give each piece of chicken space. This helps them brown better and cook evenly. Herbs make your dish shine. Here are ways to use them: - Fresh Over Dried: Fresh rosemary is best for flavor. Chop it finely and mix it with garlic. - Add at Different Stages: Some herbs, like rosemary, can go in early. Others, like parsley, are best added at the end. - Experiment with Combinations: Try pairing rosemary with thyme or basil. This can add depth to your dish. - Use the Whole Plant: You can use both the leaves and stems for extra flavor. Just chop them finely. Avoid these pitfalls for a perfect meal: - Skipping the Sear: Don’t skip searing the chicken. This builds flavor and texture. - Neglecting Seasoning: Season generously with salt and pepper. It brings out the dish's best flavors. - Not Monitoring Cooking Time: Keep an eye on the clock. Overcooking can dry out the chicken. - Ignoring Leftovers: This dish tastes even better the next day. Store it properly to enjoy later. For the full recipe, check out the One-Pot Rosemary Garlic Chicken. {{image_2}} You can swap out some ingredients in this recipe to fit your taste. For instance, use chicken breasts instead of thighs. They cook quicker but stay juicy when cooked right. You can also replace rosemary with thyme for a different flavor. If you do not have baby potatoes, regular potatoes work too. Just cut them smaller for even cooking. For a bit of heat, add red pepper flakes or paprika. If you want a vegetarian meal, you can still enjoy this dish. Replace chicken with hearty vegetables like eggplant, mushrooms, or chickpeas. Use vegetable broth in place of chicken broth. Toss in more green beans and add some bell peppers for color. You can also include tofu for protein. Cook the veggies until tender, then mix in the same herbs and spices for flavor. You can make this dish in more ways than one. For stovetop cooking, follow the same steps but simmer on low. This will take about 30 minutes. If you choose a slow cooker, brown the chicken first. Then, place it in the slow cooker with the other ingredients. Cook on low for 6-8 hours or high for 3-4 hours. Every method keeps the flavors bright and fresh. For the full recipe, check out the detailed instructions above. After enjoying your One-Pot Rosemary Garlic Chicken, let it cool down. Store any leftovers in an airtight container. Place it in the fridge. It will stay fresh for up to three days. If you want to keep it longer, consider freezing. For freezing, first ensure the chicken is cool. Place the chicken and veggies in a freezer-safe container. Be sure to use a container that seals well. You can freeze it for up to three months. Label the container with the date. This helps you keep track of freshness. To reheat, first thaw your chicken in the fridge overnight. You can also use the microwave for quick defrosting. Once thawed, place it in a pot on low heat. Add a splash of chicken broth to keep it moist. Stir occasionally until heated through. This helps maintain great flavor and texture. The best way to season chicken is simple. Use salt, pepper, and herbs. For this recipe, I love using fresh rosemary. It adds a nice flavor. Paprika also brings warmth and color. Always season both sides of the chicken. This ensures every bite tastes great. One-pot meals can take about 45 to 60 minutes. This includes prep and cooking time. For our One-Pot Rosemary Garlic Chicken, it takes about 50 minutes total. The chicken cooks in the oven for around 35 minutes. Each step helps build flavors, so be patient. Yes, you can use boneless chicken. It cooks faster than bone-in chicken. Just check the internal temperature to ensure it's safe. Boneless chicken may need about 20 to 25 minutes in the oven. Adjust the cooking time for the best results. This blog post covered key aspects of making a tasty one-pot meal. We discussed ingredients, step-by-step cooking, and tips to avoid mistakes. You learned how to customize your dish and store your leftovers properly. Remember, with just a few tweaks, you can make this recipe your own. Keep experimenting, and always enjoy the cooking process. Good food brings joy, so have fun in the kitchen!
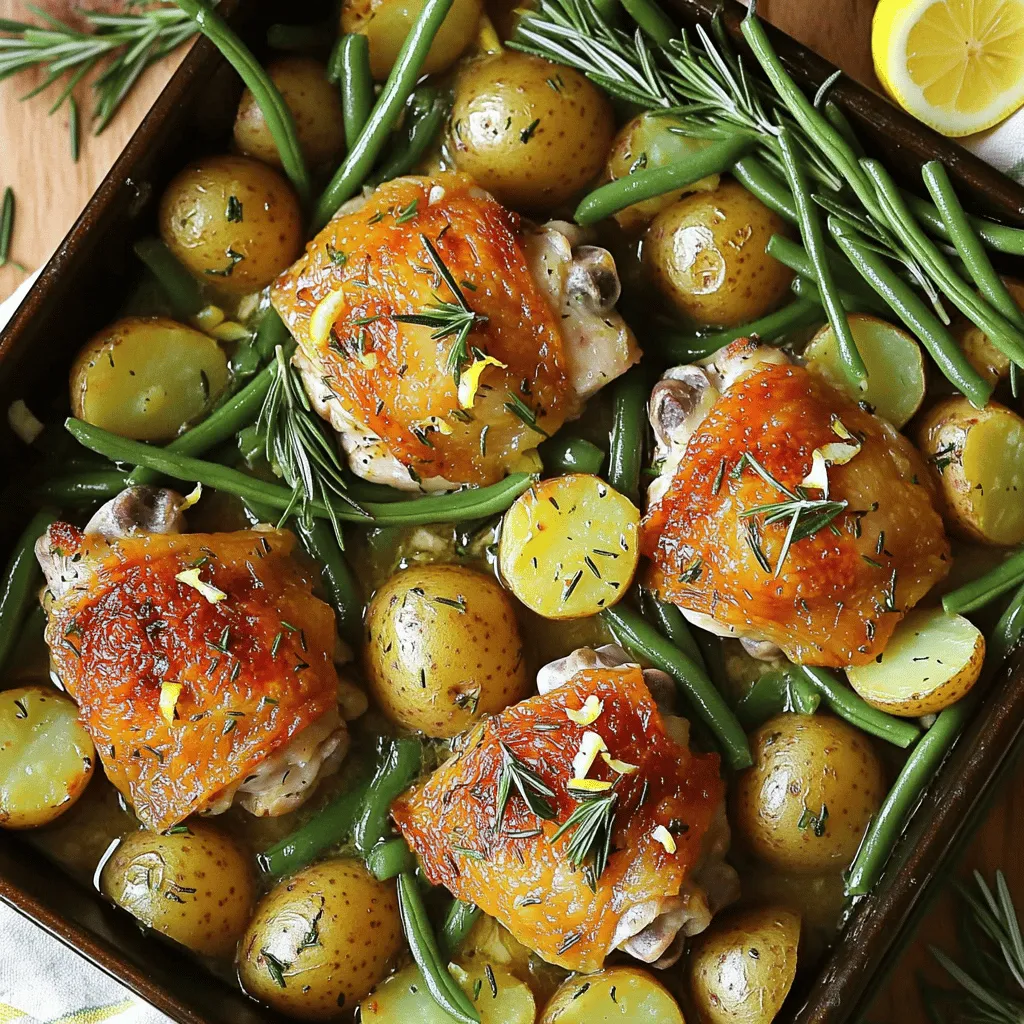
One-Pot Rosemary Garlic Chicken Easy Weeknight Meal
Looking for a delicious meal that’s quick and easy? You’re in the right place! This One-Pot Rosemary Garlic Chicken is a perfect weeknight dish that
- 2 pounds beef stew meat, cut into 1-inch cubes - 4 carrots, peeled and sliced - 3 potatoes, diced - 1 onion, chopped - 3 cloves garlic, minced - 4 cups beef broth - 2 tablespoons tomato paste - 1 tablespoon Worcestershire sauce - 1 teaspoon dried thyme - 1 teaspoon dried rosemary - Salt and pepper to taste - 2 tablespoons olive oil - 1 bay leaf - 1 cup frozen peas (added at the end) When I cook beef stew, I always start with fresh ingredients. The beef stew meat comes first. I like to choose a good cut, like chuck roast. It breaks down well during cooking and adds flavor. Then, I grab some carrots and potatoes. They add sweetness and heartiness to the stew. Onions and garlic give a great base flavor. I never skip them. For broth, I use beef broth for a rich taste. Tomato paste adds depth, while Worcestershire sauce brings a savory note. Herbs like thyme and rosemary add aroma. I season with salt and pepper to make everything pop. Olive oil helps with browning the meat. Lastly, I add a bay leaf for extra flavor. For this recipe, you will also need a slow cooker and some basic kitchen tools. These ingredients and tools make cooking easy and fun. If you want the full recipe, check the details above. To start, I heat olive oil in a large skillet. I season the beef stew meat with salt and pepper. It’s key to sear the meat on all sides until browned. This step takes about 4-5 minutes. Searing helps deepen the stew's flavor. Next, I layer the browned beef in the slow cooker. I add chopped onions, minced garlic, sliced carrots, and diced potatoes. This mix creates a colorful and hearty base for my stew. In a bowl, I combine beef broth, tomato paste, Worcestershire sauce, thyme, rosemary, and a bay leaf. I whisk this until well mixed. Then, I pour the broth mixture over the meat and vegetables in the slow cooker. This blend will soak into the ingredients as they cook. Now, I set the slow cooker to low for 8 hours or high for 4 hours. During this time, I check the doneness of the beef and vegetables. The goal is tender meat and soft veggies that melt in your mouth. About 30 minutes before serving, I stir in frozen peas. This adds a nice pop of color and sweetness. I also taste the stew and adjust the seasoning as needed. More salt or pepper may be required for the perfect flavor. For the full recipe, check out the complete details above. To make your beef stew taste fantastic, start by searing the meat. When you brown the beef, it builds a rich flavor. This step is key. I recommend using high heat and a little olive oil. A splash of red wine can add more depth. It brings a nice richness to the dish. If you want a thicker stew, there are a few easy ways to do it. You can create a cornstarch slurry. Mix equal parts cornstarch and cold water, then stir it in. Another method is to mash some of the veggies in the stew. This helps to thicken it naturally. You might also use less broth for a heartier texture. This makes each bite more satisfying. When serving your stew, think about great pairings. Crusty bread is ideal for soaking up the juices. Mashed potatoes also make a perfect side. They add creaminess and comfort. For a nice touch, garnish with fresh herbs like parsley or thyme. This adds color and freshness. Enjoy your meal with family and friends! {{image_2}} You can change up the vegetables in your stew. Try adding mushrooms, bell peppers, or green beans. These options bring new colors and flavors. In the fall, use root veggies like parsnips or sweet potatoes. In the spring, add fresh peas or asparagus for a bright taste. If you want a twist, swap the beef for chicken or pork. This change gives the stew a different flavor. Chicken cooks faster, so check the time. For a vegetarian stew, use lentils or chickpeas. They add protein while keeping it hearty. Experiment with different herbs and spices. Try adding paprika for a smoky taste or bay leaves for depth. You can also use chicken or vegetable broth instead of beef broth. This change will alter the flavor profile and make it lighter. For the full recipe, refer to the initial section. To keep your Slow Cooker Beef Stew fresh, follow these tips: - Refrigerate: Place the stew in an airtight container. It stays good for about 3-4 days. Make sure it cools down first to avoid condensation. - Freeze: For longer storage, freeze the stew. Use freezer-safe bags or containers. It lasts up to 3 months. Lay bags flat in the freezer for easy stacking. Reheating your stew is easy. You can use a stove or microwave. Here’s how: - Stove: Pour the stew into a pot. Heat over medium-low heat. Stir often and heat until warm. This keeps the flavor intact. - Microwave: Use a microwave-safe bowl. Cover it with a microwave-safe lid or plate. Heat in short bursts, stirring in between. This helps avoid hot spots. To maintain flavor and texture: - Add a splash of beef broth or water if it gets too thick. - Stir well to mix any settled ingredients before serving. You can store Slow Cooker Beef Stew in the fridge for about 3 to 4 days. Make sure to keep it in an airtight container. If you want to keep it longer, you can freeze it for up to 3 months. Just label it with the date for easy tracking. It is not safe to leave the stew cooking overnight on low. Most slow cookers recommend cooking for no more than 8 hours. If you need to cook longer, consider using a programmable slow cooker. This way, you can set a timer to switch to warm after the cooking time is up. Slow Cooker Beef Stew pairs well with several sides. Here are some tasty options: - Crusty bread for dipping - Mashed potatoes for a comforting touch - A fresh green salad for a light contrast - Rice to soak up the stew's juices Yes, you can easily make this stew gluten-free. Just swap out regular beef broth for gluten-free broth. Use gluten-free Worcestershire sauce and check your tomato paste for gluten. These simple swaps let you enjoy this tasty dish without worry. For beef stew, look for cuts that are tender and flavorful. Good options include: - Chuck roast, which becomes really tender - Brisket for a rich taste - Round steak for a lean choice These cuts break down well during slow cooking, giving you a delicious stew. This beef stew recipe is easy to follow and full of flavor. You learned about the key ingredients, kitchen tools, and steps to make it right. Remember to sear the meat for added taste and adjust seasonings for your preference. Feel free to experiment with different vegetables or proteins. With these tips, you can create a delicious meal in your slow cooker. Enjoy every comforting bite and share it with family or friends! Your cooking can bring people together, and there's nothing better than a warm stew to do just that.
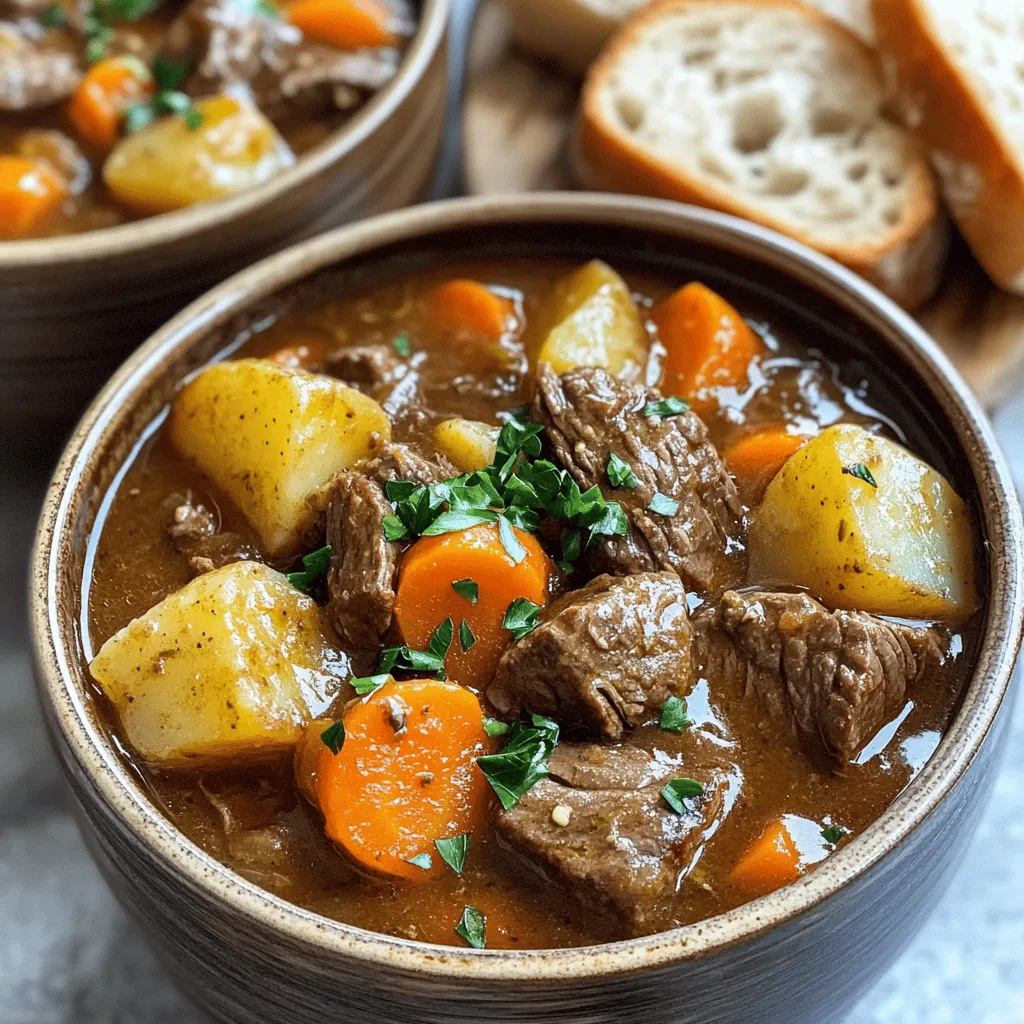
Slow Cooker Beef Stew Easy and Flavorful Recipe
Looking for a comforting meal that’s easy to make? This Slow Cooker Beef Stew recipe packs rich flavors and tender beef, all with minimal effort.
To make the Effortless Street Corn Chicken Rice Bowl, you will need: - 2 cups cooked jasmine rice - 1 lb boneless, skinless chicken thighs, diced - 1 cup corn kernels (fresh, frozen, or canned) - 1 red bell pepper, diced - 1 avocado, diced - 1/2 cup crumbled feta cheese - 1/4 cup fresh cilantro, chopped - 2 tablespoons olive oil - 1 teaspoon smoked paprika - 1 teaspoon garlic powder - 1 teaspoon cumin - Juice of 1 lime - Salt and pepper to taste If you want to swap some items, here are a few ideas: - Use brown rice instead of jasmine rice for a nuttier flavor. - Try chicken breast if you prefer leaner meat. - Swap feta for goat cheese if you enjoy a tangy taste. - Use lime zest for a stronger lime flavor if you like. To prepare this dish, you will need: - A mixing bowl for marinating the chicken - A skillet for cooking the chicken and vegetables - A spatula or wooden spoon for stirring - Serving bowls for assembling the dish - A knife and cutting board for chopping ingredients I recommend using a non-stick skillet for easy cooking and cleaning. A sturdy cutting board helps with safe chopping. Enjoy your cooking adventure! To make your chicken tasty, you need to marinate it well. First, take a bowl and mix together olive oil, smoked paprika, garlic powder, cumin, lime juice, salt, and pepper. Then, add the diced chicken thighs and make sure they are well coated. Let this sit for at least 15 minutes. This time allows the flavors to soak into the chicken. If you have more time, marinating for up to 2 hours will deepen the flavor even more. Now it's time to cook the chicken. Heat a skillet over medium-high heat. Add the marinated chicken to the skillet. Cook it for about 7 to 10 minutes. You want the chicken to be fully cooked and golden brown on the outside. To check if it’s done, cut a piece in the middle; it should be white, not pink. If you prefer grilling, you can cook the chicken on a grill for similar results. Oven-baking is another option; just bake at 400°F for about 20 minutes. In the same skillet, after you remove the chicken, add corn and diced red bell pepper. Sauté them for about 5 minutes. You want the corn to have a slight char and the peppers to be tender. Keep the heat high enough to get some color but not so high that they burn. Season this mix with salt and pepper to enhance the flavor. This step adds a sweet and smoky taste that pairs well with the chicken. To boost flavor in your Effortless Street Corn Chicken Rice Bowl, consider adding spices. Try cayenne pepper for heat or smoked paprika for a smoky touch. You can also mix in chili powder for depth. Homemade sauces can take your dish to the next level. A simple lime crema made with sour cream, lime juice, and a pinch of salt adds creaminess. For a zesty twist, mix Greek yogurt with garlic and chopped cilantro. These sauces bring fresh flavor to your bowl. Serving your rice bowl in a colorful way makes it more fun. Use wide, shallow bowls to show off each layer. Start with a base of rice, then add the corn and chicken. Top with avocado and feta for a pop of color. Garnishes can elevate your dish. Fresh cilantro looks great and adds flavor. A sprinkle of lime zest adds a bright touch. Try adding chopped green onions or a slice of lime on the side for a nice finish. {{image_2}} You can switch up the proteins in your Effortless Street Corn Chicken Rice Bowl. Instead of chicken, try using shrimp or tofu. Shrimp cooks fast and adds a nice touch. Tofu is great for a vegetarian or vegan option. Just press and cube it before marinating. You can also skip the meat altogether. Use roasted chickpeas for crunch and protein. They soak up flavors well and add a delightful texture. To change the flavor, think about different dressings or seasonings. You could use a zesty lime vinaigrette. It brings a fresh twist to the dish. A chipotle sauce adds some heat and smokiness. Incorporating seasonal vegetables can also enhance your bowl. Use grilled zucchini in summer or roasted butternut squash in fall. Sweet corn pairs well with any vegetable, so get creative! For the full recipe, check out the Effortless Street Corn Chicken Rice Bowl. To keep your Effortless Street Corn Chicken Rice Bowl fresh, store leftovers in an airtight container. Make sure to let the dish cool down before sealing it. This helps keep moisture in check. You can store it in the fridge for up to three days. When you want to eat it again, reheat it in the microwave. Use a medium setting to warm it gently. Stir halfway through to ensure even heating. This way, your chicken stays juicy and the veggies keep their crunch. If you want to save some for later, you can freeze parts of the dish. First, cool the chicken and corn mixture. Place it in freezer-safe bags. Be sure to squeeze out extra air before sealing. You can freeze the rice separately as well. This helps maintain the best texture. When you're ready to eat, take them out and thaw them in the fridge overnight. To reheat, warm them in the microwave or a skillet. Add a splash of water to keep the rice moist. Enjoy a tasty meal just like the first time! You can spice up the Effortless Street Corn Chicken Rice Bowl in a few ways. First, add diced jalapeños when cooking the corn. This gives your dish a nice kick. You can also mix in some cayenne pepper or red pepper flakes into the chicken marinade. Start with a small amount and taste as you go. For a smoky flavor, try adding chipotle powder. Just remember to balance the heat with the other flavors in the bowl. Yes, you can prepare this dish in advance. Cook the chicken and store it in the fridge for up to three days. The same goes for the corn mixture. Just reheat them when you’re ready to serve. You can also cook the rice ahead of time. Store it in an airtight container. For best results, keep the fresh toppings, like avocado and cilantro, separate until you serve. This keeps everything fresh and tasty. This rice bowl pairs well with many sides. Consider serving a simple green salad. A light vinaigrette works great here. You can also serve tortilla chips with salsa. This adds a nice crunch. If you want something warm, grilled veggies or a side of refried beans are excellent choices. You could even offer a refreshing drink like lime-infused water or a light beer. You now have a complete guide to making the Effortless Street Corn Chicken Rice Bowl. We covered ingredients, cooking tools, and step-by-step instructions. You learned how to marinate the chicken and prepare the corn and veggies for the best taste. I shared tips for flavor and presentation, plus variations to suit different diets. Finally, we discussed storage and reheating methods. Follow these steps, and you’ll enjoy a tasty and satisfying meal. Make this recipe your own and have fun in the kitchen!
Effortless Street Corn Chicken Rice Bowl Delight
Are you ready for a meal that’s both easy and full of flavor? My Effortless Street Corn Chicken Rice Bowl is just what you need!
- 2 boneless, skinless chicken breasts - 3 cups whole wheat pasta (penne or fusilli) - 1 cup cherry tomatoes, halved - 1/2 cup balsamic vinegar - 2 tablespoons olive oil - 3 cloves garlic, minced - 1 cup spinach, chopped - 1/2 cup feta cheese, crumbled - 1 teaspoon dried basil - 1 teaspoon dried oregano - Salt and pepper to taste - Fresh basil leaves for garnish For this recipe, you can swap the chicken for turkey or tofu. Use any pasta shape you like, not just whole wheat. Swap cherry tomatoes for diced bell peppers or zucchini if you prefer. If you want a creamier sauce, add a splash of heavy cream or a touch of cream cheese. You can also use white wine instead of balsamic vinegar for a different flavor. This meal is healthy and full of good stuff. Each serving has about: - Calories: 400 - Protein: 30g - Carbs: 50g - Fat: 12g - Fiber: 6g This recipe serves four, making it great for family dinners or meal prep. With wholesome ingredients, you get a tasty dish that fuels your day. First, fill a large pot with water and add salt. Bring the water to a boil. This helps the pasta taste better. Next, add 3 cups of whole wheat pasta. Cook it according to the package instructions. You want it to be al dente, which means it should be firm yet cooked through. After cooking, drain the pasta but save 1/2 cup of the pasta water. This water will help mix flavors later. While the pasta cooks, grab 2 boneless, skinless chicken breasts. Season them with salt, pepper, dried basil, and oregano. This adds great flavor. Heat 1 tablespoon of olive oil in a large skillet over medium heat. Once hot, add the chicken breasts. Cook for 5-6 minutes on each side. You want them to be golden brown and fully cooked. When done, remove the chicken and let it rest for 5 minutes. Then, slice it into strips. In the same skillet, add another tablespoon of olive oil and the minced garlic. Sauté for about 30 seconds until you smell the garlic. Next, add the halved cherry tomatoes and balsamic vinegar. Stir everything well. Let this simmer for about 2-3 minutes. The tomatoes should soften a bit. Now, add the chopped spinach and the cooked pasta. Stir to combine everything. If the pasta looks dry, add some reserved pasta water until it reaches the right consistency. Finally, add the sliced chicken to the skillet. Mix gently and cook for another 1-2 minutes to heat everything through. For the full recipe, you can refer back to the beginning of the article. Cooking can be fun and simple. Here are some tips to make your dish shine: - Always use fresh ingredients. They add more flavor. - Season your chicken well. A good seasoning makes a big difference. - Keep an eye on the pasta. Overcooked pasta turns mushy. - Reserve some pasta water. It helps your sauce stick better. Cooking chicken can be tricky. Here’s how to do it right: - Start with even pieces. This helps them cook at the same rate. - Use medium heat in the pan. This gives a nice golden color. - Cook for 5-6 minutes on each side. Check for doneness with a meat thermometer; it should be 165°F. - Let it rest after cooking. This keeps the chicken juicy. Presentation matters! Here are some ways to serve your dish nicely: - Use bowls or plates with a wide rim. It makes the dish look more inviting. - Top with fresh basil leaves. They add a pop of color and taste. - Drizzle extra balsamic vinegar on top. It gives a gourmet touch. - Serve with a side salad. It makes the meal more complete. For more details on the recipe, check the Full Recipe. {{image_2}} You can switch the chicken for other proteins. Try turkey, shrimp, or tofu. Each option adds a unique flavor. Turkey is lean and great for health. Shrimp cooks fast and tastes amazing with balsamic. Tofu is perfect for a plant-based meal. Just make sure to cook it until golden. For a vegetarian version, skip the chicken. You can add more veggies instead. Bell peppers, zucchini, and mushrooms work well. These veggies add color and taste to your dish. You can also use chickpeas for protein. They are filling and nutritious. You can use various pasta shapes for this recipe. Penne and fusilli are great choices. But you can also try spaghetti or farfalle. Each shape holds the sauce differently. This gives you a new experience with every bite. Whole wheat pasta adds fiber, but feel free to use regular pasta. For the complete recipe, check the Full Recipe for Wholesome Balsamic Chicken Pasta. To keep your balsamic chicken pasta fresh, let it cool first. Then, use an airtight container. Store in the fridge for up to three days. This way, the flavors stay intact. When you’re ready to enjoy the leftovers, use the microwave or stovetop. If using the microwave, heat in short bursts. Stir after each burst to avoid hot spots. If on the stovetop, add a splash of water. This helps keep the pasta moist. If you want to freeze the dish, it’s smart to separate the chicken and pasta. Place each in its own container. Freeze for up to three months. When ready to eat, thaw overnight in the fridge. Then, reheat as mentioned above. This keeps your meal tasty and fresh. Balsamic vinegar offers many health perks. It is low in calories and has no fat. It can help with digestion and may lower blood sugar. Balsamic vinegar is also rich in antioxidants. These can help fight free radicals in your body. You can use it to add flavor without extra calories. Yes, you can! This recipe is flexible. Feel free to swap in your favorite veggies. Bell peppers, zucchini, or mushrooms work well. You can also try broccoli or asparagus. Just make sure to cook them until tender. This will keep your pasta dish colorful and tasty. To make more servings, simply increase the ingredients. For every two extra servings, add one more chicken breast. Increase pasta and veggies by the same amount. Adjust the sauce ingredients too, to keep flavors balanced. You can also double the recipe if needed. Just make sure your pot or skillet is big enough. For the complete guide, check out the Full Recipe for Wholesome Balsamic Chicken Pasta. This blog post covered key steps to make Balsamic Chicken Pasta. We explored the ingredients, measurements, and nutritional info. I shared step-by-step instructions for cooking the pasta and chicken, plus making the sauce. You learned handy tips to cook chicken perfectly and serving ideas. We also looked at variations for proteins and pasta types, along with storage and reheating information. Remember, this recipe is flexible and fun. Enjoy your time in the kitchen!
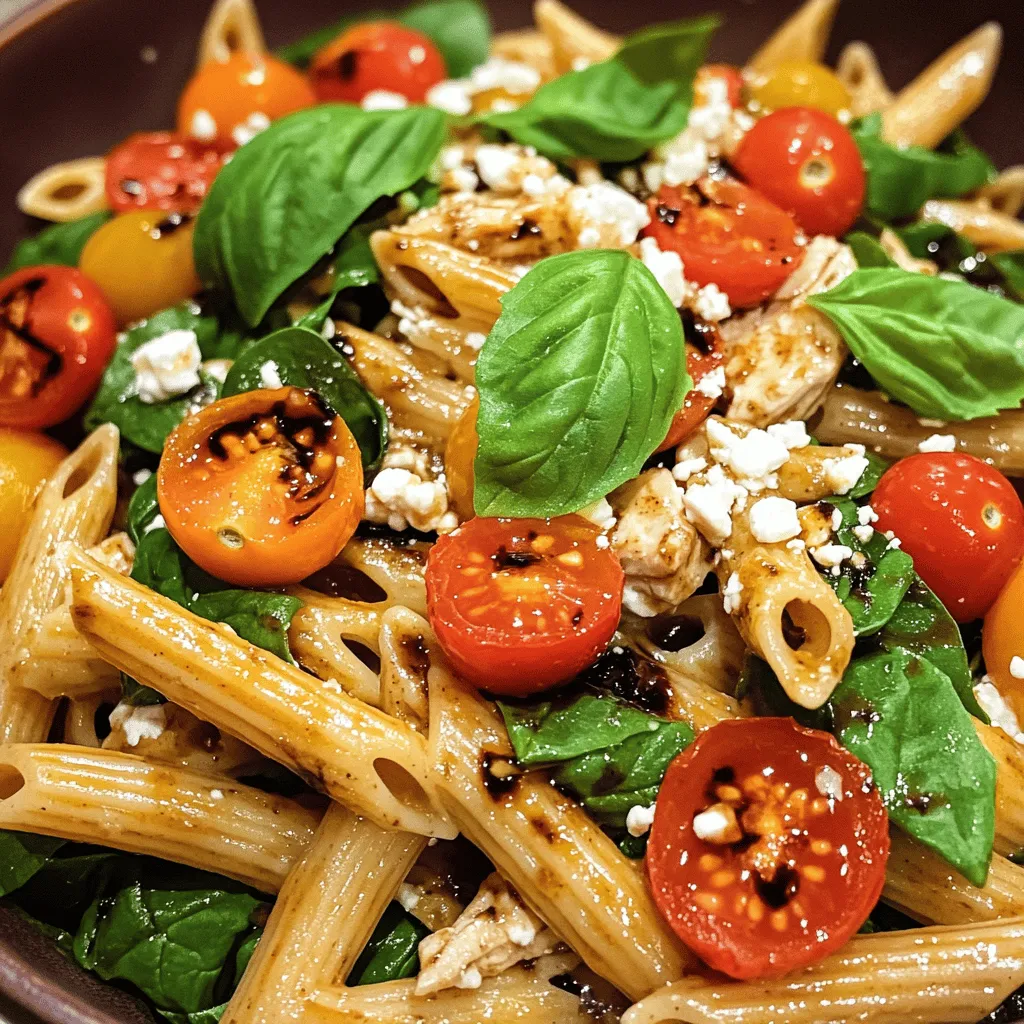
Wholesome Balsamic Chicken Pasta Quick and Tasty Meal
Are you looking for a fast and delicious meal that’s good for you? This Wholesome Balsamic Chicken Pasta is your answer! In just a few
To make Easy Honey Balsamic Chicken, gather these simple ingredients: - 4 boneless, skinless chicken breasts - 1/3 cup balsamic vinegar - 1/3 cup honey - 2 garlic cloves, minced - 1 tablespoon Dijon mustard - 1 tablespoon olive oil - Salt and pepper, to taste - Fresh thyme or parsley for garnish These ingredients blend well to create a sweet and tangy flavor. The balsamic vinegar adds depth, while honey gives a nice sweetness. You can enhance your dish with these optional garnishes: - Fresh thyme - Fresh parsley - Lemon wedges These garnishes add color and freshness. They make the dish look nice and taste even better. You can swap some ingredients if needed: - Use chicken thighs instead of breasts for a juicier bite. - Maple syrup can replace honey for a different flavor. - Apple cider vinegar can work in place of balsamic vinegar. - Dijon mustard can be swapped with yellow mustard if that’s what you have. These substitutions keep your meal flexible and tasty. Every ingredient plays a role in the overall flavor. If you’re missing something, don’t stress! Just use what you have on hand. For the full recipe, check out the earlier section. Marinating the chicken is key to flavor. Start by mixing balsamic vinegar, honey, minced garlic, Dijon mustard, olive oil, salt, and pepper in a bowl. Whisk until smooth. This mixture is your marinade. Next, place the chicken breasts in a resealable bag or shallow dish. Pour the marinade over the chicken, making sure each piece gets coated. Seal the bag or cover the dish. Refrigerate for at least 30 minutes, but up to 4 hours is best. This time allows the chicken to absorb all those yummy flavors. You can cook this chicken in two main ways: grilling or using a skillet. Both methods bring out different tastes. If you grill, preheat your grill to medium heat. This method gives a nice smoky flavor. If you use a skillet, heat it over medium heat with a bit of olive oil to avoid sticking. When hot, remove the chicken from the marinade, but keep the marinade for later. Cook the chicken for about 6-7 minutes per side. Make sure the internal temperature hits 165°F (75°C). The chicken should be golden brown and juicy. Once the chicken is cooked, it’s time to finish it off. Take the reserved marinade and pour it into a small saucepan. Bring it to a boil over medium-high heat. Then, lower the heat and let it simmer for 5-7 minutes. This thickens the sauce and enhances the flavor. Drizzle the thickened marinade over the cooked chicken before serving. For a final touch, garnish with fresh thyme or parsley. This adds color and a burst of flavor. You now have a stunning dish that looks as good as it tastes. Check out the Full Recipe for more details! To get the best flavor from your honey balsamic chicken, start with the marinade. Mix balsamic vinegar, honey, minced garlic, Dijon mustard, olive oil, salt, and pepper in a bowl. Make sure to whisk it well. A good marinade makes a big difference. Marinate your chicken for at least 30 minutes. For even more flavor, let it sit for up to 4 hours. This step helps the chicken absorb all those tasty notes. Getting the right heat is key. Preheat your grill or skillet to medium heat. If using a skillet, add olive oil to prevent sticking. Cook the chicken for about 6-7 minutes on each side. It should reach an internal temperature of 165°F (75°C). This ensures it's safe to eat and juicy. If you see a nice caramelized brown color, that's a good sign! When it comes to serving, get creative! Drizzle some thickened marinade over the chicken for added flavor. Fresh thyme or parsley on top adds a pop of color. Serve your chicken with roasted veggies or a fresh salad. It pairs well with rice or quinoa too. This dish is not just tasty; it's also easy to impress guests! For the full recipe, check out the Easy Honey Balsamic Chicken section. {{image_2}} You can make your honey balsamic chicken even better by adding vegetables. Toss in bell peppers, zucchini, or broccoli for a pop of color and taste. These veggies add nutrition and soak up the flavorful marinade. Just cut them into bite-sized pieces. Add them to the marinating chicken for at least 30 minutes. When cooking, grill or sauté the chicken and veggies together. This way, they cook evenly and blend their flavors perfectly. Want to change the taste? You can easily adjust the sweetness or tartness of your dish. If you like a sweeter flavor, add more honey. Start with a teaspoon at a time and taste as you go. For more tartness, add extra balsamic vinegar. Remember, balance is key. You want to enjoy the rich taste of both honey and vinegar. Try different amounts until you find your perfect mix. Serving your honey balsamic chicken with different sauces can elevate your meal. A drizzle of garlic aioli or a tangy yogurt sauce pairs well. You can also try chimichurri for a fresh twist. Each sauce brings its flavor, making your dish unique. Mix and match sauces to keep things exciting every time you cook! For the full recipe, check the link above. To store your honey balsamic chicken, let it cool first. Place the chicken in an airtight container. Make sure to cover it well to keep it fresh. You can keep it in the fridge for up to four days. Each time you take some out, check for any off smells or changes in color. If you want to freeze the chicken, wrap it tightly in plastic wrap or foil first. Then, place it in a freezer bag. This helps prevent freezer burn. You can freeze it for up to three months. When you’re ready to eat it, thaw it overnight in the fridge before reheating. Reheat your chicken gently. You can use the oven or microwave. If using the oven, preheat to 350°F (175°C). Place the chicken in a baking dish, add a splash of water, and cover it with foil. Heat for about 15-20 minutes. If using the microwave, warm it for 1-2 minutes at a time until hot. This way, the chicken stays juicy. For best flavor, drizzle some fresh marinade over it before serving. You can find the full recipe at the beginning to recreate this dish as needed. Yes, you can use chicken thighs. They are more juicy and tender than breasts. Thighs add rich flavor to the dish. Cook them the same way as breasts. Just check that they reach 165°F (75°C). This will ensure they are safe to eat. You can marinate the chicken for at least 30 minutes. For best results, aim for 4 hours. This gives the chicken time to soak up the flavors. If you need to, you can marinate it overnight. Just keep it in the fridge to stay fresh. Many side dishes go well with honey balsamic chicken. Here are a few ideas: - Steamed broccoli - Roasted sweet potatoes - Garlic mashed potatoes - Quinoa salad - Mixed green salad Each of these sides adds a nice touch to your meal. Choose what you like best! You can find the full recipe to make this dish easily. In this post, we explored how to make easy honey balsamic chicken. We covered ingredients, marinating, cooking methods, and tips for flavor. I shared ideas for cool variations and how to store leftovers. With these steps, you can create a tasty dish that impresses everyone. Try it yourself and have fun in the kitchen. Enjoy your delicious honey balsamic chicken!
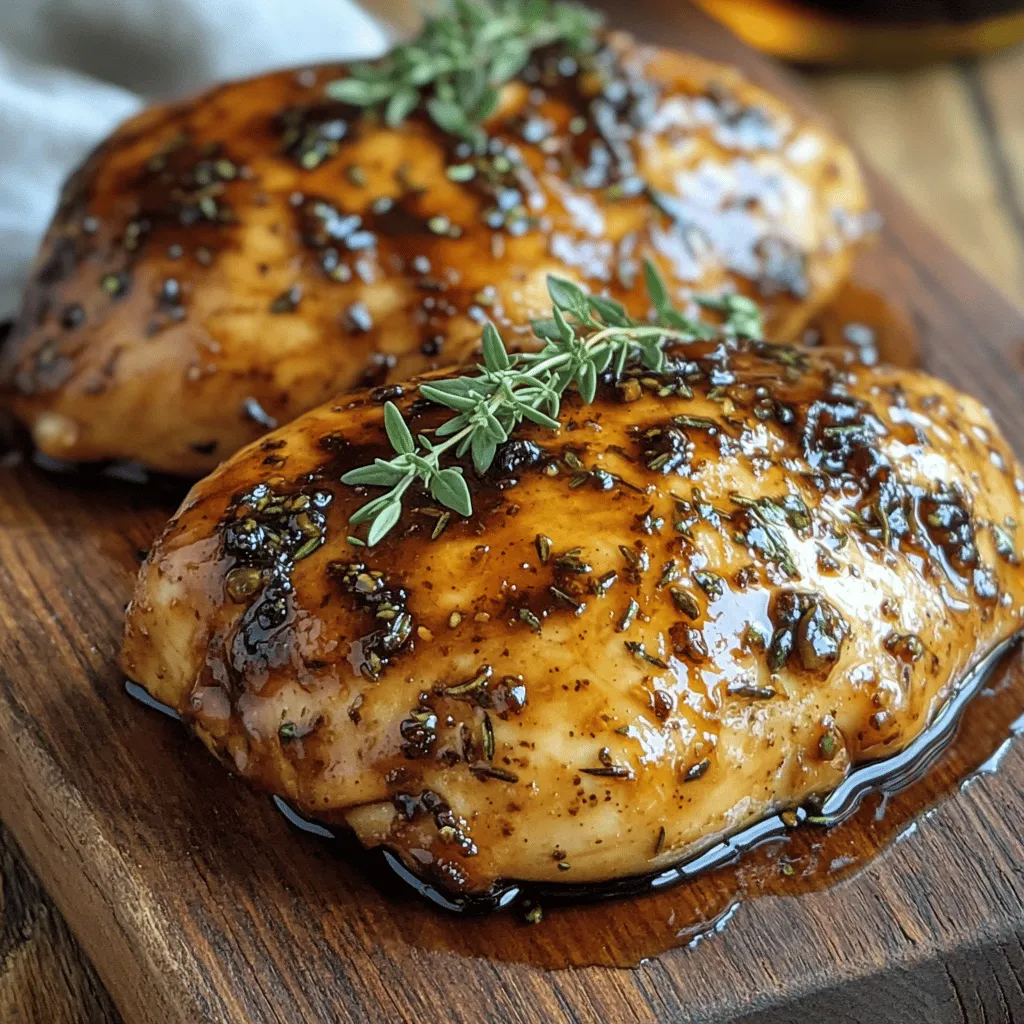
Easy Honey Balsamic Chicken Flavorful Dinner Delight
Looking for a quick dinner that bursts with flavor? You’ve found it! My Easy Honey Balsamic Chicken combines sweet honey with tangy balsamic vinegar, creating
To make the best grilled chicken marinade, you need key ingredients. Here’s what you will need: - 1/4 cup olive oil - 1/4 cup freshly squeezed lemon juice - 2 tablespoons honey - 3 cloves garlic, minced - 1 tablespoon Dijon mustard - 2 teaspoons dried oregano - 1 teaspoon smoked paprika - 1/2 teaspoon cayenne pepper (optional, for heat) - Salt and freshly ground black pepper to taste These ingredients work together to create a rich, zesty flavor that makes your chicken shine. The olive oil helps keep the chicken moist. The lemon juice brings brightness, while honey adds sweetness. Not all chicken cuts are the same. I recommend using boneless, skinless chicken breasts. They cook evenly and soak up the marinade well. You can also use thighs if you prefer a richer taste. Thighs have more fat, which adds juiciness. Keep in mind that the cooking time may change based on the cut you choose. Always check that the chicken reaches 165°F (75°C) for safe eating. Feel free to get creative with your marinade! Here are some optional add-ins to boost the flavor: - Fresh herbs like thyme or rosemary - A splash of soy sauce for umami - A tablespoon of mustard for extra tang - Citrus zest for a bright kick These additions can take your grilled chicken to the next level. For the full recipe, check out The Ultimate Grilled Chicken Marinade. Remember to let the chicken marinate for at least an hour, or overnight for the best results! To make the best grilled chicken marinade, start by mixing your ingredients. This marinade has a balance of oil, acid, and flavor. After you mix it, coat the chicken and let it sit. The longer it marinates, the better it tastes. Finally, grill it to juicy perfection. Gather your ingredients. You will need: - 1/4 cup olive oil - 1/4 cup freshly squeezed lemon juice - 2 tablespoons honey - 3 cloves garlic, minced - 1 tablespoon Dijon mustard - 2 teaspoons dried oregano - 1 teaspoon smoked paprika - 1/2 teaspoon cayenne pepper (optional) - Salt and freshly ground black pepper to taste - 4 boneless, skinless chicken breasts In a medium bowl, whisk together the olive oil, lemon juice, honey, garlic, Dijon mustard, oregano, smoked paprika, cayenne pepper, salt, and black pepper. Make sure it is well combined. This marinade adds flavor and moisture to the chicken. After marinating, preheat your grill to medium-high heat. Remove the chicken from the marinade. Let any extra drip off, and discard the marinade. Place the chicken on the grill. Cook for about 6-8 minutes on each side. Use a meat thermometer to check for doneness. The internal temperature should reach 165°F (75°C). Once done, let it rest for 5 minutes before slicing. This helps keep the juices inside the chicken. Enjoy your flavorful grilled chicken! For a full recipe, refer to the earlier section. To get the best flavor, start with fresh chicken. Use skinless, boneless cuts. They soak up flavors well. Before you marinate, trim any extra fat from the chicken. This helps the marinade reach the meat better. Use a resealable bag or a shallow dish. This ensures the marinade coats every part. Make sure to massage the marinade into the chicken. This step makes a big difference. For quick flavor, marinate for at least one hour. But, for the best taste, aim for overnight. The longer you marinate, the more flavor the chicken will absorb. If you are short on time, even a 30-minute soak can help. Just remember, do not marinate for more than 24 hours. The meat can turn mushy if left too long. Start with a hot grill. Preheat it to medium-high heat for the best results. Remove the chicken from the marinade and let the excess drip off. Discard the leftover marinade to avoid cross-contamination. Grill the chicken for 6-8 minutes on each side. Use a meat thermometer to check the internal temperature. It should reach 165°F (75°C). Let the chicken rest for 5 minutes after grilling. This helps keep it juicy. You can find the full recipe in the main article to help you get started! {{image_2}} You can change the flavor of your marinade easily. Try using different herbs like basil, thyme, or rosemary. Instead of lemon juice, use lime for a zesty twist. You can also swap honey with maple syrup for a unique sweetness. Adding soy sauce gives a nice umami taste. For a spicy kick, use sriracha or hot sauce. If you want a lighter marinade, use Greek yogurt instead of olive oil. It adds creaminess and keeps the chicken juicy. You can also reduce honey to cut down on sugar. Use fresh garlic instead of minced to boost flavor without added salt. Switch out Dijon mustard for a whole grain option for added texture. This marinade is not just for chicken. You can use it on fish like salmon or white fish. Shrimp also works great; just reduce marinating time. For veggies, think bell peppers, zucchini, or mushrooms. Toss them in the marinade and grill alongside your protein. It enhances flavors and makes for a colorful dish. Don’t forget to check out the Full Recipe for detailed steps and tips! If you have leftover marinade, you can store it in the fridge. Use an airtight container. It will keep for up to three days. Make sure to label it with the date. Always remember, never reuse marinade that touched raw chicken. If you want to keep it longer, consider freezing it. You can freeze marinated chicken for later use. Place the chicken in a freezer-safe bag. Pour in the marinade and seal it tightly. This way, the chicken will soak up the flavors as it thaws. It can stay in the freezer for up to three months. When ready to cook, just thaw it overnight in the fridge. To store grilled chicken, let it cool first. Once cooled, wrap it in plastic wrap or place it in a container. Grilled chicken stays fresh in the fridge for up to four days. For longer storage, freeze it. Cut the chicken into portions for easy thawing later. Enjoy it in salads, sandwiches, or as a main dish. For the full recipe, check out the Ultimate Grilled Chicken Marinade. To marinate chicken, first mix the marinade well. I use a bowl to combine all the ingredients until smooth. Then, place the chicken in a resealable bag or dish. Pour the marinade over the chicken, covering it completely. Seal the bag or cover the dish tightly. This method keeps the chicken juicy and full of flavor. For the best flavor, marinate chicken for at least one hour. However, if you can wait, marinating overnight is ideal. The longer the chicken sits in the marinade, the more it absorbs those tasty flavors. Just be careful not to marinate for more than 24 hours, or the texture might change. Yes! This marinade works great with other meats, too. You can use it for pork chops or shrimp. Just adjust the marinating time based on the meat. For shrimp, a quick 30 minutes is enough. For pork, aim for 2 to 4 hours. Grilled chicken pairs well with many side dishes. Here are a few tasty options: - Grilled vegetables like zucchini and bell peppers - A fresh green salad with vinaigrette - Creamy coleslaw for a crunchy bite - Rice or quinoa for a filling option - Garlic bread to soak up the juices These sides complement the flavors of the chicken and create a balanced meal. For the full recipe, check out The Ultimate Grilled Chicken Marinade. This blog post covered key ingredients and steps to marinate and grill chicken. We explored essential marinade components and how to choose the right chicken cut. You learned about mixing methods, grilling techniques, and tips for juicy results. We also looked at delicious variations and storage options. In the end, mastering chicken marination can elevate your meals. Enjoy experimenting with flavors and techniques to make your dish truly yours.
The Best Grilled Chicken Marinade Flavor Boosting Guide
Ready to elevate your grilling game? In this guide, I’ll share the best grilled chicken marinade that packs in bold, irresistible flavors. You’ll learn which
- Chicken breast specifications Use 2 boneless, skinless chicken breasts. They cook evenly and stay juicy. Look for chicken that is firm and pale pink. Avoid any with dark spots or a strong smell. Fresh is best! - Broccoli selection tips Choose 2 cups of broccoli florets that are bright green and firm. The stems should be thick and not wilted. Smaller florets cook faster and blend well with the chicken. If you find broccoli with yellow flowers, skip it. - Butter and garlic importance You need 4 tablespoons of unsalted butter for a rich flavor. Butter helps to create a tasty sauce that coats the chicken and broccoli. Use 4 cloves of minced garlic for a fragrant aroma and strong taste. Fresh garlic adds depth to the dish. This combo makes the meal feel special. For the full recipe, check out the complete details to make this savory weeknight meal! First, you need to season the chicken. I like to use paprika and Italian seasoning. They add great flavor. Sprinkle salt and pepper on both sides of each chicken breast. This is key for taste. Next, heat a large skillet over medium-high heat. Melt 2 tablespoons of butter. Once it’s hot and bubbling, add the chicken. Cook for 6-7 minutes on each side. You want the chicken to be golden brown. Use a meat thermometer. The chicken should reach 165°F (75°C) inside. After cooking, take the chicken out and let it rest. Now, it’s time for the broccoli. Use fresh broccoli florets for the best taste. After removing the chicken, add the remaining 2 tablespoons of butter to the same skillet. Once melted, add 4 minced garlic cloves. Sauté for about 30 seconds. This brings out the garlic's lovely aroma. Next, toss in the broccoli florets. Sauté them for 3-5 minutes. You want them bright green and tender but still crisp. This texture makes the dish more enjoyable. After cooking the broccoli, it’s time to combine everything. Return the chicken to the skillet with the broccoli. Squeeze 1 tablespoon of fresh lemon juice over the top. This adds a nice zing. Gently toss everything to mix the flavors. Cook for just one more minute. This warms everything through and melds the flavors. Your garlic butter chicken and broccoli is now ready to serve. It looks great on a plate over rice or quinoa. Drizzle any leftover garlic butter sauce on top for extra flavor. For the full recipe, check the details above. To make your Garlic Butter Chicken & Broccoli even tastier, consider adding a pinch of red pepper flakes. This small touch gives the dish a nice kick. You can also experiment with fresh herbs like parsley or thyme. They add brightness and depth. Adjusting salt and pepper is key too. Always taste as you cook. This way, you can find the perfect balance that suits your taste buds. Using the right skillet is important. A heavy-bottomed skillet or cast iron works best for even cooking. It helps the chicken brown nicely. Also, a meat thermometer is a must-have tool. It ensures your chicken is cooked to 165°F (75°C). This is the safe temperature for juicy and tender chicken. Making your dish look great can enhance the meal. Serve the chicken and broccoli on a colorful plate. Place them over a bed of white rice or quinoa. Drizzle any leftover garlic butter sauce on top. For a fresh touch, add lemon slices around the plate. This adds color and flavor, making your meal look as good as it tastes. Check out the Full Recipe for more tips on how to impress with your plating! {{image_2}} If you want to change up the protein, consider using shrimp or tofu. Both options cook quickly and absorb flavors well. For a heartier meal, try using turkey or pork. You can also mix in other vegetables such as bell peppers, carrots, or snap peas. Just be sure to adjust cooking times for these veggies so they stay crisp. To make this dish gluten-free, use tamari instead of soy sauce if you choose to add it. Check all labels on sauces and ingredients to avoid gluten. For a vegan option, replace the chicken with chickpeas or a plant-based chicken substitute. Use vegan butter for the sauce. You can also skip the butter altogether and use olive oil for a lighter touch. Spice things up by adding chili flakes for a kick or cumin for warmth. You can also explore different cuisines. Add curry powder for an Indian twist or soy sauce for an Asian flair. For sauces, try teriyaki or a splash of balsamic vinegar. These can enhance the dish and give it a new spin. Check the full recipe for a classic version that you can customize to your taste! To keep your garlic butter chicken and broccoli fresh, store leftovers properly. Place the chicken and broccoli in an airtight container. Make sure to let it cool before sealing. If you use glass containers, they work well for this dish. They help keep flavors intact and are easy to clean. When you reheat, aim for low heat. This helps maintain the dish’s flavor and texture. You can use the microwave or a skillet. If using a microwave, cover the bowl to keep moisture in. Stir halfway to heat evenly. In a skillet, add a splash of water to prevent drying out. Avoid overheating, as it can toughen the chicken and make the broccoli mushy. In the fridge, garlic butter chicken and broccoli lasts about three to four days. Check for signs of spoilage before eating. If you see any off smells or changes in color, it’s best to toss it. Always trust your senses—when in doubt, throw it out! How to make Garlic Butter Chicken & Broccoli spicy? To add spice, use red pepper flakes. Add about 1/4 teaspoon when cooking garlic. You can also add a dash of hot sauce to the finished dish. Adjust to your heat preference for the best taste. Can I make this dish ahead of time? Yes, you can prepare this dish ahead. Cook the chicken and broccoli, then store in the fridge. Reheat in a skillet before serving. This keeps the flavors fresh and the dish warm. What do you serve with Garlic Butter Chicken & Broccoli? I recommend serving this dish with rice or quinoa. You can also pair it with a simple salad for more veggies. Garlic bread also makes a great side if you want to indulge. What to do if the chicken is undercooked? If the chicken is undercooked, return it to the skillet. Cook it over medium heat until it reaches 165°F (75°C). Always check the thickest part of the chicken for doneness. How to fix overcooked broccoli? If your broccoli is overcooked, try adding ice water. This will stop the cooking and help it stay bright green. If it’s too soft, you can blend it into a soup for a tasty dish. Caloric content per serving Each serving of Garlic Butter Chicken & Broccoli has about 400 calories. This can vary based on the side dishes you choose. Breakdown of macronutrients for the dish - Protein: 35g - Carbohydrates: 15g - Fats: 25g This makes it a balanced meal with good protein and healthy fats. Enjoy your meal, knowing it’s both tasty and nutritious! This blog post covered making a tasty garlic butter chicken and broccoli dish. We explored key ingredients, cooking steps, and tips to enhance flavors. You learned how to store leftovers, reheat properly, and adjust for different diets. Cooking is fun and can be simple. With practice, you’ll enjoy making this dish your own. Remember, don't be afraid to experiment with flavors and ingredients. Happy cooking!
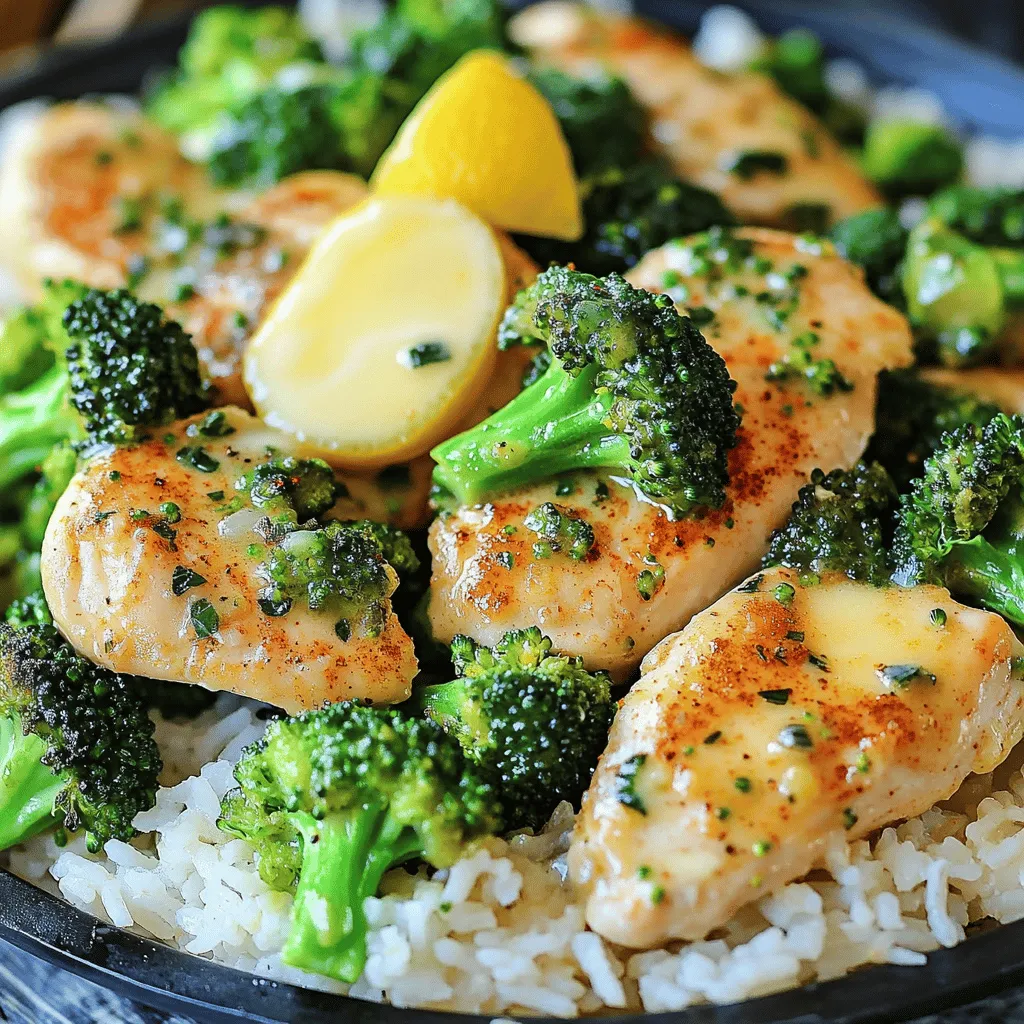
Garlic Butter Chicken & Broccoli Savory Weeknight Meal
Looking for a quick, tasty dinner? You’ve found it! Garlic Butter Chicken & Broccoli is the perfect weeknight meal that’s easy to make and packed
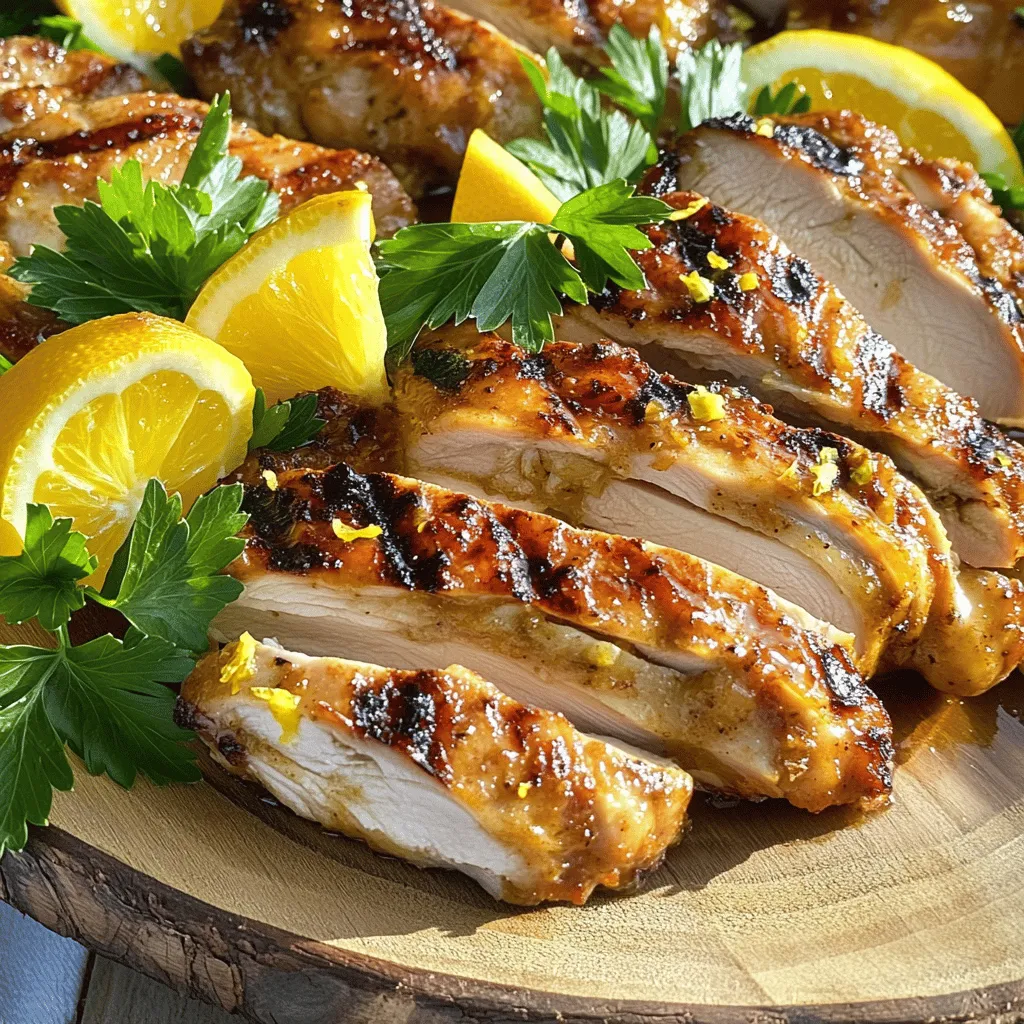
- Chicken Breasts: Use 2 boneless, skinless chicken breasts for this dish. They stay juicy and tender when grilled. - Marinade Components: The marinade includes olive oil, lemon zest, lemon juice, minced garlic, fresh rosemary, and thyme. This mix brings bright and fresh flavors. - Bowls' Filling Ingredients: For the bowls, you'll need cooked quinoa or brown rice, halved cherry tomatoes, diced cucumber, and sliced avocado. Fresh parsley adds a nice touch. - How to Measure Olive Oil and Lemon Juice: Use a liquid measuring cup for olive oil. For lemon juice, squeeze fresh lemons and measure the juice in the same cup. - Chopping Vegetables: Dice the cucumber into small cubes. Halve the cherry tomatoes for easy eating. Slicing the avocado should be done just before serving to keep it fresh. - Preparing Herbs for Marinade: Chop fresh rosemary and thyme finely. This helps release their oils and flavor into the marinade. You can use a sharp knife or kitchen scissors for this task. This recipe is quick and easy, perfect for a fresh meal. For the full recipe, check [Full Recipe]. How to Create the Marinade To make the marinade, mix olive oil, lemon zest, lemon juice, minced garlic, chopped rosemary, thyme, salt, and pepper in a bowl. The olive oil adds moisture. Lemon gives it a bright taste. Fresh herbs bring depth to the flavor. This simple mix makes chicken tender and tasty. Best Practices for Marinating Chicken Use a resealable bag for marinating. Place the chicken breasts inside and pour the marinade over them. Seal the bag tightly. This method ensures the chicken gets coated well. Let it sit in the fridge for at least 30 minutes. For more flavor, try marinating for up to 2 hours. Prepping the Grill Before you start grilling, preheat your grill or grill pan to medium-high heat. A hot grill sears the chicken, giving it nice grill marks. This step also locks in the juices. Tips for Perfectly Grilled Chicken Breast Remove the chicken from the marinade and shake off the excess. Grill each breast for 6-7 minutes on each side. Check that the internal temperature reaches 165°F (75°C). Once done, let the chicken rest for 5 minutes. This helps keep it juicy when you slice it. Layering Ingredients Properly Start with a base of cooked quinoa or brown rice. Top it with sliced grilled chicken. Then, add halved cherry tomatoes, diced cucumber, and sliced avocado. Each ingredient brings its own flavor and texture. This makes your bowl colorful and appealing. Garnishing Tips for Presentation Drizzle any leftover marinade or a splash of lemon juice on top. This adds brightness. Finally, sprinkle fresh parsley over each bowl. It adds a pop of green and makes the dish look fresh. For the full recipe, check the instructions above. To get the most flavor from your grilled lemon herb chicken, timing is key. Marinating for at least 30 minutes is a must. However, if you can, let it sit for up to 2 hours. This longer time allows the herbs and lemon to soak deep into the meat. You will taste the difference. After grilling, resting the chicken is just as important. Let it rest for 5 minutes before slicing. This helps keep the juices inside. Juicy chicken tastes better and feels tender in your mouth. If you're not grilling, you can cook the chicken on the stovetop or in the oven. For stovetop cooking, use a skillet over medium heat. Cook each side for about 6-7 minutes until it reaches 165°F (75°C). In the oven, preheat to 375°F (190°C). Place the chicken on a baking sheet. Bake for about 25-30 minutes until cooked through. Using a meat thermometer is a smart move. It ensures the chicken is perfectly done. Insert it in the thickest part of the breast. When it reads 165°F (75°C), it's safe to eat. When it comes to serving, how you arrange your bowl matters. Start with a base of quinoa or brown rice. Next, add the sliced grilled chicken. Scatter cherry tomatoes and diced cucumber for color. Finish with avocado slices on top. For pairings, consider adding a simple green salad or a light vinaigrette. It adds freshness and balances the rich flavors of the chicken. You can find the full recipe for more details on creating this delicious meal. {{image_2}} You can easily switch up the protein in your grilled lemon herb chicken bowls. If you want a meat-free option, try tofu. It soaks up the marinade well. For seafood lovers, shrimp is another great choice. Just be sure to adjust the cooking time, as shrimp cooks faster than chicken. For grains or bases, you have options too! Instead of quinoa or brown rice, consider using couscous. It cooks quickly and adds a nice texture. You can also try farro or barley for a nutty flavor that pairs well with the lemon herb notes. If you like a little heat, add red pepper flakes to the marinade. This will give your dish a spicy kick. You can also try smoked paprika for a deeper flavor. Incorporating seasonal vegetables can elevate your bowls. Add bell peppers in the summer or roasted butternut squash in the fall. These veggies not only taste great but also add vibrant colors to your meal. If you're looking for gluten-free options, use quinoa or rice as your base. They are both naturally gluten-free. Also, you can use tamari instead of soy sauce in the marinade for a gluten-free flavor. For low-calorie substitutes, swap out the olive oil for a low-calorie cooking spray. This will reduce the fat content but still keep your chicken moist. You can also skip the avocado or use less to cut calories while still enjoying the dish. You can find the full recipe for grilled lemon herb chicken bowls in the earlier sections. Enjoy experimenting with these variations! To keep your grilled lemon herb chicken bowls fresh, refrigerate them in airtight containers. This keeps moisture in and prevents odors from other foods. Make sure to store the chicken and veggies separately from the grains. This helps maintain their texture. Leftovers stay good for three to four days in the fridge. For safe reheating, use the microwave or oven. When using the microwave, cover the bowl with a damp paper towel. This keeps the chicken moist. Heat in short bursts, stirring between to warm evenly. If you use the oven, preheat it to 350°F (175°C). Place the bowl in the oven covered with foil for about 15 minutes. Planning ahead makes weeknight meals easier. You can marinate the chicken the night before. This infuses more flavor and saves time. Cook a batch of quinoa or brown rice at the start of the week. Store it in the fridge for quick assembly. When prepping veggies, wash and chop them in advance. Store each type in separate containers. This keeps them fresh and crisp. Slice the avocado just before serving to prevent browning. With these tips, you can enjoy fresh bowls all week long. For more detailed steps, check out the Full Recipe. For the best taste, marinate chicken for at least 30 minutes. This time allows the flavors to soak in. If you have more time, up to 2 hours works great. Just remember, don’t go over 2 hours, or the chicken may get too salty. If you want a different flavor, try lime or orange juice. Both give a fresh taste. You can also use grapefruit for a twist. Each fruit adds a unique taste profile to your dish. Yes! Grilled chicken is super versatile. You can use it in salads, wraps, or sandwiches. Slice it up and toss it on top of greens for a quick lunch. - Ideas for Leftover Grilled Chicken - Add to pasta or grain salads. - Mix into tacos with fresh toppings. - Use in stir-fries with seasonal veggies. - Versatility of Grilled Chicken Bowls Grilled chicken bowls can change with the season. Swap out veggies or grains based on what's fresh. This keeps meals exciting! You can also check the Full Recipe for more ideas on how to enjoy your grilled chicken. This blog post covered how to make delicious chicken bowls from start to finish. We explored essential ingredients, how to measure and prepare them, and detailed steps for marinating and grilling. We also shared tips for serving and storage, as well as creative variations to suit your tastes. In the end, preparing chicken bowls is simple and fun. With these steps, you can create meals that are tasty and adaptable. Enjoy your cooking journey and the tasty bowls you’ll make!
Grilled Lemon Herb Chicken Bowls Flavorful and Fresh
Are you ready to spice up your dinner routine? These Grilled Lemon Herb Chicken Bowls are bursting with flavor and freshness. Perfect for any night,
To make the best marinated grilled chicken, you need some key ingredients. Here is what you will need: - 4 boneless, skinless chicken breasts - 1/4 cup olive oil - Juice and zest of 2 lemons - Juice and zest of 1 orange - 2 cloves garlic, minced - 1 tablespoon honey - 1 tablespoon Dijon mustard - 1 teaspoon dried oregano - Salt and pepper to taste These ingredients blend well to create a bright and zesty flavor. The olive oil adds richness, while the citrus gives it a fresh kick. Honey and Dijon mustard bring a sweet and tangy balance. You will also need some tools to prepare and cook your chicken: - Mixing bowl - Whisk - Resealable plastic bag or shallow dish - Grill Using a bowl and whisk helps mix the marinade evenly. A bag or dish is great for soaking the chicken. The grill brings everything together with that smoky flavor we all love. For the full recipe, check out the full recipe section. To start, you need to make the marinade. In a mixing bowl, combine: - 1/4 cup olive oil - Juice and zest of 2 lemons - Juice and zest of 1 orange - 2 cloves garlic, minced - 1 tablespoon honey - 1 tablespoon Dijon mustard - 1 teaspoon dried oregano - Salt and pepper to taste Whisk these together until smooth. Next, take four boneless, skinless chicken breasts. Place them in a large resealable plastic bag or a shallow dish. Pour the marinade over the chicken, making sure each piece is coated well. Seal the bag or cover the dish tightly. Refrigerate for at least 1 hour, but overnight works best for deeper flavor. While your chicken marinates, get your grill ready. Preheat the grill to medium-high heat. This step is key for achieving that perfect sear. Make sure your grill grates are clean. You can use a grill brush to remove any leftover bits from past meals. Clean grates help prevent sticking and ensure nice grill marks. Now it’s time to grill! Remove the chicken from the marinade. Let any excess marinade drip off. Discard the leftover marinade to avoid any food safety issues. Place the chicken on the grill. Grill each side for 6-8 minutes. Use a meat thermometer to check the chicken's internal temperature. It should reach 165°F (74°C) to be safe to eat. Once done, take the chicken off the grill. Let it rest for 5 minutes before slicing. This helps keep the juices inside. For the full recipe, check out the complete instructions to guide your cooking journey! To keep your chicken from sticking to the grill, oil the grates well. Use a paper towel soaked in oil and tongs to wipe the grates before you start. This simple step makes a big difference. Let the chicken rest for five minutes after grilling. This helps the juices stay in the meat, making it more tender. You can add more flavor to your marinade by mixing in spices or herbs. Try adding smoked paprika for a smoky taste or fresh thyme for a bright note. You can also switch up the citrus flavors by using lime or grapefruit. Each offers a unique twist on the dish. Marinated grilled chicken pairs well with fresh salads or grilled veggies. Serve it sliced on a platter and garnish with fresh herbs like parsley or cilantro. Add wedges of lemon and orange for a burst of color. This not only looks great but also enhances the flavor with each bite. For a complete meal, serve with rice or quinoa. For the full recipe, check out Zesty Citrus Marinated Grilled Chicken. {{image_2}} You can change the flavor of your chicken by using different fruits. For example, you can use limes or grapefruits instead of lemons and oranges. This switch adds a fresh twist. You can also mix in some pineapple juice for a sweeter taste. To add some heat, try mixing in spicy ingredients. A dash of hot sauce can bring excitement to your meal. You can also use chili flakes or minced jalapeños to give it a kick. These changes can make your dish fun and new. If you want to cook indoors, baking is a great choice. Preheat your oven to 400°F (200°C). Place the chicken in a baking dish and cover it with foil. Bake for about 25-30 minutes. Check the chicken's temperature to ensure it’s safe to eat. You can also use skewers to grill your chicken. Cut the chicken into cubes and thread them onto the skewers. This method allows for even cooking and makes for a fun presentation. Just remember to soak wooden skewers in water to prevent burning. You can make this dish healthier by choosing low-fat options. Use skinless chicken breasts and cut back on the oil. You can also swap honey for a sugar-free sweetener to lower the sugar content. For gluten-free options, make sure your mustard is gluten-free. Most mustard is fine, but checking labels is smart. If you want a dairy-free version, you’re in luck! This recipe already does not use dairy. Enjoy your meal without any worries! For the full recipe, check out the Zesty Citrus Marinated Grilled Chicken . To keep your grilled chicken fresh, place it in an airtight container. This helps maintain moisture. You can refrigerate it for up to four days. If you notice any off smells or changes in color, it’s best to toss it. For long-term storage, freeze your marinated chicken. Wrap each piece tightly in plastic wrap. Then, place them in a freezer bag. This will prevent freezer burn. You can freeze it for up to three months. When you're ready to use it, thaw it in the fridge overnight or use the microwave on low power. To reheat grilled chicken without drying it out, use the oven. Preheat to 350°F (175°C). Place the chicken in a baking dish, cover it with foil, and add a splash of broth or water. Heat for about 15-20 minutes. You can also slice leftover chicken and add it to salads, wraps, or stir-fries for quick meals. For more ideas, check out the Full Recipe. For the best flavor, you should marinate chicken for at least 1 hour. If you have more time, aim for 4 to 6 hours. For maximum taste, marinate overnight. Just remember, too long can make the chicken mushy. Yes, chicken thighs work great! They stay moist and have rich flavor. Adjust the cooking time since thighs take a bit longer. Always check the internal temperature. It should reach 165°F (74°C) for safe eating. If you're out of olive oil, use canola or vegetable oil. For Dijon mustard, yellow mustard is a fine substitute. If you lack fresh garlic, garlic powder works, too. Just use 1/8 teaspoon for each clove. These swaps keep the flavor strong! Check the full recipe for more ideas. In this article, I covered how to make a great chicken marinade and grill it perfectly. You learned about the key ingredients, needed equipment, and step-by-step grilling instructions. I also shared tips, flavor variations, and storage methods to keep your grilled chicken fresh. Remember, the right marinade and cooking method can transform your meals. With these tips, you can enjoy tender, juicy chicken every time. Now, it's time to gather your ingredients and get grilling!
Easy Marinated Grilled Chicken Simple and Flavorful Dish
Looking for a simple yet tasty dish? You’re in the right spot! This easy marinated grilled chicken is full of flavor and super simple to