Dinner

You need one sheet of puff pastry. Make sure it is thawed. This dough forms the base of the tart. It gives a nice, flaky texture when baked. Roll it out to fit a 9-inch tart pan. Next, gather three large onions. Slice them thinly for even cooking. Heat two tablespoons of olive oil in a large skillet. Add the onions and cook them over medium heat. This will take about 15-20 minutes. Stir them often. They should become soft and brown. This is called caramelizing. Add one tablespoon of balsamic vinegar and one teaspoon of thyme leaves. Season with salt and pepper to taste. Cook for two to three more minutes. Let the mixture cool a bit before using. Now, for the creamy part, crack two large eggs into a bowl. Whisk them well. Add one cup of heavy cream and mix until smooth. Grate one cup of Gruyère cheese and stir it in. This cheese gives a rich flavor. Make sure it is evenly mixed. This mixture will be poured over the onions later. First, preheat your oven to 400°F (200°C). Take a sheet of puff pastry and let it thaw. On a clean surface, sprinkle a little flour. Roll out the pastry to fit your 9-inch tart pan. Place the pastry in the pan and press it gently into the edges. Prick the bottom with a fork. This helps to stop the pastry from puffing too much while baking. Next, grab a large skillet and heat 2 tablespoons of olive oil over medium heat. Add 3 large, thinly sliced onions. Stir them often for about 15 to 20 minutes. You want them soft and golden brown. This is the sweet spot for caramelizing. Once they reach that lovely color, stir in 1 tablespoon of balsamic vinegar and 1 teaspoon of thyme leaves. Cook this for another 2 to 3 minutes. Make sure to season with salt and pepper to your liking. Then, take the skillet off the heat and let the onion mix cool a bit. In a mixing bowl, crack open 2 large eggs and add 1 cup of heavy cream. Whisk them together until they are well mixed. Now, add in 1 cup of grated Gruyère cheese. Make sure to mix it until the cheese is evenly spread. This filling will blend perfectly with your caramelized onions. Once everything is ready, spread the caramelized onion mix over your puff pastry base. Pour the egg and cheese mixture over the onions. Bake it in your preheated oven for 25 to 30 minutes. You'll know it's done when the filling is set and the pastry is a nice golden brown. After baking, allow it to cool for a few minutes. Garnish with fresh parsley for a pop of color before serving. Enjoy! To make great caramelized onions, start with medium heat. Use a large skillet and add olive oil. Cook the onions for about 15-20 minutes. Stir them often to avoid burning. When the onions turn golden brown, add balsamic vinegar and thyme. This adds a sweet and tangy flavor. Don’t rush this step. Patience brings out their best taste. For a crispy crust, roll out the puff pastry thinly. Make sure it fits your tart pan well. Prick the bottom with a fork. This step helps prevent puffing and keeps it flat. Bake the tart at 400°F (200°C) until golden brown. This usually takes about 25-30 minutes. Watch closely so it doesn’t burn. A golden crust is key to a perfect tart. This tart tastes great warm or cold. If you serve it warm, the cheese is melty and delicious. Let it cool for a few minutes after baking. This helps the filling set. If you prefer it cold, refrigerate it for a couple of hours. Cold tart is nice for picnics or lunch boxes. It can be enjoyed any time of day. {{image_2}} You can switch Gruyère for other cheeses. Fontina melts well and gives a creamy taste. Cheddar adds a sharpness that contrasts nicely with the sweet onions. For a tangy twist, try goat cheese. Each cheese changes the flavor, so feel free to experiment. To make this tart vegan, use a plant-based puff pastry. Replace the eggs with a mix of ground flaxseed and water. For the cream, use coconut cream or cashew cream. You can also use vegan cheese or nutritional yeast for a cheesy flavor. These swaps keep the dish rich and tasty without dairy. Enhance your tart with extra ingredients. Try adding sautéed mushrooms for an earthy flavor. Spinach brings a fresh note and vibrant color. For a kick, sprinkle in some red pepper flakes. You can also add caramelized garlic for depth. These add-ins make each bite exciting and unique. After you enjoy the tart, you may have some left. Let it cool completely. Place leftovers in an airtight container. The tart stays fresh for up to 3 days in the fridge. If you want to keep it longer, freezing is a great option. You can freeze the tart if you want to save it for later. Wrap it tightly in plastic wrap and then in foil. This helps prevent freezer burn. The tart can stay in the freezer for up to 2 months. When you’re ready, just thaw it in the fridge overnight before reheating. To reheat the tart, preheat your oven to 350°F (175°C). Place the tart on a baking sheet. Heat it for about 15-20 minutes, or until warm. This method keeps the crust crispy and the filling creamy. You can also reheat it in the microwave for 1-2 minutes, but the crust may not be as crisp. If you cannot find Gruyère cheese, here are some good substitutes: - Emmental cheese - Comté cheese - Fontina cheese - A blend of mozzarella and parmesan These cheeses have similar flavors and textures. Emmental offers a nutty taste like Gruyère. Comté is also rich and smooth. Fontina melts well, just like Gruyère. You can mix mozzarella and parmesan for a tasty combo. You can store the tart in the fridge for up to three days. Wrap it tightly in plastic wrap. This keeps it fresh and prevents it from drying out. When you want to eat it, just reheat it in the oven. This brings back its crispy crust and warm filling. Yes, you can make the tart in advance. Prepare the tart and bake it as directed. Let it cool completely before storing. Cover it tightly and keep it in the fridge. You can also freeze it before baking. Just thaw it in the fridge overnight before baking. This makes meal prep easy! This blog post covers the main ingredients for a cheese tart and how to prepare it. We discussed puff pastry, onions, and the cheese blend. The step-by-step guide helps you caramelize onions and mix the filling. Tips ensure a crispy crust and perfect serving. You can explore variations like different cheeses or vegan options. Lastly, proper storage keeps your tart fresh. Remember, cooking is fun and creative! Enjoy making your cheese tart and share it with others. It’s a treat anyone will love!
Caramelized Onion Gruyere Tart Savory Flavor Delight
If you’re craving a dish that bursts with savory flavor, my Caramelized Onion Gruyère Tart is the answer. This dish combines sweet, tender onions with
To make Cheesy Stuffed Pepper Soup, you need these ingredients: - 2 large bell peppers (any color), diced - 1 cup onion, chopped - 3 cloves garlic, minced - 1 pound ground beef or turkey - 1 (15 oz) can diced tomatoes - 4 cups beef or vegetable broth - 1 cup uncooked rice (white or brown) - 1 teaspoon Italian seasoning - 1 teaspoon smoked paprika - Salt and pepper to taste - 1 cup corn kernels (frozen or fresh) - 1 ½ cups shredded cheese (cheddar or mozzarella) - Fresh parsley or cilantro for garnish You can change some of the ingredients to fit your taste. Try these ideas: - Use different colors of bell peppers for a vibrant look. - Swap ground beef for ground chicken or pork for a lighter option. - Instead of rice, use quinoa for a protein boost. - Add other vegetables like zucchini or carrots for more nutrients. - Change the cheese to pepper jack for a spicy kick. If you’re missing an ingredient, don’t worry! Here are some swaps: - Use vegetable broth instead of beef broth for a vegetarian option. - Replace rice with cooked pasta if you prefer. - If you don’t have fresh corn, canned corn works fine. - Use onion powder if you lack fresh onions. - If you need a dairy-free option, try a plant-based cheese. These swaps and variations make this soup flexible and fun. Enjoy making it your own! Start by gathering your ingredients. You need: - 2 large bell peppers (any color), diced - 1 cup onion, chopped - 3 cloves garlic, minced - 1 pound ground beef or turkey - 1 (15 oz) can diced tomatoes - 4 cups beef or vegetable broth - 1 cup uncooked rice (white or brown) - 1 teaspoon Italian seasoning - 1 teaspoon smoked paprika - Salt and pepper to taste - 1 cup corn kernels (frozen or fresh) - 1 ½ cups shredded cheese (cheddar or mozzarella) - Fresh parsley or cilantro for garnish Chop the onion, garlic, and bell peppers first. This makes cooking easier. Heat a tablespoon of oil in a large pot over medium heat. Add the chopped onion. Sauté it until it looks clear, which takes about 5 minutes. Next, add the minced garlic and diced bell peppers. Cook these for another 3-4 minutes until they soften a bit. Now, raise the heat to medium-high. Add the ground beef or turkey. Cook this until it browns, which takes about 5-7 minutes. Break it apart with a spatula as it cooks. After that, stir in the diced tomatoes, broth, uncooked rice, Italian seasoning, smoked paprika, salt, and pepper. Bring this mix to a boil. Once it boils, lower the heat to low. Cover the pot and let it simmer for about 20 minutes. This allows the rice to cook fully. Finally, add the corn kernels and shredded cheese. Stir this until the cheese melts and blends well. Taste it and adjust the seasoning if needed. Serve it hot, garnished with fresh parsley or cilantro for a nice touch. Keep an eye on the heat. Too high, and the soup can burn. Stir often to prevent sticking. If you want a thicker soup, let it simmer longer. For a thinner soup, add more broth. You can also switch up the cheese. Try mozzarella for a creamier texture or cheddar for a sharper taste. Don't forget to taste and adjust your seasoning. This ensures every bite is full of flavor. To make the best Cheesy Stuffed Pepper Soup, start with fresh ingredients. Use ripe bell peppers for a sweet taste. When cooking the onions, let them become soft and clear. This step adds great flavor. Also, don't rush the browning of the meat. A good browning gives your soup depth. For extra flavor, add a splash of hot sauce or a pinch of red pepper flakes. These give a nice kick. You can also try different spices like cumin or oregano. A squeeze of fresh lemon juice brightens the dish. Fresh herbs like parsley or cilantro make it fresh and tasty. Serve the soup hot in bowls, topped with extra cheese. You can also add a dollop of sour cream for creaminess. Pair your soup with crusty bread or a fresh side salad. This makes a cozy meal for any day. Don't forget to share with family or friends! {{image_2}} You can make this soup vegetarian or vegan. Start by skipping the meat. Use a mix of beans, like black beans or chickpeas, instead. This adds protein and texture. Use vegetable broth for the base. You can also use extra veggies, like zucchini or mushrooms, for flavor. Choose plant-based cheese or skip it for a lighter soup. Fresh herbs like basil or parsley will make it taste great. If you want a different protein, try ground chicken or pork. You can also use lentils for a fun twist. Cook the lentils separately and add them in later. This keeps their texture nice. If you are short on time, grab pre-cooked rotisserie chicken. This adds flavor and cuts cooking time. To add heat, toss in some chili powder or cayenne pepper. Start with a little and taste as you go. You can also add diced jalapeños for more kick. If you like a smoky flavor, use smoked paprika. Top your soup with sliced fresh peppers for a spicy crunch. This version will warm you up on chilly days. To keep your cheesy stuffed pepper soup fresh, let it cool first. Use an airtight container to store leftovers. This helps keep the soup from drying out. You can store it in the fridge for up to three days. If you notice any changes in smell or color, throw it away. You can freeze cheesy stuffed pepper soup for later. Use freezer-safe containers or bags. Make sure to leave some space for expansion. Label each container with the date. The soup can last up to three months in the freezer. When ready to use, thaw it overnight in the fridge before reheating. Reheat the soup on the stove for the best flavor. Use medium heat and stir often. This helps prevent sticking or burning. You can also use the microwave. Pour the soup into a microwave-safe bowl. Cover it, leaving a small gap for steam. Heat in short bursts, stirring in between, until hot. Adjust seasoning if needed before serving again. You can make Cheesy Stuffed Pepper Soup ahead of time. First, cook the soup as usual. Let it cool completely. Then, store it in an airtight container in the fridge. It stays fresh for about three days. To reheat, warm it on the stove or in the microwave. If you want to make it even tastier, add cheese right before serving. Yes, you can use different types of cheese. Cheddar and mozzarella work well, but feel free to experiment. Try pepper jack for a spicy kick or cream cheese for extra creaminess. Each cheese will change the flavor a bit, so pick what you love. Just remember to adjust the amount if you choose a stronger cheese. You can serve this soup with many tasty sides. A simple green salad pairs well and adds freshness. Crusty bread or garlic bread is great for dipping. You might even consider serving it over cooked pasta or quinoa for a heartier meal. Each option brings its own twist, making your meal even more enjoyable. In this blog post, I covered the key parts of making Cheesy Stuffed Pepper Soup. We talked about ingredients, the cooking process, and tips to improve flavor. I shared ways to store leftovers and answered common questions. Remember, you can easily swap ingredients for your taste. Don’t hesitate to get creative. Enjoy your cooking journey and the warmth this soup brings to your table.
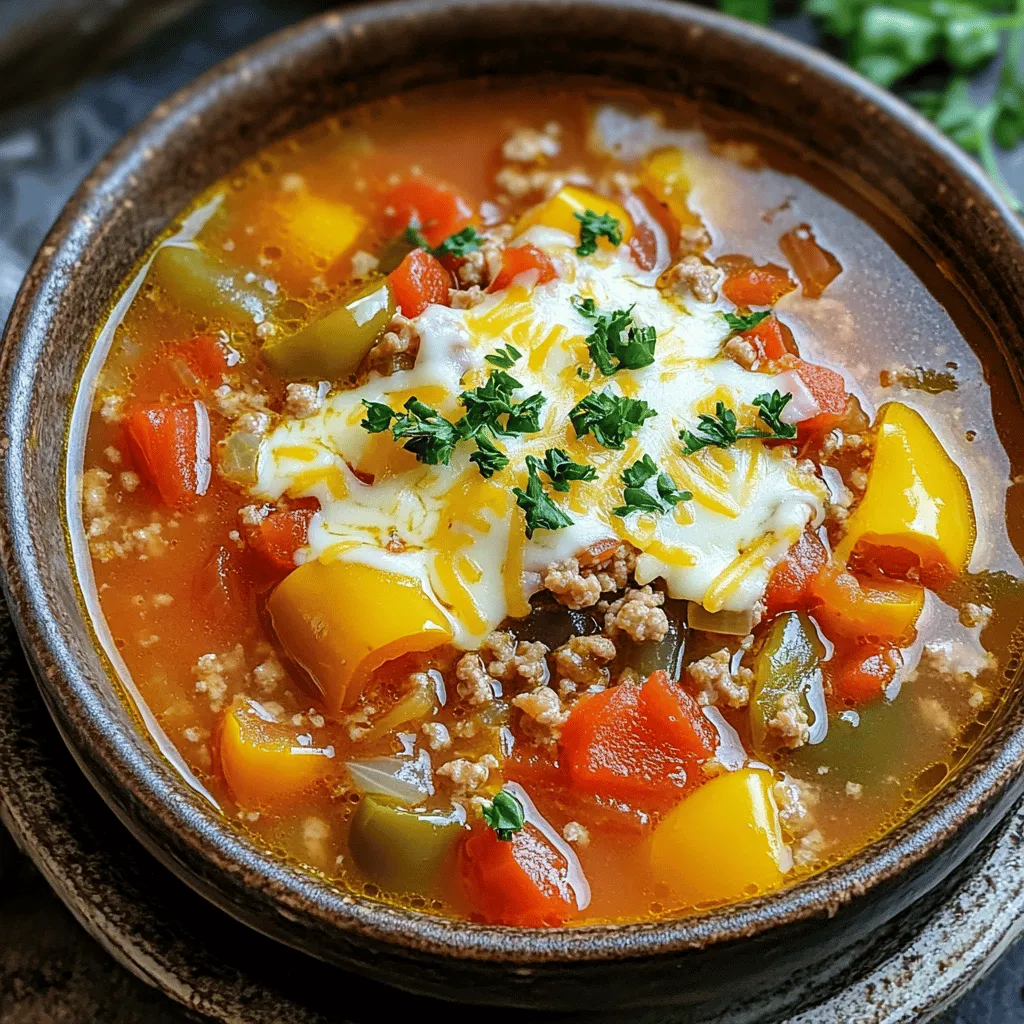
Cheesy Stuffed Pepper Soup Flavorful and Cozy Meal
Warm up your day with my Cheesy Stuffed Pepper Soup, a cozy meal that’s full of flavor! This recipe is easy to make and perfect
For a tasty slow cooker chicken korma, you will need: - 1.5 lbs boneless, skinless chicken thighs, cut into bite-sized pieces - 1 large onion, finely chopped - 3 cloves garlic, minced - 1 tablespoon fresh ginger, grated - 1 can (13.5 oz) coconut milk - 1 cup plain yogurt - 2 tablespoons tomato paste - 2 tablespoons korma curry paste (adjust to taste) - 1 tablespoon ground turmeric - 2 teaspoons garam masala - 1 teaspoon ground cumin - 1 teaspoon ground coriander - 1 teaspoon chili powder (optional, for heat) - Salt to taste These ingredients create a rich and creamy sauce that coats the chicken perfectly. The spices add depth and warmth to the dish. For a touch of freshness and crunch, consider these garnishes: - Fresh cilantro, chopped - Toasted almonds or cashews Garnishes enhance the flavor and add color to your dish. They make the meal more appealing. You can swap some ingredients if you need to. Here are a few options: - Chicken thighs can be replaced with chicken breasts for a leaner choice. - Greek yogurt can work instead of plain yogurt for a thicker texture. - If you can't find korma curry paste, use curry powder as a substitute. These substitutions can help you customize the dish to your liking without losing flavor. Start by chopping one large onion. You want it finely chopped for the best flavor. Next, mince three cloves of garlic and grate one tablespoon of fresh ginger. These aromatics add a lot of depth to the dish. In your slow cooker, mix the onion, garlic, and ginger well. Spread them evenly across the bottom. Now, take 1.5 lbs of boneless, skinless chicken thighs and cut them into bite-sized pieces. Place the chicken on top of the onion mix. Make sure the chicken is spread out evenly. In a separate bowl, combine one can of coconut milk and one cup of plain yogurt. Add two tablespoons of tomato paste and two tablespoons of korma curry paste. You can adjust the curry paste to your taste. Then, mix in one tablespoon of ground turmeric, two teaspoons of garam masala, one teaspoon of ground cumin, and one teaspoon of ground coriander. If you like heat, add one teaspoon of chili powder. Stir everything until smooth. Pour this sauce over the chicken in the slow cooker. Gently stir to coat the chicken evenly. Cover your slow cooker and set it to cook. You can choose to cook on low for 6-8 hours or on high for 3-4 hours. The chicken should become tender and fully cooked. After cooking, taste the dish. Adjust the salt if needed. If you want a thicker sauce, leave the lid off and cook on high for an extra 30 minutes. Serve the chicken korma over cooked basmati rice. Garnish with fresh cilantro and toasted almonds or cashews for a nice touch. To make your chicken korma shine, start with fresh ingredients. Use high-quality chicken thighs for juicy bites. The right spices bring depth to the dish. Combine the korma curry paste with coconut milk and yogurt for a creamy base. Let the flavors blend by cooking it low and slow. This will help the spices infuse into the chicken. Remember to taste before serving. Adjust salt or add more spices as needed. Fresh cilantro adds a bright touch at the end. A slow cooker is your best friend for this dish. Layer the ingredients correctly. Start with onions, garlic, and ginger at the bottom. This helps them cook well and adds flavor. Cut the chicken into even pieces for uniform cooking. Always cover the slow cooker to keep the heat inside. If you want a thicker sauce, remove the lid for the last 30 minutes of cooking. This helps reduce excess liquid and enhance flavor. If you like spice, add chili powder to the mix. Start with one teaspoon and taste as it cooks. If you want less heat, skip the chili powder. You can also use mild korma paste. For a milder dish, balance the heat with extra yogurt. This creates a creamy texture while cooling the spice. Always remember, you can adjust the heat to suit your taste. {{image_2}} You can easily swap chicken for vegetables. Use chickpeas, cauliflower, or potatoes. These options soak up the flavors well. I love using a mix of chickpeas and spinach. It adds protein and color. Just cook the veggies until tender. This keeps the dish light yet hearty. If you want other proteins, try lamb or beef. Both meats bring a rich taste. Cut them into small pieces to ensure even cooking. You can also use shrimp for a quick cook time. Just add the shrimp in the last hour of cooking. This way, they stay juicy and tender. To change the spice level, adjust the chili powder. For mild, skip it or use less. For more heat, add fresh chilies or extra korma paste. Tasting as you cook helps find the right level. Just remember, you can always add more spice, but removing it is hard! To store leftovers, let the chicken korma cool first. Use an airtight container. Place the chicken korma in the container and seal it tight. Keep it in the fridge for up to four days. Always label your container with the date. This helps you track how long it's been stored. Reheating is easy. You can use the microwave or the stovetop. If using a microwave, place the korma in a safe dish. Cover it loosely to avoid splatters. Heat in short bursts. Stir it between intervals to ensure even heating. If using the stovetop, put it in a pan over low heat. Stir often until it’s hot. You may want to add a splash of water to help loosen the sauce. If you want to freeze your chicken korma, use a freezer-safe container. Let it cool completely before you freeze it. Leave some space in the container for expansion. You can freeze it for up to three months. To thaw, place it in the fridge overnight. When ready to eat, reheat as mentioned above. Enjoy the flavors again! Yes, you can use chicken breasts. They will cook well in the slow cooker. Chicken thighs have more fat, which makes them juicier. Breasts may dry out if overcooked. If you prefer breasts, check the cooking time closely. To thicken the sauce, remove the lid for the last 30 minutes. This lets steam escape. You can also add a cornstarch slurry. Mix 1 tablespoon of cornstarch with 2 tablespoons of cold water. Stir this into the sauce and cook until thickened. Serve Chicken Korma with cooked basmati rice. It soaks up the sauce well. You can also add naan bread for dipping. For a fresh touch, add a side salad or cucumber raita. Garnish with fresh cilantro and nuts for extra flavor. In this post, we covered the key ingredients for making Chicken Korma. You can use fun garnishes or swaps for different tastes. I shared step-by-step instructions for cooking it just right. Tips and tricks helped you enhance flavor and use a slow cooker. You learned about variations, storage, and answers to common questions. Now, you have the tools to create a delicious Chicken Korma at home. Enjoy cooking and sharing this tasty dish!
Slow Cooker Chicken Korma Flavorful and Easy Recipe
Are you ready to savor the rich flavors of India without the fuss? My Slow Cooker Chicken Korma recipe brings you a delicious meal with
- 1 lb boneless, skinless chicken breasts - 4 cups chicken broth - 2 cups carrots, diced - 1 cup celery, diced - 1 onion, chopped - 3 cloves garlic, minced - 1 teaspoon dried thyme - 1 teaspoon dried rosemary - 1 teaspoon Italian seasoning - Salt and pepper to taste - 1 cup heavy cream (or coconut cream) - 1 package (16 oz) potato gnocchi - 2 cups fresh spinach, chopped - 2 tablespoons fresh parsley, chopped (for garnish) Gathering the right ingredients is key to making a warm and comforting soup. Start with chicken breasts. They give the soup a hearty base. Next, grab fresh carrots, celery, and onion. These veggies add sweetness and crunch. Don't forget garlic! It brings a lovely aroma and flavor. Seasoning is crucial, too. Use thyme, rosemary, and Italian herbs for depth. Salt and pepper will enhance all the flavors. For creaminess, choose heavy cream or coconut cream. This makes the soup rich and smooth. Finally, the gnocchi adds a fun twist and texture. Fresh spinach brightens the dish. It also packs in nutrients. Top it all off with parsley for a pop of color. This mix of ingredients creates a balanced and tasty soup. Each bite will warm you from the inside out. - Layering the Chicken and Vegetables Start by placing the boneless chicken breasts at the bottom of your slow cooker. This step is key. The chicken will cook evenly and soak up flavors. Next, add the diced carrots, diced celery, and chopped onion right on top of the chicken. These veggies add a nice crunch and taste. - Adding the Liquid and Seasonings Pour 4 cups of chicken broth over the layers. Make sure everything is well submerged. This broth is the heart of the soup. Then, sprinkle in the minced garlic, dried thyme, dried rosemary, Italian seasoning, salt, and pepper. Stir gently to mix. This balance of flavors is essential for a warm, comforting dish. - Slow Cooking on Low vs. High You can cook on low for 6-8 hours or high for 4 hours. If you have time, I recommend low. It makes the chicken super tender. The flavors meld beautifully when cooked slowly. If you’re short on time, the high setting works too. Just check the chicken for doneness. - Shredding the Chicken Once cooked, remove the chicken carefully. Use two forks to shred it into bite-sized pieces. This step adds texture to the soup. Return the shredded chicken back into the slow cooker. It’s now ready for the next delicious step. - Incorporating Gnocchi and Cream Stir in the potato gnocchi and 1 cup of heavy cream. This cream makes the soup rich and creamy. Let it cook on high for about 30 minutes. The gnocchi will float to the top when they’re done. That’s your sign they’re ready! - Adding Spinach In the last 10 minutes, add the chopped spinach. It wilts quickly and adds color. Stir it in until it’s just wilted. This soup is now a vibrant mix of flavors and textures, ready to warm your soul. - Ensuring Flavor Profiles: Always taste your soup before serving. If it needs more depth, add salt or herbs. Fresh parsley gives a nice finish too. - Recommended Serving Suggestions: Serve the soup in rustic bowls. A sprinkle of fresh parsley adds color. Pair it with crusty bread for dipping. - What to Do if the Soup is Too Thick: If the soup is thick, add more chicken broth. Stir well and heat it for a few minutes. - Adjusting Flavors Before Serving: Taste the soup before you serve it. If it lacks flavor, add more salt, pepper, or herbs. - Ideal Slow Cooker Size and Type: A 6-quart slow cooker works great for this soup. It gives enough space for all the ingredients. - Other Useful Cooking Tools: Have two forks ready to shred the chicken. A sturdy ladle helps serve the soup easily. {{image_2}} You can easily change the protein in this soup. Use turkey instead of chicken for a leaner option. For a plant-based choice, try tofu. The texture of tofu works well with gnocchi. You can also switch up the veggies. Add peas or corn for sweetness. You can use zucchini or bell peppers for extra color. The soup stays tasty and fun with these swaps. If you need a gluten-free option, look for gluten-free gnocchi. Many brands offer this choice now. You can also use rice noodles as a fun substitute. For a vegan version, use vegetable broth instead of chicken broth. Swap heavy cream for coconut cream or cashew cream. This keeps the soup creamy without dairy. Want some heat? Add red pepper flakes or a splash of Sriracha. This adds a nice kick to the soup. Adjust the amount to your spice level. Fresh herbs make a big difference. Toss in some fresh basil or oregano before serving. This adds bright flavors and aromas to your warm bowl of soup. How long can it last in the fridge? You can keep this soup in the fridge for about 3 to 4 days. Make sure to store it in an airtight container. This helps to keep it fresh and safe to eat. Best practices for freezing and reheating To freeze, let the soup cool first. Then, pour it into freezer-safe bags or containers. Leave some room at the top for expansion. Label the bags with the date. You can freeze it for up to 3 months. When you are ready to eat, thaw it overnight in the fridge. How to properly reheat without compromising quality To reheat the soup, pour it into a pot over low heat. Stir it often until it warms up. You can also use the microwave. Heat in short bursts and stir in between to avoid hot spots. If the soup seems thick, add a splash of chicken broth or water to thin it out before serving. The prep time for this soup is about 15 minutes. You can cook it on low for 6-8 hours or on high for 4 hours. That means the total time can be up to 7 hours. The slow cooker does most of the work, making it easy for you. Yes, you can use frozen gnocchi. Just add it in the last 30 minutes of cooking. Frozen gnocchi cooks quickly, so it will work well in the soup. If you use fresh gnocchi, add it during the last 30 minutes too. Both options will give you a tasty soup. You can definitely make this soup ahead of time. Prepare it a day before and store it in the fridge. The flavors will blend well overnight. When ready to eat, just heat it on the stove. You can also freeze it for later. Just thaw it overnight in the fridge before reheating. You've learned how to create a rich slow cooker chicken gnocchi soup. I shared key ingredients and step-by-step instructions. The tips and variations I mentioned help you adjust the flavors and stay within your diet. Lastly, you can store leftovers for later enjoyment. This soup is versatile, easy to make, and sure to please many palates. Enjoy experimenting with your own touches to make it just right for you!
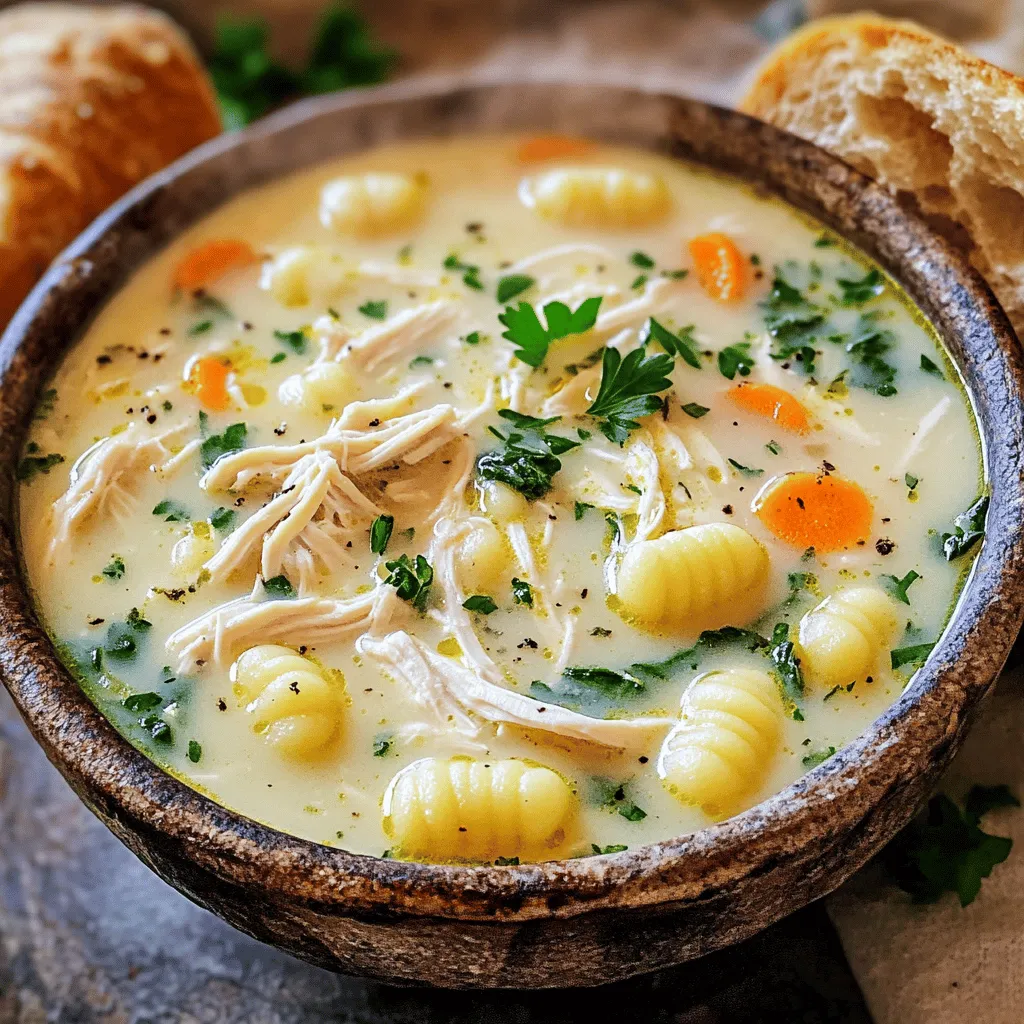
Slow Cooker Chicken Gnocchi Soup Warm and Comforting Dish
Looking for a warm and comforting meal? Try my Slow Cooker Chicken Gnocchi Soup! This simple recipe blends tender chicken, fresh veggies, and creamy broth
- 4 large bell peppers (any color), diced - 1 lb ground turkey (or beef) - 1 small onion, diced - 2 cloves garlic, minced - 1 can (14.5 oz) diced tomatoes - 4 cups vegetable broth - 1 cup cooked rice (white or brown) Bell peppers give this soup its bright color. You can use any color you like. Red, yellow, and green all work well. Ground turkey is lean and tasty, but beef adds more flavor. Choose what you like best. Onions and garlic are key vegetables. They add a sweet and savory taste. Diced tomatoes bring in acidity and depth. Vegetable broth makes the soup rich and warm. Rice brings heartiness to each bite, making the soup filling. - 1 tablespoon Italian seasoning - 1 teaspoon smoked paprika - Salt and pepper to taste - 1 cup shredded cheese (cheddar or mozzarella) - Fresh parsley, chopped (for garnishing) Italian seasoning adds classic herbs like basil and oregano. Smoked paprika gives a nice, smoky flavor. Adjust salt and pepper to your taste. Cheese is the perfect topping. Cheddar adds sharpness, while mozzarella melts beautifully. Fresh parsley adds a pop of green and freshness. Each ingredient works together for a tasty and hearty soup. To start, we need to brown the ground meat. In a large pot over medium heat, add 1 pound of ground turkey or beef. Cook it for about 5 to 7 minutes. Break it up with a spoon as it cooks. This step is key for flavor. If there's too much fat, drain it out. Next, we cook the aromatics. Add 1 small diced onion and 2 minced garlic cloves to the pot. Stir this mixture for about 3 to 4 minutes. The onion should turn soft and clear. This brings out a nice aroma that makes your kitchen smell amazing. Now, it’s time to incorporate the bell peppers and tomatoes. Add 4 large diced bell peppers to the pot. Let them cook for around 5 minutes. This softens them just enough. Now pour in 1 can of diced tomatoes with their juices. Follow this with 4 cups of vegetable broth. Stir everything together until well mixed. The soup is starting to come together nicely. Next, we combine the rice and seasonings. Stir in 1 cup of cooked rice. Then, add 1 tablespoon of Italian seasoning and 1 teaspoon of smoked paprika. Season with salt and pepper to taste. Bring the mixture to a gentle boil. After that, reduce the heat to low. Let it simmer for about 20 minutes. This lets all the flavors blend together. For the final touch, stir in half of the shredded cheese during the last few minutes of cooking. Let it melt into the soup. Taste it and adjust the seasoning if needed. Serve hot, garnished with the remaining cheese and fresh chopped parsley on top. Enjoy this hearty and flavorful dish! Simmer time is key for great flavor. When you let the soup simmer, the tastes blend. Aim for at least 20 minutes on low heat. This step helps the spices and veggies release their full flavor. Choosing the right meat adds depth. Ground turkey offers a lighter option, while beef gives a richer taste. Both work well, so pick what you like best. If you want a twist, try ground chicken or even plant-based meat. Storing leftovers properly keeps the soup fresh. Let it cool before placing it in an airtight container. Keep it in the fridge for up to three days. For longer storage, consider freezing it. Reheating is easy and keeps flavor intact. Warm it gently on the stove over low heat. Stir often to avoid burning. You can also use the microwave, but cover the bowl to keep moisture in. Add a splash of broth if it seems thick. {{image_2}} You can swap out proteins in this soup. Ground turkey is great, but you can use chicken or even tofu for a plant-based option. Each choice changes the taste and texture a bit. When it comes to grains, you have options too. Instead of traditional rice, try quinoa for a nutty flavor or cauliflower rice for fewer carbs. Both are delicious and add unique textures to your soup. Want to kick up the heat? Add a pinch of cayenne or a splash of hot sauce. This adds warmth and excitement to every spoonful. You can adjust the spice to fit your taste. Adding more veggies is a smart move. Try adding zucchini for a soft bite or corn for a touch of sweetness. These additions make the soup even heartier and more colorful. To store your stuffed bell pepper soup, first let it cool to room temperature. Transfer it to an airtight container. This keeps the soup fresh and tasty. You can refrigerate it for up to 3 to 4 days. Before serving again, stir the soup well and heat it on the stove or in the microwave. Freezing is a great way to keep your soup longer. Use freezer-safe containers or heavy-duty bags. Make sure to leave some space at the top. The soup can stay fresh in the freezer for about 3 months. When you’re ready to enjoy it again, thaw the soup overnight in the fridge. Reheat it on the stove over low heat. Stir often to make sure it heats evenly. You can also use the microwave, but check it frequently to avoid overheating. Can I use fresh rice instead of cooked? No, you cannot use fresh rice. Fresh rice needs cooking time. It will not absorb the flavors well. Always use cooked rice. It blends perfectly into the soup. What can I serve with stuffed bell pepper soup? You can serve many sides. A simple green salad pairs well. Garlic bread makes a great choice too. You can also enjoy it with crusty rolls for dipping. How do I make this soup vegetarian-friendly? To make the soup vegetarian, swap out the meat. Use lentils or mushrooms for protein. You can also add beans for extra texture. Choose vegetable broth to keep it meat-free. Stuffed bell pepper soup is a tasty dish that combines colorful peppers, hearty meat, and spices. You learned about key ingredients like veggies, broth, and seasonings. I shared easy steps for cooking and tips for great results. Remember, you can adjust flavors and even make it vegetarian. With the right storage, this soup stays fresh and delicious. Enjoy exploring your own twists on this comforting recipe!
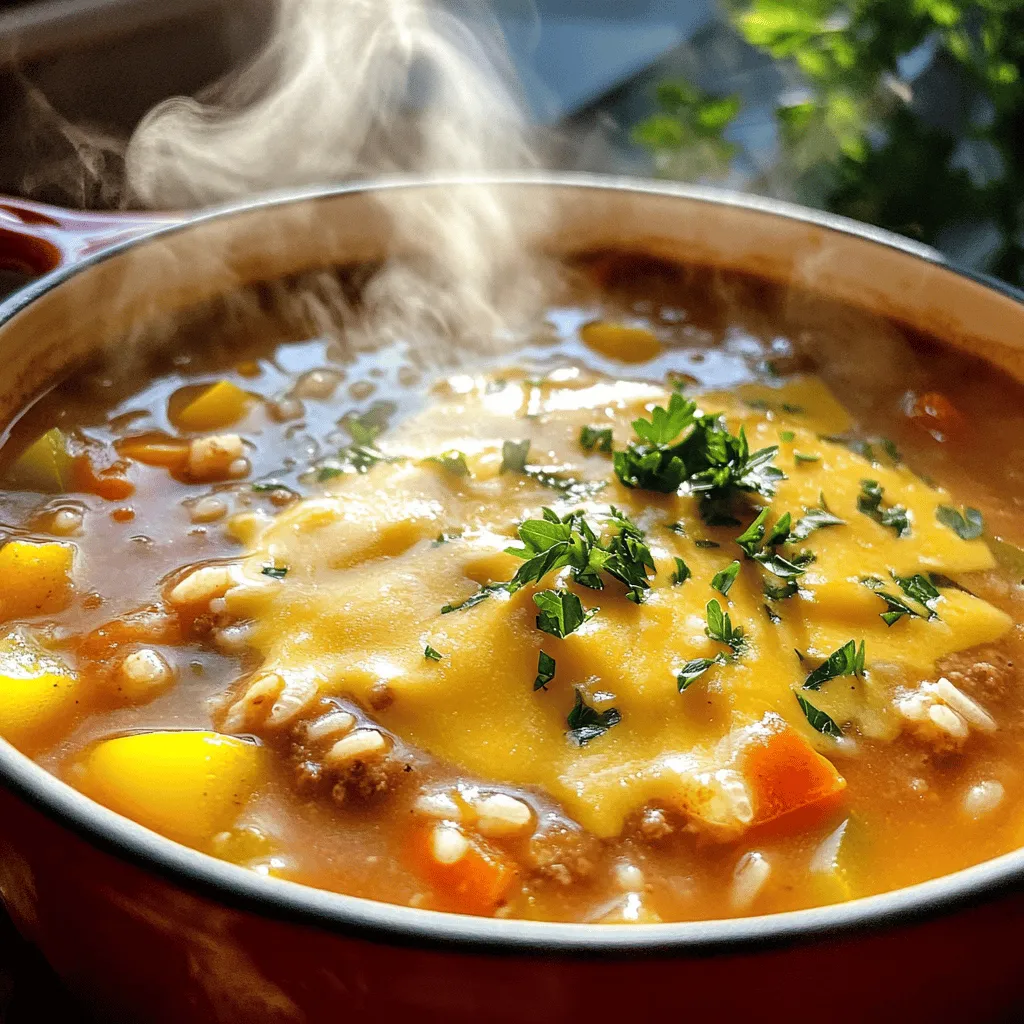
Stuffed Bell Pepper Soup Flavorful and Hearty Dish
Are you ready to warm your soul with a bowl of Stuffed Bell Pepper Soup? This dish is packed with vibrant veggies, hearty meat, and
To make One-Pot Creamy Tuscan Chicken Pasta, you will need: - 2 boneless, skinless chicken breasts, diced - 8 ounces pasta (penne or fusilli work great) - 2 tablespoons olive oil - 3 cloves garlic, minced - 1 teaspoon Italian seasoning - 2 cups baby spinach - 1 cup cherry tomatoes, halved - 1 cup chicken broth - 1 cup heavy cream - ½ cup grated Parmesan cheese - Salt and pepper to taste - Fresh basil leaves for garnish You will need a few tools to make this dish: - A large pot or skillet - A wooden spoon for stirring - A sharp knife for dicing the chicken - A cutting board for prep - Measuring cups and spoons You can swap some ingredients if needed: - Use any pasta shape you like, such as spaghetti or rotini. - If you don’t have heavy cream, use half-and-half or whole milk. - For a lighter option, try using Greek yogurt instead of cream. - If you’re out of chicken broth, vegetable broth works well too. - Fresh spinach can be replaced with kale or arugula. - You can use shredded cheese if you don’t have grated Parmesan. Start with the chicken. Dice 2 boneless, skinless chicken breasts into small pieces. Heat 2 tablespoons of olive oil in a large pot over medium heat. Once it's warm, add the chicken. Sprinkle salt, pepper, and 1 teaspoon of Italian seasoning on top. Cook the chicken for about 5-7 minutes. You want it browned and fully cooked. When done, take the chicken out and set it aside. In the same pot, add 3 minced garlic cloves. Sauté them for about 30 seconds until you smell the garlic. Next, toss in 1 cup of halved cherry tomatoes. Cook for another 2 minutes. The tomatoes should soften a bit. Pour in 1 cup of chicken broth and scrape any browned bits from the bottom. Add 8 ounces of pasta, like penne or fusilli, and bring everything to a boil. Once boiling, lower the heat to a simmer. Cover the pot and cook according to the pasta package, usually 10-12 minutes. Stir it occasionally to avoid sticking. After the pasta cooks, most of the liquid will be absorbed. Now, stir in 1 cup of heavy cream, the cooked chicken, and 2 cups of baby spinach. Cook for an additional 2-3 minutes. You want the spinach to wilt and everything to heat through. Take the pot off the heat. Mix in ½ cup of grated Parmesan cheese until the sauce is creamy. Taste the dish and adjust the salt and pepper if needed. Serve hot in bowls. Garnish with fresh basil leaves and a sprinkle of extra Parmesan for a nice touch. Enjoy! To get juicy chicken, start with even-sized pieces. Dice your chicken breasts into bite-sized cubes. This way, they cook evenly. Heat the olive oil until hot, but not smoking. Add the chicken and cook for 5-7 minutes. You want it golden brown with no pink inside. Use a meat thermometer if needed; the center should be 165°F. After cooking, let the chicken rest. This keeps the juices inside. A creamy sauce is a key part of this dish. After cooking the pasta, reduce the heat before adding cream. This helps prevent the cream from curdling. Stir in the cream slowly while mixing. It should blend smoothly. Don’t forget to add the Parmesan cheese last. This adds flavor and thickness. If the sauce is too thick, add a splash of chicken broth to reach your desired consistency. To elevate the dish, consider adding fresh herbs. Chopped parsley or thyme works well. You can also toss in some red pepper flakes for heat. For a zingy touch, squeeze fresh lemon juice just before serving. Another option is to add sun-dried tomatoes for extra flavor. They bring a sweet and tangy taste that pairs nicely. Experiment with these flavors to make it your own! {{image_2}} You can make a tasty vegetarian version of this dish. Instead of chicken, use tofu or Portobello mushrooms. If you choose tofu, press it to remove extra water. Then, dice it into cubes. For Portobello mushrooms, slice them thick. Cook these in the same way as the chicken. Add them after the garlic, letting them brown before moving to the next steps. This keeps the dish creamy and rich while keeping it meat-free. If you need a gluten-free option, swap regular pasta for gluten-free pasta. Many brands offer great choices. Just make sure to check the package for cooking times. You can use rice or quinoa as another base. The sauce stays the same, making it creamy and delicious. Gluten-free options are just as easy and tasty. Add some heat to your One-Pot Creamy Tuscan Chicken Pasta! You can mix in red pepper flakes when you cook the garlic. Start with a pinch, and then taste. If you like it spicier, add more. This twist gives the dish a nice kick. It pairs well with the rich cream and cheese. To store your One-Pot Creamy Tuscan Chicken Pasta, let it cool first. Place it in an airtight container. This way, you keep it fresh. Store it in the fridge for up to three days. If you have more, consider freezing it. When you want to reheat your pasta, use a skillet. Add a splash of chicken broth or cream. This helps bring back some creaminess. Heat it over medium heat, stirring often. You can also use the microwave. Just cover it to avoid drying out. If you freeze your pasta, use a freezer-safe container. Leave some space at the top for expansion. It can last up to three months in the freezer. When you’re ready, thaw it in the fridge overnight. Then, reheat as mentioned above. Enjoy your easy dinner anytime! Yes, you can use different types of pasta. While penne or fusilli are great, you can choose any short pasta. Bowtie or elbow macaroni also work well. The key is to adjust the cooking time based on the pasta type. Always check the package for the best cooking time. This way, your pasta will be just right! To make the dish spicy, add red pepper flakes. Start with a small pinch. You can add more if you like it hotter. You can also use spicy sausage instead of chicken for a different flavor. Mixing in diced jalapeños is another great option. Spice it up to match your taste! This dish pairs well with a simple salad. A fresh green salad with a light vinaigrette is a great choice. Garlic bread is another tasty side. It helps soak up the creamy sauce. You can also serve it with roasted vegetables for a healthy option. Enjoy your meal with these easy sides! This blog covers the key steps to make One-Pot Creamy Tuscan Chicken Pasta. We discussed the ingredients needed and the tools you’ll use. You learned how to cook the chicken, pasta, and sauce together. Tips help you make the dish even better. You can try fun variations like vegetarian or spicy options. Remember to store any leftovers properly for later enjoyment. Cooking should be fun and rewarding, so enjoy your flavorful meal!
One-Pot Creamy Tuscan Chicken Pasta Easy Dinner Idea
If you’re searching for an easy and tasty dinner, you’re in the right place! One-Pot Creamy Tuscan Chicken Pasta is a simple dish that combines
- 8 oz fettuccine pasta - 1 pound Andouille or smoked sausage, sliced into rounds - 1 bell pepper (red or green), diced - 1 small onion, finely chopped - 3 cloves garlic, minced - 1 cup heavy cream - 1 cup grated Parmesan cheese - 1 teaspoon Cajun seasoning - ½ teaspoon smoked paprika - Salt and freshly cracked black pepper to taste - Chopped fresh parsley for garnish To make Cajun sausage Alfredo pasta, you need a few key ingredients. Fettuccine, a flat pasta, creates a great base. The Andouille or smoked sausage adds a rich, spicy flavor. You can choose any bell pepper, but red adds nice color. Onions and garlic add depth to the dish. Heavy cream and Parmesan cheese make the sauce creamy and rich. Cajun seasoning brings the heat, while smoked paprika adds a subtle smokiness. Don’t forget salt and pepper to taste. Lastly, fresh parsley gives the dish a beautiful finish. - Large pot for boiling pasta - Skillet for sautéing - Colander for draining pasta Having the right tools makes cooking easier. A large pot helps you boil the pasta perfectly. A skillet is essential for sautéing the sausage and vegetables. Use a colander to drain the pasta without a mess. These tools make your cooking process smooth and fun. {{ingredient_image_2}} - Bring salted water to a boil in a large pot. - Add 8 oz of fettuccine pasta and cook until al dente. This usually takes about 8-10 minutes. - Once cooked, drain the pasta in a colander. Set aside some pasta water for later. - Heat 2 tablespoons of olive oil in a large skillet over medium heat. - Add 1 pound of sliced Andouille or smoked sausage. - Cook for 5-7 minutes until the sausage is browned and crispy. - Toss in 1 diced bell pepper and 1 chopped small onion into the skillet. - Sauté for 3-4 minutes until the veggies are soft. - Add 3 minced garlic cloves and stir for about 1 minute until fragrant. - Lower the heat and pour in 1 cup of heavy cream. - Stir well, allowing it to warm without boiling. - Gradually mix in 1 cup of grated Parmesan cheese, 1 teaspoon of Cajun seasoning, and ½ teaspoon of smoked paprika. - Stir until the cheese melts, and the sauce becomes creamy. Adjust the seasoning with salt and pepper. - Add the drained fettuccine to the skillet. Toss gently to coat the pasta in the sauce. - If the sauce is too thick, add a bit of the reserved pasta water. - Heat everything together for about 2 minutes before serving. Salting water is key to great pasta. It boosts flavor right from the start. Use a good amount of salt in the water. Aim for a taste like the sea. Cook the fettuccine until it is al dente. This means it should have a slight bite. It should not be too soft. This texture holds up well in the creamy sauce. To make your Cajun Sausage Alfredo Pasta even better, try adding more spices. A dash of cayenne pepper can add heat. You might also like smoked paprika for a deeper flavor. Using fresh ingredients makes a big difference. Fresh garlic and peppers bring bright tastes. Dried spices are handy too, but fresh often shines in dishes. For plating, use deep, wide bowls. This makes the dish look full and inviting. Twirl the pasta for a nice, neat presentation. Garnish with fresh parsley for a pop of color. You can also add extra grated Parmesan cheese on top. A sprinkle of black pepper adds visual contrast and flavor. Pro Tips Choose Quality Sausage: Opt for high-quality Andouille or smoked sausage for the best flavor. The better the sausage, the richer your dish will be! Don't Overcook the Pasta: Make sure to cook the fettuccine until it's al dente. This ensures it retains a slight bite and holds up well in the creamy sauce. Adjust the Spice: If you prefer a milder dish, reduce the Cajun seasoning or smoked paprika. You can always add more later if desired! Save Pasta Water: Remember to reserve some pasta water before draining! This starchy water can help adjust the sauce's consistency without losing flavor. {{image_4}} You can swap out the sausage for different proteins. Chicken works great in this dish. Use about 1 pound of diced chicken breast. Shrimp also adds a nice touch. If you choose shrimp, cook it until pink and firm. For a meatless option, try vegetarian sausage. Just adjust your cooking time as needed. Cook chicken longer, while shrimp cooks fast. Feel free to change the cheese in the sauce. Goat cheese or cream cheese can add a unique twist. Experiment with spices to enhance the flavor. Want more heat? Add a pinch of cayenne or red pepper flakes. You can also try herbs like thyme or oregano for a new taste. Adding seasonal veggies can boost this dish. Think about spinach, mushrooms, or zucchini. These add color and nutrients. Cook them with the sausage for a few minutes. Adjust cooking times based on the veggie. Softer veggies need less time, while firmer ones need more. Enjoy the fresh flavors! To keep your Cajun Sausage Alfredo Pasta fresh, store it in an airtight container. This helps prevent moisture loss and keeps flavors intact. Place the container in the fridge right after the meal. Proper refrigeration helps maintain the dish's quality. Leftovers last for about 3 to 4 days in the fridge. Be sure to check for any signs of spoilage before eating. If you find any strange smells or changes in texture, it's best to toss it out. If you want to save some for later, freezing works well too. First, let the pasta cool completely. Then, portion it into freezer-safe bags or containers. Squeeze out as much air as you can before sealing. This keeps freezer burn away and preserves taste. When you're ready to eat, take it out of the freezer and thaw it in the fridge overnight. Reheat it gently on the stove or in the microwave. If the sauce seems a bit thick, add a splash of water or milk to loosen it up. Enjoy your flavorful meal even days later! Cajun seasoning is a blend of spices that adds a kick to dishes. The common spices used in Cajun seasoning include: - Paprika - Oregano - Thyme - Garlic powder - Onion powder - Black pepper - Cayenne pepper These spices create a warm and spicy flavor. You can mix your own or buy it pre-made. Yes, you can make Cajun Sausage Alfredo Pasta gluten-free. To do this, look for gluten-free fettuccine. Many brands offer pasta made from rice or chickpeas. These alternatives cook well and taste great. To thicken your Alfredo sauce, try these tips: - Use more cheese. Adding extra Parmesan helps. - Mix in a cornstarch slurry. Combine cornstarch with a bit of water, then stir it in. - Cook the sauce longer. Let it simmer to reduce and thicken naturally. These methods keep the flavor rich and creamy. Adjust to your liking for the perfect sauce! This blog post covered a rich fettuccine dish using simple ingredients like sausage, cream, and cheese. We explored helpful tools, step-by-step cooking methods, and tips to enhance flavor. You can also customize the recipe with different proteins and veggies. Storing and reheating tips ensure you enjoy leftovers later. Remember, cooking should be fun! Experiment with flavors and make this dish your own. Happy cooking!
Cajun Sausage Alfredo Pasta Flavorful and Simple Meal
Are you ready to spice up your dinner routine? Cajun Sausage Alfredo Pasta blends creamy goodness with a kick of flavor. This quick and simple
- 2 cups cooked shredded chicken - 1 cup BBQ sauce (your favorite brand) - 2 cups green cabbage, finely shredded - 1/2 cup red cabbage, finely shredded - 1 cup carrots, grated You need cooked shredded chicken for flavor and texture. BBQ sauce adds a sweet, smoky taste. Use both green and red cabbage for color and crunch. Grated carrots bring a hint of sweetness and extra crunch. - 1/4 cup mayonnaise - 2 tablespoons apple cider vinegar - 1 tablespoon honey - Salt and pepper to taste Make a creamy dressing with mayonnaise. Apple cider vinegar adds a tangy kick. Honey sweetens the mix, balancing the flavors. Don’t forget salt and pepper for seasoning. - 4 large tortillas or wraps - Fresh cilantro, for garnish (optional) Tortillas or wraps hold all the goodness. I like large ones for easy wrapping. Fresh cilantro gives a nice pop of flavor, but it’s optional. To start, take a large bowl. In this bowl, combine 2 cups of cooked shredded chicken and 1 cup of your favorite BBQ sauce. Mix them well. You want to coat the chicken fully with the sauce. This step adds a tasty kick to your chicken. Set this mixture aside while you prepare the coleslaw. Next, grab another bowl to make the coleslaw dressing. Whisk together 1/4 cup of mayonnaise, 2 tablespoons of apple cider vinegar, 1 tablespoon of honey, and a pinch of salt and pepper. Make sure it’s smooth. Now, take 2 cups of finely shredded green cabbage, 1/2 cup of finely shredded red cabbage, and 1 cup of grated carrots. Toss these veggies in the dressing until they are well-coated. This mix gives your wraps a nice crunch. Now it’s time to put everything together. Lay a large tortilla flat on your surface. Spoon a generous amount of the BBQ chicken mixture onto the center of the tortilla. Next, add a handful of the coleslaw on top of the chicken. Roll the tortilla tightly while folding in the sides to create a wrap. Repeat this with the remaining tortillas and fillings. Finally, slice each wrap in half diagonally and arrange them on a platter. If you like, add fresh cilantro on top for a nice touch. Enjoy your BBQ chicken coleslaw wraps! Choosing the right BBQ sauce: Pick a BBQ sauce that you love. Some sauces are sweet, while others are tangy. You can try a smoky flavor for a new twist. Taste the sauce before you add it to your chicken. This way, you know it will be just right. Adjusting spice levels: If you like heat, add some hot sauce or cayenne pepper to the BBQ mix. Start slow and keep tasting. You can always add more spice, but it’s hard to take it out once it’s in. Tips for crunchier coleslaw: For a crunchier coleslaw, cut your cabbage and carrots thin. You can also chill the coleslaw for a bit. This makes it stay crisp and fresh. Use fresh veggies, as they have more crunch. Making ahead for flavor enhancement: You can make the coleslaw a few hours early. This gives time for the flavors to mix. Just keep it in the fridge. When you’re ready, add it to your wraps. Pairing with sides: These wraps go great with chips or pickles. The crunch of chips pairs well with the soft wraps. Pickles add a nice tang and bright flavor. Presentation ideas: To make your wraps look nice, slice them in half diagonally. Place them on a big platter. You can sprinkle fresh cilantro on top for color. This makes your meal more fun and inviting! {{image_2}} You can change the protein in these wraps to suit your taste. Try using turkey instead of chicken. For a plant-based option, tofu works great. You can also swap out the vegetables in the coleslaw. Instead of green cabbage, you can use napa cabbage or kale. For a crunchier bite, add bell peppers or radishes. Want a spicy kick? Add some sliced jalapeños to the coleslaw. You can also try different dressings. A zesty ranch or a tangy vinaigrette can give your wraps a new twist. Consider adding herbs like cilantro or parsley for fresh flavors. For a low-carb meal, use large lettuce leaves instead of tortillas. Romaine or butter lettuce works best for wraps. If you want a healthier choice, try whole grain tortillas. They add fiber and nutrients, making your meal more filling. To store your BBQ chicken coleslaw wraps, wrap them tightly in plastic wrap or foil. This keeps them fresh. Place the wraps in an airtight container. They will last in the fridge for about three days. After this, the wraps may get soggy or lose flavor. You can freeze prepared wraps for later. Wrap each one in plastic wrap, then place them in a freezer bag. They can stay frozen for up to three months. When you're ready to eat, thaw them in the fridge overnight. Reheat in the oven or microwave until warm. For leftover coleslaw, store it in an airtight container in the fridge. It will stay fresh for about five days. To avoid sogginess in wraps, keep the coleslaw separate until serving. This way, your wraps stay crisp and tasty. Yes, you can prep some parts in advance. Cook and shred the chicken a day before. Mix it with BBQ sauce and refrigerate. You can also make the coleslaw a few hours before serving. Just keep it in the fridge. Assemble the wraps right before serving for the best taste. If you want a swap for mayonnaise, try Greek yogurt or avocado. Both add creaminess and a nice flavor. Use equal parts to replace mayonnaise in the dressing. These options are great for those avoiding eggs or looking for healthier choices. Yes, this recipe can be gluten-free. Choose gluten-free tortillas or wraps to avoid gluten. Check labels for BBQ sauce too. Many brands offer gluten-free options, so look for those. Enjoy tasty wraps without worries! You learned how to make tasty BBQ chicken coleslaw wraps. We covered each step, from mixing the chicken and sauce to assembling the perfect wrap. Remember, using fresh ingredients enhances the taste. You can swap flavors or even try different proteins. Store your wraps properly for the best results. Enjoy these wraps as a healthy meal or snack. They are easy to customize for your tastes. Dive in and get creative with your BBQ chicken wraps!
BBQ Chicken Coleslaw Wraps Flavorful and Easy Meal
Looking for a quick and tasty meal? BBQ Chicken Coleslaw Wraps are here to save the day! This easy recipe is packed with flavor and
- 2 pounds flank steak or skirt steak - 1/4 cup olive oil - 3 cloves garlic, minced - Juice of 1 orange - Juice of 1 lime For carne asada, I choose flank or skirt steak. These cuts are tender and full of flavor. The fat in these steaks helps keep the meat juicy while cooking. I always include olive oil, garlic, and the fresh juices from an orange and lime. These ingredients add zest and depth to the dish. - 2 tablespoons soy sauce - 1 tablespoon ground cumin - 1 tablespoon chili powder - 1 tablespoon paprika - 1 teaspoon onion powder - 1 jalapeño, sliced (optional for heat) Next, I add seasonings. Soy sauce adds umami, while cumin and chili powder bring warmth. Paprika gives a subtle smokiness, and onion powder adds a savory note. If you like heat, add a sliced jalapeño for a spicy kick. This mix transforms the steak into something special. - Fresh cilantro, for garnish - Tortillas, for serving - Fresh diced avocados, for topping To serve carne asada, I love using warm tortillas. They cradle the meat perfectly. Topping with fresh diced avocados adds creaminess. A sprinkle of cilantro brings a pop of color and fresh flavor. Together, these elements create a vibrant meal that everyone enjoys. Start by patting the flank steak dry with paper towels. This step helps the meat brown better. After that, season both sides with salt and pepper. This simple seasoning boosts the meat's flavor. In a bowl, combine the olive oil, minced garlic, orange juice, and lime juice. Add soy sauce, ground cumin, chili powder, paprika, and onion powder. Mix well to create a marinade. This blend gives the meat a rich, zesty taste. Place the seasoned steak in the crockpot. Pour the marinade over the meat, ensuring it gets well-coated. For a spicy kick, add sliced jalapeño on top. Cover the crockpot and set it to low. Cook for 6-8 hours. The meat should become tender and easy to shred. Once cooked, remove the steak from the crockpot. Use two forks to shred the meat into pieces. If you like, return the shredded meat to the crockpot. Stir it into the juices for extra flavor. Serve the carne asada in warm tortillas. Top with fresh diced avocado and cilantro for a tasty finishing touch. To boost the taste, marinate the steak for at least two hours. For best results, let it sit overnight. This allows the flavors to soak deep into the meat. You can find great flank or skirt steak at your local butcher. Ask for high-quality cuts, as they will give you the best flavor. If your steak is thicker than two inches, adjust the cooking time. You may need to cook it for 8-10 hours on low. Check the meat's tenderness with a fork. It should shred easily when it's ready. When serving carne asada, warm the tortillas first. This adds a nice touch. Top the meat with fresh cilantro and diced avocados for color and taste. You can also add sliced radishes or diced tomatoes for extra crunch. {{image_2}} To change the spice level, you can try different peppers. Here are a few options: - Jalapeño: Adds a mild heat. Slice it and put it in the crockpot. - Serrano: A bit hotter than jalapeños. Use whole or chopped. - Habanero: Very spicy! Use it sparingly, if at all. You can also use spicy marinades. Look for ones that include chipotles or extra hot sauce. This gives your carne asada a nice kick. If you want to switch proteins, you have great options. You can use chicken or pork instead of beef. - Chicken: Use boneless, skinless thighs for a juicy outcome. - Pork: Pork shoulder is tasty and can be shredded easily. For a meatless option, try mushrooms or jackfruit. They soak up flavors well and give a hearty bite. How you serve carne asada can change the meal. Here are some fun ideas: - Tacos: Warm tortillas filled with carne asada, avocado, and cilantro. - Burritos: Roll up the carne asada with rice and beans for a filling dish. - Rice or Salads: Serve it over rice or mix it into salads for a fresh twist. These variations keep meals exciting and let you enjoy carne asada in new ways. After enjoying your carne asada, let it cool down first. Place it in a shallow container to cool faster. Cover it tightly with a lid or plastic wrap. This keeps the meat fresh and prevents odors from mixing. For the best taste, eat leftovers within three days. For storage containers, glass or plastic with airtight lids work best. They keep the meat moist and flavor intact. Avoid using containers that let air in, as this can dry out your carne asada. To freeze carne asada, make sure it is completely cool. Place it in freezer-safe bags or containers. Remove as much air as possible before sealing. This helps prevent freezer burn and keeps the meat tasty. You can freeze it for up to three months. When you are ready to eat, thaw the carne asada in the fridge overnight. For reheating, you can use a microwave, stovetop, or oven. If using the stovetop, add a little broth or water to keep it moist. Heat until it is warmed through. You can keep refrigerated carne asada for about three to four days. After this time, the quality may decline. Always check for signs of spoilage before eating. Look for changes in smell, texture, or color. If the carne asada smells sour or looks slimy, it is best to throw it away. Keeping an eye on these signs helps ensure you enjoy safe and tasty meals. Carne asada means "grilled meat" in Spanish. This dish comes from Mexico. It features marinated beef, often flank or skirt steak. The meat is grilled to give it a smoky flavor. You can serve it in tacos or burritos. It's a favorite for family gatherings and street food. The marinade usually includes citrus juices, garlic, and spices, making it very tasty. Yes, you can cook carne asada on high heat. However, there are pros and cons. Cooking on high heat saves time. You get a nice sear on the meat. But, the meat may not become as tender. Cooking on low heat lets flavors blend. It also makes the meat juicy and easy to shred. I recommend low heat for the best taste. You can tell when carne asada is done by checking its tenderness. When the meat pulls apart easily using a fork, it is ready. The internal temperature should be around 145°F for medium-rare. If you like it more done, aim for 160°F. Look for a nice brown color and juicy texture. Many sides pair well with carne asada. Here are some popular choices: - Rice - Beans - Grilled vegetables - Corn tortillas - Fresh salsa - Guacamole - Cilantro These sides add flavor and contrast to the meat. They also create a well-rounded meal. Yes, you can make carne asada without a crockpot. You can grill it on a barbecue or stovetop. The key is to marinate the meat first. You can also use a slow cooker or an oven. For grilling, cook over medium-high heat for about 5-7 minutes per side. For the oven, bake at 350°F for about 25-30 minutes. Each method gives a unique taste. Carne asada is a rich dish that combines bold flavors and tender meat. We covered key ingredients, seasoning tips, and step-by-step cooking methods. With options for spice levels and protein choices, you can easily make it your own. Remember to store leftovers properly for the best taste later. This dish is versatile and can be enjoyed in many forms, like tacos or burritos. Enjoy your cooking and savor the delicious results!
Carne Asada Crockpot Recipe for Flavorful Meals
Ready to elevate your meals? This Carne Asada Crockpot Recipe makes it easy to enjoy rich flavors with minimal effort. I’ll guide you through all
- 1 lb ground turkey or beef - 1 large onion, diced - 2 cloves garlic, minced - 1 bell pepper (any color), diced - 1 can (14.5 oz) diced tomatoes, undrained - 1 can (15 oz) black beans, rinsed and drained - 1 can (15 oz) kidney beans, rinsed and drained - 1 can (8 oz) tomato sauce - 2 tablespoons chili powder - 1 tablespoon ground cumin - 1 teaspoon smoked paprika - 1 teaspoon oregano - 1 cup corn kernels (fresh or frozen) - Salt and pepper to taste - Fresh cilantro for garnish To make the best crockpot chili, start with the right ingredients. Ground turkey or beef gives a hearty base. I love using onion, garlic, and bell pepper for great flavor. The beans are key; I use black beans and kidney beans for texture. Diced tomatoes add juiciness, while tomato sauce brings it all together. Spices like chili powder, cumin, smoked paprika, and oregano create depth. I like to add corn for sweetness. Lastly, don't forget salt and pepper to enhance all the flavors. Fresh cilantro on top makes it look nice and taste fresh. This blend of ingredients makes a rich, tasty chili that warms the soul. You can customize it based on what you have at home. Enjoy your cooking! 1. Cooking ground meat In a skillet, heat it on medium. Add 1 lb of ground turkey or beef. Cook until it turns brown. Break it apart with a spatula as it cooks. Once done, drain any extra grease. This step adds a nice flavor. 2. Preparing vegetables Dice up 1 large onion, 1 bell pepper, and mince 2 cloves of garlic. The fresh veggies give a great taste to the chili. 3. Adding ingredients to the crockpot Transfer the cooked meat to the crockpot. Toss in the diced onion, minced garlic, and bell pepper. Next, pour in 1 can of diced tomatoes and 1 can each of black and kidney beans. Don’t forget 1 can of tomato sauce! Add 1 cup of corn kernels for a sweet crunch. 1. Cooking times: low vs. high settings Cover the crockpot. If you want a slow cook, set it on low for 6-8 hours. For a quicker meal, use the high setting for 3-4 hours. 2. Stirring and seasoning adjustments Stir the chili occasionally. This helps mix all the flavors. Before serving, taste it. Adjust the salt and pepper to your liking. It’s all about making it perfect for you! To boost the flavor, you can adjust seasonings. Use more chili powder for heat or add a splash of lime juice for brightness. I like to brown the meat in a skillet first. This step adds depth and a nice crust. Cook it until it is browned, then drain any grease. This makes the chili taste richer. If you want to make it meat-free, swap ground meat with lentils or mushrooms. Both add great taste and texture. You can also use veggie broth instead of tomato sauce for extra flavor. To enhance flavors, add smoked paprika and a dash of soy sauce. It brings out the umami in the dish. Don't forget to use fresh herbs like cilantro to brighten it up! {{image_2}} You can make chili in many ways. Beef chili uses ground beef. Turkey chili uses ground turkey. Both are tasty, but they have different flavors. Ground turkey is leaner and has less fat. Beef has a richer taste. You can choose based on your health needs or preferences. Vegetarian chili is also a great option. You can use beans, lentils, or chickpeas instead of meat. These add protein and fiber. You can mix in more vegetables like zucchini or bell peppers. This makes the chili hearty and filling. Get creative by adding unique ingredients. Sweet potatoes add a touch of sweetness and creaminess. Jalapeños give it a spicy kick. You can also try corn for sweetness and texture. Each addition can change the flavor and make it your own. Adjusting the spice level is easy. If you want more heat, add extra chili powder or cayenne pepper. You can also use fresh jalapeños. Adding them early in the cooking process makes the heat blend in well. For more flavor, try smoked paprika. If you prefer a milder chili, use less chili powder. You can also add more beans and corn to balance the heat. Creamy toppings like sour cream or avocado can help cool it down. Both options make your chili just the way you like it. To keep your chili fresh, put it in an airtight container. This way, it stays tasty for up to four days in the fridge. Make sure it cools down first before you seal it. If you want to save it longer, freezing is a great option. Divide the chili into portions and use freezer-safe bags or containers. Label the bags with the date. Frozen chili can last up to three months. When you’re ready to eat it, just pull it out and let it thaw in the fridge overnight. When it’s time to enjoy your leftovers, you can reheat them in a few easy ways. For the microwave, put the chili in a bowl and cover it with a microwave-safe lid. Heat it for about two to three minutes, stirring halfway through. If you prefer the stovetop, pour the chili into a pot. Heat it over medium heat for about 5 to 10 minutes. Stir it often to keep it from sticking. Always check the temperature before serving. Enjoy that warm, hearty flavor once again! Can I substitute ground turkey with another protein? Yes, you can. Ground beef, chicken, or even plant-based proteins work well. Each option brings its own flavor, so choose what you like best. How long can I store leftover chili in the fridge? You can keep leftover chili in the fridge for about 3 to 4 days. Make sure to store it in an airtight container to keep it fresh. What can I serve with crockpot chili? Great sides for chili include cornbread, tortilla chips, or a fresh salad. You can also top it with cheese, sour cream, or avocado for extra flavor. How to thicken chili if it's too watery? If your chili is too watery, try adding a bit more tomato sauce or some cornmeal. You can also let it cook longer with the lid off to reduce the liquid. Can I make chili in the instant pot instead of a crockpot? Absolutely! Just follow the same steps, but cook it on high pressure for about 20 minutes. This saves time but still gives you that rich, hearty flavor. You now have a full guide to make the best crockpot chili. From choosing key ingredients like meat, beans, and spices to step-by-step cooking instructions, this post equips you for success. Remember, you can make chili your own by trying different flavors and adjusting the spice levels. Storing and reheating leftovers is simple, ensuring you enjoy this dish for days. With these tips, you can impress friends and family with your cooking skills. Enjoy your chili adventure!
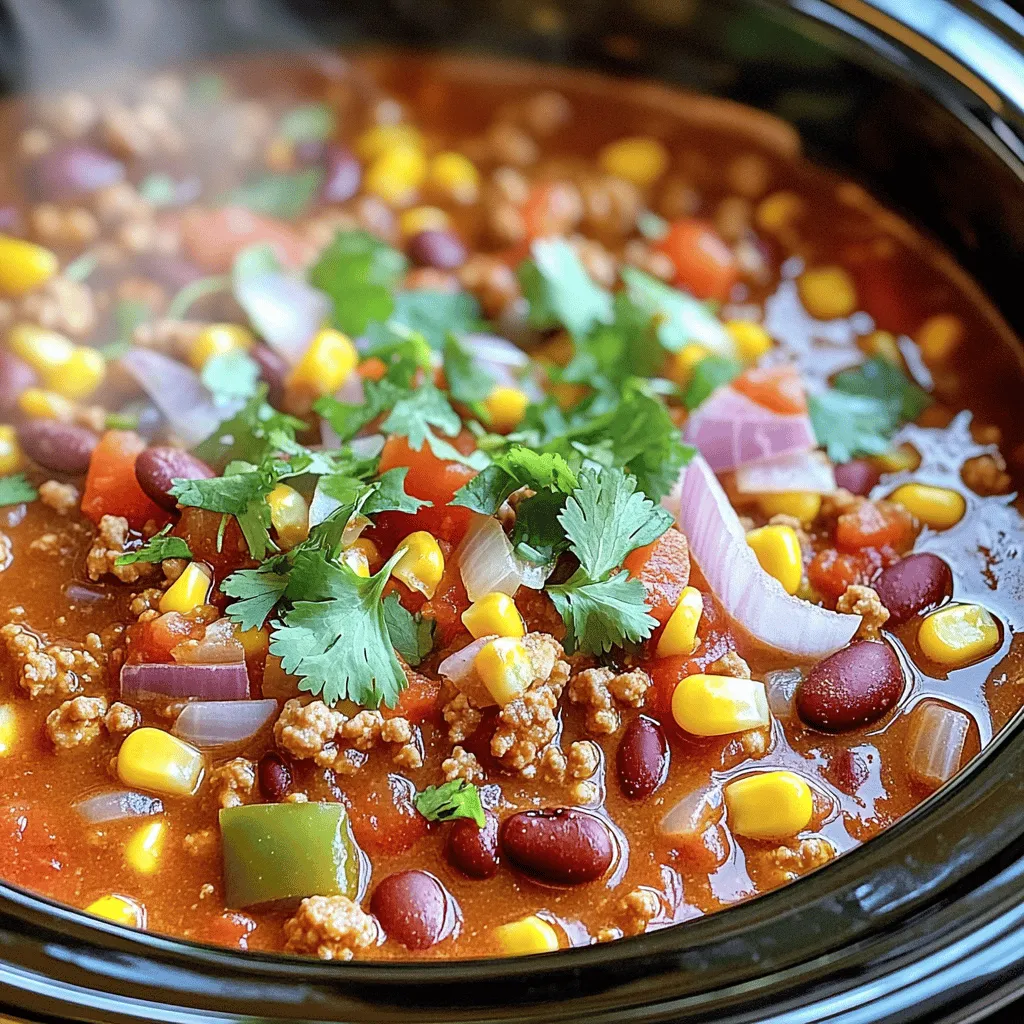
Best Crockpot Chili Hearty Flavorful Comfort Food
Craving a cozy meal that warms you from the inside out? You’ll love my Best Crockpot Chili recipe! Packed with hearty ingredients like ground meat,