Dinner
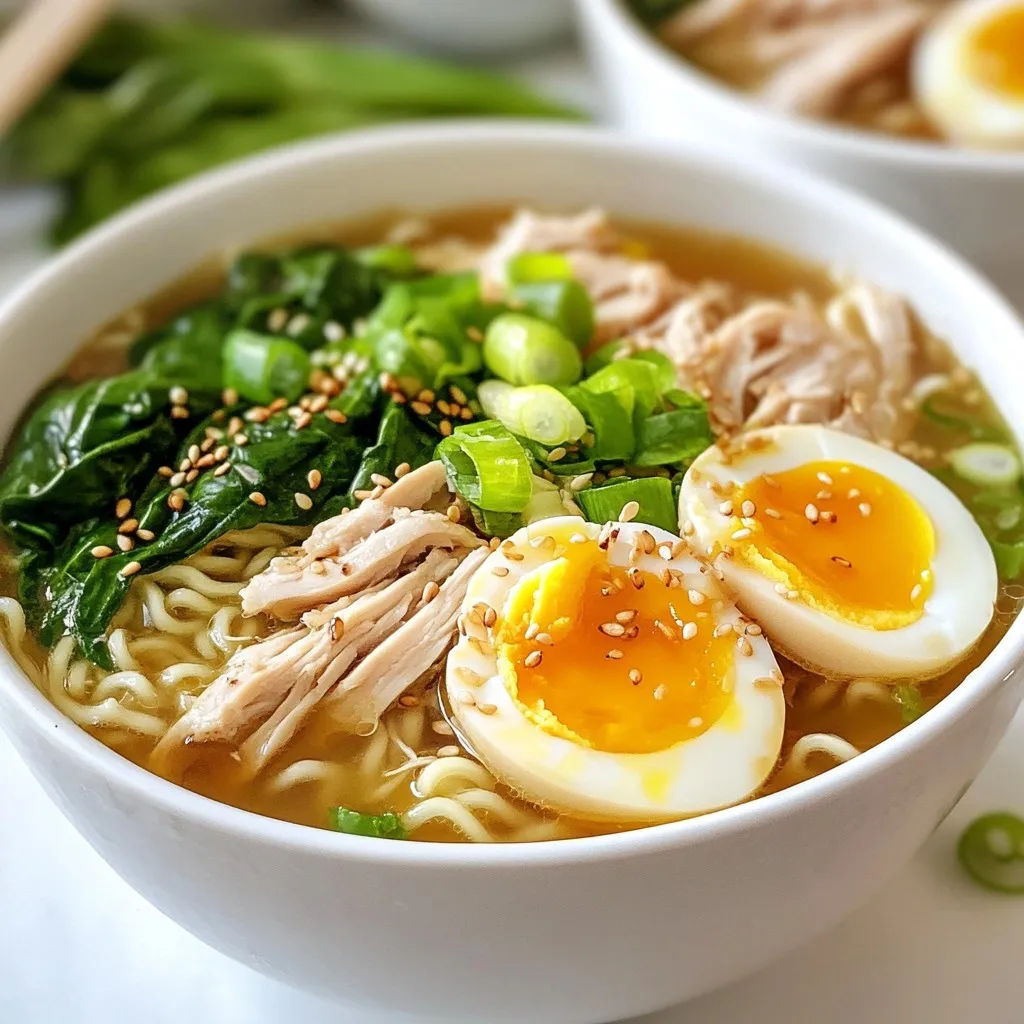
Easy Chicken Ramen Simple Dish for Busy Nights
Looking for a quick and tasty meal? My Easy Chicken Ramen is just what you need for those busy nights! With simple ingredients like chicken
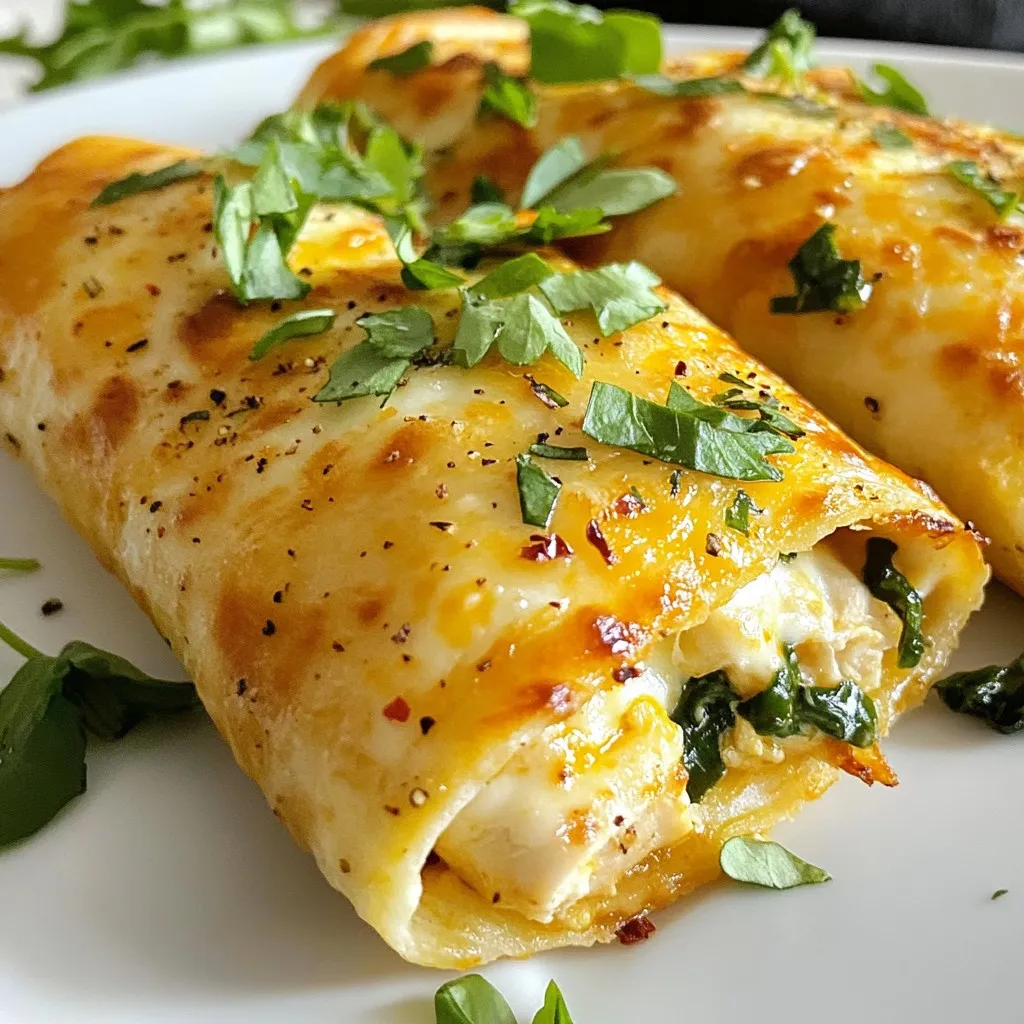
Cheesy Garlic Chicken Wraps Simple Flavorful Dish
Are you ready to make a tasty meal with little effort? My Cheesy Garlic Chicken Wraps combine savory flavors and crispy textures in a fun,
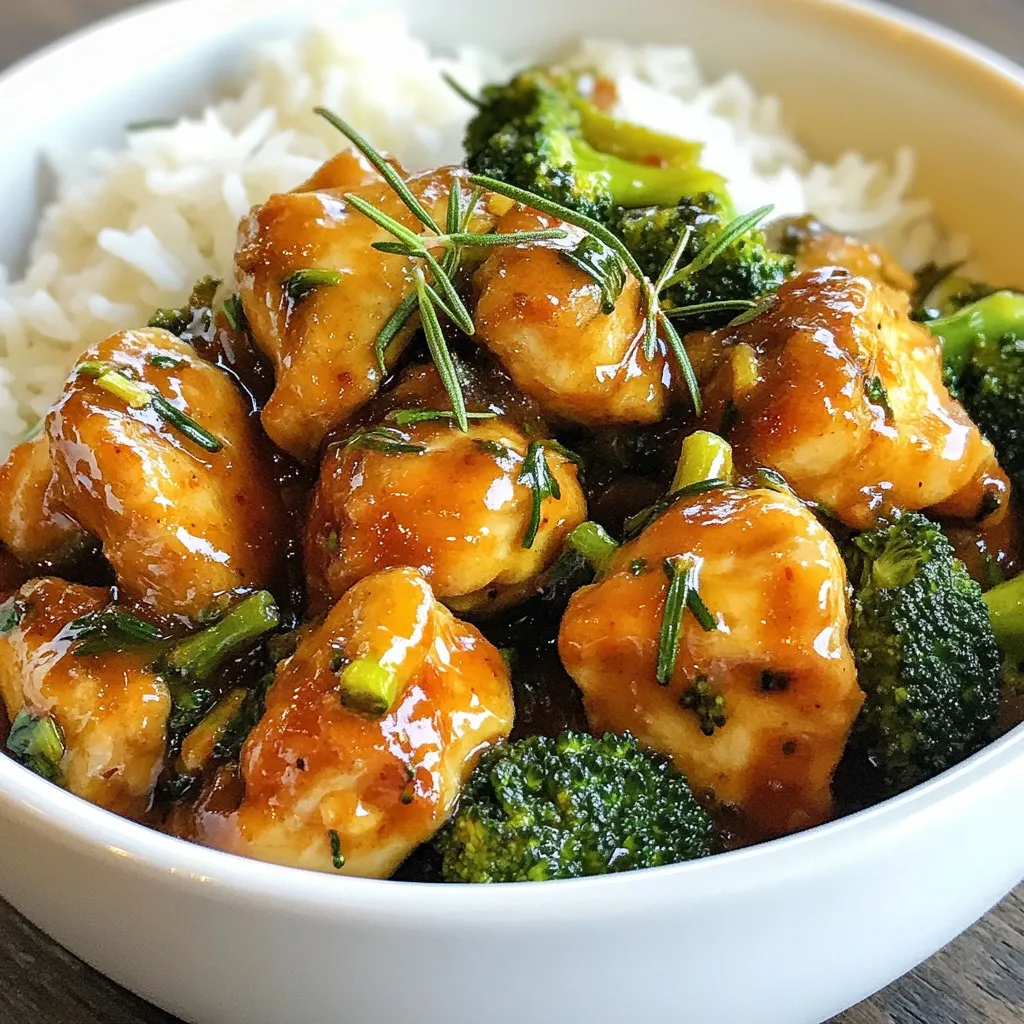
Garlic Butter Chicken & Broccoli Flavorful Dinner Dish
Looking for a quick, tasty dinner? Garlic Butter Chicken & Broccoli is your answer! This dish combines juicy chicken, fresh broccoli, and a rich garlic
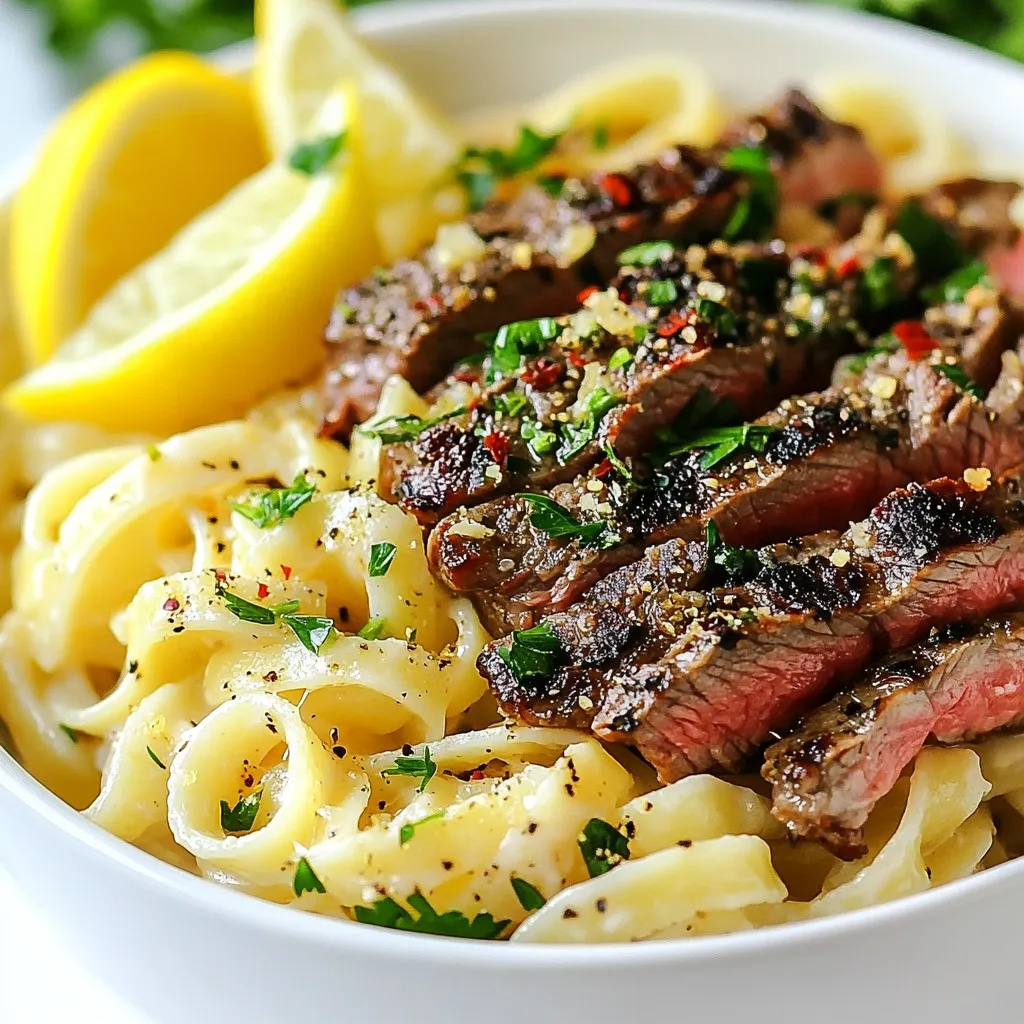
Cowboy Butter Steak Linguine Flavorful Pasta Delight
If you’re craving a pasta dish that’s rich, savory, and downright delicious, you need to try Cowboy Butter Steak Linguine! This dish pairs tender ribeye
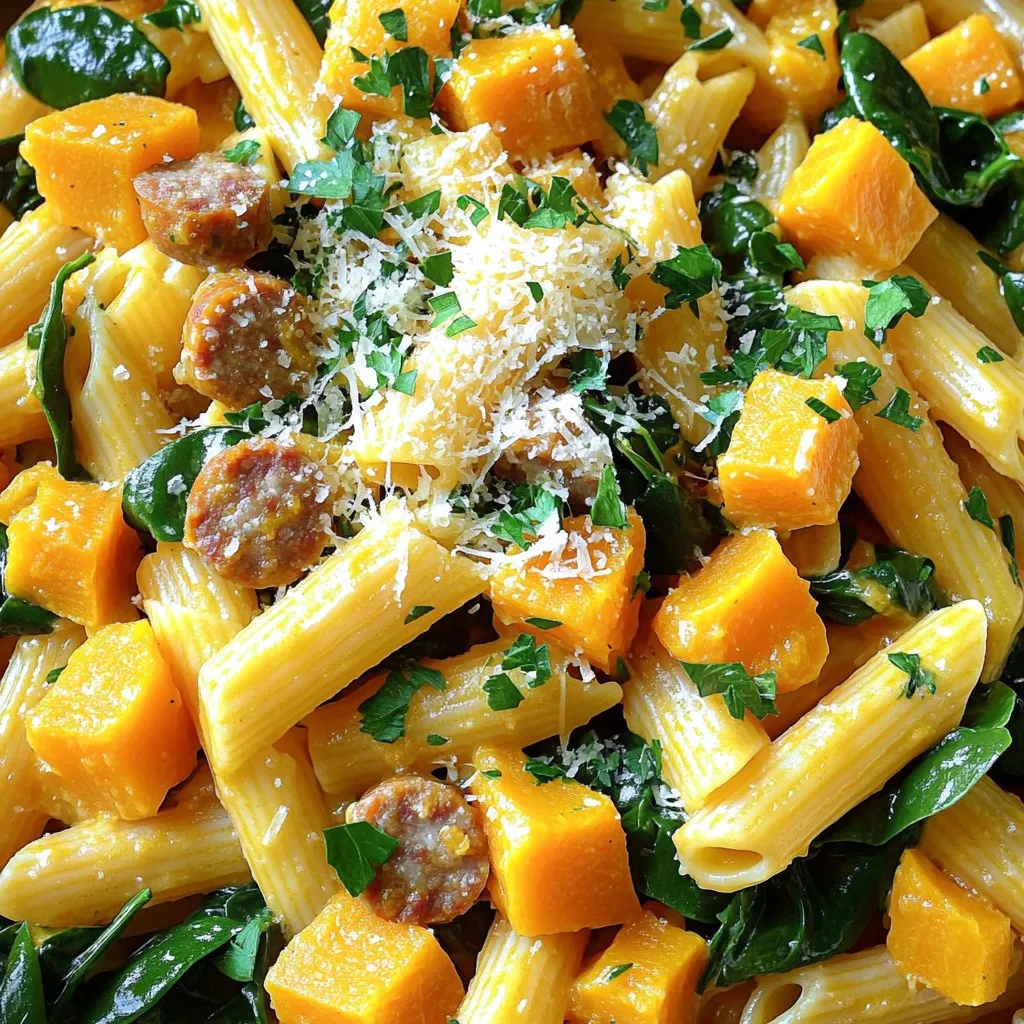
Autumn Sausage Squash Pasta Delightful and Simple Meal
Fall flavors shine in this Autumn Sausage Squash Pasta. You’ll love how simply you can combine hearty Italian sausage with roasted butternut squash for a

Copycat Grilled Cheese Burrito Delightful and Easy Recipe
Are you ready to take your grilled cheese game to a whole new level? With my Copycat Grilled Cheese Burrito, you’ll enjoy gooey cheese, flavorful
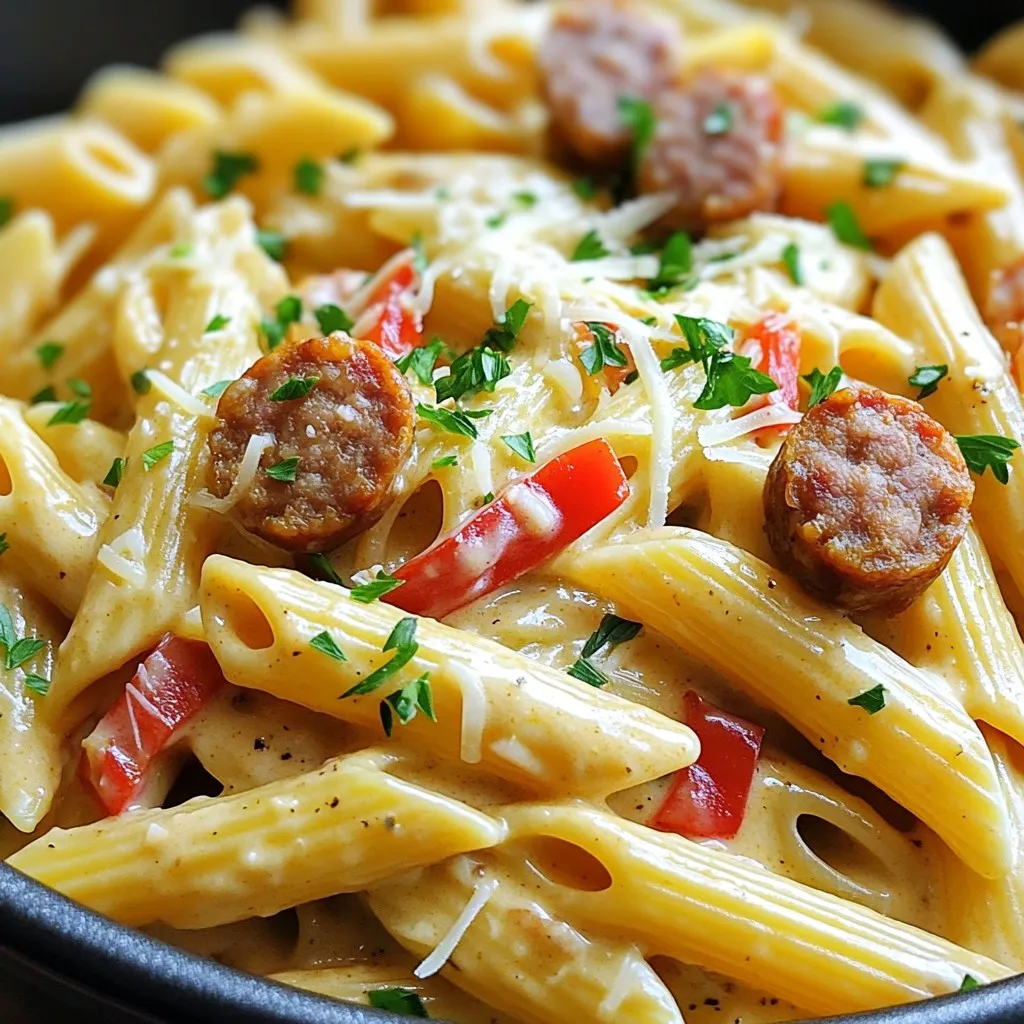
One Pot Creamy Cajun Sausage Pasta Quick Delight
Looking for a tasty meal that comes together in one pot? You’re in for a treat! My One Pot Creamy Cajun Sausage Pasta is the

Savory Slow Cooker Chicken Tortellini Delight
If you’re on the hunt for a warm, comforting meal, my Savory Slow Cooker Chicken Tortellini Delight is here for you! Packed with tender chicken,
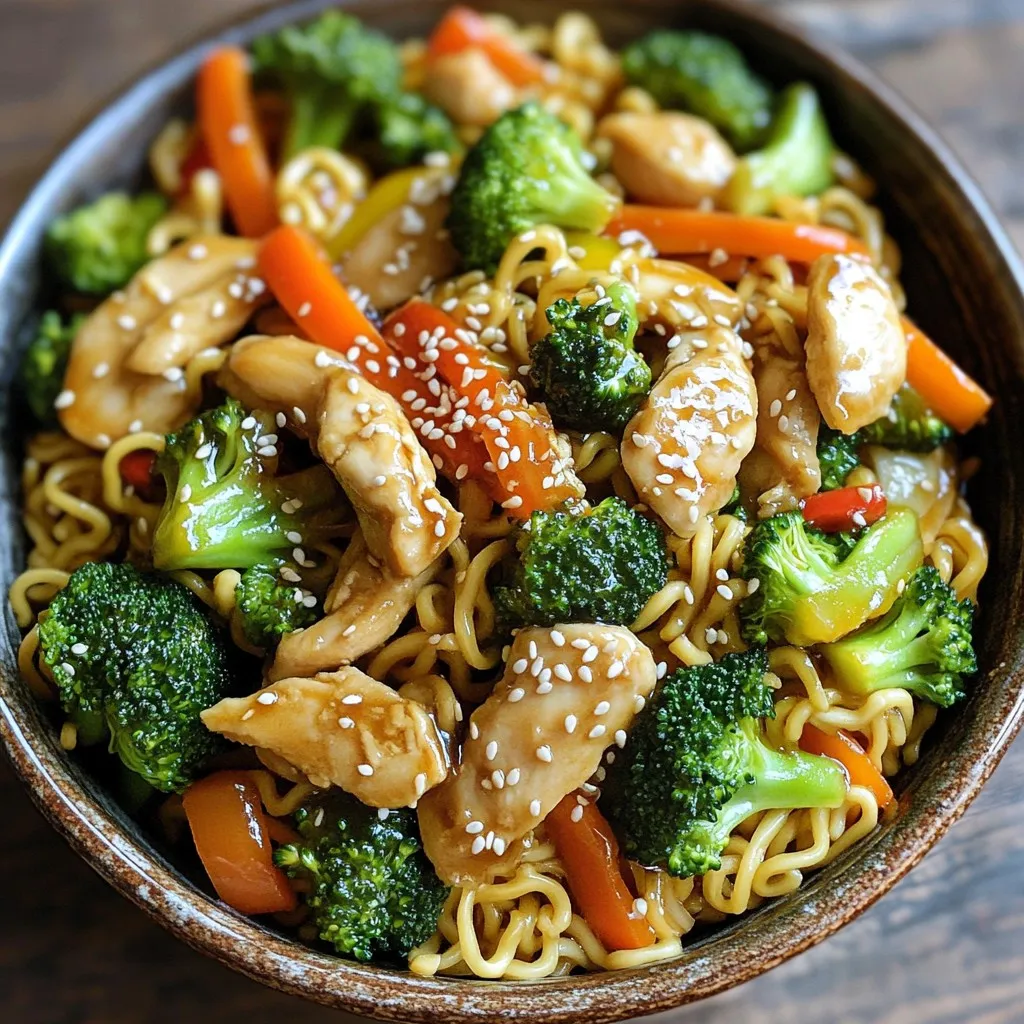
Chicken Ramen Stir Fry Quick and Flavorful Meal
Looking for a quick and tasty meal? Try my Chicken Ramen Stir Fry! This recipe is simple and filled with flavor. You can whip it
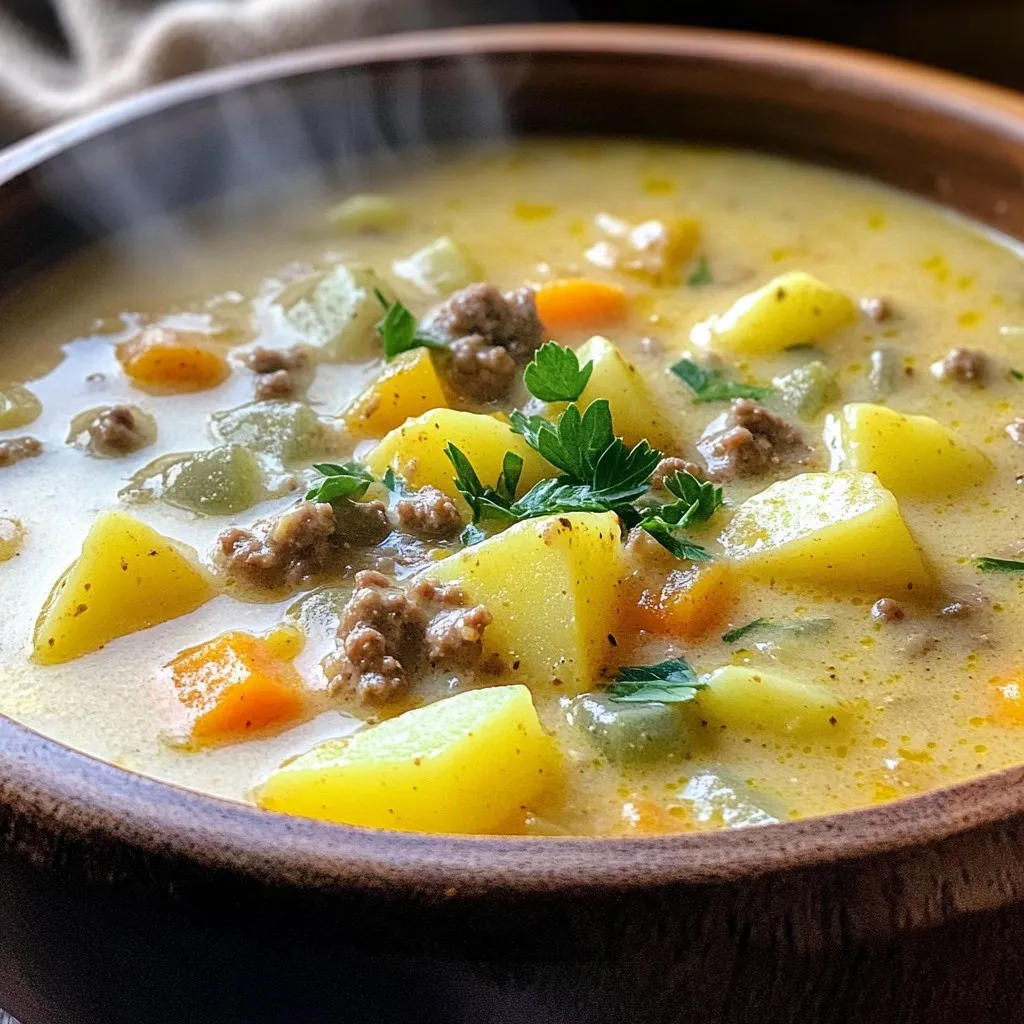
Creamy Hamburger Potato Soup Simple and Satisfying
Looking for a hearty dish that warms you from the inside out? Look no further! My Creamy Hamburger Potato Soup is simple to make and