Dinner
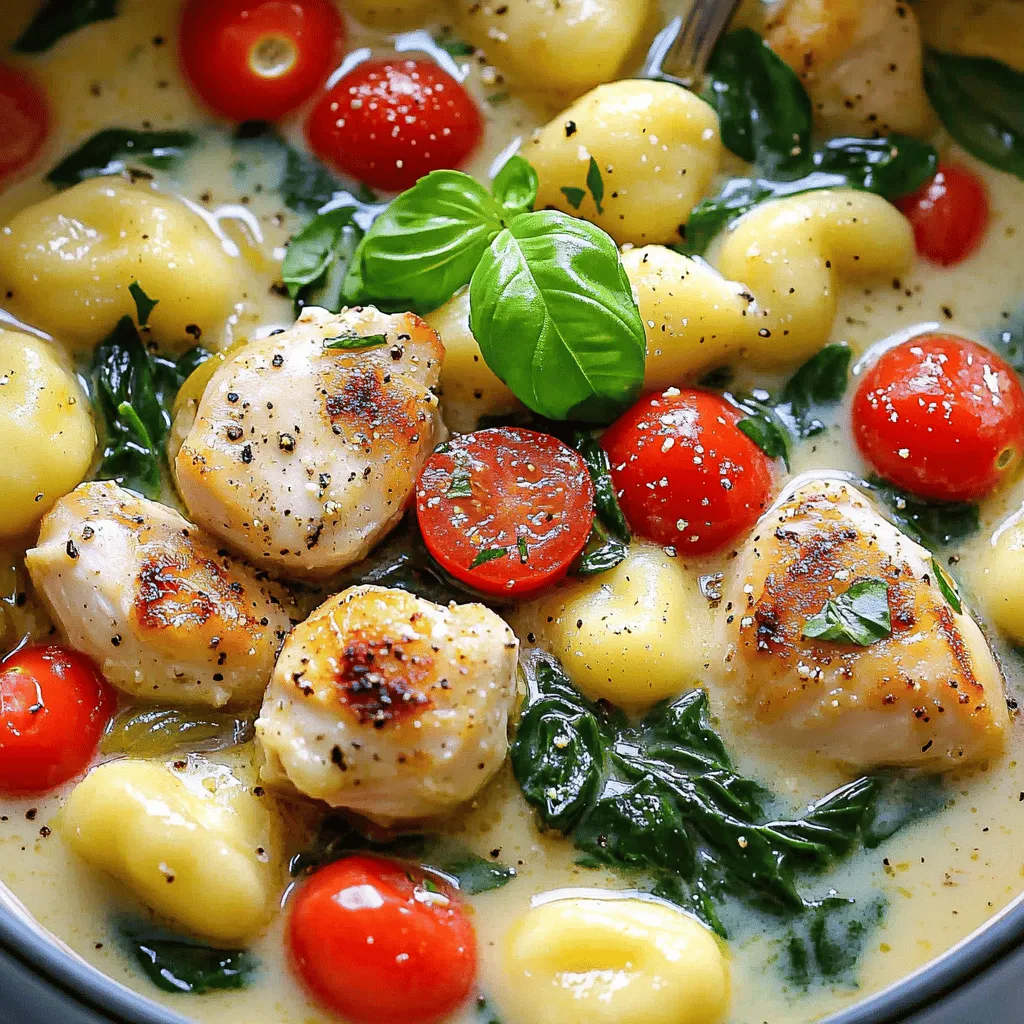
One Pot Tuscan Chicken Gnocchi Easy and Tasty Meal
Craving a simple yet delicious meal? One Pot Tuscan Chicken Gnocchi is here to save your dinner night! This easy recipe combines tender chicken, pillowy
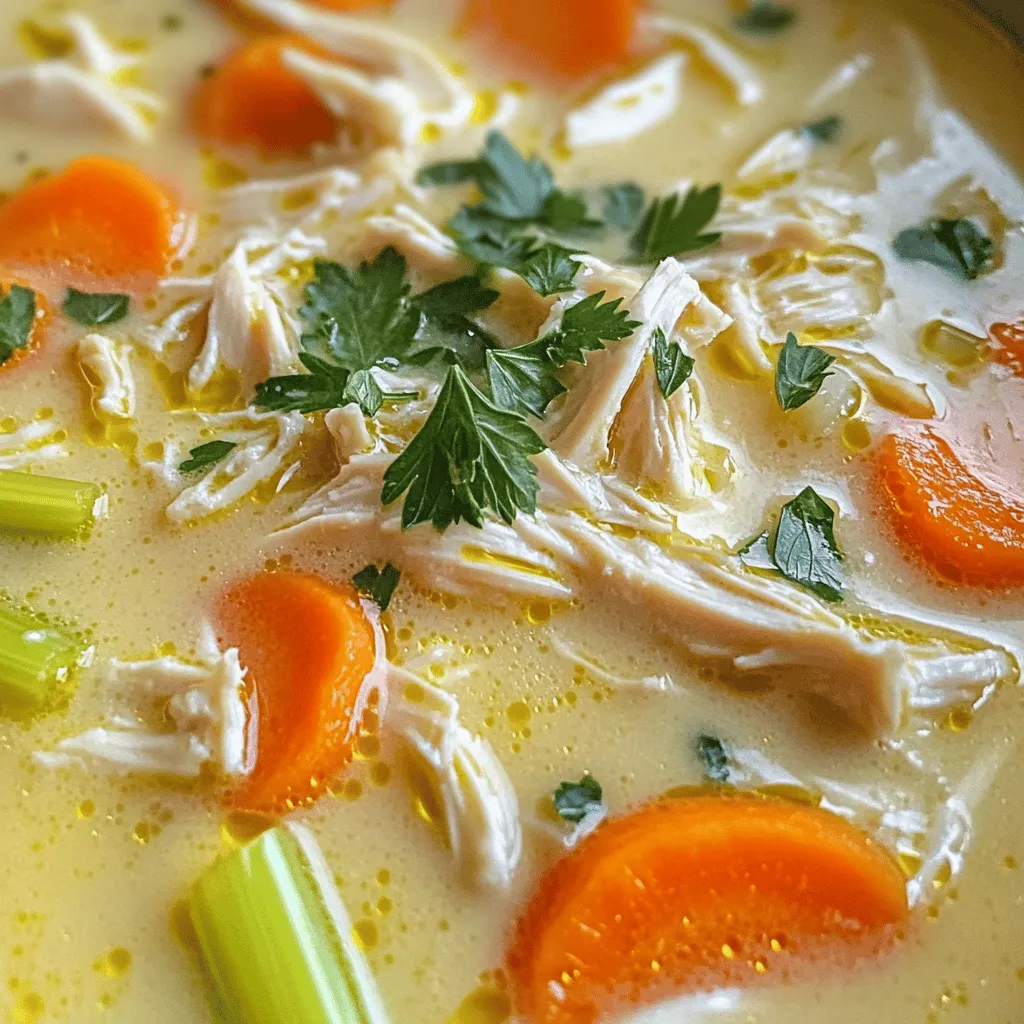
Creamy Marry Me Chicken Soup Divine Comfort Dish
If you’re searching for the ultimate comfort food, I’ve got just the dish—Creamy Marry Me Chicken Soup. This soup promises warmth and happiness in every
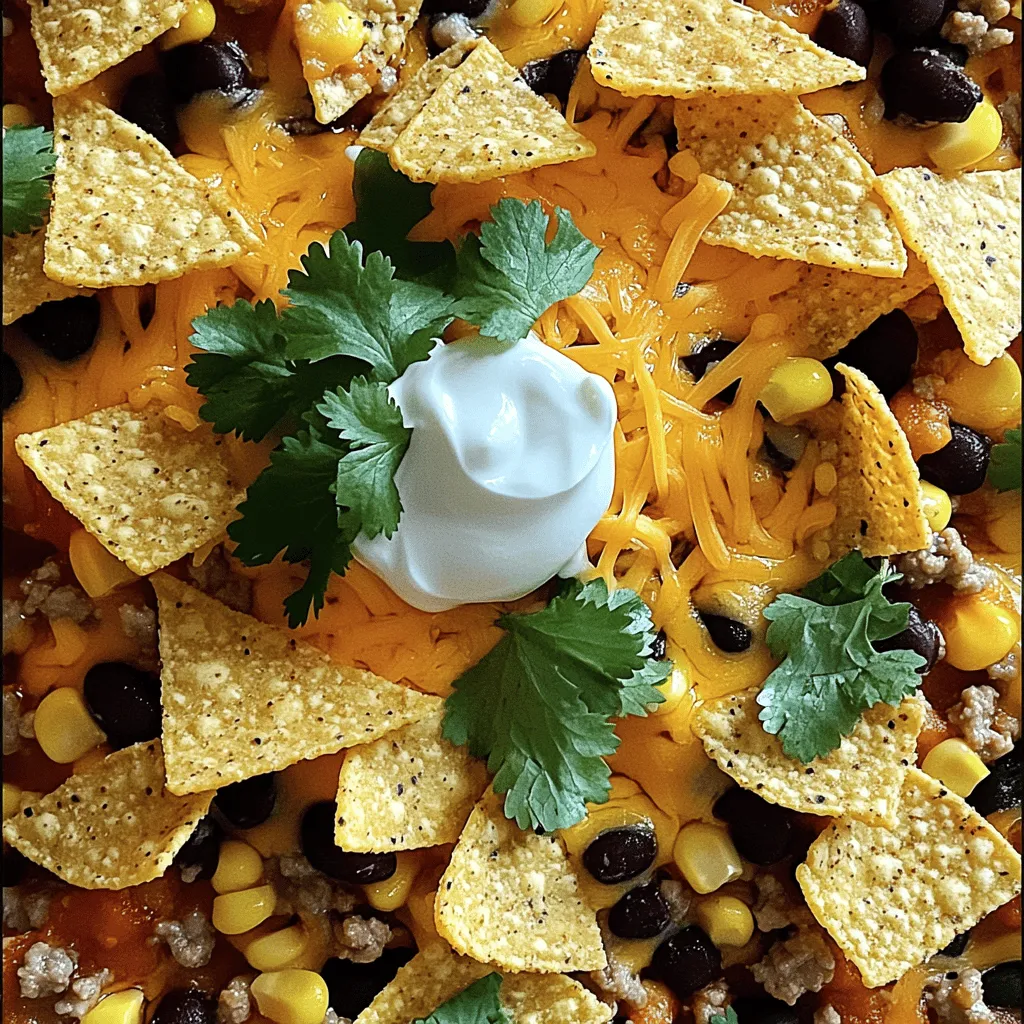
Crockpot Taco Casserole Easy Family Dinner Recipe
Looking for an easy family dinner that everyone will love? Look no further than this Crockpot Taco Casserole! It’s packed with bold flavors from ground
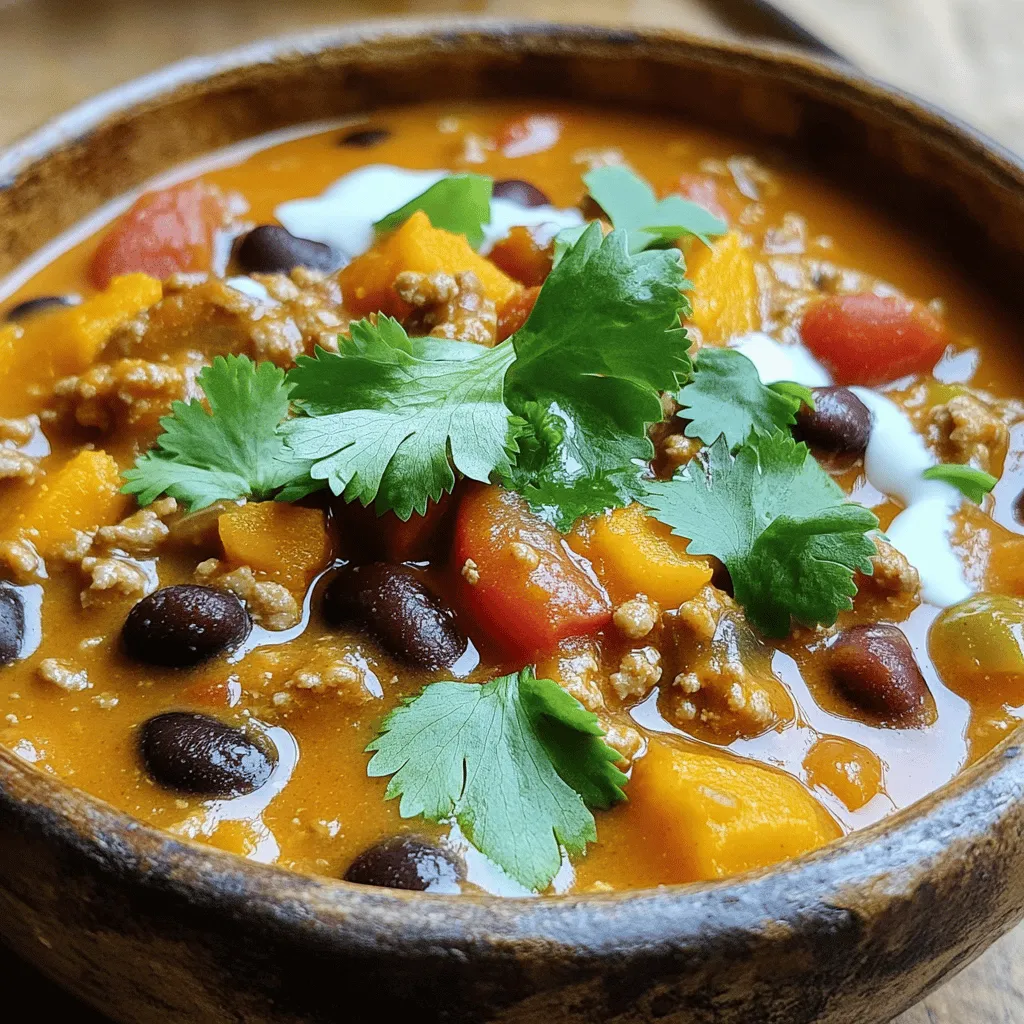
Creamy Turkey Pumpkin Chili Satisfying Comfort Dish
Warm your soul with my Creamy Turkey Pumpkin Chili, a dish that’s packed with flavor and comfort. This recipe is not just another chili; it’s

One-Pot Creamy Tuscan Chicken Pasta Delight
Craving a warm, creamy dish that’s bursting with flavor? I’ve got just the thing! My One-Pot Creamy Tuscan Chicken Pasta combines tender chicken, savory vegetables,
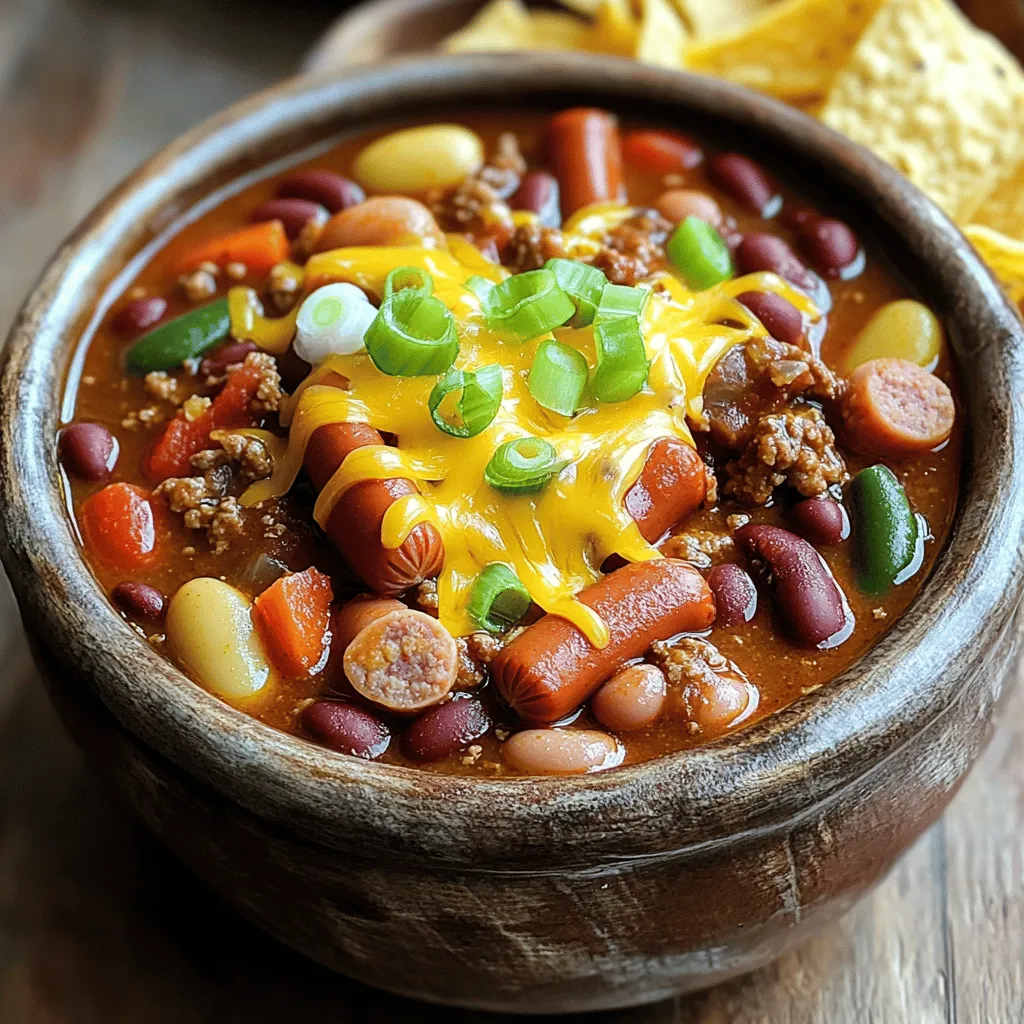
Rich Hot Dog Chili Flavorful and Hearty Recipe
If you love a hearty meal, you’ll savor my Rich Hot Dog Chili recipe. It’s packed with flavor and easy to make from scratch! This
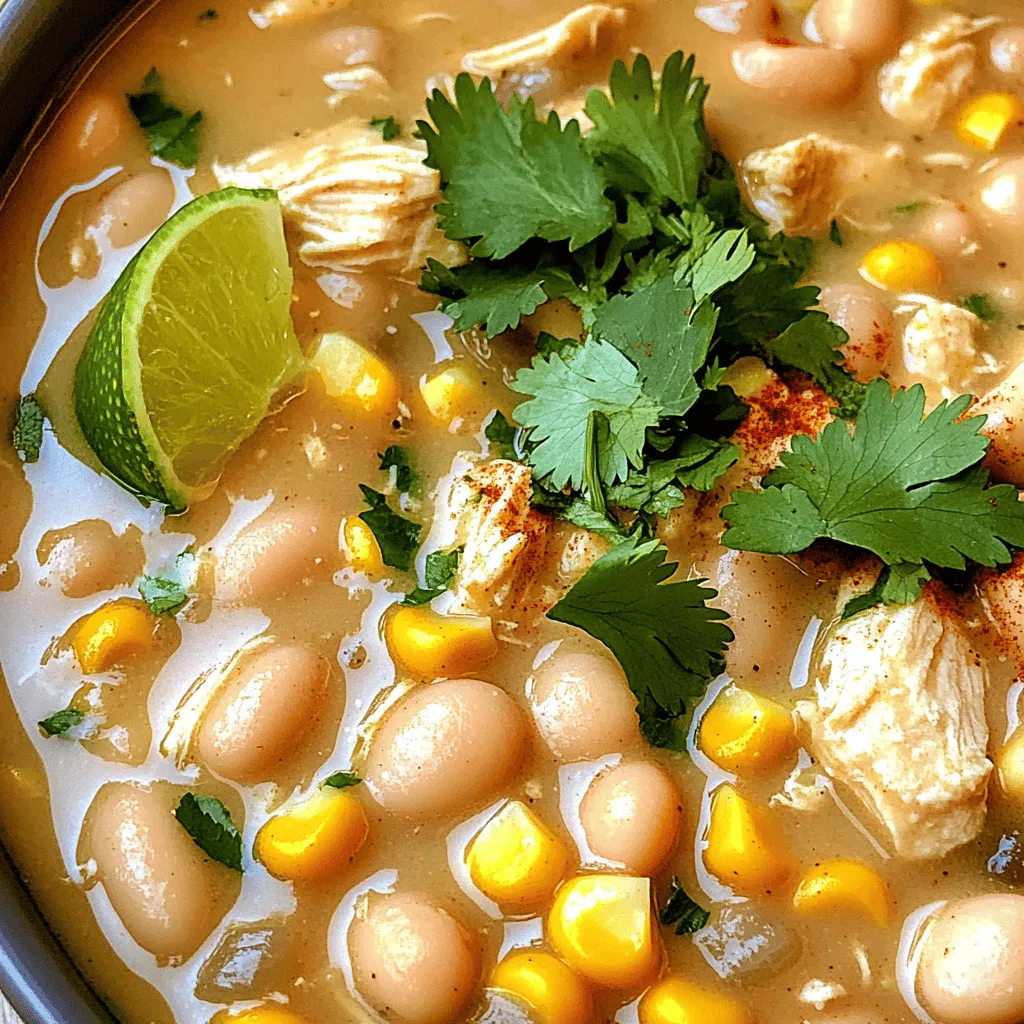
Creamy White Chicken Chili Easy and Flavorful Recipe
Looking for a warm and cozy meal? My Creamy White Chicken Chili is your answer! This easy and flavorful recipe combines tender chicken, hearty beans,
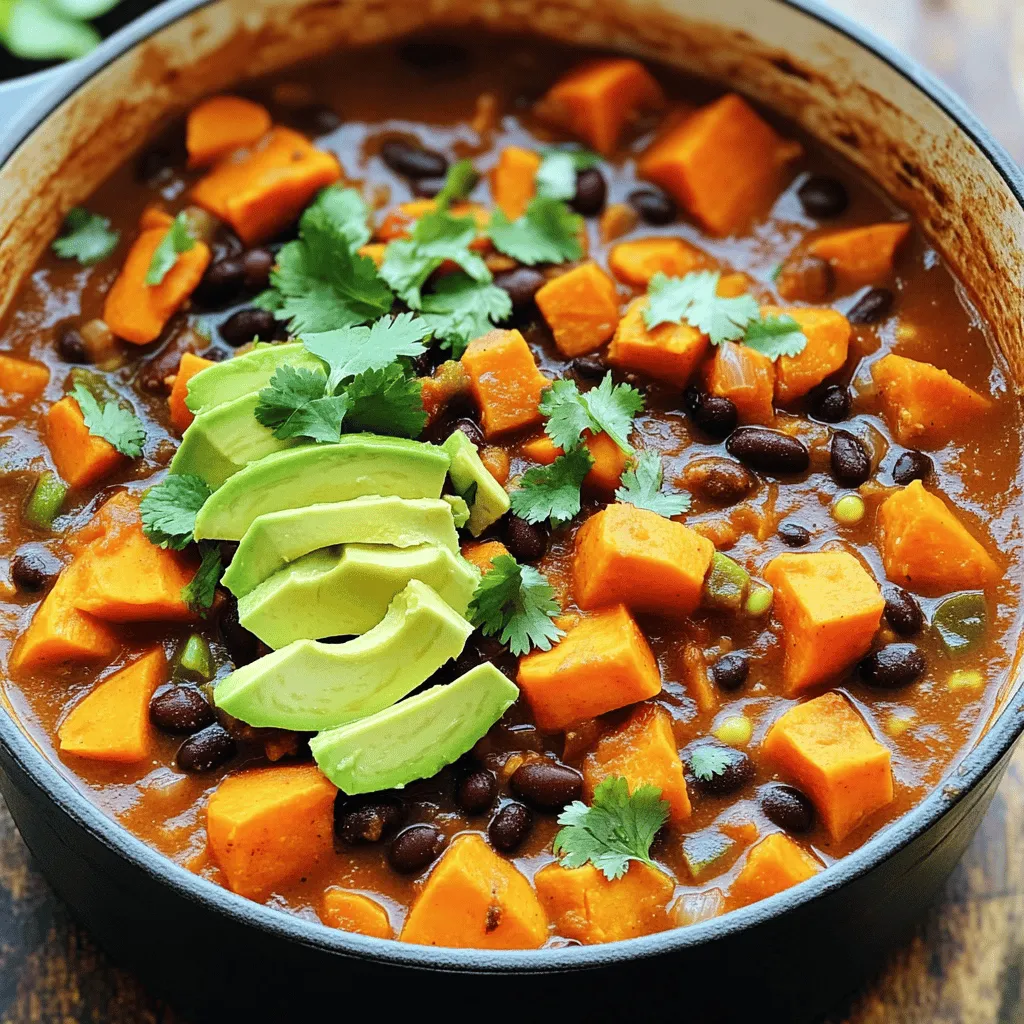
Healthy Sweet Potato Turkey Chili Flavorful and Easy
Looking for a hearty dish that’s both tasty and healthy? My Healthy Sweet Potato Turkey Chili is just what you need! With ground turkey, sweet
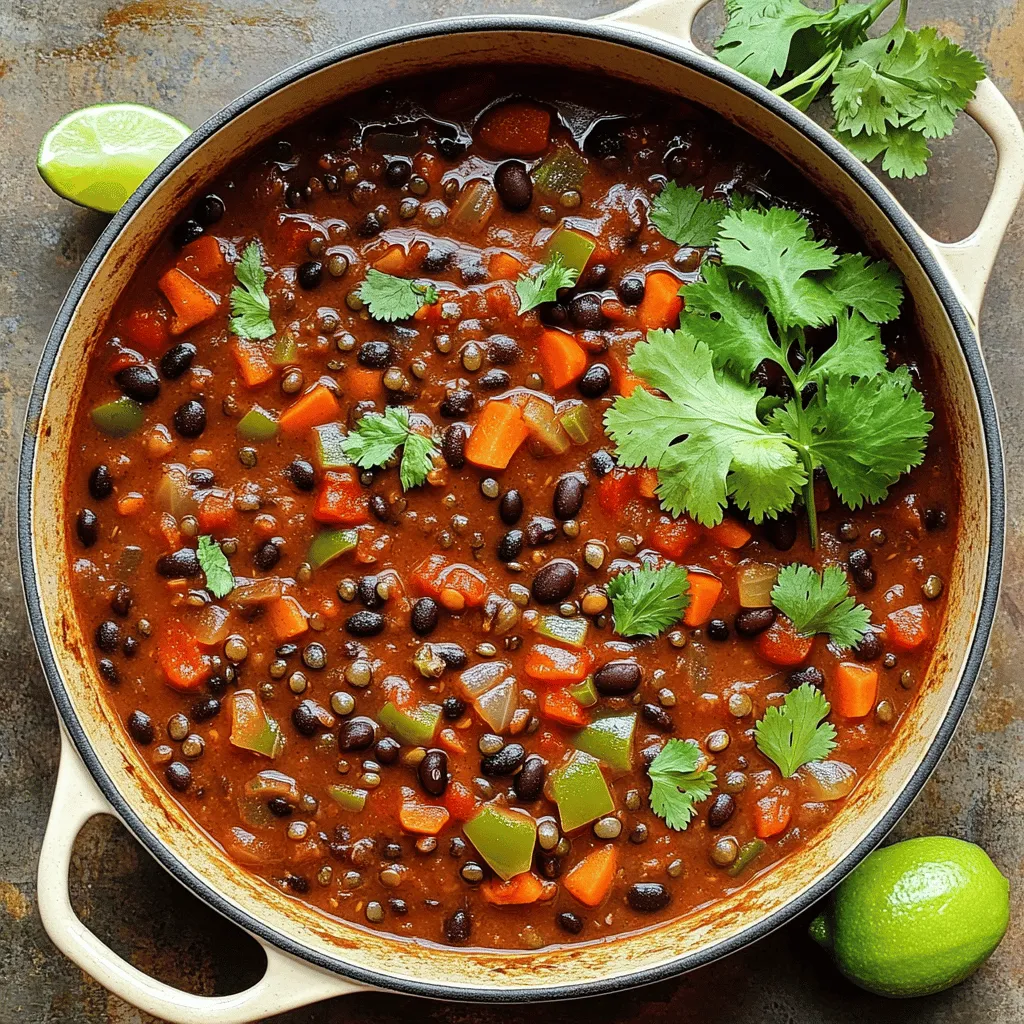
Vegan Black Bean & Lentil Chili Flavorful and Simple Recipe
Are you ready to enjoy a warm bowl of Vegan Black Bean & Lentil Chili that packs a punch of flavor? This recipe is not
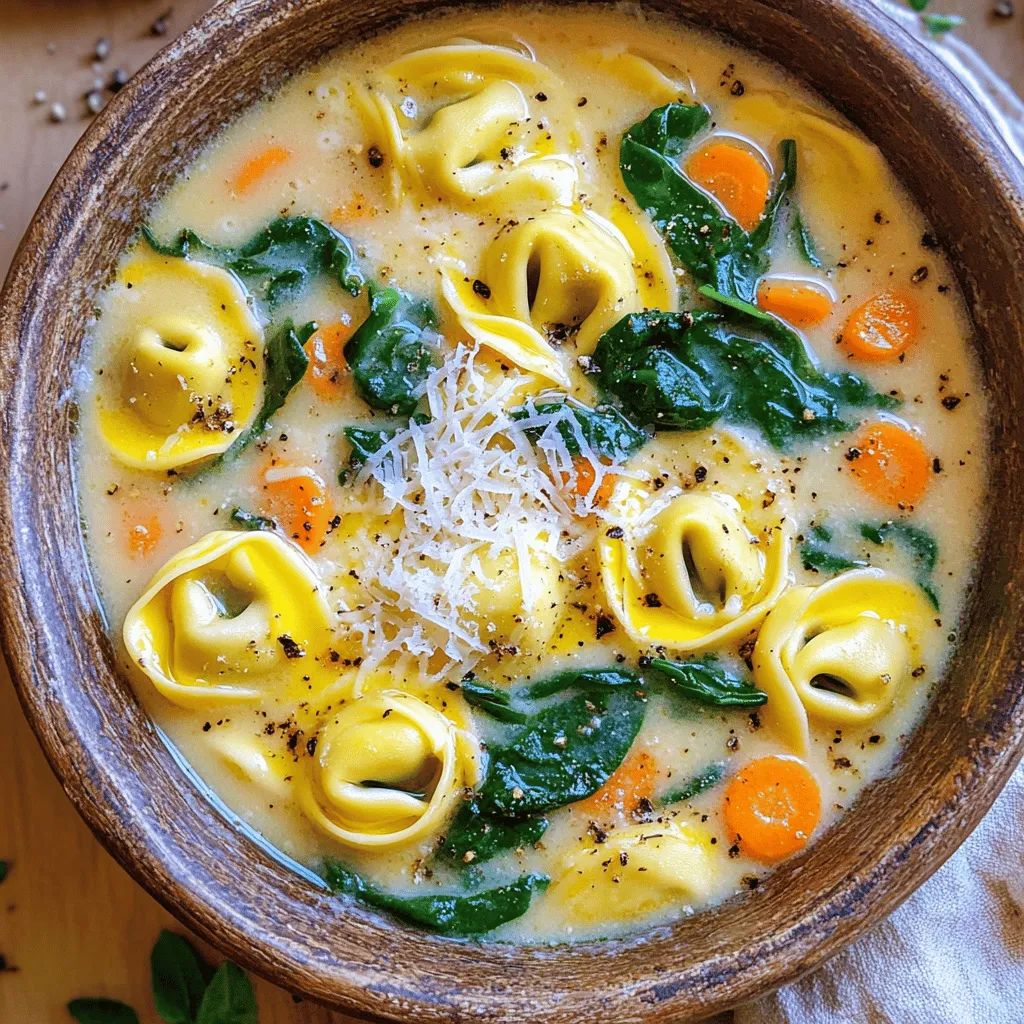
Minute Creamy Tortellini Soup Quick and Easy Recipe
Looking for a quick and tasty dinner? My Minute Creamy Tortellini Soup is the answer! You can make this delicious soup in no time with