Dinner
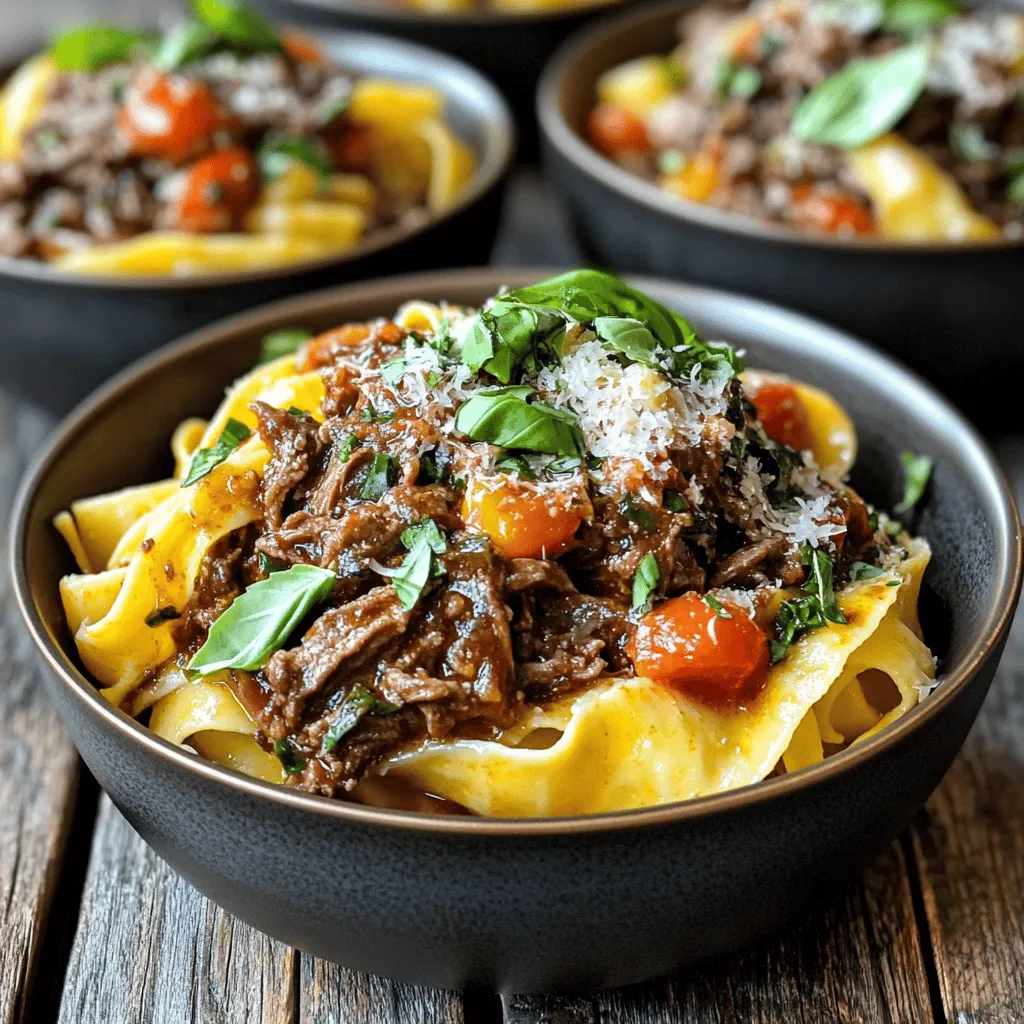
Balsamic Beef Ragu Slow Cooker Delicious Meal Guide
Looking for a hearty and flavorful meal that requires minimal effort? This Balsamic Beef Ragu Slow Cooker guide will walk you through each simple step.

Sheet Pan Chicken Kabobs Flavorful and Easy Meal
Ready to whip up a delicious meal with minimal cleanup? My Sheet Pan Chicken Kabobs are not only flavorful but also easy to make! With

Creamy Tuscan Chicken Soup Flavorful Comfort Food
Warm your soul with a bowl of Creamy Tuscan Chicken Soup! This dish combines tender chicken, fresh veggies, and rich cream for the perfect comfort
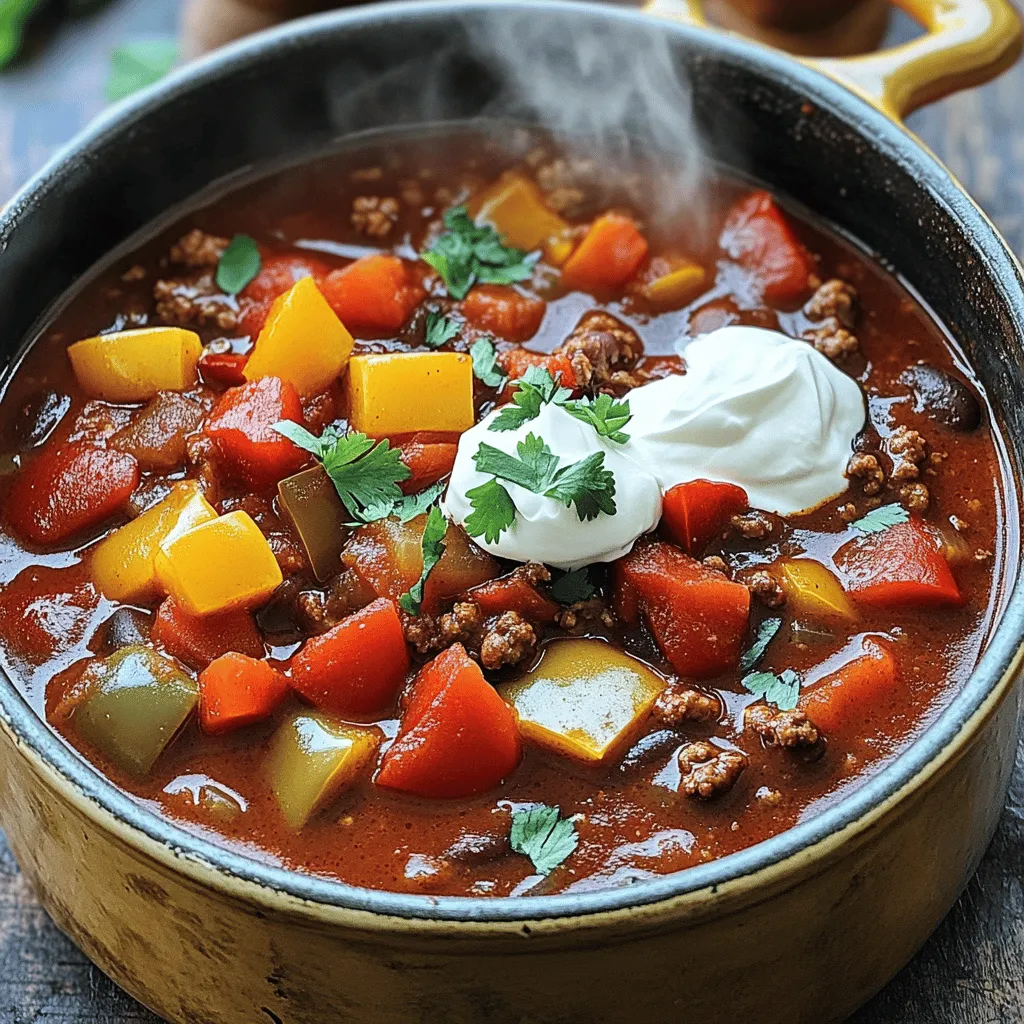
Classic Chili Flavorful Comfort in a Bowl
Looking for a warm, hearty meal that hits the spot? Classic chili delivers flavorful comfort in every bite! This dish combines rich ground beef (or

Loaded Potato Soup Rich and Creamy Comfort Dish
If you crave a warm, hearty meal, loaded potato soup is your answer. This rich and creamy dish combines simple ingredients to create amazing flavor.

Sweet & Sour Chicken Flavorful and Easy Recipe Guide
Are you ready to enjoy a tasty dish that’s both easy and fun to make? This Sweet & Sour Chicken recipe will become a family
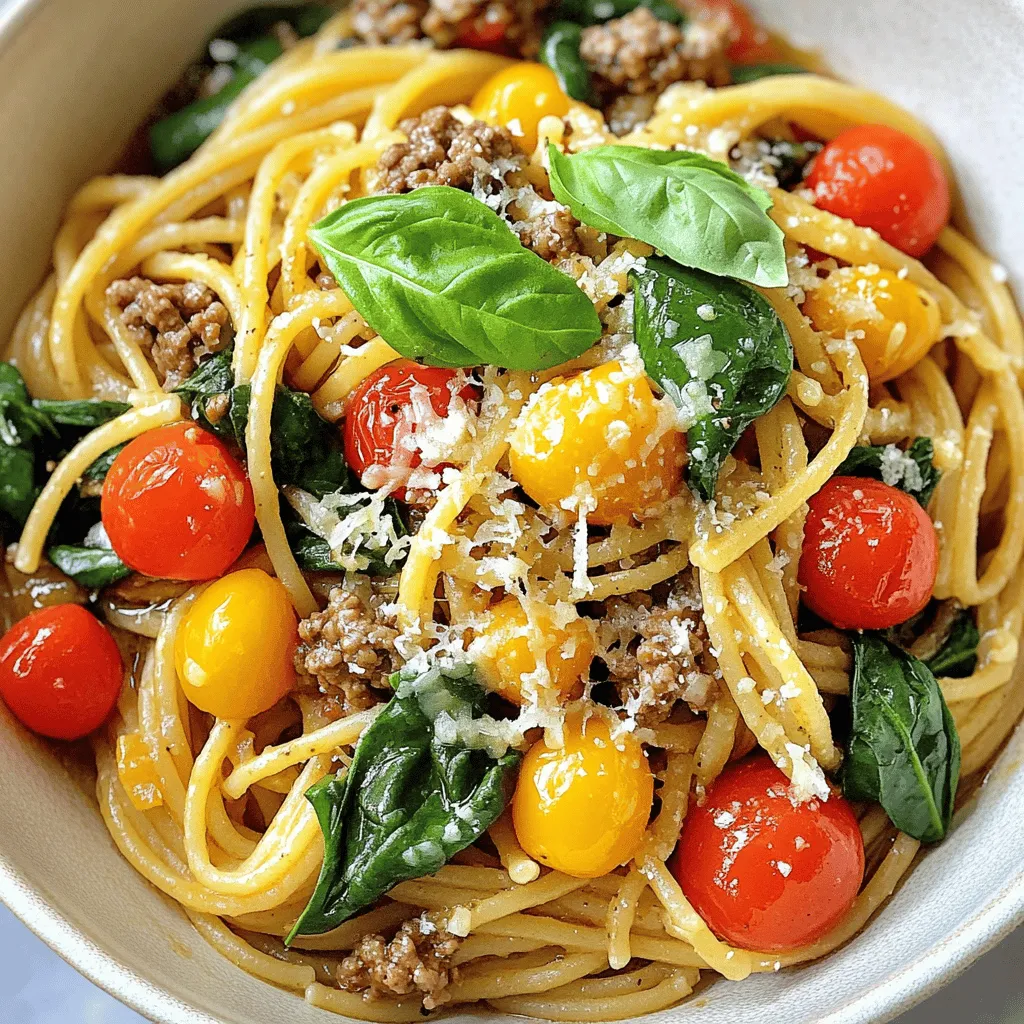
Minute Protein Beef Pasta Quick and Flavorful Meal
Looking for a quick meal that packs a protein punch? My Minute Protein Beef Pasta is perfect for busy nights. It’s easy to make, full
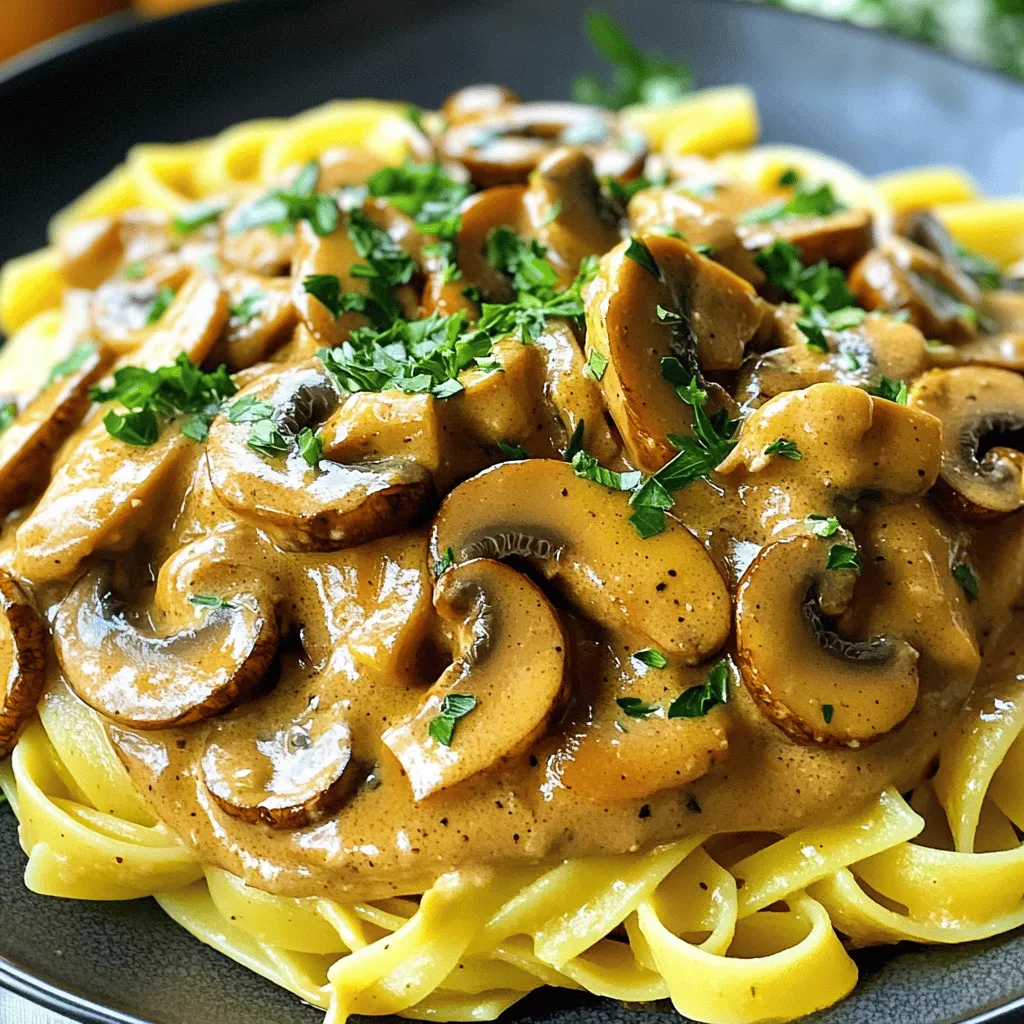
Vegan Mushroom & Seitan Stroganoff Flavorful Dish
Ready to dive into a creamy, savory wonder? This Vegan Mushroom & Seitan Stroganoff packs rich flavors and satisfying textures. Perfect for weeknight dinners or
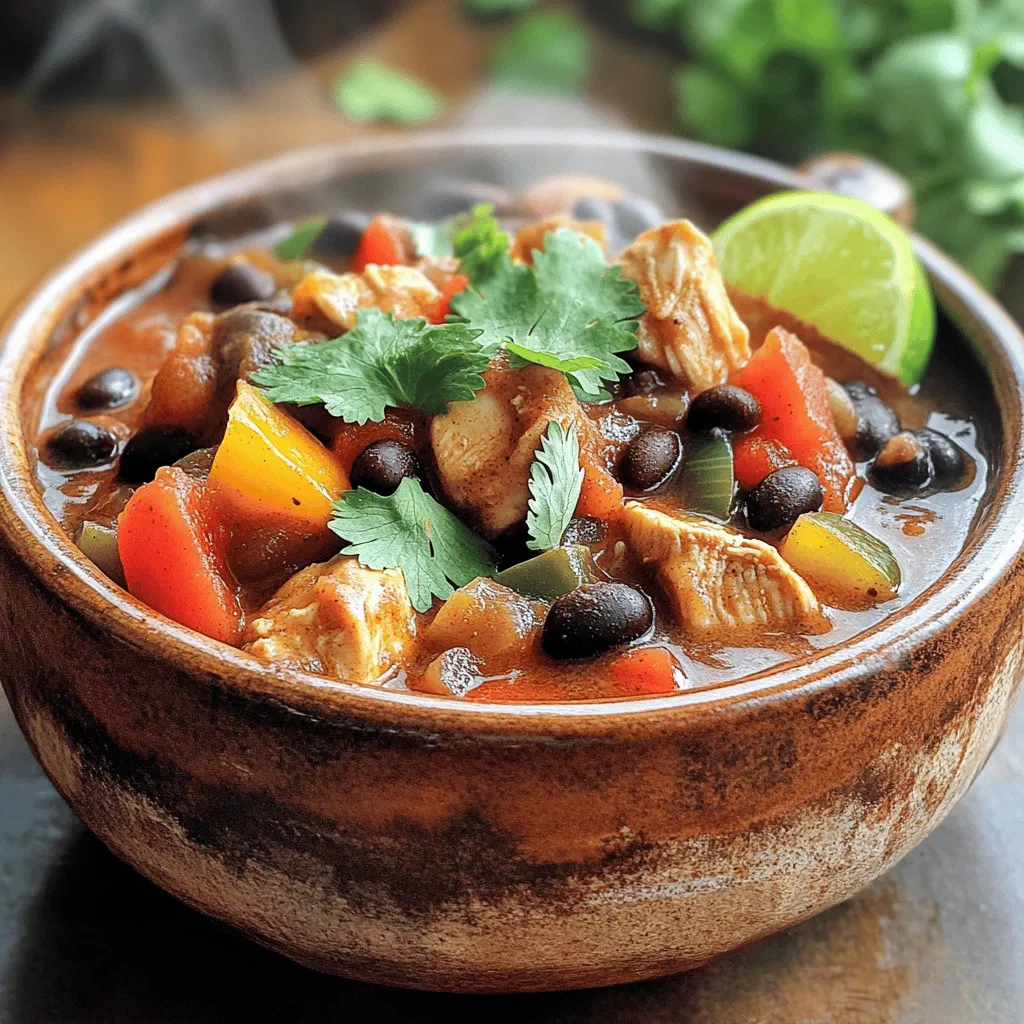
Smoky Ancho Chicken Chili Flavorful and Hearty Dish
Looking for a dish that warms your heart and tickles your taste buds? Smoky Ancho Chicken Chili hits the spot! This flavorful and hearty recipe

Easy Baked Chicken Parmesan Simple and Tasty Dinner
Are you looking for a quick and tasty dinner idea? This Easy Baked Chicken Parmesan recipe is perfect for busy nights. You’ll love the crispy