Dinner
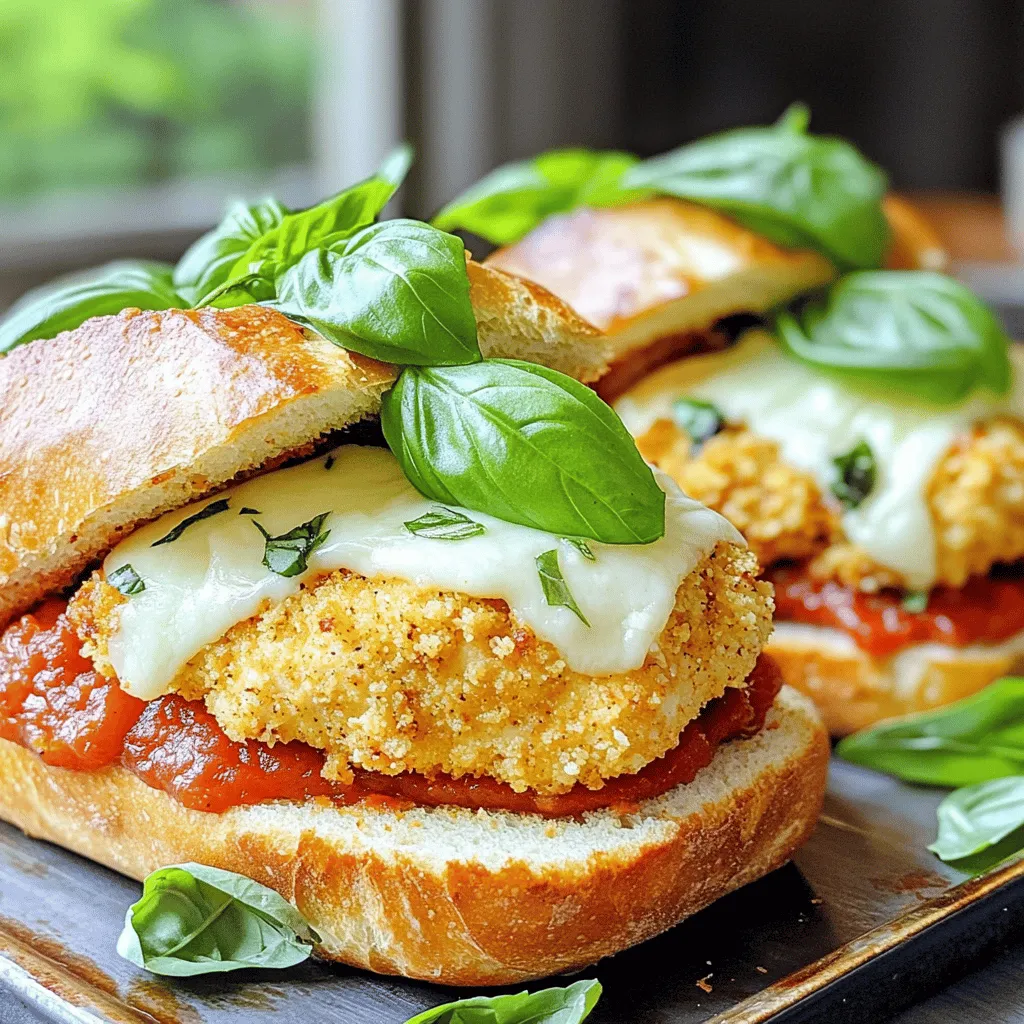
Air Fryer Chicken Parmesan Sandwiches Delightfully Easy
Looking for a quick, tasty meal? My Air Fryer Chicken Parmesan Sandwiches are the answer! These sandwiches are crispy, cheesy, and packed with flavor. Best
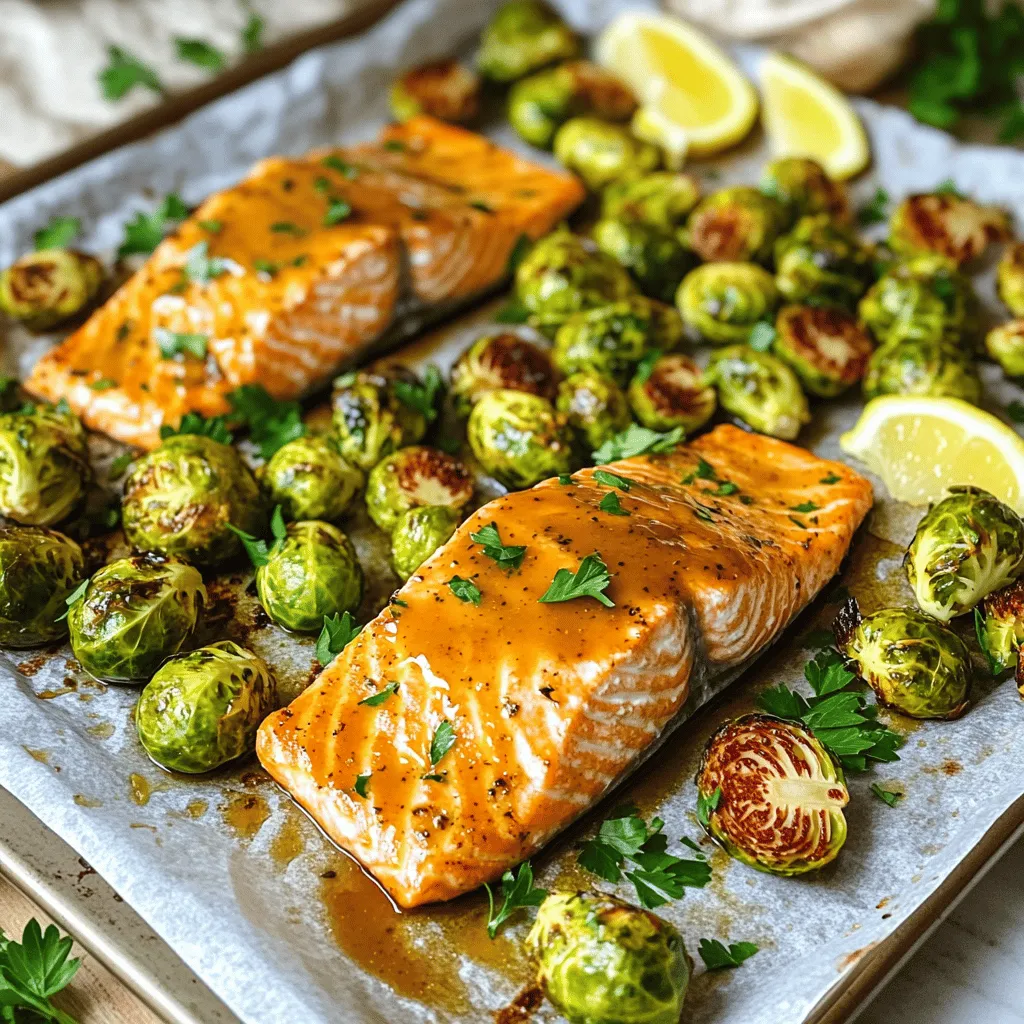
Sheet Pan Maple Mustard Salmon & Sprouts Flavor Boost
Looking to elevate your dinner game? With my Sheet Pan Maple Mustard Salmon & Sprouts, you’ll enjoy a burst of flavor that’s quick and easy
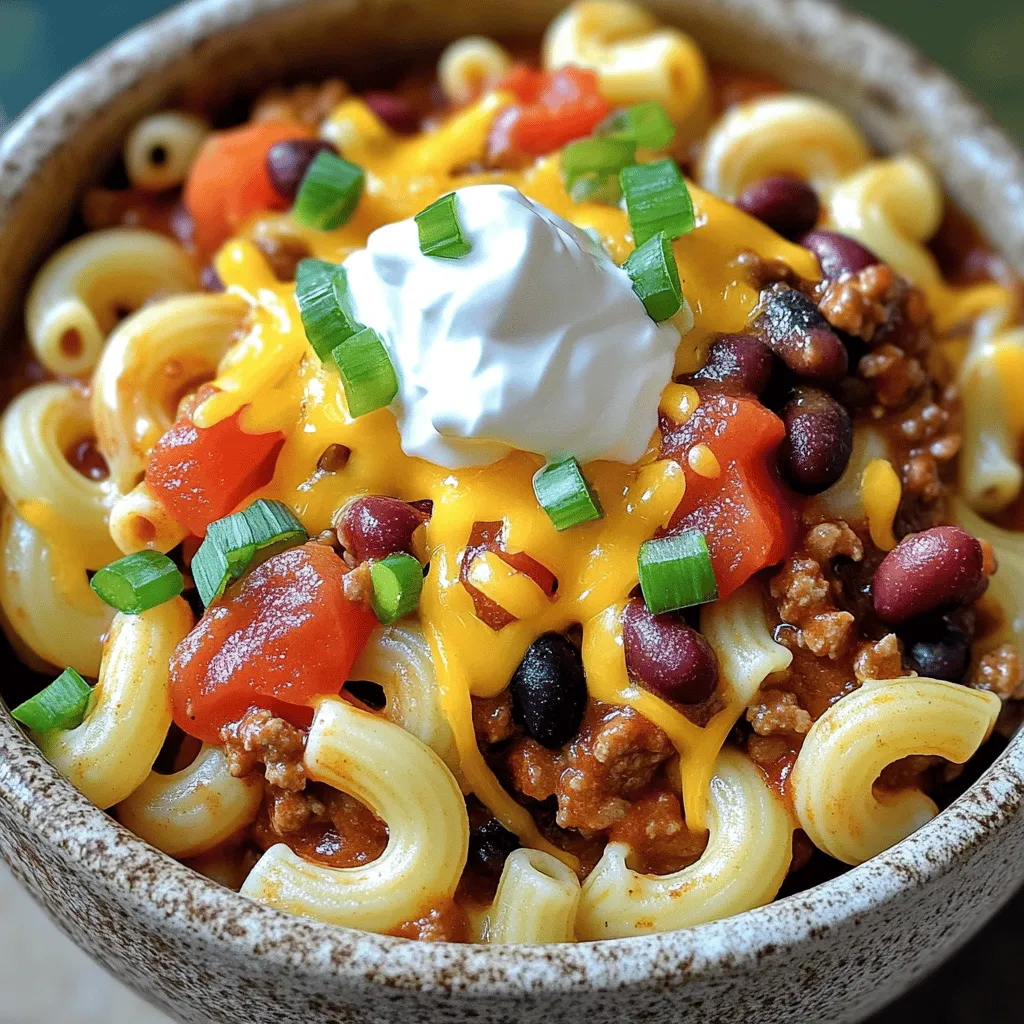
Savory Slow Cooker Loaded Chili Mac for Cozy Nights
Cozy nights call for warm, comforting meals, and my Slow Cooker Loaded Chili Mac hits the spot every time. This dish combines rich flavors with
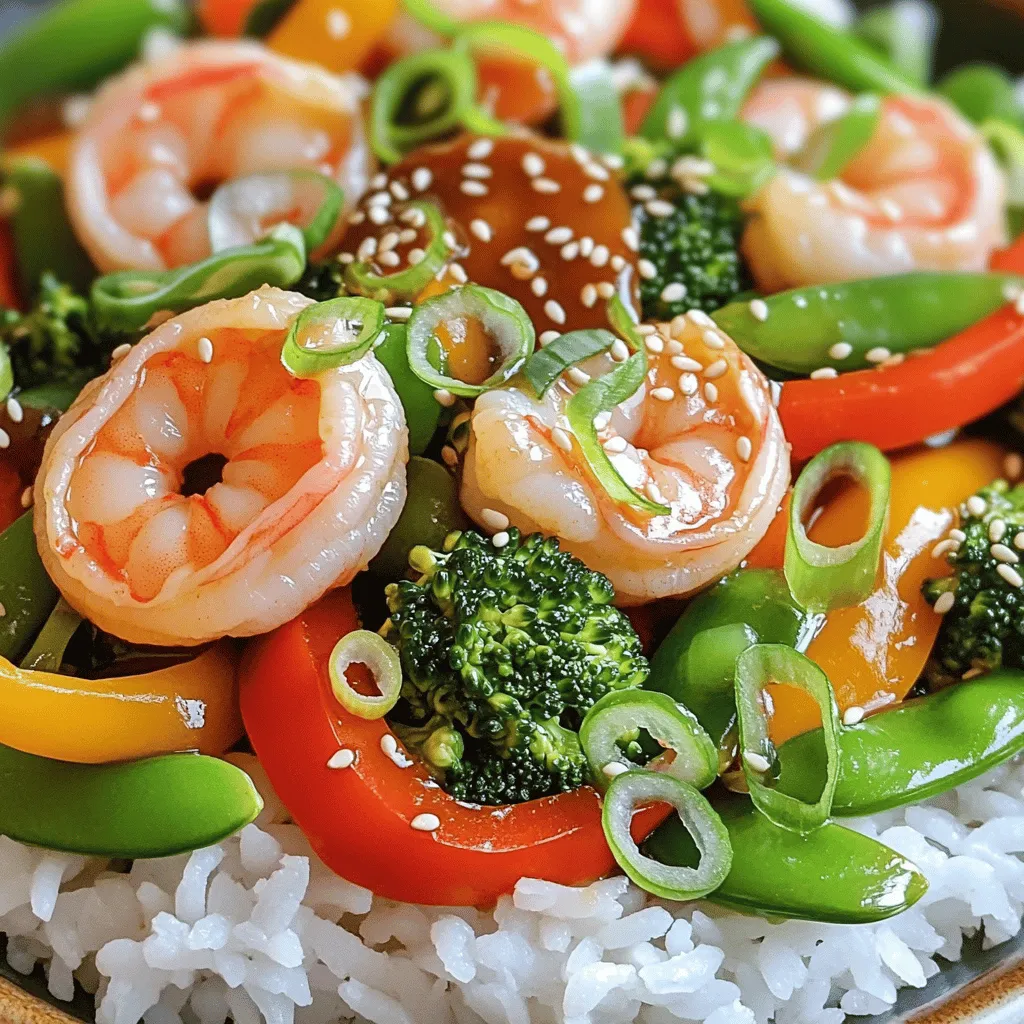
Teriyaki Shrimp Veggie Stir-Fry Quick and Tasty Meal
Looking for a quick and tasty meal? My Teriyaki Shrimp Veggie Stir-Fry is the answer! This dish combines tender shrimp and fresh veggies with a
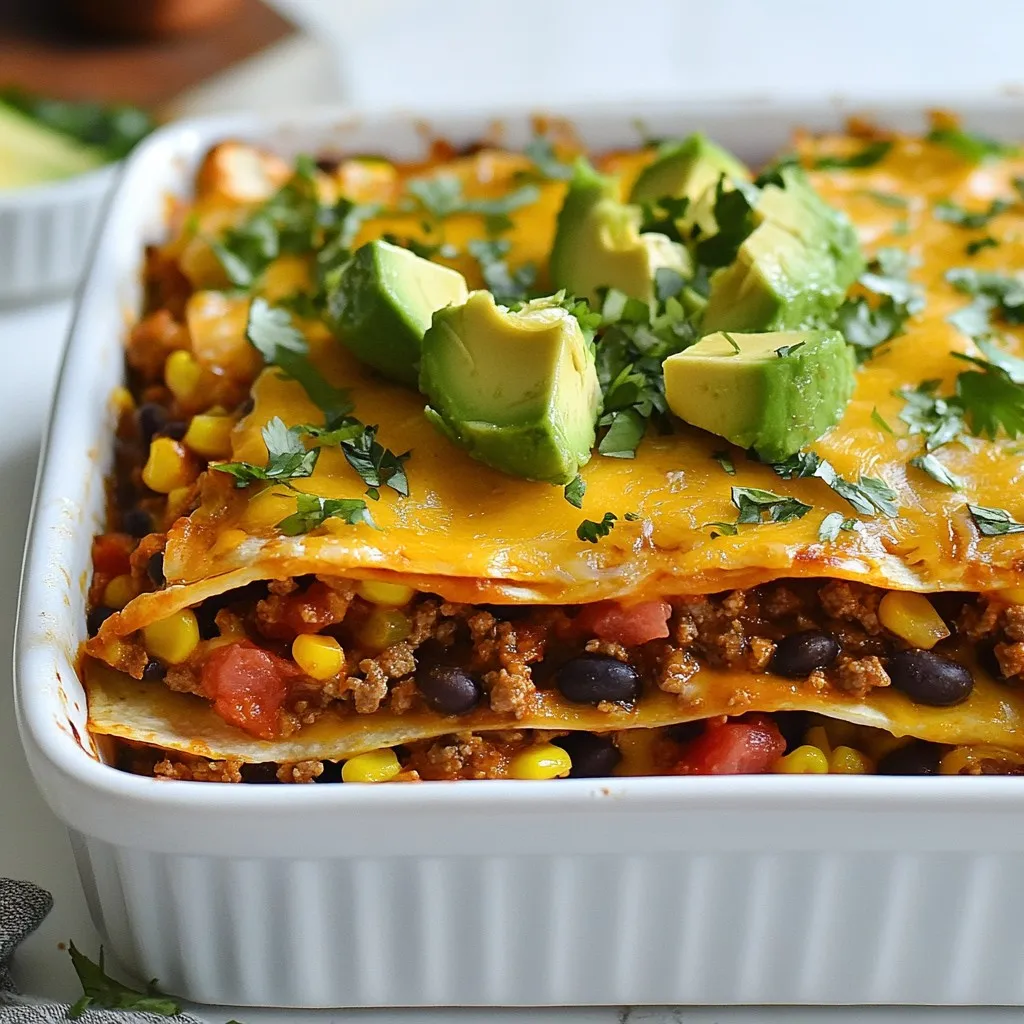
Layered Taco Lasagna Flavorful and Easy Dinner Option
Are you ready to take taco night to a whole new level? This Layered Taco Lasagna is not only flavorful but also easy to whip
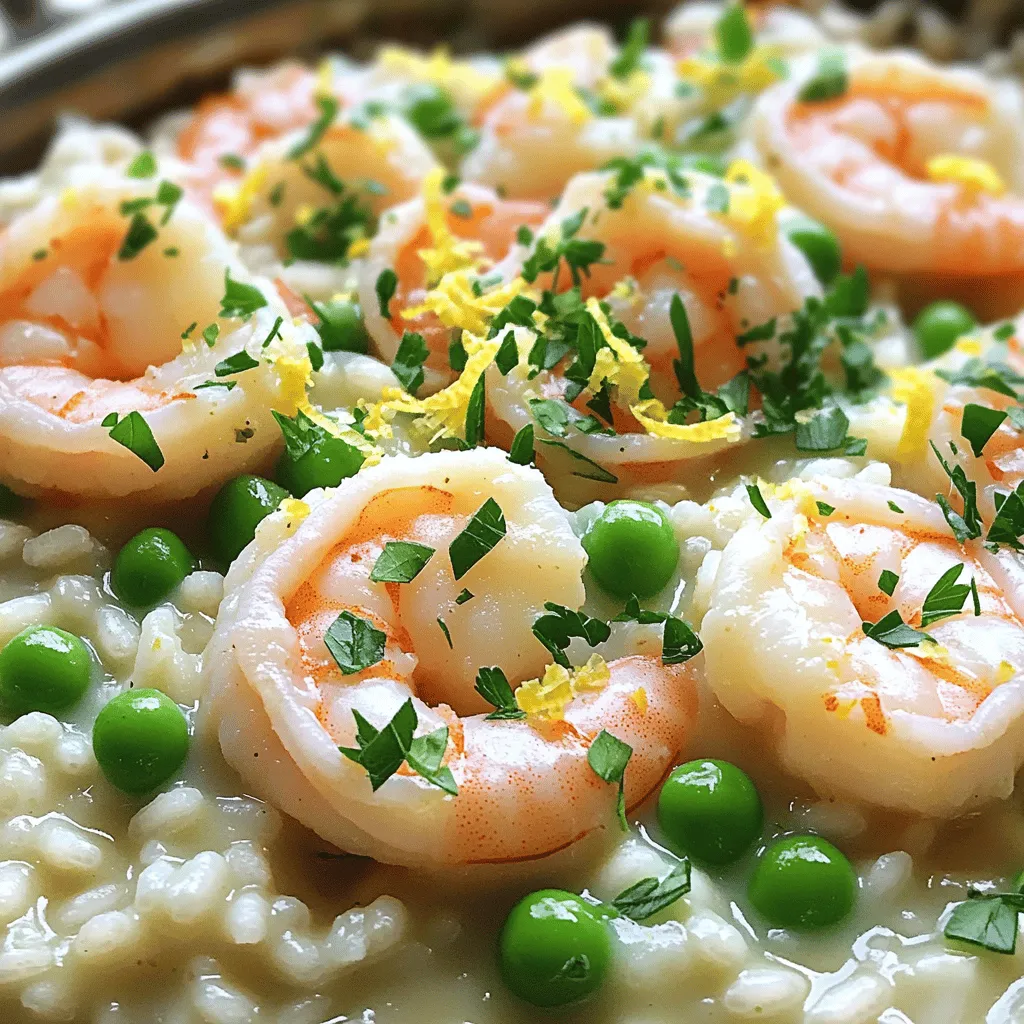
Creamy Lemon Shrimp Risotto Simple and Tasty Meal
Looking for a simple and tasty meal that impresses? My Creamy Lemon Shrimp Risotto is just what you need! In this one-pot wonder, fresh shrimp
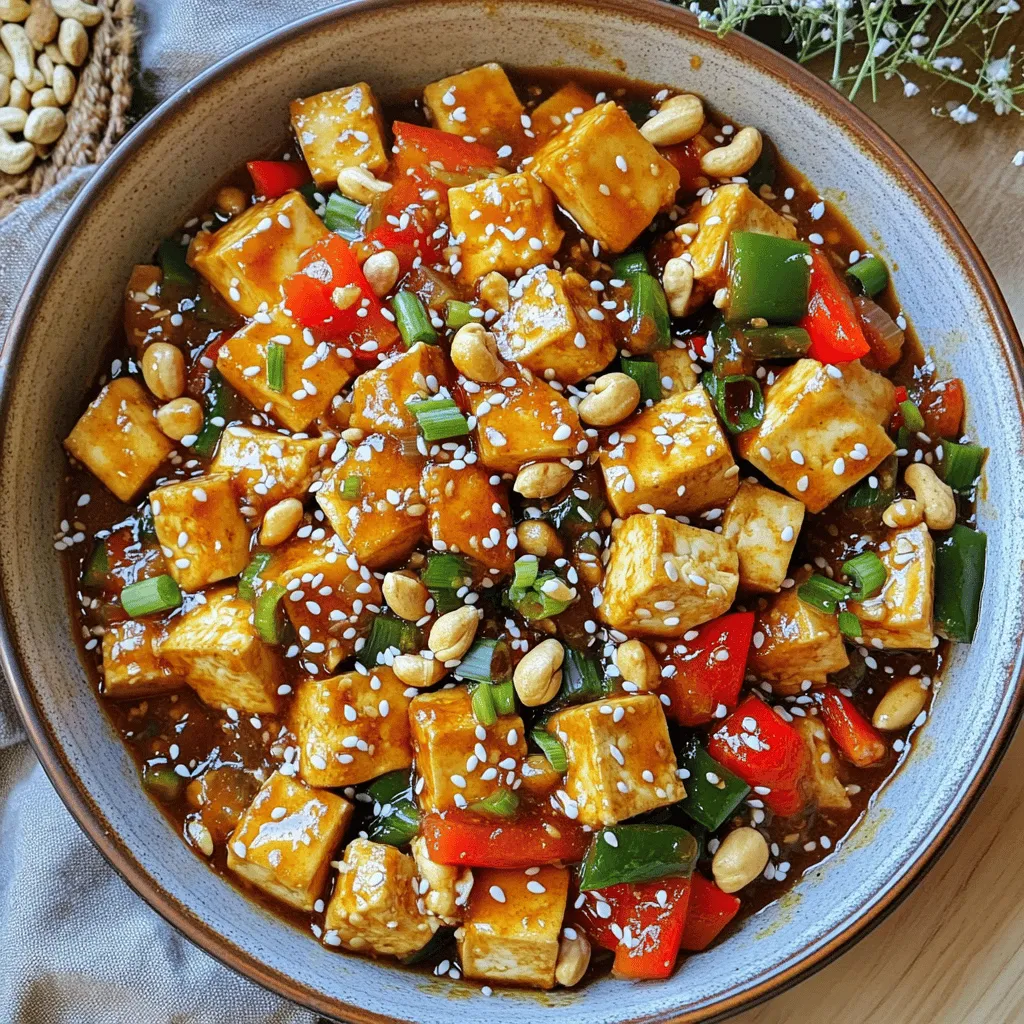
Spicy Kung Pao Tofu Better Than Takeout Delight
Are you tired of takeout options that just don’t hit the spot? You’re in the right place! This Spicy Kung Pao Tofu recipe packs bold
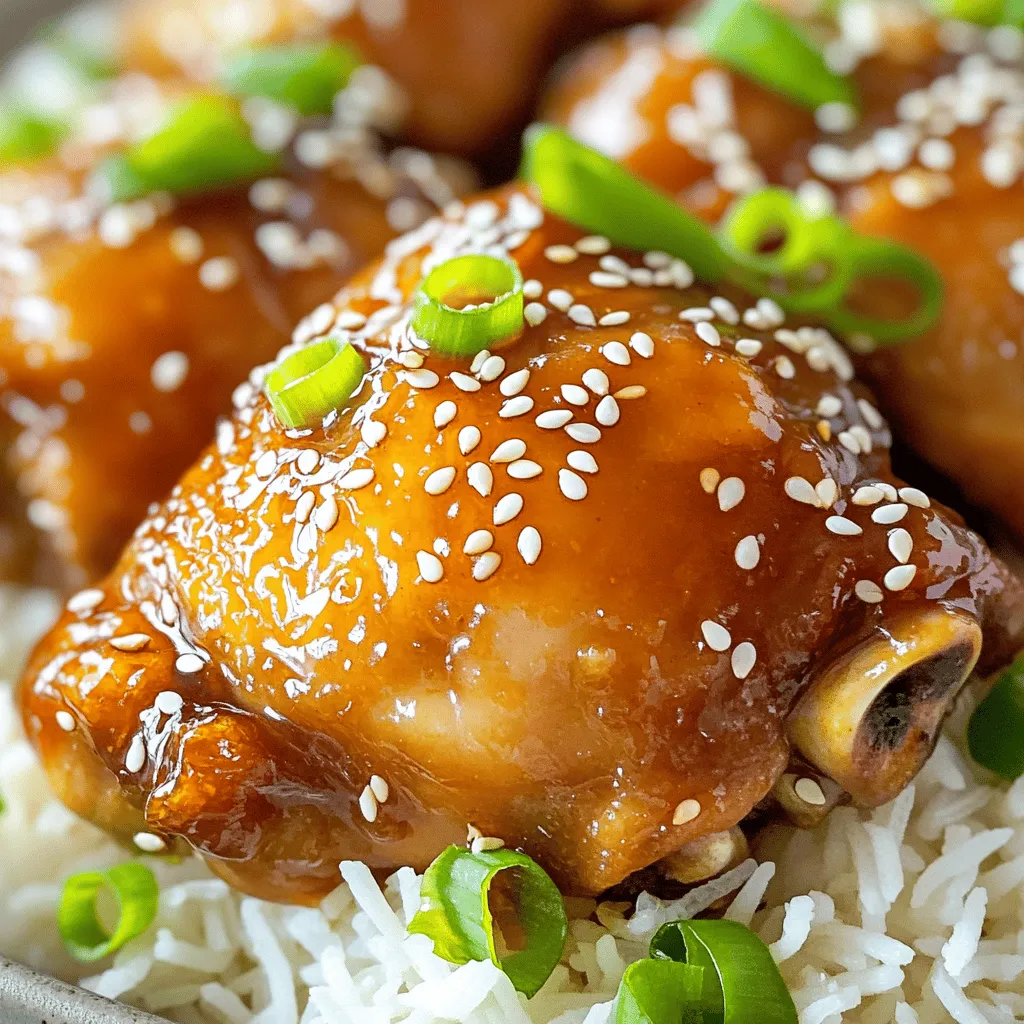
Slow Cooker Honey Garlic Chicken Thighs Simple Meal
Are you ready to make a delicious meal with minimal effort? In this post, you’ll learn how to prepare Slow Cooker Honey Garlic Chicken Thighs.
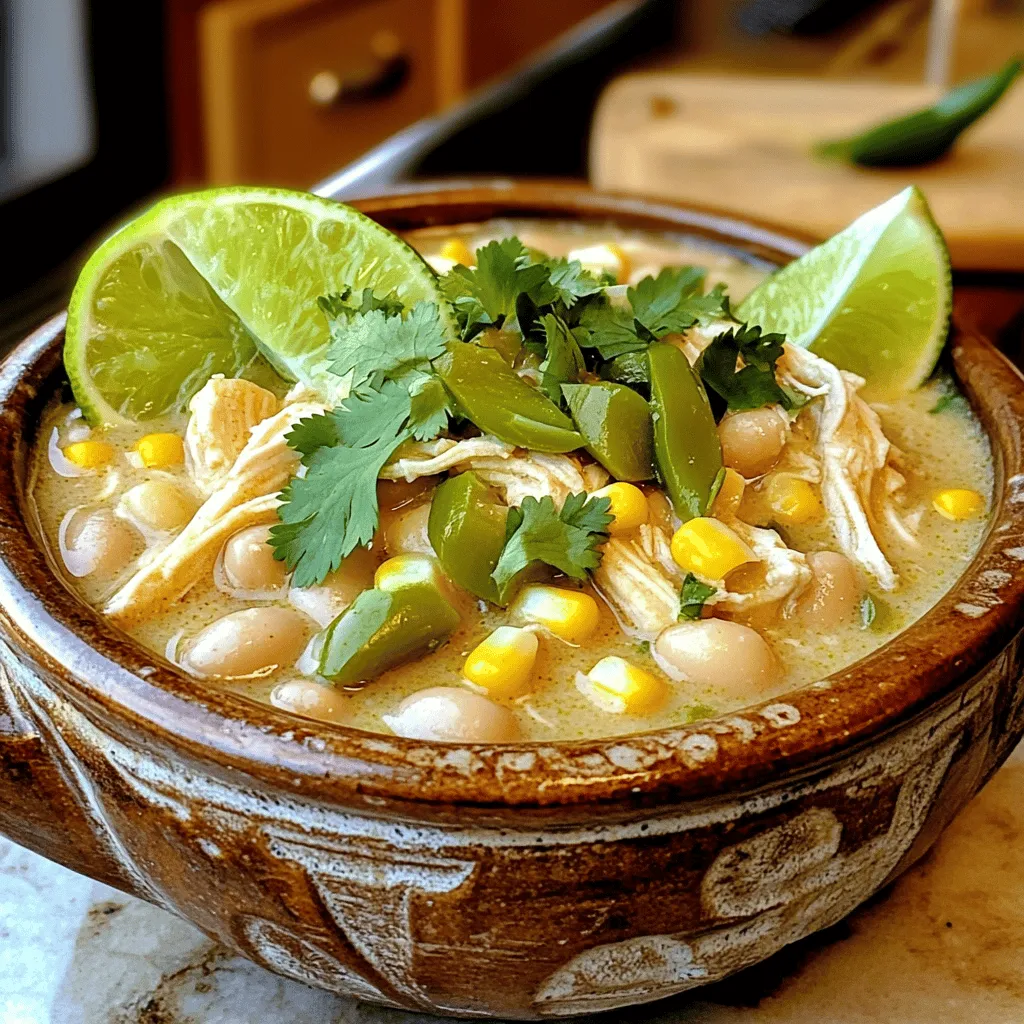
Creamy White Chicken Chili Slow Cooker Delight
Craving a warm, comforting dish? Look no further than my Creamy White Chicken Chili Slow Cooker Delight. This easy recipe lets you toss in simple
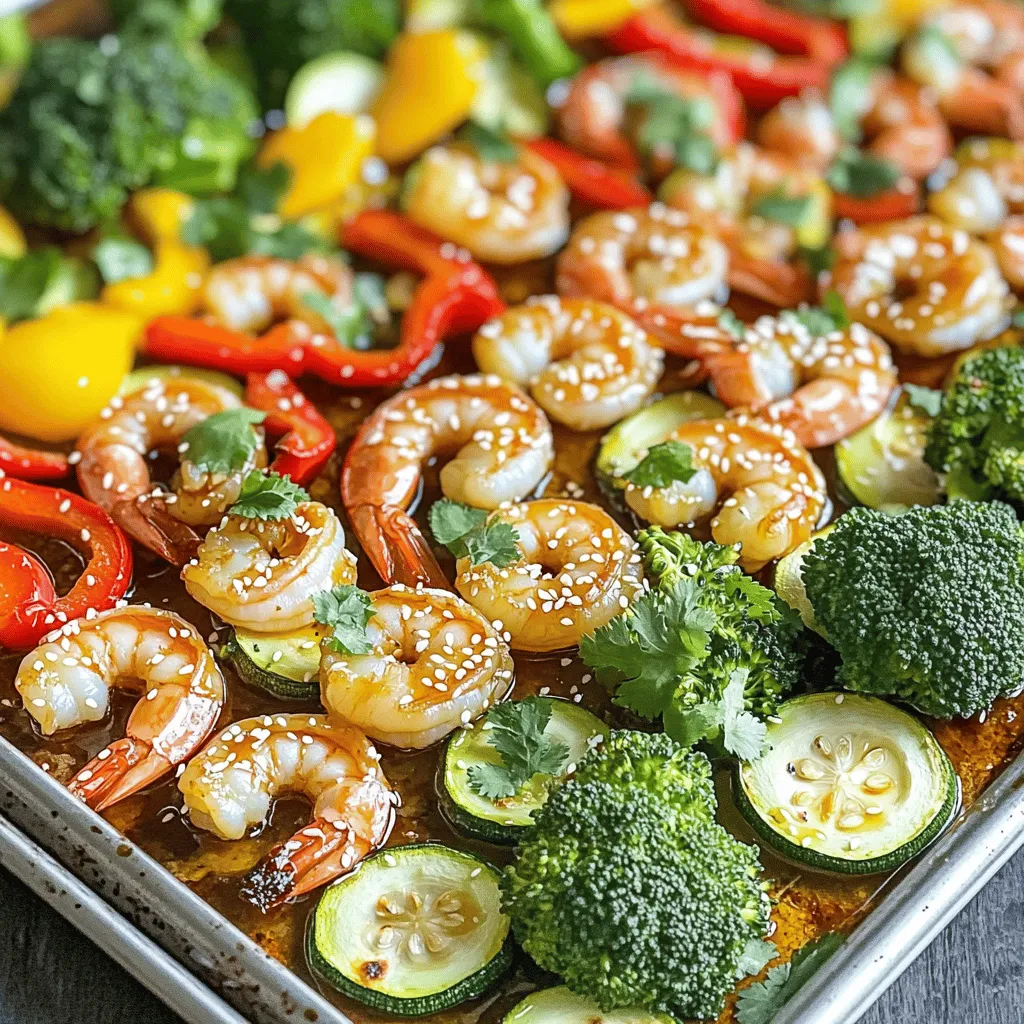
Honey Garlic Shrimp and Veggies Sheet Pan Delight
If you crave a meal that’s easy, tasty, and healthy, you’re in the right place! In this Honey Garlic Shrimp and Veggies Sheet Pan Delight,