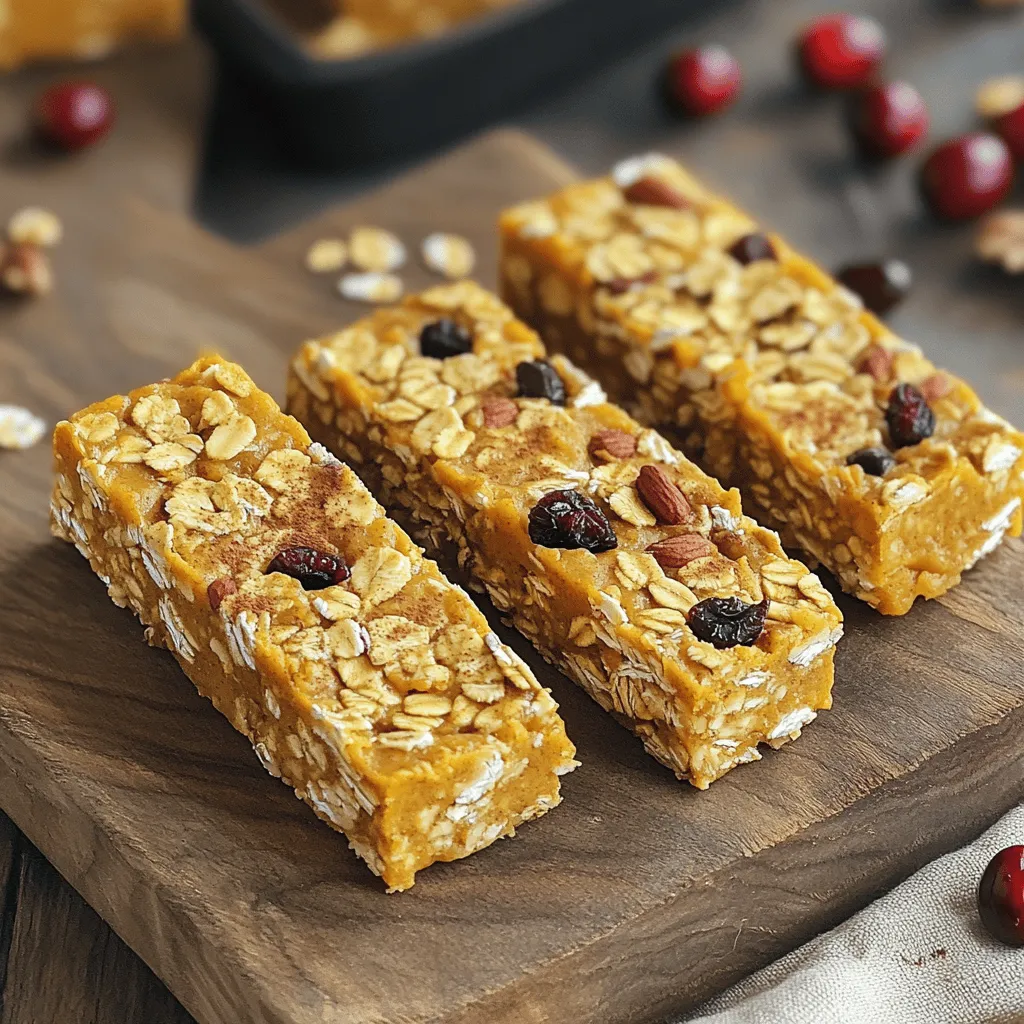
Desserts

- 1/2 cup unsalted butter (melted) - 1 cup granulated sugar - 2 large eggs - 1 teaspoon vanilla extract - 1/3 cup unsweetened cocoa powder - 1/2 cup all-purpose flour - 1/4 teaspoon salt - 1/4 teaspoon baking powder - 8 oz cream cheese (softened) - 1/2 cup granulated sugar - 1 large egg - 1 teaspoon vanilla extract - 1/2 cup caramel sauce - 1/2 cup pecans (chopped) - Sea salt (optional for sprinkling) Each ingredient plays a key role in making these delicious caramel pecan cheesecake brownie cups. The brownie layer starts with melted butter and sugar for a rich base. Eggs and vanilla add moistness and flavor. Cocoa powder brings the chocolatey goodness, while flour helps bind it all together. The salt and baking powder elevate the taste and texture. For the cheesecake layer, softened cream cheese gives a creamy texture. Sugar and egg sweeten and set the cheesecake, while vanilla adds that lovely aroma. Finally, the topping brings everything together. Caramel sauce drizzles on top for sweetness. Chopped pecans add crunch and nutty flavor. A dash of sea salt gives a perfect contrast. This blend of ingredients makes every bite a delightful treat. Enjoy the rich flavors and textures these cups provide! - Preheat oven to 350°F (175°C). - Line muffin tin with cupcake liners. - In a bowl, combine melted butter and sugar. Mix well. - Add eggs and vanilla extract. Stir until smooth. - In another bowl, whisk cocoa powder, flour, salt, and baking powder. Gradually mix this into the wet mixture. Be careful not to overmix. - Spoon about 1 tablespoon of brownie batter into each muffin liner. Fill them one-third full. - In a mixing bowl, beat softened cream cheese and sugar until smooth. - Add egg and vanilla extract. Mix until well combined. - Spoon about 1 tablespoon of cheesecake mixture on top of the brownie batter in each muffin cup. - Top with a small dollop of the remaining brownie batter. - Bake for 20-25 minutes. A toothpick should come out clean. - Let them cool in the pan for 10 minutes. Then, move them to a wire rack to cool completely. - Once cooled, drizzle caramel sauce over each cup. - Sprinkle chopped pecans on top and add a pinch of sea salt if you like. - Always use room temperature ingredients. This makes mixing easier and smoother. - Do not overmix your brownie batter. This keeps your brownies soft and chewy. - These cups are best when served chilled or at room temperature. - Pair them with coffee or a scoop of vanilla ice cream for extra joy. - Consider adding chocolate chips or extra pecans in the layers for a tasty twist. - Use homemade caramel sauce to boost the flavor and richness of your cups. {{image_2}} You can change up the nuts in these cups. Swap pecans for walnuts or almonds. Each nut brings its own taste. Try flavored cream cheese for fun twists. Cinnamon or pumpkin spice adds a nice touch. Your cheesecake layer can surprise your taste buds. If you want a gluten-free treat, use almond flour instead of regular flour. This simple swap keeps the taste great. For a vegan version, pick plant-based cream cheese. You still get that creamy texture without dairy. These options help everyone enjoy these brownie cups. You can serve these brownie cups in fun ways. Create a layered parfait with whipped cream and fruit. It looks beautiful and tastes amazing. Or, bake one larger brownie cake instead of cups. Slice it up for a crowd-pleasing dessert. Each style makes your treat special and unique. You can store leftover caramel pecan cheesecake brownie cups easily. Put them in an airtight container. They will stay fresh in your fridge for up to a week. This way, you can enjoy them later without losing any taste! If you want to keep them longer, freezing works great. First, lay the brownie cups in a single layer on a baking sheet. Make sure they do not touch each other. Once they freeze solid, transfer them to a freezer-safe container. They can last for about three months in the freezer. When you're ready to eat them, take them out of the freezer. Thaw the brownie cups in the refrigerator overnight. This method keeps their texture nice. If you want them warm, reheat in the microwave for a few seconds. This makes the caramel gooey and delightful again. Enjoy! Look for a clean toothpick test in the brownie layer. Stick a toothpick into the center of the brownie cup. If it comes out clean, they are done. This means the brownie layer is cooked right. If there’s wet batter, bake them a bit longer. Checking this step is key for perfect texture. Yes, you can substitute with your favorite nuts. Walnuts or almonds work great too. Just chop them up as you would pecans. This lets you customize the flavor. Each nut brings its unique taste. It’s a fun way to experiment! Add chocolate chips to the brownie batter or use a chocolate ganache topping. Mixing in chocolate chips gives bites of melted chocolate. For ganache, melt chocolate with cream and pour it over the cooled cups. This creates a rich, chocolatey layer. Your guests will love the extra chocolate flavor! Absolutely, they are easy to serve and always a hit! Each cup is a perfect single serving. You don’t need plates or forks. They look great on a dessert table, too. Just set them out, and watch everyone smile! These brownie cups combine rich brownie, creamy cheesecake, and sweet caramel pecans. You learned how to prepare each layer and add tips for the perfect bake. You can even mix things up with flavor variations and dietary tweaks. Remember, these treats store well and are great for sharing. Enjoy making your own delicious dessert cups. They are sure to impress your family and friends!
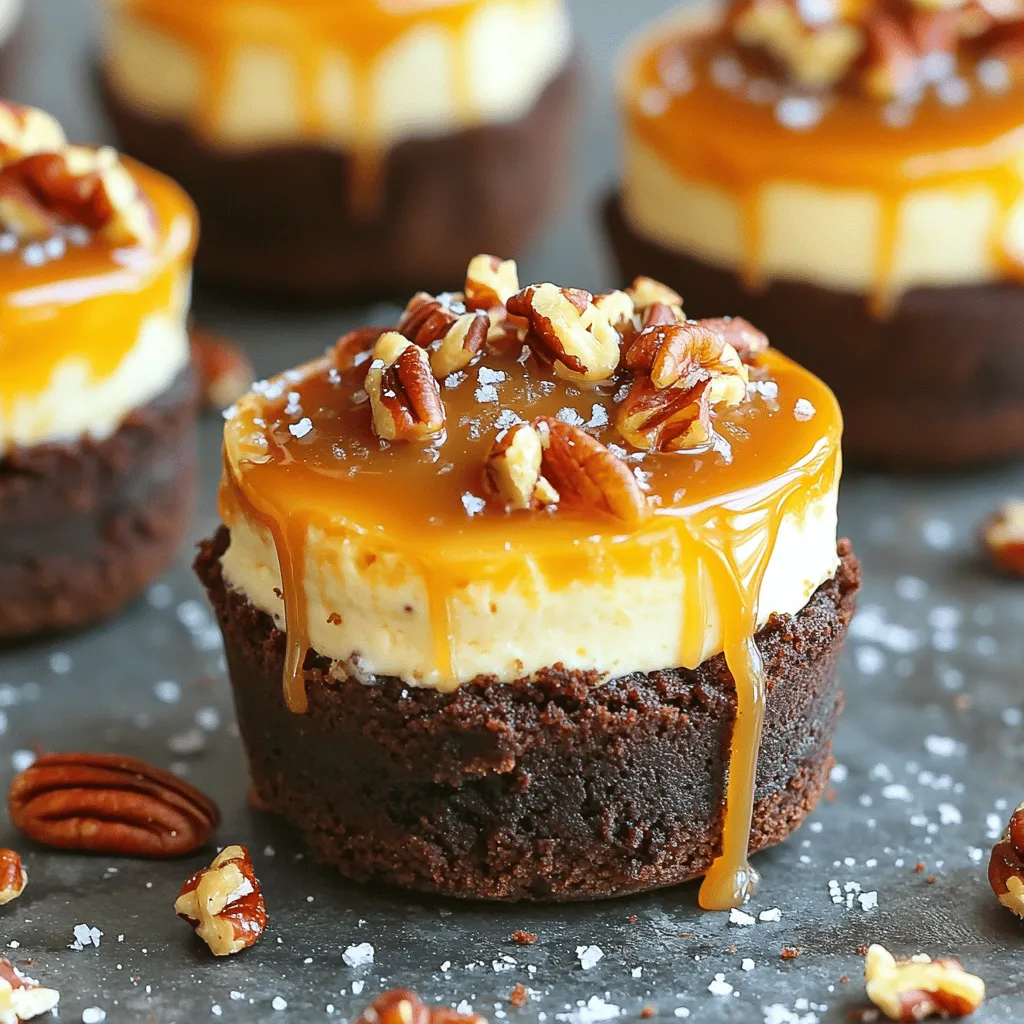
Caramel Pecan Cheesecake Brownie Cups Delightful Treat
Indulge in the finest dessert experience with my Caramel Pecan Cheesecake Brownie Cups. These tasty treats combine rich brownie layers, smooth cheesecake, and a delightful
To make the best cinnamon swirl banana bread, gather these simple ingredients: - 3 ripe bananas, mashed - 1/3 cup melted butter - 1 teaspoon baking soda - Pinch of salt - 3/4 cup sugar - 1 large egg, beaten - 1 teaspoon vanilla extract - 1 1/2 cups all-purpose flour - 1 tablespoon ground cinnamon - 1/2 cup chopped walnuts (optional) - 1 tablespoon brown sugar Ripe bananas bring sweetness and moisture to the bread. Look for bananas with brown spots. The melted butter adds richness. Baking soda helps the bread rise. A pinch of salt enhances the flavors. Use sugar to sweeten the bread. The beaten egg binds the batter and adds moisture. Vanilla extract gives a lovely aroma. All-purpose flour forms the base of the batter. Ground cinnamon and brown sugar create the swirl. The optional walnuts add crunch and flavor. You can leave them out if you prefer. Each ingredient plays a role in making this banana bread a tasty treat. Enjoy the process of mixing and baking! - Preheat your oven to 350°F (175°C). This helps the bread bake evenly. - Grease a 9x5 inch loaf pan. You can also line it with parchment paper for easy removal. - In a mixing bowl, mash 3 ripe bananas until smooth. - Combine the mashed bananas with 1/3 cup melted butter. Mix well until they blend nicely. - In the same bowl, add 1 teaspoon baking soda and a pinch of salt. Stir until mixed. - Pour in 3/4 cup sugar, 1 beaten egg, and 1 teaspoon vanilla extract. Mix until everything is combined. - Gently add 1 1/2 cups all-purpose flour. Stir until just combined. Be careful not to over-mix; this keeps the bread light. - In a small bowl, mix 1 tablespoon ground cinnamon and 1 tablespoon brown sugar. This will create the swirl. - Pour half of the banana batter into the loaf pan. Sprinkle half of the cinnamon-sugar mixture on top. - Add the rest of the batter, then sprinkle the remaining cinnamon-sugar mixture. - Use a knife or skewer to swirl the batter gently. This creates a lovely marbled effect. - Bake in your preheated oven for about 50-60 minutes. - To know if it’s done, insert a toothpick in the center. If it comes out clean, the bread is ready. - Once baked, let it cool in the pan for about 10 minutes. Then transfer it to a wire rack to cool completely. - Best banana ripeness for flavor: Use very ripe bananas. They should be brown and soft. This gives your bread a sweet taste. The riper the banana, the better the flavor. - Mixing tips to avoid tough bread: Mix your batter gently. When you add flour, stir until just combined. Overmixing makes the bread tough. You want it to be soft and light. - How to serve warm: Slice your banana bread while it is still warm. Serve it with a pat of butter on top. The butter will melt and make it even tastier. - Garnishing ideas for presentation: Add banana slices on top for a nice look. You can also sprinkle powdered sugar for a sweet finish. This makes your bread look beautiful and inviting. - Overmixing the batter: As mentioned, mixing too much is a mistake. It makes the bread dense. Just mix until you can't see any dry flour. - Not greasing the pan properly: Always grease your loaf pan well. Use butter or cooking spray. If you don’t, the bread may stick and break when you try to take it out. {{image_2}} You can make your cinnamon swirl banana bread even more exciting. Here are a few fun options: - Incorporating chocolate chips: Add about 1/2 cup of chocolate chips. This turns your bread into a sweet treat. The mix of chocolate and banana is a lovely match. - Using nut alternatives: If you want a crunch, add nuts like pecans or almonds. Chopped walnuts also work great here. They enhance the texture and flavor of the bread. If you have specific diet needs, here are some easy changes: - Gluten-free options: Swap out all-purpose flour for a gluten-free mix. Many brands offer blends that work well in baking. This way, you can enjoy the bread without the gluten. - Vegan substitutions for eggs and butter: Use a flax egg instead of a real egg. Just mix 1 tablespoon of flaxseed meal with 2.5 tablespoons of water and let it sit. For butter, use coconut oil or a vegan spread. This keeps your recipe plant-based. You can change up your banana bread with the seasons: - Adding pumpkin spice in fall: Mix in a teaspoon of pumpkin spice for a warm flavor. It gives your bread a cozy taste perfect for fall. - Incorporating dried fruits or nuts for holiday versions: Add dried cranberries or raisins during the holidays. You can also use chopped pecans or hazelnuts for a festive touch. This adds both flavor and a holiday feel to your bread. To keep your banana bread fresh, first decide where to store it. You can choose room temperature or refrigeration. - Room Temperature: Store the bread in an airtight container. This keeps it soft and moist. It lasts for about 3-4 days. - Refrigeration: If you need it to last longer, wrap it in plastic wrap and place it in the fridge. This method can keep it fresh for up to a week. Wrapping is key! Use plastic wrap or aluminum foil. This helps seal in moisture while keeping out air. If you want to store your banana bread for a longer time, freezing is a great option. 1. Step-by-Step Freezing Instructions: - Allow the banana bread to cool completely. - Wrap it tightly in plastic wrap. Make sure there are no gaps. - Place the wrapped bread in a freezer bag, and seal it well. - Label the bag with the date. You can freeze it for up to 3 months. 2. How to Defrost for Optimal Freshness: - When you're ready to enjoy it, take the bread out of the freezer. - Leave it wrapped and let it thaw in the fridge overnight. - For a warm treat, slice and toast it after thawing. This gives it a fresh-baked taste. Bananas should be very ripe for the best flavor. Look for bananas with brown spots. The more brown spots, the sweeter they are. Overripe bananas mash easily and create a moist texture in the bread. If you have bananas that are too green, they will not give a sweet taste. Aim for bananas that are soft and have a strong banana smell. Yes, you can make this recipe without eggs! A common option is to use applesauce. Mix 1/4 cup of unsweetened applesauce for each egg. Another choice is mashed banana. Use 1/4 cup of mashed banana as a substitute. You can also try flaxseed meal. Mix 1 tablespoon of flaxseed meal with 2.5 tablespoons of water. Let it sit for a few minutes to thicken before adding it to the batter. To know if your banana bread is done, look for a few signs. The top should be golden brown and may crack a bit. Use a toothpick and insert it into the center. If it comes out clean or with a few crumbs, it is ready. If it has wet batter, bake for a few more minutes and check again. Yes, you can use frozen bananas! Just make sure to thaw them first. After thawing, drain any extra liquid. The bananas will be very soft, which is perfect for mashing. This can save you time and reduce waste. You now have the key to making a delicious banana bread. We covered all the ingredients, from ripe bananas to optional nuts. I shared step-by-step directions to mix your batter and create that tasty cinnamon swirl. Plus, I've offered tips to avoid common mistakes and variations for every season. In the end, perfect banana bread is just a recipe away. Enjoy baking and sharing it warm with others!
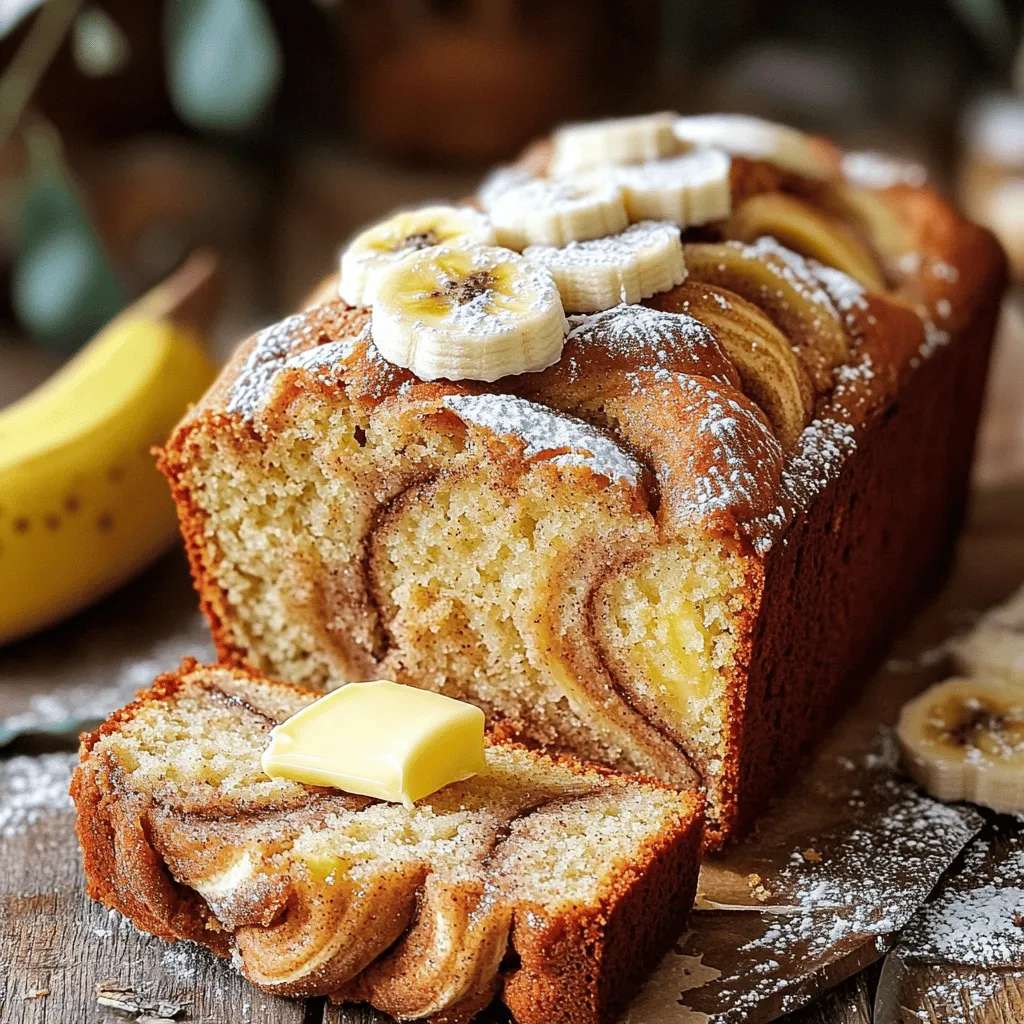
Cinnamon Swirl Banana Bread Simple and Tasty Recipe
Looking for a simple and tasty treat? You’ve come to the right place! This Cinnamon Swirl Banana Bread is easy to make and packed with
To make No-Bake Peanut Butter Pretzel Bars, you need a few simple ingredients. Each one plays a key role in creating that perfect bite. Here’s what you will need: - 1 ½ cups crushed pretzels - 1 cup peanut butter (creamy or crunchy) - ½ cup honey or maple syrup - 2 cups rolled oats - 1 cup chocolate chips (semi-sweet or dark) - ½ teaspoon salt - ½ teaspoon vanilla extract - ¼ cup mini chocolate chips for topping (optional) These ingredients come together to create a treat that is both sweet and salty. The pretzels add a nice crunch, while the peanut butter and chocolate create a smooth and rich flavor. You can choose creamy or crunchy peanut butter based on your taste. Honey adds sweetness, but maple syrup works well too if you prefer a different flavor. Using rolled oats gives the bars a hearty texture. The addition of semi-sweet or dark chocolate chips adds a lovely richness. The salt and vanilla extract enhance all the flavors, making each bite delightful. If you want a fun touch, sprinkle mini chocolate chips on top before chilling. Gather these ingredients, and you will be ready to create a tasty treat. 1. Start by mixing the dry ingredients. In a large bowl, combine 1 ½ cups of crushed pretzels and 2 cups of rolled oats. Stir them well to blend. 2. Next, heat the peanut butter mixture. In a small saucepan, add 1 cup of peanut butter, ½ cup of honey or maple syrup, ½ teaspoon of salt, and ½ teaspoon of vanilla extract. Heat it over low heat. Stir until the mix is smooth and well combined. 3. Now, combine the wet and dry ingredients. Remove the saucepan from the heat. Pour the peanut butter mixture over the pretzel and oat mix. Stir it all together until the dry ingredients are well coated. Finally, fold in 1 cup of chocolate chips, making sure they are evenly spread. 1. Prepare the baking pan. Take an 8x8 inch or 9x9 inch square pan. Line it with parchment paper, leaving some paper hanging over the edges. This helps with easy removal later. 2. Press down the mixture firmly. Transfer the peanut butter mix into the pan. Use a spatula or your hands to press it down evenly. Make sure it's compact and smooth on top. 3. Top with mini chocolate chips if you like. Sprinkle ¼ cup of mini chocolate chips on top. Gently press them into the bars so they stick. 1. Refrigerate the bars. Place the pan in the fridge for at least 2 hours. This helps the bars to firm up and hold their shape. 2. Cut into bars. Once the bars are set, lift them out of the pan using the parchment paper. Cut them into squares or bars with a sharp knife. Enjoy your tasty treat! To make sure your no-bake bars turn out well, you need the right consistency. The mixture should be thick and sticky. If it's too dry, add a bit more peanut butter or honey. If it's too wet, add some more oats or pretzels. Pressing firmly is key for a better texture. Use your hands or a spatula to pack the mixture into the pan. This helps the bars hold together better after chilling. If you want to change things up, there are great peanut butter alternatives. Almond butter or sun butter works well too. Just remember, each will bring its own flavor to the bars. For sweetener options, you can swap honey or maple syrup with agave syrup or brown rice syrup. Each sweetener will add its own twist. You can make your bars unique by adding nuts or seeds. Chopped almonds, walnuts, or pumpkin seeds give more crunch and nutrition. Using different types of chocolate can also change the taste. Try white chocolate for a sweeter treat, or dark chocolate for a richer flavor. This allows you to create a bar that fits your taste perfectly. {{image_2}} You can easily change the taste of your no-bake peanut butter pretzel bars. One fun way is to add cocoa powder. Just mix in about ¼ cup to give your bars a rich chocolate flavor. This simple tweak makes each bite taste like a treat from a bakery. Another option is to mix in dried fruits. You can use raisins, cranberries, or even chopped apricots. Dried fruits add sweetness and chewiness. Try adding about ½ cup for a fruity twist. If you need a gluten-free option, simply use gluten-free pretzels. They work just as well as regular ones. Make sure your oats are gluten-free too. This way, everyone can enjoy these tasty bars. For a vegan version, swap honey for maple syrup. Use dark chocolate chips that are dairy-free. This keeps the flavor rich while making it plant-based. You can easily adjust the ingredient amounts for your needs. If you want smaller bars, cut the recipe in half. This gives you about 8 bars. If you have a crowd, double the recipe. You’ll get around 32 bars, perfect for sharing. Just remember to adjust your baking pan size based on the amount you choose to make. To keep your no-bake peanut butter pretzel bars fresh, store them in an airtight container. A glass or plastic container works well. If you have leftover bars, you can also wrap them tightly in plastic wrap and then place them in the container. This extra layer will help keep them from drying out. At room temperature, these bars last about 3 to 5 days. For the best flavor and texture, I recommend storing them in the fridge. When refrigerated, they can last up to 2 weeks. The cool temperature helps them stay firm and delicious. If you want to keep your bars for longer, freezing is a great option. Wrap each bar in plastic wrap and place them in a freezer-safe bag. Make sure to remove as much air as possible. They can last up to 3 months in the freezer. When you're ready to enjoy them, just take them out and let them thaw at room temperature for a bit. Can I use crunchy peanut butter? Yes, you can use crunchy peanut butter. It adds a nice texture to the bars. If you like a little crunch, this is a great choice. How long do these bars need to chill? These bars need to chill for at least 2 hours. This helps them set properly. If you can wait longer, that’s even better! What can I substitute for honey or maple syrup? You can use agave syrup or brown rice syrup instead. Both will keep the bars sweet and tasty. Just make sure to use the same amount. Why are my bars too crumbly? If your bars are too crumbly, you may not have enough wet ingredients. Try adding a bit more peanut butter or sweetener. This will help bind the mixture better. How do I know when the bars are set properly? The bars are set when they feel firm to the touch. You should be able to lift them out of the pan without them falling apart. If they feel soft, give them more chill time. You can create tasty no-bake peanut butter pretzel bars with simple steps. We covered the ingredients, the preparation process, and helpful tips. Experiment with flavors and storage methods to make these bars your own. These treats are easy to customize and share. Enjoy them fresh or stored for later. With a bit of practice, you’ll master a healthy snack that everyone loves. Keep creating and have fun with your recipes!
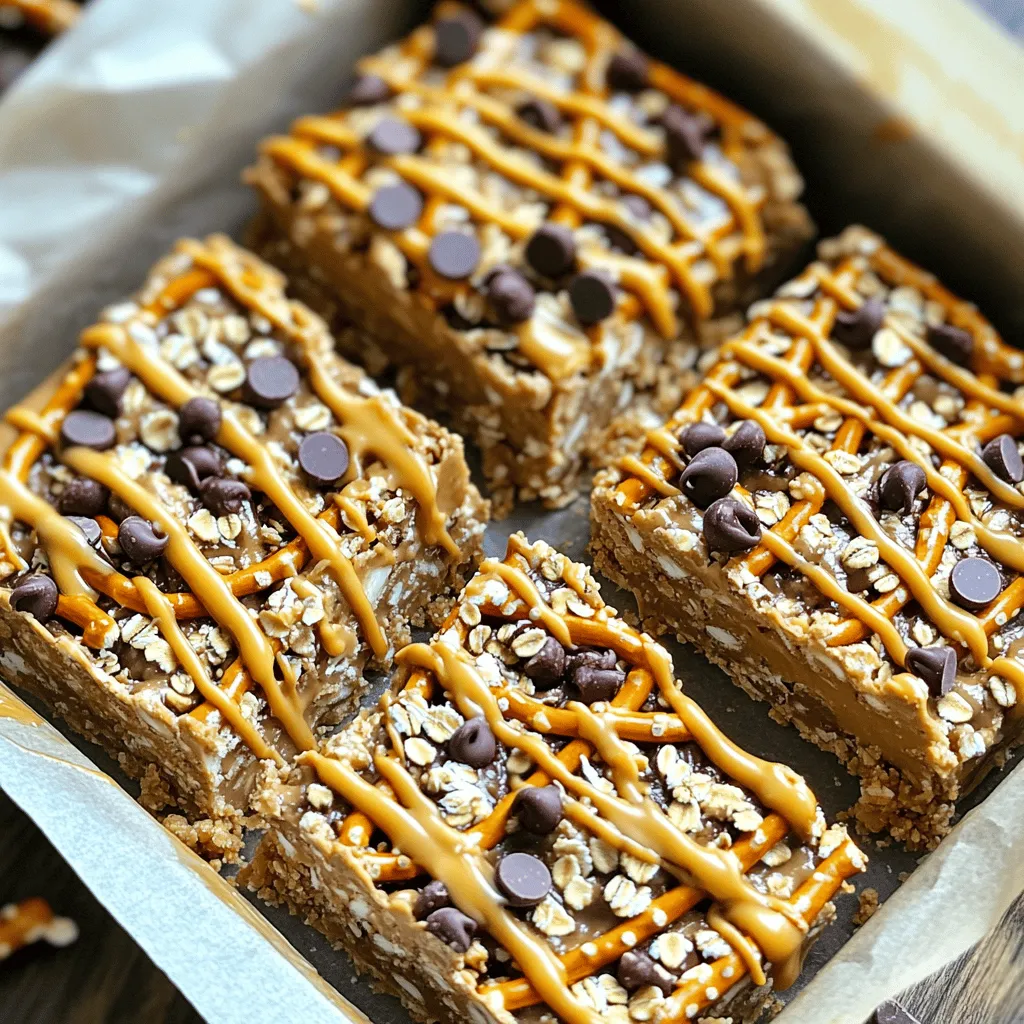
No-Bake Peanut Butter Pretzel Bars Delightful Treat
Who doesn’t love a sweet and salty treat? My No-Bake Peanut Butter Pretzel Bars are the perfect snack to satisfy any craving. With just a
To make No-Bake Oreo Peanut Butter Bars, you need a few simple ingredients. Here’s what you will need: - 24 Oreo cookies, crushed - 1 cup creamy peanut butter - 1/2 cup unsalted butter, melted - 1 cup powdered sugar - 1 teaspoon vanilla extract - 1 cup semi-sweet chocolate chips - 2 tablespoons coconut oil (optional for smoothness) These ingredients are easy to find at any grocery store. The crushed Oreos form the base, giving a rich and sweet flavor. Creamy peanut butter adds a nice nutty taste and smooth texture. Melted butter helps bind the cookies together. Powdered sugar sweetens the mix, while vanilla extract enhances the flavor. The chocolate chips make for a delightful topping, and coconut oil, if used, makes the chocolate smooth and shiny. Gather these ingredients before starting. It makes the process quick and fun! To start, grab 24 Oreo cookies and crush them into small pieces. You can use a food processor or place them in a bag and smash them with a rolling pin. Next, melt 1/2 cup of unsalted butter. Combine the crushed Oreos and melted butter in a large bowl. Mix until it looks like wet sand. The right consistency should be crumbly but hold together when pressed. Now, let's make the peanut butter layer. Add 1 cup of creamy peanut butter, 1 cup of powdered sugar, and 1 teaspoon of vanilla extract to the Oreo mix. Stir it well until everything blends into a smooth mixture. Make sure there are no lumps. This layer adds a rich and creamy taste to your bars. Next, line an 8x8-inch baking dish with parchment paper. Leave some paper hanging over the edges for easy removal. Press the Oreo peanut butter mixture into the bottom of the dish firmly. Use a spatula or the back of a measuring cup to smooth it out. Then, melt 1 cup of semi-sweet chocolate chips in a microwave-safe bowl. If you want extra smoothness, add 2 tablespoons of coconut oil. Heat in 30-second bursts, stirring each time until melted. Pour the chocolate over the peanut butter layer and smooth it out evenly. Now, it's time to chill! Place the baking dish in the refrigerator for at least 2 hours. This helps the bars set and become firm. Once chilled, lift the bars out using the parchment paper. Cut them into squares. You can sprinkle some crushed Oreos on top for a nice touch. Enjoy your tasty treat! To get the best texture, fully combine your ingredients. Mix the crushed Oreos and melted butter until it looks like wet sand. This helps the crust hold together well. When you add the peanut butter, powdered sugar, and vanilla extract, stir gently. Make sure everything is smooth and mixed well. Press the mixture firmly into the baking dish. Use a spatula or the back of a measuring cup to pack it down tightly. This step is key for a strong base. If it’s not pressed well, the bars may crumble when you cut them. Melting chocolate in the microwave is simple. Start by putting the chocolate chips in a microwave-safe bowl. Add coconut oil if you want a smoother finish. Heat it on high for 30 seconds. Then, take it out and stir. Repeat this until the chocolate is melted and smooth. If you don’t have a microwave, you can use a double boiler. Fill a pot with water and bring it to a simmer. Place a heat-safe bowl on top, making sure it doesn’t touch the water. Add the chocolate chips and stir until they melt. Make your bars look great when serving. Cut them into squares and place them on a nice platter. You can sprinkle crushed Oreo crumbs on top for more texture. For an extra treat, drizzle melted chocolate or peanut butter over the bars. This adds flavor and makes them pop visually. Consider serving with a scoop of ice cream for a fun dessert twist! {{image_2}} You can make your No-Bake Oreo Peanut Butter Bars a bit healthier. Here are a couple of easy swaps: - Using reduced-fat peanut butter: This option cuts some fat but keeps the great taste. - Substituting with sugar-free Oreos: This swap lowers sugar and helps some diets. Want to change the taste? Adding extra flavors is a fun way to customize: - Incorporating chopped nuts or candies: Try adding peanuts or chocolate candies for crunch. - Adjusting the chocolate type: Experiment with dark, white, or milk chocolate for a new twist. These bars can fit into various diets, making them a great treat for many people: - Vegan options available: Use plant-based butter and dairy-free chocolate for a vegan treat. - Gluten-free adaptations: Choose gluten-free Oreos to make sure everyone can enjoy these bars. To keep your No-Bake Oreo Peanut Butter Bars fresh, use an airtight container. This will lock in moisture and flavor. If you don’t have one, a covered dish works too but may not be as effective. Always store the bars in the fridge. The cool temperature helps them stay firm and tasty. You can store these bars for about one week in the fridge. After that, they may start to spoil. Signs of spoilage include a change in texture or an off smell. If the bars feel sticky or look dry, it's best to toss them. Enjoy them fresh for the best flavor! Yes, you can freeze these bars. To freeze, cut them into squares. Wrap each square in plastic wrap or foil. Place them in an airtight container. They can last up to three months in the freezer. To thaw, take them out and leave them in the fridge for a few hours. You can also let them sit at room temperature for about 30 minutes. This makes them soft again. To boost the chocolate flavor, add more chocolate chips. Use a layer of chocolate on top and in the mix. You can melt extra chocolate and spread it on the top layer. Mixing in cocoa powder with the peanut butter layer also adds a rich taste. You can even use dark chocolate for a deeper flavor. If you don’t have coconut oil, you can use butter instead. Vegetable oil is another good option. Both will keep the chocolate smooth. Just use the same amount as the coconut oil. This will help your chocolate layer stay nice and glossy. These bars can last up to a week in the fridge. Store them in an airtight container. Make sure they are cool before sealing. After a few days, they may lose some texture. For the best taste, enjoy them within the first few days. These Oreo peanut butter bars are easy and fun to make. You mix crushed Oreos with butter for the crust. Then, you blend peanut butter, sugar, and vanilla for the filling. After pressing it into a dish, you melt chocolate for the topping. Chill, cut into squares, and enjoy. Remember, you can customize these bars to fit your taste. Try different toppings or flavors. Store them well to keep them fresh. Enjoy making and sharing these tasty treats with friends and family!
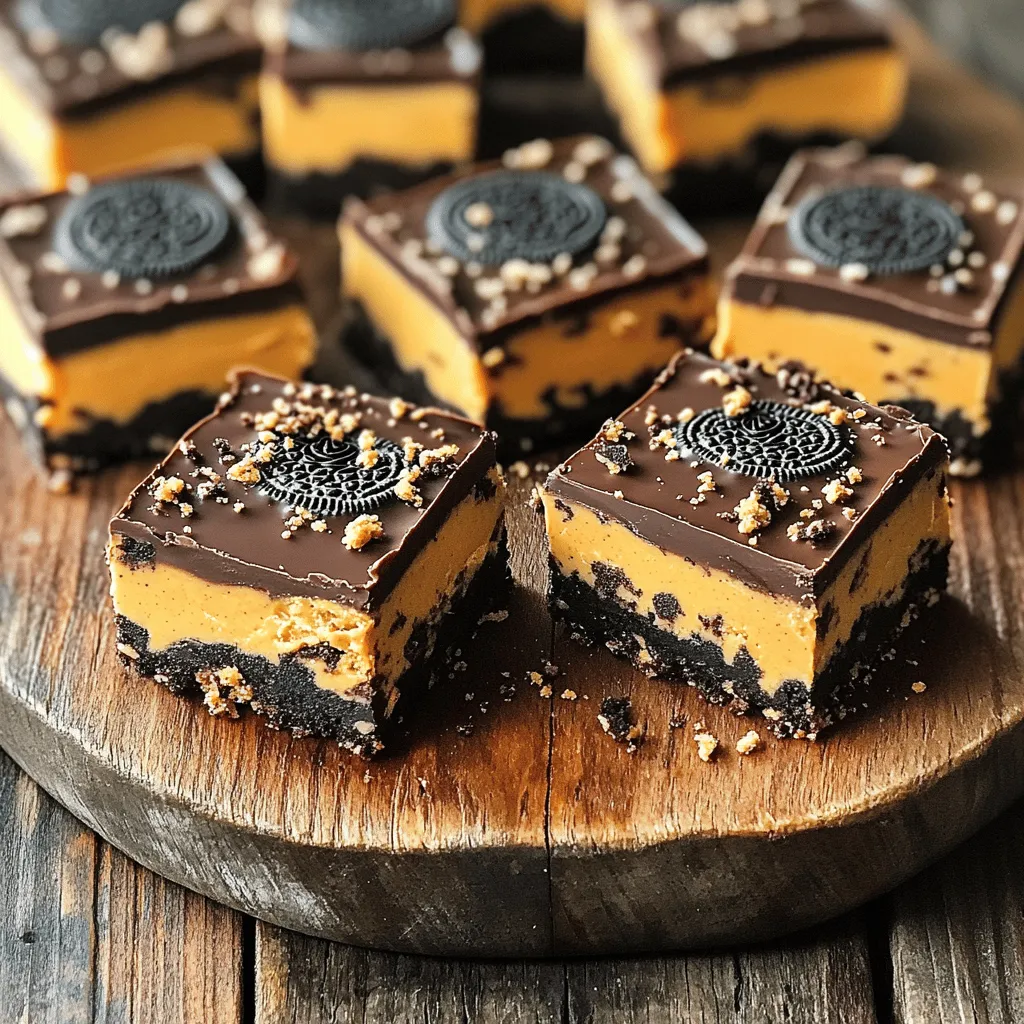
No-Bake Oreo Peanut Butter Bars Easy and Delicious Treat
Are you craving a sweet treat that’s quick and easy? You’ll love these No-Bake Oreo Peanut Butter Bars! With just six ingredients and no oven
- 1 cup unsalted butter, melted - 2 cups granulated sugar - 4 large eggs - 1 teaspoon vanilla extract - 1 cup all-purpose flour - 1 cup unsweetened cocoa powder - 1/2 teaspoon salt The brownie base is rich and fudgy. The melted butter adds moisture. Granulated sugar gives it sweetness. Eggs add structure and help it rise. Vanilla extract enhances the flavor. The flour and cocoa powder create a soft texture. Salt balances the sweetness and deepens the taste. - 16 oz cream cheese, softened - 1 cup powdered sugar - 2 large eggs - 1 teaspoon vanilla extract The cheesecake layer is creamy and smooth. Softened cream cheese provides a rich base. Powdered sugar sweetens it without grittiness. Eggs help set the layer, making it firm. Vanilla extract gives that classic cheesecake flavor, making it irresistible. - 1 cup pecans, chopped - 1 cup caramel sauce (store-bought or homemade) The caramel pecan topping is a delightful mix of flavors. Chopped pecans add crunch and nuttiness. Caramel sauce brings a sweet, sticky finish. Together, they create a beautiful and tasty layer on top of the cheesecake. This topping makes the bars fun and festive. First, preheat your oven to 350°F (175°C). This step is key for even baking. While the oven heats, prep your baking pan. You can grease a 9x13 inch baking pan. Alternatively, line the pan with parchment paper. This makes it easy to lift the bars out later. In a large bowl, mix the melted butter and granulated sugar. Whisk them together until smooth. Next, add the eggs one at a time. Make sure to mix well after each addition. Stir in the vanilla extract for flavor. Now, sift in the flour, cocoa powder, and salt. Gently fold until just combined. Be careful not to overmix. Pour this brownie batter into your prepared pan, spreading it evenly. For the cheesecake layer, beat the softened cream cheese in a mixing bowl. You want it to be smooth and creamy. Gradually add the powdered sugar, mixing until well blended. Then, add the eggs and vanilla extract. Mix again until everything is nicely incorporated. Pour the cheesecake mixture over the brownie base. Spread it out evenly across the top. Now, bake this in your preheated oven for about 30 to 35 minutes. The cheesecake should look set but still jiggle a bit in the center. Check that the brownie layer is firm to the touch. After baking, let the bars cool for about 10 minutes. Sprinkle the chopped pecans evenly over the cheesecake layer. Then, drizzle the caramel sauce on top. If you like, use a knife to gently swirl the caramel into the cheesecake. Return the bars to the oven for an extra 5 to 10 minutes. This warms the pecans and caramel. Let the bars cool completely in the pan. Finally, refrigerate them for at least 2 hours to set. Once chilled, lift them out using the parchment paper, slice, and enjoy! To make the best brownies, always start with fresh ingredients. Use high-quality cocoa powder. Melt your butter completely for a rich flavor. Whisk the sugar and butter well to blend them. Add eggs one at a time, mixing after each. This helps create a smooth batter. When adding dry ingredients, sift them first. This avoids lumps and adds air for a light texture. Mix gently to avoid overmixing. Overmixing can lead to dense brownies. A smooth cheesecake layer is key. Make sure your cream cheese is softened to room temperature. This helps it blend more easily. Beat it well until creamy and free of lumps. Gradually add powdered sugar to avoid a grainy texture. Mix in the eggs and vanilla slowly. This keeps the mixture smooth. Pour the cheesecake layer gently over the brownie base. Spread it evenly for even baking. For a great caramel swirl, use warm caramel sauce. If it's cold, it won't swirl well. After baking, let the bars cool for about 10 minutes. This gives the cheesecake layer time to set. Sprinkle chopped pecans on top first. Drizzle the warm caramel sauce over this layer. Use a knife to gently swirl the caramel into the cheesecake. Be careful not to mix too much. You want distinct swirls for the best look! {{image_2}} You can boost the brownie base flavor easily. Here are some ideas: - Chocolate Chips: Add 1 cup of chocolate chips for extra chocolate goodness. - Coffee: Mix in 1 tablespoon of instant coffee for a rich taste. - Nut Butter: Stir in 1/2 cup of peanut butter or almond butter for a nutty twist. These simple changes make each bite more exciting and delicious. Toppings can change the whole vibe of your dessert. Here are some tasty options: - Fresh Fruit: Add sliced strawberries or raspberries for a fresh touch. - Whipped Cream: Serve with a dollop of whipped cream for added creaminess. - Dark Chocolate Drizzle: Drizzle melted dark chocolate over the top for an elegant finish. Mix and match these toppings to suit your taste or the season. If you need a gluten-free version, it’s easy to adapt: - Gluten-Free Flour: Replace all-purpose flour with a 1:1 gluten-free baking blend. - Check Ingredients: Ensure your caramel sauce and other toppings are gluten-free. This way, everyone can enjoy these delightful bars without worry. To keep your caramel pecan cheesecake brownie bars fresh, store them in an airtight container. Place a piece of wax paper between layers to prevent sticking. You can keep them in the fridge for up to one week. This way, you can enjoy the rich flavors for days. If you want to save some for later, freezing is a great option. First, let the bars cool completely. Then, slice them into squares. Wrap each square tightly in plastic wrap and then in aluminum foil. Place them in a freezer-safe bag. These bars freeze well for up to three months. When you crave a treat, just thaw them in the fridge. To enjoy your bars warm, you can reheat them. Place a square on a microwave-safe plate and heat for about 10-15 seconds. Keep an eye on them to avoid overheating. You can also place the bars in a preheated oven at 350°F (175°C) for about 5-10 minutes. This will make the caramel gooey again, bringing back that fresh-baked taste. Yes, you can use other nuts. Walnuts or almonds work great. Just chop them up like you would pecans. They add a nice crunch, too. Each nut gives a unique flavor, so feel free to experiment. Making caramel sauce is simple. You need sugar and butter. Start by melting 1 cup of sugar in a pan over low heat. Stir until it turns golden brown. Then add 6 tablespoons of butter. Mix until smooth. Finally, pour in 1/2 cup of heavy cream. Stir until it thickens. Let it cool before using. If you need a cream cheese substitute, use Greek yogurt or ricotta cheese. Both options provide a creamy texture. For a dairy-free option, try cashew cream. Just blend soaked cashews with a bit of lemon juice and water until smooth. These bars last up to one week in the fridge. Store them in an airtight container for best results. You can also freeze them for up to three months. Just make sure to wrap them tightly before freezing. This way, they stay fresh and tasty! This blog post covered how to make delicious caramel pecan cheesecake brownies. We discussed the key ingredients, from the brownie base to the creamy topping. I shared step-by-step instructions for baking and assembling the dessert. You also learned tips for perfect results and tasty variations. Keep these ideas in mind as you bake. Enjoy your homemade treats, and don't forget to share them! With practice, you'll master this recipe and impress everyone with your skills. Happy baking!
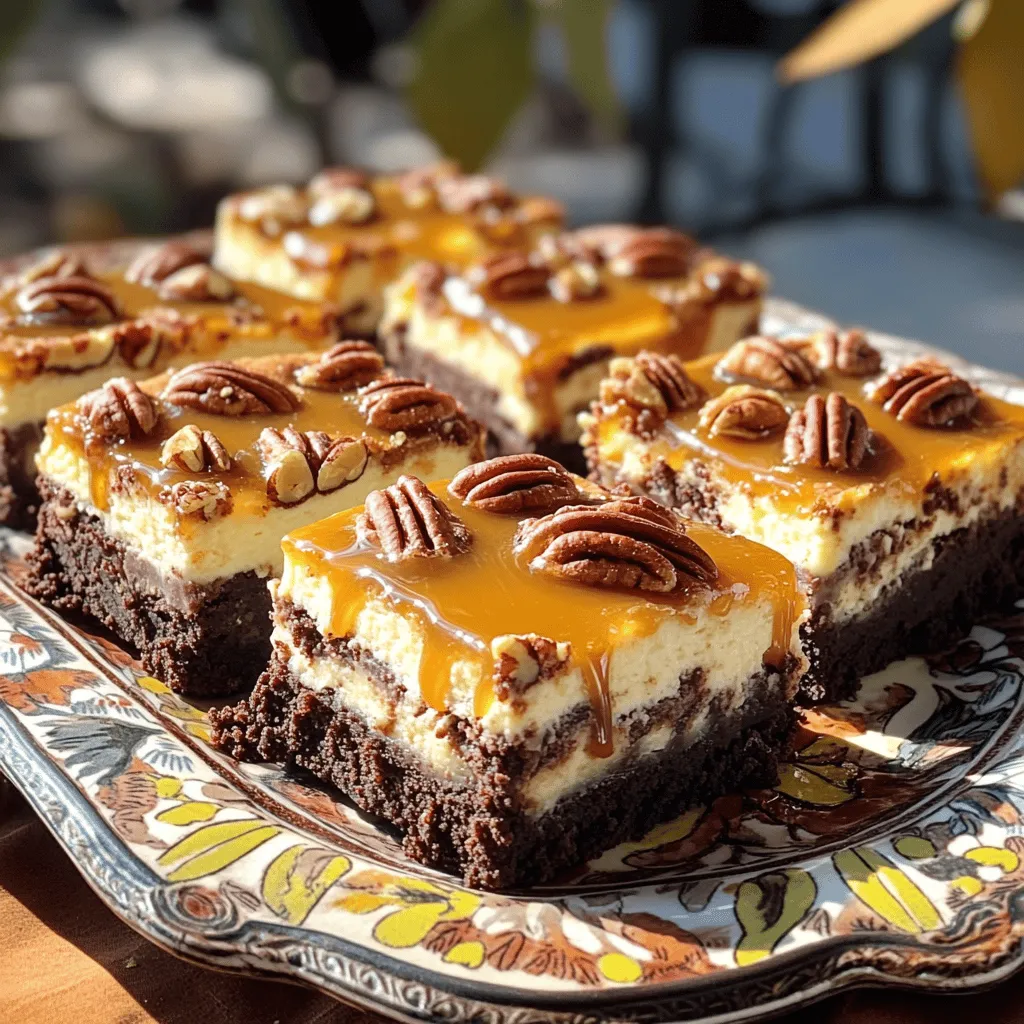
Caramel Pecan Cheesecake Brownie Bars Easy Delight
Get ready to indulge in a sweet treat that combines rich, fudgy brownies, creamy cheesecake, and crunchy pecans. My Caramel Pecan Cheesecake Brownie Bars are
To make these tasty donut holes, you will need: - 2 cups all-purpose flour - 1/3 cup granulated sugar - 2 teaspoons baking powder - 1/2 teaspoon salt - 1/2 teaspoon ground cinnamon - 1/4 teaspoon nutmeg - 1/4 cup unsalted butter, melted - 1 large egg - 3/4 cup milk - 1 teaspoon vanilla extract You also need a few baking essentials: - 1/2 cup maple syrup - 1/4 cup powdered sugar - Extra granulated sugar and cinnamon for coating These ingredients create a simple but delicious base for your donut holes. You can find them in any grocery store. If you want to get creative, consider these optional toppings: - Chopped nuts for crunch - Sprinkles for color - A drizzle of chocolate for extra sweetness These toppings add fun and flavor to your donut holes. Feel free to mix and match! Start by preheating your oven to 350°F (175°C). This step warms up the oven for even baking. Next, grab a mini muffin pan or a donut hole pan. Lightly grease it with cooking spray. This helps prevent sticking and makes cleanup easy. In a large mixing bowl, whisk together the dry ingredients. You need 2 cups of all-purpose flour, 1/3 cup of granulated sugar, 2 teaspoons of baking powder, 1/2 teaspoon of salt, 1/2 teaspoon of ground cinnamon, and 1/4 teaspoon of nutmeg. Whisk these until they are well combined. This mix forms the base of your donut holes. In a separate bowl, combine the wet ingredients. Use 1/4 cup of melted unsalted butter, 1 large egg, 3/4 cup of milk, and 1 teaspoon of vanilla extract. Whisk these together until the mixture is smooth. This adds flavor and moisture to your donut holes. Now, slowly pour the wet ingredients into the bowl with the dry mix. Stir gently until just combined. Do not overmix! It's okay if you see a few lumps. Overmixing can make the donut holes tough. Use a spoon or a piping bag to fill each cavity in the pan. Fill each one about 2/3 full with the batter. This allows room for the donut holes to rise without spilling over. Place the pan in your preheated oven. Bake for 10-12 minutes. The tops should be lightly golden. To test, insert a toothpick in the center. It should come out clean when the donut holes are ready. While your donut holes bake, prepare the glaze. In a bowl, mix 1/2 cup of maple syrup with 1/4 cup of powdered sugar. Stir until smooth. This sweet glaze adds a rich flavor to your donut holes. In a shallow dish, mix 1/4 cup of granulated sugar with 1 teaspoon of cinnamon. After baking, let the donut holes cool slightly. Roll each one in the cinnamon sugar mixture until fully coated. This adds a crunchy, sweet layer. Drizzle the maple glaze over the coated donut holes. Alternatively, dip the tops directly into the glaze for extra sweetness. Allow the glaze to set for a few minutes before serving warm. Enjoy these delightful cinnamon sugar maple glazed donut holes! To get soft and fluffy donut holes, mix carefully. Overmixing makes them tough. You want some lumps, so don't worry! A light hand is key. Bake until golden on top. This usually takes about 10-12 minutes. Use a toothpick to check. If it comes out clean, they are done. To store your donut holes, let them cool first. Place them in an airtight container. They stay fresh for about two days. If you want to keep them longer, freeze them. Wrap each donut hole in plastic wrap. Then, place them in a freezer bag. To reheat, warm them in the oven at 350°F (175°C) for about 5-7 minutes. This keeps them soft. One common mistake is not greasing the pan well. This can make it hard to remove your donut holes. Also, check your baking powder's freshness. Old baking powder can affect rise and texture. Lastly, resist the urge to skip the glaze! It adds the perfect touch of sweetness. {{image_2}} You can mix up the flavor of your donut holes easily. For a chocolate twist, add 1/3 cup of cocoa powder to the dry ingredients. This gives a rich, deep taste that pairs well with the glaze. If you prefer pumpkin, replace 1/2 cup of milk with 1/2 cup of pure pumpkin puree. Add a bit more cinnamon and nutmeg for that warm fall flavor. Choosing different flavors keeps things fresh and fun! If you want gluten-free donut holes, swap the all-purpose flour for a gluten-free blend. Look for one that works for baking. You may need to add a little extra baking powder to help them rise. Always check the package to ensure it is gluten-free. This way, everyone can enjoy your tasty treats without worry. For a dairy-free version, replace the milk with almond milk or oat milk. You can use coconut oil instead of butter. This change keeps the donut holes moist while adding a hint of coconut flavor. Make sure your powdered sugar is also dairy-free, as some brands may add milk ingredients. These simple swaps ensure everyone can dive into these delicious bites! Cinnamon sugar maple glazed donut holes go great with many drinks. You can serve them with coffee for a warm start to your day. Tea is another good choice, especially chai or Earl Grey. For kids, milk or hot chocolate makes a sweet match. You might also try them with apple cider. The flavors blend well together and add joy to any meal. To show off your donut holes, use a nice platter or tiered stand. A simple white plate highlights their golden color. You can sprinkle some extra cinnamon sugar around them for fun. Add a small bowl of maple syrup on the side for dipping. This way, guests can enjoy more of that sweet flavor. A touch of fresh fruit, like berries, adds color and balance to your spread. These donut holes are perfect for many events. They shine at breakfast or brunch gatherings. Serve them at holiday parties like Thanksgiving or Christmas for a festive touch. They also work well for casual get-togethers with friends. Kids love them for birthday parties or playdates. Anytime you need a sweet treat, cinnamon sugar maple glazed donut holes will impress! Yes, you can use a regular muffin pan. Just fill each cup halfway. Your donut holes will be more like muffin tops, but they will still taste great. Keep an eye on the baking time; they may need a few extra minutes. Store leftover donut holes in an airtight container. They stay fresh at room temperature for up to three days. If you live in a warm area, put them in the fridge to keep them fresh longer. Yes, you can freeze them. Let the donut holes cool completely first. Then, place them in a single layer on a baking sheet. Freeze for about an hour, then move them to a freezer bag. They will stay good for about three months. To reheat, place the donut holes in an oven at 350°F (175°C) for about 5-7 minutes. This keeps them warm and soft. You can also use a microwave, but they may get a bit chewy. Enjoy them warm for the best taste! You now know how to make delicious donut holes from scratch. We covered ingredients, baking steps, and helpful tips. You learned about flavors and ways to serve them too. Remember, small details matter. Following these steps ensures great taste and texture. Get creative with toppings and variations. Share these delightful treats at your next gathering! Enjoy your baking journey!
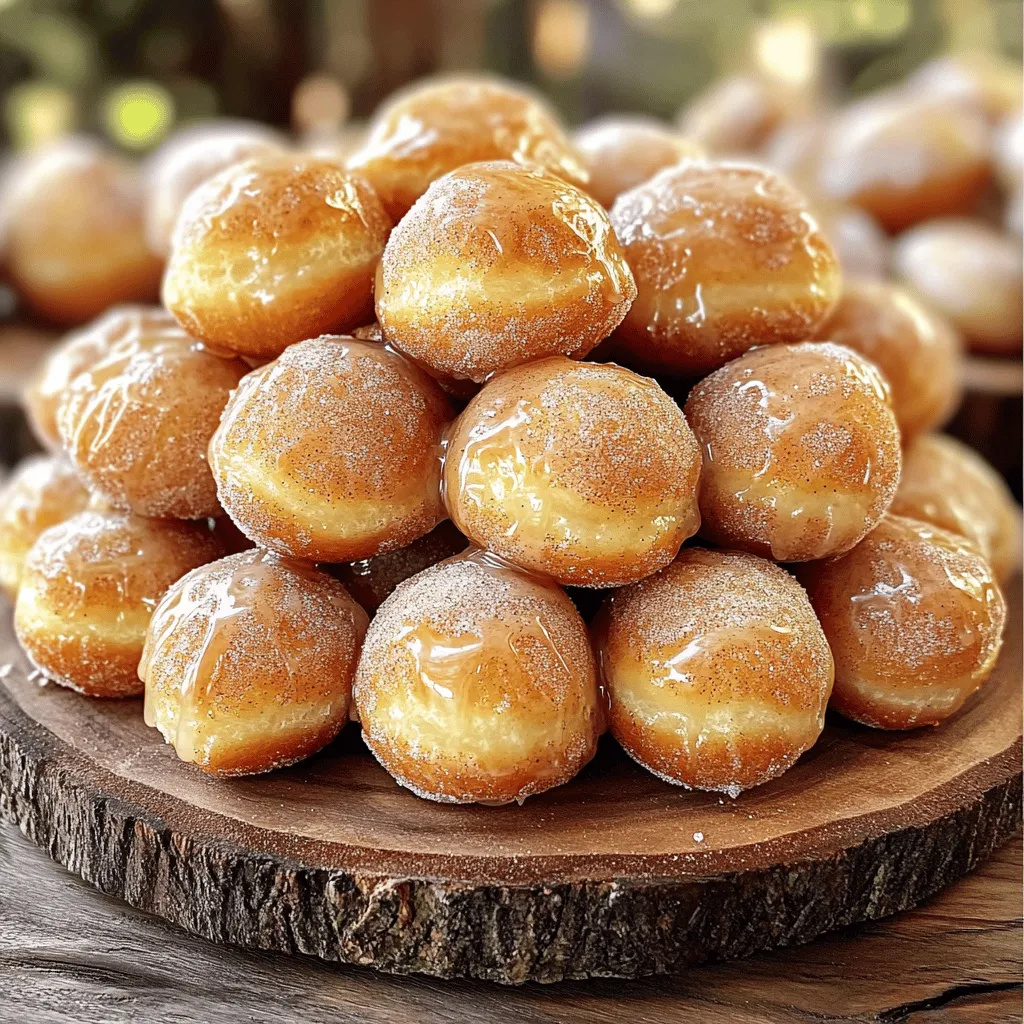
Cinnamon Sugar Maple Glazed Donut Holes Delight
Are you ready to treat yourself to a warm, sweet delight? Our Cinnamon Sugar Maple Glazed Donut Holes will make your taste buds dance! You’ll
- 2 cups all-purpose flour - 2 cups granulated sugar - 1 teaspoon baking powder - 1 teaspoon baking soda - 1/2 teaspoon salt - 1 teaspoon ground cinnamon - 1/2 teaspoon ground nutmeg To start, we need our dry ingredients. All-purpose flour gives the cake body. Granulated sugar adds sweetness. The baking powder and soda help it rise. Salt enhances flavor, while cinnamon and nutmeg add warmth. - 4 large eggs - 1 cup vegetable oil - 2 cups finely grated carrots (about 4 medium carrots) - 1 cup crushed pineapple, drained Next, we gather our wet ingredients. Eggs bind the mixture. Vegetable oil keeps the cake moist. Grated carrots bring texture and sweetness. Crushed pineapple adds a juicy twist. - 1/2 cup chopped walnuts or pecans - 1/2 cup raisins For extra crunch and flavor, consider add-ins. Chopped walnuts or pecans add nutty richness. Raisins bring a chewy sweetness. Feel free to mix and match! - 8 oz cream cheese, softened - 1/2 cup unsalted butter, softened - 4 cups powdered sugar - 1 teaspoon vanilla extract For the frosting, we need cream cheese and butter. They create a rich, smooth base. Powdered sugar sweetens and thickens it. Vanilla extract adds a lovely aroma. This frosting makes the cake feel special! 1. Preheating the oven: Start by preheating your oven to 350°F (175°C). This step is key for even baking. 2. Greasing and flouring cake pans: Next, take two 9-inch round cake pans. Grease them well with butter or oil. Then, dust them with flour. This prevents the cake from sticking. 1. Combining dry ingredients: In a large bowl, mix 2 cups of all-purpose flour, 2 cups of granulated sugar, 1 teaspoon of baking powder, 1 teaspoon of baking soda, 1/2 teaspoon of salt, 1 teaspoon of ground cinnamon, and 1/2 teaspoon of ground nutmeg. Stir well to blend. 2. Mixing wet ingredients: In another bowl, crack 4 large eggs. Beat them until smooth. Then, add 1 cup of vegetable oil and mix until combined. 1. Folding in additional ingredients: Slowly pour the wet mix into the dry mix. Stir gently until just combined. Add 2 cups of finely grated carrots, 1 cup of crushed pineapple, and optional 1/2 cup of chopped walnuts or pecans and 1/2 cup of raisins. Fold these in carefully. 2. Baking time and techniques: Divide the batter evenly between the pans. Bake for 25-30 minutes. Check with a toothpick in the center. It should come out clean. 1. Making the cream cheese frosting: While the cakes cool, beat 8 oz of softened cream cheese and 1/2 cup of softened unsalted butter in a bowl until smooth. Gradually add 4 cups of powdered sugar and 1 teaspoon of vanilla extract. Mix until fluffy. 2. Layering and icing the cake: Once the cakes cool completely, place one layer on a plate. Spread a generous amount of frosting on top. Add the second layer and frost the top and sides. For fun, you can add extra nuts or a sprinkle of cinnamon. To get that perfect bakery-style texture, mix your batter gently. Overmixing makes the cake tough. Combine the dry and wet ingredients until just mixed. You want some lumps for a tender cake. When cooling, let the cakes rest in the pans for 10 minutes. This helps them firm up. Then, transfer them to a wire rack to cool completely. This step is key for perfect layering. For a smooth frosting finish, make sure your cream cheese and butter are soft. Beat them well before adding sugar. This way, you avoid lumps. Spread a thin layer first. This is called a crumb coat. Let it set before adding a thicker layer. You can spice up your presentation! Consider adding nuts or edible flowers on top. A sprinkle of cinnamon also adds flair. This makes your cake look as good as it tastes. Be careful with your ingredient measurements. Too much flour leads to a dry cake. Use a kitchen scale for accuracy if you can. Watch the baking time closely. Every oven is different. Start checking your cake at 25 minutes. Use a toothpick to test for doneness. If it comes out clean, your cake is ready! {{image_2}} You can make this carrot cake a bit healthier. Try using whole wheat flour instead of all-purpose flour. Whole wheat flour adds fiber and nutrients. You can also lower the sugar. Use half the amount or try a sugar substitute. This change keeps the cake sweet without extra sugar. Want to change the flavor? Add spices like ginger or cloves for a warm taste. You can also mix in vanilla or almond extract. For crunch and texture, use different nuts. Pecans or hazelnuts work great. You can throw in dried fruits too. Try coconut or chopped apples for a fruity twist. If you need a gluten-free option, use gluten-free flour blends. These blends mimic regular flour well. For a vegan cake, replace eggs with flax eggs or applesauce. Use a vegan butter for the frosting. This way, everyone can enjoy your delicious carrot cake! To keep your carrot cake fresh for a few days, store it at room temperature. Place the cake in a cool, dry spot. Cover it with a cake dome or wrap it in plastic wrap. This keeps moisture in and prevents it from drying out. If you want to store it longer, refrigerate the cake. Make sure to wrap it tightly in plastic wrap. This helps maintain its flavor and texture while keeping it safe from other odors in the fridge. For long-term storage, freezing is your best bet. Wrap each cake layer in plastic wrap. Then, place them in a freezer-safe bag. This prevents freezer burn. You can also freeze the cream cheese frosting in an airtight container. To thaw the cake, take it out of the freezer. Leave it in the fridge overnight. If you need it faster, let it sit at room temperature for a couple of hours. This will help the cake regain its moisture and texture. Your carrot cake can last about 3-4 days at room temperature. In the fridge, it can last up to a week. For frozen cake, it stays good for about 3 months. To keep it fresh, always check for signs of spoilage. If you see mold or smell something off, it’s best to toss it. Enjoy your delicious cake while it’s still at its best! To check if your carrot cake is done, use the toothpick test. Insert a toothpick into the center of the cake. If it comes out clean, your cake is ready. If there is batter on the toothpick, bake it a bit longer. You can also look for visual cues. The edges of the cake should be slightly pulled away from the pan. The top should be golden brown and spring back when gently pressed. Yes, you can make this cake ahead of time. Bake the cake and let it cool completely. Wrap each layer tightly in plastic wrap. This way, it stays fresh in the fridge for up to two days. If you want to bake it several days ahead, freeze the layers. They stay good for up to three months. Just thaw them in the fridge overnight before frosting. If you don't have cream cheese, you can use mascarpone cheese. It has a similar texture and taste. You can also use Greek yogurt mixed with a little butter for a lighter option. For the cake itself, if you want a dairy-free option, use non-dairy yogurt or silken tofu blended until smooth. Each option will give you a different flavor but will still be delicious! This blog post covered essential ingredients for carrot cake, detailed steps for baking, tips for texture and frosting, variations for better health, storage advice, and common FAQs. You now have a clear path to creating a delicious and moist carrot cake that everyone will love. Remember, the key lies in balancing flavors and avoiding common mistakes. Enjoy the process, and let your creativity shine. Your perfect carrot cake awaits!
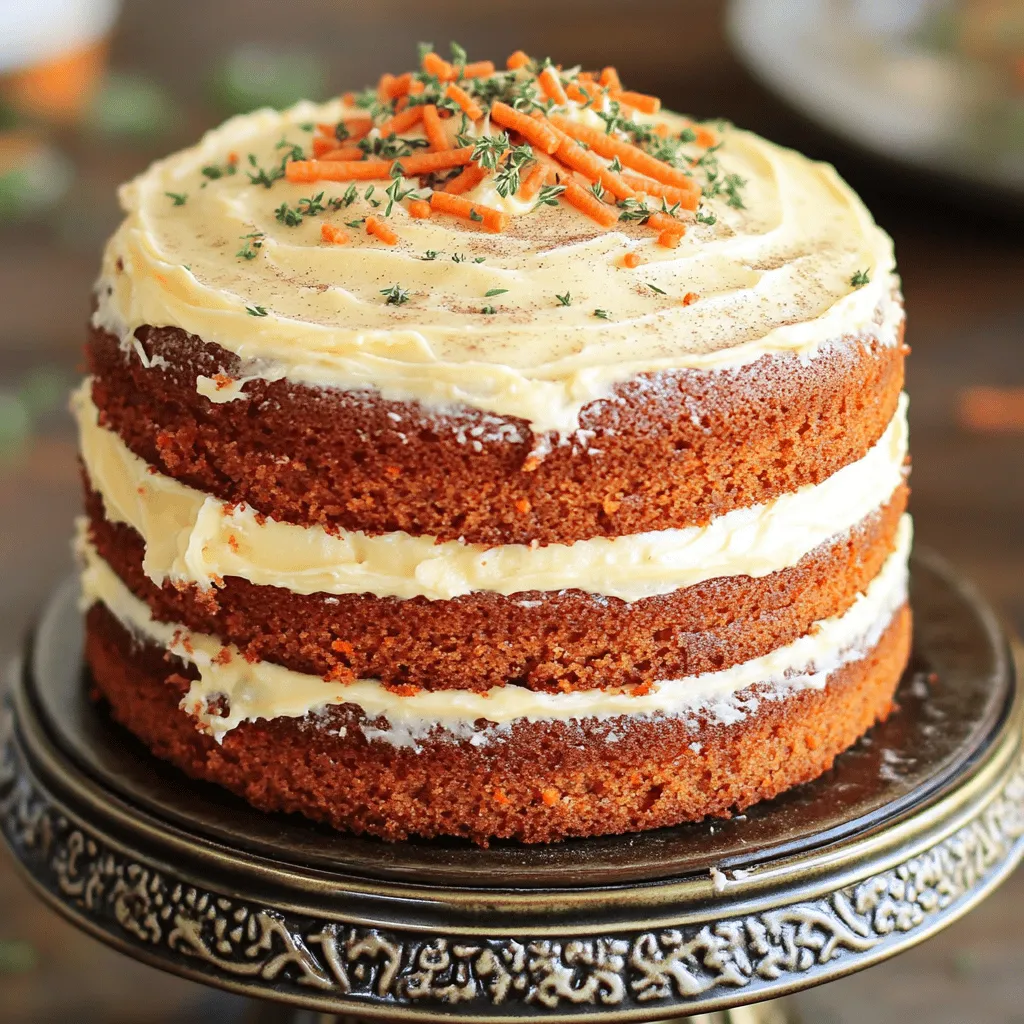
Carrot Cake with Cream Cheese Frosting Bakery Style Delight
Indulge in a slice of heaven with my bakery-style carrot cake topped with creamy frosting! This recipe combines fresh grated carrots, crushed pineapple, and warm
To make Matcha Coconut No Bake Energy Bites, you need: - 1 cup rolled oats - 1/2 cup almond butter (or any nut butter) - 1/4 cup honey or maple syrup - 1/4 cup shredded unsweetened coconut - 1 tablespoon matcha green tea powder - 1/4 cup mini chocolate chips (optional) - Pinch of salt - 1/4 teaspoon vanilla extract If you have nut allergies, use sunflower seed butter or pumpkin seed butter. They both work great! For sweeteners, maple syrup is a good option if you want it vegan. You can also use agave syrup for a different taste. If you want to cut sugar, try mashed bananas or dates. They add sweetness and moisture. - Rolled oats: They are rich in fiber. This helps with digestion and keeps you full. - Almond butter: This nut butter gives healthy fats and protein. It helps your body build muscle. - Honey or maple syrup: These natural sweeteners provide quick energy. They also have antioxidants. - Shredded coconut: This adds healthy fats and fiber. It can help with heart health. - Matcha green tea powder: Matcha boosts metabolism and gives you a calm alertness. It's also full of antioxidants. - Mini chocolate chips: They add flavor and can lift your mood. Use dark chocolate for added health benefits. - Salt: A small pinch can enhance flavors. It also helps balance hydration in your body. - Vanilla extract: This adds a warm flavor that makes everything taste better. It can also aid digestion. First, take a large bowl. Add 1 cup of rolled oats. Then, mix in 1/2 cup of almond butter. You can use any nut butter you like. Next, pour in 1/4 cup of honey or maple syrup. This adds sweetness. Toss in 1/4 cup of shredded coconut for texture. Now, add 1 tablespoon of matcha green tea powder. This gives a nice green color and flavor. Don’t forget a pinch of salt to enhance the taste. Finally, add 1/4 teaspoon of vanilla extract for a nice aroma. Mix all these ingredients well. You want a sticky mixture. Once the mixture is ready, wash your hands. Grab about a tablespoon of the mix. Roll it into a ball about 1 inch in diameter. Keep your hands slightly damp to help with rolling. Place the formed balls on a baking sheet. Make sure to line it with parchment paper. This will prevent sticking. Continue rolling until all the mixture is shaped into bites. You should end up with about 12 energy bites. After shaping the bites, it's time to chill them. Place the baking sheet in the fridge. Let the energy bites chill for at least 30 minutes. This helps them firm up nicely. Once set, transfer the bites to an airtight container. You can store them in the refrigerator. They should last up to 2 weeks. Enjoy these tasty bites whenever you need a quick snack! To get the best texture, balance is key. You want your bites to be chewy but firm. If they feel too dry, add more almond butter. If too wet, mix in a bit more oats. This helps hold everything together. You can boost the flavor easily. Try adding a dash of cinnamon or nutmeg. You can also fold in dried fruits like cranberries or apricots for a sweet twist. If you love chocolate, mini chocolate chips add a fun touch. One big mistake is not chilling long enough. Let the bites sit for at least 30 minutes. This helps them firm up nicely. Another error is not mixing well. Make sure everything is combined before rolling into balls. Lastly, don’t skip the pinch of salt; it enhances all the flavors. {{image_2}} You can make these energy bites vegan easily! Simply swap the honey for maple syrup. This sweetener is perfect for plant-based diets. All other ingredients are already vegan-friendly. Enjoy the same great taste without any animal products! Want to change things up? You can add many mix-ins to these bites. Try dried fruits like cranberries or apricots for sweetness. You can also use seeds like chia or flax for extra crunch. If you love chocolate, add more mini chocolate chips or even cacao nibs. Each mix-in gives a new twist to the flavor! If you have nut allergies, no worries! You can use sunflower seed butter instead of almond butter. This option keeps the bites creamy and tasty. Always check labels to ensure no hidden nuts are in your ingredients. Enjoy these bites safely without nuts! Store your Matcha Coconut No Bake Energy Bites in an airtight container. This keeps them fresh. I recommend placing a piece of parchment paper between layers if you stack them. It prevents them from sticking together. These bites stay good in the fridge for up to two weeks. If you want them to last longer, freezing is a great option. To freeze, place the energy bites on a baking sheet. Make sure they're not touching each other. Freeze them for about an hour until firm. Once frozen, transfer them to a freezer-safe bag. They can last up to three months in the freezer. When you want one, just take it out and let it thaw a few minutes at room temperature. Check for any off smells or changes in color. If the bites feel sticky or have an unusual texture, it’s best to toss them. If you see any mold, do not eat them. Always trust your senses. Keeping your energy bites stored well helps you enjoy them longer! These energy bites last for up to two weeks in the fridge. Store them in an airtight container. Keeping them chilled helps maintain their freshness and flavor. Yes, you can make them gluten-free. Just use certified gluten-free oats. This way, you avoid any gluten cross-contamination while still enjoying a tasty treat. Matcha offers many health benefits. It is rich in antioxidants, which help fight free radicals. Matcha can boost energy and enhance focus. It also supports metabolism and promotes relaxation. Absolutely! These energy bites are great for kids. They are packed with nutrients and offer a tasty snack. Just keep an eye on any nut allergies when serving to children. Yes, you can use any nut butter you like. Peanut butter, cashew butter, or sunflower seed butter all work well. Just remember that each nut butter has its own unique flavor. Choose one your family enjoys! These energy bites are easy to make and full of flavor. We covered the best ingredients, substitutes, and health benefits. I shared clear steps for preparation, forming, and storing your bites. Plus, I highlighted tips for texture and flavor. You can easily create variations for different diets or preferences. Remember to store them properly to keep them fresh. With these tools, you can enjoy tasty and healthy snacks anytime. I hope you try making them soon!
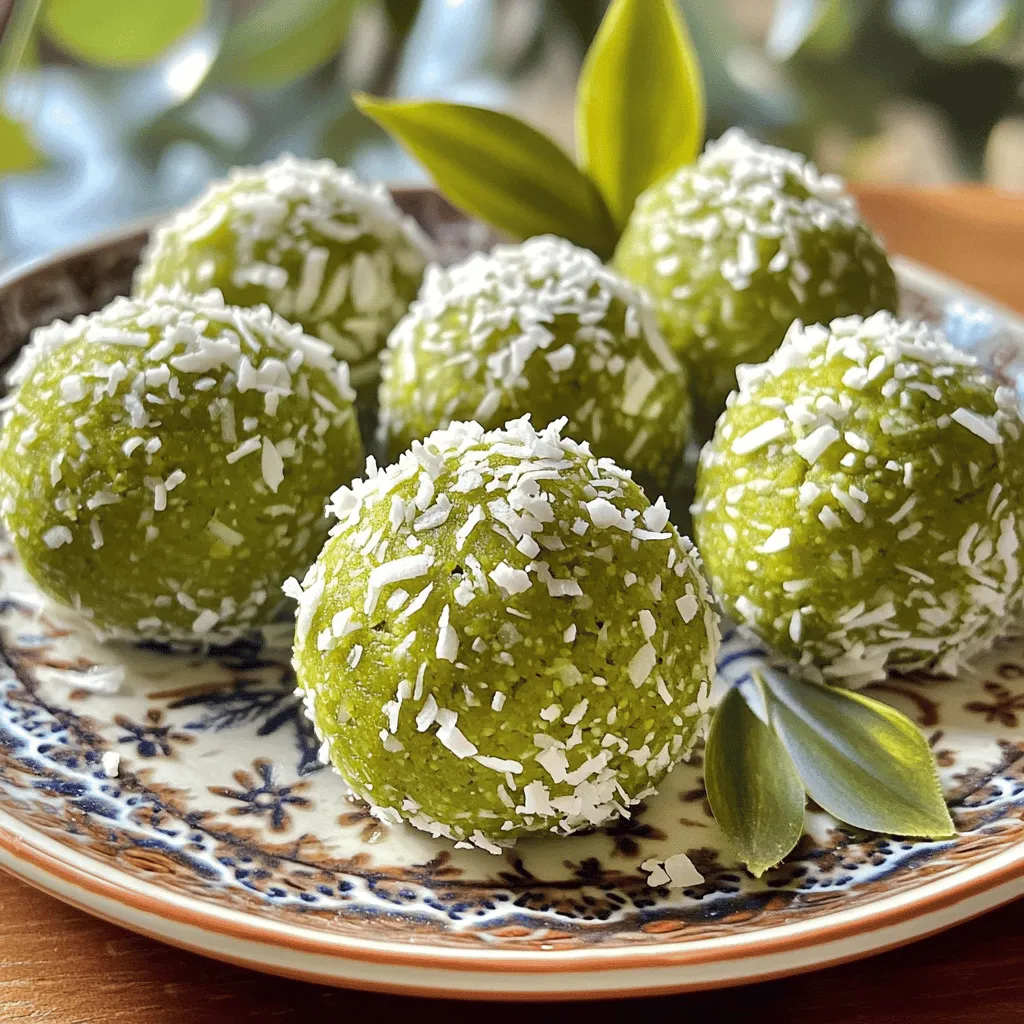
Matcha Coconut No Bake Energy Bites Simple Recipe
Looking for a quick and healthy snack? Try my Matcha Coconut No Bake Energy Bites! Packed with flavor and good-for-you ingredients, they are simple to
- 3 ripe bananas, mashed - 1/2 cup granulated sugar - 1/2 cup brown sugar, packed - 1/3 cup melted coconut oil - 2 large eggs - 1 teaspoon vanilla extract - 1 1/2 cups all-purpose flour - 1 teaspoon baking soda - 1/4 teaspoon salt - 1 teaspoon ground cinnamon - 1/2 teaspoon ground ginger - 1/4 teaspoon ground cardamom - 1/4 teaspoon ground cloves - 1/4 teaspoon black pepper - 1/2 cup chopped walnuts (optional) I love using ripe bananas for this bread. They add natural sweetness and moisture. This recipe combines different sugars, like granulated and brown sugar. Brown sugar gives a rich flavor. Coconut oil keeps the bread soft and adds a hint of tropical taste. For the dry ingredients, we use all-purpose flour, baking soda, and salt. The baking soda helps the bread rise nicely. The spices are what make this banana bread special. Cinnamon, ginger, cardamom, cloves, and black pepper create a warm chai flavor. If you want to add a crunch, add walnuts. They are optional but highly recommended. You can also switch them for other nuts or seeds if you prefer. 1. Start by preheating your oven to 350°F (175°C). This step is key for even baking. 2. Prepare a 9x5 inch loaf pan by greasing it or lining it with parchment paper. This helps the bread come out easily. 3. In a large bowl, mash the ripe bananas until smooth. Add granulated sugar and brown sugar. Mix until well blended. 4. Next, add melted coconut oil and eggs to the mixture. Stir in the vanilla extract until everything is smooth. 1. In another bowl, combine the dry ingredients. Whisk together the all-purpose flour, baking soda, salt, and spices: cinnamon, ginger, cardamom, cloves, and black pepper. 2. Gradually add the dry ingredients into the wet banana mix. Fold gently to combine. Be careful not to overmix. If you like, fold in the chopped walnuts for some crunch. 3. Pour the batter into your prepared loaf pan. Use a spatula to smooth the top. 4. Place the pan in the oven and bake for 60-70 minutes. To check for doneness, insert a toothpick into the center. It should come out clean when the bread is ready. 1. While your bread cools, prepare the maple glaze. In a small bowl, mix the powdered sugar, maple syrup, and 1 tablespoon of milk. 2. Stir until the glaze is smooth. If you want a thinner glaze, add more milk until you reach your desired consistency. Drizzle the glaze over your cooled banana bread and let it drip down the sides for a beautiful finish. - Alternative sweeteners: You can use honey or agave syrup instead of sugar. Just reduce the liquid in the recipe slightly. - Dairy-free options: Replace milk in the glaze with almond or oat milk. This makes it creamy without dairy. - Flour variations: Try using whole wheat flour or almond flour. Each gives a different taste and texture. - Avoiding overmixing: Mix ingredients just until combined. Overmixing makes the bread tough. - Perfecting the texture: For moist bread, ensure bananas are very ripe. They should be brown and soft. - Ensuring even baking: Place the loaf pan in the center of the oven. Rotate halfway through baking for even heat. Using these tips will help you create a delightful chai spice banana bread. Enjoy the process and the tasty results! {{image_2}} You can easily change the flavor of your chai spice banana bread. Here are two fun ideas: - Adding chocolate chips: Mix in a half cup of chocolate chips. This adds a sweet burst of flavor. The chocolate pairs well with the chai spices. - Incorporating fruits like apples or pears: Dice up some apples or pears. Fold them into the batter for extra moisture and sweetness. The fruits will make your bread even more delightful. If you want to skip the nuts, you can do that too. Here are some ways to enjoy your bread without nuts: - Omitting nuts: Just leave them out. Your banana bread will still be soft and tasty. - Using different seeds: Try adding sunflower or pumpkin seeds. They give a nice crunch and boost nutrition. You can make this recipe gluten-free with just a few swaps: - Gluten-free flour alternatives: Use a 1:1 gluten-free flour mix. This keeps the texture light and fluffy. - Adjusting other ingredients: You might need to check the baking soda and salt levels. Sometimes, gluten-free flour can need a little extra rise. These variations let you customize your chai spice banana bread. Feel free to mix and match to find your favorite version! To keep your chai spice banana bread fresh, store it correctly. Here are the best methods: - Room temperature vs. refrigerator: If you plan to eat the bread within three days, store it at room temperature. Keep it in a cool, dry place away from sunlight. If you need it to last longer, place it in the fridge. This helps to prevent mold but may dry it out a bit. - Using airtight containers: Use an airtight container to keep the bread moist. Wrap the loaf in plastic wrap before placing it in the container. This extra layer helps keep air out and moisture in. Want to save your banana bread for later? Freezing is a great option! Here’s how to do it: - How to freeze banana bread: Let the loaf cool completely. Then, slice it into pieces or freeze it whole. Wrap each slice in plastic wrap or foil. Place the wrapped slices in a freezer bag. Remove as much air as possible before sealing. - Thawing tips: When you're ready to eat the bread, take out the slices you want. Leave them at room temperature for 1-2 hours to thaw. You can also heat them in the microwave for a quick warm-up. This brings back the fresh taste! To check if your banana bread is done, use the toothpick test. Insert a toothpick into the center of the loaf. If it comes out clean, your bread is ready. If it has wet batter on it, bake for a few more minutes. Look for a golden brown crust and a firm top. The loaf should spring back when lightly pressed. Yes, you can use frozen bananas! First, thaw them in the fridge or at room temp. Once they are soft, mash them well. You may find that frozen bananas are even sweeter. This can add extra flavor to your bread. Just ensure to drain any excess liquid before mixing. Chai spice banana bread lasts about 3-5 days when stored at room temperature. Keep it in an airtight container to maintain freshness. If you want it to last longer, you can freeze it. Wrapped tightly, it can stay good for up to three months. Just remember to thaw it completely before enjoying! You learned how to make delicious banana bread by mixing ripe bananas with the right ingredients. I shared steps for preparing, baking, and glazing your bread. You also discovered tips for substitutions and variations to fit your taste. Lastly, I covered storage methods to keep your bread fresh. Now it’s time to get baking! Enjoy your homemade banana bread and share it with friends and family. Your kitchen will smell amazing, and the results will be worth it.
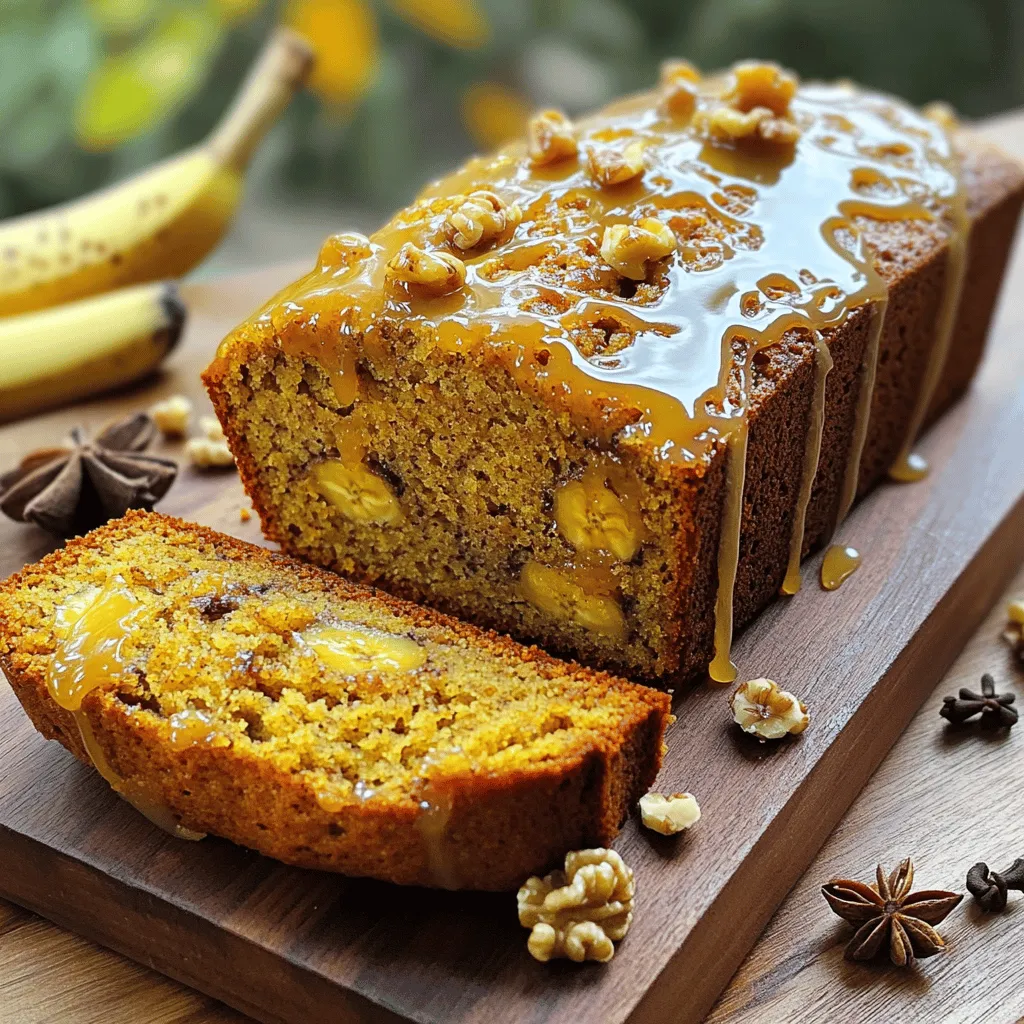
Chai Spice Banana Bread with Maple Glaze Delight
Welcome to a warm, cozy experience with my Chai Spice Banana Bread with Maple Glaze! This recipe blends the sweet comfort of ripe bananas with
To make Pumpkin Pie Oatmeal Energy Balls, you will need the following simple ingredients: - 1 cup rolled oats - 1/2 cup canned pumpkin puree - 1/2 cup almond butter (or peanut butter) - 1/4 cup honey or maple syrup - 1 teaspoon vanilla extract - 1 teaspoon pumpkin pie spice - 1/4 cup ground flaxseed - 1/4 cup mini chocolate chips (optional) - Pinch of salt - 1/4 cup chopped pecans or walnuts (optional) Each ingredient plays a key role. The rolled oats are the base and give these energy balls their chewy texture. Canned pumpkin puree adds moisture and a rich, fall flavor. Almond butter or peanut butter keeps them creamy and adds healthy fats. Honey or maple syrup serves as a natural sweetener. Vanilla extract enhances the flavor, creating a comforting aroma. Pumpkin pie spice, which includes cinnamon, nutmeg, and ginger, brings warmth. Ground flaxseed boosts nutrition with fiber and omega-3s. For a fun twist, add mini chocolate chips. They give a burst of sweetness. Chopped pecans or walnuts add crunch and extra nutrients. If you want a nut-free version, just skip the nut butter and nuts. These ingredients come together to create a tasty snack that is perfect for any time of day. First, grab a large mixing bowl. Add 1 cup of rolled oats, 1/2 cup of canned pumpkin puree, and 1/2 cup of almond butter. If you prefer peanut butter, that works too! Next, pour in 1/4 cup of honey or maple syrup and 1 teaspoon of vanilla extract. Mix everything together until it looks smooth. Now, it's time to add flavor! Sprinkle in 1 teaspoon of pumpkin pie spice, 1/4 cup of ground flaxseed, and a pinch of salt. If you want some extra fun, toss in 1/4 cup of mini chocolate chips or 1/4 cup of chopped pecans or walnuts. Stir the mixture until it blends well. Once your mixture is ready, use your hands to form small balls. Aim for about 1 inch in size. Place each ball on a baking sheet lined with parchment paper. After forming your energy balls, it's time to chill them. Put the baking sheet in the fridge for about 30 minutes. This helps them firm up nicely. After chilling, your energy balls will be ready to enjoy! Mixing is key for great flavor in your energy balls. Start with a big bowl. Add rolled oats, pumpkin puree, almond butter, honey, and vanilla extract. Stir until you see no dry oats. This ensures every bite is tasty. Next, add pumpkin pie spice and ground flaxseed. If you want, include chocolate chips or nuts. Keep mixing until everything is well combined. A good mix means better flavor! How you serve these energy balls can make them more fun. Place them on a bright plate to catch eyes. You can also put them in a cute box or jar. This makes a great gift, too! For a festive touch, sprinkle some extra pumpkin pie spice on top. It looks great and makes them smell wonderful! Do you like your treats sweeter? You can easily change how sweet your energy balls are. Start with the amount of honey or maple syrup in the recipe. If you want more sweetness, just add a bit more. Taste the mixture before you form the balls. This way, you can get it just right for your taste buds! {{image_2}} You can easily adjust this recipe to fit your needs. For nut-free options, use sun butter instead of almond or peanut butter. This swap keeps the creamy texture while ensuring safety for those with nut allergies. If you want a vegan version, replace honey with maple syrup. Both sun butter and maple syrup add a nice flavor without any animal products. Want to make your energy balls more exciting? Try adding different spices or flavored extracts. A dash of ginger will give a warm kick. You can also add a splash of almond or vanilla extract for extra depth. These small changes can really boost the flavor and make each bite special. Did you know you can use oats in different forms? Quick oats work just as well as rolled oats. They help the energy balls hold together nicely. If you prefer a chewier texture, stick with rolled oats. This choice will give your energy balls a heartier feel. To keep your Pumpkin Pie Oatmeal Energy Balls fresh, store them in an airtight container. This method helps prevent air from making them dry. You can also use a glass jar with a tight lid. Place parchment paper between layers if you stack them. This keeps them from sticking together. These energy balls last about one week in the refrigerator. After that, they may start to lose their flavor and texture. Always check for any off smells or changes in appearance before eating. If they look or smell funny, it's best to toss them out. If you want to store your energy balls for a longer time, freezing is a great option. Place them in a single layer on a baking sheet first. Freeze for about an hour until firm. Then, transfer them to a freezer-safe bag or container. They can last up to three months in the freezer. To enjoy them, just thaw in the fridge for a few hours before eating. To make pumpkin pie oatmeal energy balls healthier, you can swap some ingredients. Use less honey or maple syrup. Instead, try mashed banana or unsweetened applesauce for sweetness. You can also add chia seeds for extra fiber and protein. If you want to cut calories, use a light nut butter. These small changes keep the taste while boosting nutrition. Yes, you can make these energy balls nut-free. Substitute almond butter with sun butter or soy nut butter. Both options provide a similar creamy texture and flavor. You can still enjoy the pumpkin flavor without nuts. Make sure the ingredients you choose are nut-free to avoid cross-contamination. You can add many toppings to your energy balls for extra flavor and crunch. Try rolling them in shredded coconut or crushed cereal. You can also use seeds like pumpkin or sunflower seeds. For a sweet touch, drizzle melted dark chocolate on top. Get creative and mix in your favorite toppings to make them unique! The pumpkin pie energy balls are easy to make and packed with flavor. We covered the main ingredients, simple steps, and useful tips. You can adjust sweetness and swap ingredients as needed. Remember to store them properly to keep them fresh. These energy balls are a tasty, healthy snack. Try these ideas and make them your own! Enjoy creating your version of this fun recipe.
Pumpkin Pie Oatmeal Energy Balls Simple and Tasty Treat
Looking for a tasty snack that packs a punch of flavor and energy? Let me introduce you to Pumpkin Pie Oatmeal Energy Balls! These simple