Desserts

Chocolate Peppermint Thumbprint Cookies Delight
If you love the festive taste of chocolate and mint, then you’re in for a treat! Chocolate Peppermint Thumbprint Cookies are not just cute; they

Holiday Sprinkle Sugar Cookies Festive and Fun Treat
Get ready to spread some joy this holiday season with my super fun Holiday Sprinkle Sugar Cookies! These festive treats are not just delightful to
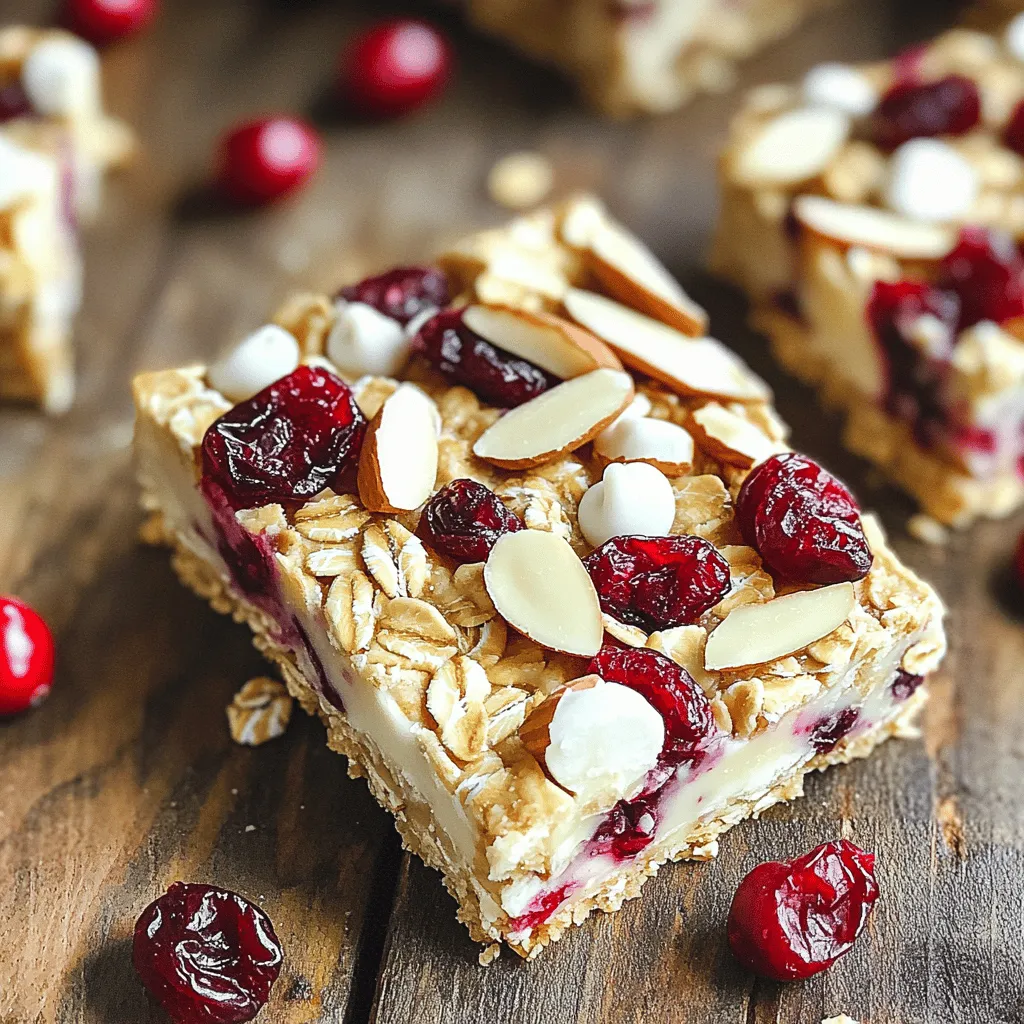
No-Bake White Chocolate Cranberry Oat Bars Delight
Craving a sweet and healthy treat? You’ll love my No-Bake White Chocolate Cranberry Oat Bars! These tasty bars are easy to make and perfect for
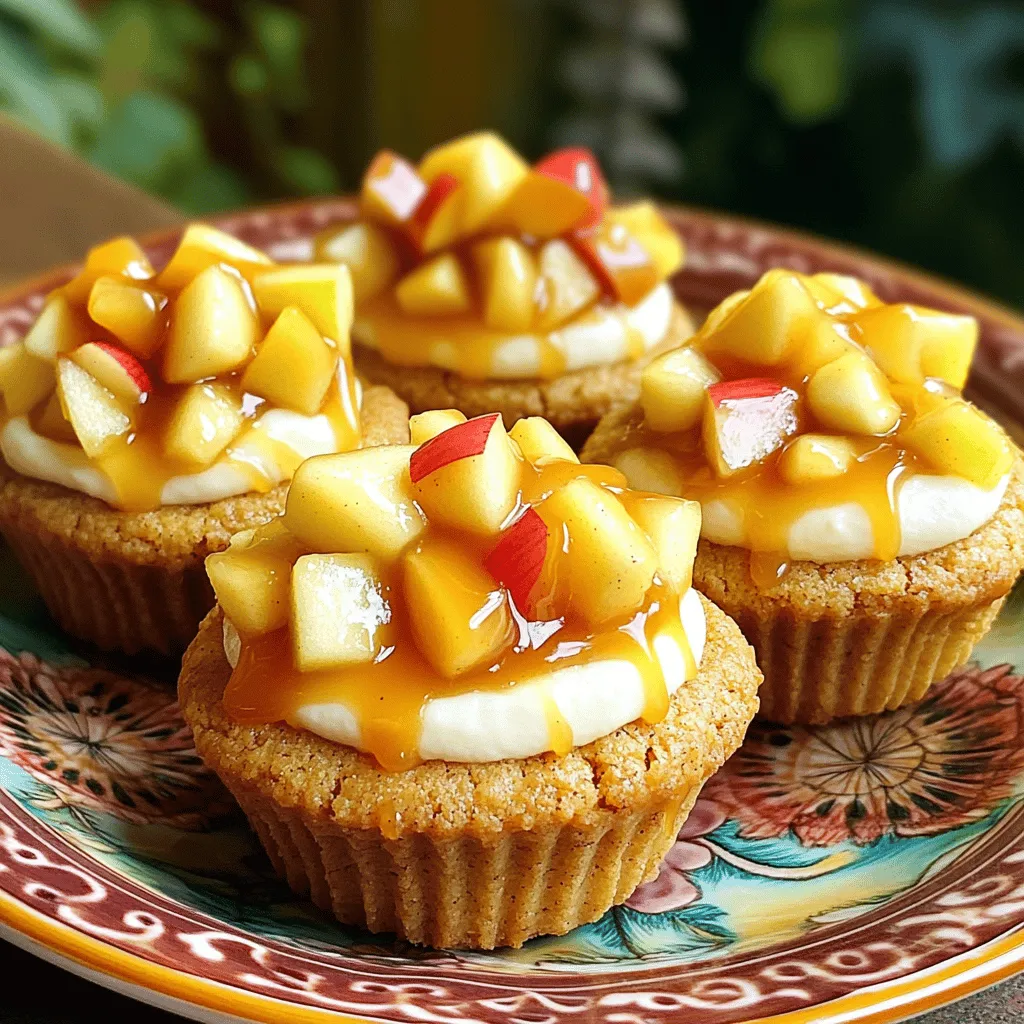
Caramel Apple Cheesecake Cookie Cups Delightful Treat
Are you ready to indulge in a sweet treat that will brighten your day? These Caramel Apple Cheesecake Cookie Cups combine crunchy cookie cups and

Warm Chocolate Crinkle Cookies Easy and Delicious Treat
Craving a sweet treat that’s easy to make? Dive into my recipe for Warm Chocolate Crinkle Cookies! These cookies are soft and fudgy, with a
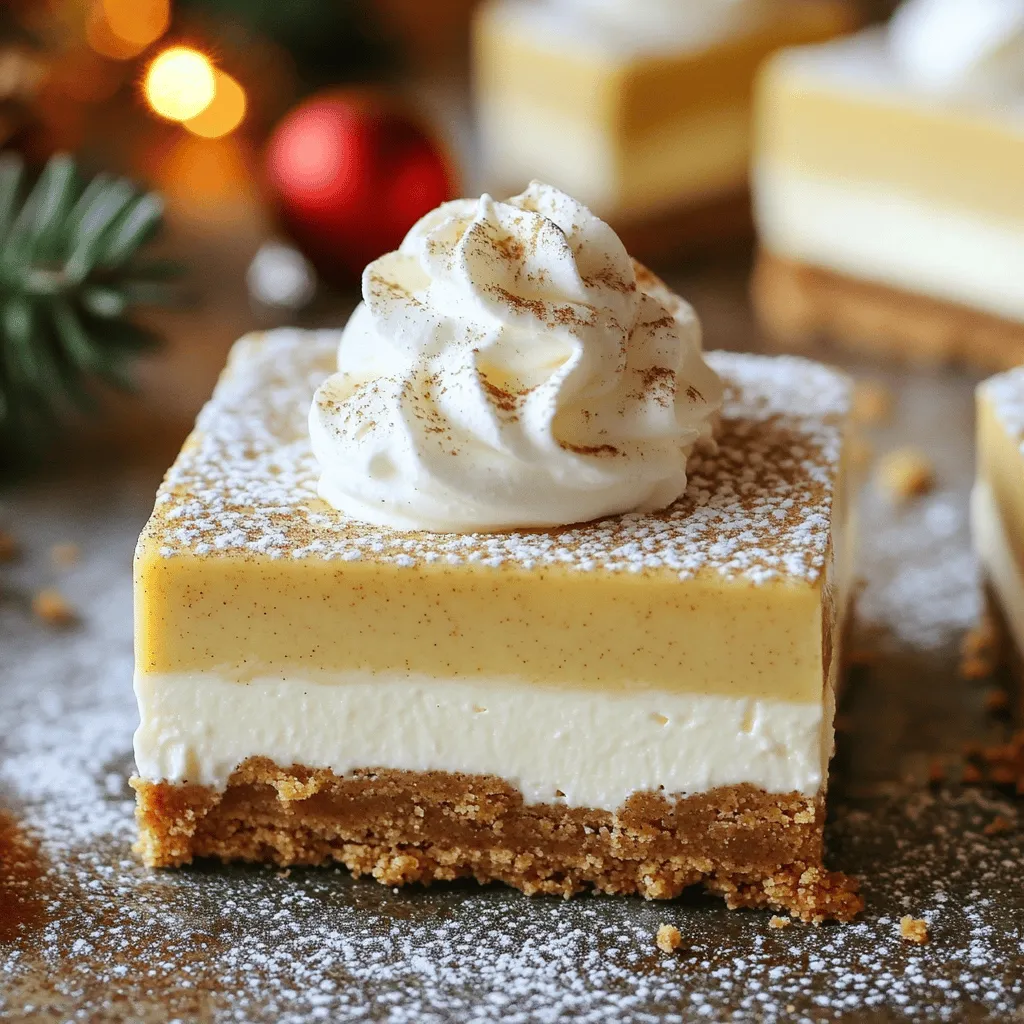
No-Bake Eggnog Cheesecake Bars Delightful Holiday Treat
Looking for a sweet holiday treat that’s easy to make? You’re in the right spot! These No-Bake Eggnog Cheesecake Bars are creamy, festive, and full

Bakery-Style Peppermint Chocolate Cupcakes Delight
Get ready to treat your taste buds with my Bakery-Style Peppermint Chocolate Cupcakes! With rich chocolate, a hint of peppermint, and a soft texture, these
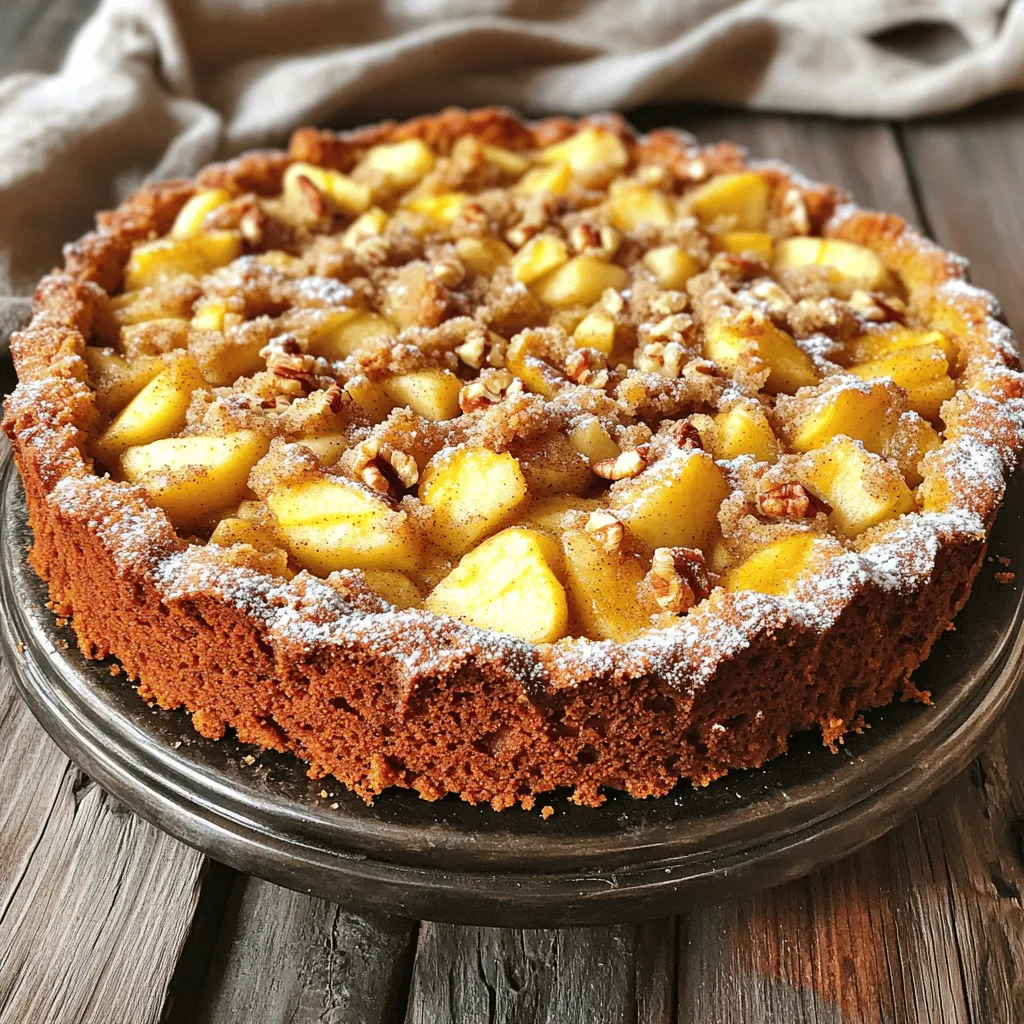
Apple Spice Coffee Cake with Streusel Delightful Treat
Love the warm flavors of fall? You’ll adore this Apple Spice Coffee Cake with Streusel! Imagine biting into a soft, spiced cake topped with a
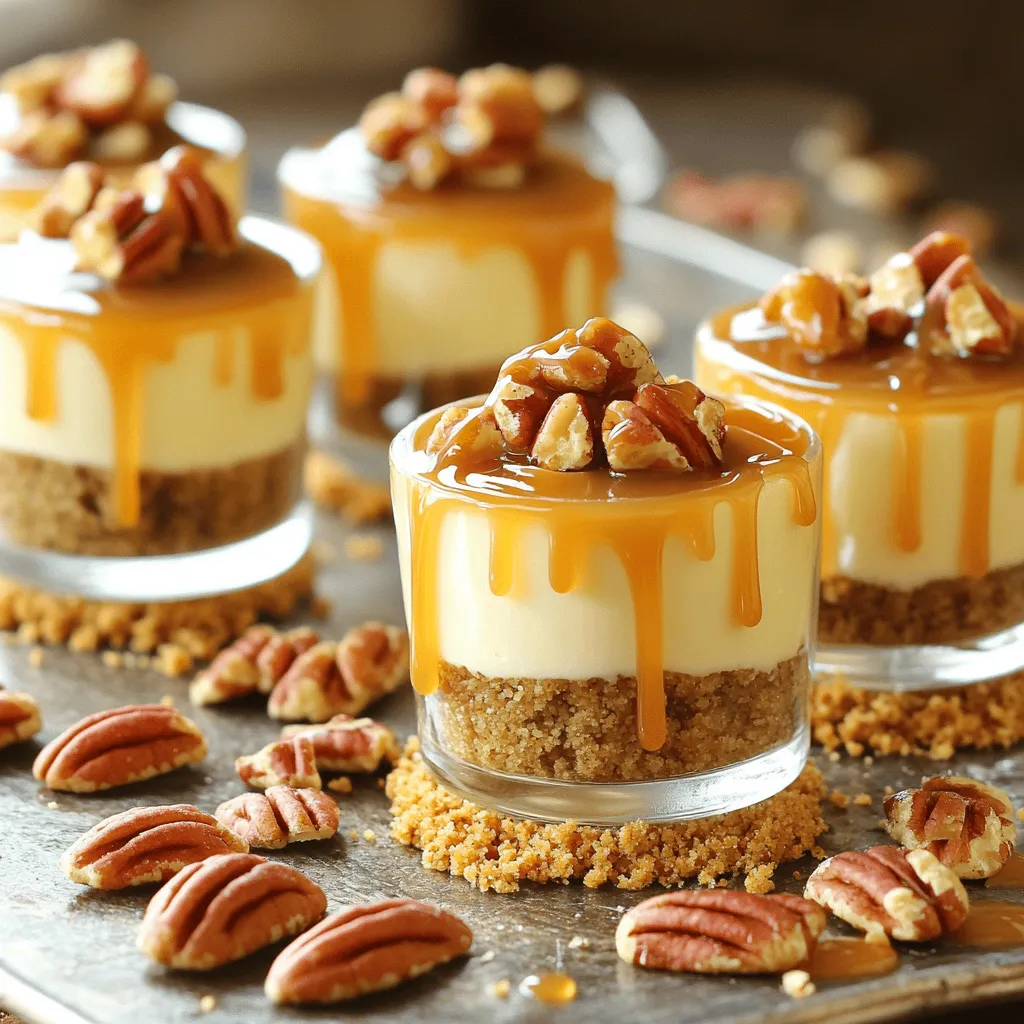
No-Bake Caramel Pecan Cheesecake Cups Delightful Treat
Indulge in something sweet with my No-Bake Caramel Pecan Cheesecake Cups! This simple dessert combines creamy cheesecake filling, crunchy pecans, and rich caramel, all in
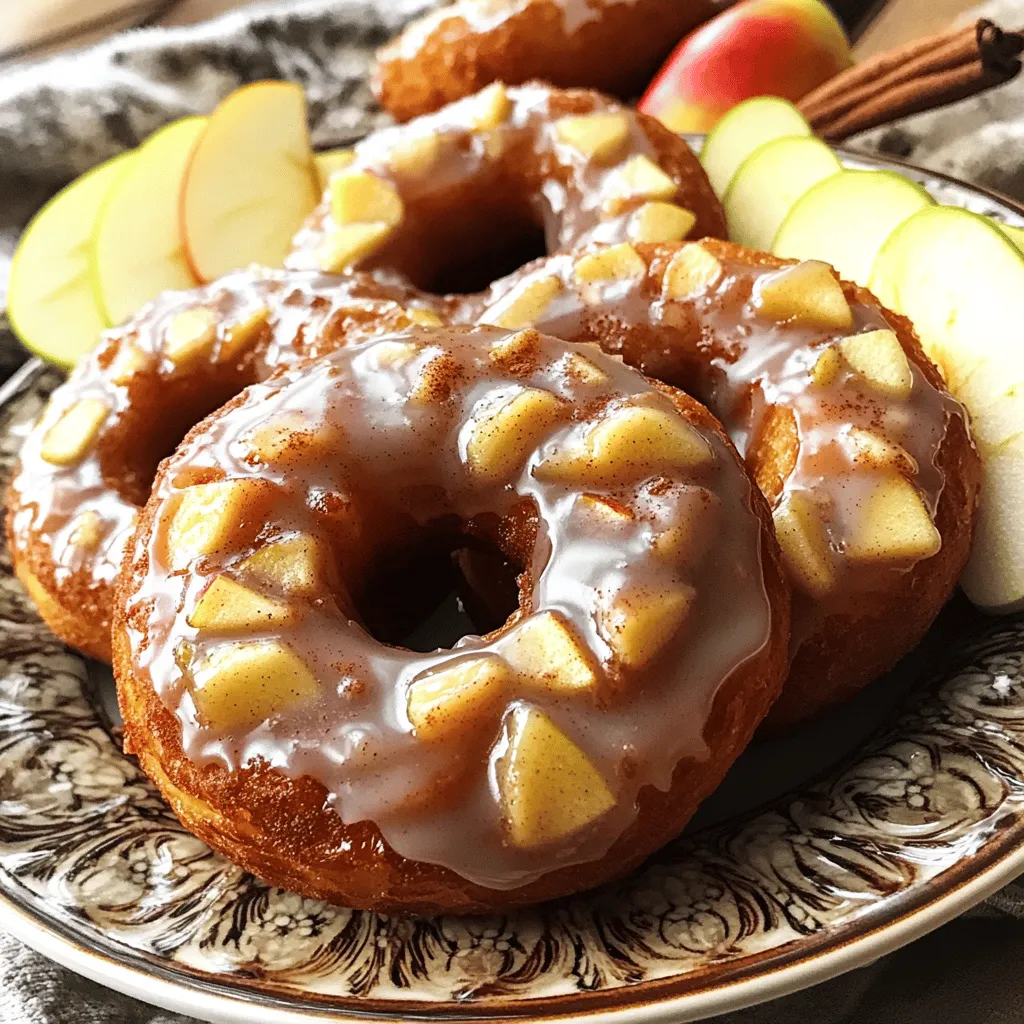
Apple Fritter Donuts with Glaze Simple and Tasty Treat
Do you crave a warm, sweet treat that’s easy to make? Look no further! In this guide, I’ll show you how to whip up delicious