Desserts

To make these tasty gluten-free zucchini muffins, gather these main ingredients: - 2 cups grated zucchini (about 2 medium zucchinis) - 1 cup gluten-free all-purpose flour - 1/2 cup almond flour - 1/2 teaspoon baking soda - 1 teaspoon baking powder - 1 teaspoon ground cinnamon - 1/2 teaspoon nutmeg - 1/4 teaspoon salt - 1/2 cup honey or maple syrup - 1/2 cup unsweetened applesauce - 2 large eggs - 1 teaspoon vanilla extract These ingredients work together to create a moist, flavorful muffin. Zucchini adds moisture and nutrition, while the flours provide the right texture. You can make your muffins even more special by adding optional ingredients like: - 1/2 cup chopped walnuts or pecans - 1/2 cup chocolate chips Nuts add crunch and protein. Chocolate chips bring sweetness and joy to every bite. Feel free to mix and match based on your taste. If you want to change things up, consider these substitutions: - Use coconut sugar instead of honey or maple syrup for a lower glycemic index. - Swap almond flour for oat flour if you prefer a different flavor. These swaps keep the muffins gluten-free while catering to your dietary needs. Adjusting sweeteners can change the taste, so choose what fits best for you. For the full recipe, check the details provided earlier. First, preheat your oven to 350°F (175°C). This step is key to getting those muffins to rise nicely. While the oven heats, grab a muffin tin. Line it with paper liners or lightly grease it with cooking spray. This helps keep the muffins from sticking. Next, in a large bowl, mix the dry ingredients. Combine 1 cup of gluten-free all-purpose flour, 1/2 cup of almond flour, 1/2 teaspoon of baking soda, 1 teaspoon of baking powder, 1 teaspoon of ground cinnamon, 1/2 teaspoon of nutmeg, and 1/4 teaspoon of salt. Whisk these together until there are no lumps. This ensures your muffins will have a nice texture. In another bowl, mix the wet ingredients. Whisk together 1/2 cup of honey or maple syrup, 1/2 cup of unsweetened applesauce, 2 large eggs, and 1 teaspoon of vanilla extract. Make sure this mixture is smooth. Gradually add the wet mix to the dry ingredients. Fold gently until just combined. Be careful not to over-mix; this keeps your muffins light. Now, it’s time to add the star of the show—zucchini. Fold in 2 cups of grated zucchini. If you want, you can also add 1/2 cup of chopped walnuts or pecans and 1/2 cup of chocolate chips. Mix them in gently. Fill each muffin cup about 2/3 full with the batter. This gives them room to rise without spilling over. Place your muffin tin in the preheated oven. Bake for 20-25 minutes. To check if they’re done, insert a toothpick into the center. If it comes out clean, they are ready! Once baked, take the muffins out of the oven. Let them cool in the tin for about 5 minutes. After that, transfer them to a wire rack to cool completely. This step helps them stay fluffy. For serving, enjoy the muffins warm. You can dust them with powdered sugar or top them with Greek yogurt for extra creaminess. They pair perfectly with a cup of tea or coffee. Enjoy this tasty treat from the Full Recipe! When baking gluten-free, use the right flour mix. I prefer a blend of gluten-free all-purpose flour and almond flour. This mix gives the muffins a great texture. Always check the flour for lumps before mixing. Sifting can help with this. Next, measure your ingredients correctly. Use a scale for precision. Too much flour can make your muffins dry. Always level off your measuring cups. Spoon the flour into the cup, then level it with a knife. Moisture is key to a yummy muffin. Grated zucchini adds moisture and flavor. Don’t squeeze out the water from the zucchini. You want that moisture in your muffins. Using applesauce also helps keep them soft. You can swap out half the sugar with applesauce. Honey or maple syrup keeps things sweet and moist too. A good mixing bowl is a must. I like a large, sturdy bowl for mixing. A whisk helps blend the dry ingredients well. Use a muffin tin with liners for easy cleanup. Silicone muffin pans are also great. They make it easy to pop out the muffins. A rubber spatula is perfect for folding ingredients gently. For more details on making these tasty muffins, check out the Full Recipe. {{image_2}} You can boost the nutrition of these muffins with healthy add-ins. Adding seeds like chia or flaxseed can give a nice crunch. They also add omega-3 fatty acids, which are good for your heart. Dried fruits, like raisins or cranberries, can sweeten the muffins naturally. They add different textures and flavors. Mix in about 1/2 cup of your favorite seeds or dried fruits for a fun twist. If you want a savory muffin, try adding cheese or herbs. Grated cheese, like cheddar or feta, can add a rich flavor. Fresh herbs, such as basil or thyme, can make your muffins taste special. Just add about 1/2 cup of cheese or a tablespoon of fresh herbs to the batter. These savory muffins are perfect for breakfast or a snack. You can change the flavor of your muffins easily. Adding lemon zest can brighten the taste and make them refreshing. For a sweet twist, fold in chocolate chips. They melt and create gooey pockets of chocolate. You can add about 1 tablespoon of lemon zest or 1/2 cup of chocolate chips to your batter. Each variation offers a new and exciting taste in every bite. For the full recipe, check out the delightful Gluten-Free Zucchini Muffins! To keep your gluten-free zucchini muffins fresh, store them in an airtight container. Place the muffins in a cool, dry spot. They can last for up to three days at room temperature. If you want them to last longer, consider refrigerating them for about a week. Always make sure they are completely cooled before storing. This helps prevent moisture buildup, which can make them soggy. Freezing is a great option for these muffins. First, wrap each muffin tightly in plastic wrap. Then, place them in a freezer-safe bag or container. They will stay fresh for up to three months in the freezer. When you're ready to eat them, just take out the number you want. Let them thaw in the fridge overnight or pop them in the microwave for a quick treat. To reheat your muffins, you have a few easy options. For a moist muffin, place it in the microwave for about 15-20 seconds. If you prefer a crispier texture, warm it in an oven at 350°F (175°C) for about 5-10 minutes. This method brings back the fresh-baked taste you love. Enjoy them warm for the best flavor! No, you should not use regular flour. Gluten-free flour is specially made for those with gluten issues. Regular flour contains gluten, which can cause problems for some people. If you want to use regular flour, it won't work for a gluten-free diet. Stick with gluten-free all-purpose flour for the best results. You can replace eggs in zucchini muffins. Use 1/4 cup of unsweetened applesauce for each egg. You can also use flaxseed meal. Mix one tablespoon of flaxseed meal with two tablespoons of water. Let it sit for five minutes to thicken. This mixture works well in baking too. Zucchini adds moisture and nutrition to muffins. It is low in calories and high in vitamins. Zucchini is a good source of fiber. It helps with digestion and keeps you full longer. Additionally, zucchini is rich in antioxidants. These help protect your body from damage. Using zucchini in baking makes your treats healthier without losing flavor. Gluten-free zucchini muffins are easy and fun to make. You learned about key ingredients, simple steps, and useful tips. I shared ways to add flavor and keep muffins fresh. You can store them well and even freeze extras. Try different flavors to find your favorite. I hope you enjoy baking these muffins as much as I do. Happy baking!
Gluten-Free Zucchini Muffins Tasty Healthy Treat
Are you craving a delicious treat that’s healthy and gluten-free? Look no further! I’ll guide you through making tasty gluten-free zucchini muffins that are perfect
When making Lemon Rhubarb Loaf, you need the right tools. Here’s a detailed list of ingredients: - 1 ½ cups all-purpose flour - ½ teaspoon baking powder - ¼ teaspoon baking soda - ½ teaspoon salt - ½ cup unsalted butter, softened - 1 cup granulated sugar - 2 large eggs - Zest of 1 lemon - 2 tablespoons fresh lemon juice - 1 teaspoon vanilla extract - 1 cup rhubarb, chopped (fresh or frozen) - ½ teaspoon ground ginger (optional) Each ingredient plays a key role. The flour gives the loaf structure. Baking powder and baking soda help it rise. Salt enhances the flavor. Butter makes it rich and moist, while sugar adds sweetness. Eggs bind everything together. Lemon zest and juice provide a bright flavor. The rhubarb adds a tangy twist. If you like a little spice, add ground ginger for warmth. Make sure to gather all the ingredients first. This step helps you stay organized. You can find the full recipe online for detailed instructions. Happy baking! - Preheat the oven: Start by preheating your oven to 350°F (175°C). This helps ensure your loaf bakes evenly. - Prepare the loaf pan: Grease a 9x5-inch loaf pan. For easy removal, line the bottom with parchment paper. - Combine dry ingredients: In a mixing bowl, whisk together 1 ½ cups of all-purpose flour, ½ teaspoon of baking powder, ¼ teaspoon of baking soda, ½ teaspoon of salt, and ½ teaspoon of ground ginger (if using). Set this bowl aside for later. - Cream butter and sugar: In a larger bowl, cream together ½ cup of softened unsalted butter and 1 cup of granulated sugar. Use an electric mixer to mix until the mixture is light and fluffy, about 3-4 minutes. - Add eggs and flavors: Add 2 large eggs, one at a time, mixing well after each addition. Then add the zest of 1 lemon, 2 tablespoons of fresh lemon juice, and 1 teaspoon of vanilla extract. Mix until everything is well combined. - Incorporate dry ingredients: Gradually add the dry flour mixture to the wet mixture. Stir until just combined. Be careful not to overmix; this keeps your loaf soft. - Fold in rhubarb: Gently fold in 1 cup of chopped rhubarb using a spatula. Make sure the rhubarb is evenly spread throughout the batter. - Bake and cool: Pour the batter into your prepared loaf pan, smoothing the top. Bake for 50-60 minutes. Use a toothpick to check if it’s done; it should come out clean. Once baked, let it cool in the pan for 10 minutes. Then, transfer it to a wire rack to cool completely. You can find the complete recipe in the Full Recipe section for more detailed instructions! To make the best Lemon Rhubarb Loaf, focus on mixing well. Start by creaming the butter and sugar until light. This step helps to create a fluffy texture. When you add the eggs, mix one at a time. Each egg needs to blend in fully before the next goes in. Checking doneness is simple. Use a toothpick for this. Insert it into the center of the loaf. If it comes out clean, your loaf is ready. If there’s wet batter on the toothpick, bake a bit longer. For extra flavor, consider adding spices. Ground ginger gives a warm kick. You can also try cinnamon or nutmeg for a cozy touch. A little zest of orange can brighten the loaf even more. Adjust the sweetness based on your taste. If you like it sweeter, add a bit more sugar. You can also try honey or maple syrup for a different flavor. Always remember, the balance of tart and sweet is key in this loaf! {{image_2}} You can switch fruits in this recipe. Try using strawberries for a sweet twist. They add a lovely pink color and a juicy bite. You can also use peaches if you want a sweeter loaf. Their softness adds moisture, making the loaf even richer. Instead of all-purpose flour, you can use whole wheat flour. This gives the loaf a nutty taste and adds fiber. The texture will be a bit denser, but it still tastes great. Just make sure to adjust the liquid a little if needed. If you need gluten-free options, use a gluten-free flour blend. These blends work well in most baked goods. Look for one that includes xanthan gum for the best texture. You might need to tweak the baking time just a bit. For vegan substitutions, replace the eggs with flax eggs. Mix one tablespoon of ground flaxseed with three tablespoons of water. Let it sit for a few minutes to thicken. You can also use a plant-based butter instead of regular butter. This keeps the loaf moist and flavorful. To find the full recipe, check out the section on ingredients and instructions for the Lemon Rhubarb Loaf. To keep your Lemon Rhubarb Loaf fresh, you have two main options: room temperature or refrigerator. - Room Temperature: If you plan to eat the loaf within a few days, store it at room temperature. Place it in a cool spot, away from sunlight. - Refrigerator: For longer storage, the fridge works best. Wrap the loaf tightly in plastic wrap or foil to keep it moist. Proper wrapping is key. Use plastic wrap to cover the loaf. Then seal it in an airtight container. This prevents it from drying out. Freezing is a great way to save slices for later. Here are some tips for freezing your Lemon Rhubarb Loaf. - Tips for Freezing Slices: Wait until the loaf is completely cool. Slice it into thick pieces. Wrap each slice in plastic wrap. Place them in a freezer-safe bag or container. This keeps them fresh for up to three months. - Best Methods for Thawing: To thaw, take out a slice and let it sit in the fridge overnight. If you're in a hurry, you can use the microwave. Heat it for 15-20 seconds. Enjoy your Lemon Rhubarb Loaf anytime with these easy storage tips! For the full recipe, check out the Full Recipe section. How long does the loaf last? Lemon Rhubarb Loaf stays fresh for about 3 to 4 days at room temperature. Store it in an airtight container. This keeps the loaf moist and tasty. If you want to keep it longer, you can freeze it. Wrap it well in plastic wrap and foil to avoid freezer burn. It can last up to three months in the freezer. Can I use frozen rhubarb? Yes, you can use frozen rhubarb in this recipe. Just make sure to thaw it first and drain any excess water. This helps keep your loaf from getting too soggy. Frozen rhubarb works great and saves time when fresh rhubarb isn’t in season. What can I serve with Lemon Rhubarb Loaf? You can serve this loaf with whipped cream or vanilla ice cream for extra flavor. A light dusting of powdered sugar on top makes it look fancy. Fresh lemon slices or rhubarb stalks also add a nice touch. Pair it with tea or coffee for a lovely snack. Why did my loaf sink? If your loaf sinks, it could be due to overmixing or too much liquid. Mixing too much can add too much air, which causes the loaf to rise too fast and then collapse. To fix this, mix just until the ingredients combine. Also, make sure to measure your ingredients correctly. What to do if the loaf is too dry? If your loaf is too dry, it may have baked too long or had too little moisture. To add moisture, try using a glaze made from lemon juice and powdered sugar. You can also serve it with whipped cream or ice cream to add creaminess. For next time, check the loaf a few minutes before baking time ends. This blog post covered how to make a delicious Lemon Rhubarb Loaf. We discussed the key ingredients, step-by-step instructions, and important tips for success. Plus, I shared storage methods and answered common questions. Remember, baking is fun and opens the door for creativity. Don't hesitate to try new fruits or swap ingredients to make this recipe your own. Enjoy your baking!
Lemon Rhubarb Loaf Delightful and Simple Recipe
If you’re craving a sweet treat that combines tart and tangy flavors, this Lemon Rhubarb Loaf is for you! I’ll guide you through a simple
For this recipe, you need 2 cups of grated zucchini. This is about 2 medium zucchinis. Grate them using a box grater. Make sure to squeeze out some excess moisture after grating. This helps your bread stay firm and not too soggy. You will need 1 cup of active sourdough starter. It should be fed and bubbly. This means it has been recently fed and is ready to use. A lively starter gives the bread a great rise and flavor. If your starter is not active, feed it a few hours before baking. Here are the dry ingredients you will need: - 1 cup all-purpose flour - 1/2 cup whole wheat flour - 1/2 cup brown sugar - 1 teaspoon baking soda - 1 teaspoon baking powder - 1/2 teaspoon salt - 1 teaspoon ground cinnamon - 1/4 teaspoon ground nutmeg These ingredients give flavor and structure to the bread. The whole wheat flour adds a nice texture, while the spices boost the taste. You can also add 1/2 cup chopped walnuts or pecans, and 1/2 cup chocolate chips if you want extra flavor and crunch. For the full recipe, check the instructions above. Start by preheating your oven to 350°F (175°C). This helps the bread bake evenly. Next, grab a 9x5 inch loaf pan. Grease it well or line it with parchment paper. This step makes it easy to remove the bread later. In a large bowl, add the grated zucchini and brown sugar. Let this sit for 10 minutes. This step allows the zucchini to release moisture. After that, add your active sourdough starter, yogurt, vegetable oil, and vanilla extract. Mix everything until it is smooth and well combined. In another bowl, whisk together the all-purpose flour, whole wheat flour, baking soda, baking powder, salt, cinnamon, and nutmeg. This step is key for even mixing. When you add dry ingredients to the wet mix, the bread will rise perfectly. Now, gently fold the dry mix into the wet ingredients. Be careful not to overmix; some lumps are okay. If you want, add the chopped nuts and chocolate chips for extra flavor. Pour the batter into your prepared loaf pan. Smooth the top with a spatula. Bake in your preheated oven for 55-65 minutes. Check if it’s done by inserting a toothpick in the center. It should come out clean. Let the bread cool for 10 minutes in the pan. Then transfer it to a wire rack to cool completely. Enjoy this zesty treat! To make great sourdough zucchini bread, you need to manage moisture. Zucchini holds water, which can make your bread too wet. After grating the zucchini, let it sit with sugar for ten minutes. This step helps release some moisture. You can also squeeze the zucchini in a clean cloth to remove excess liquid. This way, your bread stays moist but not soggy. Mixing is key, but overmixing can ruin your bread. When you combine wet and dry ingredients, do it gently. Stir until just mixed; lumps are fine. This keeps the bread light and fluffy. If you mix too much, the gluten develops too much and makes the bread dense. Remember, be gentle! Want to kick up the flavor? You can add fun ingredients! Here are some ideas: - Chopped nuts like walnuts or pecans for crunch. - Chocolate chips for a sweet touch. - Dried fruits like raisins or cranberries for a fruity bite. - Spices such as ginger or cloves for extra warmth. These add-ins will make your sourdough zucchini bread even more delicious. Mix in what you love! For the full recipe, check out the complete details. {{image_2}} You can make this zucchini bread gluten-free. Use a gluten-free flour blend instead of all-purpose and whole wheat flour. Look for blends that include xanthan gum for the best texture. This change keeps the bread soft and moist. To make a vegan version, replace the yogurt with applesauce. You can also use a plant-based oil instead of vegetable oil. Ensure your sourdough starter is vegan by checking its ingredients. This way, you keep the delicious flavor while making it plant-friendly. I love adding spices for extra flavor. Try adding ginger or cardamom for a warm twist. You can also mix in dried fruits like raisins or cranberries. If you like nuts, add pecans or almonds for a nice crunch. For a sweeter treat, fold in chocolate chips or a swirl of peanut butter. Each of these options creates a new taste experience in every bite. For the full recipe, check out the section above. To keep your sourdough zucchini bread fresh, store it in a cool place. Use an airtight container or a resealable bag. This helps keep moisture in and air out. Bread can last about three days at room temperature. For longer storage, consider freezing it. Freezing is a great way to save your bread. Slice the loaf before freezing. This allows you to take out only what you need. Wrap each slice in plastic wrap, then place them in a freezer bag. Your bread can stay good for up to three months in the freezer. When you’re ready to enjoy your bread, reheating is simple. You can toast slices directly from the freezer. For a softer texture, let the slices thaw first. You can also warm the whole loaf in the oven. Set your oven to 350°F (175°C) and heat it for about 10 to 15 minutes. This will bring back its fresh taste and aroma. You can tell the bread is done when a toothpick comes out clean. Insert it into the center of the loaf. If it has wet batter, bake it longer. The bread should have a golden-brown crust. It will also feel firm to the touch. Trust your senses; the aroma will fill your kitchen. You can use zucchini that is not fresh, but it should not be too soft. Slightly old zucchini may still work, but it might affect the taste and texture. If the zucchini has spots or is slimy, it’s best to toss it. Always wash and dry the zucchini before grating. To slice the bread, use a serrated knife for clean cuts. Let the bread cool completely before slicing. This helps maintain its shape. Serve the bread warm or at room temperature. You can add a dollop of yogurt or honey on top for extra flavor. A sprinkle of cinnamon can make it look festive. In this post, you learned about making sourdough zucchini bread, from the ingredients to storage tips. We covered how to perfectly mix your wet and dry ingredients. You discovered how to ensure your bread stays moist and flavorful. Remember, variations like gluten-free or vegan are easy to try. I hope you feel ready to bake. Enjoy your delicious bread fresh out of the oven! With these tips, your sourdough zucchini bread will always be a hit. Happy baking!
Sourdough Zucchini Bread Easy and Delicious Recipe
If you crave a tasty bread that’s easy to make, you’re in for a treat! This Sourdough Zucchini Bread recipe combines two favorites into a
- 1 cup grated zucchini (squeezed to remove excess moisture) - 1 cup grated carrots - 1/2 cup unsweetened applesauce - 1/2 cup brown sugar - 1/4 cup honey - 1/4 cup vegetable oil - 2 large eggs - 1 teaspoon vanilla extract - 1 1/2 cups all-purpose flour - 1 teaspoon baking powder - 1/2 teaspoon baking soda - 1 teaspoon ground cinnamon - 1/2 teaspoon ground nutmeg - 1/4 teaspoon ground ginger - 1/4 teaspoon salt - Optional add-ins: 1/2 cup chopped walnuts or pecans, 1/4 cup raisins or dried cranberries This recipe for Spiced Zucchini Carrot Bread uses simple, fresh ingredients. Start with the grated vegetables. Use one cup of zucchini and one cup of carrots. Squeeze the zucchini to get rid of extra moisture. This step is key for a moist bread. Next, gather your wet ingredients. Combine half a cup of unsweetened applesauce with half a cup of brown sugar, a quarter cup of honey, a quarter cup of vegetable oil, two large eggs, and one teaspoon of vanilla extract. This mix gives the bread its sweetness and richness. For the dry ingredients, you need one and a half cups of all-purpose flour. Add one teaspoon of baking powder and half a teaspoon of baking soda to help it rise. Spice it up with one teaspoon of ground cinnamon, half a teaspoon of ground nutmeg, a quarter teaspoon of ground ginger, and a quarter teaspoon of salt. If you want to add more flavor, consider nuts and dried fruit. Use half a cup of chopped walnuts or pecans and a quarter cup of raisins or dried cranberries. These ingredients come together to create a delightful bread. You can find the full recipe to make this delicious Spiced Zucchini Carrot Bread. - Preheat your oven to 350°F (175°C) and grease a 9x5-inch loaf pan. - In a large mixing bowl, combine the grated zucchini, grated carrots, applesauce, brown sugar, honey, vegetable oil, eggs, and vanilla extract. Mix well until everything comes together. - In a separate bowl, whisk together all dry ingredients: flour, baking powder, baking soda, cinnamon, nutmeg, ginger, and salt. Make sure they are mixed well. - Gradually add the dry ingredients to the wet mixture. Stir until just combined. It’s okay if some lumps remain; don’t overmix! - If you want extra flavor, fold in chopped nuts and dried fruit into the batter now. - Pour the batter into the prepared loaf pan. Smooth the top with a spatula for an even bake. - Bake in the preheated oven for 50-60 minutes. Check with a toothpick in the center. It should come out clean. Feel free to refer to the Full Recipe for detailed instructions and tips! - Squeeze excess moisture from grated zucchini before adding to the batter. - This step helps keep your bread from being soggy. - Ensure even mixing without overmixing to maintain a tender crumb. - Stir gently until just combined for the best texture. - Check for doneness by using a toothpick or skewer. - Insert it in the center of the bread; it should come out clean. - Adjust baking time based on oven variability. - Every oven is different, so keep an eye on your bread as it bakes. - Slice and serve on a wooden board with a dusting of powdered sugar. - This gives your bread a lovely, inviting look. - Garnish with fresh carrot and zucchini slices for decoration. - It adds a pop of color and freshness to your dish. {{image_2}} You can boost flavor with simple changes. Add spices like cardamom or cloves. These spices give a warm, rich taste. Another option is to use flavored applesauce. This adds a new layer of sweetness. If you want a gluten-free version, substitute almond or coconut flour. This keeps the bread light and tasty. For a vegan-friendly option, consider using maple syrup instead of honey. It gives that sweet touch without any animal products. Want to make your bread even more fun? Incorporate chocolate chips or coconut flakes. Both add a delightful surprise in every bite. You can also use dried fruit like chopped dates or figs. These add sweetness and chewiness to the bread. You can find these ideas in the Full Recipe to explore all your options! Store your spiced zucchini carrot bread in an airtight container at room temperature. It stays fresh for up to 3 days. This is perfect for quick snacks or breakfast on the go. For longer storage, refrigerate the bread. It lasts for up to 1 week in the fridge. If you want to keep it even longer, freeze it for up to 3 months. To freeze, wrap it tightly in plastic wrap. Then, place it in a freezer-safe bag. This keeps it safe from freezer burn. When you're ready to enjoy your bread again, reheating is easy. You can warm slices in the microwave for 10-15 seconds. If you prefer, heat them in the oven at 350°F (175°C) for a few minutes. This brings back its soft texture and delicious taste. Enjoy your slices warm! For the full recipe, check out the details above. Yes, you can use frozen zucchini and carrots. Just thaw them and drain any extra moisture before mixing. This step is key. Too much moisture can make the bread soggy. It’s best to squeeze out the water gently using a clean cloth or paper towel. This helps keep your bread fluffy and light. If you don't have applesauce, you can use unsweetened mashed banana or yogurt as good alternatives. Each option adds moisture and helps bind the bread. If you use banana, it may give a slight banana flavor, which can be nice. Yogurt adds creaminess without overpowering the other flavors. To check if the bread is done, insert a toothpick into the center. If it comes out clean, your bread is ready. If it has batter on it, bake for a few more minutes. This test is simple and reliable. Keep an eye on the time, but also trust your toothpick! This recipe blends grated zucchini and carrots with simple, healthy ingredients. You learned how to prepare a moist loaf that’s easy to make and great for sharing. Remember to handle moisture carefully and check for doneness with a toothpick. You can also customize flavors and storage to suit your needs. Enjoy baking this delightful treat, and share it with friends and family for lasting smiles. You’ll love how fun and tasty this bread can be!
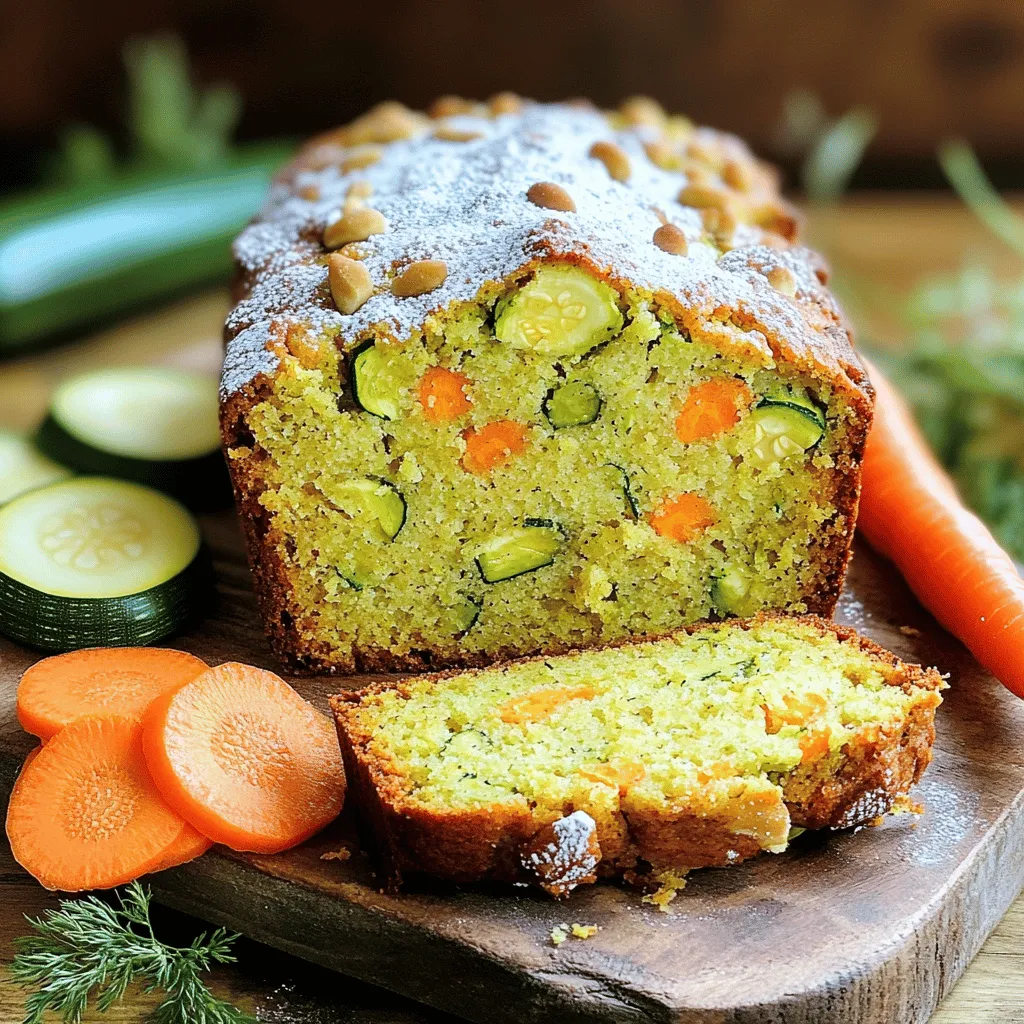
Spiced Zucchini Carrot Bread Flavorful and Easy Recipe
If you’re looking for a delicious and easy treat, you’ve found it! This spiced zucchini carrot bread is moist, flavorful, and perfect for any time
- Grated zucchini: 1 cup (about 1 medium zucchini) - Fresh blueberries: 1 cup (or frozen if necessary) - All-purpose flour: 1 ½ cups - Baking powder: 1 teaspoon - Baking soda: 1 teaspoon - Salt: ½ teaspoon - Ground cinnamon: 1 teaspoon - Granulated sugar: ½ cup - Brown sugar: ½ cup, packed - Large eggs: 2 - Vegetable oil or melted coconut oil: ½ cup - Vanilla extract: 1 teaspoon - Chopped nuts like walnuts or pecans: ½ cup When you gather the ingredients for Blueberry Zucchini Bread, focus on freshness. Using vibrant blueberries and firm zucchini boosts flavor. Grate the zucchini finely. This helps it mix well into the batter. Measure your flour carefully for the right texture. Baking powder and baking soda are key to fluffy bread. The cinnamon adds warmth and a hint of spice. The sugars in the recipe give a nice sweetness. Brown sugar adds moisture, making your bread soft. Eggs bind everything together. They help the bread rise too. Oil keeps it moist, while vanilla adds a lovely aroma. If you want a crunchy texture, consider adding nuts. They give your bread a delightful bite. For the full list and measurements, check the Full Recipe. This will guide you step-by-step to create your tasty treat. - Set oven temperature to 350°F (175°C). - Grease the loaf pan or line it with parchment paper. To start, I preheat the oven. This step ensures that your bread bakes evenly. While the oven heats, I prepare the loaf pan. Greasing or lining it makes for easy removal later. - Combine zucchini and blueberries in a medium bowl. - Whisk together dry ingredients in a large bowl. Next, I take a medium bowl and add the grated zucchini. I then toss in the blueberries. This mix helps prevent the blueberries from sinking. In a separate large bowl, I whisk the dry ingredients. This includes flour, baking powder, baking soda, salt, and cinnamon. - Beat together wet ingredients until well combined. - Gently fold wet mixture into dry ingredients, avoiding overmixing. In another bowl, I beat the wet ingredients. This includes the sugars, eggs, oil, and vanilla. Once blended, I add this mixture to the dry ingredients. I stir gently to combine them. It's important not to overmix. This keeps the bread light and fluffy. - Fold in zucchini and blueberries. - Pour batter into prepared pan and smooth top. - Bake for 50-60 minutes, checking with a toothpick. Now, I fold in the zucchini and blueberries from the medium bowl. The batter goes into the prepared pan. I smooth the top with a spatula. I bake the bread for 50 to 60 minutes. To check doneness, I insert a toothpick into the center. If it comes out clean, the bread is ready. To get the best texture in your Blueberry Zucchini Bread, avoid overmixing the batter. Overmixing can make the bread tough. Mix just until the ingredients blend. This keeps it soft and fluffy. Ensure the zucchini is well drained if it is moist. If you skip this step, the extra water can make the bread soggy. Simply squeeze the grated zucchini in a clean cloth to remove excess water. You can make your bread even better by adding spices. Consider adding nutmeg or ginger. These spices give a warm flavor that complements the blueberries. They also add a nice aroma. Substituting with whole wheat flour adds fiber to the bread. This makes it a bit healthier without losing taste. Whole wheat flour keeps the bread moist and adds a rustic touch. Enjoy your Blueberry Zucchini Bread warm with butter or cream cheese. The warm bread melts the spread, making each bite delightful. For a beautiful presentation, garnish with fresh blueberries and mint. This adds color and a fresh taste to the dish, making it look as good as it tastes. {{image_2}} You can easily make a gluten-free version of blueberry zucchini bread. Just substitute all-purpose flour with a gluten-free flour blend. This swap keeps the bread moist and tasty. Look for blends that include xanthan gum to help with texture. If you want a vegan version, replace the eggs with flaxseed meal or applesauce. Mix one tablespoon of flaxseed meal with three tablespoons of water to make one egg. You can also use plant-based oil alternatives, like coconut oil or avocado oil, in place of vegetable oil. This keeps the bread soft and delicious without any animal products. To give your bread a fun twist, try adding lemon or orange zest. This adds a bright flavor that pairs well with blueberries. For a sweeter touch, mix in some chocolate chips. They melt and create pockets of rich flavor in every bite. These simple changes can elevate your blueberry zucchini bread to new heights! After baking, let the Blueberry Zucchini Bread cool in the pan for about 10 minutes. This helps it set well. Next, transfer it to a wire rack. Let it cool completely before storing. If you store it too soon, moisture can make it soggy. Store the bread in an airtight container. This keeps it fresh and moist. You can also wrap it tightly in plastic wrap. Make sure to seal it well to keep out air. To freeze Blueberry Zucchini Bread, first, let it cool completely. Then, slice the bread for easy thawing. Wrap each slice in plastic wrap. Place the wrapped slices in a freezer-safe bag or container. This way, you can take out just what you need. When you’re ready to eat, take the slices out of the freezer. The best method for thawing is to leave them in the fridge overnight. You can also microwave a slice for a few seconds. This keeps the texture nice and soft. At room temperature, the bread lasts about 3 to 4 days. Keep it in a cool, dry place. If you notice any mold or odd smells, it’s time to throw it away. Signs that the bread has gone bad include a dry texture or changes in color. Enjoy your fresh bread while it lasts! Yes, you can use frozen blueberries! They work well in this recipe. Just keep in mind that they may release more juice while baking. This can make the bread a bit wetter. If you use frozen blueberries, check the bread a few minutes early. It may need a little less time to bake. To make this recipe healthier, you can reduce the sugar. You could use half the amount of both sugars. You can also swap all-purpose flour for whole wheat flour. This adds more fiber and nutrients. Another option is to add nuts or seeds for healthy fats. If you want to skip eggs, there are a few good substitutes. You can use applesauce, mashed banana, or yogurt. Each one gives moisture and helps the bread rise. Use 1/4 cup of any of these for each egg. This keeps the texture nice and light. To check if the bread is done, use a toothpick. Insert it into the center of the loaf. If it comes out clean, the bread is ready. If it has wet batter on it, bake for a few more minutes. Keep checking until it’s just right! You can find the Full Recipe for detailed instructions and ingredient measures. This will help you bake the best Blueberry Zucchini Bread! Blueberry zucchini bread combines fresh flavors and nourishing ingredients. We covered essential components, step-by-step instructions, and useful tips to make it right. You can also adjust the recipe to suit your needs, like going gluten-free or vegan. Remember to store and freeze the bread properly for future enjoyment. With these insights, you can bake a delicious treat that everyone will love. Happy baking!
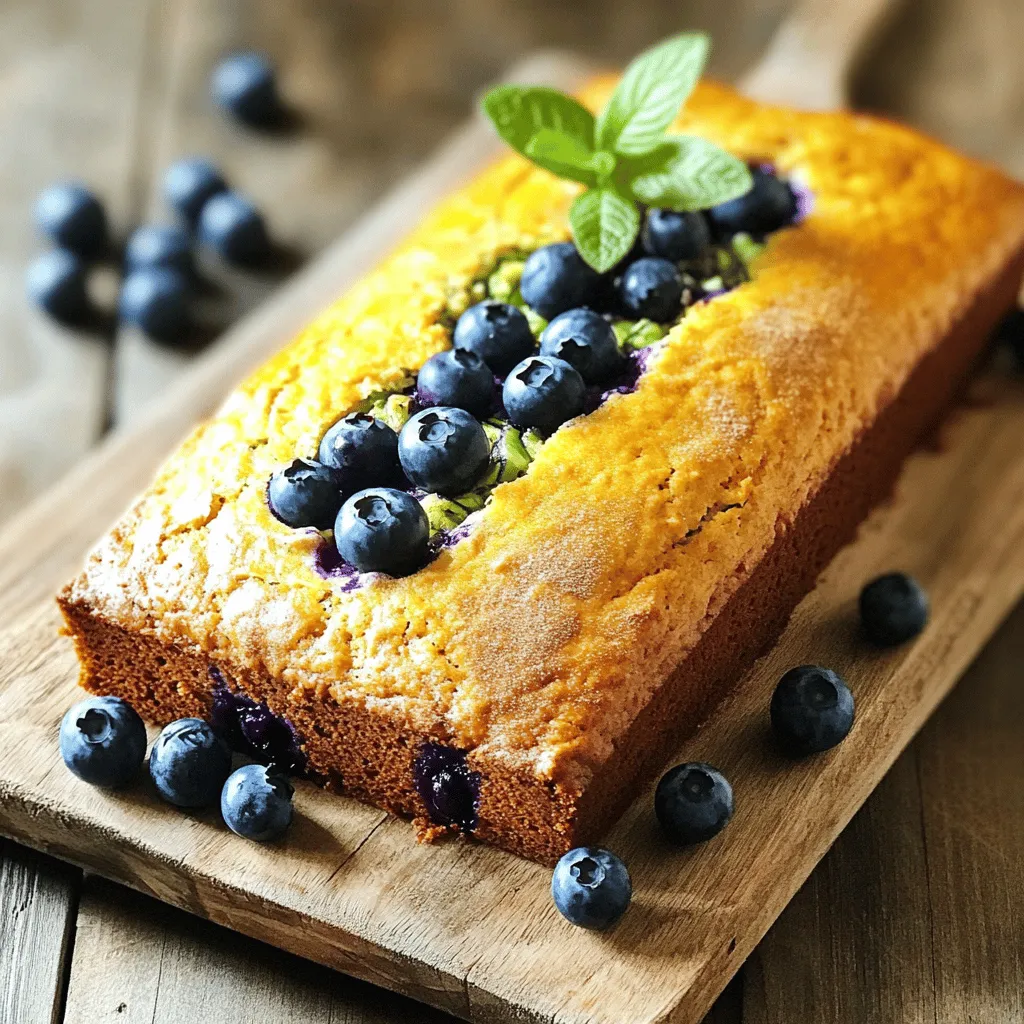
Blueberry Zucchini Bread Tasty and Simple Recipe
Craving a treat that’s both delicious and nutritious? You’re in the right place! My Blueberry Zucchini Bread recipe combines sweet blueberries with moist zucchini for
- 2 medium zucchinis, grated - 1 cup granulated sugar - 1/2 cup brown sugar, packed - 1/2 cup vegetable oil - 3 large eggs - 1 teaspoon vanilla extract - 1 1/2 cups all-purpose flour - 1 teaspoon baking powder - 1/2 teaspoon baking soda - 1/2 teaspoon salt - 1/2 teaspoon ground cinnamon - 1/2 cup unsweetened cocoa powder - 1/2 cup semi-sweet chocolate chips - 1/2 cup chopped walnuts (optional) When making this chocolate marble zucchini bread, pay close attention to your ingredients. Fresh zucchinis are best for moisture and flavor. Grate them finely. This helps blend them well into the batter. Use granulated and brown sugars for a nice balance of sweetness. The brown sugar adds a hint of caramel flavor. Vegetable oil keeps the bread moist, while eggs give it structure. The flour is the base of the bread. Make sure to measure it correctly. Too much flour can make your bread dry. Baking powder and baking soda are key for rising. They keep the bread light and fluffy. Salt and cinnamon enhance the flavors. The cocoa powder is what makes the chocolate swirl. Semi-sweet chocolate chips add richness, and walnuts add crunch. You can swap out some ingredients if needed. For example, use whole wheat flour for more fiber. If you want to cut sugar, reduce the granulated sugar slightly. For fresh versus dried ingredients, always choose fresh zucchinis. Dried ingredients should be in good shape. Check the dates on your baking powder and soda. They should be fresh for the best results. For the full experience, check out the Full Recipe. It guides you through each step to make this delightful treat. 1. Preheat your oven to 350°F (175°C). This step is key for even baking. 2. Grease and flour a 9x5 inch loaf pan. This helps the bread come out easily. 3. In a large bowl, mix the grated zucchini, granulated sugar, brown sugar, and vegetable oil. Stir until everything blends well. 4. Add three large eggs, one at a time. Mix well after each egg. Then, stir in 1 teaspoon of vanilla extract for flavor. 1. In a separate bowl, combine 1 1/2 cups of all-purpose flour, 1 teaspoon of baking powder, 1/2 teaspoon of baking soda, 1/2 teaspoon of salt, and 1/2 teaspoon of ground cinnamon. Whisk these dry ingredients together. 2. Gradually add the dry mix to your zucchini mixture. Mix just until combined. You want it moist but not over-mixed. 3. Divide the batter in half. To one half, stir in 1/2 cup of unsweetened cocoa powder. Mix until it's well blended. 1. Pour the plain zucchini batter into the loaf pan. 2. Dollop spoonfuls of chocolate batter on top of the plain batter. Use a knife to gently swirl the two batters together. This creates a lovely marbled effect. 3. If you like, sprinkle 1/2 cup of semi-sweet chocolate chips and 1/2 cup of chopped walnuts on top of the batter. 4. Bake in the preheated oven for 55-65 minutes. Check doneness by inserting a toothpick into the center. It should come out clean. Enjoy the rich taste of your Chocolate Marble Zucchini Bread! For the complete recipe, check the [Full Recipe]. Grating zucchini is simple but needs care. Here are my best tips: - Choose fresh zucchinis: Select firm zucchinis without soft spots. Fresh ones have better flavor. - Use a box grater: A box grater works well to get fine, even shreds. - Squeeze out excess moisture: After grating, place the zucchini in a clean towel. Twist the towel to remove water. This step keeps your bread from becoming soggy. Creating a beautiful marble effect adds fun to your loaf. Here’s how: - Divide the batter evenly: Split your batter into two bowls before adding cocoa powder. This way, you have equal amounts of both flavors. - Dollop carefully: Pour spoonfuls of plain and cocoa batter into your pan. Alternate between the two batters. - Swirl gently: Use a knife to swirl the batters together. Too much mixing will blend them completely, so be light-handed. Just a few gentle swirls give a lovely marbled look. Baking can be tricky, but I have tips to help avoid mistakes: - Preheat your oven: Always preheat your oven to 350°F (175°C) before baking. This helps the bread rise well. - Check your measurements: Use dry measuring cups for flour and cocoa. Too much flour can make the bread dense. - Test for doneness: Stick a toothpick into the center. If it comes out clean, your bread is ready. If not, bake a few more minutes. By following these tips, you will bake a perfect Chocolate Marble Zucchini Bread. For the full recipe, check the recipe section. Enjoy your baking! {{image_2}} You can make this chocolate marble zucchini bread a bit healthier. One way is to use whole wheat flour. Whole wheat flour adds fiber and nutrients. It also gives a nutty flavor to the bread. Just swap it with all-purpose flour in equal amounts. Another swap is to reduce the sugar. You can cut the granulated sugar to 3/4 cup. This change makes a lighter loaf but still keeps it sweet. You might not even notice the difference! To boost the flavor, try adding spices. Nutmeg or cloves work great in this recipe. These spices add warmth and depth to the taste. Just add about 1/4 teaspoon of either to the dry mix for a nice kick. You can also experiment with different types of chocolate. Use dark chocolate or white chocolate instead of semi-sweet. Each type brings its own unique taste to the bread. It’s a fun way to change things up! Mix-ins can really change your bread. You might want to try different nuts or seeds. Pecans or sunflower seeds can add a crunchy texture. Just make sure to chop them up a bit before adding. Dried fruits are another great option. Raisins or cranberries can add sweetness and chewiness. They pair well with chocolate and zucchini. Just add about 1/2 cup of your choice to the batter. For more details, you can check the [Full Recipe]. Store your chocolate marble zucchini bread at room temperature for up to three days. Keep it in an airtight container. This helps to keep the bread moist and fresh. If you want to store it longer, refrigerate it. Wrap it tightly in plastic wrap or foil. This keeps out air and moisture. To freeze your zucchini bread, follow these steps: - Cool it completely: Let the bread cool on a wire rack. - Wrap it well: Use plastic wrap, then foil for extra protection. - Label and date: Mark the wrapping with the date to track freshness. For thawing, take it out of the freezer and leave it in the fridge overnight. You can also let it sit at room temperature for a few hours. This way, you can enjoy the rich flavors of your chocolate marble zucchini bread anytime. Grab the full recipe and try making this delightful treat today! Yes, you can make this bread gluten-free. Use a gluten-free flour blend as a substitute. Ensure the blend includes xanthan gum for proper texture. This swap keeps the bread moist and tasty. To check if the bread is baked, insert a toothpick into the center. If it comes out clean, the bread is done. If it has batter on it, bake for a few more minutes. Chocolate marble zucchini bread stays fresh for about three days at room temperature. Store it in an airtight container to keep it moist. You can also refrigerate it for up to a week. Yes, you can use yellow squash or even butternut squash. Both will bring different flavors but work well in this recipe. Just grate them as you would zucchini and follow the same steps. Yes, you can make this bread dairy-free. Replace the semi-sweet chocolate chips with dairy-free ones. Also, check that your vegetable oil is dairy-free. This way, you can enjoy the bread without dairy. For the full recipe, check out the details provided earlier. This blog post shared how to make delicious Chocolate Marble Zucchini Bread. I covered the key ingredients, mixing steps, and baking tips. You learned about fun variations to try and storage methods to keep your bread fresh. Remember, using fresh zucchini and practicing the marble swirl are key. With these tips, you can bake a tasty treat that’s both sweet and healthy. Now, gather your ingredients and get started on your baking adventure!
Chocolate Marble Zucchini Bread Delightful and Rich Recipe
Are you ready to bake a treat that’s both rich and healthy? This Chocolate Marble Zucchini Bread is a delightful mix of moist flavors and
When making Ridiculously Easy French Butter Cake, you'll need some key ingredients. Each one plays a big role in creating that moist and rich flavor. - 1 cup (2 sticks) unsalted butter, melted - 1 cup granulated sugar - 4 large eggs - 1 teaspoon vanilla extract These main ingredients form the base of the cake. Unsalted butter gives a rich taste. Granulated sugar adds sweetness, while eggs help bind everything. Vanilla extract brings a warm aroma and flavor. - 2 cups all-purpose flour - 1 teaspoon baking powder - 1/2 teaspoon salt The dry ingredients are just as important. All-purpose flour gives structure, while baking powder helps the cake rise. Salt enhances the flavors, making everything more balanced. - Zest of 1 lemon (optional) - Powdered sugar for dusting (optional) For a twist, you can add lemon zest. It adds a bright flavor that pairs well with the cake. Dusting with powdered sugar gives a nice finish. It makes the cake look more appealing and adds a bit of sweetness. You can find the full recipe and instructions to create your own cake. Enjoy baking! - Preheat your oven to 350°F (175°C). - Grease a 9-inch round cake pan and line the bottom with parchment paper. - In a large mixing bowl, pour in the melted butter and sugar. - Whisk them together until they blend well and look creamy. - Add the eggs one by one, mixing after each. - Stir in the vanilla extract and lemon zest if you want a fresh taste. - In another bowl, whisk together the flour, baking powder, and salt. - Gradually add the dry mix to the wet mix. - Use a spatula to fold gently. - Stop when you see a few streaks of flour. Overmixing can make the cake tough. - Pour the batter into the prepared cake pan. - Use a spatula to smooth the top. - Bake for 40-45 minutes. The cake is done when it is golden brown. - Insert a toothpick into the center; it should come out clean. - Let the cake cool in the pan for 10 minutes. - Carefully move it to a wire rack to cool completely. For the full recipe, don't forget to check out the complete guide. To ensure even baking, always preheat your oven. This helps the cake rise well. Use an oven thermometer to check the right temperature. Place your cake in the center of the oven for the best heat flow. Do not overmix your batter. Overmixing can make the cake dense. Mix until you see no dry flour. A few lumps are okay, as they will bake out. Adding citrus zest can brighten the cake's flavor. Lemon or orange zest gives a fresh twist. Just a teaspoon can make a big difference. You can also try using different extracts. Almond or coconut extract adds a unique taste. For elegant serving, dust the cooled cake with powdered sugar. This adds a lovely touch. You can serve it with fresh berries or a dollop of whipped cream. They make the cake look fancy and taste great. For a colorful pop, use mixed fruits on the side. {{image_2}} You can easily switch up the flavor of your French butter cake. Here are two tasty options: - Chocolate French butter cake: Add 1/2 cup of cocoa powder to the dry mix. This gives the cake a rich chocolate flavor. You can also use chocolate chips for an extra treat. - Almond-flavored cake: Swap the vanilla extract for almond extract. This gives the cake a nutty taste. You can also add slivered almonds for a nice crunch. Not everyone can enjoy the same cake. Here are ways to make it more inclusive: - Gluten-free options: Use a gluten-free flour blend instead of all-purpose flour. This keeps the texture nice while making it safe for those with gluten issues. Just ensure your baking powder is also gluten-free. - Vegan substitutions: Replace the eggs with flax eggs. Mix 1 tablespoon of ground flaxseed with 2.5 tablespoons of water for each egg. Use a vegan butter for the same creamy texture. You can make this cake fit any season with a few fun changes: - Fall-themed additions: Add spices like cinnamon or nutmeg to the batter. This gives a warm flavor perfect for autumn. You can also include grated apple for added moisture. - Summer fruit pairings: Top the cake with fresh berries or peaches. You can also fold in diced peaches into the batter for a juicy surprise. Explore the [Full Recipe](#) for more ideas and instructions! To keep your French butter cake fresh, store it in an airtight container. This helps retain moisture and flavor. If you do not have a container, wrap it tightly in plastic wrap. Keep the cake at room temperature for up to three days. If you want to keep it longer, refrigeration is an option. Just note that the cake might dry out a bit in the fridge. You can freeze this cake for later use. First, let the cake cool completely. Then, wrap it in plastic wrap and aluminum foil. This double-layer helps prevent freezer burn. The cake can last in the freezer for up to three months. When you are ready to enjoy it, move it to the fridge overnight to thaw. If you want it faster, leave it at room temperature for a few hours. If you want to enjoy warm cake, reheating is easy. Place a slice in the microwave for about 10-15 seconds. This warms the cake without drying it out. You can also use the oven. Preheat it to 350°F (175°C) and heat the cake in a foil-covered dish for about 10-15 minutes. This method keeps the cake moist and tasty. This cake can last up to five days. Store it in an airtight container at room temperature. If you want to keep it fresh longer, place it in the fridge. However, this may change the cake's texture a bit. You can also freeze the cake for up to three months. Just wrap it well in plastic wrap and foil. To enjoy it later, let it thaw in the fridge overnight. Yes, you can make this cake a day before your event. It tastes great even after a night of resting. Just let it cool completely. Then, wrap it in plastic wrap to keep it moist. You can also prepare the batter a few hours ahead. Just keep it in the fridge and bake it when you are ready. This will save time and let you enjoy the fun of your gathering. If your cake sinks in the middle, it may be due to overmixing. Mixing too much can add air, making the cake rise, then collapse. Also, ensure your oven is at the right temperature. An oven that is too hot can cause the cake to rise too fast. If your cake still sinks, try using less baking powder next time. This way, you can avoid the issue and enjoy a perfect cake. You now know the main ingredients needed for a delicious cake, from butter to eggs. I shared useful tips to enhance flavor and ensure even baking. You learned how to store and freeze your cake, plus how to tackle common baking issues. Remember, baking should be fun and creative. Experiment with flavors and variations to make it your own. With these steps and insights, you can bake a fantastic cake that impresses everyone. Enjoy your tasty creations!
Ridiculously Easy French Butter Cake Delight Recipe
Welcome to the world of baking bliss with my Ridiculously Easy French Butter Cake Delight Recipe! If you crave a rich, buttery treat that’s simple
To make a great pumpkin zucchini bread, gather these key items: - 1 cup shredded zucchini (about 1 medium zucchini) - 1 cup canned pumpkin puree - 1/2 cup vegetable oil - 1/2 cup brown sugar - 1/2 cup granulated sugar - 2 large eggs - 1 teaspoon vanilla extract - 1 1/2 cups all-purpose flour - 1 teaspoon baking soda - 1/2 teaspoon baking powder - 1 teaspoon ground cinnamon - 1/2 teaspoon ground nutmeg - 1/4 teaspoon ground ginger - 1/2 teaspoon salt These ingredients work together to create a moist, flavorful bread that you’ll love. For extra flavor and texture, consider adding these optional ingredients: - 1/2 cup chopped walnuts or pecans - 1/4 cup mini chocolate chips These add-ins can make your bread even more delightful and special. You can mix and match based on your taste. Measuring your ingredients correctly is vital. Here are some tips: - Use dry measuring cups for flour and sugar. - Pack the brown sugar firmly into the cup. - Grate the zucchini finely for even mixing. Accurate measuring ensures your pumpkin zucchini bread turns out perfect every time. Follow these tips for the best results. For the complete recipe, check the Full Recipe above. Start by gathering your ingredients. You need: - 1 cup shredded zucchini (about 1 medium zucchini) - 1 cup canned pumpkin puree - 1/2 cup vegetable oil - 1/2 cup brown sugar - 1/2 cup granulated sugar - 2 large eggs - 1 teaspoon vanilla extract - 1 1/2 cups all-purpose flour - 1 teaspoon baking soda - 1/2 teaspoon baking powder - 1 teaspoon ground cinnamon - 1/2 teaspoon ground nutmeg - 1/4 teaspoon ground ginger - 1/2 teaspoon salt - 1/2 cup chopped walnuts or pecans (optional) - 1/4 cup mini chocolate chips (optional) Preheat your oven to 350°F (175°C). Grease a 9x5-inch loaf pan or use parchment paper for easy removal. In a large bowl, whisk the shredded zucchini, pumpkin puree, oil, brown sugar, granulated sugar, eggs, and vanilla until mixed well. In another bowl, sift together the flour, baking soda, baking powder, and spices. Slowly add the dry mix to the wet mix. Stir gently until combined. If you want, fold in nuts or chocolate chips for extra flavor. Pour the batter into your loaf pan. Spread it evenly with a spatula. Place the pan in the oven and bake for 55-65 minutes. Check doneness by inserting a toothpick into the center. It should come out clean. If it’s not done, give it a few more minutes. When your bread is done, take it out of the oven. Let it cool in the pan for about 10 minutes. After that, transfer the bread to a wire rack. This lets it cool completely. If you slice it too soon, it might fall apart. Once cool, enjoy your tasty Pumpkin Zucchini Bread! For the full recipe, you can refer back to the ingredients section. To keep your pumpkin zucchini bread moist, use fresh zucchini. Shred it right before mixing. The moisture from the zucchini helps the bread stay soft. Also, do not overmix the batter. Mixing too much can make the bread dry. Use a toothpick to check for doneness. If it comes out clean, your bread is ready. One common mistake is using too much flour. Always spoon flour into your measuring cup. Then level it off with a knife. If you pack the flour, your bread can become dense. Another mistake is not letting the bread cool properly. Cooling helps the flavors develop. Do not rush this step, as it can lead to a gummy texture. Use a sturdy mixing bowl for combining ingredients. A whisk is great for mixing wet ingredients. For dry ingredients, a sifter will help avoid lumps. A loaf pan lined with parchment paper helps with easy removal. Also, have a reliable toothpick on hand for testing doneness. These tools make the process smoother and more enjoyable. For the full recipe, refer to the section above. {{image_2}} You can make this pumpkin zucchini bread lighter. Use applesauce instead of oil. This swap cuts fat but keeps moisture. You can also use whole wheat flour. It adds fiber and nutrition. If you want less sugar, try using maple syrup or honey. Just remember to adjust the liquid in your recipe. Want to spice things up? Add a pinch of ground cloves or allspice. These add warmth and depth to the bread. You can also mix in dried fruits like cranberries or raisins. They bring a nice chewiness and sweetness. For a chocolate twist, use dark chocolate chips instead of mini ones. This adds richness without being too sweet. Make this bread festive for the holidays! Add chopped fresh cranberries for a tart flavor. You can also use pumpkin pie spice instead of individual spices. This gives a bold pumpkin flavor. Try adding orange zest for a bright, citrus twist. It pairs well with both pumpkin and zucchini. Each of these twists lets you enjoy a new take on the classic recipe. For the full recipe, check out the details above. To keep your pumpkin zucchini bread fresh, store it in an airtight container. This helps it stay moist and flavorful. You can also wrap the bread in plastic wrap. Place it in a cool, dry spot like your kitchen counter. If you want to keep it for a longer time, the fridge is a good choice. Just remember to let it cool completely before wrapping. If you want to save some for later, freezing is a great option. Slice the bread first for easy thawing. Wrap each slice in plastic wrap, then place them in a freezer bag. Be sure to label the bag with the date. This way, you will know how long it has been in the freezer. Pumpkin zucchini bread can last up to three months in the freezer. To enjoy your frozen slices, simply take out what you need. Thaw the bread in the fridge overnight for best results. If you're in a hurry, you can use the microwave. Heat a slice for 15 to 20 seconds. For a crispier texture, pop it in a toaster oven until warm. This will bring back its fresh-baked taste. Yes, you can use fresh zucchini. Just make sure to shred it finely. The moisture from fresh zucchini helps keep the bread moist. If you use larger pieces, the bread may not bake evenly. Pumpkin zucchini bread lasts about 3 to 5 days at room temperature. Keep it in an airtight container. If you want it to last longer, refrigerate it for up to a week. For even longer storage, freeze it. Yes, you can substitute other flours. Whole wheat flour gives a nutty flavor. Almond flour makes it gluten-free. If you use a different flour, adjust the liquid. Some flours absorb more moisture than all-purpose flour. Serve pumpkin zucchini bread warm for the best taste. A pat of butter adds a rich flavor. You can also spread cream cheese on top. For a festive touch, sprinkle cinnamon on it. Enjoy it as a snack or breakfast treat. For the full recipe, refer to Pumpkin Zucchini Delight Bread. To wrap up, we explored the key ingredients and step-by-step instructions for pumpkin zucchini bread. I shared tips on moisture, common mistakes, and tools to enhance your baking. We also discussed fun variations and best practices for storage. With these insights, you can confidently bake delicious pumpkin zucchini bread. Enjoy experimenting with flavors and impressing friends and family with your creations. Happy baking!
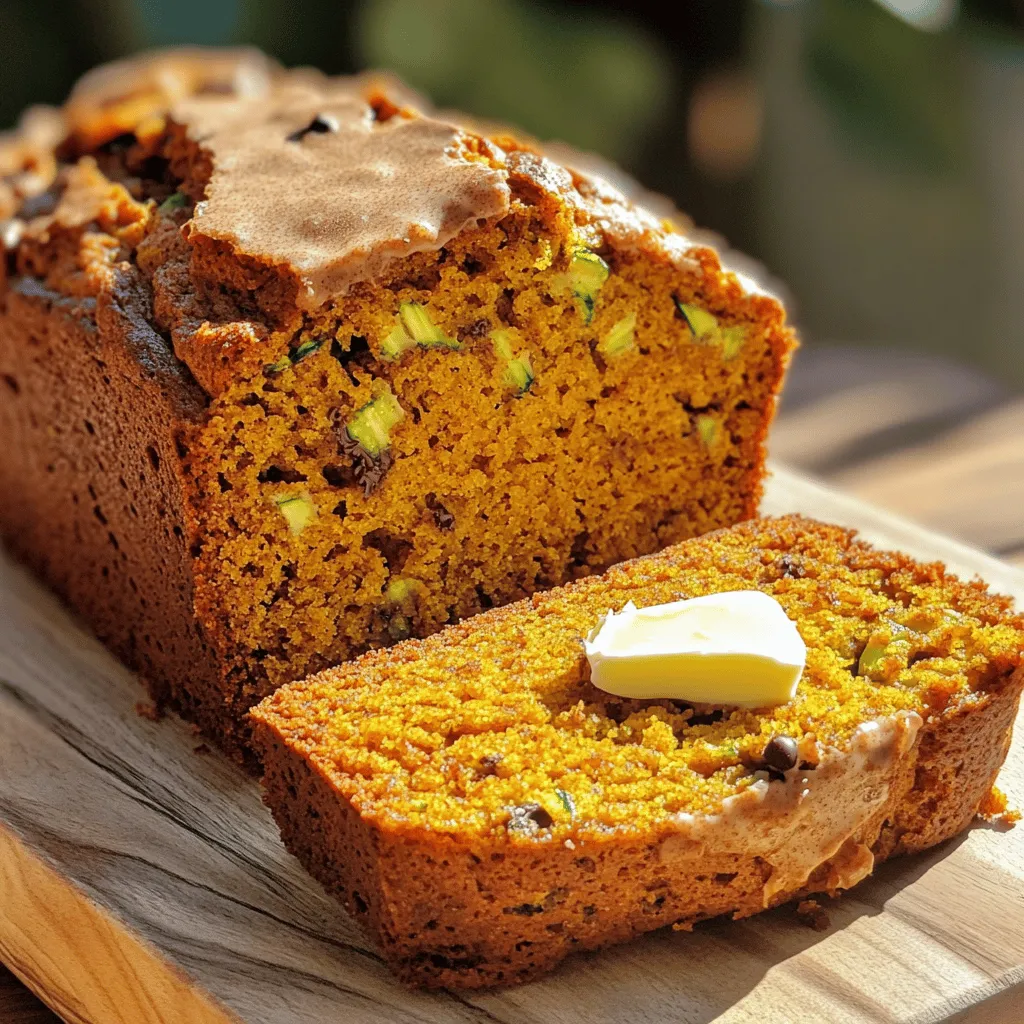
Pumpkin Zucchini Bread Fresh and Flavorful Delight
Are you ready to try a fall favorite that’s both healthy and yummy? This Pumpkin Zucchini Bread is a fresh and flavorful delight you won’t
- 2 cups grated zucchini - 1 cup granulated sugar - 1 cup brown sugar - 1 cup vegetable oil - 4 large eggs - 2 teaspoons vanilla extract - 2 cups all-purpose flour - 1 teaspoon baking powder - 1 teaspoon baking soda - 1 teaspoon cinnamon - 1/2 teaspoon nutmeg - 1/4 teaspoon salt - 8 ounces cream cheese - 1/2 cup unsalted butter - 4 cups powdered sugar - 2 tablespoons milk - 1 teaspoon vanilla extract Gathering the right ingredients is key to a tasty zucchini cake. I love using fresh zucchini because it adds moisture without overpowering the cake. The sugars create a nice sweetness, while the vegetable oil keeps it soft. Four eggs help to bind everything together, giving the cake structure. When it comes to dry ingredients, make sure you use all-purpose flour for the best results. Baking powder and baking soda help the cake rise. Cinnamon and nutmeg add warmth and spice. A touch of salt balances the sweetness perfectly. For the cream cheese frosting, choose full-fat cream cheese for the best flavor and texture. The butter adds richness. Powdered sugar gives a smooth finish, while milk and vanilla extract bring it all together. You can find the full recipe at the end of this article. Happy baking! - Preheat the oven to 350°F (175°C). - Prepare the zucchini by grating and removing excess moisture. Grating zucchini is easy. Use a box grater or a food processor. Once you grate it, place the zucchini in a clean towel. Twist the towel and squeeze out the extra water. This step helps keep your cake from being too wet. - Combine wet ingredients: sugars, oil, eggs, and vanilla extract. - Mix dry ingredients: whisk flour, baking powder, baking soda, cinnamon, nutmeg, and salt. In a large bowl, mix granulated sugar, brown sugar, and vegetable oil. Add the eggs, one at a time, and whisk in the vanilla. In another bowl, whisk the dry ingredients. This includes flour, baking powder, baking soda, cinnamon, nutmeg, and salt. Make sure you mix these well so the flavors blend. - Combine wet and dry ingredients gently. - Divide batter into prepared cake pans and bake for 25-30 minutes. Gently fold the dry ingredients into the wet mixture. Be careful not to over-mix. Finally, fold in the grated zucchini. Divide the batter evenly into two greased cake pans. Bake them in the oven for about 25 to 30 minutes. Check for doneness using a toothpick. It should come out clean from the center. - Beat cream cheese and butter until smooth. - Gradually add powdered sugar, milk, and vanilla extract to make fluffy frosting. For the frosting, beat the softened cream cheese and butter together in a bowl. Mix until it is smooth. Gradually add the powdered sugar, mixing well after each addition. Then stir in the milk and vanilla extract to make it light and fluffy. Once your cake cools completely, you can frost it with this creamy delight. For the full recipe, check the details above. Enjoy your baking! To get the best texture in your cake, you must prepare the zucchini well. Start by grating two medium zucchinis. Then, place the grated zucchini on a clean kitchen towel. Twist the towel to squeeze out excess moisture. Aim to remove as much water as you can. This step is key. If your zucchini is too wet, the cake can turn out soggy. Trust me, nobody wants that! Using room temperature ingredients is crucial for a great cake. When your eggs and oil are at room temperature, they mix better. This helps create a light, fluffy batter. If you forget, place eggs in warm water for a few minutes. You can also take your oil out early. This simple step can make a big difference in your final cake. For the perfect cream cheese frosting, you want a smooth and fluffy texture. Start with softened cream cheese and butter. Beat them together until creamy. Gradually add powdered sugar, mixing well. If the frosting is too thick, add a little milk. This will help achieve a spreadable consistency. You want it to taste rich but not too sweet. Adjust the vanilla extract to enhance the flavor. Follow these steps for a frosting that everyone will love! {{image_2}} You can switch up the frosting to change the cake's flavor. Try using whipped cream for a light touch. It adds a fluffy texture and fresh taste. If you love chocolate, use chocolate frosting instead. This gives a rich, sweet bite that pairs well with zucchini. Both options can create a fun twist on the classic recipe. Want to make your zucchini cake more special? Adding nuts can bring a nice crunch. Walnuts or pecans work great here. You can also mix in chocolate chips for a sweet surprise. Dried fruit like raisins or cranberries can add a chewy texture. These add-ins not only boost flavor but also make each bite unique. Is gluten a concern for you? No problem! You can make a gluten-free zucchini cake. Use almond flour or a gluten-free flour blend instead of all-purpose flour. This keeps the cake moist and delicious. Just remember to check the baking soda and powder for gluten-free labels. You can enjoy this delightful cake without worry! For the full recipe, check out the details above. To keep your leftover zucchini cake fresh, wrap it in plastic wrap. You can also place it in an airtight container. Store it in the fridge for up to five days. If you want to enjoy it later, freezing is a great option. For freezing, slice the zucchini cake first. Wrap each slice in plastic wrap. Then, place the wrapped slices in a freezer bag. This way, you can grab one whenever you want! You can freeze the cream cheese frosting separately, too. Just store it in an airtight container. It lasts up to three months in the freezer. To gently reheat the cake, set your oven to 350°F (175°C). Place the cake on a baking sheet. Cover it with foil to keep it moist. Heat for about 10-15 minutes. Check often so it doesn’t dry out. Enjoy your cake warm, and it will taste fresh again! Yes, you can use frozen zucchini. Just make sure to thaw it first. After thawing, squeeze out any excess liquid using a clean towel. This step is crucial. Too much moisture will make your cake soggy. Once you have squeezed out the water, you can use the zucchini just like fresh. The zucchini cake will stay fresh in the fridge for about five days. Keep it in an airtight container to help retain moisture. If you have frosting on it, the cake may last a bit longer. The cream cheese frosting helps to keep it moist and tasty. Yes, you can make this cake dairy-free. Use dairy-free cream cheese and a dairy-free butter substitute for the frosting. You can also use almond milk or oat milk instead of regular milk. This way, you can enjoy the cake without the dairy. You can serve zucchini cake with a scoop of vanilla ice cream or fresh whipped cream. A side of berries adds a nice touch too. You might also pair it with a cup of coffee or tea for a warm and cozy dessert experience. For an added twist, try drizzling chocolate sauce on top. This will create a delightful contrast with the cream cheese frosting. For the full recipe, check the section above. This zesty zucchini cake combines moistness with cream cheese frosting. You will love its unique flavors! Here is how to make it: Ingredients: - 2 cups grated zucchini (about 2 medium zucchinis) - 1 cup granulated sugar - 1 cup brown sugar, packed - 1 cup vegetable oil - 4 large eggs - 2 teaspoons vanilla extract - 2 cups all-purpose flour - 1 teaspoon baking powder - 1 teaspoon baking soda - 1 teaspoon cinnamon - 1/2 teaspoon nutmeg - 1/4 teaspoon salt For the Cream Cheese Frosting: - 8 ounces cream cheese, softened - 1/2 cup unsalted butter, softened - 4 cups powdered sugar - 2 tablespoons milk - 1 teaspoon vanilla extract Instructions: 1. Preheat your oven to 350°F (175°C). Grease and flour two 9-inch round cake pans. 2. Grate the zucchini. Squeeze out moisture with a clean towel and set aside. 3. In a bowl, mix granulated sugar, brown sugar, and vegetable oil. Add eggs, one by one. Stir in vanilla extract. 4. In another bowl, whisk together flour, baking powder, baking soda, cinnamon, nutmeg, and salt. 5. Gradually add dry ingredients to wet ingredients. Stir gently. Fold in the grated zucchini. 6. Divide batter between cake pans. Bake for 25-30 minutes. Check with a toothpick. 7. Let cakes cool in pans for 10 minutes. Move to wire racks to cool completely. 8. For frosting, beat cream cheese and butter until smooth. Gradually add powdered sugar. Mix in milk and vanilla extract until fluffy. 9. Frost cooled cakes. Place one layer on a plate, spread frosting, and add the second layer. Use remaining frosting to cover. 10. Garnish with cinnamon or lemon zest for flair. Enjoy your delightful zesty zucchini cake! This recipe provides a clear guide for creating a delicious treat. Enjoy cooking! This blog post outlines a delicious zucchini cake recipe. It covers key ingredients, step-by-step instructions, and tasty variations. You learned how to prepare zucchini, mix ingredients, and create the perfect cream cheese frosting. Remember, adding nuts or using different frostings can enhance flavors. Proper storage helps keep your cake fresh for longer. Try this recipe, enjoy the rich taste, and share it with friends. Baking is fun, and this cake will impress everyone. Enjoy your time in the kitchen and happy baking!
Zucchini Cake with Cream Cheese Frosting Delight
Imagine biting into a moist, flavorful slice of zucchini cake topped with creamy frosting. This treat is perfect for family gatherings or a simple dessert
- 2 cups grated zucchini (water squeezed out) - 2 cups all-purpose flour - 1 ½ cups granulated sugar - 1 teaspoon baking powder - 1 teaspoon baking soda - 1 teaspoon ground cinnamon - ½ teaspoon salt - ½ cup vegetable oil - 4 large eggs - 1 teaspoon vanilla extract - 1 cup caramel sauce (store-bought or homemade) - 1 cup unsweetened whipped cream - Optional: crushed walnuts or pecans for topping These ingredients make the Caramel Zucchini Poke Cake both moist and sweet. Using zucchini adds a nice texture and extra nutrition. Make sure to squeeze out the water from the zucchini before using it. This step keeps the cake from getting too soggy. You can use store-bought caramel sauce for ease, or you can make your own if you prefer. The whipped cream on top gives a lovely lightness to the cake. If you're feeling adventurous, add some crushed walnuts or pecans for extra crunch. This recipe is simple and uses common ingredients, making it easy to whip up at home. For the full recipe, check out the instructions later in this article! - Preheat the oven to 350°F (175°C). Grease and flour a 9x13-inch baking pan. - In a large bowl, mix the dry ingredients: flour, sugar, baking powder, baking soda, cinnamon, and salt. - In another bowl, prepare the wet mixture. Blend the eggs, vegetable oil, and vanilla extract. Add the grated zucchini and stir until even. - Gradually combine the wet and dry ingredients. Stir gently without overmixing. - Pour the batter into the prepared baking pan. Spread it evenly with a spatula. - Bake for 30-35 minutes. Check if a toothpick comes out clean from the center. - Allow the cake to cool for 10 minutes. Use a skewer to poke holes all over the cake. - Pour caramel sauce over the warm cake. Let it seep into the holes for extra flavor. - Cool the cake completely. Once cooled, spread unsweetened whipped cream on top. - If you like, add crushed walnuts or pecans for a tasty crunch. For the full recipe, check out the details above. Enjoy making this delicious cake! To make your cake perfect, start with the zucchini. First, wash the zucchini well. Then, grate it finely. After grating, place the zucchini in a clean cloth. Squeeze out as much water as you can. This step is key. Too much moisture can make your cake soggy. When choosing zucchini, look for firm, shiny options. Smaller zucchinis often taste better. They have fewer seeds and are less watery. If the skin looks dull or has blemishes, skip it. Fresh zucchini will help your cake rise and taste great. Mixing the batter is critical. Be careful not to overmix. Stir just until the dry and wet ingredients combine. This keeps your cake light and fluffy. Overmixing can lead to a dense texture that nobody wants. For checking if your cake is done, use a toothpick. Insert it in the center of the cake. If it comes out clean, your cake is ready. If there is batter on the toothpick, bake it a bit longer. Always trust your senses and check at least five minutes before the timer goes off. Presentation is key for a stunning dessert. Slice the cake into neat squares. Use a spatula to lift each piece onto a plate. Drizzle more caramel sauce over each slice for a treat. Pair your cake with a scoop of vanilla ice cream. The cold ice cream contrasts nicely with the warm cake. You can also serve it with coffee or tea for a delightful afternoon pick-me-up. For a dessert table, add fresh fruit like strawberries or blueberries. They add color and freshness to the spread. For the [Full Recipe], visit the main article. {{image_2}} You can switch up the cake mix for a fun twist. Use chocolate cake mix instead of the homemade batter. It adds a rich flavor that pairs well with the caramel. If you want a different sweetness, try coconut sugar or honey. These options give a unique taste and still work great. Spice up your cake with a dash of nutmeg or a spoon of vanilla bean. These spices deepen the flavor and make your cake more interesting. You can also add different nuts or toppings. Chocolate chips go well in the batter, or try crushed walnuts for a nice crunch. If you need a gluten-free cake, use almond flour or a gluten-free blend. It gives the same moistness without the gluten. For a vegan option, swap the eggs for flaxseed meal mixed with water. You can also use coconut cream instead of regular whipped cream. These swaps still keep your cake tasty and enjoyable. To keep your Caramel Zucchini Poke Cake fresh, store it in the fridge. First, cover the cake with plastic wrap or aluminum foil. This prevents it from drying out. If you have leftover whipped cream, store it separately in an airtight container. For long-term storage, you can freeze the cake. Cut it into pieces and wrap each piece in plastic wrap. Then place them in a freezer bag. This method helps keep the flavor and texture. In the fridge, the cake stays fresh for about 4 to 5 days. Always check for signs of spoilage before eating. Look for mold or an off smell. If the cake feels dry or hard, it might be past its prime. You can also taste a small piece to see if it still tastes good. If it seems off, it’s better to throw it away. Enjoy your delicious cake while it’s fresh! For the full recipe, check out the link above. Can I use frozen zucchini for this recipe? Yes, you can use frozen zucchini. Just make sure to thaw and drain it well. Squeezing out excess water helps keep the cake light and fluffy. Fresh zucchini is great, but frozen works too! What is the best way to serve Caramel Zucchini Poke Cake? I like to slice it into squares and serve on dessert plates. Drizzle more caramel sauce over each piece for extra sweetness. Adding a dollop of whipped cream makes it even better! How can I make this cake more chocolatey? You can swap some flour for cocoa powder. About ½ cup of cocoa will add rich flavor. You could also mix in chocolate chips for a double chocolate treat. Your taste buds will thank you! Is it possible to make it ahead of time? Absolutely! You can bake the cake a day before. Just store it in the fridge after it cools. Add whipped cream and toppings just before serving to keep them fresh. What are some good topping alternatives for the cake? If you want to mix it up, try using cream cheese frosting instead of whipped cream. Fresh fruits like strawberries or blueberries also add a nice touch. Nuts like pecans or walnuts give a nice crunch too! For the full recipe, check out the [Full Recipe]. In this post, I covered how to make a delicious Caramel Zucchini Poke Cake. We talked about the ingredients you need, the step-by-step instructions, and helpful tips for baking. I also shared fun variations and storage tips. This cake is an easy bake that hides zucchini well in its rich flavor. You can impress your friends and family with this simple recipe. So, gather your ingredients and start baking today! Enjoy every slice you make.
Caramel Zucchini Poke Cake Delicious and Easy Recipe
Get ready to enjoy a sweet and moist treat with my Caramel Zucchini Poke Cake! This recipe is not just easy; it’s a delicious way