Desserts
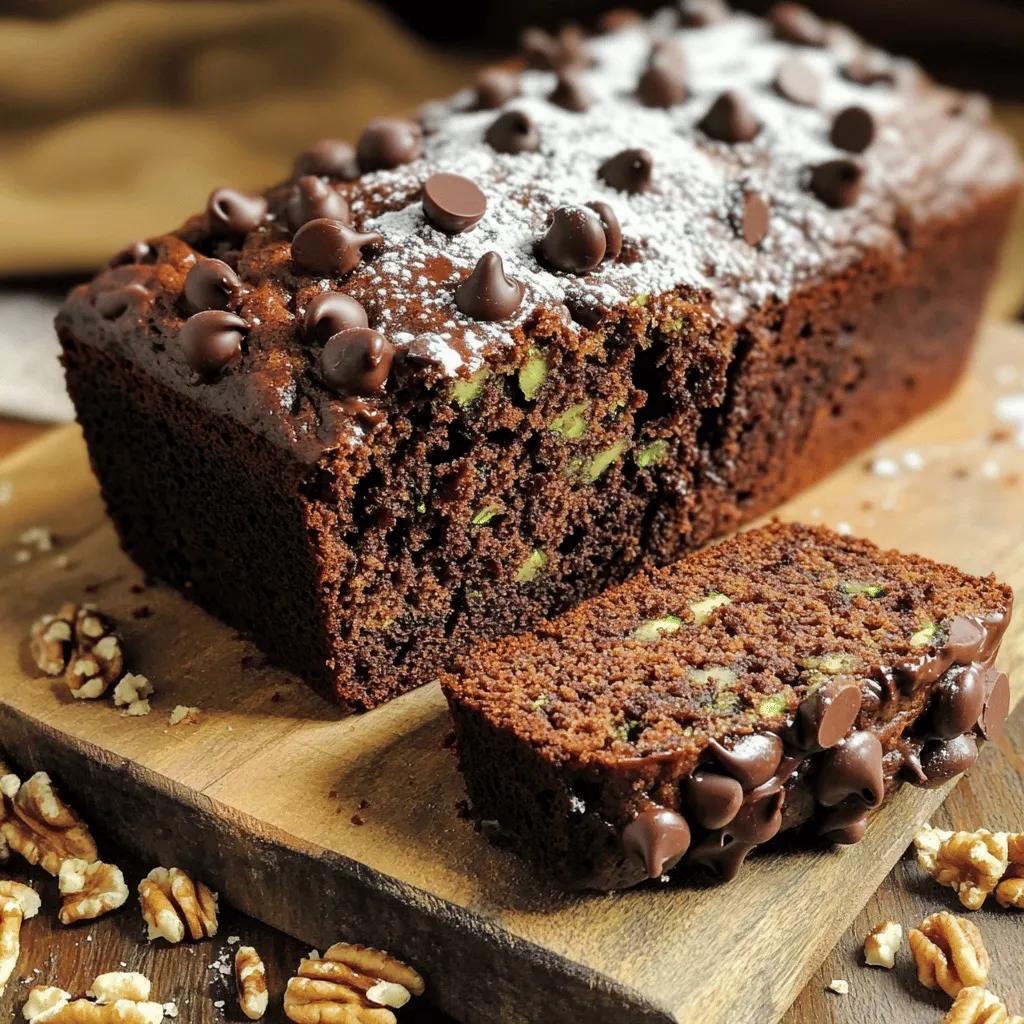
![To make chocolate peanut butter zucchini bread, gather these key ingredients: - 1 cup grated zucchini (about 1 medium zucchini) - 1/2 cup creamy peanut butter - 1/2 cup unsweetened applesauce - 1/2 cup brown sugar, packed - 1/4 cup granulated sugar - 2 large eggs - 1 teaspoon vanilla extract - 1 cup all-purpose flour - 1/2 cup cocoa powder - 1 teaspoon baking soda - 1/2 teaspoon baking powder - 1/4 teaspoon salt - 1/2 cup chocolate chips (dark or semi-sweet) - 1/4 cup chopped walnuts or pecans (optional) These ingredients create a moist and rich bread. The zucchini adds moisture without any strong taste. Peanut butter gives it a creamy, nutty flavor. Cocoa powder provides a deep chocolate taste. You can easily swap some ingredients if needed. Use almond butter instead of peanut butter for a nut-free option. Applesauce can be replaced with yogurt for extra tang. If you have no brown sugar, use all granulated sugar. You can use whole wheat flour instead of all-purpose flour for a healthier twist. Getting the measurements right is key. Use a kitchen scale for the most accurate results. One medium zucchini gives about one cup when grated. If you use a different type of sugar, keep the total amount the same. For flour, make sure it is leveled off in the measuring cup. This will ensure the bread rises properly. By following these tips, you'll create a delicious loaf that everyone will love. For the full recipe, check out the details above! First, gather all your ingredients. You will need: - 1 cup grated zucchini - 1/2 cup creamy peanut butter - 1/2 cup unsweetened applesauce - 1/2 cup packed brown sugar - 1/4 cup granulated sugar - 2 large eggs - 1 teaspoon vanilla extract - 1 cup all-purpose flour - 1/2 cup cocoa powder - 1 teaspoon baking soda - 1/2 teaspoon baking powder - 1/4 teaspoon salt - 1/2 cup chocolate chips - 1/4 cup chopped walnuts or pecans (optional) Make sure to wash and grate the zucchini. The smaller the pieces, the better they mix. In a large bowl, mix the grated zucchini, peanut butter, applesauce, brown sugar, granulated sugar, eggs, and vanilla extract. Use a whisk to blend everything until smooth. This step is key. It helps the sugars dissolve and creates a nice base for your bread. In a separate bowl, whisk together the all-purpose flour, cocoa powder, baking soda, baking powder, and salt. This helps mix the dry ingredients evenly. It’s important to do this before adding them to the wet mix. Now, gently add the dry mix to the wet mix. Use a spatula to fold everything together. Be careful not to overmix. Next, fold in your chocolate chips and nuts. Pour the batter into a greased loaf pan. Smooth the top with a spatula. Bake it in a preheated oven at 350°F (175°C) for 50-60 minutes. To check if it’s done, insert a toothpick into the center. If it comes out clean, it’s ready. Once baked, let it cool in the pan for 10 minutes. Then, transfer it to a wire rack to cool completely. For more details, check the Full Recipe. When selecting zucchini, look for firm, shiny skin. Avoid any that feel soft or have blemishes. Choose smaller zucchinis, as they tend to be sweeter and less watery. Remember, fresh zucchini gives the best flavor to your bread. To achieve a moist and fluffy bread, squeeze out excess water from the grated zucchini. You can use a clean kitchen towel for this. Do not overmix the batter; mix until just combined. This keeps the bread light and airy. If your bread is too dense, check if you overmixed the batter. For bread that doesn't rise, ensure your baking soda and powder are fresh. If the edges brown too quickly, cover them with foil halfway through baking. This helps your bread cook evenly. {{image_2}} You can easily make this recipe gluten-free. Simply swap the all-purpose flour for a gluten-free blend. Many brands offer great mixes that work well in baking. Make sure the blend contains xanthan gum for better texture. This keeps your bread moist and fluffy. Just follow the same measurements in the recipe. Want to jazz up your zucchini bread? Consider adding spices! Cinnamon or nutmeg can add warmth and depth. You might also try a splash of espresso powder. This brings out the chocolate flavor more. Another option is a bit of orange zest. It gives a fresh twist to the taste. You can even add vanilla bean seeds for an extra touch of luxury. If you want to change things up, you can switch the nuts. Almonds or hazelnuts are great choices. They add a nice crunch and flavor. For the chocolate, try using white chocolate chips. They create a sweet contrast to the rich flavors. You can also add a swirl of nut butter on top before baking. This creates a pretty design and extra taste. Feel free to mix and match these ideas to make this recipe your own! For the complete recipe, you can refer to the [Full Recipe]. To keep your chocolate peanut butter zucchini bread fresh, wrap it well. Use plastic wrap or aluminum foil. Store it at room temperature for up to three days. If you want it to last longer, move it to the fridge. This will keep it fresh for about a week. Freezing is a great option if you have extra bread. Slice the loaf before freezing. Wrap each slice tightly in plastic wrap, then place them in a freezer bag. Make sure to remove as much air as possible. This way, you can enjoy a slice whenever you like. The bread can stay good in the freezer for three months. To reheat your bread, you have a few options. For the best taste, use the oven. Preheat it to 350°F (175°C). Place the bread on a baking sheet and warm it for about 10 minutes. If you’re in a hurry, use a microwave. Heat each slice for about 15-20 seconds. Enjoy your chocolate peanut butter zucchini bread warm for a delicious treat. For the full recipe, check out the recipe section above. Yes, you can use frozen zucchini. Just make sure to thaw and drain it first. This will remove excess water. If you skip this step, your bread could turn out soggy. You can grate fresh zucchini and freeze it for later use too. Check your bread with a toothpick. Insert it into the center of the loaf. If it comes out clean, your bread is ready. Baking times may vary, so start checking around 50 minutes. The edges should look firm and the top should spring back slightly when pressed. This recipe uses grated zucchini, which adds moisture and nutrients. The applesauce replaces some oil and adds natural sweetness. Peanut butter adds protein and healthy fats. Using less sugar and adding nuts also boosts the health factor. Plus, it’s all about balance and enjoying treats mindfully! In this post, we explored how to make chocolate peanut butter zucchini bread. We covered key ingredients and possible substitutes, ensuring you know what to use. I provided step-by-step instructions, helpful tips, and variations to enhance your recipe. You also learned how to store and reheat leftovers. This delicious bread is easy to make and fun to tweak. Enjoy baking and sharing your tasty creation!](https://therecipehatch.com/wp-content/uploads/2025/07/97c7a6e4-0487-4118-bdfa-0c6b0ebb3de2.webp)
Chocolate Peanut Butter Zucchini Bread Easy Recipe
Are you ready to bake something delicious and healthy? This Chocolate Peanut Butter Zucchini Bread recipe is an easy way to enjoy a tasty treat.

Refreshing Peach Sorbet Simple and Easy Recipe
Are you ready to enjoy a sweet and refreshing treat this summer? In “Refreshing Peach Sorbet: Simple and Easy Recipe,” I’ll show you how to
![To make a tasty zucchini cake, you need some key ingredients. Here’s what you will need: - 2 cups grated zucchini (about 2 medium zucchinis) - 1 ½ cups all-purpose flour - 1 cup granulated sugar - ½ cup packed brown sugar - 1 teaspoon baking powder - 1 teaspoon baking soda - ½ teaspoon salt - 1 teaspoon ground cinnamon - ½ teaspoon vanilla extract - ½ cup vegetable oil - 3 large eggs These ingredients work together to create a moist and flavorful cake. The grated zucchini adds moisture and a subtle sweetness. For the delicious cream cheese frosting, gather these simple items: - 8 oz cream cheese, softened - ½ cup unsalted butter, softened - 4 cups powdered sugar - 1 teaspoon vanilla extract The cream cheese and butter mix to create a rich frosting. The powdered sugar adds sweetness, while the vanilla extract enhances the flavor. You can add a twist to your cake with some optional ingredients. Consider these: - ½ cup crushed walnuts (optional) - ½ cup raisins (optional) Adding crushed walnuts gives a nice crunch. Raisins add a sweet burst. These ingredients make the cake even more delightful and fun! You can find the full recipe with instructions to make this delightful cake. To start, you need to preheat your oven to 350°F (175°C). Grab two medium zucchinis and wash them well. Grate them using a box grater or food processor. Once grated, place the zucchini in a clean towel and squeeze out extra moisture. This step keeps the cake from being too wet. In a large bowl, whisk together the dry ingredients. Combine 1 ½ cups of all-purpose flour, 1 cup of granulated sugar, ½ cup of packed brown sugar, 1 teaspoon of baking powder, 1 teaspoon of baking soda, ½ teaspoon of salt, and 1 teaspoon of ground cinnamon. In another bowl, mix the wet ingredients. Beat together ½ cup of vegetable oil, 3 large eggs, and ½ teaspoon of vanilla extract until smooth. Now comes the fun part! Slowly add the wet mix to the dry mix. Stir gently until you see no dry flour. Then, fold in the grated zucchini and any optional ingredients like ½ cup of crushed walnuts or ½ cup of raisins. Pour this batter into a greased 9x13 inch baking pan. Bake it in the oven for 30-35 minutes. It’s done when a toothpick comes out clean. After baking, let the cake cool completely on a wire rack. While the cake cools, prepare the cream cheese frosting. In a bowl, beat 8 oz of softened cream cheese and ½ cup of unsalted butter until creamy. Gradually mix in 4 cups of powdered sugar and 1 teaspoon of vanilla extract. Keep beating until it is fluffy and smooth. Once your cake is cool, it’s time to frost! Spread the cream cheese frosting evenly across the top. For a pretty touch, sprinkle some crushed walnuts on top or add a few thin zucchini ribbons as a garnish. Serve it cut into squares and enjoy your delicious treat! Check out the Full Recipe for more details on this delightful cake. To bake a moist zucchini cake, start with fresh zucchini. Grate it finely and pat it dry. This step removes excess water. Too much moisture can make the cake soggy. Mix the wet and dry ingredients gently. Overmixing can create a dense cake. Use room temperature eggs and oil for better blending. Bake in a preheated oven at 350°F for about 30-35 minutes. Check with a toothpick; it should come out clean. One common mistake is not drying the zucchini enough. This can lead to a watery cake. Another mistake is measuring flour incorrectly. Too much flour can make the cake heavy. Use the spoon and level method for accurate measurements. Don’t open the oven door too soon. This can cause the cake to sink. Lastly, let the cake cool completely before frosting. This prevents the frosting from melting. To make smooth cream cheese frosting, use softened cream cheese and butter. Beat them together until creamy. Gradually add powdered sugar to avoid lumps. If the frosting is too thick, add a splash of milk. For a richer flavor, use vanilla extract. Spread the frosting evenly with a spatula. You can add crushed walnuts or zucchini ribbons on top for a nice touch. For a fun twist, try adding a dash of cinnamon or lemon zest to the frosting. For the full recipe, check the Zucchini Bliss Cake with Cream Cheese Frosting section. {{image_2}} You can easily make a gluten-free zucchini cake. Replace all-purpose flour with a gluten-free blend. Look for blends that contain xanthan gum for better texture. You might also use almond flour or coconut flour. Each option gives a unique flavor and texture. Just remember, you may need to adjust the liquid. Want a healthier cake? Swap the granulated sugar for coconut sugar or honey. This change adds a rich flavor. You can also use applesauce instead of some oil. This keeps your cake moist while cutting calories. If you want more fiber, add whole wheat flour in place of regular flour. Adding spices and extracts can elevate your cake. For a warm taste, try adding nutmeg or ginger. A teaspoon of lemon zest brightens the flavors. You can also mix in some cocoa powder for a chocolate twist. Vanilla extract adds depth, while almond extract gives a sweet note. These small changes can make a big difference in taste. For the complete recipe, check out the [Full Recipe]. To keep your zucchini cake fresh, store it in an airtight container. This will help keep moisture in and prevent it from drying out. You can also wrap the cake tightly with plastic wrap. If you have leftovers, place them in the fridge for best results. The cool air will help preserve the cream cheese frosting and the cake's texture. You can freeze zucchini cake for later. First, let it cool completely. Then, wrap it in plastic wrap and foil. This keeps it safe from freezer burn. When you're ready to eat, take it out and let it thaw in the fridge overnight. If you want to enjoy it warm, reheat slices in the microwave for 10-15 seconds. When stored properly, this cake lasts up to five days in the fridge. The cream cheese frosting stays fresh and tasty. If you freeze it, the cake can last up to three months. Just remember to check for any signs of freezer burn before enjoying it. For the best flavor, eat it within two months. To sweeten your zucchini cake, add more sugar. You can use up to 1 ¾ cups of granulated sugar. For extra flavor, mix in a bit of honey or maple syrup. You could also add chocolate chips for a rich taste. This can make each bite sweeter and more delightful. Yes, you can choose many frosting types! Cream cheese frosting is popular, but buttercream or chocolate ganache works well, too. For a lighter option, try whipped cream or a glaze made from powdered sugar and milk. Each frosting gives a unique taste and look to your cake. Absolutely! To make a vegan zucchini cake, swap eggs for flax eggs. Mix 1 tablespoon of flaxseed meal with 2.5 tablespoons of water. Let it sit until it thickens. Use plant-based milk instead of regular milk. Replace butter with coconut oil or vegan margarine in the frosting. Follow the Full Recipe for guidance. You learned about the key ingredients for a tasty zucchini cake and fluffy cream cheese frosting. I shared step-by-step instructions to help you bake like a pro. Tips and tricks enhanced your baking skills, while variations offered ideas to fit your needs. Proper storage tips ensure your cake stays fresh longer. Embrace these methods to enjoy your baking journey. You can create a delicious dessert that everyone loves. Happy baking!](https://therecipehatch.com/wp-content/uploads/2025/07/35b53d8d-db67-4ebe-a4d0-7b10a0077c59.webp)
Zucchini Cake with Cream Cheese Frosting Delight
Are you ready to indulge in a dessert that’s both tasty and unique? This Zucchini Cake with Cream Cheese Frosting is a game changer. Packed
Gluten-Free Chocolate Chip Zucchini Bread Tasty Delight
If you love moist, sweet treats, you’ll adore this Gluten-Free Chocolate Chip Zucchini Bread! Packed with zucchini and rich chocolate, it’s a delightful way to
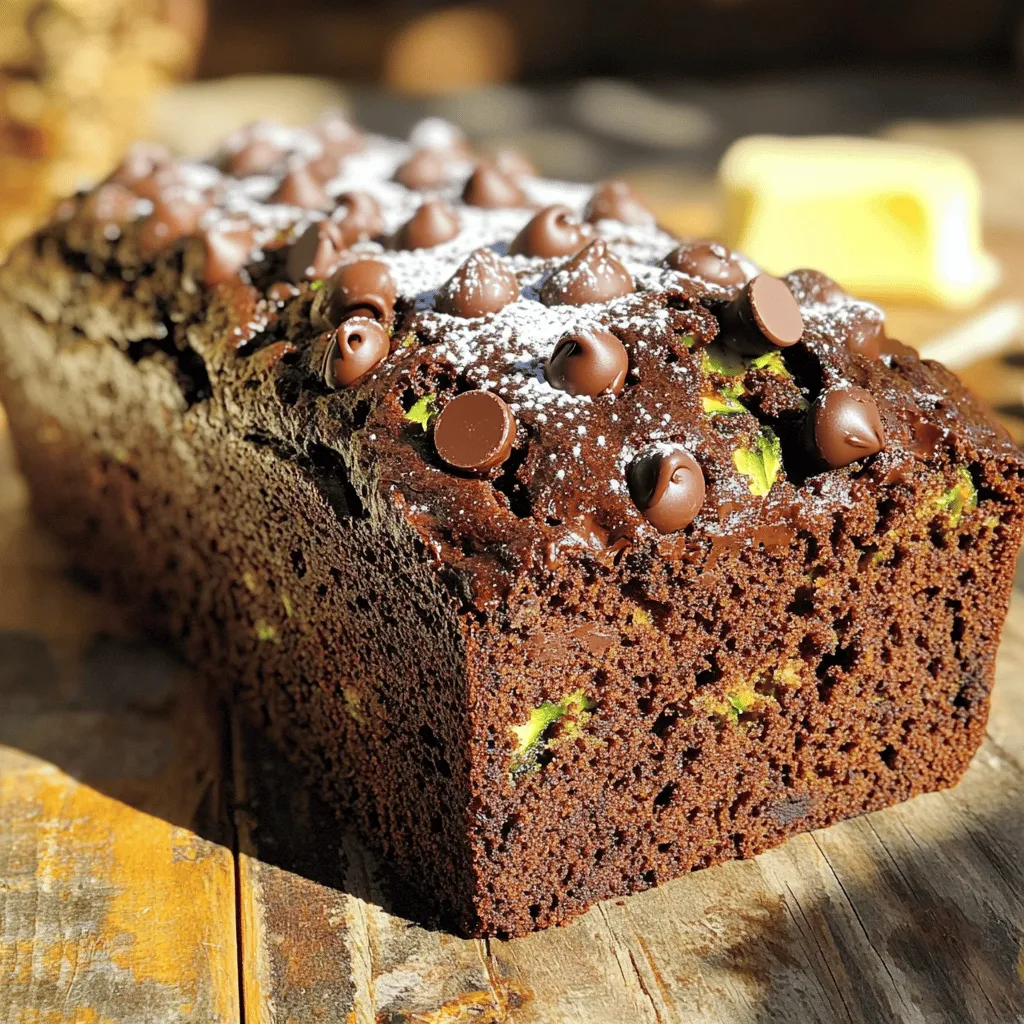
![- 1 ½ cups all-purpose flour - ½ cup unsweetened cocoa powder - 1 tsp baking soda - ½ tsp baking powder - ½ tsp salt - ½ cup granulated sugar - ½ cup brown sugar, packed - 1 cup vegetable oil or applesauce - 3 large eggs - 1 tsp vanilla extract - 2 cups grated zucchini - 1 cup chocolate chips - Optional: Chopped nuts for added texture When making Double Chocolate Zucchini Cake, I always focus on fresh ingredients. Each one plays a vital role. The all-purpose flour gives the cake structure. It helps hold everything together. The unsweetened cocoa powder adds rich chocolate flavor without extra sugar. Baking soda and baking powder work together. They help the cake rise and become light. A pinch of salt balances the sweetness. I love using a mix of granulated sugar and brown sugar. Granulated sugar sweetens, while brown sugar adds moisture and depth. The vegetable oil or applesauce keeps the cake moist. Applesauce is a great option if you want a healthier cake. The eggs provide richness and help bind the batter. Vanilla extract brings warmth and flavor. Now, let’s talk about the star of the show: zucchini. Grating it makes it easy to mix into the batter. Plus, it adds moisture without changing the flavor. Lastly, I add chocolate chips for extra chocolatey goodness. Chopped nuts are optional, but they add a nice crunch. This ingredient list is simple but powerful. Each element works together to create a moist, flavorful cake. For the complete recipe, check out the [Full Recipe]. 1. Preheat your oven to 350°F (175°C). Grease a 9x13-inch pan or line it with parchment paper. 2. In a medium bowl, whisk together the flour, cocoa powder, baking soda, baking powder, and salt. Mix well and set aside. 3. In a large bowl, beat the granulated sugar, brown sugar, and vegetable oil together until smooth. If using applesauce, mix until well combined. 1. Gradually add the dry ingredients to the wet mixture. Mix just until combined. Do not overmix. 2. Carefully fold in the grated zucchini and chocolate chips. If you want, add nuts for a nice crunch. 1. Pour the batter into your prepared baking pan. Smooth the top with a spatula. 2. Bake in the oven for 30-35 minutes. Check doneness using a toothpick. It should come out clean or with a few moist crumbs. 3. Let the cake cool in the pan for about 10 minutes. Then, transfer it to a wire rack to cool completely. For the full recipe, check out the detailed section. To make your Double Chocolate Zucchini Cake moist, use fresh zucchini. Grate it and squeeze out some water. This helps keep the cake from getting soggy. Also, use room-temperature eggs for better mixing. This makes the batter smoother. Measuring ingredients correctly is key. Use a kitchen scale for flour and sugar. For cocoa powder, spoon it into the measuring cup, then level it off. This ensures you don’t pack it down too much. Accurate measurements help your cake rise perfectly. When mixing, combine wet and dry ingredients gently. Stir just until you see no dry flour. Overmixing can make the cake tough. Fold in zucchini and chocolate chips carefully. You want to keep the batter light and fluffy. If you want to cut some fat, use applesauce. Swap it out for vegetable oil in equal amounts. This change keeps your cake moist but lowers the calories. For vegan options, try flax eggs. Mix 1 tablespoon of flaxseed meal with 2.5 tablespoons of water. Let it sit for a few minutes until it thickens. This works well in place of eggs, binding the ingredients together nicely. For the full recipe, check out the [Full Recipe]. {{image_2}} Gluten-free version: You can make this cake gluten-free by using alternative flours. Almond flour or coconut flour both work well. You can also try a gluten-free all-purpose blend. Just remember to adjust the liquid in the recipe, as these flours absorb more moisture. Vegan Double Chocolate Zucchini Cake options: To make this cake vegan, swap the eggs for flax eggs or unsweetened applesauce. Use plant-based milk like almond or soy milk in the wet mix. Also, ensure your chocolate chips are dairy-free. These simple swaps keep the cake rich and tasty. To bring more depth to your cake, consider adding spices. A touch of cinnamon can add warmth. A bit of espresso powder enhances the chocolate flavor without making the cake taste like coffee. Just a teaspoon or two will make a difference. You can also switch up the chocolate chips. Try using white chocolate or peanut butter chips for a fun twist. They add sweetness and a different flavor that pairs well with zucchini. Mix and match to find your favorite combination! For the complete recipe, check the [Full Recipe]. You can store your Double Chocolate Zucchini Cake at room temperature for a day or two. Wrap it in plastic wrap or place it in an airtight container. This keeps it moist and fresh. If you want to keep it longer, store it in the refrigerator. This can help it last about a week. Just make sure to cover the cake well to avoid drying. For long-term storage, freezing is your best bet. To freeze, cut the cake into slices. Wrap each slice well in plastic wrap, then place them in a freezer bag. This prevents freezer burn. The cake can stay fresh for up to three months in the freezer. When you're ready to enjoy it, take a slice out and let it thaw in the fridge. You can also reheat it in the microwave for a warm treat. Set the microwave for about 10 to 15 seconds. Check to see if it’s warm enough. Enjoy your cake just like the day you made it! - Can I substitute the zucchini for another vegetable? Yes, you can use carrots or even pumpkin. Each adds a unique flavor. Just make sure to grate them well. - How do I know when the cake is done baking? A toothpick test works best. Insert a toothpick in the center. It should come out clean or with just a few crumbs. - What can I add for extra flavor or texture? Try adding nuts like walnuts or pecans. You can also mix in spices like cinnamon or espresso for depth. - How long does the cake last? The cake stays fresh for 3 to 5 days at room temperature. Store it in an airtight container. - Can I use a different type of sugar? Yes, you can use coconut sugar or honey. Adjust the amount since honey is sweeter than regular sugar. - What to do if the cake is too dry or too wet? For dry cake, add a little more oil or applesauce next time. If it’s too wet, reduce the zucchini slightly. - How to fix a cake that did not rise properly? Check your baking soda and powder for freshness. If they are old, they may not work well. In this blog post, we explored how to make a delicious Double Chocolate Zucchini Cake. We covered the ingredients, preparation, baking steps, and helpful tips to get the best results. You learned about variations and how to store your cake for later. Remember, it's all about the right mix of ingredients and techniques. Enjoy baking this tasty treat with the joy of knowing you’ve made a healthier dessert option. Your friends and family will love it! Happy baking!](https://therecipehatch.com/wp-content/uploads/2025/07/0242d9c0-30dd-4312-bc2b-ab9d40e2365b.webp)
Indulgent Double Chocolate Zucchini Cake Recipe
Craving something sweet and rich that doesn’t skimp on flavor? You’re in the right place! This Indulgent Double Chocolate Zucchini Cake combines the best of
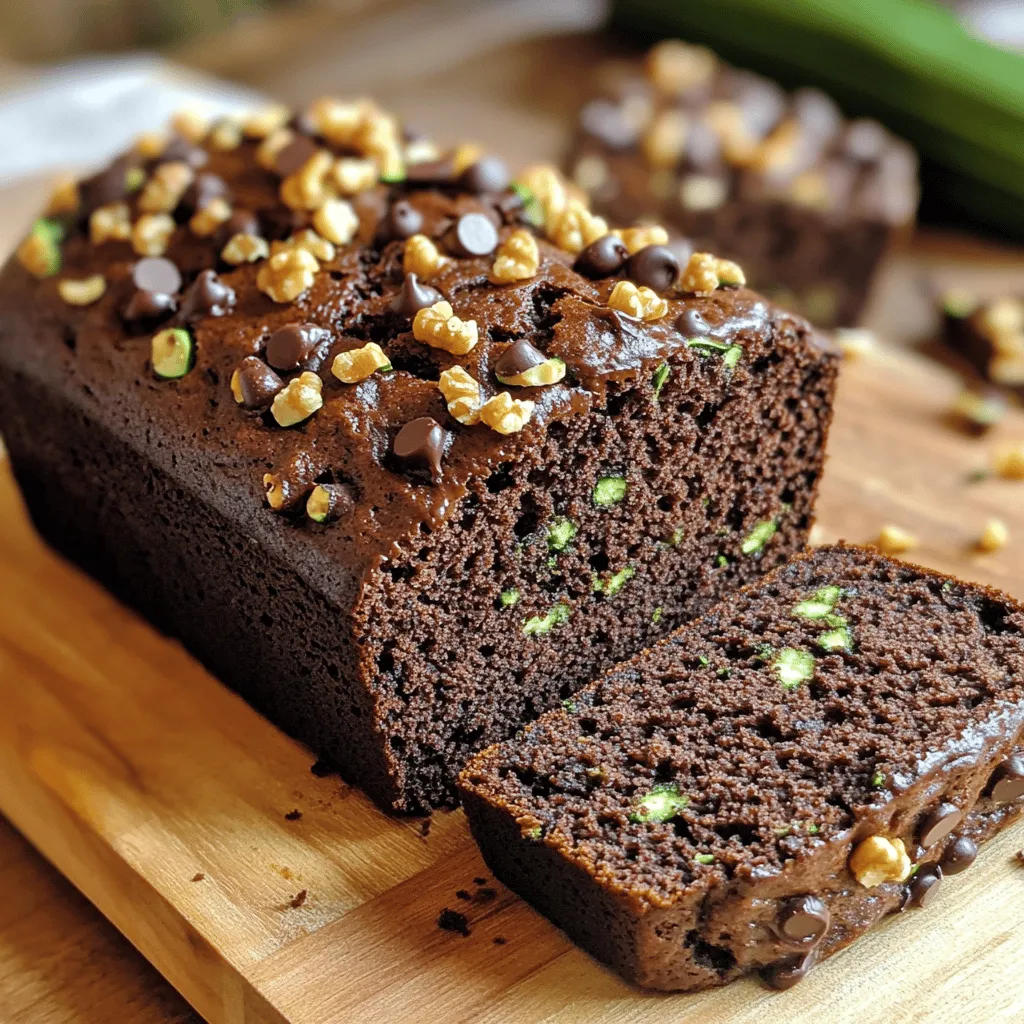
![To make tasty zucchini brownies, gather these main ingredients: - 1 ½ cups grated zucchini (about 1 medium zucchini, squeezed dry) - 1 cup all-purpose flour - ½ cup unsweetened cocoa powder - 1 teaspoon baking powder - ½ teaspoon baking soda - ½ teaspoon salt - ½ cup granulated sugar - ½ cup brown sugar, packed - ½ cup vegetable oil (or melted coconut oil) - 2 large eggs - 1 teaspoon vanilla extract - ½ cup semi-sweet chocolate chips (plus more for topping, optional) These ingredients work together to create rich, moist brownies. The zucchini adds moisture and nutrients without changing the flavor much. You can enhance your brownies with these optional ingredients: - ½ cup chopped nuts (like walnuts or pecans) - ½ teaspoon cinnamon for warmth - A pinch of sea salt on top for contrast Adding these can give your brownies a unique twist. Nuts add crunch, while cinnamon brings a cozy flavor. If you need to swap ingredients, here are some ideas: - Use whole wheat flour for a healthier option. - Replace granulated sugar with coconut sugar for a lower glycemic index. - Swap vegetable oil with unsweetened applesauce for less fat. These substitutions can help you adapt the recipe to your needs without losing flavor. Try them out and enjoy your customized zucchini brownies! Start by preheating your oven to 350°F (175°C). Grease an 8x8-inch baking pan or line it with parchment paper. This makes it easy to take the brownies out later. Next, grab a medium bowl. Whisk together 1 cup of all-purpose flour, ½ cup of unsweetened cocoa powder, 1 teaspoon of baking powder, ½ teaspoon of baking soda, and ½ teaspoon of salt. Mix these dry ingredients well until they are fully combined. In a large mixing bowl, combine ½ cup of granulated sugar, ½ cup of packed brown sugar, and ½ cup of vegetable oil. Mix these together until they are smooth. Next, add 2 large eggs and 1 teaspoon of vanilla extract. Whisk until the mixture is smooth again. Now, it's time to add the star of our recipe: the grated zucchini. You will need 1 ½ cups of squeezed-dry zucchini. Gently fold it into the wet ingredients until everything is mixed well. Gradually add the dry mix to the wet mix. Be careful not to overmix! Lastly, stir in ½ cup of semi-sweet chocolate chips, saving a few for the top. Pour the batter into your prepared pan, spreading it evenly. If you saved some chocolate chips, sprinkle them on top now. Bake in your preheated oven for 25-30 minutes. You can check if they are done by inserting a toothpick in the center. It should come out with a few crumbs, but not wet batter. Once done, allow the brownies to cool in the pan for about 10 minutes. After that, transfer them to a wire rack to cool completely. When cooled, cut into squares and enjoy! For an extra touch, serve them stacked on a decorative plate, dusted with powdered sugar, and garnished with a mint leaf. You can find the full recipe above. To start, wash your zucchini well. Then, grate it using a box grater. Make sure to squeeze out the extra water. This step is crucial. Too much moisture can make your brownies soggy. Use a clean kitchen towel or paper towel to remove excess water. Aim for about 1 ½ cups of grated zucchini for the best results. This subtle vegetable adds moisture and nutrition without changing the taste. Achieving the right texture is key. Mix your dry ingredients in one bowl and your wet ingredients in another. Combine them gently. Overmixing can lead to tough brownies. Mix just until you see no dry flour. The batter should be thick but smooth. Adding semi-sweet chocolate chips gives extra flavor and texture. If you want a fudgier brownie, reduce the flour slightly. Keep an eye on baking time. Check them at 25 minutes to avoid overbaking. One common mistake is not preparing the zucchini properly. Soggy zucchini leads to mushy brownies. Another mistake is overmixing the batter. This makes your brownies dense instead of light. Also, don’t skip the chocolate chips; they add sweetness and meltiness. Finally, resist the urge to open the oven door too early. This can cause the brownies to sink. Follow these tips, and you’ll have a delightful treat! For more details, check the Full Recipe. {{image_2}} You can make these brownies gluten-free with a simple swap. Use almond flour or a gluten-free flour blend instead of all-purpose flour. This keeps the brownies moist and tasty. Make sure to check that your cocoa powder is gluten-free, too. Your friends will not notice the difference! To make these brownies vegan, replace the eggs with flax eggs. Mix 1 tablespoon of ground flaxseed with 2.5 tablespoons of water for each egg. Let it sit for about five minutes. You can also use plant-based oil, like coconut oil or olive oil, for moisture. This way, everyone can enjoy a delicious treat! Add extra fun to your zucchini brownies. Try mixing in chopped nuts like walnuts or pecans for crunch. A pinch of cinnamon or nutmeg can add warmth and spice. You can also use different types of chocolate, like dark chocolate or white chocolate chips. Each twist gives a new flavor profile, so feel free to get creative! For the complete recipe, check out the [Full Recipe]. To keep your zucchini brownies fresh, let them cool first. Then, place them in an airtight container. You can store them at room temperature for up to three days. If you want them to last longer, move them to the fridge. They will stay good for a week in there. Freezing is a great option for long-term storage. Cut the brownies into squares. Wrap each piece tightly in plastic wrap. Then, place them in a freezer-safe bag or container. Zucchini brownies will keep well in the freezer for up to three months. When you’re ready to enjoy them, just thaw in the fridge overnight. Reheating zucchini brownies is easy. If you want them warm, use the microwave. Heat them for about 15-20 seconds. Check if they're warm enough. Alternatively, you can reheat in the oven. Preheat the oven to 350°F (175°C). Place the brownies on a baking sheet and heat for about 5-10 minutes. This way, they stay soft and tasty. For more details, check out the Full Recipe. Yes, you can use frozen zucchini. Just make sure to thaw and drain it well. Frozen zucchini might add more moisture, so squeeze out extra water. This helps keep the brownies from being too wet. You can check for doneness by inserting a toothpick into the center. If it comes out with a few crumbs, the brownies are ready. If the toothpick has wet batter, they need more time. Bake for about 25-30 minutes for the best results. Yes, you can swap cocoa powder with carob powder for a different flavor. You can also use dark chocolate instead. Just melt it and mix it into your wet ingredients. This will give your brownies a rich taste while still being delicious. For the full recipe, refer back to the earlier section. You learned how to make tasty zucchini brownies. We covered key ingredients, step-by-step cooking, and handy tips. I shared easy ways to change the recipe for your needs. You can store and reheat leftovers wisely. Remember, using fresh zucchini gives the best flavor. Enjoy your brownies and have fun trying new tasty twists. Happy baking!](https://therecipehatch.com/wp-content/uploads/2025/07/94061957-1608-4f5a-a606-7458ca768498.webp)
Zucchini Brownies Delightful and Healthy Dessert Recipe
Looking for a tasty treat that’s also good for you? Zucchini brownies are the answer! These rich, fudgy squares hide healthy veggies in every bite.

Chocolate Zucchini Cookies Delightfully Rich Treat
Are you ready to dive into a deliciously unique treat? Chocolate zucchini cookies offer a rich, chocolaty flavor that will surprise you with their moistness.
![For this dessert, you need fresh peaches. Use about 2 cups, pitted and sliced. The brown sugar adds sweetness, so include 2 tablespoons. A touch of 1 teaspoon cinnamon gives warmth, while 1 tablespoon lemon juice brightens the flavor. The crust starts with 1 1/2 cups of graham cracker crumbs. You will also need 1/4 cup of unsalted butter, melted. Add 1 tablespoon of sugar to make it sweet and crisp. The cheesecake filling uses 3 (8 oz) packages of softened cream cheese. Mix in 1 cup of granulated sugar and 1 teaspoon of vanilla extract. You also need 3 large eggs for richness. Finally, add 1 cup of sour cream to create a creamy texture. For a special touch, you can garnish with whipped cream and peach slices. You can find the full recipe for this delightful treat [Full Recipe]. Preheat your oven to 400°F (200°C). In a bowl, mix sliced peaches with brown sugar, cinnamon, and lemon juice. Toss until the peaches are well coated. Spread the peaches on a lined baking sheet. Roast for 20-25 minutes until they are tender and caramelized. Remove them and let them cool slightly. In a medium bowl, combine graham cracker crumbs, melted butter, and sugar. Mix well until it looks like wet sand. Press this mixture evenly into the bottom of a 9-inch springform pan. Bake for 10 minutes at 350°F (175°C). Remove it from the oven and let it cool. In a large bowl, beat softened cream cheese until it is smooth. Gradually add granulated sugar and vanilla extract. Mix until combined. Add eggs, one at a time, mixing well after each. Fold in sour cream until everything is smooth and creamy. Gently fold in the roasted peaches, saving some to decorate later. Pour the cheesecake mixture over the cooled crust in the springform pan. Bake at 350°F (175°C) for 50-60 minutes. The center should be set but slightly jiggly. Turn off the oven and crack the door. Let the cheesecake cool in the oven for one hour. After an hour, take the cheesecake out and let it cool at room temperature for another hour. Cover it and refrigerate for at least 4 hours, or overnight. When ready to serve, carefully remove it from the springform pan. Slice and top with whipped cream and reserved roasted peaches. Enjoy this delightful treat from the Full Recipe! When picking peaches, look for ripe ones. They should feel slightly soft when you press them. A sweet aroma is a good sign too. Choose peaches with a deep color, as this shows they are ripe. Avoid any peaches with bruises or dark spots. If you find hard peaches, let them sit at room temperature for a few days. They will ripen nicely. A great crust holds your cheesecake together. Use fresh graham cracker crumbs for the best taste. Mix them well with melted butter and sugar. Press this mixture firmly into the bottom of your springform pan. Bake it at 350°F (175°C) for 10 minutes. Let it cool completely before adding the filling. This cool crust keeps the cheesecake from becoming soggy. Overmixing the cheesecake batter can add too much air. This makes your cheesecake crack. Mix just until smooth. Another mistake is baking at a high temperature. Always bake your cheesecake low and slow. It needs time to set properly. Lastly, don’t skip the cooling step. Letting it cool slowly in the oven helps avoid cracks. Following these tips will help you create a perfect roasted peach cobbler cheesecake every time. For the full recipe, check the link. {{image_2}} You can easily swap peaches for other fruits. Try using fresh berries, apples, or pears. Each fruit brings its own flavor and charm. For berries, use strawberries or blueberries. For apples, choose a mix of sweet and tart varieties. This keeps the recipe fresh and fun all year round. While graham cracker crust is classic, feel free to switch it up. Use crushed cookies like Oreos for a chocolate twist. Shortbread cookies add a rich flavor too. You can even make a nut-based crust, using almonds or pecans. Just blend them with butter for a crunchy base. Want to take your cheesecake to the next level? Add spices like nutmeg or ginger for warmth. You can also mix in chocolate chips for added indulgence. Using flavored extracts like almond or coconut can change the taste too. Don't forget to top with caramel or chocolate sauce for a sweet finish. Try these variations to make your roasted peach cobbler cheesecake unique. You can find the full recipe to guide you on this tasty journey. To keep your roasted peach cobbler cheesecake fresh, wrap it tightly in plastic wrap or foil. Place it in the fridge. It stays good for about 5 days. If you want to save it longer, consider freezing it. To freeze your cheesecake, let it cool completely first. Slice the cheesecake into pieces. Wrap each slice in plastic wrap, then place them in a freezer bag. Remove as much air as you can. Your cheesecake can last up to 3 months in the freezer. To reheat cheesecake, avoid the microwave. Instead, preheat your oven to 250°F (120°C). Place the cheesecake in the oven for about 10-15 minutes. This method warms it without drying it out. Enjoy it warm or at room temperature for the best taste. To make roasted peach cobbler cheesecake, you start by roasting fresh peaches. Slice and mix them with brown sugar, cinnamon, and lemon juice. Roast these in a preheated oven at 400°F for 20-25 minutes. While they cool, prepare the crust using graham cracker crumbs, melted butter, and sugar. Press this mix into a springform pan and bake for 10 minutes at 350°F. Next, beat softened cream cheese with sugar and vanilla until smooth. Add eggs one by one and mix well. Fold in the sour cream and roasted peaches. Pour this filling over the crust and bake at 350°F for 50-60 minutes. Cool it in the oven, then chill it for at least 4 hours. You can find the full recipe above. A cheesecake typically needs to chill for at least 4 hours. This helps it set properly and develop a nice texture. For the best result, chill it overnight. This way, the flavors meld well. Yes, you can make this cheesecake in advance. It stores well in the fridge for up to five days. Just cover it tightly with plastic wrap or foil. You can even freeze it for longer storage. Roasted peach cobbler cheesecake pairs well with whipped cream, fresh peach slices, or a drizzle of caramel sauce. A scoop of vanilla ice cream is also a great match. These additions enhance the flavors and make the dessert even more delightful. This guide covered how to make a delicious roasted peach cobbler cheesecake. We discussed essential ingredients like fresh peaches and crust components. I shared step-by-step instructions, tips for picking peaches, and common baking mistakes. You can even try variations with different fruits or crusts. In the end, this cheesecake is a tasty treat. With a little practice, you’ll impress everyone with your skills. Enjoy every bite!](https://therecipehatch.com/wp-content/uploads/2025/07/bfc42322-02ab-4ee4-9823-a9b15898738e.webp)
Roasted Peach Cobbler Cheesecake Divine Dessert Delight
Are you ready to treat your taste buds? This Roasted Peach Cobbler Cheesecake combines sweet peaches, a buttery crust, and creamy filling for a dessert
Decadent Double Chocolate Zucchini Bread Recipe
Are you ready to indulge in a sweet treat that doesn’t skimp on flavor? My Decadent Double Chocolate Zucchini Bread is your perfect answer. Packed
Healthy Chocolate Zucchini Bread Simple and Tasty Recipe
Looking for a delicious and healthy treat? Try my Healthy Chocolate Zucchini Bread! This simple recipe hides the goodness of zucchini in rich, chocolatey goodness.