Desserts
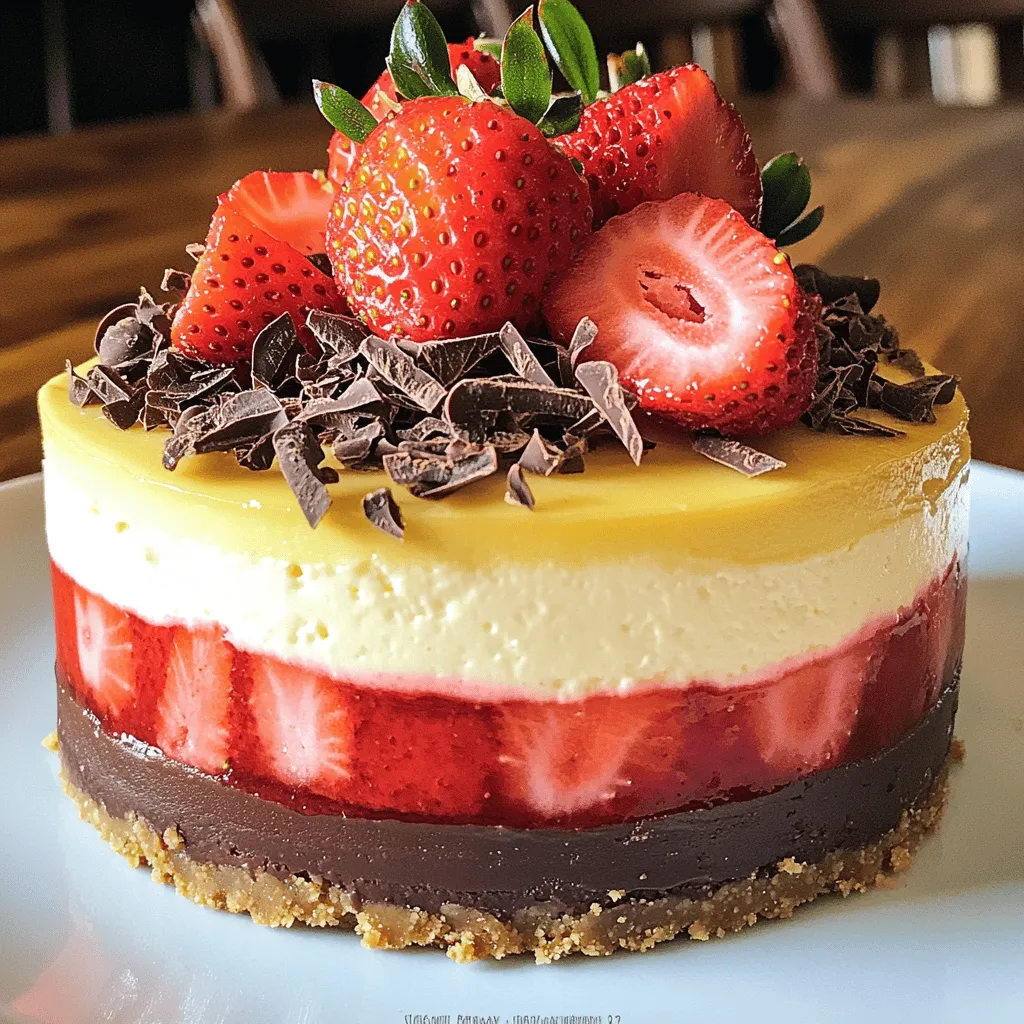
Double Decker Neapolitan Cheesecake Delightful Recipe
Are you ready to impress your friends and family with a treat that’s both beautiful and delicious? This Double Decker Neapolitan Cheesecake recipe combines creamy
Strawberry Mascarpone Cream Cake Delightful Treat
Indulge in a rich and creamy experience with my Strawberry Mascarpone Cream Cake. This delightful treat combines fresh strawberries and smooth mascarpone for an unforgettable
![To make the best Strawberry Whipped Cream Cake, start with fresh strawberries. Look for bright red berries that are firm and fragrant. Avoid any that are dull or mushy. Fresh strawberries add the best flavor and sweetness. If you need gluten-free options, use a gluten-free flour blend. For those who need dairy-free options, substitute buttermilk with almond milk and the butter with coconut oil. Using heavy cream is key for making the whipped cream. It whips up nice and thick, creating a rich texture. Avoid light cream, as it won’t hold its shape well. Here’s what you need for the cake: - 1 ½ cups all-purpose flour - 1 cup granulated sugar - 1 ½ teaspoons baking powder - ½ teaspoon baking soda - ¼ teaspoon salt - ½ cup unsalted butter, softened - 2 large eggs - 1 teaspoon vanilla extract - ½ cup buttermilk - 1 cup fresh strawberries, diced - 1 ½ cups heavy cream - 2 tablespoons powdered sugar - 1 teaspoon vanilla extract (for whipped cream) - Additional strawberries for garnish For the full recipe, check out the complete guide to create this tasty dessert! First, preheat your oven to 350°F (175°C). Greasing your cake pan is key. Use butter or non-stick spray to coat the bottom and sides of a 9-inch round cake pan. This keeps the cake from sticking. In a large bowl, mix the dry ingredients. Combine 1 ½ cups of all-purpose flour, 1 cup of granulated sugar, 1 ½ teaspoons of baking powder, ½ teaspoon of baking soda, and ¼ teaspoon of salt. Whisk them together well. Now, it's time to add the wet ingredients. Add ½ cup of softened butter, 2 large eggs, 1 teaspoon of vanilla extract, and ½ cup of buttermilk to the dry mix. Use an electric mixer on medium speed. Mix until the batter is smooth. Next, gently fold in 1 cup of diced fresh strawberries. This adds flavor and makes the cake fruity. Pour the cake batter into your prepared pan. Spread it out evenly. Bake for 25-30 minutes. Check if it's done by inserting a toothpick into the center. If it comes out clean, the cake is ready. Once baked, let the cake cool in the pan for about 10 minutes. This step is important. It allows the cake to set and makes it easier to remove from the pan. After that, transfer it to a wire rack to cool completely. While the cake cools, prepare the whipped cream. In a large bowl, add 1 ½ cups of heavy cream, 2 tablespoons of powdered sugar, and 1 teaspoon of vanilla extract for flavor. Whip the cream using a hand mixer. Start on medium-high speed until you see stiff peaks form. This means the cream holds its shape well. Be careful not to over-mix; it can turn into butter if you whip too long. Once the cake is cool, slice it into two equal layers. Place one layer on a serving plate. Spread a generous amount of whipped cream on top and layer with fresh strawberries. Place the second layer on top and repeat the process. Finish by covering the cake with whipped cream and adding more strawberries for decoration. For the complete instructions, check out the Full Recipe. To ensure your cake is moist, use room temperature ingredients. Cold butter or eggs can lead to a dry cake. Mix the batter gently, and don’t over-mix it. This keeps air in, making the cake light and fluffy. When layering whipped cream and strawberries, start with a smooth layer of cream on the first cake layer. Place diced strawberries evenly on top. Repeat this with the second layer, adding more cream and strawberries. This creates a lovely contrast and bursts of flavor in each slice. For decorating, spread whipped cream smoothly on the top and sides. Add fresh strawberries on top for a pop of color. You can also drizzle strawberry sauce around the plate for extra flair. Mint leaves add a fresh touch. If your cake turns out dense, check your measurements. Too much flour can weigh it down. Make sure to sift your flour and measure it accurately. Also, avoid over-mixing the batter; this can create a heavy texture. If your whipped cream won't whip, check the cream's temperature. It needs to be very cold. Use a clean bowl and beaters to avoid any residue. Start whipping slowly, then increase the speed. This will help create the stiff peaks you want. For the full recipe, see the [Full Recipe]. {{image_2}} You can change up the flavor of your cake with a few simple tweaks. Adding lemon zest gives a bright taste. Just a teaspoon can make a big difference. You can also use a vanilla bean. It adds a rich and warm flavor that pairs well with strawberries. If you love chocolate, try adding cocoa powder. Just mix in 1/4 cup into the dry ingredients. You can also top the cake with chocolate shavings. This will give your cake a fun twist and a rich taste. Don't be afraid to get creative with fruits! Blueberries and raspberries can be great additions. Just fold in one cup of your chosen fruit with the strawberries. This adds more color and flavor to your cake. For extra texture, consider nuts. Chopped almonds or walnuts can add a nice crunch. Coconut flakes can also work well, giving a tropical vibe. Mix in 1/2 cup of either into your batter. These variations can elevate your Strawberry Dream Whipped Cream Cake. Check out the Full Recipe for more tips! To keep your Strawberry Whipped Cream Cake fresh, store it in the fridge. Place the cake in an airtight container. If you do not have one, cover it tightly with plastic wrap. This keeps moisture in and prevents it from drying out. The cake stays fresh for about 3 to 4 days in the fridge. The whipped cream may start to lose its texture after this time. For longer storage, freeze individual pieces. Wrap each piece in plastic wrap, then place them in a freezer bag. If you have leftover cake, you can refresh it. Take the cake out of the fridge and let it sit for about 15 minutes. This brings back some of its original flavor and texture. You can also add a new layer of whipped cream or fresh strawberries on top for a bright look. For frozen pieces, thaw them in the fridge overnight. This keeps the cake moist. You can warm them slightly in the microwave before serving. This way, the flavors of the strawberries shine through. If you want, add a dollop of fresh whipped cream to each slice. For the full recipe, check out the details above. Can I use frozen strawberries instead of fresh? Yes, you can use frozen strawberries. Just thaw them first. Drain any excess juice to keep the cake from getting soggy. Fresh strawberries bring a bright taste, but frozen works well too. How can I make this cake ahead of time? You can bake the cake a day in advance. Cool it completely, then wrap it well in plastic wrap. Store it in the fridge. You can also whip the cream ahead of time. Just keep it in the fridge until you're ready to layer. What’s the best way to serve the cake? Slice the cake into wedges and serve it chilled. Garnish each slice with extra strawberries. For a fun twist, drizzle some strawberry sauce on the plate before placing the cake slice. This adds a nice touch and makes it look fancy! - Calories and serving size breakdown: Each slice has about 250 calories. This is based on a serving size of 1/10 of the cake. - Any dietary concerns (sugar content, allergens): The cake contains sugar and gluten. If you have allergies, consider using gluten-free flour and a sugar substitute. Always check labels for allergens. For the full recipe, refer to the section above. In this article, we explored how to make a delicious strawberry whipped cream cake. We discussed choosing fresh ingredients, like strawberries and heavy cream, and shared simple steps for baking and decorating. You learned tips to keep your cake moist and how to troubleshoot issues, like a dense cake or whipped cream that won’t whip. Finally, we looked at storage and serving tips to keep your cake fresh. With these ideas, creating your perfect cake is easy and fun. A yummy strawberry whipped cream cake awaits you!](https://therecipehatch.com/wp-content/uploads/2025/07/81893a91-c810-411f-a91c-4da14d03f7a1.webp)
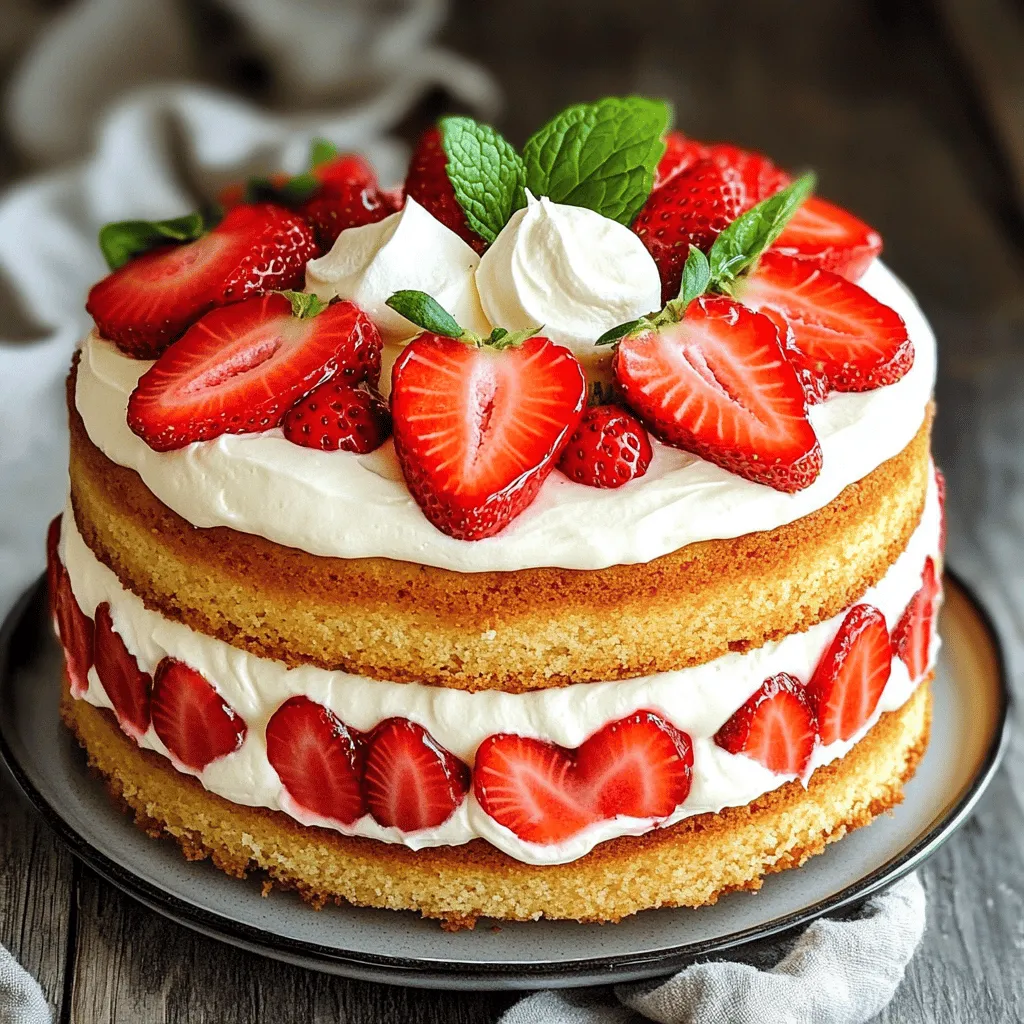
Strawberry Whipped Cream Cake Delightful and Easy Recipe
Are you ready to create a show-stopping dessert without a fuss? My Strawberry Whipped Cream Cake recipe doesn’t just look divine—it’s easy and packed with
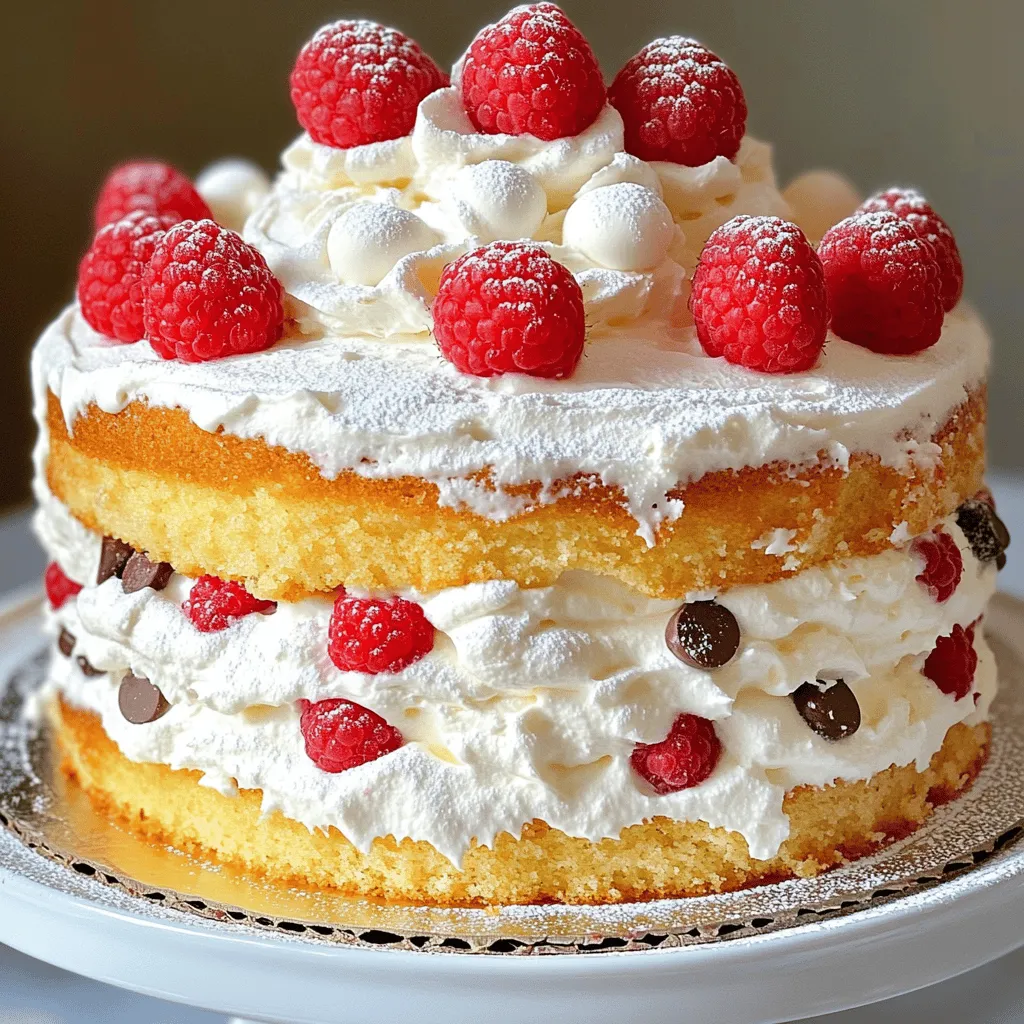
Fluffy White Chocolate Raspberry Cake Easy Delight
If you’re ready to treat yourself or impress friends, try my Fluffy White Chocolate Raspberry Cake. This easy delight combines creamy white chocolate with tangy
![To make these moist chocolate zucchini muffins, gather the following key ingredients: - 1 cup grated zucchini (squeezed dry) - 1 cup all-purpose flour - 1/2 cup unsweetened cocoa powder - 1 teaspoon baking soda - 1/2 teaspoon baking powder - 1/4 teaspoon salt - 1/2 cup granulated sugar - 1/4 cup brown sugar, packed - 1/2 cup vegetable oil - 2 large eggs - 1 teaspoon vanilla extract These ingredients work together to create a soft and rich muffin. The grated zucchini adds moisture and a subtle texture that you won't taste, making these muffins a sneaky way to include veggies in your diet. For an extra treat, consider these optional add-ins: - 1/2 cup chocolate chips (dark or semi-sweet) - 1/4 cup chopped walnuts Chocolate chips give a burst of flavor in each bite. Walnuts add a nice crunch and healthy fats. You can mix and match based on your taste! Each muffin contains about 180 calories. Here’s a simple breakdown of the macronutrients: - Fat: 8g - Carbohydrates: 25g - Protein: 3g These muffins are not only delicious but also provide some nutrients. The zucchini adds fiber and vitamins, making them a better choice than many other snacks. Enjoy these muffins knowing they’re a tasty way to sneak in some veggies! For the complete recipe, check out the Full Recipe section. 1. Preheat your oven to 350°F (175°C). This helps the muffins bake evenly. 2. Prepare your muffin tin. Grease it or line it with cupcake liners. This makes for easy removal. 3. Mix dry ingredients. In a medium bowl, whisk together: - 1 cup all-purpose flour - 1/2 cup unsweetened cocoa powder - 1 teaspoon baking soda - 1/2 teaspoon baking powder - 1/4 teaspoon salt 1. Mix wet ingredients. In a large bowl, beat together: - 1/2 cup granulated sugar - 1/4 cup brown sugar, packed - 1/2 cup vegetable oil 2. Add eggs. Mix in 2 large eggs, one at a time. Stir in 1 teaspoon vanilla extract. 3. Incorporate zucchini. Gently fold in 1 cup of grated zucchini. Make sure it mixes well. 4. Combine wet and dry. Gradually add the dry mix to the wet mix. Stir just until combined. Do not overmix. 5. Add chocolate chips. Fold in 1/2 cup chocolate chips and 1/4 cup chopped walnuts if you like. 1. Fill the muffin cups. Divide the batter evenly, filling each cup about 2/3 full. 2. Bake. Place in the oven and bake for 18-20 minutes. 3. Check for doneness. Insert a toothpick in the center. It should come out clean. 4. Cool the muffins. Let them sit in the tin for 5 minutes. Then, transfer to a wire rack to cool completely. You can find the full recipe for these decadent Chocolate Zucchini Muffins to enjoy! How to properly squeeze zucchini To get the best results, start with fresh zucchini. Grate it using a box grater. Once grated, place the zucchini in a clean kitchen towel. Twist the towel to remove excess moisture. You want it dry but not completely. This step keeps your muffins from becoming too soggy. Tips for achieving a moist texture Use a blend of sugars, like granulated and brown sugar. Brown sugar adds depth and moisture. Also, don’t overmix your batter. Mix just until combined. Overmixing can lead to dry muffins. Lastly, add chocolate chips for extra flavor and moisture. Ideas for garnishing or pairing Serve your muffins warm. A light dusting of powdered sugar looks great. You can also spread a bit of cream cheese on them. For a fun twist, try pairing them with fresh fruit like strawberries or raspberries. They add a nice contrast to the rich chocolate. Alternatives to powdered sugar dusting If you want something different, try a drizzle of melted chocolate. This adds extra sweetness and makes them look fancy. You could also top them with a sprinkle of sea salt. This gives a lovely sweet and salty flavor that many enjoy. Best types of muffin tins Use a non-stick muffin tin for easy release. Silicone muffin cups are also great. They make it simple to pop out the muffins. Ensure your muffin tin has a good depth to hold the batter well. Tools for easy mixing and measuring A set of measuring cups and spoons is key. Use a whisk for combining dry ingredients. For wet ingredients, a large mixing bowl works best. A spatula is perfect for folding in the zucchini and chocolate chips. These tools make your baking experience smooth. For the full recipe, check out the [Full Recipe]. {{image_2}} You can make chocolate zucchini muffins even better for you. Try using whole wheat flour instead of all-purpose flour. This adds fiber and makes them heartier. If you're looking for a gluten-free option, coconut flour works well, too. Reducing sugar is another smart choice. You can cut the sugar in half and still enjoy great flavor. For a sweet twist, use sugar substitutes like stevia or monk fruit. These options help you enjoy muffins without all the calories. Want to kick up the flavor? Adding spices can make a big difference. Try mixing in a teaspoon of cinnamon or nutmeg. These spices add warmth and depth to your muffins. You can also get creative with mix-ins! Adding dried fruit like raisins or cranberries gives a nice chew and natural sweetness. You can change your muffins with the seasons. In the fall, try making pumpkin chocolate muffins. Just swap some zucchini for pumpkin puree. This keeps the muffins moist and adds a cozy flavor. Don’t forget about other veggies! You can integrate carrots or sweet potatoes for a fun twist. These add nutrition and keep the muffins delicious. Whatever you choose, each variation opens a door to new flavors and fun! Check out the Full Recipe for more ideas. To keep your chocolate zucchini muffins fresh, store them in an airtight container. This helps keep moisture in and prevents them from drying out. I prefer using a glass container with a tight lid. If you plan to eat them within a few days, just place them on the kitchen counter. Always let the muffins cool completely before putting them away. This avoids extra moisture that can cause sogginess. Freezing muffins is simple. Here’s how to do it: 1. Cool the Muffins: Make sure your muffins are completely cool. 2. Wrap Individually: Wrap each muffin in plastic wrap. This prevents freezer burn. 3. Place in a Bag: Put the wrapped muffins in a freezer bag. Remove as much air as possible before sealing. 4. Label and Date: Write the date on the bag. This helps you keep track of freshness. To thaw them, just take out a muffin and leave it at room temperature for about 30 minutes. You can also microwave it for about 15 seconds for a quick warm-up. At room temperature, your chocolate zucchini muffins last about 3 to 4 days. If you store them in the fridge, they can last up to a week. Watch for signs they have gone bad. If you see mold or notice a sour smell, it’s time to toss them. Enjoy your baking adventures, and remember to check out the Full Recipe for more tips! Can I use frozen zucchini in this recipe? Yes, you can use frozen zucchini. Just thaw it first and squeeze out the water. This will help keep your muffins moist. Frozen zucchini works well, but fresh is always best if you have it. How can I make these muffins gluten-free? To make gluten-free muffins, substitute all-purpose flour with a gluten-free flour blend. This blend usually has starches and binders that mimic regular flour. Be sure to check that your chocolate chips are also gluten-free. What to do if the muffins come out dry? If your muffins turn out dry, it may be due to overbaking or too much flour. Make sure to measure flour accurately. If they are dry, try adding a bit of yogurt or applesauce next time for extra moisture. How to adjust baking time for mini muffins? Mini muffins bake faster than regular ones. Cut the baking time to about 10-15 minutes. Always check them with a toothpick to see if they are done. They should come out clean when baked right. Can I substitute oil for applesauce? Yes, you can replace oil with unsweetened applesauce. This swap reduces fat and adds natural sweetness. Use the same amount of applesauce as the oil in the recipe. What can I use instead of eggs? If you need an egg substitute, try using flaxseed meal or chia seeds. Mix 1 tablespoon of either with 2.5 tablespoons of water. Let it sit for a few minutes to thicken before adding it to your batter. You now know how to make delicious chocolate zucchini muffins. We covered key ingredients like grated zucchini, cocoa powder, and add-ins like chocolate chips and walnuts. I shared tips on baking and storage to keep your muffins fresh. You can even try healthier alternatives or seasonal twists. Remember, muffins are easy to bake and can be customized. Enjoy these tasty treats, and don't hesitate to experiment with your favorite flavors. Happy baking!](https://therecipehatch.com/wp-content/uploads/2025/07/7a894583-5470-4e1b-9055-48101af01285.webp)
Chocolate Zucchini Muffins Moist and Simple Recipe
Ready to bake something delicious and healthy? Our Chocolate Zucchini Muffins are moist, simple, and packed with flavor. You’ll find them a hit for breakfast
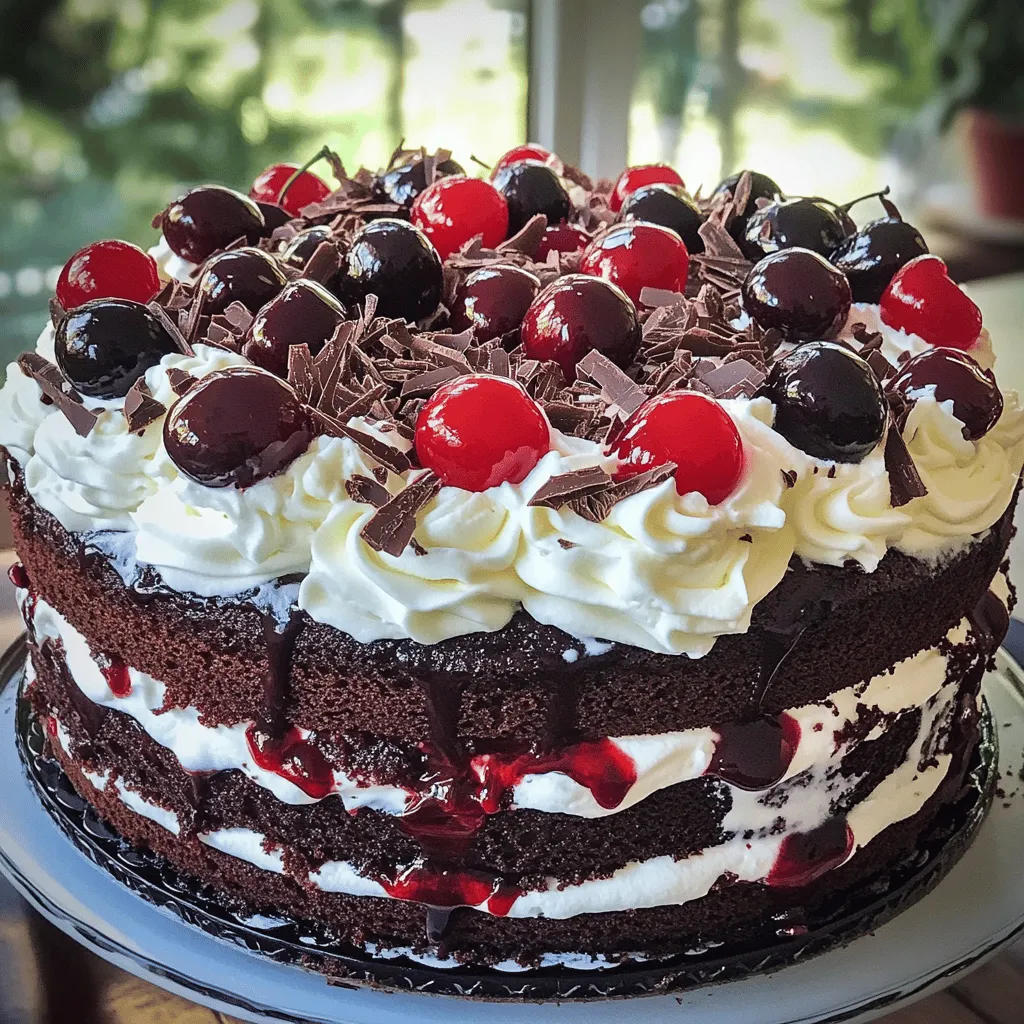
Decadent Black Forest Cake Easy Recipe to Try Today
If you crave something rich and delicious, then you’re in the right place! This Decadent Black Forest Cake recipe is simple to follow and perfect
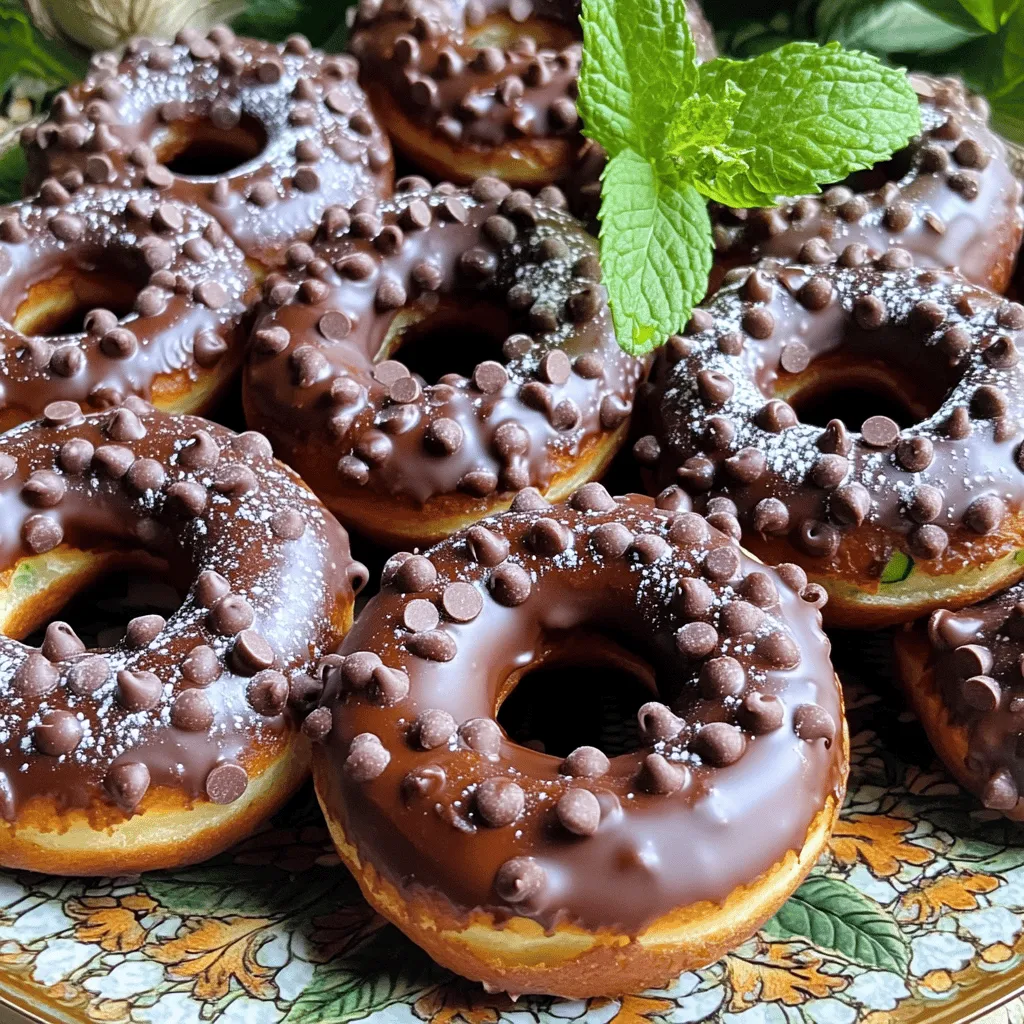
Chocolate Zucchini Donut Recipe Easy and Delicious Treat
If you love donuts but want a fun twist, you’re in the right place! My Chocolate Zucchini Donut Recipe offers a deliciously moist treat that
![For this cake, you need 2 cups of fresh strawberries. Make sure they are ripe and sweet. Remove the green tops and slice them. This step brings out their juicy goodness. Mixing them with sugar makes them even better. Let them sit for about 30 minutes. This will make them soft and juicy. You will need 1 cup of heavy cream and 1/2 cup of granulated sugar. The cream must be chilled for the best results. This will help you whip it to stiff peaks. The sugar sweetens the cream and helps it hold its shape. Add 1 teaspoon of vanilla extract for a nice touch of flavor. For the cake, gather these ingredients: - 1 1/2 cups all-purpose flour - 1/2 teaspoon baking powder - 1/4 teaspoon salt - 1/2 cup unsalted butter, softened - 2 large eggs The flour gives the cake structure. Baking powder helps it rise. Salt enhances all the flavors. Beat the softened butter with the sugar until fluffy. Then add the eggs, mixing them in one at a time. This cake base is light and soft. You can find the Full Recipe for more details on the steps! Start by hulling and slicing 2 cups of fresh strawberries. Place them in a bowl. Add 1/4 cup of granulated sugar to the berries. Let them sit for about 30 minutes. This step helps make the strawberries soft and juicy. The sugar draws out their natural juices. It creates a sweet syrup that enhances the mousse. In a small bowl, sprinkle 1 tablespoon of unflavored gelatin over 3 tablespoons of cold water. Let it bloom for about 5 minutes. Meanwhile, in a mixing bowl, beat 1 cup of chilled heavy cream until soft peaks form. Gradually add the remaining 1/4 cup of sugar and 1 teaspoon of vanilla extract. Continue whipping until stiff peaks form. Gently fold in the macerated strawberries. Melt the bloomed gelatin in the microwave for about 10 seconds. Fold the gelatin into the mixture until well combined. Preheat your oven to 350°F (175°C). In a bowl, sift together 1 1/2 cups of all-purpose flour, 1/2 teaspoon of baking powder, and 1/4 teaspoon of salt. In another bowl, cream 1/2 cup of softened unsalted butter with the remaining sugar until light and fluffy. Beat in 2 large eggs, one at a time. Gradually add the dry ingredients. Mix until just combined. Pour the batter into a greased 9-inch round cake pan. Bake for 20-25 minutes. Check with a toothpick; it should come out clean. Let it cool completely in the pan. Once cool, slice the cake in half horizontally. Place one layer on a serving plate. Spread half of the strawberry mousse over it. Top with the second layer and spread the remaining mousse on top. Refrigerate the assembled cake for at least 2 hours. This helps the mousse set properly. When ready, slice the cake and serve it chilled. You can garnish with fresh strawberries on top for a beautiful touch. Enjoy the delightful flavors of your strawberry mousse cake! For the complete recipe, refer to [Full Recipe]. To get the best texture for your mousse, start with cold cream. I chill my mixing bowl and beaters in the fridge. This helps the cream whip up nicely. When you whip the cream, stop when soft peaks form. Then, add sugar and vanilla. Keep whipping until you see stiff peaks. Gently fold in your strawberries. This keeps the mousse light and airy. For a fluffy cake, use room temperature butter and eggs. Cream the butter and sugar until it's light and fluffy. This adds air into your batter. Sift the flour, baking powder, and salt together. This helps mix them evenly. When you add dry ingredients, mix until just combined. Over-mixing can make your cake dense. When serving your cake, slice it with a sharp knife. For a clean cut, dip the knife in hot water and wipe it dry. Garnish each slice with fresh strawberries or a sprig of mint. You can add a dollop of whipped cream on the side. This makes each bite even better. For a fun twist, try adding a drizzle of chocolate sauce. Enjoy this delightful Strawberry Mousse Cake with your friends and family! For the complete recipe, check out the Full Recipe. {{image_2}} You can add chocolate to your strawberry mousse cake for a rich twist. Start by melting 4 ounces of dark chocolate. Mix this chocolate into the mousse after folding in the strawberries. This change makes the cake taste decadent and adds a lovely color contrast. Top it with chocolate shavings for a beautiful finish. To make a vegan version, swap heavy cream for coconut cream. Use 2 cans of full-fat coconut milk. Chill them overnight and scoop out the thick part. For the gelatin, use agar-agar as a plant-based alternative. This keeps the cake creamy without any dairy. Even non-vegans will love this version! For a gluten-free cake, replace all-purpose flour with a gluten-free blend. Ensure it has xanthan gum for better texture. You can also use almond flour or coconut flour. These options give the cake a unique flavor and texture. Always check labels to avoid hidden gluten. This way, everyone can enjoy your strawberry mousse cake! To keep your strawberry mousse cake fresh, wrap it tightly in plastic wrap. You can also use an airtight container. This prevents air from drying out the cake. Store it in the fridge. Enjoy it within three days for the best taste. If you want to save some cake for later, freezing works well. First, slice the cake into portions. Wrap each piece in plastic wrap. Then, place the wrapped slices in a freezer bag. Remove as much air as possible. Your cake will stay fresh for up to three months. When ready to eat, thaw in the fridge overnight. The shelf life of your strawberry mousse cake depends on storage. In the fridge, it lasts about three days. If frozen, it can last up to three months. Always check for any signs of spoilage before serving. Enjoy your cake at its best! For the full recipe, refer to the earlier sections. Yes, you can use frozen strawberries. Just thaw them first. Drain excess liquid before adding them to the mousse. This helps keep the mousse from being too watery. Fresh strawberries do taste better, but frozen ones work in a pinch. Check the cake with a toothpick. Insert it in the center of the cake. If it comes out clean, the cake is done. You can also lightly press the top; it should spring back. Underbaking can lead to a soggy texture, so watch closely. Absolutely! You can make the mousse a day ahead. Just store it in the fridge. It needs time to set, so making it early helps. Just remember to fold it into the cake layers when you assemble. You can find Strawberry Mousse Cake at bakeries or dessert shops. Many grocery stores also sell them in the frozen section. For a special occasion, consider ordering from a local bakery. They often make fresh cakes to your liking. Use a sharp knife to slice the cake. Dip the knife in warm water to get clean cuts. Serve each slice chilled for the best taste. You can add fresh strawberries on top for a lovely touch. For a fun twist, pair it with whipped cream. For the complete recipe, check out the Full Recipe above! To create a delicious strawberry mousse cake, I covered key ingredients, step-by-step instructions, and useful tips. You now know how to prepare fresh strawberries, make a rich mousse, and bake a fluffy cake. Remember to chill your cake for the best flavor and texture. Explore variations, including vegan or chocolate options, to fit your diet. Store any leftovers carefully to keep them fresh longer. Enjoy making your cake, and don’t hesitate to share with friends. You’ll impress them with your skills and creativity.](https://therecipehatch.com/wp-content/uploads/2025/07/35b5ed4a-dcb2-4af6-9dff-5b7cd9ef6c38.webp)
Strawberry Mousse Cake Delightful and Easy Recipe
If you’re craving a sweet treat that’s simple to make, I’ve got just the recipe for you! This Strawberry Mousse Cake is both delightful and
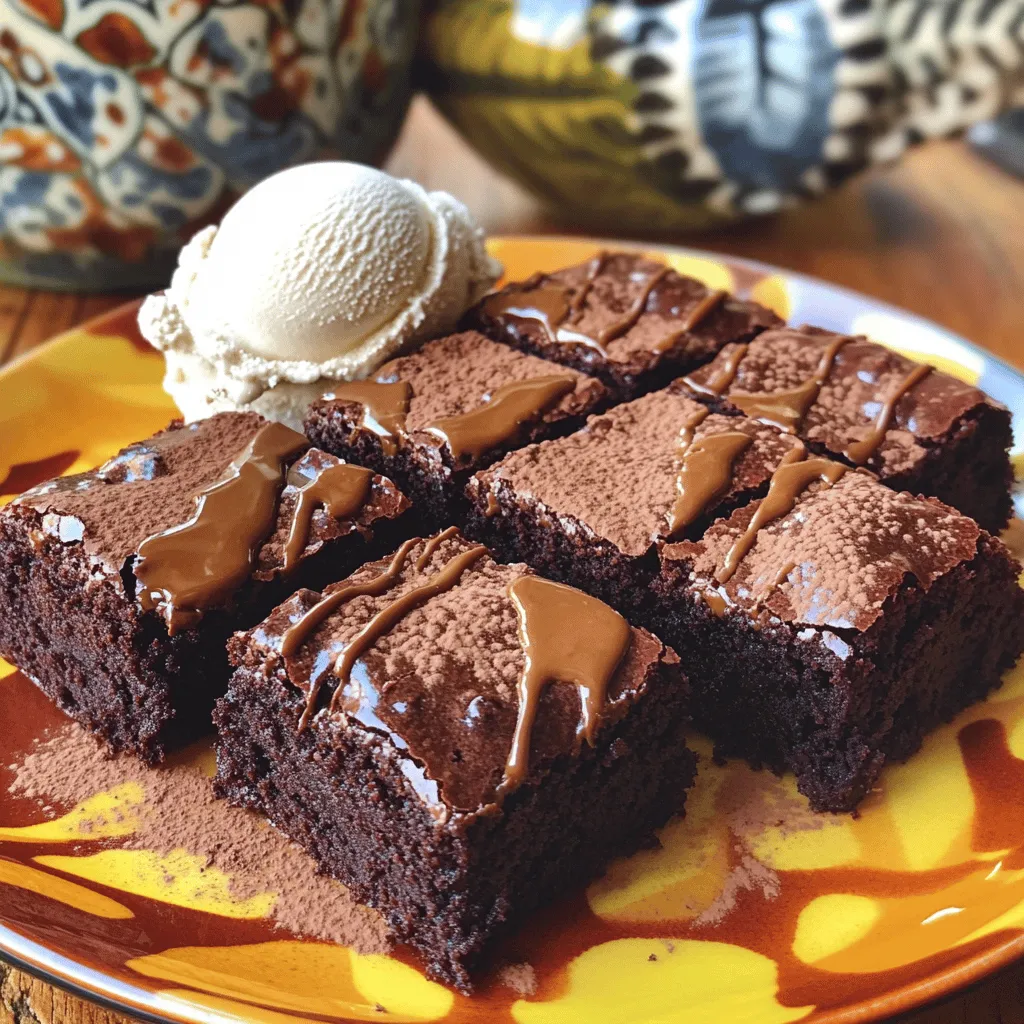
Extra Fudgy Vegan Brownie Cake Delightful and Rich
Ready to indulge in a rich, fudgy treat that’s completely vegan? My Extra Fudgy Vegan Brownie Cake is not only delicious but also easy to
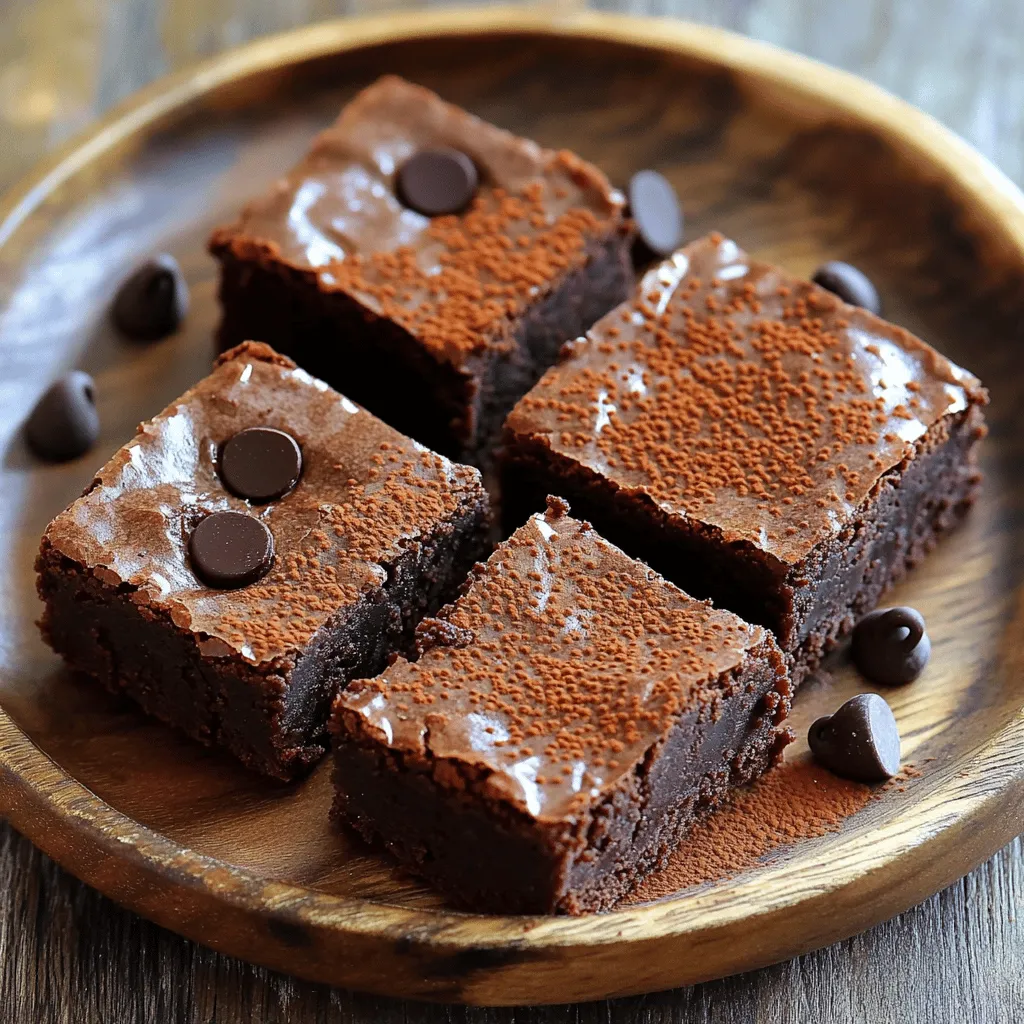
Healthy Low-Calorie Greek Yogurt Brownies Recipe
Looking for a guilt-free dessert that satisfies your chocolate cravings? I’ve got you covered with my Healthy Low-Calorie Greek Yogurt Brownies Recipe. These rich, fudgy