Desserts
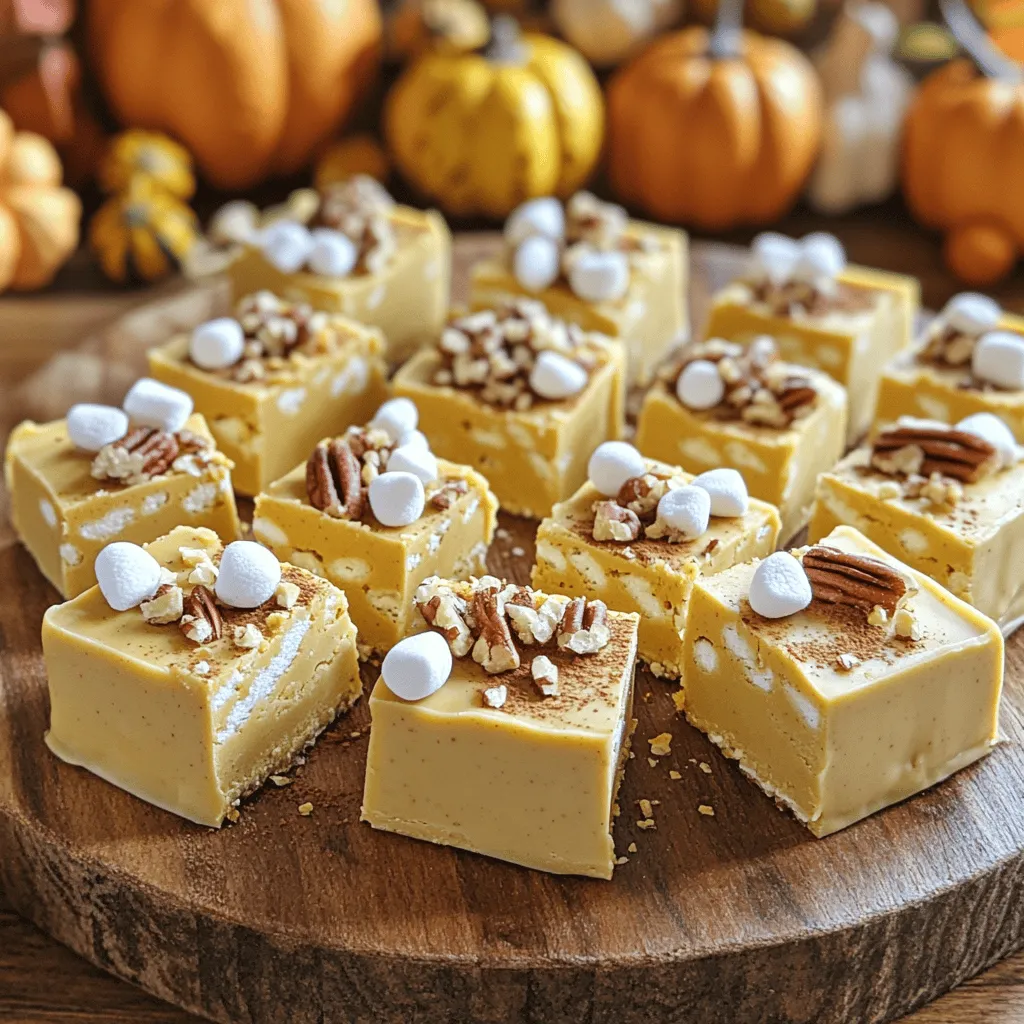
Pumpkin Pie Fudge Irresistible Holiday Dessert Recipe
Get ready to wow your friends and family this holiday season with my Pumpkin Pie Fudge recipe! This sweet treat combines creamy white chocolate and
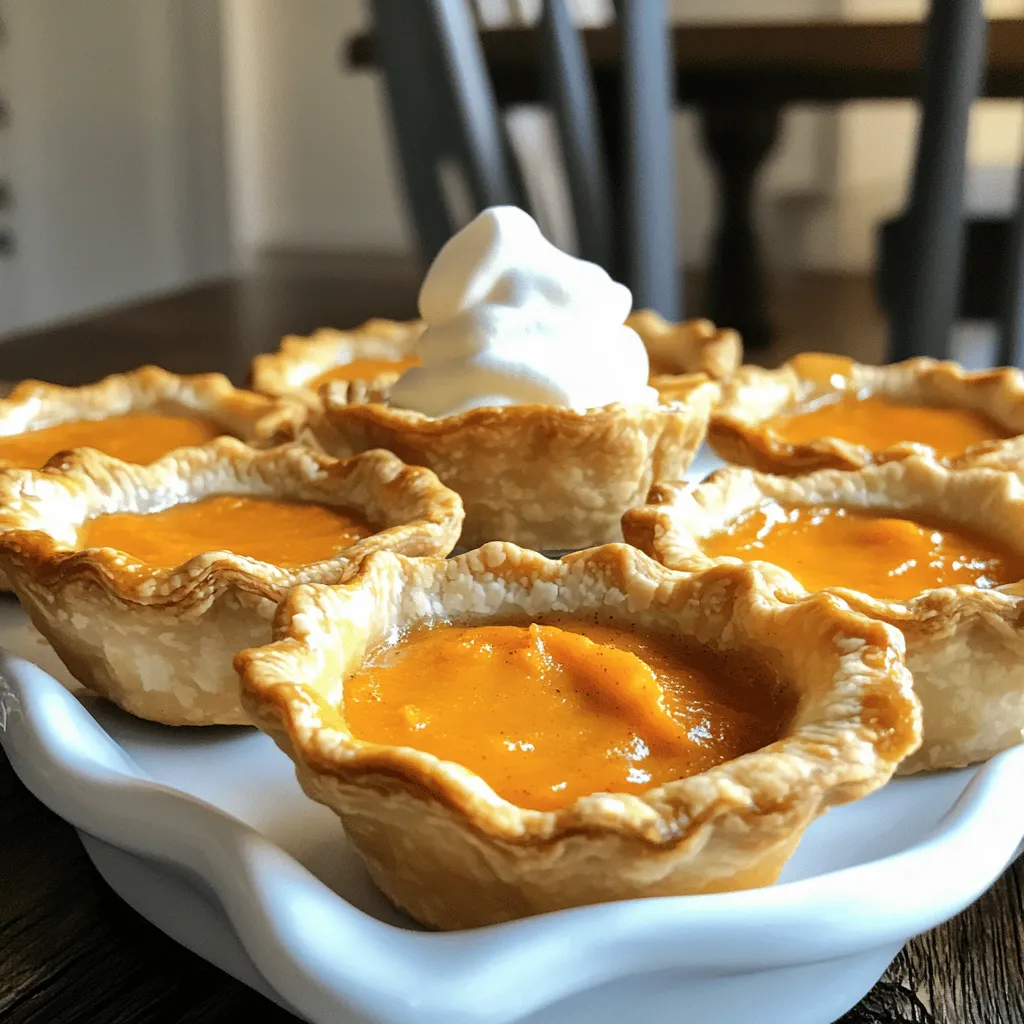
Mini Sweet Potato Pies With Creamy Filling Delight
If you love sweet potatoes and crave a tasty treat, you’re in for a delight! Today, I’ll show you how to make delightful mini sweet
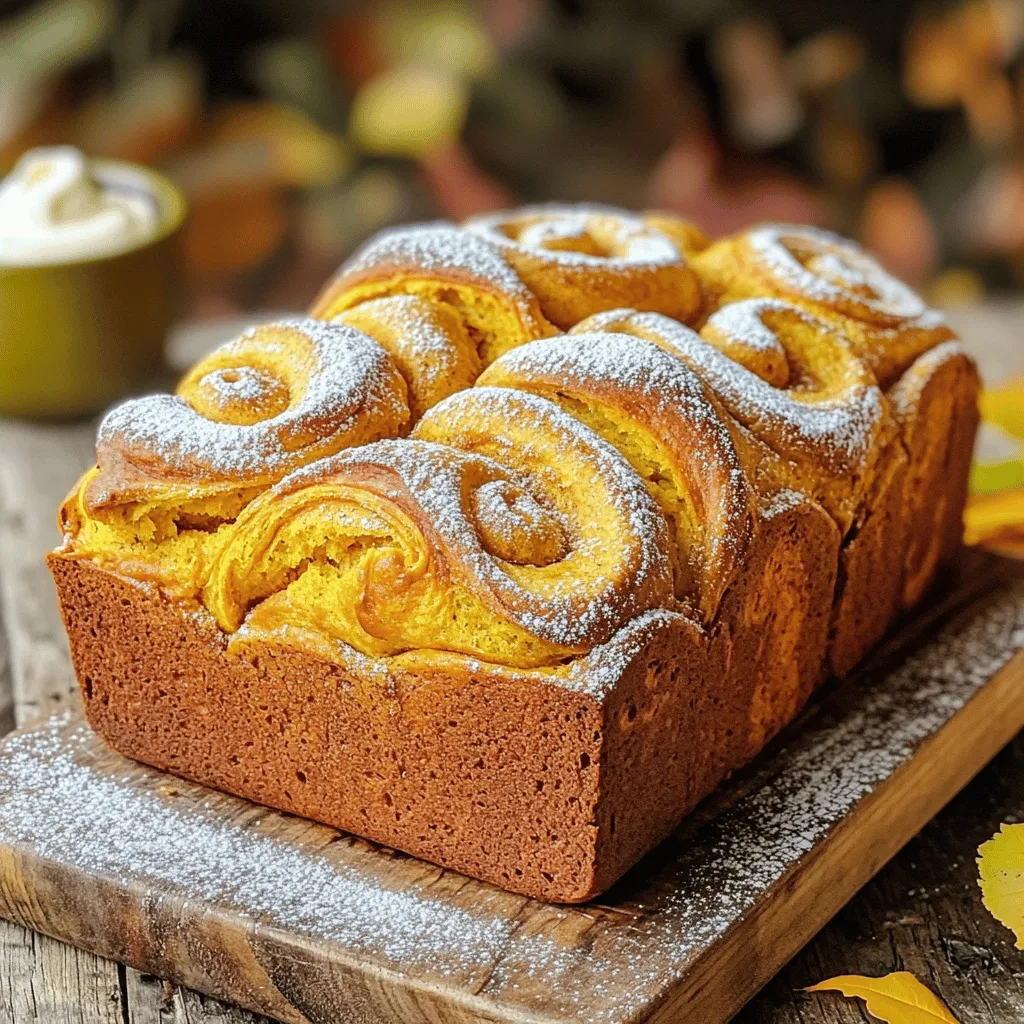
Starbucks Style Pumpkin Bread Heavenly and Easy Recipe
Have you ever wished you could recreate that warm, spicy goodness of Starbucks pumpkin bread at home? Well, you’re in the right place! This easy
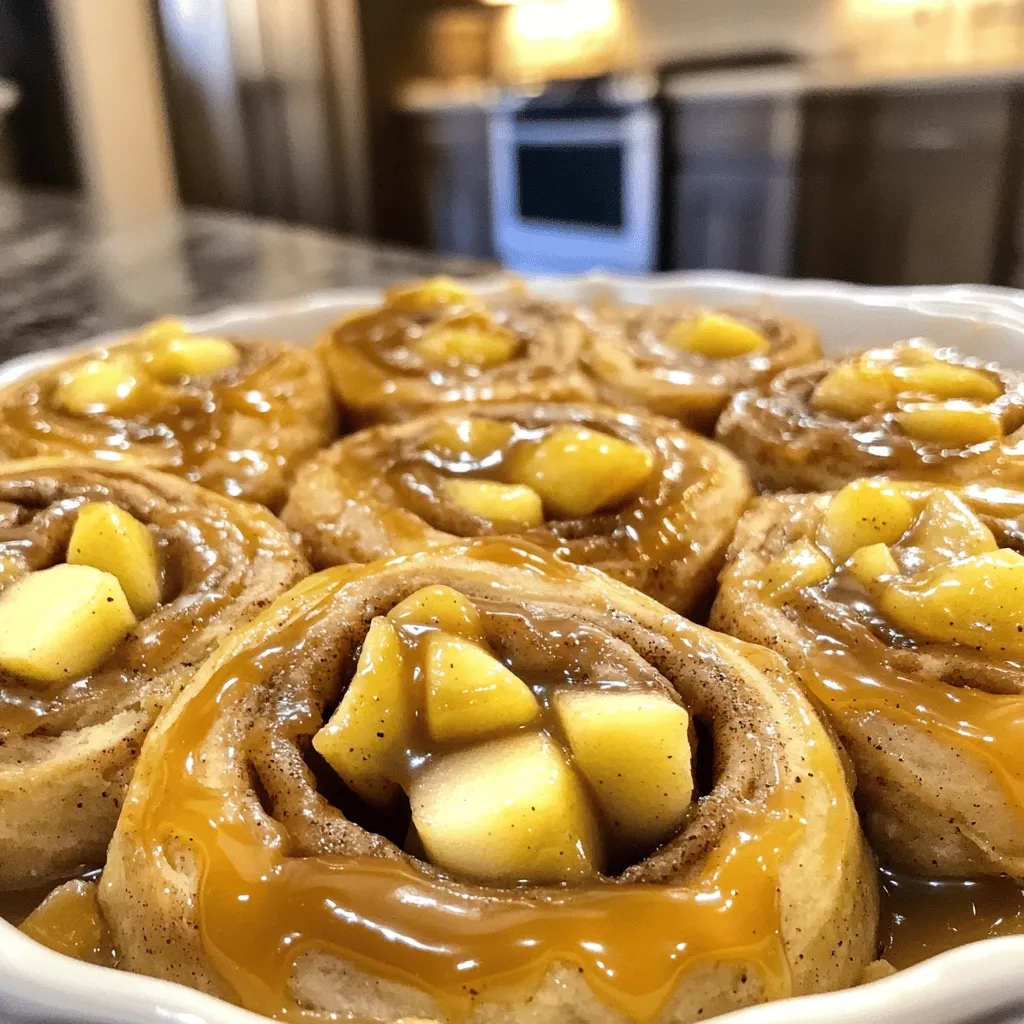
Caramel Apple Cinnamon Rolls Delightful and Easy Recipe
Are you ready to impress your family with a sweet treat? I have an easy recipe for delightful Caramel Apple Cinnamon Rolls that will have
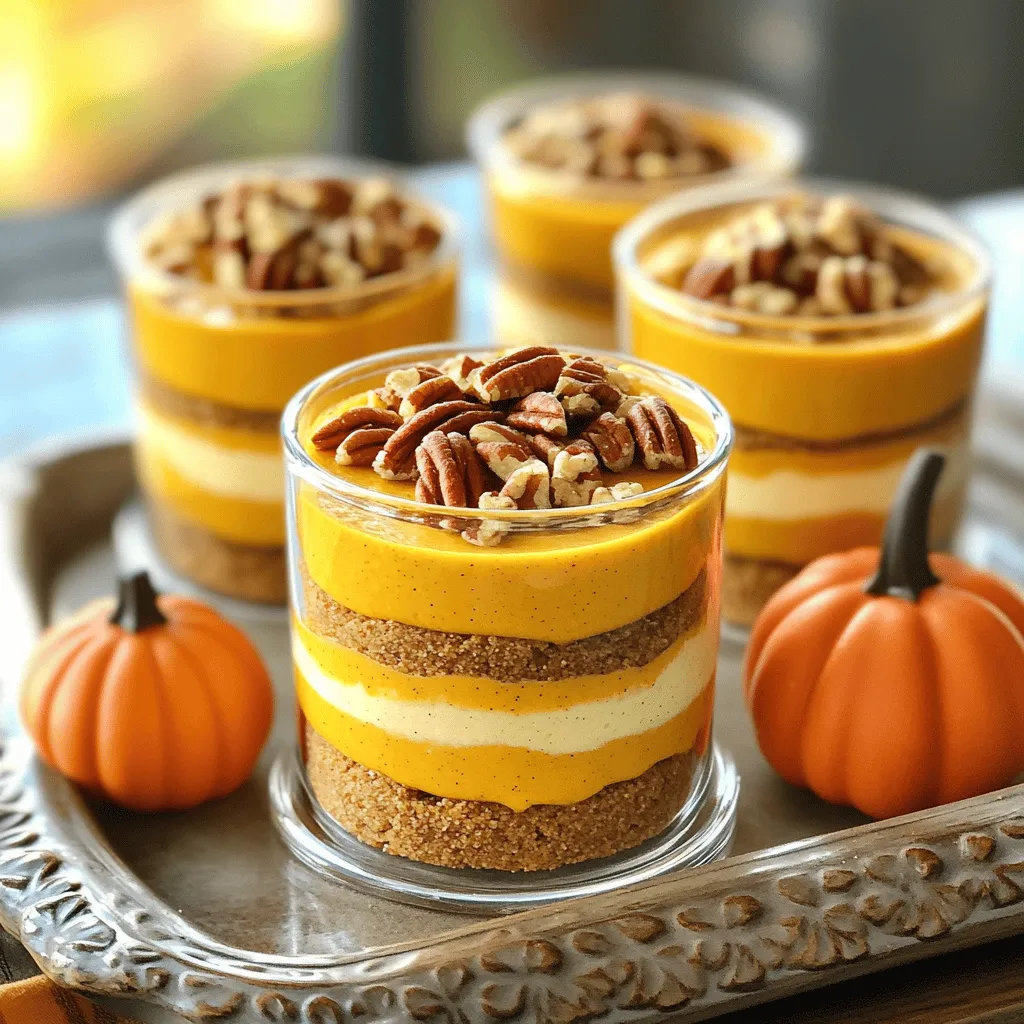
No-Bake Pumpkin Cheesecake Cups Creamy and Easy Treat
Craving a fall treat that’s creamy and easy? Look no further! These No-Bake Pumpkin Cheesecake Cups are perfect for any occasion. With just a few
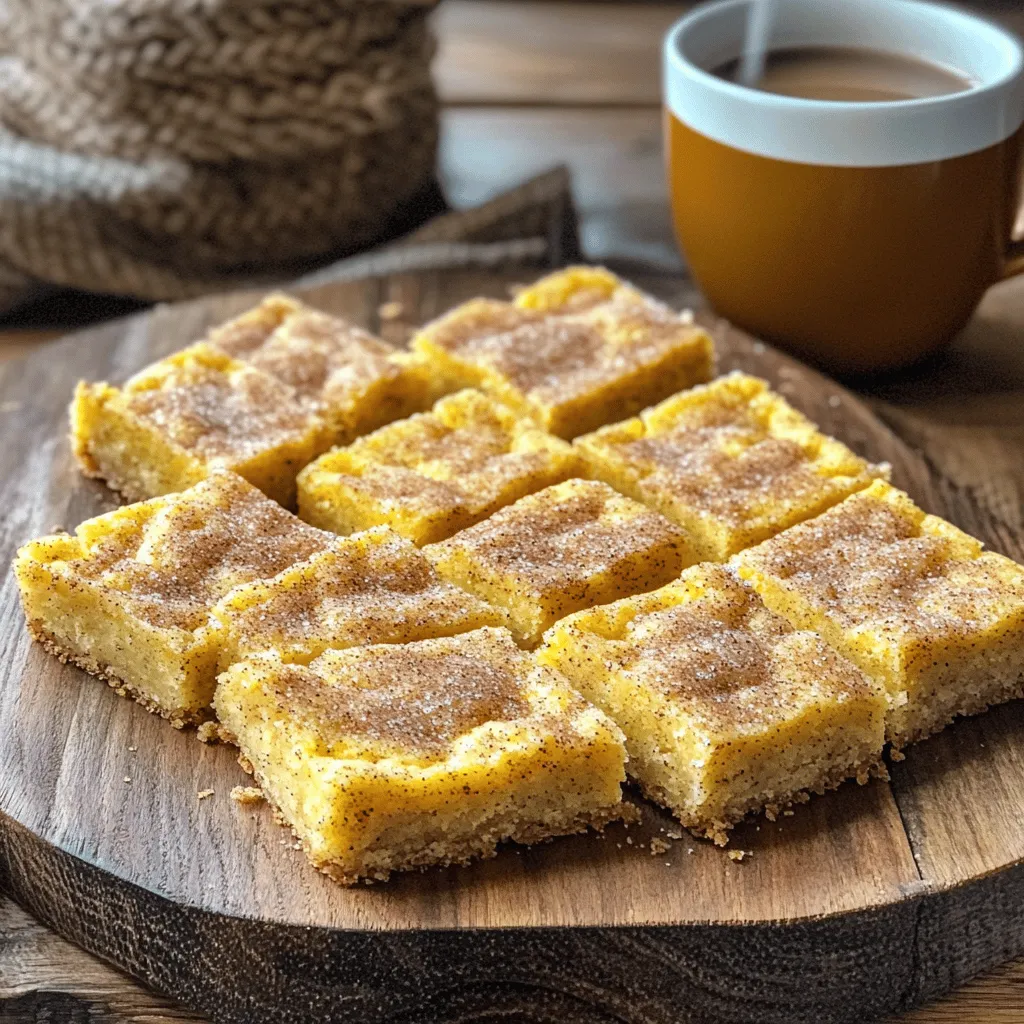
Spiced Chai Snickerdoodle Bars Irresistible Treat
Craving a cozy treat that blends warm spices with sweet goodness? Look no further! My Spiced Chai Snickerdoodle Bars are the perfect pick-me-up, combining the
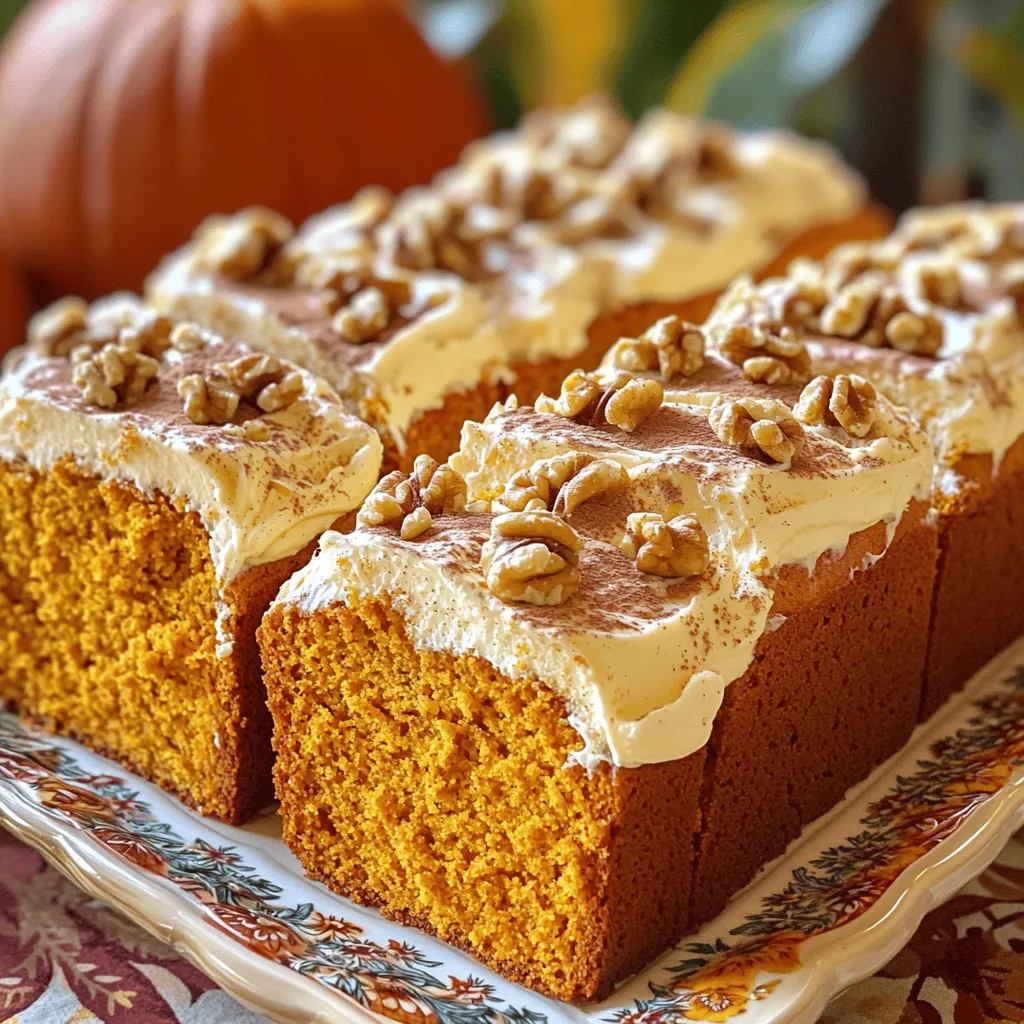
Pumpkin Bread with Cream Cheese Frosting Delight
Are you ready to indulge in the ultimate fall treat? In this blog, I’ll show you how to make moist pumpkin bread topped with luscious
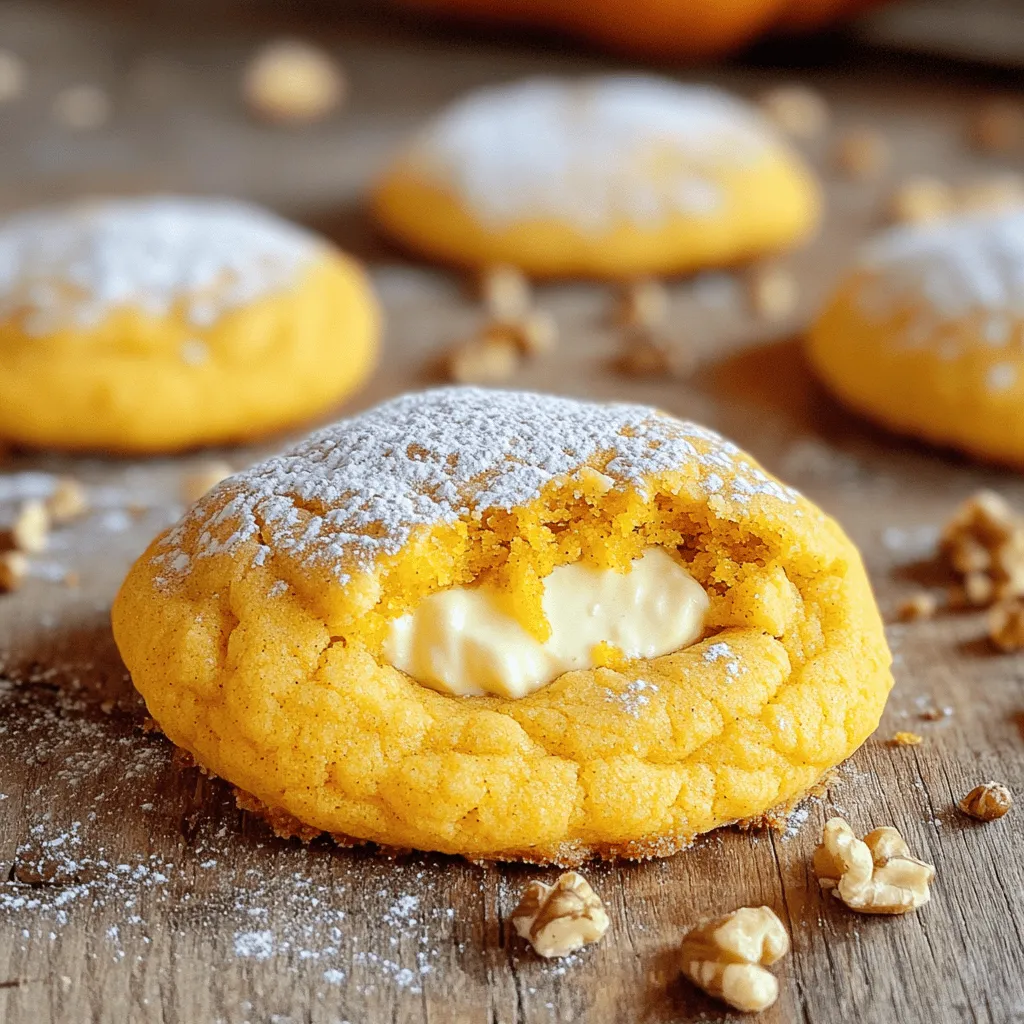
Pumpkin Cheesecake Cookies Delicious Seasonal Treat
Get ready to indulge in fall’s flavors with my Pumpkin Cheesecake Cookies! These soft and chewy treats blend creamy cheesecake goodness with warm pumpkin spice.
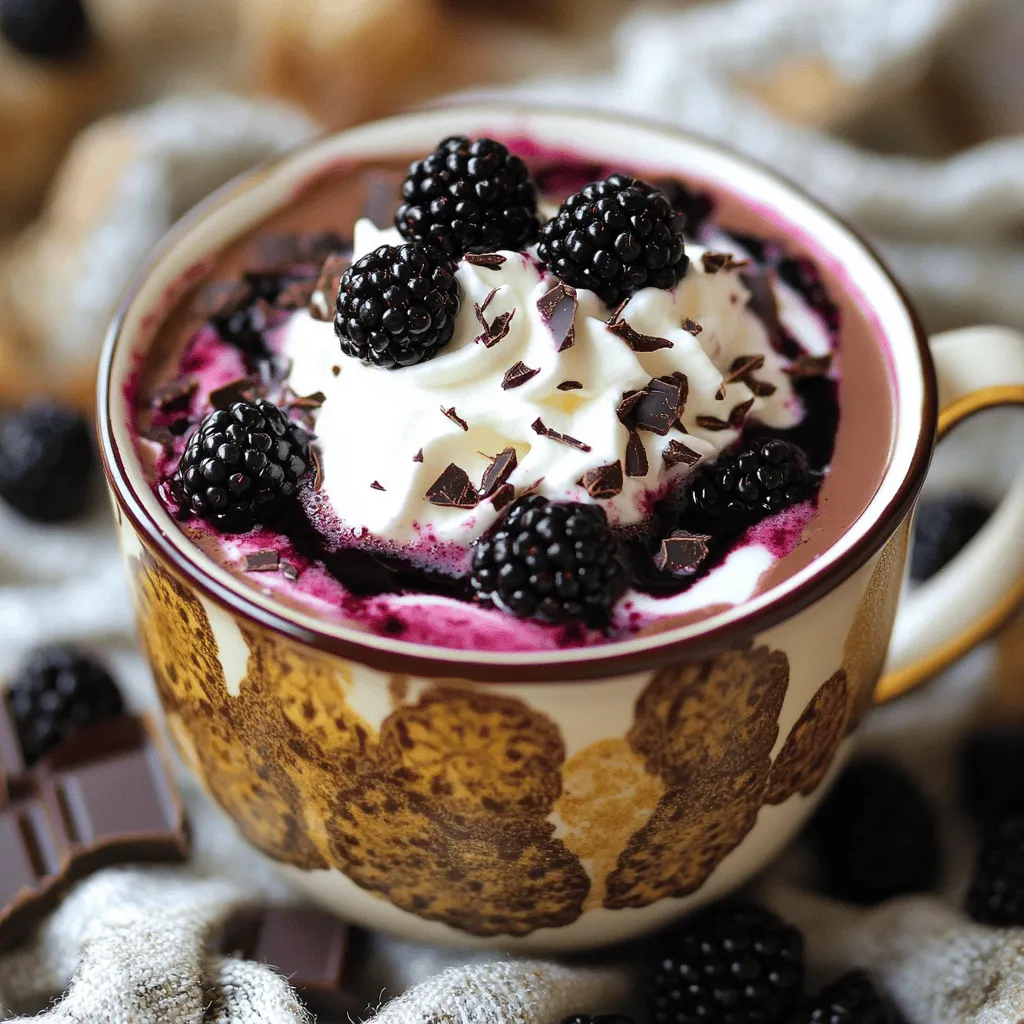
Blackberry Hot Chocolate Rich and Cozy Delight
Are you ready to sip on something special this season? Blackberry Hot Chocolate is a rich and cozy delight you won’t want to miss. With
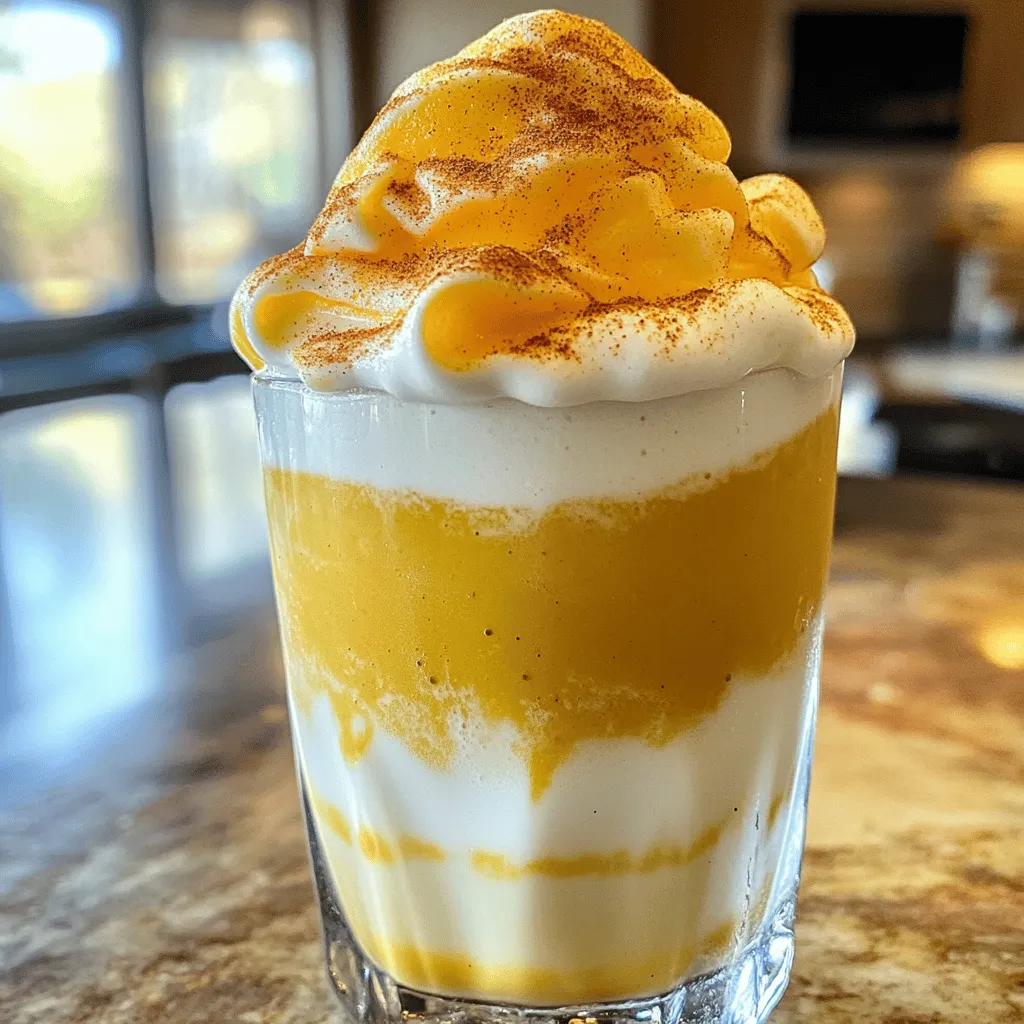
Pumpkin Cold Foam Creamy and Delightful Recipe
Are you ready to elevate your fall drinks? Let’s dive into the world of Pumpkin Cold Foam! This creamy, delightful treat can turn any beverage