Desserts

To make Brown Butter Pumpkin Chocolate Chip Cookies, you will need the following ingredients: - ½ cup unsalted butter - 1 cup pumpkin puree - ¾ cup packed brown sugar - ½ cup granulated sugar - 1 large egg - 1 teaspoon vanilla extract - 2 cups all-purpose flour - 1 teaspoon baking soda - ½ teaspoon baking powder - ½ teaspoon salt - 1 teaspoon ground cinnamon - ½ teaspoon ground nutmeg - 1 cup semi-sweet chocolate chips These ingredients come together to create a cookie with rich flavors. Brown butter gives a nutty taste. Pumpkin adds moisture and a hint of sweetness. The chocolate chips bring in a delightful contrast. Each bite offers a perfect blend of pumpkin and chocolate. You can use canned pumpkin puree or make your own. Both will work well. Make sure your butter is unsalted for the best flavor. Gather these ingredients before you start. It will make the process smoother. Plus, you will feel ready to bake! - To start, melt the unsalted butter in a saucepan over medium heat. - Keep an eye on the butter as it melts. After a few minutes, it will foam. - Swirl the pan gently. This helps the butter brown evenly. - Watch for a golden brown color and a nutty smell. This takes about 5-7 minutes. - Once it looks right, take it off the heat and let it cool a bit. - In a large bowl, combine the brown butter and pumpkin puree. Stir well. - Next, add the packed brown sugar and granulated sugar. Mix until combined. - Now, beat in the egg and vanilla extract. Keep stirring until the mixture is smooth. - In another bowl, whisk together the flour, baking soda, baking powder, salt, cinnamon, and nutmeg. - Gradually add this dry mix to the wet ingredients. Stir until just combined. - Be careful not to overmix, or the cookies might not be soft. - Use rounded tablespoons to drop the dough onto a lined baking sheet. - Space the dough about 2 inches apart. This gives them room to spread. - Bake in your preheated oven at 350°F for 10-12 minutes. - The edges should be set, and the centers might look a bit soft. They will firm up as they cool. - Let the cookies sit on the baking sheet for 5 minutes, then transfer them to a wire rack. To make brown butter, watch for a few signs. The butter will foam up first. Stir it occasionally. Look for a golden brown color. A nutty aroma means it's ready. Don't walk away! It can burn fast. Common mistakes include cooking the butter too quickly. High heat can lead to burning. Another mistake is not stirring enough. Always keep an eye on it as it cooks. For best storage, use an airtight container. This keeps the cookies soft and fresh. You can also add a slice of bread inside. The bread helps keep the cookies moist. To keep cookies soft, avoid the fridge. The cold can dry them out. Instead, store them at room temperature. For a lovely presentation, use a decorative cookie jar. A rustic wooden platter works well too. For an extra touch, sprinkle a bit of sea salt on top. Pair these cookies with milk or coffee. Hot chocolate is another great choice. The flavors blend perfectly! {{image_2}} You can switch the pumpkin puree with sweet potato puree. Sweet potato gives a nice twist. You can also try butternut squash puree for a different flavor. For chocolate chips, semi-sweet is great, but you can mix it up. Use dark chocolate chips for a richer taste. White chocolate chips can add a sweet touch, too. Spices can change the cookie's taste. Try adding ginger or allspice for a warm flavor. A splash of almond or maple extract can also enhance the sweetness. Want some crunch? Add chopped nuts like walnuts or pecans. Dried fruits like cranberries or raisins can add sweetness and chewiness. For Halloween, add orange and black sprinkles for fun. For Thanksgiving, use cinnamon sugar on top for a festive touch. In winter, try peppermint extract for a cool flavor. For spring, add lemon zest to brighten up the cookies. You can even shape them into fun themes for each holiday. To keep your cookies fresh, use airtight containers. These containers keep air out and moisture in. This helps the cookies stay soft and tasty. You can store them at room temperature for up to a week. If you want to keep them longer, freezing is a good option. Place the cookies in a freezer-safe bag or container. They can stay frozen for up to three months. You can store cookie dough in two ways: refrigerating or freezing. If you plan to bake soon, refrigerate the dough for up to three days. Just wrap it tightly in plastic wrap. If you want to save it for later, freeze the dough. Shape it into balls and place them in a freezer-safe bag. They can last for up to three months in the freezer. To bake frozen dough, take it out and let it thaw in the fridge overnight. Then, bake as usual. If you’re in a hurry, you can bake straight from frozen. Just add a couple of extra minutes to the bake time. Yes, you can use salted butter. It will add a bit of saltiness. If you choose salted butter, skip adding the extra salt in the recipe. This will keep the flavor balanced. The cookies are done when the edges are set, and the centers look slightly underbaked. They should have a golden color on the edges. You can also gently press the tops; they should feel set but soft. You can use a flax egg. To make one, mix 1 tablespoon of ground flaxseed with 3 tablespoons of water. Let it sit for about 5 minutes until it thickens. This works well in cookies. These cookies last about a week when stored in an airtight container. They stay soft and tasty. If you want them to last longer, you can freeze them for up to three months. Yes, you can make them gluten-free! Use a 1:1 gluten-free flour blend instead of all-purpose flour. Check that your chocolate chips are also gluten-free. This lets everyone enjoy these cookies. You now have a clear guide to make delicious pumpkin cookies. We covered key ingredients like brown butter and pumpkin puree, plus step-by-step instructions. Remember to perfect the browning and store your cookies right for freshness. Taste and creativity can lead to fun variations. Whether you add different spices or flavor tweaks, enjoy the process. Your pumpkin cookies can delight any crowd, all while making wonderful memories in the kitchen.
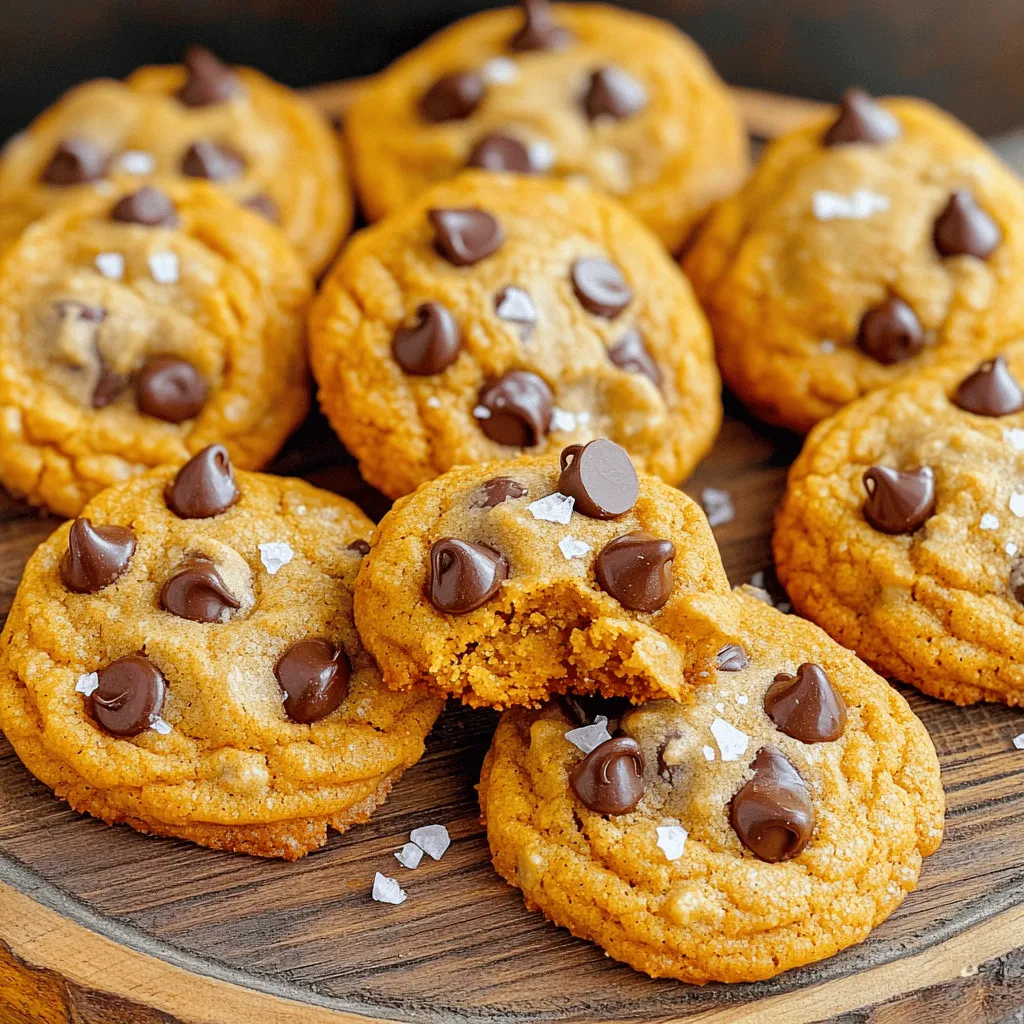
Brown Butter Pumpkin Chocolate Chip Cookies Delight
Craving a sweet treat this fall? Look no further! Brown Butter Pumpkin Chocolate Chip Cookies are the perfect blend of cozy pumpkin and rich, nutty
For this recipe, you need 1 sheet of puff pastry. Make sure it is thawed before you start. Puff pastry gives these twists their flaky and light texture. You can find it in the freezer section of most grocery stores. Be sure to keep it cold until you are ready to roll it out. The filling is key to the flavor. You will need 1/2 cup of canned pumpkin puree. This gives the twists that rich pumpkin taste. Mix the puree with 1/4 cup of granulated sugar for sweetness. Also, add 1 teaspoon of cinnamon, 1/4 teaspoon of nutmeg, and 1/4 teaspoon of ginger. These spices bring warmth and depth to your filling. Finally, stir in 1/2 teaspoon of vanilla extract for a lovely aroma. You will need some extra flavor on top. Prepare extra cinnamon sugar for sprinkling. This is just a mix of sugar and cinnamon. It adds a sweet crunch to the outside of the twists. You can make it by combining 1 tablespoon of sugar with 1/2 teaspoon of cinnamon. This simple touch makes your twists even more delicious! First, you need to preheat your oven to 400°F (200°C). This heat makes your twists crispy. Next, line your baking sheet with parchment paper. This paper helps keep the twists from sticking. It also makes cleanup easy. On a lightly floured surface, take your thawed puff pastry. Roll it out gently to smooth any creases. This makes it easier to work with. After that, cut the pastry into 6 equal rectangles. Make sure they are all the same size for even baking. In a mixing bowl, combine the pumpkin puree, granulated sugar, and spices. Add cinnamon, nutmeg, ginger, and vanilla extract. Mix these well until everything is blended. This filling gives your twists a warm, sweet flavor. It’s what makes them special. Now, take a generous spoonful of the pumpkin mixture. Place it in the center of each pastry rectangle. Fold one side of the pastry over the filling. Press down the edges to seal them tight. You can twist the pastry slightly for a fun look. Brush the tops of each twist with the beaten egg. Drizzle melted butter over them for extra flavor. Don’t forget to sprinkle extra cinnamon sugar on top. This adds sweetness and a nice crunch. Bake your twists in the preheated oven for 15-20 minutes. Look for them to turn golden brown and flaky. Once done, take them out and let them cool slightly before serving. Enjoy your tasty treats! To get the best puff pastry, start with a good quality sheet. Thaw it slowly in the fridge. This keeps the layers nice and flaky. Roll it out gently on a floured surface. Do not press too hard; you want to keep air in the layers. Cut the pastry into even rectangles for uniform baking. This helps them cook evenly. For a richer taste, consider adding a pinch of salt to the pumpkin filling. This enhances the sweetness and balances flavors. You can also use brown sugar instead of granulated sugar for a deeper taste. Mixing in a splash of maple syrup can add a lovely twist. If you like nuts, chop up some pecans or walnuts. They add crunch and flavor. Presentation matters for these treats. After baking, let them cool slightly. Dust them with extra cinnamon sugar for a sweet finish. Arrange them on a nice plate or platter. You can even drizzle a bit of melted chocolate over them for a fun touch. Serve with a dollop of whipped cream or ice cream on the side to make them special. {{image_2}} You can change the spice mix to fit your taste. Try adding cloves or allspice for a warm twist. For a more unique flavor, use cardamom. Adjust the spice levels to make your own blend. Just keep the total amount similar to what the recipe calls for. The key is to enhance the pumpkin flavor without overpowering it. While pumpkin is classic, other fillings work great too. You could use sweet potato for a different taste. Apple or pear filling adds a fresh fruit flavor. Chocolate ganache makes it rich and sweet. Each filling brings its own fun twist. Experiment and see which ones you like best! Puff pastry is light and flaky, but you have other choices. You can use phyllo dough for a crispier texture. Biscuits or pie dough offer a heartier bite. Each pastry type changes the final result. Choose the one that suits your taste and mood. Just remember to adjust baking times if needed. You can store your Cinnamon Sugar Pumpkin Pie Twists in the fridge. Place them in an airtight container. They stay fresh for up to three days. If you want to keep them longer, consider freezing them instead. This method helps maintain their taste and texture. To freeze your twists, follow these steps: - Allow the twists to cool completely. - Place them in a single layer on a baking sheet. - Freeze for about two hours until firm. - Transfer them to a freezer bag or container. - Label the bag with the date and store for up to three months. When you're ready to enjoy them again, reheat the twists easily. Preheat your oven to 350°F (175°C). Place the twists on a baking sheet. Heat for about 10-15 minutes until warm. This method keeps them flaky and delicious. You can also use a microwave, but the texture may change slightly. Yes, you can make these twists ahead of time. You can prepare the pumpkin filling and assemble the twists. Then, store them in the fridge for up to a day. When you are ready to bake, just brush them with egg wash and sprinkle with cinnamon sugar. Bake them right before serving for the best taste and texture. If you don’t have pumpkin puree, you can use sweet potato puree. It has a similar texture and flavor. You can also use butternut squash puree. Both options work well in this recipe. Just make sure to use unsweetened purees for the best results. To make these twists gluten-free, use gluten-free puff pastry. Many stores sell this option now. You can also make your own using gluten-free flour blends. Follow the same steps as with regular puff pastry. The flavor and texture will still be tasty! In this blog post, we explored puff pastry twists filled with pumpkin. We covered how to prepare, bake, and store them. You learned tips for perfect pastry and flavor boosts. Trying different spices or fillings can keep this fun. Remember to store leftovers well for fresh treats later. Enjoy making these tasty twists! They are sure to impress your family and friends.
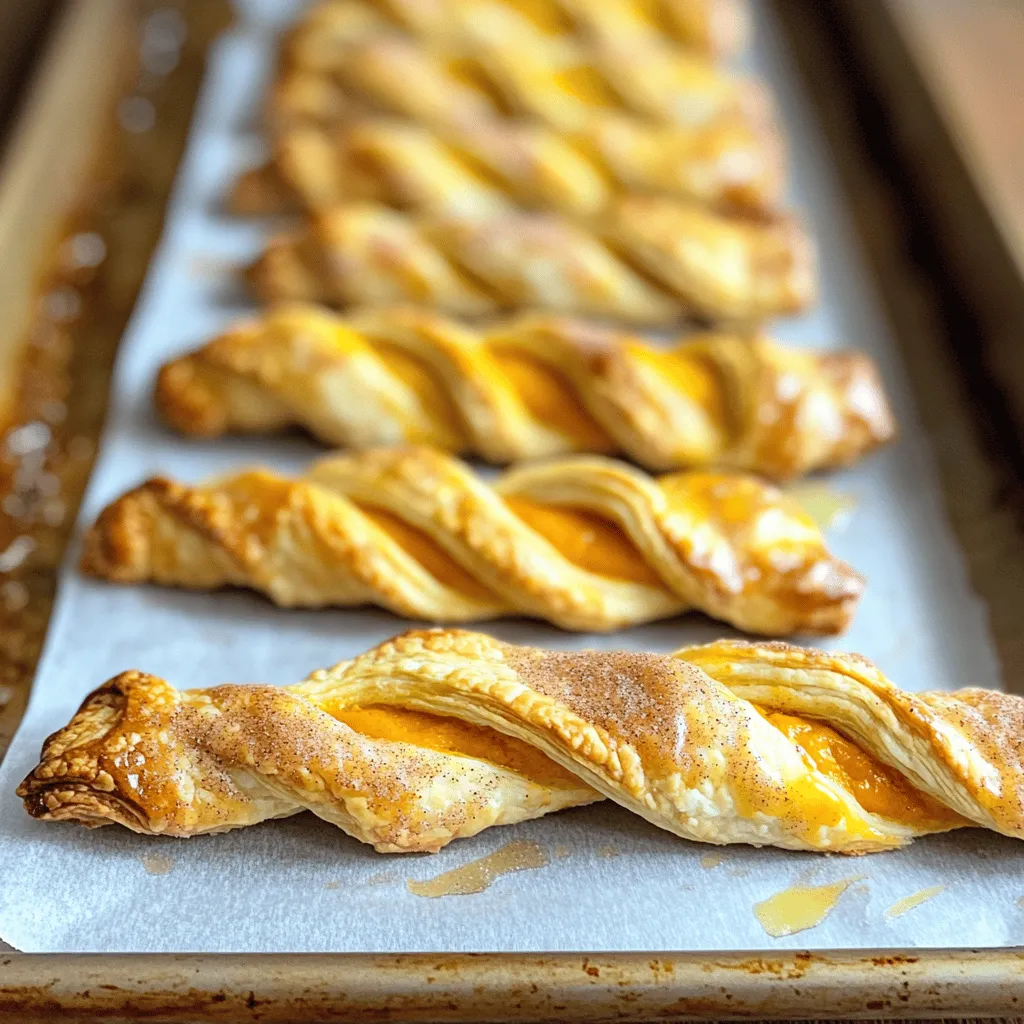
Cinnamon Sugar Pumpkin Pie Twists Tasty Treat Recipe
Looking to impress your guests this fall? You can’t go wrong with my Cinnamon Sugar Pumpkin Pie Twists! These treats combine flaky puff pastry with
- 2 cups all-purpose flour - 1 teaspoon baking soda - ½ teaspoon salt - 1 cup unsalted butter, softened - 1 cup brown sugar, packed - ½ cup granulated sugar - 1 teaspoon vanilla extract - 2 large eggs - 2 cups chocolate chips (milk or semi-sweet) - 1 cup mini marshmallows - 1 cup graham cracker crumbs To make these S'mores Cookie Bars, you need a mix of simple, tasty ingredients. First, gather your flour, baking soda, and salt. These form the base of the cookie. Next, you will need butter, brown sugar, and granulated sugar. The butter must be soft to mix well. This mixture gives the bars their rich flavor and soft texture. Don't forget the vanilla extract and eggs. They add moisture and depth to the dough. Now, for the fun part: the chocolate chips, mini marshmallows, and graham cracker crumbs. These ingredients create that classic S'mores flavor. The chocolate brings sweetness, while the marshmallows add a gooey texture. The graham cracker crumbs give a crunchy bite. - Drizzle of melted chocolate - Extra graham cracker crumbs for topping - Mini marshmallows for garnish For extra flair, consider adding a drizzle of melted chocolate on top. It looks great and tastes even better. You can also sprinkle some extra graham cracker crumbs for a crunch. Mini marshmallows make a cute garnish too. They add a fun touch, making your bars even more inviting. 1. First, preheat your oven to 350°F (175°C). 2. Grease a 9x13 inch baking pan or line it with parchment paper. 3. In a medium bowl, mix together 2 cups of all-purpose flour, 1 teaspoon of baking soda, and ½ teaspoon of salt. Set this bowl aside. 1. In a large mixing bowl, cream 1 cup of softened unsalted butter, 1 cup of packed brown sugar, and ½ cup of granulated sugar. Mix until light and fluffy, about 3-4 minutes. 2. Next, add in 2 large eggs and 1 teaspoon of vanilla extract. Beat this mixture until it's well combined. 1. Gradually mix the dry ingredients into the wet mixture. Stir until just combined. Avoid overmixing. 2. Now, fold in 2 cups of chocolate chips, 1 cup of graham cracker crumbs, and 1 cup of mini marshmallows. Make sure they are evenly spread throughout the dough. 3. Spread the dough evenly into the prepared baking pan. Use a spatula to smooth the top. 1. Bake in the preheated oven for 25-30 minutes. Look for a golden brown color. 2. To check for doneness, insert a toothpick in the center. If it comes out clean, the bars are ready. 1. Let the bars cool in the pan for about 15 minutes. This helps them set. 2. For best results, cool them for a few more minutes on a wire rack. 3. Cut into squares for serving. Enjoy your delicious S'mores Cookie Bars! To bake the perfect S'mores cookie bars, avoid overmixing the dough. When you mix the wet and dry ingredients, stop as soon as they come together. Overmixing can make the bars tough. Check for doneness by looking for a golden brown color. Insert a toothpick in the center. If it comes out clean, your bars are ready. Remember, they will continue to cook a bit after you take them out. For a fun presentation, serve the bars on a wooden cutting board. Drizzle melted chocolate over the top for a special touch. You can also sprinkle extra graham cracker crumbs and mini marshmallows on top. This adds color and texture. Pair these bars with a scoop of vanilla ice cream or a glass of cold milk. The cool, creamy textures balance the warm cookie bars perfectly. To make your baking easier, use a 9x13 inch baking pan. Grease it well or line it with parchment paper for easy removal. A spatula helps spread the dough evenly in the pan. A whisk works well for mixing dry ingredients. Use a large mixing bowl for creaming butter and sugars together. These tools make the process smooth and fun! {{image_2}} You can switch up the flavors to make your S'mores Cookie Bars even better. Instead of using regular chocolate chips, try dark chocolate or white chocolate. Dark chocolate brings a rich taste, while white chocolate adds a creamy sweetness. You can also explore using different brands or types of chocolate chips to find your favorite. For sweeteners, consider using coconut sugar or honey. Coconut sugar gives a slight caramel flavor. Honey adds natural sweetness and moisture. Both options can give your cookie bars a unique twist. If you need gluten-free options, swap the all-purpose flour for a gluten-free blend. Many brands offer great mixes that work well in baking. Just make sure it includes xanthan gum for the right texture. For vegan substitutions, use dairy-free butter and flax eggs. To make a flax egg, mix one tablespoon of ground flaxseed with three tablespoons of water. Let it sit for a few minutes until it thickens. This will help bind the bars just like eggs do. You can also create themed S'mores Cookie Bars for special occasions. For Halloween, add orange food coloring to the dough and top with candy corn. For Christmas, mix in crushed peppermint candies or holiday-themed sprinkles. These fun ideas can make your treats festive and exciting! Store your S'mores cookie bars at room temperature. Use an airtight container to keep them fresh. If you live in a hot area, refrigerate them for extra safety. These bars can last about five days. To freeze the bars, first let them cool completely. Next, cut them into squares. Wrap each square in plastic wrap. Place the wrapped bars in a freezer bag. They can stay fresh for up to three months. To reheat, place a bar on a microwave-safe plate. Heat for about 10-15 seconds. This warms it up without making it too hot. You can also enjoy them cold for a tasty treat! You can use several fun options instead of graham cracker crumbs. Here are some ideas: - Crushed cookies: Try vanilla wafers or digestive biscuits. - Oreo crumbs: For a chocolate twist, crush Oreos. - Almond flour: This adds a nutty flavor and gluten-free option. - Bisquick: It works well for a quick substitute. These options will give your bars a unique taste while still providing that crunchy base. Yes, you can prepare these cookie bars in advance. Here are some tips: - Mix the dough: You can mix the dough a day before. Store it in the fridge. - Bake and cool: Bake them a day ahead. Store in an airtight container. - Freeze: You can freeze the baked bars for up to three months. Just thaw before serving. Making them early helps save time for your fun gathering. Chewy cookie bars are a delight! Here are some simple techniques: - Use brown sugar: This helps retain moisture. - Don't overbake: Bake until just golden brown. A toothpick should come out with a few moist crumbs. - Add extra marshmallows: They keep the bars soft and gooey. These tips will make sure your cookie bars stay chewy and delicious. Absolutely! S'mores Cookie Bars are perfect for kids. Here’s why: - Easy to make: Kids can help mix and spread the dough. - Safe ingredients: They use common baking items, which are safe. - Fun to eat: The gooey marshmallows and chocolate make them exciting. These cookie bars are a sweet treat that kids will love to make and eat! In this blog post, we explored how to make tasty S'mores Cookie Bars. You learned the key ingredients, step-by-step instructions, and helpful tips. I shared fun variations and storage tips to keep your treats fresh. Remember, these cookie bars are simple, fun to make, and loved by kids. Enjoy every bite, and don’t forget to share with friends!
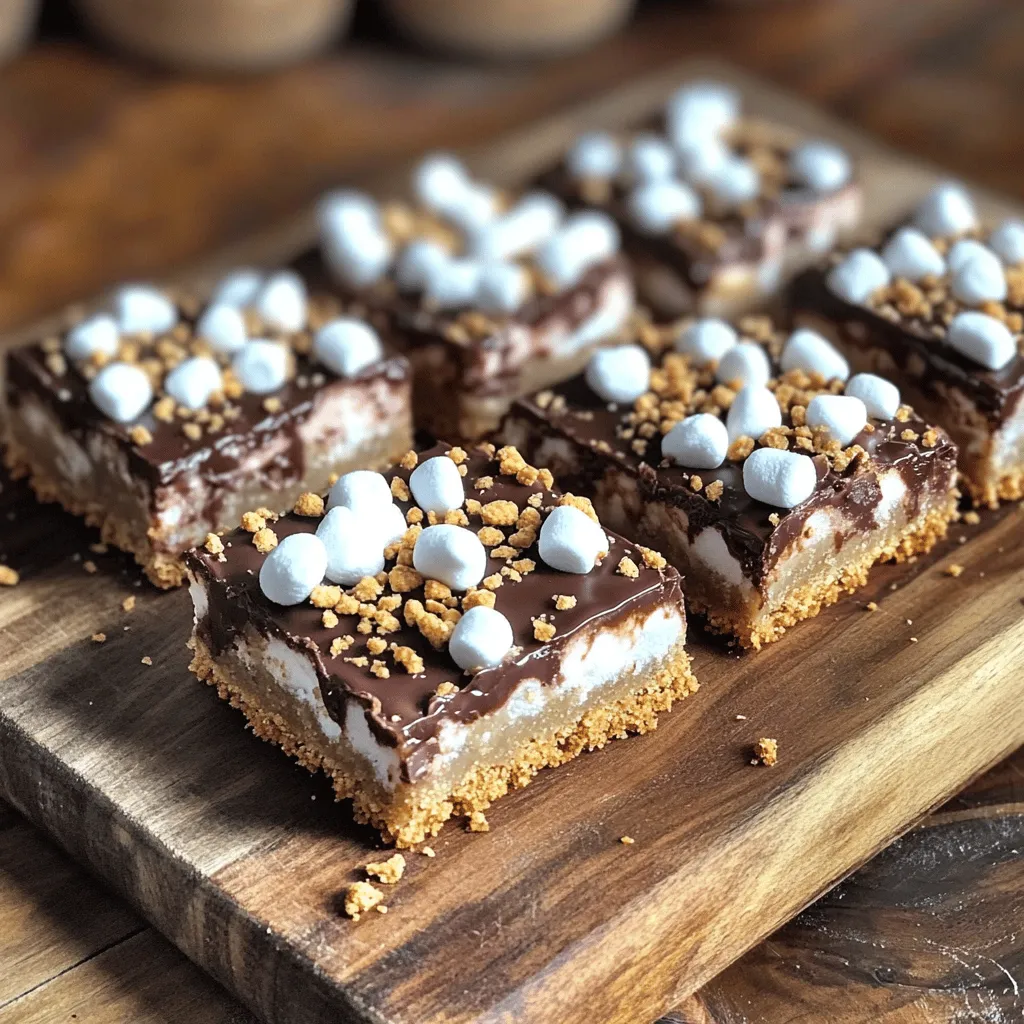
S’mores Cookie Bars Easy Recipe for Sweet Fun
Craving a sweet, campfire-inspired treat? Try these S’mores Cookie Bars! This easy recipe combines rich chocolate, gooey marshmallows, and crunchy graham crackers in one delicious
To make a tasty lemon blueberry pound cake, you need the following ingredients: - 1 cup unsalted butter, softened - 2 cups granulated sugar - 4 large eggs - 3 cups all-purpose flour - 1 tablespoon baking powder - 1/2 teaspoon salt - 1 cup buttermilk - Zest of 2 lemons - 1/4 cup fresh lemon juice - 2 cups fresh blueberries (or frozen, thawed and drained) - 1 teaspoon vanilla extract These ingredients create a soft, moist cake that bursts with lemon and blueberry flavor. The butter adds richness, while the sugar provides sweetness. Eggs help bind everything together. The flour gives your cake structure, and baking powder makes it rise. You can add a touch of sweetness with these optional decorations: - Powdered sugar for dusting This simple dusting can elevate your cake's look and taste. It adds a nice contrast to the bright blueberries. Choosing the right blueberries is key for flavor and texture. Here are my tips: - Look for plump, firm berries with a deep blue color. - Check for a white, powdery bloom on the surface; this shows freshness. - Avoid berries that are mushy or have leaks. Fresh blueberries make your cake juicy and flavorful. If fresh ones aren't available, frozen blueberries work too. Just thaw and drain them before use. Start by gathering all your ingredients. You will need: - 1 cup unsalted butter, softened - 2 cups granulated sugar - 4 large eggs - 3 cups all-purpose flour - 1 tablespoon baking powder - 1/2 teaspoon salt - 1 cup buttermilk - Zest of 2 lemons - 1/4 cup fresh lemon juice - 2 cups fresh blueberries - 1 teaspoon vanilla extract - Optional: Powdered sugar for dusting Next, preheat your oven to 350°F (175°C). Grease a 9x5-inch loaf pan. You can also line it with parchment paper. This will help the cake come out easily later. In a large bowl, cream the softened butter and sugar. Use an electric mixer on medium speed until fluffy. This should take about 3-4 minutes. Add the eggs one at a time. Mix well after each egg. Don’t forget to scrape the bowl’s sides to mix everything well. In a separate bowl, whisk together the flour, baking powder, and salt. Gradually add this dry mix to the wet mix. Alternate with the buttermilk. Start with the flour, mix, then add buttermilk, and repeat until combined. Now, gently fold in the lemon zest, lemon juice, blueberries, and vanilla extract. Use a spatula and be careful not to crush the blueberries. Pour the batter into your prepared loaf pan. Smooth the top with a spatula. Bake in the oven for 60-70 minutes. Check if it’s done by inserting a toothpick in the center. If it comes out clean, the cake is ready. If the top browns too quickly, cover it with aluminum foil for the last 20 minutes. After baking, take it out of the oven. Let it cool in the pan for about 10 minutes. Then, carefully transfer it to a wire rack to cool completely. Once cooled, you can dust the top with powdered sugar for an extra touch. Enjoy this fresh and flavorful treat! To keep your Lemon Blueberry Pound Cake moist, use fresh ingredients. Always use room temperature butter and eggs. This helps them blend better. Adding buttermilk also adds moisture and a slight tang. Don't skip the lemon juice; it keeps the cake soft and flavorful. Avoid over-mixing the batter once you add the flour. This can lead to a dense cake. Gently fold in the blueberries to prevent them from breaking. Many people make simple mistakes when baking. One key mistake is not preheating the oven. Always set your oven to 350°F before starting. Another mistake is not measuring ingredients correctly. Use a kitchen scale for precision. If you don’t have one, use measuring cups and spoons carefully. Lastly, don’t forget to check your cake with a toothpick. If it comes out clean, your cake is done! Having the right tools makes baking easier. Here’s a list of tools you need: - 9x5-inch loaf pan: This is the perfect size for your cake. - Electric mixer: It saves time when creaming butter and sugar. - Mixing bowls: Use at least two for mixing wet and dry ingredients separately. - Spatula: A silicone spatula helps you fold in ingredients gently. - Wire rack: This allows your cake to cool evenly after baking. Using these tools will help you create a perfect Lemon Blueberry Pound Cake every time! {{image_2}} You can switch up the blueberries for other fruits. Try raspberries or strawberries for a fresh taste. Cherries work well too. Just chop them into small pieces. Make sure to adjust the sugar if the fruit is very sweet or tart. To make a gluten-free version, swap all-purpose flour for a gluten-free blend. Look for one that works well in baking. You may need to add a little more liquid, like milk or water, to keep the batter moist. This way, everyone can enjoy this tasty treat. For a fun twist, add a lemon drizzle icing. Mix powdered sugar with fresh lemon juice until smooth. Drizzle it on top of the cooled cake for a sweet and tangy finish. It adds a nice shine and extra flavor. You can also sprinkle some zest on top for a pop of color. To keep your Lemon Blueberry Pound Cake fresh, store it in an airtight container. This helps it stay moist and keeps out air. If you do not have a container, wrap the cake tightly in plastic wrap. Place it in a cool, dry place, away from sunlight. Avoid storing it in the fridge, as this can dry it out. For best taste, eat the cake within three days. If you want to keep it longer, freezing is a great option. You can freeze your Lemon Blueberry Pound Cake for up to three months. First, let the cake cool completely. Wrap it tightly in plastic wrap, then in aluminum foil. This double wrap prevents freezer burn. Write the date on the foil so you know when you froze it. When you're ready to enjoy it, thaw the cake overnight in the fridge. For quicker thawing, leave it at room temperature for a few hours. If your cake feels dry after storage, don't worry! You can refresh it easily. Use a simple syrup made from equal parts water and sugar. Heat the mixture until the sugar dissolves. Brush the syrup over the top of the cake. This adds moisture and sweetness. Another option is to serve slices with a dollop of whipped cream or a scoop of ice cream. Both options bring back that fresh taste and make your cake shine again. Yes, you can use frozen blueberries. Just make sure to thaw and drain them first. This step helps keep the batter from becoming too wet. Frozen berries work well and still taste great in the cake. The cake lasts about 3 to 5 days at room temperature. Keep it in an airtight container to keep it fresh. If you want it to last longer, you can freeze it. It stays good for about 2 to 3 months in the freezer. The key to a fluffy pound cake is creaming the butter and sugar well. This step adds air to the batter. Also, adding eggs one at a time helps. Mixing well after each egg ensures a smooth batter. Finally, don’t overmix when adding flour; just mix until combined. This keeps the cake light and airy. In this article, we explored how to make a delicious lemon blueberry pound cake. We covered essential ingredients, with tips on selecting fresh blueberries and decoration ideas. You learned step-by-step instructions, from prepping to baking. I shared tips for a moist cake and common mistakes to avoid. We also discussed fun variations, storage tips, and answered common FAQs. Remember, baking is fun! Enjoy experimenting with flavors and sharing your cake with others.
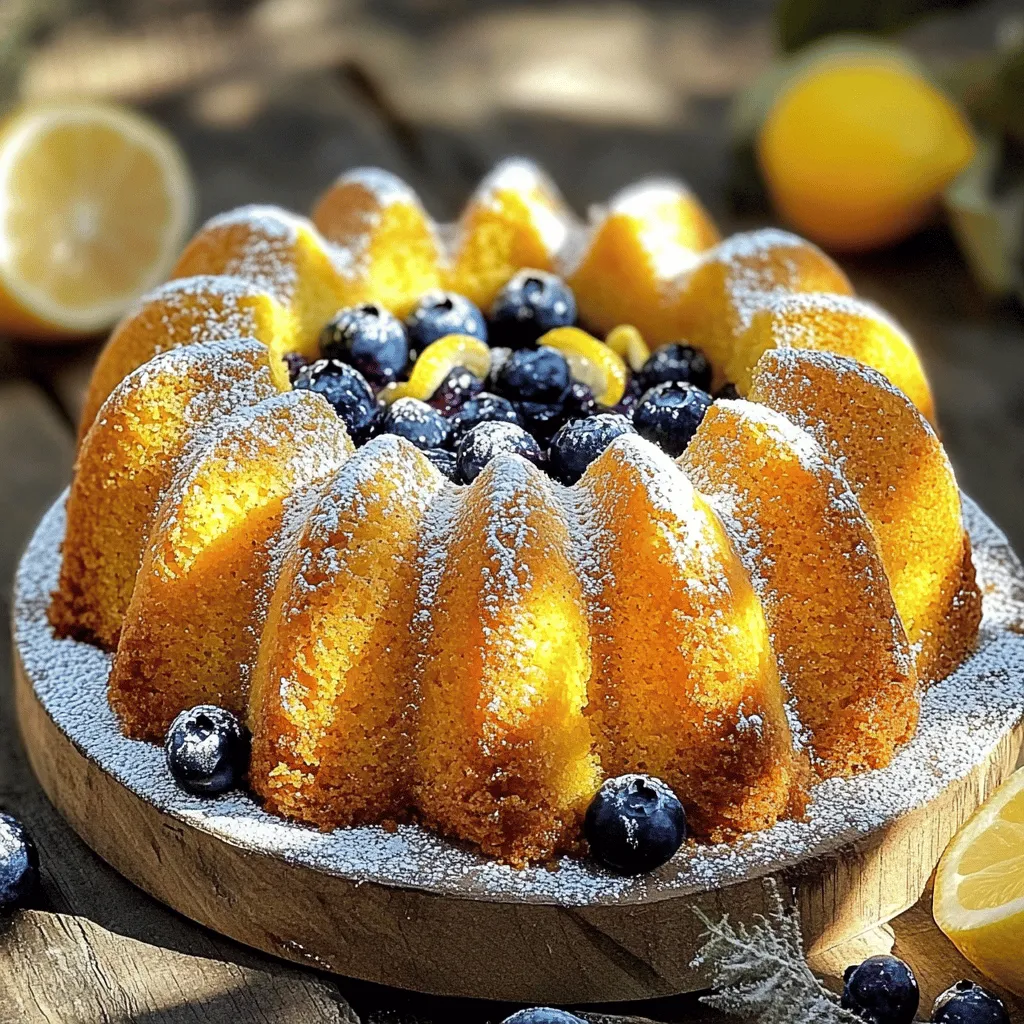
Lemon Blueberry Pound Cake Fresh and Flavorful Treat
Are you ready to bake a delicious Lemon Blueberry Pound Cake? This treat bursts with fresh flavors that brighten any day. I’ll share the best
Frosted pumpkin bars need simple, yet key ingredients. Here’s what you will use: - 1 cup canned pumpkin puree - 1 cup granulated sugar - 1/2 cup vegetable oil - 2 large eggs - 1 teaspoon vanilla extract - 1 1/2 cups all-purpose flour - 1 teaspoon baking powder - 1 teaspoon baking soda - 1 teaspoon ground cinnamon - 1/2 teaspoon ground nutmeg - 1/4 teaspoon ground ginger - 1/4 teaspoon salt These items create a rich, moist dessert that is perfect for fall. You can easily swap some ingredients for dietary needs: - Pumpkin puree: Use homemade pumpkin puree or other squash. - Sugar: Try coconut sugar or maple syrup for a healthier option. - Vegetable oil: Use melted coconut oil or applesauce for less fat. - Eggs: Substitute with flaxseed meal mixed with water for a vegan option. - Flour: Choose gluten-free flour blend for gluten-sensitive folks. These swaps help everyone enjoy the bars. Frosting adds a creamy touch to the bars. Here’s what you will need: - 6 oz cream cheese, softened - 1/4 cup unsalted butter, softened - 2 cups powdered sugar - 1 teaspoon vanilla extract - 1 tablespoon milk (as needed for consistency) This mix creates a smooth, sweet topping that pairs perfectly with pumpkin. Start by preheating your oven to 350°F (175°C). While it warms up, grease a 9x13 inch baking pan. Use parchment paper to line the pan, letting it hang over the edges. This helps you lift the bars out later. In a big mixing bowl, combine 1 cup of canned pumpkin puree, 1 cup of granulated sugar, and 1/2 cup of vegetable oil. Crack in 2 large eggs and add 1 teaspoon of vanilla extract. Mix these ingredients well until they are smooth. In another bowl, whisk together 1 1/2 cups of all-purpose flour, 1 teaspoon of baking powder, 1 teaspoon of baking soda, 1 teaspoon of ground cinnamon, 1/2 teaspoon of ground nutmeg, 1/4 teaspoon of ground ginger, and 1/4 teaspoon of salt. Now, pour the dry mix into the wet mix. Stir gently until just combined. Be careful not to mix too much. Pour the batter into your prepared baking pan. Spread it evenly with a spatula. Place the pan in your preheated oven and bake for 25 to 30 minutes. You can check if they are done by inserting a toothpick in the center. If it comes out clean, they are ready. Once baked, take the pan out of the oven. Let it cool for about 10 minutes. Use the parchment paper to lift the bars out and cool them completely on a wire rack. For the frosting, you need 6 oz of softened cream cheese and 1/4 cup of softened unsalted butter. Beat these together in a bowl until creamy. Gradually add 2 cups of powdered sugar and 1 teaspoon of vanilla extract. Start mixing on low speed. Once mixed, increase the speed to make it fluffy. If the frosting feels too thick, add 1 tablespoon of milk at a time. Keep mixing until you reach the right consistency. Once your pumpkin bars are cool, spread the frosting evenly over the top. Cut the bars into squares and enjoy your tasty treat! To keep your pumpkin bars moist, use canned pumpkin puree. It has more water than fresh pumpkin. Mix the wet ingredients well. This helps the batter stay light. Avoid overmixing once you add the dry ingredients. Mix just until combined for the best texture. One common mistake is using too much flour. Measure your flour by scooping it and leveling it off. Another mistake is not cooling the bars before frosting. If you frost while hot, the frosting will melt. Lastly, don’t skip the spices. They add flavor that makes these bars special. For a smooth frosting, use softened cream cheese and butter. Beat them together until creamy. Add powdered sugar slowly to avoid a mess. If the frosting is too thick, add milk one tablespoon at a time. This will help you reach the perfect spreadable consistency. {{image_2}} If you need a gluten-free option, swap all-purpose flour with a gluten-free blend. Many blends work well and include a mix of rice flour and starches. Just ensure it contains xanthan gum for better texture. You can also use almond flour, but adjust the amount as it can be denser. You can spice up your pumpkin bars by adding different flavors. Try adding more spices like ground cloves or allspice for a warm touch. You can also mix in chopped nuts, like walnuts or pecans, for a crunchy bite. For a fun twist, stir in chocolate chips or butterscotch chips for added sweetness. Serve these pumpkin bars warm or chilled. They pair well with whipped cream or a scoop of vanilla ice cream. You can also drizzle some caramel sauce on top for an extra treat. For a cozy drink, enjoy them with hot apple cider or a warm cup of chai tea. To keep your frosted pumpkin bars fresh, store them in an airtight container. This helps prevent them from drying out. Place a piece of wax paper between layers if you stack them. You can also cover the pan tightly with plastic wrap. Keep the bars at room temperature for up to three days. If you want them to last longer, move to the fridge. They will stay fresh in the fridge for about a week. Freezing is a great way to keep pumpkin bars for months. First, let the bars cool completely. Cut them into squares before freezing. Wrap each square in plastic wrap, then place them in a freezer bag. Be sure to remove as much air as possible. Label the bag with the date. These bars can stay in the freezer for up to three months. When you're ready to enjoy, simply thaw them in the fridge overnight. Reheating your pumpkin bars is easy. First, take them out of the fridge or freezer. If they're frozen, let them thaw completely. You can reheat in the microwave for about 15-20 seconds. This warms them up without drying them out. If you prefer, you can also pop them in a 350°F oven for about 5-10 minutes. Check to see if they are warm throughout. Enjoy them fresh, just like when you made them! Yes, you can use fresh pumpkin. Just make sure to cook and puree it first. Fresh pumpkin adds a nice flavor. It may be a bit wetter, so adjust your dry ingredients slightly. Check your pumpkin bars with a toothpick. Insert it into the center. If it comes out clean, they are done. The edges should look set, and the center should not jiggle. Yes, you can make the frosting early. Store it in the fridge for up to three days. When ready to use, let it sit out to soften. Mix again before spreading on the bars. Use a sharp knife for clean cuts. First, let the bars cool completely. Lightly score the top into squares before cutting. This helps guide your cuts and keeps the frosting neat. Frosted pumpkin bars are a tasty treat made with simple ingredients. We covered everything from key ingredients to baking tips. You learned about ingredient swaps for diets and how to store leftovers. Remember to avoid common baking mistakes and try flavor variations to make them unique. These bars are great for sharing or enjoying with friends. Now, you are ready to bake perfect frosted pumpkin bars that everyone will love!
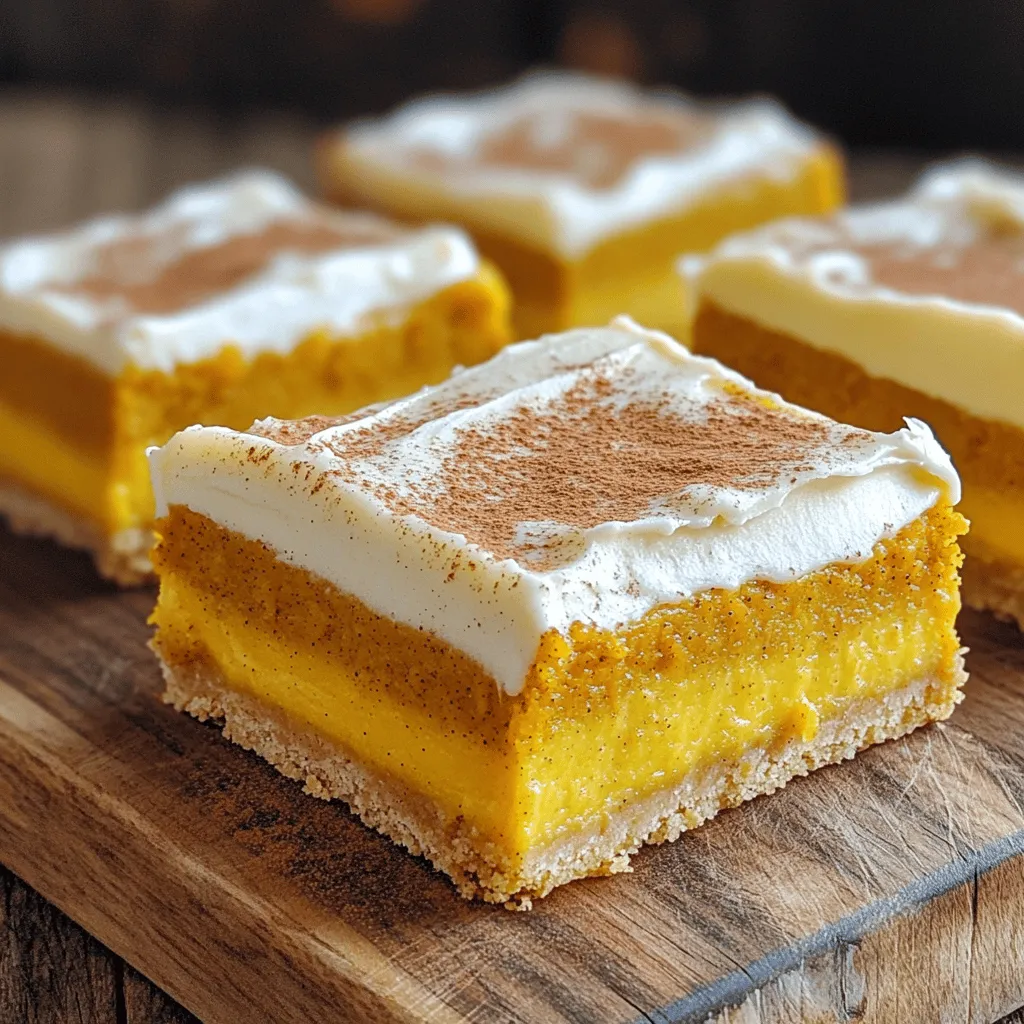
Frosted Pumpkin Bars Rich and Moist Dessert Delight
Get ready to indulge in a treat that captures the essence of fall! My Frosted Pumpkin Bars are rich, moist, and bursting with flavor. These
- 4 cups all-purpose flour - 2 teaspoons active dry yeast - 1/4 cup granulated sugar - 1 teaspoon salt - 1 tablespoon pumpkin pie spice - 1 cup warm milk - 1/2 cup unsalted butter - 1 cup pure pumpkin puree - 1 large egg - 1/2 cup brown sugar - 1 teaspoon cinnamon - 1/4 cup chopped pecans - 1/4 cup powdered sugar - 1-2 tablespoons milk for glaze Each ingredient plays a key role in making pumpkin spice pull-apart bread deliciously soft. The all-purpose flour forms the base for the dough, giving it structure. Active dry yeast helps the bread rise, creating that fluffy texture we love. Granulated sugar and brown sugar add sweetness and moisture. Pumpkin pie spice brings warmth and flavor, making every bite comforting. Warm milk activates the yeast, while melted butter adds richness. Pure pumpkin puree not only provides flavor but also ensures the bread stays moist. The egg helps bind everything together. If you want extra flavor or crunch, consider adding cinnamon and chopped pecans. A glaze made from powdered sugar and milk adds a sweet finish. You can mix and match these ingredients to suit your taste. Enjoy the process of creating this delightful treat! - Combine warm milk, sugar, and yeast in a small bowl. - Let it sit for 5-10 minutes until frothy. This step wakes up the yeast. A frothy mix shows that the yeast is active and ready to help your bread rise. - In a large bowl, mix flour, salt, and pumpkin pie spice. - Create a well in the center. Add the yeast mixture, melted butter, pumpkin puree, and egg. - Mix until a shaggy dough forms. - Transfer the dough to a floured surface. Knead for 5-7 minutes until smooth. This helps develop gluten, making the bread soft. - In a small bowl, prepare your cinnamon-sugar filling. Mix brown sugar, cinnamon, and chopped pecans if you like. - Roll out the dough into a large rectangle, about 12x18 inches. Brush the surface with melted butter. - Sprinkle the cinnamon-sugar mixture evenly over the dough. Cut the dough into six strips, then cut each strip into quarters. Stack these squares on top of each other. - Place the stack in a greased loaf pan. This shape helps create those lovely pull-apart layers. - Preheat your oven to 350°F (175°C). - Bake the pull-apart bread for 30-35 minutes. Look for a golden brown color. When tapped, it should sound hollow. - While the bread bakes, prepare the glaze. Whisk together powdered sugar and milk until smooth. - Once the bread cools for about 10 minutes, drizzle the glaze over it. This adds a sweet finish to your warm bread. To make perfect dough, you need warm milk. It should be about 110°F. This helps wake up the yeast. Mix warm milk, sugar, and yeast in a bowl. Let it sit for 5-10 minutes. You want it to be frothy. This means the yeast is ready to work. Kneading is key for good bread. After mixing your ingredients, knead the dough for 5-7 minutes. This builds the gluten. A strong gluten will help your bread rise and stay soft. Keep your surface lightly floured to prevent sticking. When baking, always check for doneness. To do this, tap the bread. If it sounds hollow, it’s done. The color matters too. Aim for a rich golden brown. This shows it baked well and has flavor. To achieve that golden crust, brush the top with melted butter before baking. This adds color and flavor. You can also place the bread on a middle rack. This ensures even heat circulation. Presentation makes a big difference. Serve the bread warm. Let guests pull apart their pieces. It’s fun and interactive! You can dust it with extra powdered sugar for a nice touch. Pair this bread with coffee or tea. The warm spices blend well with these drinks. It makes your gathering feel cozy and inviting. {{image_2}} You can spice up your pumpkin spice pull-apart bread. Try adding nutmeg or ginger for a warm kick. These spices enhance the flavor and make it more exciting. You can also mix in walnuts or almonds. Nuts give a nice crunch and add texture. They can make the bread even more satisfying. If you need a gluten-free version, use gluten-free flour instead of all-purpose flour. This swap works well and keeps the bread light and tasty. For a dairy-free option, use plant-based milk like almond or oat milk. These simple changes let everyone enjoy this bread without worry. Want to get creative? Add chocolate chips for a sweet twist that kids love. They melt and create little pockets of sweetness. You could also try making a cinnamon roll version. Roll the dough like a cinnamon roll, and bake it in a round pan. This twist adds fun and is perfect for brunch gatherings. Enjoy these variations and make this bread your own! To keep your pumpkin spice pull-apart bread at room temperature, wrap it tightly in plastic wrap. This method helps keep the bread soft and moist. You can also store it in an airtight container. Make sure to place the bread in a cool, dry area. Avoid direct sunlight or heat, as this can dry it out. For the best taste, eat it within three days. If you want to save bread for later, freezing is a great option. First, slice the bread or leave it whole. Wrap it well in plastic wrap, then place it in a freezer bag. Remove as much air as you can to avoid freezer burn. This bread can last for up to three months in the freezer. To thaw, move it to the fridge overnight. For a warm treat, reheat the slices in the oven at 350°F for 10-15 minutes. Got leftover bread? Don’t let it go to waste! You can turn it into tasty bread pudding. Just cube the bread and mix it with eggs, milk, and spices. Bake until set, and you'll have a new dessert. Another fun idea is to make French toast. Dip slices in an egg mixture and cook them in a skillet. Serve with syrup or fresh fruit for a delightful breakfast. Pumpkin spice pull-apart bread stays fresh for about 2-3 days at room temperature. To keep it longer, wrap it tightly in plastic wrap. Store it in an airtight container. This helps keep the bread soft and moist. If you want to keep it even longer, freeze it. Wrap the bread well and store it in the freezer. It can last for about 2-3 months. When you're ready to eat, thaw it overnight in the fridge. Yes, you can make pumpkin spice pull-apart bread gluten-free! Use a gluten-free all-purpose flour blend. Make sure it has xanthan gum in it, which helps with texture. You may need to adjust the liquid in the recipe. Gluten-free flours can absorb more moisture. Start with the same amount of milk, then add more if needed to form a soft dough. If you don't have pumpkin puree, you can use applesauce or mashed sweet potatoes. Both options give a nice flavor and moisture. You can also use butternut squash puree, as it has a similar taste. If you make your own puree, cook and blend the pumpkin or squash until smooth. Make sure it's not too watery! To make your bread less sweet, reduce the sugar in the recipe. You can cut the granulated sugar down to 2 tablespoons. For the brown sugar, you can also lower it to 1/4 cup. Taste your filling mix before adding it to the dough. This way, you can adjust the sweetness to your liking. Remember, the glaze adds extra sweetness, so you may want to skip it or use less. Yes, you can use instant yeast instead of active dry yeast. Instant yeast does not need to be activated in warm milk. Just mix it with your dry ingredients. Use the same amount of instant yeast as active dry yeast. Your dough may rise a little faster, so keep an eye on it. This can save you some time in your baking process! You now know how to make delicious pumpkin spice pull-apart bread. We covered all the key ingredients, mixed and kneaded the dough, and baked it to perfection. You learned tips for variations and how to store your bread for later enjoyment. Keep experimenting with flavors and adjustments to make it your own. Enjoy sharing this treat with others or savoring it yourself. This bread can warm up any occasion and bring joy to your kitchen!
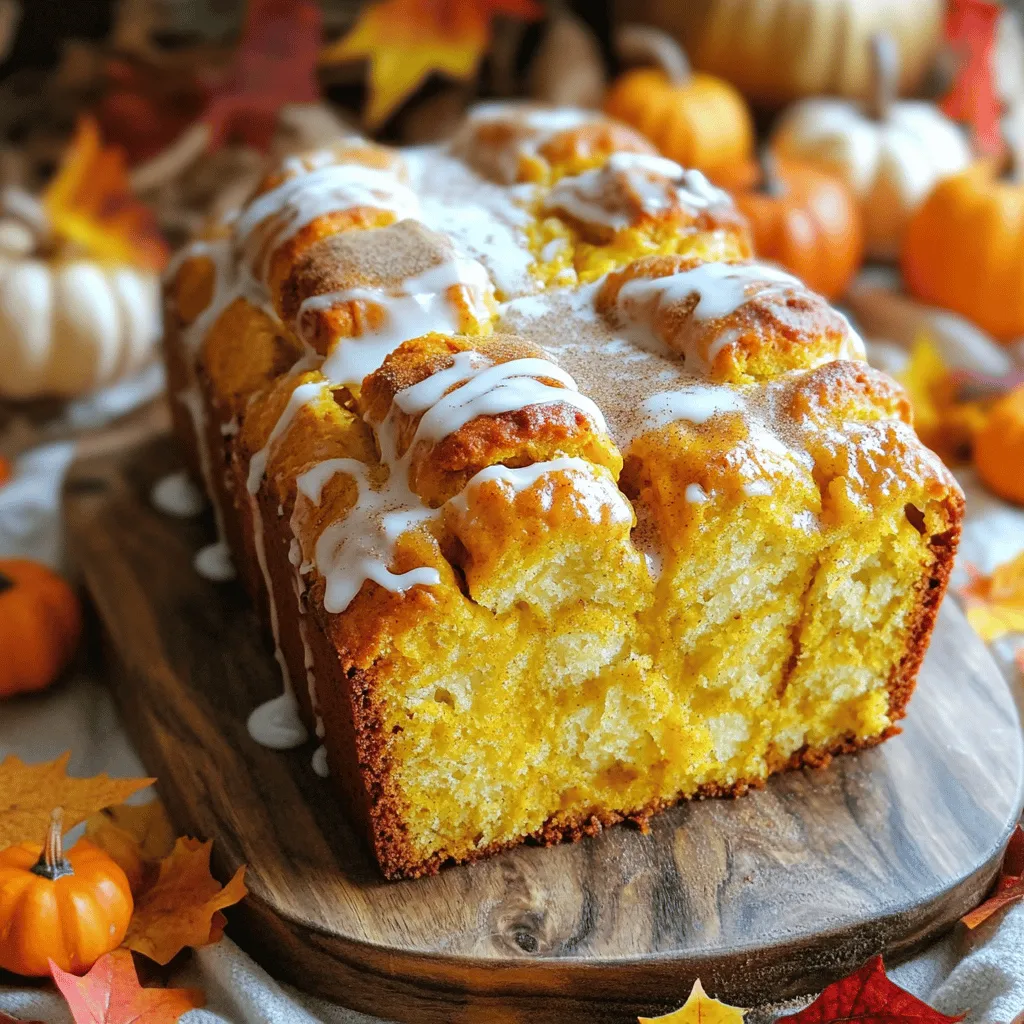
Pumpkin Spice Pull-Apart Bread Irresistibly Soft Treat
Are you ready for fall’s coziest treat? This Pumpkin Spice Pull-Apart Bread is soft, warm, and bursting with flavor. Imagine flavors of pumpkin, warm spices,
To make Funfetti Cookie Dough Dip, gather these items: - 1 cup all-purpose flour, heat-treated - 1/2 cup unsalted butter, softened - 1/2 cup brown sugar, packed - 1/4 cup granulated sugar - 1 teaspoon vanilla extract - 1/2 cup cream cheese, softened - 1/2 cup mini chocolate chips - 1/2 cup rainbow sprinkles - 1/4 cup milk (adjust for desired consistency) You need heat-treated flour to make this dip safe. Raw flour can contain harmful bacteria. Heating it kills any germs. To heat-treat flour at home, microwave it in 30-second bursts for about 1.5 minutes. This step ensures your dip is safe and delicious. Always let the flour cool before mixing it in. You can easily make this dip vegan or dairy-free. Here are some swaps: - Use plant-based butter instead of unsalted butter. - Replace cream cheese with a dairy-free cream cheese. - For milk, use almond, soy, or coconut milk. These changes keep the fun and flavor while making it suitable for everyone. Enjoy your tasty dip! First, you need to prepare the flour. I heat the all-purpose flour in a microwave-safe bowl. I do this in 30-second intervals for a total of 1.5 minutes. This step is key to killing any bacteria. After heating, let it cool down before using it. Next, I cream together the softened butter, brown sugar, and granulated sugar. I use a hand mixer for this. I mix until the blend is light and fluffy. It should take a few minutes to get the right texture. This step adds air, which makes the dip light. Now, I add the softened cream cheese and vanilla extract into the bowl. I mix until everything is well combined. Then, I gradually add the cooled flour. I mix until it forms a dough-like consistency. If it feels too thick, I add a splash of milk. This helps reach the creamy dip texture. After that, I fold in the mini chocolate chips and rainbow sprinkles. I make sure they are evenly spread throughout the dip. This adds fun colors and sweet bites. It’s the best part, making the dip look so festive! Finally, I transfer the cookie dough dip to a serving bowl. I chill it in the fridge for 30 minutes. This helps the flavors blend well. You can also serve it right away if you can't wait! For serving, I love using dippers like graham crackers, apple slices, or pretzel sticks. A few extra sprinkles on top make it look even better! One mistake is not heat-treating the flour. Raw flour can have germs. Heat it in the microwave for 1.5 minutes. This step keeps your dip safe. Another error is overmixing the dough. Mix just until you see no dry flour. This keeps the dip creamy and smooth. Lastly, don’t skip chilling the dip. Chilling helps the flavors blend well. If your dip is too thick, add milk gradually. Start with a tablespoon. Mix it in and check the texture. You want it to be creamy, not runny. If it’s too thin, add more flour. Just a little at a time will help. The right consistency makes it easy to dip. To wow your guests, serve the dip in a fun bowl. Use a colorful bowl to match the sprinkles. Add a sprinkle of extra rainbow sprinkles on top. This makes it look festive! Offer a variety of dippers like graham crackers, apple slices, and pretzel sticks. Each dipper adds a new flavor and crunch. Arrange them nicely around the bowl for a great look. Enjoy your tasty treat! {{image_2}} You can give your Funfetti Cookie Dough Dip a fun twist. Try adding chocolate or peanut butter. For a chocolate version, mix in 1/2 cup of cocoa powder. This gives a rich, sweet taste. For peanut butter lovers, add 1/2 cup of creamy peanut butter. The dip becomes smooth and nutty. Both options make the dip more exciting! Seasonal sprinkles can change the look of your dip. For Halloween, add orange and black sprinkles. For Christmas, use red and green ones. These sprinkles not only taste good but also look festive. They make the dip fun for any holiday party. You can even match sprinkles to your party theme! You can make this dip healthier, too. Use less sugar to cut calories. Try 1/4 cup of brown sugar and 2 tablespoons of maple syrup. This keeps the sweetness but lowers the sugar. You can also swap cream cheese for Greek yogurt. This adds protein and makes the dip lighter. Enjoy your tasty treat with fewer calories! After you enjoy your Funfetti cookie dough dip, you may have some leftover. To store it, place the dip in an airtight container. This helps keep it fresh. Make sure to put it in the fridge right away. The cold helps maintain its flavor and texture. It’s best to eat it within five days. You can freeze the dip if you want to save it longer. Use a freezer-safe container. Leave some space at the top because it will expand when frozen. When you want to eat it, move it to the fridge to thaw overnight. You can also warm it gently in the microwave. Just be careful not to overheat it. The dip lasts about five days in the fridge. If you freeze it, it can last up to three months. To keep it fresh longer, avoid using utensils that are not clean. This prevents bacteria from getting in. If you see any change in color or smell, it's best to throw it out. No, you should not eat raw flour. Raw flour can contain harmful bacteria. To make it safe, heat-treat the flour first. This kills any germs and makes it safe for eating. You can keep the dip in the fridge for about 5 days. Store it in an airtight container. This helps keep it fresh and tasty for your next snack. You can serve this dip with many fun dippers. Good options include: - Graham crackers - Apple slices - Pretzel sticks - Vanilla wafers These dippers pair well with the sweet flavors of the dip. Yes, this recipe is very kid-friendly. Kids love the sweet flavors and colorful sprinkles. Plus, they can help mix the ingredients. Just make sure to supervise them when using the mixer. Yes, you can make a vegan version of this dip. Use vegan butter and dairy-free cream cheese. You can also swap the milk for a plant-based option. This way, everyone can enjoy it! In this article, we explored how to make a delightful Funfetti Cookie Dough Dip. We discussed key ingredients, like heat-treated flour, and suggested easy swaps for vegan options. You learned step-by-step instructions to create the right texture and add fun extras. We shared tips to avoid common mistakes and presented creative serving ideas. Lastly, we covered variations, storage tips, and answered your frequently asked questions. I hope you’re excited to try this sweet treat. It’s simple, fun, and perfect for sharing!
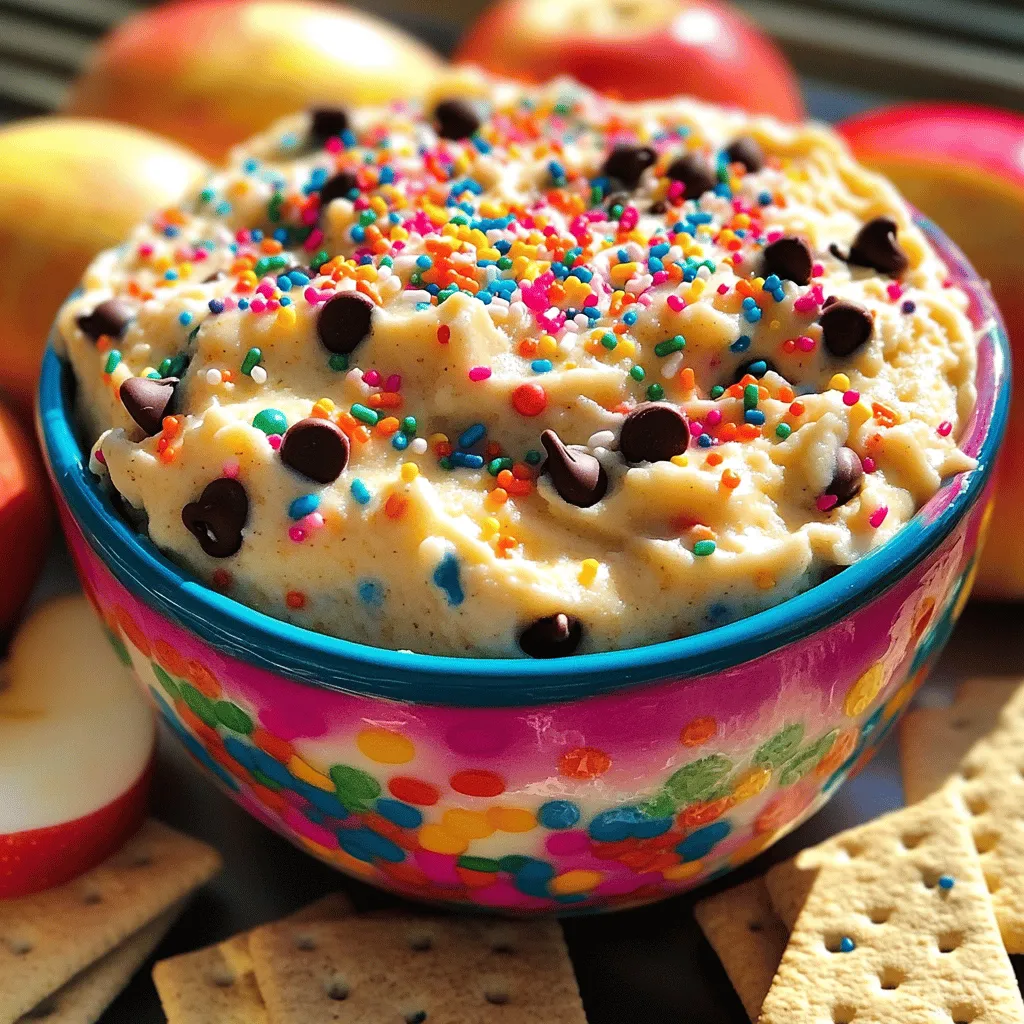
Funfetti Cookie Dough Dip Tasty and Simple Treat
Are you ready for a sweet treat that hits all the right spots? Funfetti Cookie Dough Dip is not just fun—it’s simple, tasty, and perfect
To make these No-Bake Oreo Cheesecake Bars, gather the following ingredients: - 24 Oreo cookies, crushed - 4 tablespoons unsalted butter, melted - 16 oz cream cheese, softened - 1 cup powdered sugar - 2 teaspoons vanilla extract - 1 cup heavy whipping cream - ½ cup mini chocolate chips (optional) - Additional crushed Oreos for topping These ingredients create a rich and creamy treat, perfect for any occasion. The crushed Oreos form a yummy crust that pairs well with the smooth cheesecake filling. The heavy cream adds a light texture, making each bite a delight. If you want a bit of fun, throw in some mini chocolate chips for extra sweetness. You can also sprinkle more crushed Oreos on top for added crunch. With these simple ingredients, you can whip up a dessert that everyone will love! To start, grab a medium mixing bowl. Add the crushed Oreo cookies along with the melted butter. Mix them well until you see the crumbs fully coated. This step gives your crust a rich flavor. Next, take a 9x9-inch baking dish. Press the Oreo mixture into the bottom firmly. Use the back of a measuring cup or your hands to pack it tightly. Make sure it covers the entire base. Once done, place it in the fridge. This helps the crust set while you work on the filling. Now, let’s prepare the cheesecake filling. In a large mixing bowl, beat the softened cream cheese. Use an electric mixer until it’s smooth and creamy. Then, slowly add the powdered sugar and vanilla extract. Mix until everything is fluffy and well blended. In another bowl, whip the heavy cream until stiff peaks form. This gives your cheesecake a light texture. After that, gently fold the whipped cream into the cream cheese mixture. Be careful not to deflate the whipped cream. This keeps your cheesecake light and airy. If you like, you can fold in mini chocolate chips for extra flavor. To get a smooth filling, start with cream cheese at room temperature. Cold cream cheese can make lumps in your mix. Let it sit out for at least 30 minutes. When mixing, use an electric mixer to beat the cream cheese until it is creamy. This step helps create a nice base. When you add whipped cream, use a folding technique. This means gently mixing the whipped cream into the cream cheese. Do not stir too hard. You want to keep air in the whipped cream for a light texture. You can change the cookie base for fun flavors. Try using chocolate cookies or even graham crackers. Each type gives a new taste to your bars. You can also use flavor extracts to boost the taste. Almond or mint extract can add a nice twist. Just use a little, about half a teaspoon, for a big impact. Chilling time is key to a good cheesecake bar. After you assemble the bars, chill them for at least 4 hours. This helps the filling set well. For the best results, chill them overnight. This gives the flavors time to mix and the bars a firm texture. Enjoy the wait; the treat will be worth it! {{image_2}} To make Chocolate Oreo Cheesecake Bars, add cocoa powder to the filling. Use ¼ cup of cocoa powder for a rich taste. This change gives a deep chocolate flavor that pairs well with Oreos. For toppings, try drizzling melted chocolate or using chocolate shavings. You can also add mini chocolate chips for extra crunch. These small changes can elevate your bars to a whole new level of deliciousness. If you want individual servings, try making Mini Cheesecake Cups. Use a muffin tin lined with cupcake liners. Press the Oreo crust mixture into each liner. You will need to adjust the chilling time. Mini cups set faster, usually in about 2 to 3 hours. They are perfect for parties or gatherings where everyone wants their own treat! For gluten-free options, swap regular Oreos with gluten-free cookies. Brands like Glutino or K-Toos work well and taste great. Make sure to check the labels for gluten-free certification. This adjustment keeps the recipe safe for those with gluten allergies. You might also need to use gluten-free powdered sugar, though most are already gluten-free. These small swaps let everyone enjoy cheesecake bars! Store your No-Bake Oreo Cheesecake Bars in an airtight container. This keeps them fresh and tasty. You can keep them in the fridge for up to five days. Make sure to place a piece of parchment paper between the bars and the lid. This helps avoid sticking. To freeze your cheesecake bars, cut them into squares first. Wrap each square in plastic wrap. Then, place them in a freezer-safe bag or container. This keeps them safe from freezer burn. You can freeze them for up to three months. When you're ready to enjoy them, take them out of the freezer. Thaw them in the fridge for a few hours. This way, they keep their creamy texture. Avoid thawing at room temperature, as it may change the texture. Enjoy your delicious treat whenever you want! Yes, you can use light cream cheese. It will make the bars lower in fat. However, the texture may be a bit softer. This can change how the bars set. For the best results, stick with regular cream cheese if possible. It gives the bars a richer taste and a firmer texture. These cheesecake bars can last up to five days in the fridge. Store them in an airtight container. This keeps them fresh and tasty. If you want to enjoy them longer, consider freezing. Just slice them first, then wrap each piece tightly before freezing. Absolutely! You can use different cookies for the crust. Some tasty options include chocolate chip cookies or graham crackers. Each choice gives a unique flavor. Chocolate chip cookies add sweetness, while graham crackers offer a classic taste. Experiment to find your favorite! This blog post covered all you need to make delicious Oreo cheesecake bars. We discussed key ingredients, step-by-step instructions, and handy tips to ensure a smooth filling. You can even explore fun variations like mini cups or gluten-free options. Remember proper storage to keep your treats fresh and tasty. Enjoy sharing this easy dessert with friends and family. With just a few steps, you can create a sweet treat everyone loves. Happy baking!
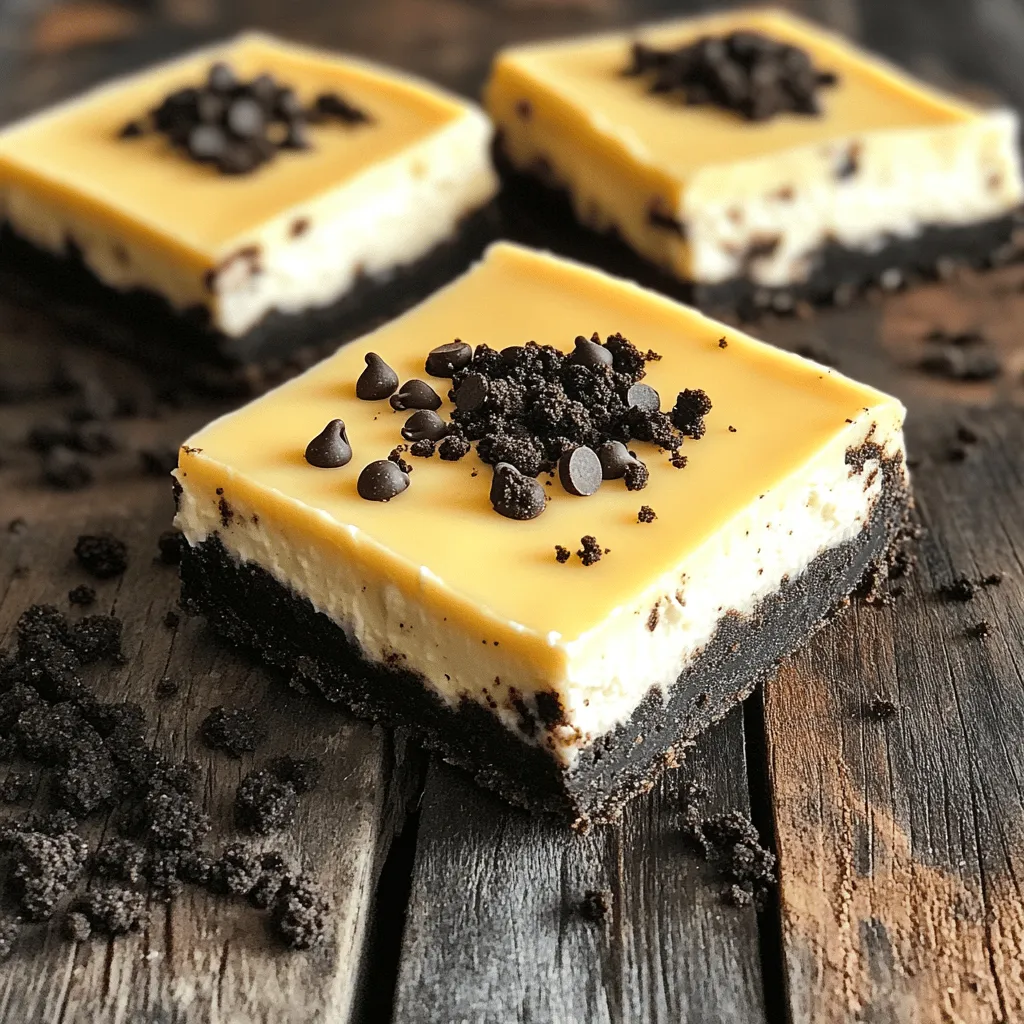
No-Bake Oreo Cheesecake Bars Simple and Delicious Treat
Craving a sweet treat that’s easy to make? This No-Bake Oreo Cheesecake Bars recipe has you covered. With just a few simple ingredients, you can
- 1 cup self-rising flour - 1 cup plain Greek yogurt When making these donuts, precise measurements are key. I recommend using a dry measuring cup for both the flour and yogurt. This helps ensure your donuts rise well and stay fluffy. To measure flour, spoon it into the cup without packing it down. Use a knife to level it off for accuracy. For yogurt, scoop it directly into the measuring cup, packing it lightly but not too tight. If you adjust the recipe, remember that too much flour can make the donuts dry. Too little can make them dense. Stick to these cup measurements for the best results. {{ingredient_image_2}} Start by preheating your oven to 350°F (175°C). This step is key to getting golden donuts. While the oven heats, prepare a baking sheet. Line it with parchment paper to stop sticking. This makes cleanup easy and ensures perfect donuts. In a large mixing bowl, combine 1 cup of self-rising flour with 1 cup of plain Greek yogurt. Use a spatula or wooden spoon to mix. Keep stirring until a sticky dough starts to form. You want it to be moist but not too wet. If it feels too dry, add a little yogurt. Next, turn the dough onto a lightly floured surface. Knead it gently for about 1-2 minutes. This helps make the dough smooth. Roll the dough out to about 1/2 inch thick. To shape your donuts, use a donut cutter or two circular cookie cutters. Cut out the larger circle and then the smaller center. Place the cut donuts on the prepared baking sheet. Leave space between each one for even baking. Now, transfer the baking sheet to your preheated oven. Bake the donuts for about 12-15 minutes. Keep an eye on them. They should turn a lovely golden brown on top. A good sign of doneness is a light spring when you touch the tops. Once baked, take them out and cool them on a wire rack. This helps maintain their fluffy texture. To make your donuts light and fluffy, stick to the right ingredient ratios. Use equal parts of self-rising flour and Greek yogurt. This balance helps create that airy texture we want. When kneading the dough, be gentle. Knead for just 1-2 minutes. Over-kneading can make your donuts tough. Make your donuts look great. After baking, dust them with powdered sugar. This adds sweetness and a nice look. You can also dip them in melted chocolate. Top with sprinkles or nuts for extra flair. Use a pretty plate to show off your tasty treats! Avoid overmixing the dough. This can lead to heavy donuts that don't rise. Mix just until combined. Another mistake is uneven baking. Make sure the donuts have space on the baking sheet. This allows hot air to flow around them, ensuring even cooking. Pro Tips Use Room Temperature Ingredients: Allow your Greek yogurt to come to room temperature before mixing. This helps create a smoother dough and ensures even baking. Don’t Overwork the Dough: Knead the dough just until it comes together. Overworking can result in dense donuts, so be gentle! Experiment with Flavors: Feel free to add spices like cinnamon or nutmeg to the dough for an extra kick. You can also mix in chocolate chips or fruit for variety. Check for Doneness: Keep an eye on your donuts in the oven. They should be golden brown on top; a toothpick inserted in the center should come out clean. {{image_4}} You can spice up your two-ingredient donuts with ease. Adding spices like cinnamon gives a warm touch. Just blend in a teaspoon or two while mixing. Want a sweeter taste? Try adding extracts like vanilla or almond. These little boosts can change the whole flavor. Different types of yogurt can change the texture. Greek yogurt makes donuts fluffy and soft. If you prefer, use regular yogurt for a lighter donut. You can also try different flours. All-purpose flour works well, but whole wheat adds a nutty flavor. Toppings can turn simple donuts into a fun treat. A quick glaze is easy to make with powdered sugar and water. For a crunch, sprinkle nuts or colorful sprinkles on top. You can even dip them in melted chocolate for extra joy. Get creative and mix and match to find your favorite! To keep your donuts fresh, store them in an airtight container. This helps prevent them from getting dry. You can also wrap them tightly in plastic wrap. The best place to store them is at room temperature. - Best storage methods: Airtight container or plastic wrap. - Optimal storage duration: They stay fresh for up to 2 days. When you want to enjoy a donut again, reheating is easy. You can use an oven or a microwave. - Techniques for reheating donuts: - Oven: Preheat it to 350°F (175°C). Place the donut on a baking sheet for about 5 minutes. - Microwave: Heat for 10-15 seconds for a quick warm-up. - Maintaining freshness: Reheat only what you plan to eat. This keeps the rest fresh for later. Two ingredient donuts are simple, quick pastries made with just self-rising flour and Greek yogurt. This easy recipe yields fluffy donuts that you can bake in your oven. You mix the flour and yogurt, shape the dough, and bake. They are a great way to enjoy fresh donuts without a lot of fuss. No, you cannot use regular flour without adjusting the recipe. Self-rising flour has baking powder and salt mixed in. If you use regular flour, you need to add those ingredients separately. For one cup of regular flour, add 1.5 teaspoons of baking powder and a pinch of salt. To make the donuts healthier, you can use low-fat Greek yogurt. You could also substitute some of the flour with whole wheat flour. Adding spices like cinnamon can enhance flavor without adding sugar. Try to keep toppings light, too. Use fresh fruit or a light drizzle of honey for sweetness. To freeze donuts, first let them cool completely. Then, place them in an airtight container or a freezer bag. Be sure to separate layers with parchment paper to avoid sticking. Frozen donuts can last up to three months. When ready to eat, thaw them at room temperature or warm them in the oven. Yes, you can add chocolate chips or fruits to the dough! Fold in about half a cup of chocolate chips or chopped fruits like blueberries or bananas. This will add flavor and texture to your donuts. Just be careful not to overmix, so the donuts stay fluffy. Making two-ingredient donuts is easy and fun. You learned about the key ingredients, like self-rising flour and Greek yogurt, and how to measure them correctly. I showed you how to mix, shape, and bake donuts. Plus, I offered tips to make them fluffy and delicious. Remember, each step matters for great results. So, get creative with flavors and toppings! Enjoy your fresh donuts today and store extras properly. Keep this guide handy for your next baking adventure.
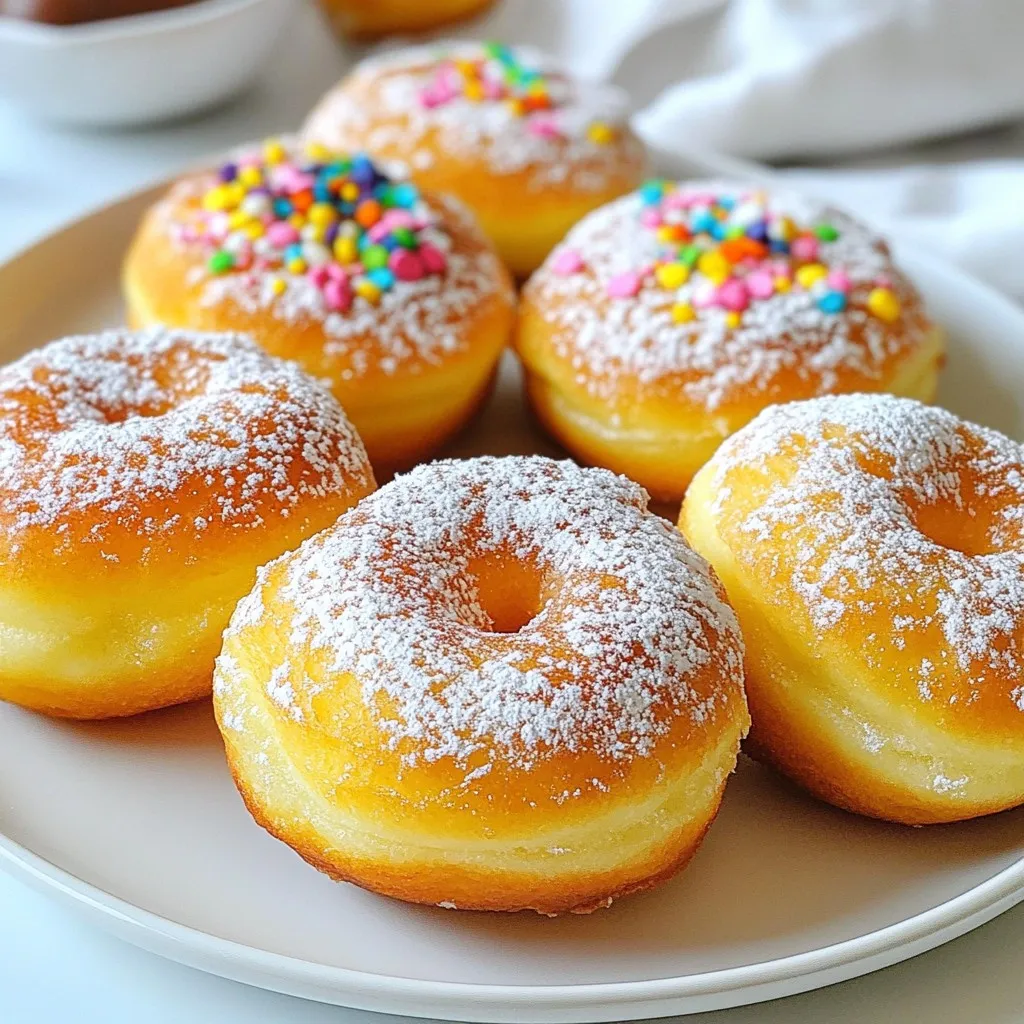
Two Ingredient Donuts Simple and Quick Recipe
If you’re craving a sweet treat but want to keep it simple, I’ve got just the recipe for you! These two-ingredient donuts are quick to
- 1 cup pure pumpkin puree - 1/2 cup brown sugar - 1/4 cup granulated sugar - 1/4 cup vegetable oil - 2 large eggs - 1 teaspoon vanilla extract - 1 1/2 cups all-purpose flour - 1 teaspoon baking powder - 1/2 teaspoon baking soda - 1 teaspoon ground cinnamon - 1/2 teaspoon ground nutmeg - 1/4 teaspoon ground ginger - 1/4 teaspoon salt - 1 cup semi-sweet chocolate chips Pumpkin chocolate chip muffins need simple, fresh ingredients. Each one plays an important role. - Pumpkin puree gives moisture and a soft texture. It also lends a warm, sweet taste. - Brown sugar adds richness, while granulated sugar brings sweetness. Together, they create a perfect balance. - Vegetable oil keeps the muffins moist. It helps them rise and stay fluffy. - Eggs bind the mix, adding air for a lighter muffin. - Vanilla extract adds a lovely flavor that pairs well with pumpkin. - All-purpose flour forms the base. It provides structure and helps the muffins hold together. - Baking powder and baking soda help the muffins rise and become light. - Spices like cinnamon, nutmeg, and ginger give warm, cozy notes. They make every bite feel special. - Salt enhances the flavors. Just a pinch makes the sweet taste pop. - Chocolate chips bring joy. They melt slightly and create little pockets of delight in each muffin. - Pumpkin puree alternatives: You can use sweet potato puree or applesauce if needed. - Sugar substitutes: Honey or maple syrup can work, but adjust the wet ingredients. - Vegetable oil options: You can use melted coconut oil or applesauce for a lighter option. These swaps help you customize your muffins while keeping them tasty and fun! 1. Preheating the oven: First, set your oven to 350°F (175°C). This temperature is perfect for baking muffins and helps them rise nicely. 2. Preparing the muffin tin: Line a muffin tin with paper liners or spray it with non-stick spray. This step makes it easy to remove the muffins later. 1. Combining wet ingredients: In a large bowl, mix 1 cup of pure pumpkin puree, 1/2 cup of brown sugar, 1/4 cup of granulated sugar, 1/4 cup of vegetable oil, 2 large eggs, and 1 teaspoon of vanilla extract. Whisk until smooth. 2. Whisking dry ingredients: In another bowl, whisk together 1 1/2 cups of all-purpose flour, 1 teaspoon of baking powder, 1/2 teaspoon of baking soda, 1 teaspoon of ground cinnamon, 1/2 teaspoon of ground nutmeg, 1/4 teaspoon of ground ginger, and 1/4 teaspoon of salt. Make sure everything is mixed well. 3. Mixing the batter: Gradually add the dry mix to the wet mix. Stir gently until just combined. Be careful not to overmix, as this can make the muffins tough. Next, fold in 1 cup of semi-sweet chocolate chips evenly throughout the batter. 1. Filling the muffin cups: Pour the batter into the prepared muffin tin. Fill each cup about 3/4 full. This gives them room to rise without overflowing. 2. Baking time and temperature: Place the muffin tin in the oven. Bake for 18-20 minutes. 3. Checking for doneness: To check if they are done, insert a toothpick into the center of a muffin. If it comes out clean, the muffins are ready. If it has batter on it, bake for a few more minutes. - Avoiding overmixing: Mix the wet and dry ingredients gently. Overmixing makes the muffins tough. Aim for a few lumps in the batter. - Perfecting the muffin texture: Use room-temperature eggs and pumpkin puree. This helps create a lighter, fluffier muffin. - Serving suggestions: Serve your muffins warm. They taste best fresh from the oven. Pair them with coffee or tea for a cozy vibe. - Garnishing ideas: Dust the muffins with powdered sugar. Add a sprig of mint on top for a nice touch. - Altitude and humidity considerations: If you live at high altitude, reduce sugar by 1 tablespoon. This helps the muffins rise better. In humid weather, add an extra tablespoon of flour. - Oven calibration tips: Every oven is different. Use an oven thermometer to check your temperature. Adjust baking time if the muffins are browning too fast or slow. {{image_2}} You can easily boost the flavor of your muffins. Here are some ideas: - Add spices: Try cloves or allspice for a warm, cozy taste. - Incorporate nuts: Chopped walnuts or pecans add a nice crunch. - Mix in dried fruits: Raisins or cranberries can bring extra sweetness. Need to adjust for special diets? Here are some simple swaps: - Gluten-free options: Use a gluten-free flour blend to keep it light. - Vegan substitutions: Swap eggs for flaxseed meal or unsweetened applesauce. Make these muffins fit any season with these twists: - Holiday spice version: Add nutmeg or cardamom for festive flair. - Different chocolate types: Use dark chocolate or white chocolate chips for a twist. To keep your pumpkin chocolate chip muffins fresh, store them in an airtight container. This helps retain moisture and keeps them soft. Place a paper towel inside the container to absorb any extra moisture. You can layer muffins between sheets of paper towels. This method prevents them from getting soggy. I recommend using plastic or glass containers with tight lids. These materials keep air out and maintain freshness. If you want to keep muffins for a few days, store them at room temperature. To freeze muffins, wait until they cool completely. This helps prevent ice crystals from forming inside. Wrap each muffin in plastic wrap. Then, place them in a freezer bag. Be sure to label the bag with the date. You can freeze muffins for up to three months. When you're ready to enjoy a muffin, take one out and let it thaw. You can leave it at room temperature for about an hour. For a quicker option, use the microwave. Heat it for about 15 to 20 seconds. This will warm it up nicely. At room temperature, these muffins last for about 3 to 5 days. You can enjoy them fresh and tasty during this time. Look for signs of spoilage like mold or an off smell. If your muffins feel dry or hard, they may not be good anymore. Always trust your senses; if something seems off, it’s best to not eat it. Can I use canned pumpkin instead of fresh? Yes, you can use canned pumpkin. It saves time and is just as tasty. Look for pure pumpkin puree, not pumpkin pie filling. This keeps your muffins rich and flavorful. How do I know when my muffins are done baking? You can check with a toothpick. Insert it into the center of a muffin. If it comes out clean or with a few crumbs, your muffins are done. They should also be golden on top. Can I make mini muffins with this recipe? Absolutely! Just fill the mini muffin cups about halfway. Bake for about 10 to 12 minutes. Keep an eye on them, as they will cook faster than regular muffins. Why are my muffins dense? Dense muffins often come from overmixing the batter. Mix just until the dry ingredients are combined. Also, check your baking powder for freshness. Old baking powder won't rise well. What to do if my muffins overflow? If your muffins overflow, they may be too full. Fill the muffin cups only three-quarters full next time. If they overflow during baking, let them cool before removing from the pan. Nutritional information per muffin Each muffin is about 165 calories. They contain 4 grams of protein and 24 grams of carbs. Enjoy the fiber from pumpkin, too! Allergen alerts for ingredients These muffins contain eggs and gluten. They also have chocolate, which may not be safe for everyone. Be cautious if you have allergies. This blog post covered a delicious pumpkin muffin recipe. We examined each ingredient and offered easy swaps. You learned step-by-step instructions for perfect muffins and helpful tips for baking success. We also explored fun variations to try. Finally, we discussed the best ways to store your muffins. Baking can be fun and rewarding. I hope you feel inspired to make these pumpkin muffins now!
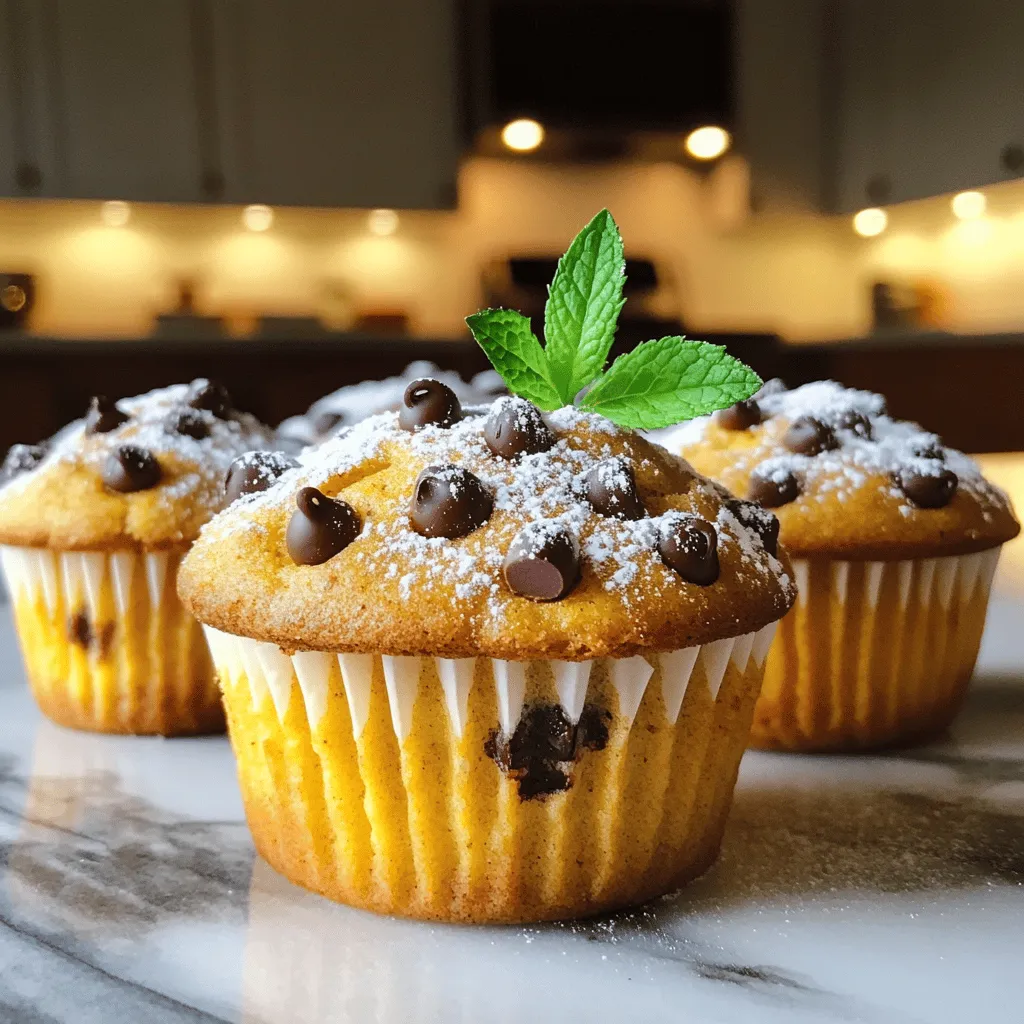
Pumpkin Chocolate Chip Muffins Irresistible Breakfast Treat
If you’re longing for a cozy and delicious way to start your day, these Pumpkin Chocolate Chip Muffins are the answer! Packed with warm spices