Breakfast

To make these roll-ups, you will need: - 6 slices of white bread (crusts removed) - 3 large eggs - 1/2 cup milk - 1 teaspoon vanilla extract - 1 teaspoon ground cinnamon - 1/4 cup sugar - 4 tablespoons butter - Maple syrup for serving - Powdered sugar for dusting (optional) These ingredients create the base for a delightful breakfast treat. The white bread becomes soft and sweet, while the eggs and milk give a rich flavor. Cinnamon adds warmth, and sugar helps with sweetness. You can get creative with different fillings and toppings. Here are some fun ideas: - Nut butter (like peanut or almond) - Cream cheese - Fruit jam - Fresh fruits (like bananas or strawberries) These fillings add extra taste and texture. You can mix and match to find your favorite combo. You will need a few key tools for this recipe: - Rolling pin - Mixing bowl - Skillet or frying pan - Whisk - Spatula Having the right equipment helps make the process smooth. A rolling pin flattens the bread, while a skillet cooks the roll-ups to a perfect golden brown. For the full recipe and instructions, check out the [Full Recipe]. First, take your six slices of white bread. Remove the crusts for a soft bite. Use a rolling pin to flatten each slice. This makes them easier to roll. Aim for about a quarter inch thickness. The thinner bread helps it cook well. Next, grab a mixing bowl. Add three large eggs to the bowl. Pour in half a cup of milk along with one teaspoon of vanilla extract. Now, add one teaspoon of ground cinnamon. Whisk this mix until it looks smooth. This will coat the rolls nicely. Now, take a slice of the flattened bread. Place one to two teaspoons of your favorite filling at one edge. You can use nut butter, cream cheese, or fruit jam. Roll the bread tightly like a burrito. Then, mix a quarter cup of sugar with the remaining cinnamon in a separate dish. Dip each roll in the egg mixture first. Make sure it’s well-coated. Then, roll it in the cinnamon-sugar mix. Heat a large skillet over medium heat. Add two tablespoons of butter until it melts. Place the roll-ups seam side down in the hot skillet. Cook for two to three minutes on each side. Look for a golden brown color and a crispy texture. Repeat this step with the rest of the butter and rolls. Once done, place the cooked roll-ups on a serving plate. You can dust them with powdered sugar if you like. Serve warm with maple syrup on the side for dipping. Enjoy the sweet, crispy goodness! For the full recipe, check the earlier section. To make the best Cinnamon French Toast Roll Ups, start with the bread. Use soft white bread for easy rolling. I recommend removing the crusts; this helps keep the roll-ups tender. Use a rolling pin to flatten each slice. This step makes the bread pliable and easy to fill. When rolling, place the filling close to one edge. Roll tightly from that edge to prevent spilling. One mistake is overfilling the roll-ups. If you add too much filling, they can burst open while cooking. Use only 1-2 teaspoons of filling. Another mistake is not coating the rolls well in egg mix. Make sure each roll is fully coated before frying. This ensures a crispy outer layer. Lastly, don’t rush the cooking process. Cooking on medium heat is key. If the heat is too high, the outside cooks too fast, leaving the inside soggy. To get that perfect crispy texture, use enough butter when cooking. Melt 2 tablespoons in the skillet for the first batch, then add the rest as needed. Also, don’t overcrowd the pan. Leave space between each roll-up so they cook evenly. Flip them gently to avoid breaking. For extra crunch, cook them a bit longer until golden brown. This will give you that nice crisp outside while keeping the inside soft and fluffy. For the complete recipe, check out the [Full Recipe]. {{image_2}} You can get creative with fillings. Here are a few ideas: - Nut butter (like peanut or almond) - Cream cheese with fruit jam - Chocolate spread with banana slices - Fresh berries with a sprinkle of sugar Try mixing some ingredients. For example, use chocolate spread and banana. It is a tasty combo. To make your roll-ups even better, think about these flavor boosts: - Add a pinch of nutmeg to the egg mixture - Use flavored milk, like vanilla or almond milk - Top with whipped cream for a special touch These small changes can create a new flavor each time. You can still enjoy this recipe if you need gluten-free or dairy-free options. Use gluten-free bread instead of white bread. For the egg mixture, swap regular milk with almond milk or oat milk. These options work well and taste great. Enjoy your roll-ups without worry. For the full recipe, check out the detailed instructions above. To store your Cinnamon French Toast Roll Ups, let them cool first. Place them in an airtight container. You can keep them in the fridge for up to three days. Make sure they are not stacked on top of each other. This keeps them from getting soggy. If you have a lot, you might want to wrap them in foil or plastic wrap before putting them in the container. When you are ready to enjoy your leftovers, reheating is easy. You can use a microwave, skillet, or oven. To microwave, place them on a plate and heat for 30 seconds. Check if they are warm. If not, heat for another 15 seconds. For a skillet, melt a bit of butter over medium heat. Cook each roll for about 1-2 minutes on each side. This gives them a nice crispy texture. If using an oven, preheat it to 350°F (175°C). Place the roll-ups on a baking sheet and heat for about 10 minutes. You can also freeze these roll-ups for later. After cooling, wrap each roll in plastic wrap. Then, place them in a freezer bag. Make sure to remove as much air as you can. They can last in the freezer for up to three months. When you want to eat them, thaw them in the fridge overnight. Then, use the reheating instructions to enjoy them again. This makes breakfast quick and easy! Be sure to check out the Full Recipe for more details. To make Cinnamon French Toast Roll Ups ahead of time, prepare the roll-ups and cook them. Allow them to cool, then store in an airtight container in the fridge. You can reheat them in a skillet or microwave when you're ready to serve. This way, you save time on busy mornings while still enjoying a tasty treat. Yes, you can use whole wheat bread instead of white bread. Whole wheat adds fiber and a nutty flavor. The roll-ups will still taste great. Just remember to flatten the bread well, as it makes rolling easier. If you want to try something new, here are some fun dipping sauces: - Chocolate sauce - Honey - Yogurt - Peanut butter - Fruit preserves These sauces can add a twist to your roll-ups and keep breakfast exciting. To make Cinnamon French Toast Roll Ups more kid-friendly, let kids choose their fillings. Options like Nutella, whipped cream cheese, or jam work well. You can also cut the roll-ups into bite-sized pieces for little hands. Adding colorful sprinkles on top can make the dish even more fun. Cinnamon French Toast Roll Ups are a fun treat to make and enjoy. We talked about the main ingredients and equipment needed. You learned step-by-step how to prepare, cook, and serve them. I shared tips to perfect the roll ups and avoid common mistakes. You can even try different fillings and options like gluten-free bread. These roll ups are great for leftovers too. Now, you can create your own delicious breakfast or snack! Enjoy the process and share the joy with family and friends.
Cinnamon French Toast Roll Ups Easy and Tasty Recipe
If you crave a fun twist on breakfast, Cinnamon French Toast Roll Ups are for you! This easy recipe brings joy to your plate with
- 6 slices of bread (white or whole grain) - 4 tablespoons butter, softened - 1 tablespoon ground cinnamon - 1/4 cup sugar - 2 large eggs - 1/4 cup milk (dairy or non-dairy) - 1 teaspoon vanilla extract - 1/4 cup cream cheese, softened - 1/4 cup powdered sugar - Syrup for serving To create these delightful roll-ups, you need a mix of simple ingredients. The bread acts as the base, while cream cheese adds richness. The cinnamon and sugar give that classic cinnamon roll flavor. With eggs and milk, you create a lovely custard that brings it all together. You can use any bread you like. White bread is soft and perfect for rolling. Whole grain offers a nuttier flavor and is a bit healthier. The butter is key. It helps cook the roll-ups and adds a nice golden crust. The cinnamon and sugar mix is what makes these roll-ups taste like a sweet treat. The eggs and milk create a rich batter for dipping. The vanilla extract adds a warm note. Cream cheese brings a creamy texture, while powdered sugar gives an extra sweet touch. Finally, don’t forget the syrup! It adds sweetness and makes these roll-ups even more fun to eat. For the full recipe, you can check out the details above. Enjoy making these tasty treats! Preparation of the Filling First, mix cream cheese with powdered sugar. Use a bowl to blend them until smooth. This will be the sweet filling. Set this aside for later use. Flattening and Filling the Bread Next, take a rolling pin to flatten each slice of bread. This helps make rolling easier. Once flattened, spread the cream cheese mixture evenly across each slice. Leave a little space at the edges, so it does not ooze out. Rolling and Cooking Now it’s time to roll! Start at one end and roll each slice tightly into a log. Make sure it is snug but not too tight. After rolling, dip each log in the egg mixture to coat it. Heat a skillet over medium heat and add butter. Place the roll-ups in the skillet and cook until golden brown on all sides. This should take about 2-3 minutes per side. Enjoy the warm, sweet aroma filling your kitchen! For the full recipe, check out the complete instructions. To make perfect cinnamon roll French toast roll-ups, flatten the bread evenly. This step helps you roll them tightly. Use a rolling pin to gently press down on each slice. Fresh ingredients also make a big difference. They boost the flavor and taste of your roll-ups. When cooking, keep the heat at medium. This prevents the roll-ups from burning too quickly. Flip them carefully to keep the filling inside. If you are gentle, your roll-ups will stay intact and look great. Serve your roll-ups with warm syrup and a dusting of powdered sugar. This adds sweetness and a nice touch. You can also pair them with fresh fruit. Berries add color and flavor, making your dish even more delightful. {{image_2}} You can make your Cinnamon Roll French Toast Roll-Ups even more fun. Try adding chocolate chips or chopped nuts to the cream cheese filling. This makes each bite a sweet treat. You can also use flavored cream cheese, like strawberry or blueberry. This twist adds fruit flavor and a nice color. If you need a gluten-free option, choose gluten-free bread. This works well and keeps the roll-ups tasty. For a vegan version, swap out the eggs. You can use a flaxseed mixture instead. Just mix one tablespoon of ground flaxseed with three tablespoons of water. Let it sit until it thickens. This will bind your roll-ups perfectly. You can serve these roll-ups in many ways. For a sweet dessert, add whipped cream on top. This makes a great finish. If you want to serve them for brunch, pair them with crispy bacon or sausage. This adds a savory touch that balances the sweetness. Each option transforms your roll-ups into a special meal. For the complete recipe, check the Full Recipe. To keep your Cinnamon Roll French Toast Roll-Ups fresh, place them in an airtight container. Store in the fridge. They taste best within 2-3 days. This helps maintain their flavor and texture. When you're ready to enjoy leftovers, warm them up. You can use a skillet or microwave. If you want them crispy again, toast them lightly. This brings back that delightful crunch we all love. Want to save some for later? You can freeze the roll-ups before cooking. Just ensure they’re wrapped well. When ready to eat, thaw them in the fridge overnight. Cook from frozen as per the Full Recipe. Enjoy them any time you crave this tasty treat! You can use mascarpone or ricotta as alternatives. Both will give a creamy texture. Mascarpone has a rich taste, while ricotta is lighter. Try them and see which one you like best. Yes, you can prepare them and refrigerate before cooking. Make the roll-ups and place them in a covered dish. They can stay in the fridge for up to a day. Just cook them when you are ready for a quick breakfast. Opt for whole grain bread and reduce sugar in the filling. Whole grain adds more fiber. You can also swap out some sugar for a natural sweetener like honey or maple syrup. This way, you keep the flavor but make it a bit better for you. Cinnamon pairs well with nutmeg or pumpkin spice for added flavor. A pinch of nutmeg gives a warm, cozy taste. If you love fall flavors, pumpkin spice can bring that right to your breakfast table. Experiment and find your perfect mix! Cinnamon Roll French Toast Roll-Ups are simple, tasty, and fun to make. Start with basic ingredients, flatten the bread, and fill it with cream cheese. Roll them up, dip in egg, and cook until golden. You can change the flavors or make them healthier. Store leftovers well and enjoy them later. With these tips, you will create a delightful dish that everyone will love. Try this recipe today and add your special touch!
Cinnamon Roll French Toast Roll-Ups Easy Breakfast Delight
Start your day with a warm hug in the form of Cinnamon Roll French Toast Roll-Ups! These simple, sweet treats combine the joy of cinnamon
- Whole grain bread - Large eggs - Shredded cheddar cheese - Butter - Salt and pepper - Paprika - Fresh chives or parsley If you want to change things up, consider these options. For bread, try white or sourdough. Gluten-free bread works well too. For cheese, mozzarella or pepper jack can add a fun twist. You can also use egg substitutes like tofu or chickpea flour if you prefer. Add depth to your toast with herbs and spices. Try adding garlic powder, onion powder, or even a dash of hot sauce. For cheese blends, mix in gouda or feta for a unique flavor. These changes can make your dish really stand out! Preheating the air fryer Start by preheating your air fryer to 350°F (175°C). This step helps the toast cook evenly and get that nice crispy texture. Buttering the bread Take your 4 slices of whole grain bread and spread a thin layer of butter on one side of each slice. This will create a golden crust when you cook it. Make sure to cover the entire surface for the best results. Arranging bread in the air fryer Place the slices of bread, buttered side up, in the air fryer basket. Do not overcrowd the basket; you may need to cook in batches if your air fryer is small. Adding eggs and cheese Now crack an egg into the center of each slice of bread. Be gentle to keep the yolk intact. Season each egg with salt, pepper, and optional paprika. Then, sprinkle a generous amount of shredded cheddar cheese over the eggs. Monitoring cooking time for desired egg doneness Cook your egg and cheese toast for about 8 to 10 minutes. Check at the 8-minute mark. If you want a runny yolk, stop there. For a firmer yolk, cook longer. Tips for batch cooking If you have more bread to cook, keep the first batch warm in an oven set to low. This way, all your toast can be served hot at the same time. Enjoy your delicious meal! For the full recipe, check out the complete guide. To get the best eggs, check the yolk consistency. If you like runny yolks, pull the toast out at 8 minutes. For firmer yolks, let it cook longer. Keep an eye on the eggs as they cook to avoid overcooked eggs. Overcooked eggs can turn rubbery fast, so timing is key. You can enhance the flavor with fun toppings. Try adding diced tomatoes, spinach, or even crispy bacon. You can also use flavored butters, like garlic or herb butter, for an extra kick. This adds layers of taste to your toast and makes each bite exciting. To prevent sticking, use parchment paper in the air fryer basket. This makes cleanup easier too. After cooking, let the basket cool down before cleaning. Use warm, soapy water to clean it well. Keeping your air fryer clean helps it last longer and cook better. For the complete cooking process, check out the Full Recipe for the Cheesy Air Fryer Egg Toast. {{image_2}} You can use many types of bread for this toast. Whole grain bread gives a nice nutty flavor and a heartier bite. It adds fiber, too. If you prefer white bread, that works great as well. It gets crispy and soft in the air fryer. For those who need gluten-free options, look for gluten-free bread. Many brands offer tasty choices that still work well with this recipe. Want to boost the nutrition? Add some veggies! Spinach is a great option. Just toss a handful on the bread before adding the egg. Tomatoes also work well. They add a fresh taste and juiciness. If you are vegan or prefer plant-based options, try plant-based cheese. There are many good brands that melt nicely and taste great, too. Let’s talk about flavor! If you like a kick, add jalapeños. They bring heat and a fun crunch. You can also try a sweet twist. Spread some mashed avocado on the bread before the egg. For a unique taste, drizzle a little maple syrup on top after cooking. It adds a nice contrast to the savory cheese and egg. Feel free to mix and match these ideas to create your perfect bite! For the full recipe, check the link. To store your leftover air fryer egg and cheese toast, wait for it to cool. Place it in an airtight container. This keeps the toast fresh and prevents it from drying out. You can store it in the fridge for up to three days. If you want to keep it longer, consider freezing it. To reheat your toast, the air fryer is your best friend. Set it to 350°F (175°C) and warm the toast for about 3-5 minutes. This method keeps the bread crispy and the cheese melty. Avoid using the microwave, as it can make the toast soggy. You can freeze prepared egg and cheese toast for later use. Make sure the toast is completely cool before wrapping it tightly in plastic wrap. Then, place it in a freezer bag. It can stay fresh for up to a month. To thaw, place it in the fridge overnight. Reheat in the air fryer as mentioned earlier for best results. Cooking Air Fryer Egg and Cheese Toast takes about 8 to 10 minutes. You should preheat your air fryer to 350°F (175°C) before cooking. This time allows the eggs to cook to your desired doneness. Check around the 8-minute mark. If you like runny yolks, pull it out then. For firmer yolks, let it cook the full 10 minutes. Yes, you can use many types of cheese! Some great options are mozzarella, gouda, or pepper jack. Each cheese gives a unique flavor. You can mix and match cheeses for added taste. Just make sure the cheese melts well for that gooey texture we all love! This toast pairs well with fresh fruit or a simple salad. You can also add crispy bacon or sausage for extra protein. A side of sliced avocado adds creaminess too. These sides make for a balanced meal and keep things tasty! Absolutely! You can make a batch of these toast slices ahead of time. Just cook them and store in the fridge. When you're ready to eat, reheat them in the air fryer for a quick meal. This way, you save time and enjoy a delicious breakfast or lunch anytime. For a busy week, this is a perfect option. Check out the Full Recipe for more details! This blog post covered making Air Fryer Egg and Cheese Toast. You learned about key ingredients, prep steps, and cooking time. We discussed substitutes, flavor variations, and important tips for great results. Use these tips to enjoy a tasty meal that fits your needs. Experiment with different ingredients and flavors to find what works best for you. Discover your favorite version of this dish, and make it again and again!
Savory Air Fryer Egg and Cheese Toast Recipe
Craving a quick and tasty breakfast? You’ll love this Savory Air Fryer Egg and Cheese Toast recipe! I’ll show you how to whip up a
To make this dish, gather these key items: - 8 slices of brioche or challah bread - 4 large eggs - 1 cup whole milk - 1 cup heavy cream - 1/2 cup granulated sugar - 2 teaspoons vanilla extract - 1 teaspoon almond extract - 1/2 teaspoon ground cinnamon - Pinch of salt - 1/4 cup brown sugar (for topping) These ingredients create a rich and creamy base that will soak into the bread. The brioche or challah provides a soft texture, while the brown sugar creates a delightful caramelized crust. You can enhance your dish with these extras: - Fresh berries - Whipped cream Adding fresh berries gives a pop of color and flavor. Whipped cream adds a light, fluffy touch that balances the sweet custard. You can easily swap some ingredients if needed: - Use almond milk instead of whole milk for a lighter option. - Substitute coconut cream for heavy cream for a dairy-free version. - Use maple syrup instead of granulated sugar for a different sweetness. These substitutions can cater to dietary needs without losing flavor. Remember, cooking is all about finding what works best for you while still enjoying the delicious results! Start by cutting the brioche or challah into thick slices. Aim for about 1 inch in thickness. This helps the bread soak up the custard well. Next, butter a 9x13 inch baking dish. Arrange the bread slices in the dish, overlapping them slightly. This creates a lovely, layered look. In a large bowl, crack open the four eggs. Add one cup of whole milk and one cup of heavy cream. Mix in half a cup of granulated sugar. Next, pour in two teaspoons of vanilla extract and one teaspoon of almond extract. Sprinkle in half a teaspoon of ground cinnamon and a pinch of salt. Whisk everything together until smooth and creamy. This custard will give your French toast that rich, decadent flavor. Now, pour the custard mixture evenly over the bread slices. Make sure all the bread gets soaked. You can press down lightly with a spatula to help the bread absorb the custard. Cover the dish with plastic wrap and place it in the fridge. Let it soak overnight or for at least four hours. This step is key; it allows the bread to soak up all that delicious flavor. For the complete experience, check out the Full Recipe for more details. To get the best custard, mix your eggs and cream well. Use whole milk and heavy cream for richness. Whisk until the mixture is smooth. This helps ensure an even texture. Let the bread soak long enough. An overnight soak works best. This allows the bread to absorb all the flavors. For a crunchy top, sprinkle brown sugar evenly before baking. Broil the French toast for a couple of minutes after baking. Watch it closely to avoid burning. You want it bubbly and golden brown. This step gives you that classic crème brûlée finish. Serve your French toast warm for the best taste. Add fresh berries and whipped cream on top. A sprinkle of powdered sugar adds a nice touch. Use a large platter for a beautiful display. This makes it look extra special for family or guests. For a fun twist, serve with maple syrup on the side. You can find the Full Recipe for more details. {{image_2}} You can make your Overnight Crème Brûlée French Toast even more exciting. Try adding fruits like bananas, strawberries, or blueberries. Just layer them between the bread slices. Nuts, like walnuts or pecans, add a nice crunch. You can also sprinkle in spices, such as nutmeg or cardamom, for a warm twist. Each choice brings a new taste to the dish. If you need dietary changes, you can still enjoy this recipe. For a gluten-free option, use gluten-free bread. Many brands make soft, tasty breads that work well. To make it dairy-free, swap whole milk and heavy cream for almond milk or coconut milk. Silken tofu can replace eggs for a vegan version. These changes keep the flavor and texture close to the original. Serving this dish can be fun and creative. You might want to drizzle maple syrup over the top for added sweetness. A sprinkle of powdered sugar can make it look fancy. Serve with yogurt or a fruit salad for a fresh touch. You can even add a scoop of ice cream for a dessert twist. Explore these options to make breakfast special! For the full recipe, check out the details above. After enjoying your Overnight Crème Brûlée French Toast, you may have some left. Store it in an airtight container. Place it in the fridge if you plan to eat it within three days. Make sure to cool it down before putting it away. This helps keep it fresh. When you are ready to eat the leftovers, reheating is easy. Preheat your oven to 350°F (175°C). Place the slices on a baking sheet. Cover them with foil to keep them moist. Heat for about 10-15 minutes. You can also use a microwave. Heat each slice for 30 seconds, checking to avoid overcooking. For short-term storage, refrigeration works best. If you want to keep the French toast longer, freezing is a good option. Wrap each slice tightly in plastic wrap, then place them in a freezer bag. This helps prevent freezer burn. When you want to eat it, defrost it in the fridge overnight before reheating. You can store Overnight Crème Brûlée French Toast in the fridge for up to three days. Make sure to cover it to keep it fresh. If you want to keep it longer, you can freeze it. Just wrap each slice well in plastic wrap and then put them in a freezer bag. This way, you can enjoy it later! Yes, you can make this recipe without eggs. You can use a mix of ground flaxseed and water as an egg substitute. For each egg, mix 1 tablespoon of ground flaxseed with 2.5 tablespoons of water. Let it sit for about five minutes until it becomes thick. You can also use silken tofu blended until smooth or unsweetened applesauce. These choices work well to create a custard-like texture. The best way to serve Overnight Crème Brûlée French Toast is warm. Top it with fresh berries and a dollop of whipped cream for a burst of flavor. You can also drizzle some maple syrup for extra sweetness. For a fun twist, serve it with a sprinkle of powdered sugar or a scoop of ice cream! If you want to impress guests, consider garnishing with mint leaves for a pop of color. To find the full recipe, check the details above. Overnight Crème Brûlée French Toast is a delightful dish made with simple ingredients. We covered what you need, how to prepare it, and tips for a perfect texture. Various options allow you to customize flavors and meet dietary needs. Storing leftovers properly ensures you can enjoy it later. This recipe is easy and fun to make, perfect for brunch or a special treat. With these steps and suggestions, you can impress anyone who tries it. Give it a go, and enjoy every tasty bite!
Overnight Crème Brûlée French Toast Simple Delight
Are you craving a sweet and creamy breakfast treat? Look no further! My Overnight Crème Brûlée French Toast is a simple delight that transforms ordinary
- 1 tube of crescent roll dough - 1 pound breakfast sausage (your choice: spicy or mild) - 1 cup shredded cheddar cheese - 1/2 teaspoon garlic powder - 1/2 teaspoon onion powder - 1/4 teaspoon black pepper - Fresh chives, finely chopped To make breakfast sausage crescent rolls, you need a few key ingredients. First, grab a tube of crescent roll dough. This dough gives the rolls their flaky texture. Next, choose one pound of breakfast sausage. You can go for spicy or mild, based on your taste. Then, don’t forget the cheese! A cup of shredded cheddar cheese adds great flavor and a nice melt. Now let’s talk seasonings. A little garlic powder, onion powder, and black pepper can really boost the taste of the sausage. These spices add depth and warmth to your dish. Lastly, if you want to take it up a notch, fresh chives make a lovely garnish. They add a pop of color and a mild onion flavor. You can find all these ingredients in your local store. For the full recipe, check out the details in the previous section. - Preheat your oven to 375°F (190°C). This step is key for a perfect bake. - In a skillet, cook the breakfast sausage over medium heat. Break it up as it cooks. You want it nice and brown. Drain any extra grease. - Add garlic powder, onion powder, and black pepper to the sausage. Stir well to mix. Then, take it off the heat. - Unroll the tube of crescent roll dough on a clean surface. - Carefully separate the dough into the pre-scored triangles. - On the wide end of each triangle, spoon about a tablespoon of the cooked sausage. - Sprinkle a little cheddar cheese over the sausage. - Starting from the wide end, roll the crescent dough over the filling. Pinch the sides to seal them well. - Place the rolled crescents on a baking sheet lined with parchment paper. - In a small bowl, beat the egg. Brush it over the tops of the crescent rolls. This gives them a nice golden finish. - Bake in your preheated oven for about 12-15 minutes. Look for that golden brown color. - Once baked, remove them from the oven. Let them cool for a bit before serving. If you want, garnish with fresh chives. For the full recipe, check the details above. Enjoy your tasty breakfast sausage crescent rolls! To handle crescent dough well, keep it cold. Cold dough is easier to roll. Work quickly but carefully. If the dough gets warm, put it in the fridge for a few minutes. This helps keep the shape when baking. Also, use a clean, flat surface to roll it out. This will make it easier to separate the triangles and fill them. For even cooking, use medium heat. Break the sausage into small pieces as it cooks. This ensures all parts cook through. Stir often to avoid burning. Once browned, drain excess fat. This keeps your rolls from becoming greasy. Mix in the spices while the sausage is still hot. This helps the flavors blend well. To get a golden finish, use an egg wash. Beat one egg in a small bowl. Brush it lightly over the tops of the crescent rolls. This adds a nice sheen and color. Make sure to cover all areas for even coloring. If you want a richer color, let them bake a bit longer, but watch closely to avoid burning. {{image_2}} You can switch out the cheddar cheese for other tasty types. Try using mozzarella for a milder taste. Pepper jack adds a spicy twist. You can even mix cheeses for a unique flavor. Each choice gives a new texture and taste. Want a kick? Add jalapeños to the sausage mix. You can also try red pepper flakes or hot sauce. These spices boost the flavor and make each bite exciting. Adjust the amount based on your heat preference. Enjoy the added warmth in every roll! For a meat-free breakfast, use plant-based sausage. Many brands offer great flavors that mimic real sausage. Cook it the same way as regular sausage. You can still use all the same spices and cheese. This option is perfect for those who want a lighter meal. It keeps the dish delicious and satisfying. To store your cooked crescent rolls, wait until they cool down. Place them in an airtight container. This helps keep them fresh. You can store them in the fridge for up to three days. If you want to keep them longer, consider freezing. To reheat your crescent rolls, the oven is best. Preheat the oven to 350°F (175°C). Place the rolls on a baking sheet. Heat them for about 10 minutes. This keeps them warm and crisp. You can also use a microwave. If you do, heat them in 15-second intervals. Just know they won’t get as crispy. To freeze uncooked crescent rolls, prepare them as normal. After rolling, place them on a baking sheet. Freeze them for about an hour until firm. Then, transfer them to a freezer bag. For cooked rolls, let them cool completely. Wrap each roll in plastic wrap. Then, place them in a freezer bag. They can last up to three months. When ready, bake from frozen for extra ease. Follow the instructions from the Full Recipe for the best results. Making breakfast sausage crescent rolls is quick! You need about 15 minutes to prep. Then, you bake them for 12 to 15 minutes. In total, it takes around 30 minutes. This means you can enjoy these tasty treats in no time! Yes, you can prepare them in advance. You can cook the sausage and mix in the seasonings. Then, store the mixture in the fridge. When you’re ready, roll the crescent dough and bake as usual. This saves time on busy mornings! These rolls pair well with many sides. You can serve them with ketchup or mustard for dipping. A fresh fruit salad adds a nice touch too. If you want something warm, scrambled eggs make a great side. Enjoy these rolls with your favorite dips for extra flavor! These breakfast sausage crescent rolls are easy and fun to make. We covered the basic ingredients: crescent dough, sausage, and cheese, along with simple seasonings. The baking steps are straightforward, and I provided tips to perfect your dish. You can also explore variations like different cheeses or vegetarian options. With the right storage and reheating methods, you can enjoy them later. Now, gather your ingredients and start cooking these delicious rolls for your next meal!
Breakfast Sausage Crescent Rolls Tasty and Simple Treat
Are you ready to serve up a delicious and easy breakfast? Breakfast sausage crescent rolls are your perfect solution! With just a few simple ingredients,
- 1 loaf of brioche bread, cut into thick slices - 4 large eggs - 1 cup whole milk - 1 cup heavy cream For this recipe, brioche bread gives a rich and soft texture. The eggs create a custard that holds everything together. The milk and cream add creaminess to the dish. - 1/2 cup granulated sugar - 1/4 cup brown sugar (for the brûlée topping) - Fresh berries (strawberries, blueberries, or raspberries) for garnish - Whipped cream (optional, for serving) The granulated sugar helps sweeten the dish. The brown sugar creates a crunchy top when brûléed. Fresh berries add color and flavor, while whipped cream gives a light touch. - 1 tablespoon vanilla extract - 1 teaspoon ground cinnamon - Pinch of salt Vanilla extract adds a warm, sweet aroma. Ground cinnamon gives a cozy spice that makes this dish special. A pinch of salt balances the sweetness and enhances the flavors. You can find the full recipe in the article for easy reference. First, grab a large mixing bowl. You will whisk together 4 large eggs, 1 cup of whole milk, and 1 cup of heavy cream. Then, add 1/2 cup of granulated sugar and 1 tablespoon of vanilla extract. Sprinkle in 1 teaspoon of ground cinnamon and a pinch of salt. Whisk these ingredients until they blend well. You want a smooth, creamy mix, so take your time. This egg mixture will soak into your brioche and give it that rich flavor you love in crème brûlée. Next, take your loaf of brioche bread. Cut it into thick slices, about an inch each. Now, arrange those slices neatly in a greased baking dish. Let them overlap just a bit; this helps with soaking. Once the bread is in the dish, pour your egg mixture over the slices. Be sure to cover each piece fully. Gently press them down with a spatula or your hands. This helps the bread soak up all that creamy goodness. Now, cover the dish with plastic wrap and place it in the fridge. Let it chill overnight, or at least for 4 hours. This step is key. It allows the flavors to meld and the bread to soak. When you are ready to bake, preheat your oven to 350°F (175°C). Take the dish out of the fridge and let it sit at room temperature for about 15 minutes. Bake the French toast for 30 to 35 minutes. Look for a golden top and firm custard. While it bakes, prepare the brûlée topping. In a small bowl, mix 1/4 cup of brown sugar with a pinch of cinnamon. Once the French toast is done, take it out of the oven. Sprinkle the brown sugar mixture over the top. Use a kitchen torch to caramelize the sugar until it forms a crispy crust. If you don’t have a torch, broil it for 1 to 2 minutes. Watch closely to avoid burning. Let it cool slightly, and then it’s ready to serve. This step leads to a delightful, crunchy topping that pairs perfectly with the soft, custardy bread. For the full recipe, check out the details above. To get the best overnight crème brûlée French toast, focus on soaking time. I recommend letting the bread soak for at least 4 hours. However, overnight soaking gives the best flavor and texture. This time allows the bread to absorb the custard mixture fully, making it creamy and moist. Next, pay attention to your oven temperature. Set it to 350°F (175°C). An accurate temperature ensures even cooking. An oven thermometer can help you check if your oven runs hot or cool. When serving, presentation matters. Arrange the French toast on a large platter. Drizzle it with maple syrup. Add a variety of fresh berries on top for color. This makes your dish look inviting and delicious. For beverages, pair this dish with coffee or a fresh fruit juice. A light tea can also complement the flavors well. These drinks enhance your breakfast experience. You have two main options for caramelizing the sugar topping. A kitchen torch gives you control and precision. It allows for a perfect crust. If you don’t have one, a broiler works too. Just keep a close watch to prevent burning. When choosing a baking dish, opt for a glass or ceramic one. These materials help distribute heat evenly. They also look nice when serving. For the full recipe, refer to the detailed steps and ingredients listed above. {{image_2}} If you need gluten-free options, use gluten-free bread. Many brands offer tasty choices that work well. Look for a bread that will soak up the egg mixture nicely. For a dairy-free version, swap whole milk and heavy cream with almond milk or oat milk. You can also use coconut cream for a rich texture. These alternatives keep the flavor great and make it suitable for everyone. To enhance the flavor, try adding spices like nutmeg or cardamom. A pinch of nutmeg adds warmth, while cardamom brings a unique twist. These spices can take your French toast to a new level. You can also mix in chocolate chips or nuts. Dark chocolate chips melt beautifully, adding sweetness. Chopped nuts give a nice crunch and extra flavor. Both options make this dish even more delightful. You can transform this dish into a savory version by adding cheese and herbs. Use a sharp cheese like cheddar or a creamy cheese like goat cheese. Adding spinach or sun-dried tomatoes can elevate the taste. For easy serving, try making mini portions. Cut the brioche into smaller squares. This way, everyone can have their own piece. Mini servings are perfect for brunch or gatherings. You can find the complete recipe for Overnight Crème Brûlée French Toast in the recipe section. To store leftovers, place the French toast in an airtight container. This keeps it fresh and prevents drying. You can also cover the dish tightly with plastic wrap. For reheating, warm slices in the oven at 350°F for about 10-15 minutes. You can also microwave individual pieces for about 30 seconds, but this might make them a bit soggy. You can freeze this dish before or after baking. If freezing before, prepare it as usual but skip the baking. Cover it well and freeze for up to a month. To freeze after baking, cool it completely, then wrap it tightly. When you’re ready to eat, thaw in the fridge overnight and reheat in the oven. This keeps the taste fresh and delicious. In the fridge, the Overnight Crème Brûlée French Toast lasts about 3-4 days. If frozen, it can last up to a month. Always check for signs it has gone bad. Look for any off smells or mold. If it looks or smells strange, it’s best to throw it out. Yes, you can! If you don’t have brioche, you can use other types of bread. Here are some great options: - Challah: This bread is soft and slightly sweet, just like brioche. - French bread: It has a nice crust and soaks up the mixture well. - Sourdough: This adds a tangy flavor for a unique taste. - Whole wheat bread: A healthier option that still works well. You can store this dish in the fridge for up to three days. For best results, cover it tightly with plastic wrap or foil. This keeps it fresh and prevents odors from other foods. When you’re ready to eat, you can reheat it in the oven at 350°F (175°C) for about 15 minutes. Make sure it’s warm all the way through. Absolutely! This recipe is perfect for a crowd. You can double the ingredients to serve more people. Just follow these tips: - Use a larger baking dish to fit all the bread. - Prepare the mixture the night before and refrigerate it. - Bake it in the morning, so it’s fresh and warm when served. - If you need to, bake two dishes at once for larger gatherings. You can find the full recipe in the article for more details on making this delicious dish! This blog post covered making Overnight Crème Brûlée French Toast from ingredients to techniques. You learned how to choose fresh brioche, whip up the perfect egg mixture, and bake it to golden perfection. For variations, we explored dietary options and flavor twists. Remember to store leftovers properly and enjoy them later. Embrace your creativity in the kitchen. This recipe is fun and delightful, perfect for any occasion. Now, go ahead and impress your friends and family with your new skills!
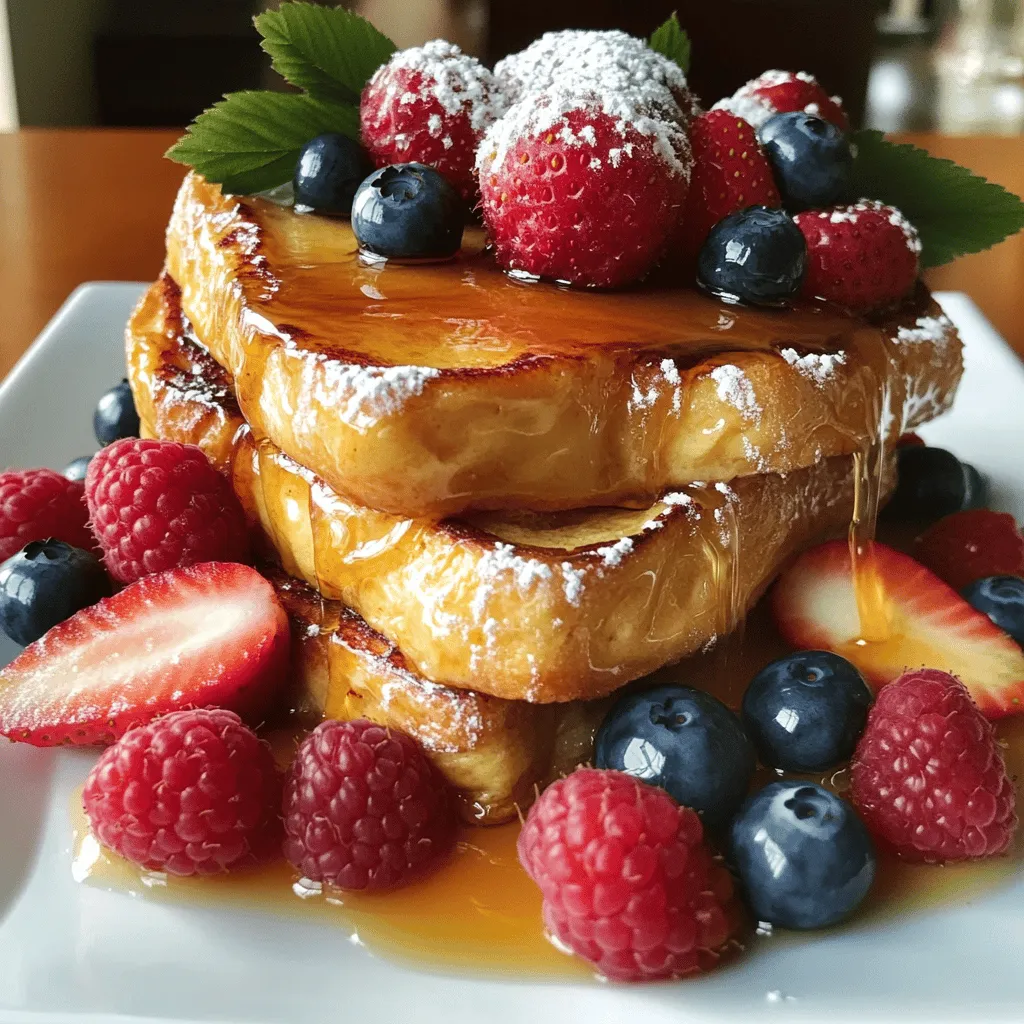
Overnight Crème Brûlée French Toast Irresistible Delight
Indulge in a breakfast that feels like dessert with my Overnight Crème Brûlée French Toast! This creamy, custardy dish uses soft brioche bread for that
- 1 large ripe banana - 1 cup rolled oats - 1 cup milk (dairy or non-dairy) These three simple ingredients make the best pancakes. First, you need a large ripe banana. The ripeness adds sweetness and flavor. Next, grab one cup of rolled oats. These oats give the pancakes a nice texture and help bind the mix. Finally, choose one cup of milk. You can use regular milk or any non-dairy option like almond or oat milk. This mix is not just easy; it is also healthy. You get good carbs, fiber, and natural sweetness. Plus, it’s quick to make! You can whip up breakfast in about 15 minutes. You don’t need fancy tools or hard-to-find items. Just a blender, a skillet, and your ingredients. Now that you have the ingredients ready, you can move on to the next steps in making your delicious pancakes. Enjoy your cooking adventure! {{ingredient_image_1}} - Step 1: Blend the ingredients Start by placing one large ripe banana, one cup of rolled oats, and one cup of milk in a blender. Blend these until the mixture turns smooth. The goal is to reach a pancake batter consistency. You want it thick but pourable. - Step 2: Preheat the skillet While blending, preheat a non-stick skillet over medium heat. Lightly grease it with cooking spray or a small amount of oil. This helps prevent sticking and gives a nice golden color. - Step 3: Pour and cook the pancakes Once the skillet is hot, pour about 1/4 cup of batter onto it for each pancake. Cook for 2 to 3 minutes. Watch for bubbles to form on the surface; this shows they’re ready to flip. - Step 4: Flip and finish cooking Gently flip each pancake and cook for another 1 to 2 minutes. Look for a golden brown color and make sure they are cooked through. Remove them from the skillet and repeat with the rest of the batter. Adjust the heat if needed to ensure even cooking. To make the best three-ingredient banana oat pancakes, focus on the batter. You want it smooth and thick. If it's too runny, add a bit more oats. If too thick, add a splash more milk. This helps create a nice fluffy texture. Next, pay attention to the cooking temperature. Start at medium heat. If the pancakes brown too fast, lower the heat a bit. Cooking them slowly helps them cook through without burning. When it comes to flipping, wait for bubbles to form on the surface. This shows they are ready. Use a spatula to flip gently. If they break, don’t worry. Just press the batter back together and keep cooking. These pancakes shine with toppings. Slice fresh bananas on top for extra sweetness. A drizzle of honey or maple syrup adds more flavor. A sprinkle of cinnamon gives a warm touch. For a complete meal, pair these pancakes with yogurt or a side of berries. This adds protein and freshness. You can also serve with nuts for crunch and healthy fats. Enjoy your meal! Pro Tips Use Overripe Bananas: The riper the banana, the sweeter and more flavorful your pancakes will be. Look for bananas with brown spots for the best results. Adjust Consistency: If the batter is too thick, you can add a little more milk to reach your desired consistency. For thicker pancakes, reduce the milk slightly. Don't Overmix: Blend just until combined. Overmixing can lead to tough pancakes. A few lumps are okay! Keep Them Warm: To keep pancakes warm while you cook the rest, place them on a plate in a preheated oven at 200°F (93°C) until ready to serve. {{image_2}} You can make these banana oat pancakes even better. Adding spices can change the taste. Try mixing in a bit of cinnamon. It gives a warm flavor that pairs well with banana. You can also add a splash of vanilla extract for more sweetness. If you love chocolate, throw in some chocolate chips. They melt and add a rich taste. Nuts also work great. Chopped walnuts or pecans give a nice crunch. This adds texture and flavor to your pancakes. If you want to make these pancakes vegan, it's easy. You can use almond milk or oat milk instead of regular milk. This keeps the recipe plant-based and tasty. You can also skip the milk altogether. Just mash the banana well and use a bit of water to thin the batter. For gluten-free options, rolled oats can be a concern. Look for oats labeled gluten-free. This ensures no gluten contamination. These pancakes can fit into many diets while still being delicious. To keep your pancakes fresh, store them well. - Refrigeration guidelines: Place leftover pancakes in an airtight container. They last up to 3 days in the fridge. If you notice any moisture, use a paper towel to absorb it. This helps prevent sogginess. - Freezing for future meals: For longer storage, freeze the pancakes. Stack them with parchment paper in between. Then place the stack in a freezer-safe bag. They can stay good for up to 2 months. When you want to enjoy your pancakes again, reheating is simple. - Best methods for reheating pancakes: The microwave is quick and easy. Heat each pancake for about 20-30 seconds. If you want them warm and crispy, use a skillet. Heat them on medium for about 1-2 minutes on each side. This gives you that fresh-off-the-griddle taste! Can I make these pancakes without milk? Yes, you can! If you want to skip the milk, use water or a plant-based milk. The pancakes will still taste great. Just blend the banana and oats with your chosen liquid. How can I make the pancakes fluffier? To make fluffier pancakes, use an extra ripe banana. You can also add a spoonful of baking powder. This helps the pancakes rise and become light. What can I use instead of banana? If you don’t have bananas, try using applesauce or even pureed pumpkin. Both options work well and add natural sweetness to your pancakes. Are these pancakes suitable for a gluten-free diet? Yes, they can be gluten-free! Just make sure to use gluten-free rolled oats. These oats will keep your pancakes safe for those avoiding gluten. What is the calorie count for one serving? One serving of these pancakes has about 200 calories. This count can change based on your toppings or any added ingredients. This blog post covered a simple pancake recipe with just a banana, oats, and milk. You learned how to prepare, cook, and store these pancakes. Remember to adjust cooking times and explore flavors with spices or toppings for your taste. You can easily modify them for various diets, too. Enjoy fluffy pancakes any day by using the tips and tricks shared. Now, whip up these delicious pancakes and make breakfast fun!
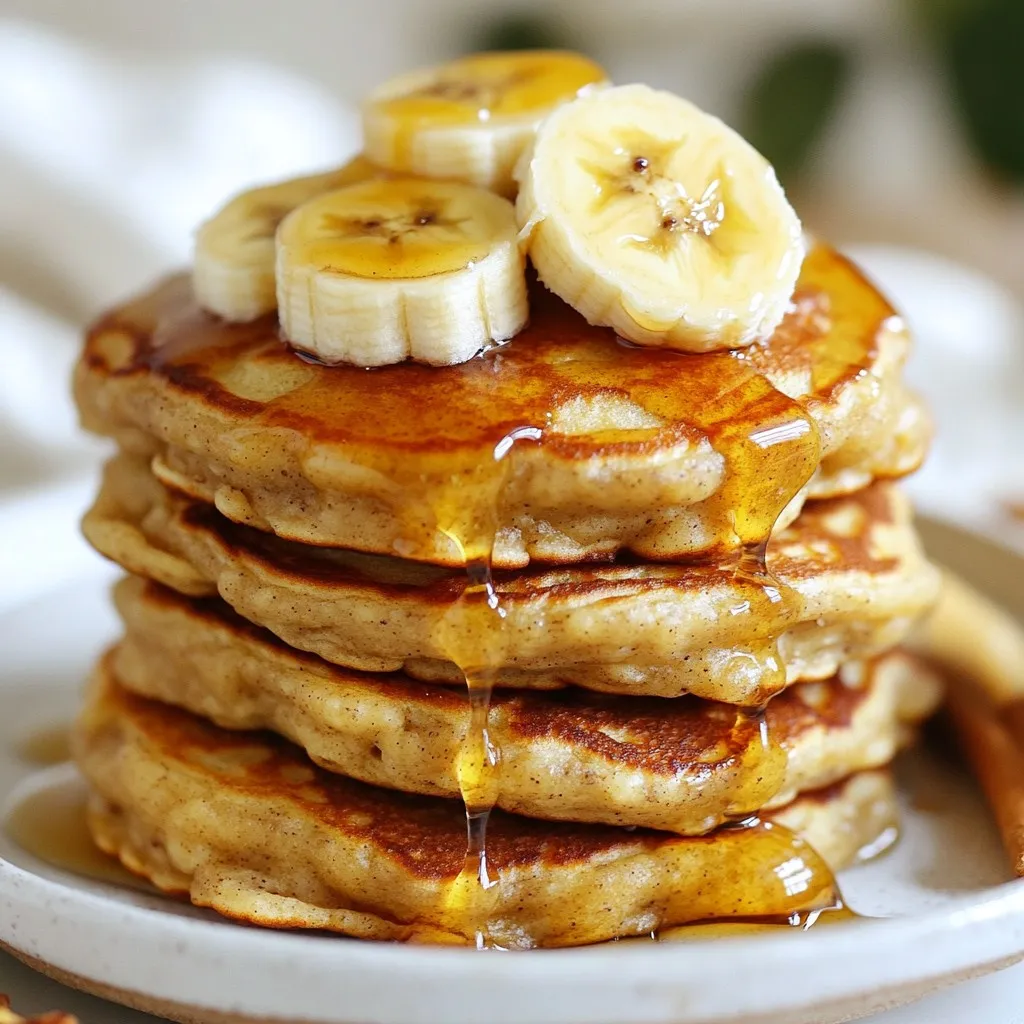
Three Ingredient Banana Oat Pancakes Simple and Easy
If you’re looking for a quick and tasty breakfast, try my three-ingredient banana oat pancakes! Just blend a large ripe banana, rolled oats, and milk.
- 1 cup rolled oats - 1 cup vanilla protein powder - 1/2 cup Greek yogurt - 1/2 cup unsweetened applesauce - 1/4 cup maple syrup - 1/4 cup almond milk (or your preferred milk) - 2 large eggs - 1 teaspoon vanilla extract - 2 teaspoons baking powder - 2 teaspoons ground cinnamon - 1/4 teaspoon salt - 1/4 cup chopped pecans or walnuts (optional) - 1/4 cup raisins (optional) You can easily change these muffins to fit your taste. Add in chopped nuts for crunch. Pecans or walnuts work well. You can also toss in some raisins for a sweet bite. If you want more flavor, try adding a bit of nutmeg or cardamom. For a richer texture, swap out the almond milk for coconut milk. These muffins are a great mix of protein and carbs. Each muffin has about 150 calories. They also pack around 10 grams of protein. The oats give you fiber, which is good for your digestion. Greek yogurt adds calcium and helps keep you full. Plus, the natural sweetness from applesauce and maple syrup means you don’t need extra sugar. {{ingredient_image_2}} Start by preheating your oven to 350°F (175°C). This step is key for even baking. Next, grab a muffin tin and line it with paper liners. If you don’t have liners, lightly grease each cup. This helps the muffins come out easily after baking. In a large bowl, add these dry ingredients: - 1 cup rolled oats - 1 cup vanilla protein powder - 2 teaspoons baking powder - 2 teaspoons ground cinnamon - 1/4 teaspoon salt Stir them together well. Make sure there are no clumps. This mix gives your muffins their base flavor and texture. In another bowl, whisk together these wet ingredients: - 1/2 cup Greek yogurt - 1/2 cup unsweetened applesauce - 1/4 cup maple syrup - 1/4 cup almond milk - 2 large eggs - 1 teaspoon vanilla extract Mix until it’s smooth. Slowly pour this wet mix into the bowl with dry ingredients. Stir gently until just combined. If you want, fold in 1/4 cup of chopped nuts or raisins for extra crunch and sweetness. Using a spoon or a scoop, fill each muffin cup about two-thirds full with batter. This amount lets them rise without spilling over. Place the muffin tin in the oven and bake for 18-20 minutes. They are done when a toothpick comes out clean when poked in the center. Let them cool in the tin for about 5 minutes. After that, transfer them to a wire rack to finish cooling. This keeps them from getting soggy. To make the best cinnamon roll protein muffins, I have some tips for you. - Measure Carefully: Use dry measuring cups for oats and protein powder. Level them off with a knife. - Don’t Overmix: Mix the wet and dry ingredients just until combined. Overmixing makes muffins dense. - Use Fresh Ingredients: Check expiration dates on your baking powder and protein powder. Fresh ingredients yield better results. - Fill Cups Evenly: Fill each muffin cup about two-thirds full. This helps them rise nicely without overflowing. To keep your muffins fresh, here are some simple storage tips. - Cool Completely: Let the muffins cool on a wire rack before storing. This prevents sogginess. - Use an Airtight Container: Store muffins in an airtight container at room temperature. This keeps them soft for 2-3 days. - Refrigerate for Longer Life: If you need them to last longer, refrigerate them. They stay fresh for up to a week. When serving your muffins, presentation matters. Here are some ideas. - Serve Warm: Warm muffins taste better and smell amazing. - Add a Glaze: Drizzle a simple glaze of powdered sugar and almond milk on top. It adds sweetness and looks great. - Sprinkle Cinnamon: A pinch of cinnamon on top enhances flavor and adds a lovely touch. - Pair with Fruit: Serve with fresh fruit like slices of apple or berries for a balanced bite. Pro Tips Ingredient Substitutions: If you don't have Greek yogurt on hand, you can substitute it with cottage cheese for a similar texture and flavor. Protein Powder Choice: Use a high-quality vanilla protein powder to enhance the flavor of your muffins. Experiment with different brands to find your favorite! Storage Tips: Store any leftover muffins in an airtight container at room temperature for up to 3 days or in the refrigerator for up to a week. Serving Suggestions: Enjoy these muffins for breakfast or as a post-workout snack. They pair well with a dollop of Greek yogurt or a smear of almond butter! {{image_4}} You can change the flavor of your muffins by using different spices. Try nutmeg for a warm, cozy taste. Cardamom adds a sweet, floral note. Cloves bring a strong, spicy flavor. Each spice gives a new twist to the classic cinnamon roll taste. If you want to swap the protein powder, you can use other sources. Cottage cheese offers a creamy texture and more protein. Silken tofu is a great vegan option, blending smoothly into the batter. You can also use ground nuts or seeds for added protein and crunch. Adding healthy ingredients can make your muffins even better. Chia seeds boost fiber and omega-3s. Flaxseed meal adds healthy fats and nutrients. You can also fold in grated carrots or zucchini for extra veggies. These add flavor and moisture, making your muffins even more delicious. To keep your Cinnamon Roll Protein Muffins fresh, place them in an airtight container. This method locks in moisture and keeps them soft. You can store them at room temperature for up to three days. If you want to keep them longer, refrigeration is a good option. Just remember to wrap them well to avoid drying out. Freezing your muffins is simple and smart. First, allow the muffins to cool completely. Once cooled, you can wrap each muffin in plastic wrap. Place the wrapped muffins in a freezer bag or container. They will stay good in the freezer for up to three months. When you want one, just take it out and let it thaw. To enjoy your muffins warm, reheating is key. Use your oven for the best texture. Preheat it to 350°F (175°C). Place the muffin on a baking sheet and heat for about 5 to 10 minutes. This method keeps the muffin moist and soft. If you’re in a hurry, you can use the microwave too. Heat them for about 15 to 20 seconds. Just be careful not to overheat, or they may become dry. Enjoy them warm for the best taste! You can use plain yogurt or cottage cheese instead of Greek yogurt. Both will work well. If you want a dairy-free option, try silken tofu or dairy-free yogurt. These substitutes keep the muffins moist and tasty. Yes, you can easily make these muffins vegan. Replace the eggs with flax eggs. To make a flax egg, mix 1 tablespoon of ground flaxseed with 2.5 tablespoons of water. Let it sit for 5 minutes to gel. Also, use a plant-based yogurt instead of Greek yogurt. Check if the muffins are done by inserting a toothpick into the center. If it comes out clean, they are ready. You can also look for a golden-brown color on top and a firm texture. Absolutely! You can use any protein powder you like. Whey, casein, or plant-based options all work. Just keep in mind that different powders may change the flavor and texture a bit. Adjust the liquid if needed for the best result. You learned how to make tasty muffins with a simple recipe. We discussed key ingredients, step-by-step instructions, and useful tips. You also found ways to customize flavors and store muffins properly. Remember, practice makes perfect, so don’t hesitate to experiment! Healthy muffins can be fun and delicious. Enjoy your baking journey and share your creations!
Cinnamon Roll Protein Muffins Delicious and Easy Treat
Are you ready to enjoy a sweet treat that’s also healthy? These Cinnamon Roll Protein Muffins are not only delicious, but they’re super easy to
To make cheesy egg toast, gather these simple ingredients. Each one adds flavor and texture to your dish. - 4 slices of whole grain bread - 4 large eggs - 1 cup shredded sharp cheddar cheese - 1/2 cup diced bell peppers (a mix of red, yellow, and green for vibrant color) - 1/4 cup finely chopped green onions - 1/4 teaspoon garlic powder - Sea salt and freshly ground black pepper, to taste - 2 tablespoons extra virgin olive oil - 1 tablespoon fresh parsley, finely chopped, for garnish These ingredients create a tasty blend of flavors. The whole grain bread gives a nice base. The eggs provide protein, while the cheddar cheese melts into gooey goodness. Bell peppers and green onions add crunch and color. Remember, fresh ingredients make the best meals! {{ingredient_image_2}} - Preheat oven to 375°F (190°C). - Heat a pan over medium heat. Add 1 tablespoon of olive oil. - Add 1/2 cup of diced bell peppers to the pan. - Sauté the peppers for about 3-4 minutes until tender and fragrant. - Take 4 slices of whole grain bread. - Use a spoon to make a small well in each slice. - Fill the wells with the sautéed bell peppers. - Crack 4 large eggs into a bowl. - Whisk the eggs until yolks and whites blend well. - Season with garlic powder, sea salt, and pepper. - Carefully pour the whisked eggs into each well. - Leave a little space near the edge to allow for cooking. - Sprinkle 1 cup of shredded cheddar cheese on top. - Drizzle a bit of olive oil on the toasts for added flavor. - Place the baking sheet in the oven. - Bake for 12-15 minutes until the egg sets and cheese melts. - After baking, remove the toasts from the oven. - Let them cool for a minute on the baking sheet. - Before serving, garnish with chopped green onions and parsley. You can make cheesy egg toast even better with different cheese types. Try mozzarella for a creamy melt. Feta adds a salty kick. Swiss cheese gives a nutty flavor. Each cheese adds a unique taste. Experimenting with spices also brings new flavors. A dash of paprika adds warmth. A pinch of cumin can add earthiness. Try fresh herbs like basil or chives for brightness. This simple change can elevate your dish. To achieve the perfect egg texture, keep a close eye on the cooking time. Bake until the egg is just set, not overcooked. The center should still be slightly soft. This will give you a nice, creamy bite. For crispier toast, use a thicker slice of bread. Whole grain works great for this. Drizzle olive oil on the bread before baking. You can also toast the bread for a few minutes first. This method adds extra crunch. When serving, use a rustic wooden board. This adds a cozy touch. Place the cheesy egg toasts in a circle on the board. Add colorful slices of avocado or cherry tomatoes around them. This not only looks great but also adds freshness. For creative plating, stack the toasts. Place one on top of the other. Garnish with parsley on top and around the plate. This simple touch makes your dish pop visually. Pro Tips Use Fresh Ingredients: Fresh bell peppers and eggs enhance the flavor and texture of your toasts. Choose organic eggs and seasonal veggies for the best taste. Experiment with Cheese: While sharp cheddar is delicious, try mixing in other cheeses like mozzarella or pepper jack for different flavor profiles. Perfectly Cooked Eggs: To achieve perfectly cooked eggs, monitor them closely while baking. Remove the toasts as soon as the eggs are set for a creamy texture. Add a Kick: For those who enjoy a bit of heat, sprinkle some red pepper flakes or add jalapeños to the sautéed peppers for an extra kick. {{image_4}} You can easily switch up the bread type. Try sourdough or rye for a new flavor. Want more protein? Add crispy bacon or diced ham. Both options give your cheesy egg toast a hearty boost. Herbs and spices can add depth. Fresh basil or thyme can elevate the taste. You might also add a pinch of paprika for a little heat. For veggies, consider spinach, mushrooms, or tomatoes. Each choice brings a unique twist to your dish. If you need gluten-free options, use gluten-free bread. It works well with the recipe. For vegan substitutes, you can try plant-based cheese and tofu instead of eggs. These swaps maintain a delightful taste while fitting your diet. To reheat cheesy egg toast, use an oven or toaster oven. Set it to 350°F (175°C). This method keeps the toast crisp. Avoid microwaving, as it makes the bread soggy. If you must use a microwave, heat it in short bursts. Check every 15 seconds to prevent overcooking. Store leftovers in the fridge within two hours of cooking. Place the toasts in an airtight container. You can also wrap them in plastic wrap. This keeps them fresh longer. For best results, eat the leftovers within two days. Yes, you can freeze cheesy egg toast! Wrap each piece in foil or plastic wrap. Place them in a freezer-safe bag. This prevents freezer burn. To reheat, bake directly from frozen. Increase the baking time to about 20-25 minutes. Enjoy your cheesy egg toast anytime! You can prepare cheesy egg toast in advance. First, make the toasts but do not bake them. Store the assembled toasts in the fridge for up to a day. When you’re ready to eat, just pop them in the oven. Bake them for about 15 minutes at 375°F (190°C). This keeps the bread fresh and the cheese melty. Yes, you can use egg substitutes. Silken tofu works well as a replacement. You can also try flaxseed meal mixed with water. Use 1 tablespoon of flaxseed with 2.5 tablespoons of water for one egg. Both options give a similar texture to the eggs, making your dish tasty. Cheesy egg toast goes great with many sides. You can serve it with fresh fruit like berries or sliced avocado. A light salad adds a nice crunch. You could also pair it with crispy bacon or sausage for a heartier meal. You can make cheesy egg toast on the stovetop. Use a pan with a lid. Toast the bread in the pan first. Add the peppers and egg mixture like in the oven method. Cover the pan and cook on low heat until the eggs set. This gives you a similar dish without baking. Each serving of cheesy egg toast has about 300 calories. It includes 15 grams of protein and 20 grams of fat. You also get about 30 grams of carbs and 3 grams of fiber. These numbers can change based on your ingredient choices. This blog post shared a simple, tasty way to make cheesy egg toast. We went through every step, from the ingredients to creative tips. You learned how to customize it and store leftovers. Try different cheeses and flavors to keep it fresh and fun. Remember, cooking is all about experimenting. Enjoy making your own version of this dish!
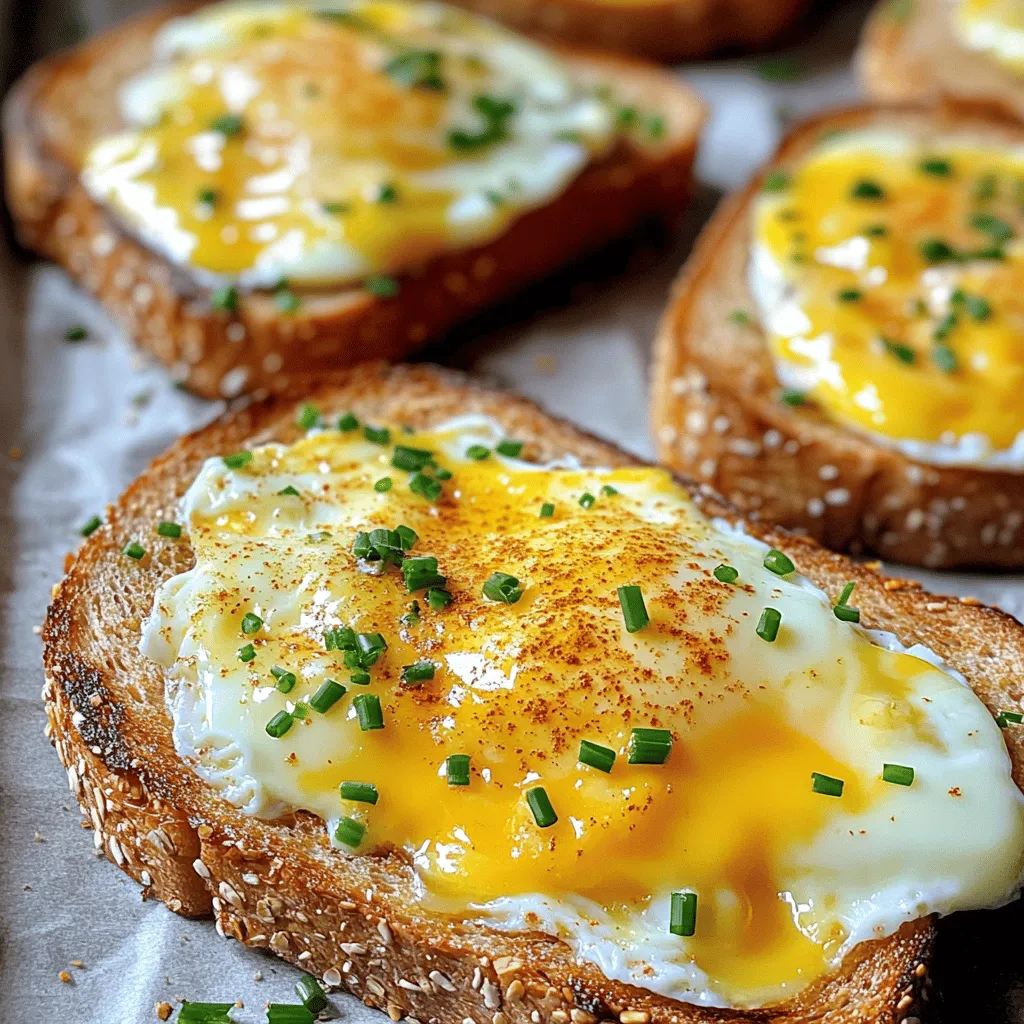
Cheesy Egg Toast Quick and Tasty Breakfast Dish
Looking for a quick and tasty breakfast idea? Cheesy Egg Toast is your answer! This delightful dish combines crispy bread, fluffy eggs, and melted cheddar