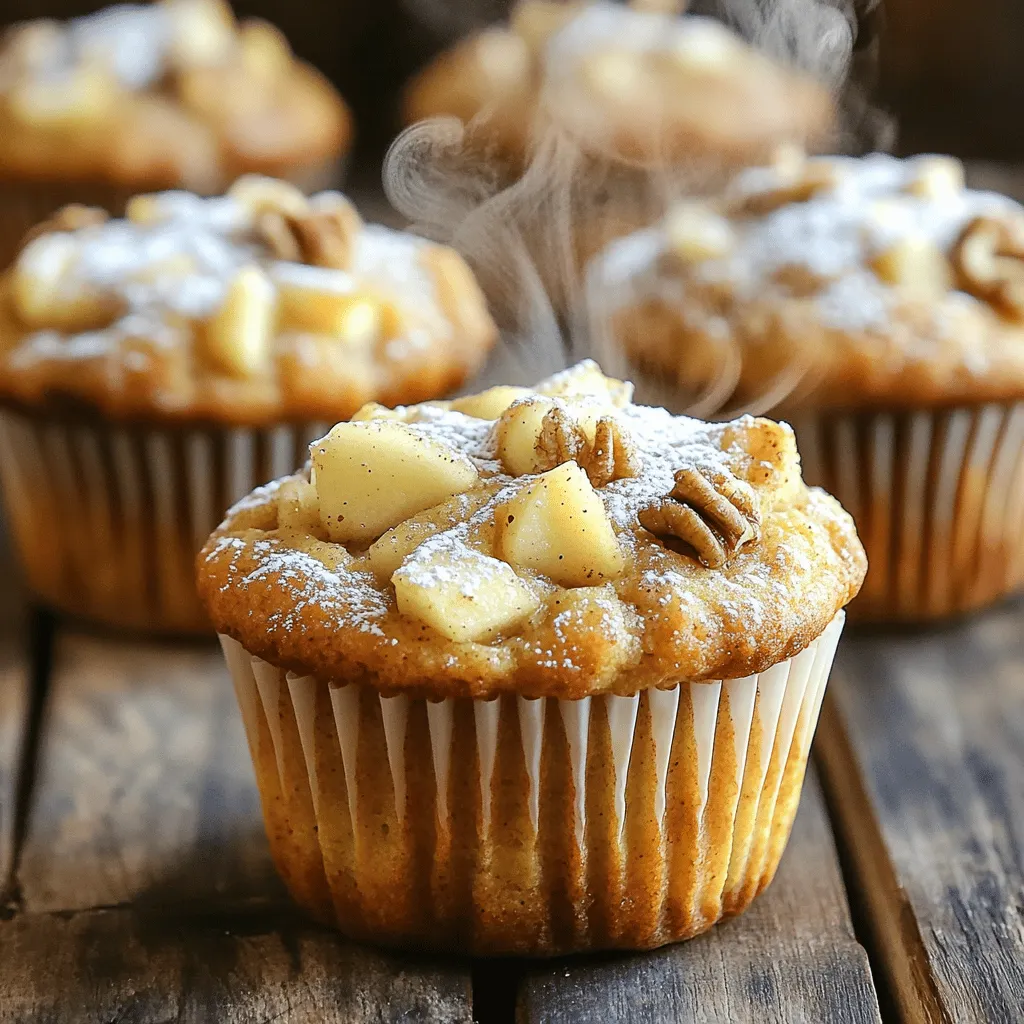
Breakfast

- 4 cups all-purpose flour - 1 packet (2 ¼ teaspoons) instant yeast - ½ cup milk, warmed - ¼ cup granulated sugar - ½ cup unsalted butter, softened - 2 large eggs - 1 teaspoon vanilla extract - ½ teaspoon salt To make these rolls, you need basic ingredients. First, flour forms the base of the dough. I use all-purpose flour for its great texture. Next, instant yeast helps the dough rise. The warm milk wakes up the yeast, making it active. Granulated sugar adds sweetness and helps with browning. Unsalted butter gives a rich flavor. Eggs provide structure and moisture. Vanilla extract adds a lovely taste. Finally, salt balances all the flavors. - 2 large apples, peeled, cored, and diced - 1 tablespoon lemon juice - 1 tablespoon ground cinnamon - ½ cup brown sugar - ½ cup chopped walnuts (optional) The filling makes these rolls special. I choose sweet apples like Granny Smith or Honeycrisp. Peeling and dicing the apples helps them cook well. A splash of lemon juice keeps the apples fresh and bright. Ground cinnamon gives that warm, cozy flavor. Brown sugar adds a deep sweetness. You can add chopped walnuts for a nice crunch. - 1 cup powdered sugar - 2 tablespoons milk The glaze is a sweet touch. It makes the rolls look beautiful and adds extra sweetness. You mix powdered sugar with milk to create a smooth texture. This glaze is optional, but I recommend it for a delicious finish. - In a large bowl, combine warm milk, granulated sugar, and yeast. - Let this mixture sit for about 5 minutes until it bubbles. - Next, mix softened butter, eggs, and vanilla in a separate bowl. - Once combined, add this to the yeast mixture. - Gradually mix in flour and salt until a dough forms. - Knead the dough on a floured surface for 5-7 minutes. It should feel smooth and elastic. - Place the dough in a greased bowl and cover it with a damp cloth. - Let it rise in a warm spot for 1-2 hours, until it doubles in size. - While waiting, prepare the apple filling. - Toss diced apples with lemon juice, cinnamon, and brown sugar in a bowl. - If you like, add chopped walnuts for extra crunch. - After the dough has risen, punch it down. - Roll the dough out on a floured surface into a large rectangle, about 12x18 inches. - Spread the apple mixture evenly over the dough, leaving a small edge. - Roll the dough tightly from one long side, forming a log. - Pinch the edges to seal, and cut into 12 equal rolls. - Place the rolls in a greased baking dish, cover with plastic wrap, and refrigerate overnight. - The next morning, preheat the oven to 375°F (190°C). - Remove the rolls from the fridge and let them sit for 30 minutes to warm up. - Bake the rolls for 25-30 minutes until they are golden brown. - For a sweet finish, whisk together powdered sugar and milk to make a glaze. - Drizzle this over the warm rolls before serving. - Ensuring yeast activation: Always use warm milk, not hot. It should feel like a warm bath. Mix this with the sugar and yeast. Wait about five minutes. You want it to foam up. This means the yeast is alive and ready. - Tips for smooth, elastic dough: When you mix in the flour, do it slowly. Knead the dough for about 5 to 7 minutes. It should feel soft and stretchy. If it’s too sticky, add a little more flour. This helps the dough hold its shape. - Importance of first rise duration: After kneading, place the dough in a greased bowl. Cover it with a damp cloth. Let it rise in a warm spot for 1 to 2 hours. It should double in size. This rise gives the rolls a fluffy texture. - Choosing the right apples: Use firm apples like Granny Smith or Honeycrisp. They add a nice tartness. This balances the sweetness of the brown sugar and cinnamon. - Balancing sweetness with cinnamon: When mixing apples, add lemon juice, brown sugar, and cinnamon. The lemon juice keeps apples fresh and bright. Adjust the sugar based on your taste. If you like it sweeter, add more brown sugar. - Optional nut additions for texture: If you enjoy crunch, add chopped walnuts. They add a great texture to the filling. Just sprinkle them evenly over the apple mix. - Best practices for refrigerating rolls: After cutting the rolls, place them in a greased dish. Cover them well with plastic wrap. This keeps them from drying out while resting overnight. - Timing for morning baking: The next day, take the rolls out of the fridge. Let them sit at room temperature for about 30 minutes. This helps them rise a bit more before baking. - Preventing rolls from drying out: If you’re worried about dryness, place a small cup of water in the oven while baking. This creates steam, helping the rolls stay moist and fluffy. {{image_2}} You can change up the filling in your apple cinnamon rolls. Here are some tasty ideas: - Cream cheese and caramel filling: This mix adds a creamy touch. Blend cream cheese with caramel sauce. Spread it on the dough before adding apples. - Nutty chocolate chip variation: Add chocolate chips and nuts for a rich twist. Mix them with apples for a fun surprise. - Dried fruit and nut combination: Use dried cranberries or apricots for sweetness. Mix with nuts like pecans for a unique flavor. The glaze can make your rolls even better. Try these options: - Cream cheese frosting: Whip cream cheese with powdered sugar and a bit of milk. Spread it on warm rolls for a rich finish. - Maple glaze recipe: Mix powdered sugar with pure maple syrup. This gives a sweet, earthy flavor that pairs well with apples. - Simple sugar syrup: Combine equal parts sugar and water. Heat until dissolved, then drizzle over your rolls for a shiny look. If you need to keep things healthy, here are some swaps: - Gluten-free flour alternatives: Use a gluten-free blend instead of all-purpose flour. This keeps the rolls soft and tasty. - Vegan options for ingredients: Replace eggs with flaxseed meal mixed with water. Use almond milk and coconut oil instead of dairy. - Reducing sugar content: Cut back on sugar by substituting with pureed fruit or using less brown sugar. This keeps the taste without extra sweetness. To keep your leftover rolls fresh, you have two options: room temperature or refrigeration. - Room Temperature: Store your rolls in an airtight container on the counter. They will stay good for about 2-3 days. - Refrigeration: If you want them to last longer, put them in the fridge. They will last up to a week, but they may dry out a bit. The best containers for storage are glass or plastic with tight lids. This will help keep the rolls soft and tasty. If you want to save some rolls for later, freezing is a great idea. Here’s how to do it effectively: 1. Wrap Each Roll: Wrap each roll in plastic wrap or aluminum foil. This prevents freezer burn. 2. Use a Freezer Bag: Place the wrapped rolls in a freezer-safe bag. Remove as much air as possible. To thaw and reheat, just take out a roll and let it sit at room temperature for a few hours. You can also reheat them in the oven at 350°F (175°C) for about 10-15 minutes. This will help them stay soft and warm. When stored correctly, your rolls will last a good time. In the fridge, they last about 5-7 days. In the freezer, they can last up to 3 months. Watch for signs of spoilage. If you see mold or if they smell off, it’s best to toss them. Fresh apple cinnamon rolls should taste sweet and warm, not sour or dry. Yes, you can. If you want to skip eggs, use one of these options: - 1/4 cup unsweetened applesauce - 1/4 cup yogurt - 1 tablespoon ground flaxseed mixed with 2.5 tablespoons water (let it sit for 5 mins) These substitutes will keep the dough moist and help it rise. Baking takes about 25 to 30 minutes. Look for these signs to know they are done: - Rolls should be golden brown on top - The edges should pull away slightly from the pan - A toothpick inserted in the center should come out clean Let them cool for a few minutes before serving. To reheat without drying them out, try these methods: - Microwave for 10-15 seconds for a soft texture - Wrap in foil and heat in the oven at 350°F (175°C) for about 10 minutes Both keep the rolls warm and fluffy. Yes, you can make the filling ahead. Just follow these tips: - Dice the apples and toss them with lemon juice, cinnamon, and brown sugar - Store it in the fridge for up to 2 days This will save time and keep your rolls fresh and tasty. Overnight Apple Cinnamon Rolls bring joy with simple steps and tasty ingredients. You learned how to prepare the dough, make a delicious apple filling, and bake rolls to golden perfection. Remember, you can get creative with fillings and glazes. The tips shared help ensure your rolls rise perfectly. Enjoy these treats fresh or save some for later. I hope you feel excited to make them for your next gathering.
Overnight Apple Cinnamon Rolls Easy and Delicious Treat
Wake up to the warm, sweet smell of Overnight Apple Cinnamon Rolls! This easy recipe is perfect for a cozy breakfast or a delightful brunch
- 1 cup cold brew coffee - 1/2 cup milk (or dairy-free alternative) - 2 tablespoons pumpkin puree - 1 tablespoon maple syrup - 1/2 teaspoon pumpkin pie spice - 1/4 teaspoon vanilla extract - Whipped cream for topping - Garnish options: cinnamon stick or additional pumpkin pie spice To make your Pumpkin Cream Cold Brew, gather these simple ingredients. Start with cold brew coffee, which gives you a smooth flavor. You can choose milk or a dairy-free option like almond milk. Pumpkin puree adds that rich, fall taste. Maple syrup sweetens the drink and gives it depth. Pumpkin pie spice brings warmth, while vanilla extract adds a lovely aroma. Don't forget the whipped cream for a tasty finish! You can also add a cinnamon stick as a garnish or sprinkle more pumpkin pie spice on top for an extra touch. These ingredients come together quickly and create a drink that feels fancy yet is easy to make at home. - In a small bowl, combine 2 tablespoons of pumpkin puree with 1 tablespoon of maple syrup. - Add in 1/2 teaspoon of pumpkin pie spice and 1/4 teaspoon of vanilla extract. - Mix until smooth and well combined. This will be your pumpkin cream. - Pour 1 cup of cold brew coffee into a separate cup. - Add 1/2 cup of milk or a dairy-free alternative to the cold brew. - Gradually stir the pumpkin cream into the cold brew mixture. - Fill a glass with ice and pour the drink over the ice. - Top it off with whipped cream. If you like, sprinkle extra pumpkin pie spice or add a cinnamon stick for garnish. To make your Pumpkin Cream Cold Brew shine, always use fresh pumpkin puree. It gives the drink a great taste. Canned pumpkin can work, but fresh is better. You can also adjust the sweetness. If you like it sweeter, add more maple syrup. If not, use less. This drink should match your taste. Garnishing makes your drink look fancy. You can add whipped cream on top. Sprinkle pumpkin pie spice for color and flavor. A cinnamon stick adds a nice touch too. For parties, serve in clear glasses. This shows off the lovely layers. You can even add a small pumpkin on the side for fun. These small details make your drink special and inviting. {{image_2}} If you want a dairy-free Pumpkin Cream Cold Brew, there are great substitutes for milk. Oat milk is creamy and has a nice flavor. Almond milk is light and adds a nutty taste. Both options work well with pumpkin. For whipped cream, you can use coconut cream. It whips up nicely and gives a rich taste. You can add more spice to your drink for extra flavor. Nutmeg adds warmth and depth. Ginger gives a nice zing that brightens the drink. You can also mix in chocolate or caramel. Chocolate syrup can add sweetness and a rich taste. Caramel sauce brings a sweet and buttery flavor. These additions make your drink unique and delicious! To keep your pumpkin puree fresh, store it in an airtight container. Make sure to refrigerate it right after opening. It can last about a week in the fridge. If you have extra puree, freeze it in ice cube trays. Once frozen, transfer the cubes to a freezer bag. This way, you can easily use small amounts later. For leftover cold brew, keep it in a sealed container in the fridge. It stays good for about a week. If you notice any off-flavors, it’s best to toss it out. Yes, you can store your prepared Pumpkin Cream Cold Brew! Place it in the fridge in a sealed container. It will taste best within two days. When you are ready to enjoy it again, you can refresh it. Just stir well and pour it over fresh ice. If you prefer it warmed, heat it gently on the stove or in the microwave. Be careful not to boil it, as this can change the taste. Pumpkin Cream Cold Brew is a delicious coffee drink. It blends rich cold brew coffee with creamy pumpkin flavors. You get a hint of sweetness from maple syrup and a warm spice from pumpkin pie spice. Topped with whipped cream, it's a perfect fall treat. Many enjoy it for its smooth texture and seasonal taste. The drink is both refreshing and comforting, making it a favorite for coffee lovers. Yes, you can make Pumpkin Cream Cold Brew ahead of time. Prepare the pumpkin cream mixture and store it in the fridge. Just keep it in a sealed container. In the morning, pour cold brew over ice and stir in your pumpkin mix. This way, you save time and still enjoy a tasty drink. However, don’t add whipped cream until you are ready to serve. This keeps it fresh and fluffy. Pumpkin Cream Cold Brew is often a seasonal drink. Most coffee shops serve it in fall, around September to November. If you crave it outside of fall, try making it at home. You can enjoy the flavors anytime with simple ingredients. Use canned pumpkin puree and spices to capture the taste. This way, you can have the seasonal joy of pumpkin any time of year. This blog post covered how to make a delicious Pumpkin Cream Cold Brew. We explored all the ingredients, from cold brew coffee to whipped cream. I shared step-by-step instructions, helpful tips, and fun variations. You can even customize it for special diets. Remember, using fresh pumpkin puree makes a big difference. This drink shines during fall, but you can enjoy it any time. I hope you try this tasty treat and impress your friends. You have all the tools to make your perfect Pumpkin Cream Cold Brew!
Pumpkin Cream Cold Brew Simple and Tasty Recipe
Looking to spice up your coffee routine? My Pumpkin Cream Cold Brew recipe is simple and oh-so-tasty! This delightful drink combines cold brew coffee with
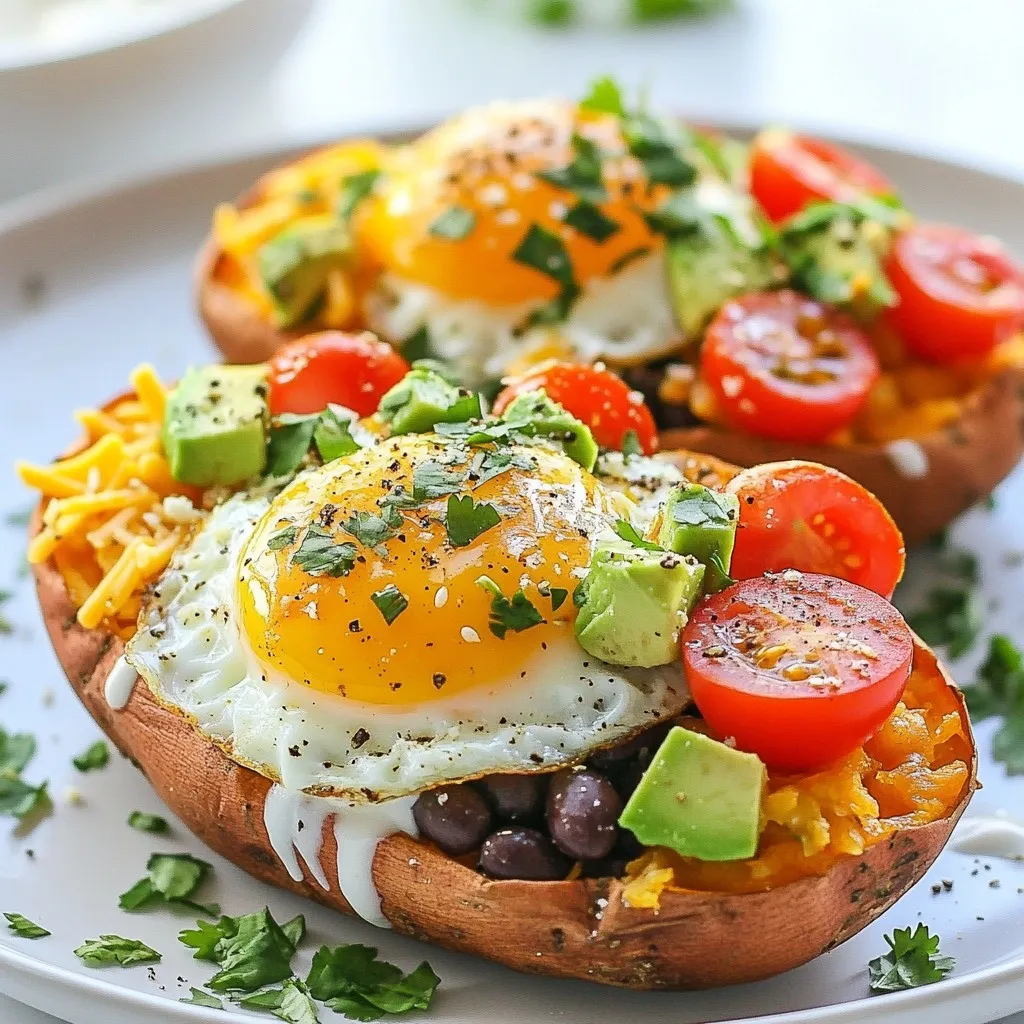
- 1 cup brewed espresso or strong coffee - 1 cup milk (dairy or your choice of non-dairy) - 1/4 cup pumpkin puree - 2 tablespoons white chocolate chips - 1 tablespoon maple syrup (adjust to taste) - 1 teaspoon vanilla extract - 1/2 teaspoon pumpkin spice (or a mix of cinnamon, nutmeg, and ginger) - Whipped cream (for topping) - Ground cinnamon and nutmeg (for garnish) To create a delicious Pumpkin White Mocha, gather these essential ingredients. First, start with 1 cup of brewed espresso or strong coffee. This gives your drink a rich base. Next, use 1 cup of milk. You can choose dairy milk or a non-dairy option like almond or oat milk. Pumpkin puree is key for flavor. You need 1/4 cup to give that warm, fall taste. White chocolate chips add sweetness. Use 2 tablespoons for a smooth mouthfeel. Maple syrup is optional; 1 tablespoon adds extra flavor. Adjust it to your liking. Vanilla extract enhances the drink's aroma. Add 1 teaspoon for that touch of sweetness. Pumpkin spice brings the essence of fall. Use 1/2 teaspoon, or mix your own blend with cinnamon, nutmeg, and ginger. Don't forget the whipped cream! It makes your drink feel special. Finally, sprinkle ground cinnamon and nutmeg on top for a beautiful finish. These ingredients come together to create a cozy, flavorful drink perfect for fall. To make the best pumpkin white mocha, you need strong coffee or espresso. Brew one cup of espresso using your machine or stovetop. If you don’t have an espresso maker, a French press works too. Use dark roast coffee for the richest flavor. Remember, the coffee should be hot and strong. This gives your drink the kick it needs. Next, grab a small saucepan. In it, mix together these ingredients: - 1/4 cup pumpkin puree - 2 tablespoons white chocolate chips - 1 tablespoon maple syrup - 1 teaspoon vanilla extract - 1/2 teaspoon pumpkin spice Place the saucepan on low heat. Stir the mixture well. Keep stirring until the white chocolate melts and blends in. This should take about 3 to 5 minutes. The warmth will help bring out the pumpkin flavor. Now it’s time to add the milk. Pour in 1 cup of your choice of milk. You can use dairy or any non-dairy milk you like. Stir the mixture gently while it heats. Do not let it boil; you want it warm. Once it's warm, take a hand frother or whisk. Froth the milk to make it creamy. This will add a nice texture. In a large mug, combine the brewed espresso with your pumpkin-milk mixture. Stir gently to blend them well. Top your drink with whipped cream. Add a sprinkle of ground cinnamon and nutmeg for a festive touch. Enjoy your homemade pumpkin white mocha! To get the right sweetness, use maple syrup. Start with one tablespoon. Taste it. Add more if you want it sweeter. Maple syrup brings a warm flavor that fits fall. Frothing milk is key for a dreamy drink. Heat the milk gently in a saucepan. Don't let it boil. Use a hand frother or a whisk. Move it up and down to build foam. This makes your drink creamy and nice. Garnish your pumpkin white mocha with whipped cream. Add a good dollop on top. Then sprinkle ground cinnamon and nutmeg for a cozy look and taste. Try other toppings too! You can use crushed graham crackers for crunch. Or drizzle some caramel sauce for extra sweetness. Each option adds a fun twist to your drink. {{image_2}} If you want a dairy-free Pumpkin White Mocha, you have choices. You can use almond, oat, or soy milk. Each type gives a unique taste. Almond milk adds a nutty flavor. Oat milk brings creaminess. Soy milk is rich and smooth. Adjust the flavors to match your milk choice. If you use almond milk, add a bit more pumpkin spice. Oat milk might need a touch more maple syrup to balance its sweetness. You can make your drink even better with simple additions. Adding chocolate or caramel syrup gives a sweet twist. A drizzle of chocolate sauce on top enhances the look and taste. Caramel syrup adds a rich, buttery flavor. Don’t stop at syrups! Explore different spice blends. Try adding a pinch of cayenne for heat. Or mix in some allspice for a warm, cozy note. Iced drinks are perfect for warm days. To make an iced version, brew your espresso and let it cool. Add ice to your glass first. Mix the pumpkin puree, white chocolate, and milk in a shaker with ice. Shake well to combine. Pour it over the ice and top with whipped cream. For cold brew, use cold coffee instead of hot. Adjust the pumpkin puree to keep the flavors strong. Enjoy your cool treat! To keep your pumpkin white mocha fresh, store it in the fridge. Use an airtight container. This helps prevent your drink from picking up other flavors. The shelf life of the drink is about two days. For the ingredients, here is how long they last: - Pumpkin puree: 3-5 days in the fridge after opening. - White chocolate chips: up to a year if stored in a cool, dry place. - Milk: 5-7 days after the sell-by date, depending on the type. When reheating your pumpkin white mocha, do it slowly. Use a saucepan over low heat. Stir it often to prevent burning. Avoid boiling, as it can ruin the flavor. For the best froth and texture, use a whisk or frother while heating. This adds air and keeps the creaminess. If you find it loses some foam, whisk again after heating to restore that lovely texture. A Pumpkin White Mocha is a warm drink that combines espresso, pumpkin puree, white chocolate, and spices. It has a sweet and creamy taste. The pumpkin adds a rich, earthy flavor, while the white chocolate gives it a smooth sweetness. You will also enjoy hints of vanilla and warm spices like cinnamon and nutmeg. This drink is a cozy treat, perfect for fall. Yes, you can use fresh pumpkin! First, cook the pumpkin until it is soft. Then, mash or blend it into a smooth puree. Keep in mind that fresh pumpkin may have a different taste compared to canned puree. You might need to adjust the sweetness or spice levels in your drink. Fresh pumpkin can be fun to use, but it takes more time to prepare. You can find Pumpkin White Mocha at popular coffee chains, like Starbucks and Dunkin'. Many local coffee shops also offer this seasonal drink. If you prefer to make it at home, you can buy the ingredients online. Stores like Amazon or grocery delivery services have all you need. Enjoy making it yourself for a fun and tasty experience! You learned how to make a delicious pumpkin white mocha from scratch. We covered the key ingredients, from espresso to spices. You also explored easy steps for brewing, mixing, and serving. Plus, we discussed ways to tweak the recipe to fit your taste. Remember, whether you like it hot or iced, your pumpkin white mocha can be perfect with just a few adjustments. Enjoy your drink and impress your friends with this simple treat. Happy brewing!
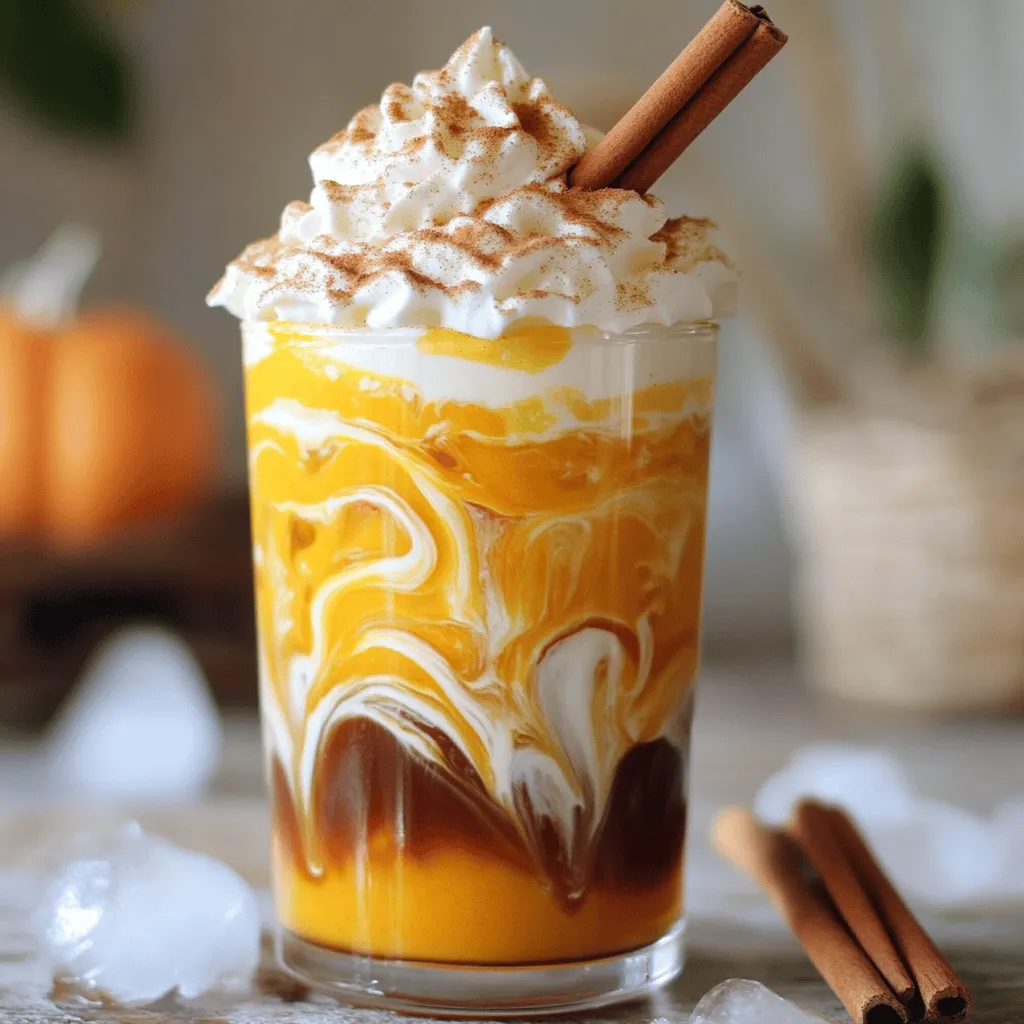
Pumpkin White Mocha Flavorful Fall Drink Recipe
Fall is here, and it’s time to savor the season with a Pumpkin White Mocha! This delightful drink blends rich pumpkin puree, sweet white chocolate,
To make the best dairy free pumpkin spice latte, you need a few key items: - 1 cup dairy-free milk (choose almond, oat, or coconut milk) - 2 tablespoons pumpkin puree - 2 tablespoons maple syrup (or another sweetener you like) - 1 teaspoon pumpkin spice blend - 1/2 teaspoon vanilla extract - 1 shot of brewed espresso or 1/2 cup strong brewed coffee These ingredients work together to create a warm and inviting drink. The dairy-free milk gives it a creamy texture. The pumpkin puree adds rich flavor, while the maple syrup sweetens it just right. The spices bring warmth, making every sip a cozy delight. You can make your latte even more unique with these optional items: - Whipped coconut cream for topping - Ground cinnamon for garnish Adding whipped coconut cream creates a lovely finish. A sprinkle of cinnamon gives it that extra festive touch. Feel free to play around with flavors and toppings to find your favorite blend. Dairy-free milk options are great for many reasons. - Almond milk is low in calories and high in vitamin E. - Oat milk has fiber, which is good for digestion. - Coconut milk has healthy fats that may support heart health. These milk choices can be easier to digest and can fit various diets. They often contain fewer allergens than regular milk, making them great for many people. By choosing dairy-free, you can enjoy your pumpkin spice latte without worry. Start by pouring 1 cup of your favorite dairy-free milk into a small saucepan. I love using oat milk for its creaminess, but you can try almond or coconut milk too. Add in 2 tablespoons of pumpkin puree. This gives the latte its rich flavor and creamy texture. Next, mix in 2 tablespoons of maple syrup. This sweetens your drink naturally. Then, add 1 teaspoon of pumpkin spice blend and 1/2 teaspoon of vanilla extract for a warm taste. Whisk these ingredients together over medium heat. Keep stirring until the mixture is hot and slightly frothy. Be careful not to let it boil. This step is key for a smooth latte. While your milk mixture heats, brew your espresso or coffee. You need 1 shot of espresso or 1/2 cup of strong brewed coffee. If you have an espresso machine, use it! If not, brew a strong coffee with your preferred method. Pour the brewed coffee or espresso into a large mug. This will be the base for your latte. Once your milk mixture is ready, gently pour it over the brewed coffee. Stir to mix everything well. Taste your latte and adjust the sweetness if you want. Add more maple syrup if you prefer it sweeter. For a fun twist, top it with whipped coconut cream. This adds a creamy layer on top. Finally, sprinkle some ground cinnamon over the whipped cream for a festive touch. Enjoy your homemade dairy-free pumpkin spice latte! To get that creamy texture, choose the right dairy-free milk. Almond, oat, and coconut milks work well. Oat milk often gives the best creaminess. Heat the milk mixture slowly. Whisk it gently to create foam. Avoid boiling, as that can change the texture. Maple syrup is my go-to sweetener. It adds a nice depth to the flavor. You can also use agave or honey if you prefer. If you want it sweeter, add more syrup. Taste as you go, and find what works for you. Using espresso gives a stronger flavor. Brew a fresh shot for the best taste. If you prefer coffee, use strong brewed coffee. Aim for a rich brew that can stand up to the milk and spices. Adjust the ratio to match your taste. You can mix espresso and coffee for a unique blend. {{image_2}} You can use many types of milk for this latte. Here are some great choices: - Almond milk - Oat milk - Coconut milk - Soy milk Each milk adds a unique flavor. Almond milk gives a nutty taste. Oat milk is creamy and sweet. Coconut milk adds a tropical touch. Try them all to find your favorite. You can change up the flavors for each season. Here are some fun ideas: - Add a dash of peppermint for winter vibes. - Use chai spice instead of pumpkin spice for an autumn twist. - Try vanilla or caramel syrup for a sweet kick. These small changes can make your latte new and exciting. Get creative and enjoy the fun of mixing flavors in your cup. Want a vegan or low-calorie option? Here’s how to make it happen: - Use a low-calorie sweetener instead of maple syrup. Options include stevia or monk fruit. - Skip the whipped coconut cream for a lighter drink. - Choose unsweetened dairy-free milk to cut extra sugar. These swaps keep your latte tasty while fitting into your diet. You can enjoy your drink without worry! If you have extra pumpkin spice latte, store it in the fridge. Use a sealed container to keep it fresh. It will last for about three days. When you want to enjoy it again, check for any changes in smell or texture. To reheat your latte, pour it into a saucepan. Heat it on low to keep the flavors. Stir it gently to mix the ingredients. Avoid boiling, as this can change the taste. If you prefer, you can also use a microwave. Heat it in short bursts, stirring in between. This way, it warms evenly. You can make a big batch if you love this drink. Just multiply the ingredients by the number of servings you want. After making it, let it cool. Then, pour it into ice cube trays or freezer-safe containers. This method makes it easy to thaw just what you need. When you want a quick latte, just thaw a cube in the fridge overnight. Then, reheat and enjoy! No, regular milk is not dairy-free. This recipe focuses on dairy-free options. You can use almond, oat, or coconut milk. These give a great taste without dairy. Each type has its own flavor and texture. Almond milk is nutty, oat milk is creamy, and coconut milk is rich. The best milk depends on your taste. Almond milk is light and nutty. Oat milk offers creaminess and sweetness. Coconut milk is thick and rich, perfect for a latte. If you want a thicker drink, use full-fat coconut milk. Try different kinds to find your favorite. To make this latte sugar-free, skip the maple syrup. You can use a sugar substitute like stevia or erythritol. Adjust the amount based on your taste. Sweetness varies with each substitute. Always check the serving size for the right amount. You now know how to make a delicious dairy-free pumpkin spice latte. I shared essential and optional ingredients, plus their health benefits. You learned to prepare the milk mixture and brew espresso or coffee. I also gave tips for a creamy texture and ways to sweeten your drink. Explore variations with different milk options and flavor tweaks. Lastly, I covered storage and reheating for leftovers. Enjoy your yummy latte and impress your friends with your new skills!
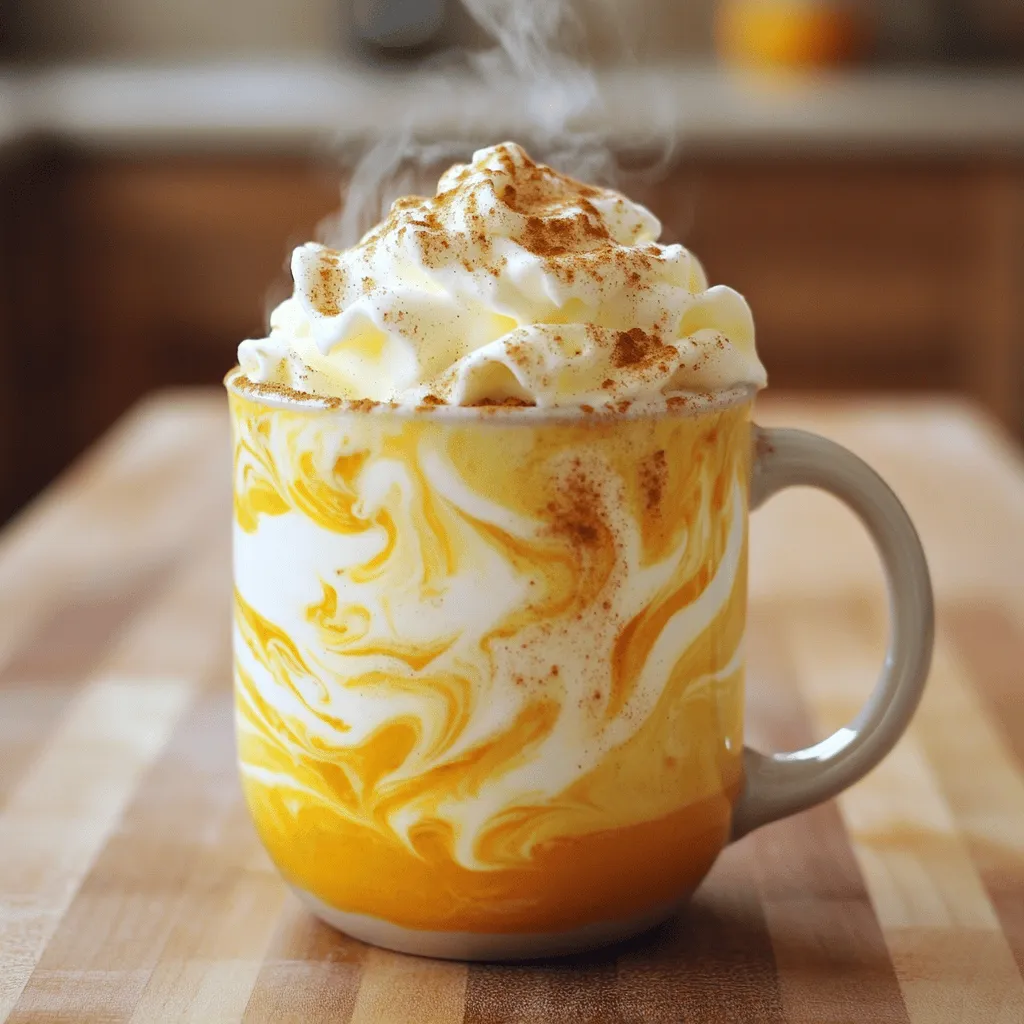
Dairy Free Pumpkin Spice Latte Rich and Creamy Recipe
Are you ready to enjoy a Dairy Free Pumpkin Spice Latte that’s rich and creamy? This simple recipe uses plant-based ingredients to give you the
- 2 cans (12.4 oz each) of refrigerated cinnamon rolls - 5 large eggs - 1 cup whole milk - 1/2 cup heavy cream - 1 teaspoon vanilla extract - 1 teaspoon ground cinnamon - 1/4 teaspoon nutmeg - 1/4 cup maple syrup The heart of this dish is the refrigerated cinnamon rolls. They make the casserole soft and sweet. You will also need eggs, milk, and cream. These create a rich custard that soaks into the rolls. Vanilla extract adds a warm flavor, while ground cinnamon and nutmeg bring out the spice. Lastly, maple syrup adds a touch of sweetness. - 1/2 cup chopped pecans or walnuts (optional) - Powdered sugar for dusting - Additional maple syrup for serving For added crunch, you can mix in chopped pecans or walnuts. They add texture and flavor. After baking, dust the casserole with powdered sugar. This gives a lovely finish. Serve with extra maple syrup on the side. Drizzle it on top for more sweetness. Start by preheating your oven to 375°F (190°C). This step is key for even cooking. While the oven heats, grab a 9x13 inch baking dish. Grease the dish with butter or cooking spray. This will prevent the casserole from sticking. Next, open two cans of refrigerated cinnamon rolls. Separate each roll and cut them into quarters. Place the pieces evenly in the greased baking dish. This helps each bite get that yummy cinnamon flavor. Now, it's time to mix the egg custard. In a large mixing bowl, whisk together 5 large eggs, 1 cup of whole milk, and 1/2 cup of heavy cream. Add in 1 teaspoon of vanilla extract, 1 teaspoon of ground cinnamon, and 1/4 teaspoon of nutmeg. Finally, stir in 1/4 cup of maple syrup. Make sure everything is well combined. Pour this egg mixture evenly over the cinnamon roll pieces. Use a spatula to gently push down any rolls that float. This ensures all pieces soak up the custard. If you want a crunchy topping, sprinkle 1/2 cup of chopped pecans or walnuts over the top. Cover the dish tightly with aluminum foil. Place it in the preheated oven and bake for 30 minutes. This helps set the custard. After that, remove the foil. Bake for another 15 to 20 minutes. Watch for a golden top and a firm center. Once it’s done, take the casserole out of the oven and let it cool for about 5 minutes. Drizzle warm icing from the cinnamon rolls over the top. For a pretty finish, dust with powdered sugar. Serve warm with extra maple syrup on the side. Enjoy your delicious creation! To make your casserole shine, choose the right spices. Ground cinnamon is a must. It gives warmth and depth. Nutmeg adds a nice twist. A little vanilla extract enhances all the flavors. If you want extra richness, use a splash of almond extract. It brings a lovely hint of sweetness. Even cooking is key. Make sure all the pieces of cinnamon roll soak in the egg mixture. Gently press them down with your fingers. This helps them absorb the flavors. Cover the dish with foil for the first half of baking. This keeps moisture in. After 30 minutes, remove the foil for a golden top. Watch it closely to avoid burning. Once baked, let it cool a bit before serving. This helps the casserole set. Drizzle the warm icing from the cinnamon rolls over the top. It adds a sweet glaze. For a beautiful finish, dust with powdered sugar. This gives a lovely contrast to the golden brown. Serve with extra maple syrup on the side for drizzling. {{image_2}} You can make this dish even better by adding fruit. Fresh berries like strawberries, blueberries, or raspberries work well. Just sprinkle them over the cinnamon rolls before pouring the egg mixture. You can also add chocolate chips for a sweeter touch. Mix in about a cup of chips, and you will have a chocolatey delight that everyone will love. While cinnamon rolls are the star, you can explore with other breads too! Brioche or challah adds a rich flavor. You can even try croissants for a flaky texture. If you want to keep it fun, use leftover pastries. Just make sure they are soft enough to soak up the egg mixture. For those with dietary needs, this casserole can fit many diets. Use gluten-free cinnamon rolls if you need a gluten-free option. Just check the package to make sure they are safe. For a dairy-free choice, swap the whole milk and heavy cream for almond or oat milk. You can also use a dairy-free cream alternative. This way, everyone can enjoy a slice of this tasty casserole! After you enjoy your Cinnamon Roll French Toast Casserole, let it cool to room temperature. Then, cut it into squares. Place the squares in an airtight container. Store them in the fridge for up to three days. This keeps them fresh and tasty. To reheat, take a square from the fridge. Place it on a microwave-safe plate. Heat it for about 30 seconds. Check if it's warm enough. If not, heat in 10-second bursts. You can also reheat in the oven. Preheat it to 350°F (175°C). Place the casserole in an oven-safe dish and cover it with foil. Heat for about 15 minutes. This method keeps it soft and delicious. If you want to save some for later, you can freeze it. Wrap each square in plastic wrap. Then, place them in a freezer bag. Make sure to remove as much air as possible. This helps prevent freezer burn. You can freeze it for up to three months. To thaw, move a square to the fridge overnight. Then, reheat it as mentioned above. Enjoy your sweet treat anytime! Yes, you can prepare this casserole the night before. To do this, follow these steps: - Assemble the casserole completely but do not bake it. - Cover it well with plastic wrap or foil. - Store it in the fridge overnight. - When you're ready to bake, let it sit for about 30 minutes at room temperature. This helps it cook evenly. This method saves time, especially for busy mornings. To avoid a soggy casserole, focus on the liquid ratio. Here are some tips: - Use the right amount of milk and cream. Stick to the recipe's measurements. - Make sure to push the cinnamon rolls down gently. This helps them soak up just enough of the liquid. - If you notice excess liquid, add a bit more cinnamon rolls or let it bake a little longer. These steps keep your casserole fluffy yet firm. Yes, homemade cinnamon rolls work great in this casserole. Here’s how to use them: - Cut your homemade rolls into smaller pieces, similar to store-bought ones. - Adjust the egg mixture if your rolls are larger or denser. You may need a bit more milk or eggs. - Bake as directed, but check for doneness. Homemade rolls may cook slightly differently. Using homemade rolls adds a personal touch and can enhance the flavor. This blog post covered how to make a Cinnamon Roll French Toast Casserole. We explored essential ingredients like cinnamon rolls, eggs, and milk. You learned how to prepare the baking dish, assemble the casserole, and bake for perfect results. We shared tips to enhance flavor, ensure even cooking, and present your dish beautifully. Try adding fruits or alternative breads for new flavors. You can store leftovers well, and even reheat them easily. Enjoy making this simple and tasty dish!
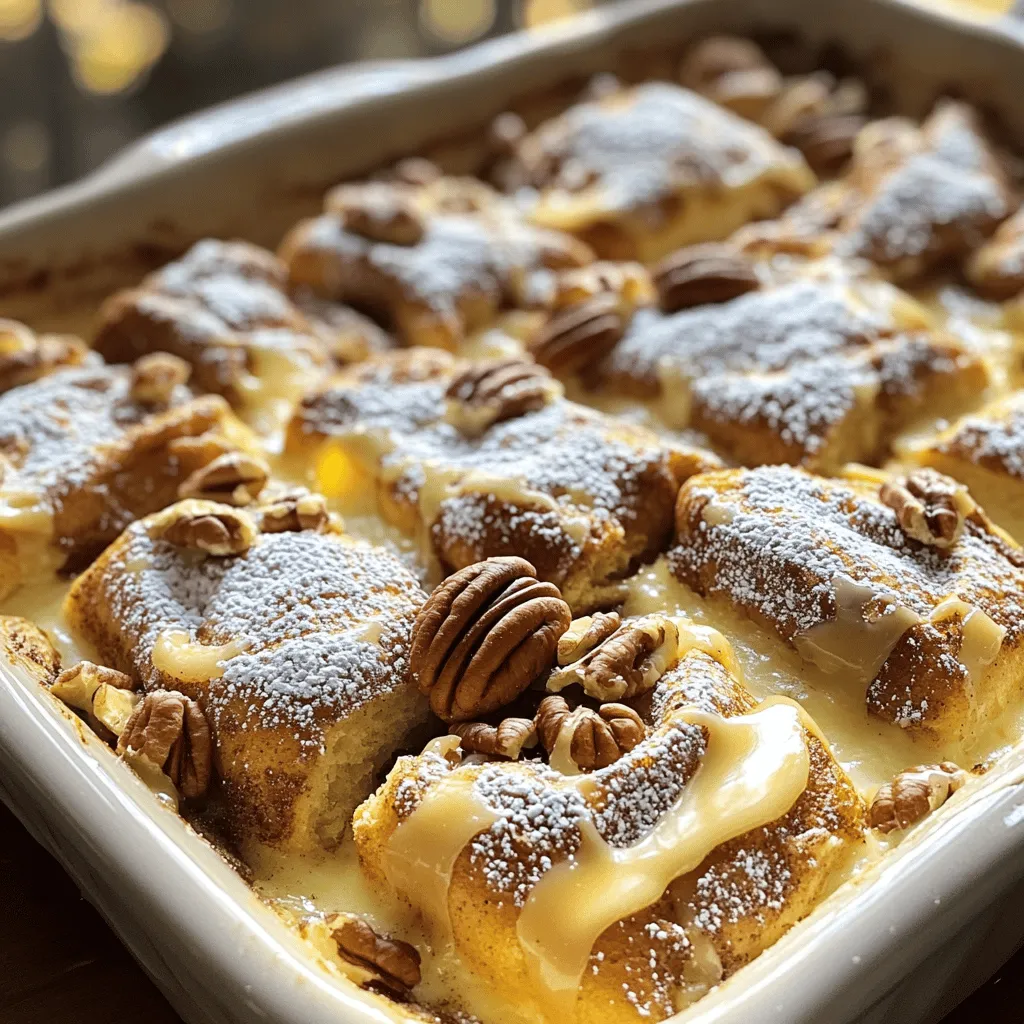
Delicious Cinnamon Roll French Toast Casserole Recipe
Looking for a tasty breakfast that’s easy to prepare? This Delicious Cinnamon Roll French Toast Casserole is the answer. With just a few simple ingredients
- 2 cups brewed coffee (cooled) - 1/4 cup brown sugar - 1 teaspoon vanilla extract - 1/2 cup milk or milk alternative (almond, oat, etc.) - Ice cubes - Optional toppings: Whipped cream, pinch of sea salt When you make brown sugar vanilla iced coffee, you need simple ingredients that blend well. Start with two cups of brewed coffee. Make sure it is cool before using. Cooling coffee helps keep your drink refreshing. Next, grab a quarter cup of brown sugar. This adds a rich flavor that white sugar cannot match. The brown sugar creates a warm note that pairs well with coffee. You also need one teaspoon of vanilla extract. This adds sweetness and a nice aroma. The vanilla brings out the flavors in your drink. For creaminess, use half a cup of milk or a milk alternative. You can use almond or oat milk if you prefer. This choice lets you make a drink that fits your taste. Don't forget the ice cubes! They keep your drink cold and enjoyable on hot days. Finally, add optional toppings like whipped cream or a pinch of sea salt. Whipped cream makes it extra special, while sea salt balances the sweetness. These ingredients come together to create a delicious treat. Enjoy your brown sugar vanilla iced coffee on a sunny day! First, take a small saucepan. Combine 1/4 cup of brown sugar and 1 cup of brewed coffee in it. Heat this mixture over medium heat. Stir it well until the sugar dissolves completely. This will take about 2 to 3 minutes. Once the sugar is gone, remove the saucepan from the heat. Let the syrup cool down before using it. Now, grab a large glass or pitcher. Pour in the cooled syrup. Next, add the rest of the brewed coffee, which is 1 cup. Don’t forget to add 1 teaspoon of vanilla extract for that sweet flavor. Stir everything together until mixed well. It’s time to build your drink! Fill a glass with ice cubes to your liking. Pour the coffee mixture over the ice, leaving some space at the top. This space is for the milk or milk alternative. Add 1/2 cup of milk to your glass. You can use almond, oat, or any other milk you like. Stir gently to mix it all together. If you want, top your drink with whipped cream and a pinch of sea salt. This adds a nice touch. Finally, stir before drinking to enjoy all the great flavors. To get the perfect syrup texture, use a small saucepan. Heat 1/4 cup of brown sugar with 2 cups of brewed coffee. Stir until the sugar dissolves. This should take only 2-3 minutes. Let it cool completely before using it in your coffee. You can adjust the sweetness by adding more or less brown sugar. If you want a creamier drink, add more milk or milk alternatives. Almond or oat milk works great! Both add a nice flavor and creaminess. I love to enjoy this iced coffee in the morning or during a hot afternoon. It’s a great pick-me-up! Pair your iced coffee with a light snack, like a muffin or cookies. You can also enjoy it with breakfast foods, like pancakes or waffles. The sweetness of the coffee goes well with these treats. {{image_2}} You can change the taste of your Brown Sugar Vanilla Iced Coffee easily. Here are some fun ideas: - Adding chocolate or caramel flavors: You can mix in chocolate syrup or caramel sauce. This gives your drink a rich twist. Just add a tablespoon with the brown sugar syrup to blend it all in. The sweet taste of chocolate or caramel pairs well with the vanilla. - Using flavored syrups or extracts: Try different flavored syrups like hazelnut or almond. A few drops can change the whole vibe. You can also use flavored extracts, like coconut or peppermint. Just remember to start small, then taste and adjust. You can make this iced coffee fit your dietary needs. Here are a couple of ways to do that: - Low-calorie sweeteners: If you want to cut calories, use sweeteners like stevia or monk fruit. They add sweetness without the extra sugar. Start with a small amount, then taste. You can always add more. - Alternative milk options for dietary needs: If you can’t have dairy, there are many milk options. Almond milk, oat milk, or soy milk all work great. Each gives a different flavor and creaminess. Choose what you like best or what you have on hand. To keep your brewed coffee fresh, store it in an airtight container. Glass or plastic works well. Keep it in the fridge. This way, it stays good for up to a week. For the brown sugar syrup, let it cool first. Then, pour it into a jar with a lid. Store it in the fridge. It can stay fresh for about two weeks. If it gets too thick, just warm it slightly to loosen up. You can make your coffee ahead of time. Brew a larger batch and cool it down. This way, you can enjoy iced coffee all week. To store the finished drink, pour it into a sealed container. Keep it in the fridge. The flavor will stay fresh for about three days. Just remember to shake or stir it before drinking. Enjoy your cold treat anytime! How can I make this iced coffee without refined sugar? You can replace brown sugar with pure maple syrup or honey. Both add a nice flavor. Use the same amount as the brown sugar. If you want a zero-calorie option, try stevia or monk fruit sweetener. Can I use cold brew coffee for this recipe? Yes, cold brew works great! It gives a smoother taste. Just mix it with the brown sugar syrup and vanilla as you normally would. What are the best milk alternatives for iced coffee? Almond milk, oat milk, and coconut milk are popular choices. They add different flavors. Almond is nutty, oat is creamy, and coconut is tropical. Choose what you like best! How long does homemade iced coffee last in the fridge? Homemade iced coffee stays fresh for about 3 to 5 days in the fridge. Store it in a sealed container. This keeps it tasting great and helps avoid spills. You now know how to create a delicious brown sugar vanilla iced coffee at home. Start with simple ingredients and follow the steps to make the syrup and mix your drink. Use our tips to adjust flavors and store leftovers. Try different variations for fun flavor upgrades. Remember, making iced coffee can be quick and easy. Enjoy it at any time. Your perfect summer drink awaits!
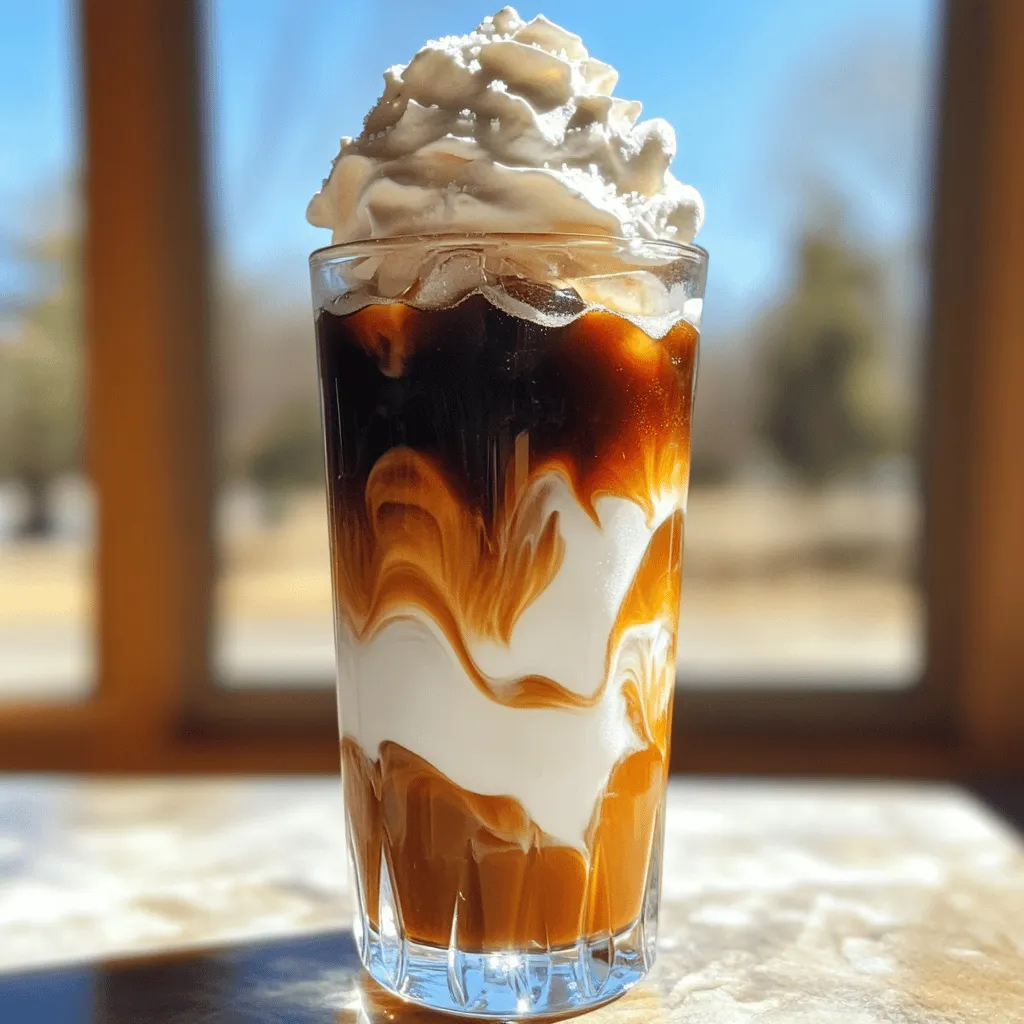
Brown Sugar Vanilla Iced Coffee Refreshing Summer Treat
Looking for a cool drink to beat the heat this summer? Try my Brown Sugar Vanilla Iced Coffee! This tasty treat combines rich coffee, sweet
- 2 cups whole milk (or your preferred milk alternative) - 1 cup heavy cream - 1/4 cup pure maple syrup (or agave nectar) - 1 vanilla bean, split and seeds scraped - 1 teaspoon pure vanilla extract - Pinch of salt - Recommended milk alternatives: You can use almond, oat, or coconut milk. Each adds a unique taste. - Quality of vanilla bean: Choose a fresh, fragrant vanilla bean. This boosts flavor and aroma in your creamer. - Sugar alternatives for health-conscious readers: Consider using honey or stevia instead of maple syrup. These options can help cut calories while keeping sweetness. 1. Start by heating 2 cups of whole milk and 1 cup of heavy cream in a medium saucepan. Use medium heat and stir often. You want it warm, but do not let it boil. 2. Once warm, add 1/4 cup of pure maple syrup. Stir it in well until it blends smoothly. 3. Now, take your vanilla bean. Split it open and scrape out the seeds. Add both the seeds and the empty pods to the saucepan. 4. Heat this mixture for about 5 to 7 minutes. This allows the flavors to infuse. Keep stirring, and remember, no boiling! 1. After the time is up, remove the saucepan from the heat. Stir in 1 teaspoon of pure vanilla extract and a pinch of salt. 2. Let your mixture cool down to room temperature. It’s important to let it cool before the next step. 3. Once cooled, strain the mixture through a fine-mesh sieve. This will remove the vanilla bean pods, leaving you with a smooth creamer. 1. For a lovely presentation, pour your creamer into a beautiful glass bottle or creamer. 2. When serving, drizzle a little homemade vanilla-infused syrup on top. You can also sprinkle some cinnamon for a nice touch. 3. This creamer pairs perfectly with coffee, adding a rich flavor that enhances your drink. To make your vanilla bean coffee creamer even better, think about sweetness. You can add more or less maple syrup based on your taste. If you want a different twist, try adding spices like cinnamon or nutmeg. A little bit goes a long way and adds warmth. You can also mix in a splash of almond or coconut extract for more depth. One big mistake is letting the mixture boil. Boiling can change the taste and texture. Instead, heat it gently until warm. Another mistake is not straining the mixture well. Use a fine-mesh sieve to catch the vanilla bean pods. This step ensures a smooth creamer. Serve your creamer warm or cold. If warm, pour it right into your coffee. If cold, chill it first. Use a nice glass bottle to show off your homemade delight. For extra flair, drizzle a bit of vanilla syrup on top or sprinkle cinnamon. This makes for an attractive presentation and enhances the overall coffee experience. {{image_2}} You can easily make this creamer dairy-free. Just swap the whole milk and heavy cream for your favorite milk alternative. Almond milk, oat milk, and coconut milk all work well. Each adds a unique flavor that enhances your coffee. Want to mix it up? Try making chocolate vanilla bean coffee creamer. Just add 1/4 cup of cocoa powder to your milk mixture. Stir well to combine and heat as usual. For seasonal flavors, add pumpkin spice in fall. Just include 1-2 teaspoons of pumpkin spice to your warm mixture. Your coffee will taste like autumn! If you're watching your sugar, you can still enjoy this creamer. Use stevia or erythritol instead of maple syrup. Start with a small amount and adjust to taste. Both options give you sweetness without the calories. Store your homemade vanilla bean coffee creamer in the fridge. It lasts for up to one week. Use a clean, airtight container to keep it fresh. Always check for any signs of spoilage before use. If it smells off or has changed color, do not consume it. Yes, you can freeze vanilla bean coffee creamer. Pour it into ice cube trays for easy use later. Once frozen, transfer the cubes to a freezer bag. This way, you can add just what you need to your coffee. Use it within three months for the best flavor. Repurposing your old containers is a great way to reduce waste. Use glass jars for storage or for homemade gifts. They are perfect for holding small snacks or spices. You can also use them for DIY projects or as plant holders. Each container can have a new life! To make this creamer, follow these basic steps: 1. Combine 2 cups of whole milk and 1 cup of heavy cream in a medium saucepan. 2. Heat the mixture on medium until warm, but do not boil. 3. Stir in 1/4 cup of pure maple syrup or agave nectar. 4. Split your vanilla bean and scrape the seeds into the mix. Add the whole pod too. 5. Heat for 5-7 minutes to let the flavors blend. Stir often. 6. Remove from heat and add 1 teaspoon of pure vanilla extract and a pinch of salt. 7. Cool to room temperature, then strain to remove the bean pods. 8. Store your creamer in a clean jar in the fridge for up to a week. Vanilla extract comes from soaking vanilla beans in alcohol. It gives a strong, sweet flavor. On the other hand, vanilla bean has tiny seeds that add a rich, natural taste to your recipes. The seeds have a fresh, floral aroma. Using both can enhance the flavor of your creamer. Yes, you can change the sweetness to fit your taste. If you want it sweeter, add more maple syrup or agave nectar. Start with one tablespoon at a time. Taste as you go to find your perfect level. If you prefer less sweetness, reduce the syrup by half. You can find vanilla bean coffee creamer in many grocery stores. Check the dairy aisle or the coffee section. If you prefer online shopping, websites like Amazon and specialty food stores sell it too. Always look for brands that use real vanilla for the best flavor. Making homemade vanilla bean coffee creamer is fun and easy. You learned about key ingredients like whole milk, heavy cream, and pure syrup. I shared tips on how to prepare and store your creamer. Experiment with flavors, from seasonal spices to sugar-free options, to suit your taste. Remember, the right container can make your coffee experience even better. Enjoy your delicious creation and impress your friends with your new skills!
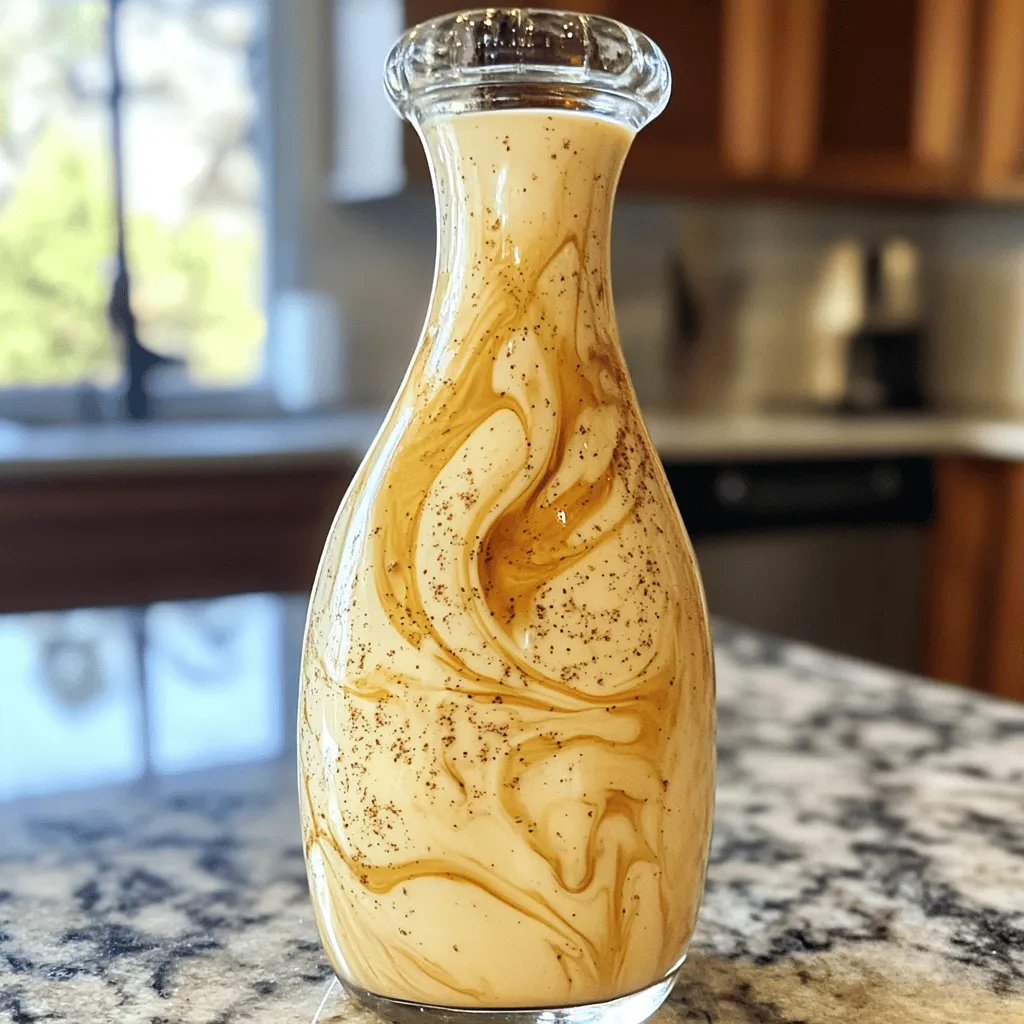
Vanilla Bean Coffee Creamer Simple Homemade Delight
Are you ready to upgrade your morning coffee? Making homemade vanilla bean coffee creamer is easy and delicious! With just a few simple ingredients, you
- 1 cup cottage cheese - 1 cup canned pumpkin puree - 2 large eggs - 1/2 cup sugar or maple syrup Cottage cheese gives these muffins a fluffy texture. It adds protein and moisture. The canned pumpkin puree brings rich flavor and adds a beautiful orange color. Eggs help bind the ingredients, making the muffins rise. You can use sugar or maple syrup for sweetness. Both options work well. - 1/4 cup melted coconut oil or unsalted butter - 1 teaspoon vanilla extract - 1 1/2 cups all-purpose flour - 1 tablespoon pumpkin pie spice Coconut oil or butter adds richness and a nice mouthfeel. Vanilla extract enhances the sweetness and flavor. All-purpose flour gives the muffins structure. Pumpkin pie spice adds warm notes of cinnamon, nutmeg, and ginger that scream fall! - 1/2 cup chopped walnuts or pecans - 1/2 cup chocolate chips You can add nuts for a crunch. Walnuts or pecans pair well with pumpkin. Chocolate chips add a sweet surprise in each bite. These add-ins make the muffins even more fun and tasty! - Preheat your oven to 350°F (175°C). - Line a muffin tin with paper liners or grease it well. - In a large bowl, combine the cottage cheese, canned pumpkin, and eggs. - Add the sweetener, coconut oil, and vanilla extract. Mix until smooth. - In a separate bowl, whisk together the flour, pumpkin pie spice, baking powder, baking soda, and salt. - Gradually add the dry mix to the wet mix. Stir gently until just combined. - Spoon the batter into the muffin tin, filling each cup about 2/3 full. - Bake for 18-20 minutes. Check doneness with a toothpick; it should come out clean. To achieve a light and fluffy muffin, avoid overmixing. Mix the wet and dry ingredients until they just blend. This keeps the muffins tender and airy. If you mix too much, the muffins can turn out tough, which no one wants! Ensuring even baking is key. Place the muffin tin in the center of the oven. This helps heat circulate well. Rotate the tin halfway through baking to promote even cooking. For sweeteners, you can use sugar or maple syrup. Maple syrup adds a nice hint of flavor. You can also try brown sugar for a richer taste. If you want less sweetness, reduce the amount based on your taste. Adjusting spices makes a big difference. If you like it spicier, add more pumpkin pie spice. You can also mix in a bit of cinnamon or nutmeg for extra warmth. These muffins taste great with toppings. Try a dollop of whipped cream on top. A sprinkle of cinnamon sugar also adds a nice touch. For drinks, pair these muffins with a hot cup of tea or coffee. The warmth of the drink complements the cozy flavor of the muffins. Enjoy them fresh for a delightful snack! {{image_2}} To make these muffins gluten-free, swap the all-purpose flour for a gluten-free blend. Look for a mix that includes xanthan gum for better texture. You may need to adjust moisture levels when using gluten-free flour. Add a bit more liquid, like milk or water, to keep muffins moist. For a vegan version, replace the eggs with flax eggs. Mix 1 tablespoon of ground flaxseed with 2.5 tablespoons of water. Let it sit for five minutes to thicken. You can also use plant-based yogurt instead of cottage cheese. Choose almond, soy, or coconut yogurt for a creamy texture. Use maple syrup or agave for sweetness. Experiment with different spices for a unique taste. Try adding cinnamon or nutmeg for more warmth. You can also mix in dried cranberries or chopped apples for a fall twist. For the holidays, consider adding chocolate chips for a festive feel. Each variation brings a new flavor and joy to your muffin experience. After baking your muffins, let them cool. Place them in an airtight container. This keeps them fresh. You can also use a zip-top bag. Store them at room temperature. They last for about three days. For longer freshness, put them in the fridge. In the fridge, they can stay good for up to one week. To freeze the muffins, first let them cool fully. Wrap each muffin in plastic wrap. Place the wrapped muffins in a freezer-safe bag. Make sure to squeeze out as much air as possible. You can freeze them for up to three months. When ready to enjoy, take one out and thaw it in the fridge overnight. For a quick fix, you can microwave it for about 30 seconds. To keep your muffins moist, store them with a slice of bread. The bread helps maintain moisture. Always check for signs of spoilage. Look for mold or an off smell. If they feel dry or crumbly, they may not be good to eat. Always trust your senses to ensure the best taste! Yes, you can use fresh pumpkin. Start by cutting a sugar pumpkin in half. Remove the seeds and stringy bits. Roast the pumpkin halves in the oven for about 45 minutes at 350°F (175°C) until soft. Scoop out the flesh and mash it until smooth. This yields about 1 cup. Fresh pumpkin may taste richer and have a more vibrant flavor than canned options. Walnuts and pecans are great choices. Walnuts add a slight bitterness and crunch, while pecans bring a sweet, buttery taste. Both nuts complement the pumpkin spice flavor well. You can also try almonds for a milder crunch or hazelnuts for a unique twist. Just remember, chop the nuts finely for even distribution in the muffins. You can reduce the sugar by half or use a natural sweetener like honey or maple syrup. This makes the muffins less sweet but still tasty. For fat, substitute half of the coconut oil with unsweetened applesauce. This keeps moisture while lowering calories. To add whole grains, replace half of the all-purpose flour with whole wheat flour. This boosts fiber and nutrients without changing the flavor much. These muffins are simple and fun to make. We covered the key ingredients, including cottage cheese and pumpkin. You learned how to mix wet and dry items to create delicious muffins. I shared tips for perfect texture and flavor, plus fun variations and storage methods. Enjoy these muffins warm or with your favorite toppings. With practice, you’ll master them quickly. Happy baking!
Pumpkin Spice Cottage Cheese Muffins Easy Recipe
If you love fall flavors, you’ll adore these Pumpkin Spice Cottage Cheese Muffins. This easy recipe blends creamy cottage cheese with pumpkin puree for moisture
To make this cozy drink, you need a few key items: - 1 cup brewed strong coffee or espresso - 1 cup milk (choose from whole, almond, or oat) - 2 tablespoons brown sugar - 1 teaspoon ground cinnamon - 1/2 teaspoon vanilla extract Each ingredient plays an important role. Strong coffee or espresso gives a bold base. Milk adds creaminess and richness. Brown sugar brings sweetness, while cinnamon and vanilla add warm flavor notes. You can top your latte with fun extras: - Whipped cream - Ground cinnamon or cinnamon sticks These toppings make your drink special. Whipped cream adds a fluffy texture. A sprinkle of cinnamon or a stick enhances the drink's look and taste. Feel free to get creative! Heating the milk: Start with one cup of milk. You can use whole, almond, or oat milk. Pour the milk into a small saucepan. Heat it over medium heat. You want it to steam but not boil. Keep an eye on it. This helps you avoid burning the milk. Frothing techniques: Once the milk is hot, it’s time to froth. You can use a milk frother for this. If you don’t have one, a whisk works too. Just whisk the milk until it gets foamy. This will make your latte creamy and rich. Brewing methods for coffee or espresso: While you heat the milk, brew your coffee or espresso. Use strong coffee to get the best taste. A French press or drip maker works well. If you prefer espresso, use an espresso machine. Brew one cup, and set it aside while you mix the other ingredients. Creating the cinnamon-brown sugar paste: In a separate bowl, mix two tablespoons of brown sugar with one teaspoon of ground cinnamon. Add half a teaspoon of vanilla extract. Stir this together until it forms a paste. This mixture will add warmth and sweetness to your latte. Mixing the latte components: Take a large coffee mug. Pour in the brewed coffee or espresso. Add the cinnamon-brown sugar paste. Stir well to make sure the sugar dissolves. Next, slowly pour the frothed milk over the coffee. Use a spoon to hold back the foam at first. Pour the liquid milk in first, then top with the foam. Finally, you can add whipped cream on top. Sprinkle some extra ground cinnamon, or use a cinnamon stick for garnish. Enjoy your cozy drink! To get that creamy froth, you need the right tools. A milk frother works wonders. You can also use a whisk or a jar with a lid. If using a jar, shake the milk hard for 30 seconds. This creates nice foam. Remember to heat your milk first but don’t boil it. Steaming it will help the froth hold its shape. Want to add more flavor? Try different syrups like caramel or mocha. You can also blend in extra spices. Nutmeg or cardamom adds a nice twist. If you love sweetness, add more brown sugar. Just mix it in with your cinnamon-brown sugar paste. This makes every sip extra tasty. The right timing and temperature matter a lot. Heat your milk until it’s steaming, around 150°F. If it’s too hot, it can affect the taste. Brew your coffee or espresso fresh so it’s hot when mixed. Cold ingredients will cool down your drink fast. Serve your latte hot for the best cozy feel. {{image_2}} If you want a dairy-free drink, try almond, oat, or coconut milk. Each option offers a unique taste and texture. Almond milk gives a slightly nutty flavor. Oat milk is creamy and frothy, perfect for lattes. Coconut milk adds a tropical twist. Choose what you like best! You can easily add different flavors to your latte. For a chocolate twist, mix in some cocoa powder or chocolate syrup. This adds a rich taste. If you prefer caramel, drizzle some caramel sauce on top. Both options make your drink sweet and fun! To enjoy an iced version, start by brewing your coffee and letting it cool. Fill a glass with ice cubes. Pour the cooled coffee over the ice. Then, use cold milk instead of hot. Froth the cold milk, then pour it over the coffee. Top with whipped cream and cinnamon. Now, you have a refreshing iced cinnamon dolce latte! To store any leftover latte mixture, pour it into an airtight container. Keep it in the fridge. It will stay fresh for up to three days. Make sure to stir it well before using. The best way to reheat your latte is on the stove. Pour it into a saucepan and warm it over low heat. Stir it gently to avoid burning. You can also use a microwave. Heat it in short bursts of 30 seconds, stirring in between. Most of your ingredients can last a while. Brewed coffee or espresso is best used right away. Store milk in the fridge for up to a week. Brown sugar stays fresh for several months if sealed well. Ground cinnamon and vanilla extract can last for years if stored properly. Yes, you can use sugar substitutes. Try using stevia, monk fruit, or coconut sugar. These options add sweetness without extra calories. Just remember to adjust the amount based on the sweetness level of the substitute. If you use a liquid sweetener, reduce the milk a bit. This keeps the drink balanced and tasty. I recommend using strong coffee or espresso. A rich brew brings out the flavors well. Espresso is great if you want a bold taste. If you prefer a lighter flavor, use brewed coffee. Make sure it is strong enough to stand up to the milk and spices. The coffee is the heart of this drink. To make this drink vegan, use plant-based milk. Almond, oat, or soy milk work well. For sweetening, choose a vegan sugar substitute. Also, skip the whipped cream or use a vegan version. This way, you can enjoy the cinnamon dolce latte without dairy products. It tastes just as good! Absolutely! To make a larger batch, just multiply the recipe. For each extra serving, add one cup of coffee and one cup of milk. Adjust the sugar and spices to taste. You can mix the ingredients in a big pot. Just be careful when frothing the milk; you may need to do it in batches. Enjoy sharing it with friends! In this post, we explored how to make a homemade cinnamon dolce latte. We covered essential ingredients like strong coffee, milk options, and sweeteners. You learned step-by-step instructions for preparing milk, brewing coffee, and combining flavors. Tips for frothing and variations, like dairy-free options, added more depth. Remember, making this drink can be fun and rewarding. Enjoy crafting your unique latte at home!
Homemade Cinnamon Dolce Latte Delightful Coffee Treat
Are you ready to savor a delicious Homemade Cinnamon Dolce Latte? This delightful coffee treat warms your soul and fills your home with cozy scents.
To make the Iced Pumpkin Cream Chai Latte, you will need: - 1 ½ cups brewed chai tea (cooled) - 1 cup milk (or dairy-free alternative) - ½ cup pumpkin puree - 2 tablespoons maple syrup - 1 teaspoon vanilla extract - ½ teaspoon pumpkin pie spice, plus extra for garnish - 1 cup ice - Whipped cream (optional for topping) Each of these ingredients plays a key role. The chai tea gives warmth and spice. The pumpkin puree adds creaminess and flavor. Maple syrup sweetens the drink naturally. You can easily swap some ingredients if needed: - Chai Tea: Use any black tea with spices if you prefer. - Milk: Almond, oat, or coconut milk work well for a dairy-free option. - Pumpkin Puree: Sweet potato puree can be a tasty alternative. - Maple Syrup: Honey or agave syrup can replace maple syrup. - Pumpkin Pie Spice: A mix of cinnamon, nutmeg, and ginger will suffice. These swaps can keep the drink tasty and fun. This drink is not only delicious but also offers some nutrition: - Calories: Approximately 250 per serving with whipped cream. - Protein: About 5 grams, depending on milk choice. - Fat: Varies based on milk type; non-dairy options may have less fat. - Carbohydrates: Roughly 35 grams, mostly from pumpkin and syrup. Enjoy this drink as a treat, but be mindful of the sugar content from the maple syrup. To start, brew your chai tea. Follow the package instructions for the best flavor. After brewing, let it cool completely. You can speed this up by placing it in the fridge. This chilled tea forms the base for your latte. Next, gather a blender. Add the cooled chai tea to it. Then, pour in one cup of milk or any dairy-free option you like. Add half a cup of pumpkin puree for that rich taste. Now, include two tablespoons of maple syrup for sweetness. Don't forget one teaspoon of vanilla extract. Lastly, add half a teaspoon of pumpkin pie spice. Blend everything on high until it's smooth. This mixture is where the magic happens. Now it’s time to serve! Fill a tall glass with ice. Pour the blended pumpkin chai over the ice, leaving some space at the top. If you want to make it special, add whipped cream on top. Sprinkle some extra pumpkin pie spice for a nice touch. Enjoy your drink right away. Stir in the whipped cream if you use it. This Iced Pumpkin Cream Chai Latte is a perfect treat for autumn! To get the best flavor, start with fresh chai tea. Brew the tea strong for a bold taste. Use good-quality pumpkin puree for a rich, smooth texture. Maple syrup adds a nice sweetness. If you like spice, add more pumpkin pie spice. Blend all the ingredients well to mix flavors. Avoid using hot chai tea. It can melt the ice too fast. Don’t skip the blending step; it helps combine all flavors. Also, watch how much pumpkin puree you add. Too much can make the drink too thick. Lastly, be careful with the maple syrup. A little goes a long way! For a pretty drink, use a tall glass. Fill it with ice before pouring in the latte. Top with whipped cream for a creamy finish. A sprinkle of pumpkin pie spice makes it look festive. Consider adding a cinnamon stick for an extra touch. Enjoy your drink while it's cold and fresh! {{image_2}} You can easily make this drink dairy-free or vegan. Just swap regular milk with a dairy-free alternative. Almond milk, oat milk, or coconut milk all work great. These options keep the drink creamy and delicious. Use your favorite non-dairy milk to enjoy the same pumpkin flavor. You can customize your Iced Pumpkin Cream Chai Latte for different seasons. For a winter twist, add peppermint extract to give a fresh taste. In spring, you can mix in some fresh vanilla for a lighter flavor. You can also try adding a splash of apple cider in the fall for extra warmth. Each season brings a new flavor to enjoy! For a fun adult version, add spiced rum to your latte. Start by blending the chai mixture as usual. Once blended, pour it over ice and add a shot of spiced rum. The rum adds a warm kick that pairs well with pumpkin and chai spices. This makes a perfect drink for an autumn gathering or cozy night in. To store your Iced Pumpkin Cream Chai Latte, pour any leftovers into a sealed container. Keep it in the fridge. This drink stays fresh for up to two days. If you notice any separation, just shake it well before enjoying again. If you prefer your chai warm, you can reheat it. Pour the latte into a pot and heat it on low. Stir often to avoid burning. You can also use the microwave. Heat it in short bursts, stirring in between. Remember, the whipped cream will not hold up when reheated. Making this drink in bulk is easy and fun. Start by brewing extra chai tea. You can mix a larger batch of the pumpkin blend in a big blender. Store the mixture in the fridge for up to two days. When ready to serve, pour over ice for a quick treat. This way, you can enjoy a fall favorite anytime! Yes, you can use different types of tea. Chai tea has rich spices that blend well with pumpkin. If you want a milder flavor, try using green tea or herbal tea. Both can add a nice twist to your drink. Just remember to adjust the spice levels. For a true chai flavor, stick to black tea or chai blends. To make it sugar-free, swap maple syrup with a sugar-free sweetener. I recommend stevia or erythritol. These sweeteners provide a similar taste without the calories. Adjust the amount according to your taste. You can also skip the sweetener altogether if you prefer a more natural flavor. The pumpkin puree adds a bit of sweetness too. Making this drink in advance is simple. Brew your chai tea and let it cool. Blend all ingredients together and store in the fridge. This way, you can serve it cold later. Just remember to stir or shake it before drinking. Pour over ice right before you enjoy it. This keeps every sip fresh and tasty. This blog post guided you through making the perfect chai tea. We explored the key ingredients, tips for flavor, and common mistakes. I shared ways to present your drink beautifully and how to store it for later. You now know how to customize your chai with fun variations. In closing, chai tea is flexible and fun. With these steps, you can enjoy it any way you like. Experiment and make it your own! Enjoy your tasty creations.
Iced Pumpkin Cream Chai Latte Flavorful Autumn Sip
Autumn is here, and so is the time for cozy drinks! The Iced Pumpkin Cream Chai Latte blends warming spices with smooth pumpkin cream for