Appetizers
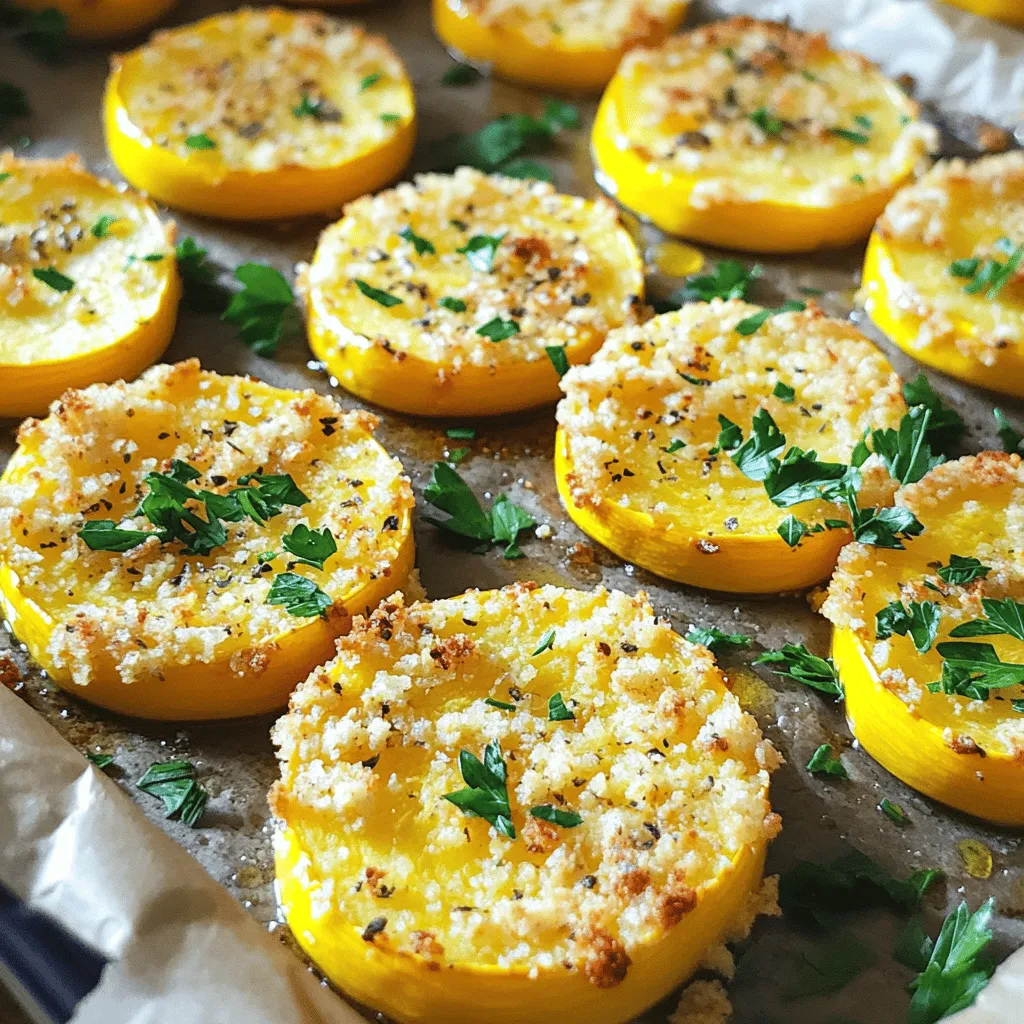
Baked Parmesan Yellow Squash Rounds Flavorful Snack
If you’re looking for a tasty and healthy snack, you’ve found it! Baked Parmesan Yellow Squash Rounds are easy to make and full of flavor.

Keto Philly Cheesesteak Roll-Ups Savory Low-Carb Dish
Get ready to savor a delicious low-carb twist on a classic favorite! My Keto Philly Cheesesteak Roll-Ups are perfect for anyone wanting to enjoy rich

Parmesan Zucchini Potato Muffins Fresh and Savory Snack
Looking for a tasty snack that’s both fresh and savory? These Parmesan Zucchini Potato Muffins are just what you need! Packed with flavor and easy

Soft and Tender Zucchini Cheddar Biscuits Delight
Welcome to your new favorite recipe! Today, I’m excited to share my Soft and Tender Zucchini Cheddar Biscuits. They’re easy to make and bursting with
![- 2 medium zucchinis, grated - 1 teaspoon salt - 1/2 cup all-purpose flour - 1/4 cup grated Parmesan cheese - 1/4 cup chopped fresh parsley - 1 large egg, beaten - 1/2 teaspoon garlic powder - 1/2 teaspoon onion powder - 1/4 teaspoon black pepper - Olive oil for frying For these easy zucchini fritters, you will need fresh ingredients that bring out the best flavor. Start with two medium zucchinis. Grating them allows for even cooking and a tender texture. Sprinkle the grated zucchini with salt. This step helps draw out excess moisture, making your fritters crispy. Next, you’ll need all-purpose flour and Parmesan cheese. The flour binds the ingredients together, while the cheese adds a savory kick. For the additional ingredients, fresh parsley adds color and freshness. One large beaten egg helps hold everything together. Garlic powder and onion powder give your fritters extra flavor. Finally, a pinch of black pepper adds a little heat. You will also need olive oil for frying. This oil provides a nice golden crust that makes the fritters irresistible. Check out the Full Recipe for details on preparation! - Grate the zucchinis and salt them. - Allow to drain for 10-15 minutes. Start by grating two medium zucchinis. I find that using a box grater works best. Once grated, place the zucchini in a colander. Sprinkle it with one teaspoon of salt. The salt helps draw out excess moisture. Let it sit for about 10-15 minutes. This step is key to making your fritters crispy. - Squeeze out excess moisture. - Combine all ingredients in a mixing bowl. After the zucchini has drained, grab a clean kitchen towel. Use it to squeeze out any remaining moisture from the zucchini. You want it to be as dry as possible. Next, in a large mixing bowl, combine the grated zucchini with the other ingredients. Add ½ cup of all-purpose flour, ¼ cup of grated Parmesan cheese, ¼ cup of chopped fresh parsley, one beaten large egg, ½ teaspoon of garlic powder, ½ teaspoon of onion powder, and ¼ teaspoon of black pepper. Mix everything well until it's fully integrated. - Heat olive oil in a skillet. - Spoon and flatten the fritters in the skillet. - Cook until golden brown on each side. Now, heat olive oil in a skillet over medium heat. Add enough oil to cover the bottom. Once the oil is hot, spoon about 2 tablespoons of the zucchini mixture onto the skillet. Flatten each fritter slightly with the back of your spoon. Cook each fritter for about 3-4 minutes on each side. Look for that golden brown color to know they are done. Adjust the heat as needed to avoid burning. After cooking, transfer the fritters to a plate lined with paper towels to soak up any extra oil. Repeat with the remaining mixture, adding more oil as needed. For the full recipe, check out [Full Recipe]. To make perfect zucchini fritters, start by draining the zucchinis. This step is key. When zucchinis are too wet, your fritters will be soggy. After grating, sprinkle salt on your zucchinis and let them sit for 10-15 minutes. This will help pull out extra moisture. After that, squeeze them in a clean towel to remove even more water. Mixing is also important. Combine all your ingredients in a large bowl. Use a spatula or spoon to mix them well. This ensures that every bite has the same flavor. When it comes to cooking, heat matters. Set your skillet over medium heat. If the heat is too high, the fritters will burn. Too low, and they will absorb too much oil. A good rule is to adjust the heat as needed. Use enough oil to coat the skillet. This helps the fritters fry evenly. If you see smoke, lower the heat. Aim for a nice golden brown color for each fritter. Presenting your fritters well makes them even more tasty. Serve them warm on a nice plate. You can add a side of Greek yogurt or tzatziki for dipping. A sprinkle of fresh parsley adds a nice touch. A lemon wedge can also brighten the dish. This not only looks good but adds flavor too. Enjoy your fritters fresh and hot! For the full recipe, check out the details above. {{image_2}} To make your zucchini fritters even better, try adding spices. Paprika gives a nice smoky flavor. A dash of cayenne adds some heat. You can also mix in different cheeses. Feta adds a creamy tang. Cheddar provides a rich, sharp taste. These tweaks can turn a simple fritter into something special. If you need a gluten-free option, swap all-purpose flour for almond flour. This change keeps the fritters tasty while meeting dietary needs. For vegan eaters, use a flax egg instead of a regular egg. To make a flax egg, mix one tablespoon of flaxseed meal with three tablespoons of water. Let it sit for five minutes until it thickens. Both options keep the flavors intact. Zucchini fritters pair well with salads or soups. Their crunch complements fresh greens. Serve them as mini-fritters for appetizers at a party. You can stack them high or arrange them on a platter. Don’t forget to add a side of Greek yogurt or tzatziki for dipping. This adds creaminess and a burst of flavor. For a fun twist, garnish with a lemon wedge. It brightens the dish and adds a zesty kick. Store cooked fritters in an airtight container. Line the bottom with paper towels to absorb moisture. This helps keep them crispy. You can refrigerate them for about 3-4 days. Always check for any off smell or color before eating. For freezing uncooked fritters, shape them and place them on a baking sheet. Freeze until solid, then transfer to a freezer bag. This way, they won’t stick together. You can keep them in the freezer for up to 3 months. To reheat, cook them directly from frozen. Use an oven for the best results. Preheat your oven to 375°F (190°C). Place the fritters on a baking sheet and heat for about 10-15 minutes. This keeps them crispy. If you use a microwave, heat in short bursts. However, this can make them soggy. Always check the fritters to avoid overheating. To make your zucchini fritters crispy, start by removing moisture. Grate the zucchinis and sprinkle them with salt. Let them sit for 10-15 minutes. This step draws out excess water. Afterward, squeeze the zucchinis with a towel to remove more liquid. Use the right amount of flour; it helps bind without making them dense. Heat your oil well before adding the fritters. Fry them until golden brown on both sides. This ensures a nice crunch. Yes, you can definitely use other veggies! Carrots, sweet potatoes, or even spinach work well. For a mix, try combining zucchini with corn or bell peppers. Each veggie will add unique flavors and textures. Grate them like you do with zucchini, and follow the same method to remove moisture. This way, you can enjoy different fritters every time! I love serving zucchini fritters warm. Pair them with dips like Greek yogurt or tzatziki sauce. These creamy dips complement the fritters well. You can also serve them on a bed of fresh salad for a light meal. Add a lemon wedge on the side for a zesty touch. Garnishing with parsley brightens the dish and adds color. To check if your fritters are done, look for a golden brown color. They should be firm to the touch. Cook each side for about 3-4 minutes over medium heat. If they brown too fast, lower the heat. When done, drain them on paper towels to remove excess oil. This ensures they stay crispy and delicious. You can make great zucchini fritters with simple steps and fresh ingredients. We discussed how to prepare and cook them to get a crispy texture. Tips for storing, freezing, and reheating will keep them tasty for later. Don't forget to explore fun variations to mix things up. Enjoy these fritters fresh, or try serving them with dips. They are perfect for any meal or snack! Happy cooking!](https://therecipehatch.com/wp-content/uploads/2025/07/b38e4d6e-9bec-4339-995f-1f8e6e3e2853.webp)
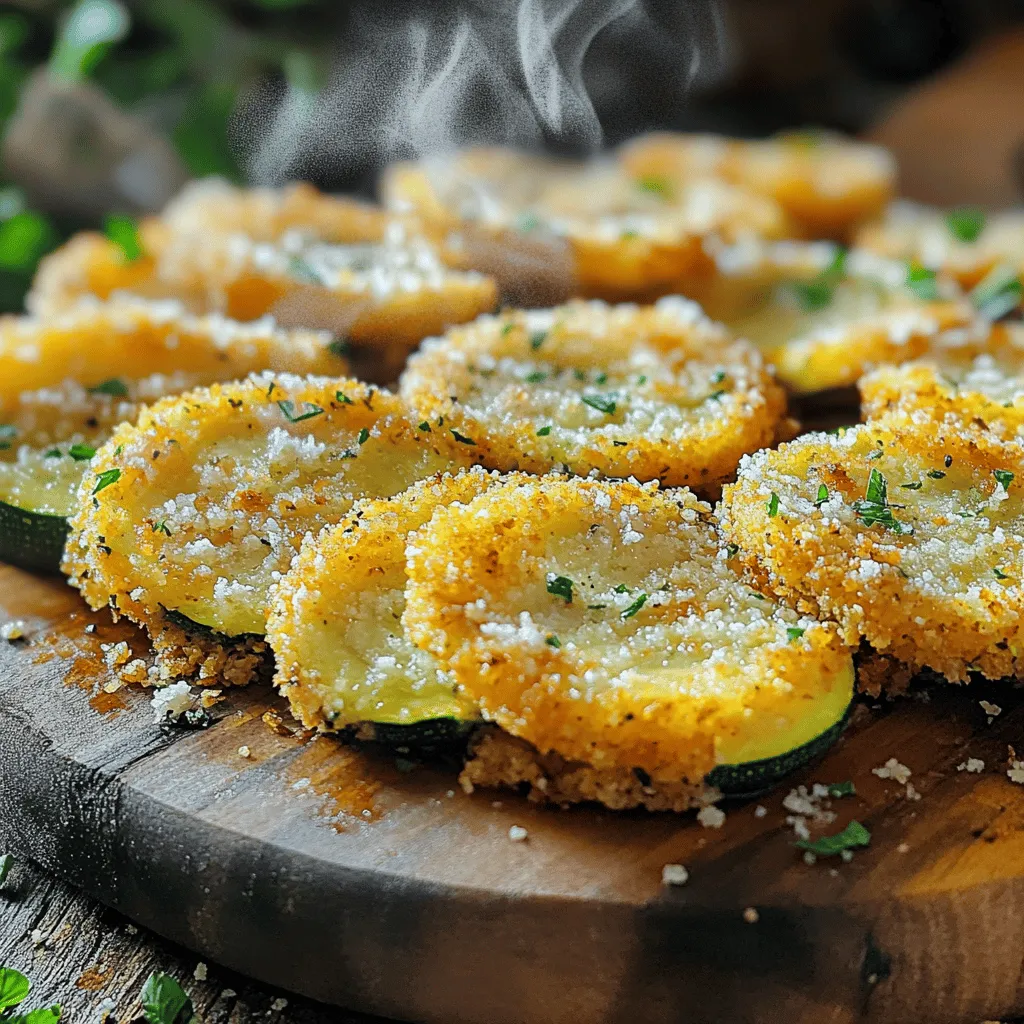
Easy Zucchini Fritters Crispy and Flavorful Recipe
Looking for a quick and tasty snack? My Easy Zucchini Fritters are the answer! These crispy, flavorful bites are simple to make, using just a
![- 2 medium zucchinis, sliced into 1/4-inch rounds - 1 cup grated Parmesan cheese - 1 cup panko breadcrumbs - 1 teaspoon garlic powder - 1 teaspoon onion powder - 1 teaspoon dried oregano - 1/2 teaspoon red pepper flakes (optional) - Salt and pepper to taste - 2 large eggs, beaten - Olive oil spray Gather these ingredients before you start. The zucchini is the star. Choose firm zucchinis for the best texture. Grated Parmesan cheese adds a rich flavor. Panko breadcrumbs give a great crunch. The garlic powder and onion powder add depth to each bite. Dried oregano brings an Italian touch. If you like heat, add red pepper flakes. Don't forget salt and pepper to enhance taste. - Baking sheet - Parchment paper - Mixing bowls - Shallow dish for coating You need a baking sheet to hold the chips. Parchment paper helps prevent sticking. Mixing bowls are for preparing the coating and egg wash. A shallow dish makes coating easier. Having these tools ready makes cooking smooth and fun. - Calories: Approximately 150 per serving - Protein: 6g - Fat: 9g - Carbohydrates: 12g These chips can fit into a balanced diet. They're a great snack option. The recipe serves four, so share with friends or family. Each serving provides good protein and flavor without many carbs. Enjoy knowing you are munching on something healthy! First, preheat your oven to 425°F (220°C). This temperature helps make the chips crispy. While it heats, get a baking sheet and line it with parchment paper. This will stop the chips from sticking. Next, take two medium zucchinis. Slice them into 1/4-inch rounds. Try to keep the slices even. This way, they cook at the same time. Now, let’s mix the coating. In a shallow bowl, combine one cup of panko breadcrumbs, one cup of grated Parmesan cheese, one teaspoon of garlic powder, one teaspoon of onion powder, one teaspoon of dried oregano, and optional red pepper flakes. Add salt and pepper to taste. Mix everything well. In another bowl, whisk two large eggs. This will be our egg wash. Take each zucchini slice and dip it into the egg wash. Let any extra egg drip off. Then, coat it in the breadcrumb mix. Press gently to make sure the coating sticks. This step is key for a tasty crunch. Place the coated zucchini chips in a single layer on the baking sheet. Lightly spray the top with olive oil for extra crunch and flavor. Now it’s time to bake! Put the baking sheet in the oven. Bake the chips for about 20 to 25 minutes. Keep an eye on them. You want them golden brown and crispy. Once done, take them out and let them cool for a few minutes. The chips are now ready for you to enjoy! For the full recipe, check out the link provided. To get that perfect crunch, panko breadcrumbs are key. They are light and airy. This texture creates a great crisp when baked. Regular breadcrumbs can make the chips dense. So, stick with panko for this recipe. Using olive oil spray is also important. It helps the chips brown nicely. Spray lightly on the tops before baking. This step makes a big difference in crispiness. For the best results, set your oven to 425°F (220°C). This temperature helps the chips cook evenly. If your oven runs hot, check them a bit earlier. The thickness of your zucchini slices affects cooking time. If you cut them thinner than 1/4 inch, they may cook faster. Adjust the time as needed to avoid burning. These chips pair well with many dips. Try marinara or ranch for a tasty combo. The flavors of the dips really enhance the chips. For plating, arrange them on a colorful plate. Add some fresh herbs like parsley for a nice touch. This makes your snack look even more inviting. For more ways to enjoy zucchini, check out the Full Recipe! {{image_2}} You can make your baked Parmesan zucchini chips even more fun by trying different spices. Italian herbs work great for a classic taste. You might also enjoy adding smoked paprika for a subtle smoky flavor. Mix and match to find your favorite blend! Different cheese types can also change the game. Cheddar adds a sharp bite, while mozzarella brings a creamy touch. Feel free to experiment with what you have on hand. If you need a gluten-free option, replace panko breadcrumbs with almond flour or crushed gluten-free crackers. Both will still give you that satisfying crunch without the gluten. For those following a vegan diet, you can swap out the eggs. Use a mixture of ground flaxseed and water. This will help the coating stick just like eggs do. Zucchini is just the start! You can use eggplant if you want a meaty chip. Slice it thin, just like the zucchini. Yellow squash is another tasty option, adding a slight sweetness. Why not create a mixed chip platter? Combine zucchini, eggplant, and squash. This colorful mix will impress your guests and add variety to your snack time! For the full recipe, check out the complete guide. To keep your zucchini chips crispy, try these best practices: - Cool Completely: Let the chips cool fully before storing. This step helps reduce moisture. - Use Airtight Containers: Place chips in a container with a tight seal. This keeps air out and maintains crispness. - Avoid Stacking: Layering can cause chips to become soggy. Instead, store them in a single layer if possible. - Store at Room Temperature: Keep in a cool, dry place. Do not refrigerate, as this can introduce moisture. When you want to enjoy your leftover chips, reheating can help restore their crunch. Here are some methods: - Oven Method: Preheat your oven to 350°F (175°C). Spread the chips on a baking sheet. Heat for about 5-10 minutes, watching closely to avoid burning. - Air Fryer Method: If you have an air fryer, this is a great option. Set it to 350°F (175°C) and heat the chips for 3-5 minutes. This method revives the crunch. - Microwave Caution: While you can use a microwave, it may make the chips soft. Use this method only if you have no other choice. Following these tips helps keep your baked Parmesan zucchini chips delicious and crunchy! For the full recipe, check out the earlier sections. Yes, you can prepare zucchini chips in advance. Slice the zucchinis and coat them. Place the chips on a baking sheet, but do not bake them yet. Cover with plastic wrap and refrigerate for up to 24 hours. When you're ready, bake them straight from the fridge. This saves time and keeps them fresh. To reheat your chips, use the oven or an air fryer. Preheat the oven to 350°F (175°C) and bake for about 10 minutes. This helps restore their crispiness. If using an air fryer, heat at 350°F (175°C) for 5-7 minutes. Both methods keep the chips crunchy and tasty. Absolutely! Air frying is a great option. After coating the zucchini, place them in a single layer in your air fryer basket. Set the temperature to 375°F (190°C) and cook for 10-12 minutes. Shake the basket halfway through to ensure even cooking. This method makes the chips super crispy and delicious. Yes, these chips are a healthy snack choice. Zucchini is low in calories and high in vitamins. Each serving has about 120 calories, depending on the amount of cheese used. They provide fiber and essential nutrients, making them a great alternative to regular chips. Enjoy guilt-free snacking with this tasty recipe! For the full recipe, check [Full Recipe]. This blog post laid out how to make baked Parmesan zucchini chips. You saw the key ingredients, tools needed, and the steps to create this tasty snack. I shared tips for achieving the best crunch and suggested fun variations to try. Storing and reheating guidelines help you keep your chips fresh. Enjoy making these easy, fun snacks that can fit many diets and preferences. Don’t hesitate to experiment and find your favorite flavor!](https://therecipehatch.com/wp-content/uploads/2025/07/f8d3b043-937d-4202-b98d-30919e56a3eb.webp)
Baked Parmesan Zucchini Chips Crispy and Flavorful Snack
Want a snack that’s both tasty and healthy? Try my Baked Parmesan Zucchini Chips! These chips are crispy, flavorful, and easy to make. With just
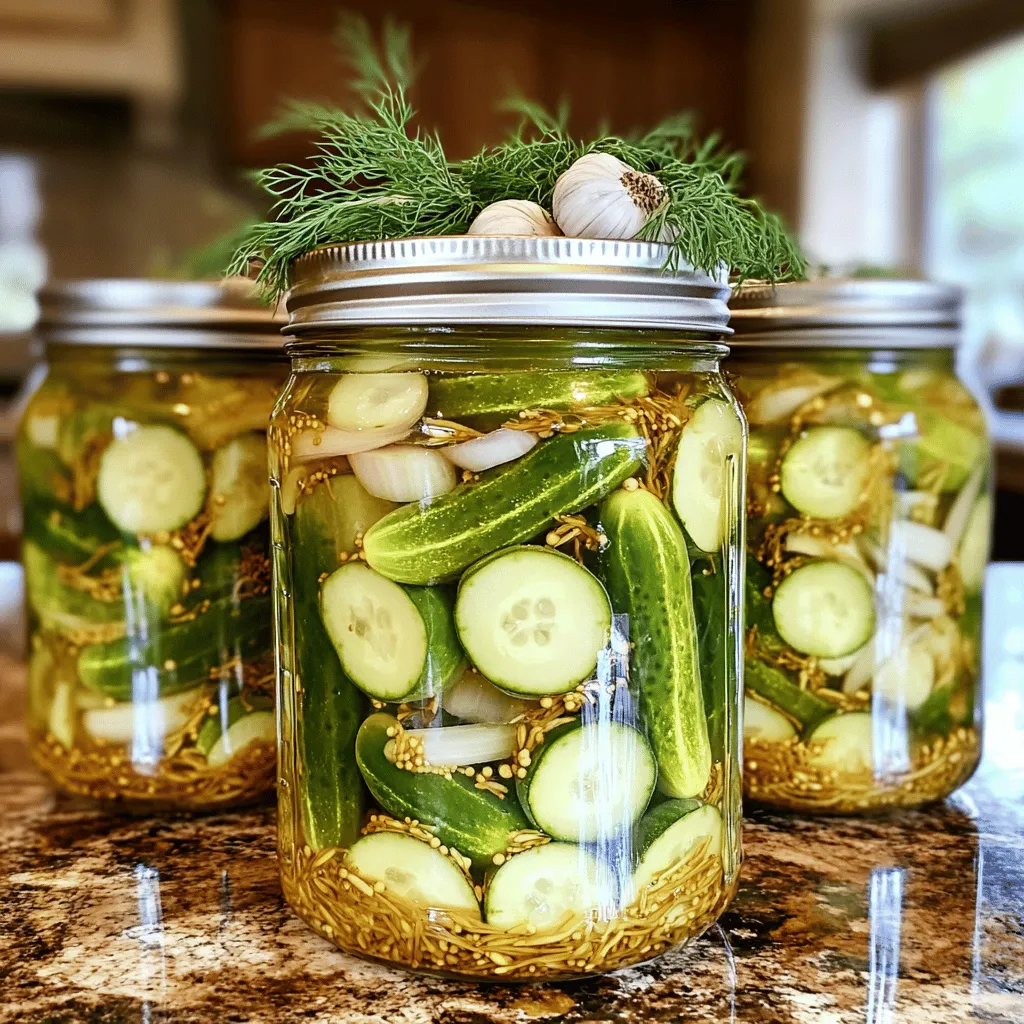
Mom’s Perfect Sweet Gherkin Pickles Easy Recipe Guide
Are you ready to impress your family with the perfect sweet gherkin pickles? In this easy recipe guide, I’ll walk you through every step of

EASY Garlic Parmesan Chicken Bites Mouthwatering Snack
If you’re looking for a simple snack that packs a delicious punch, you’ll love these EASY Garlic Parmesan Chicken Bites! With just a few ingredients,
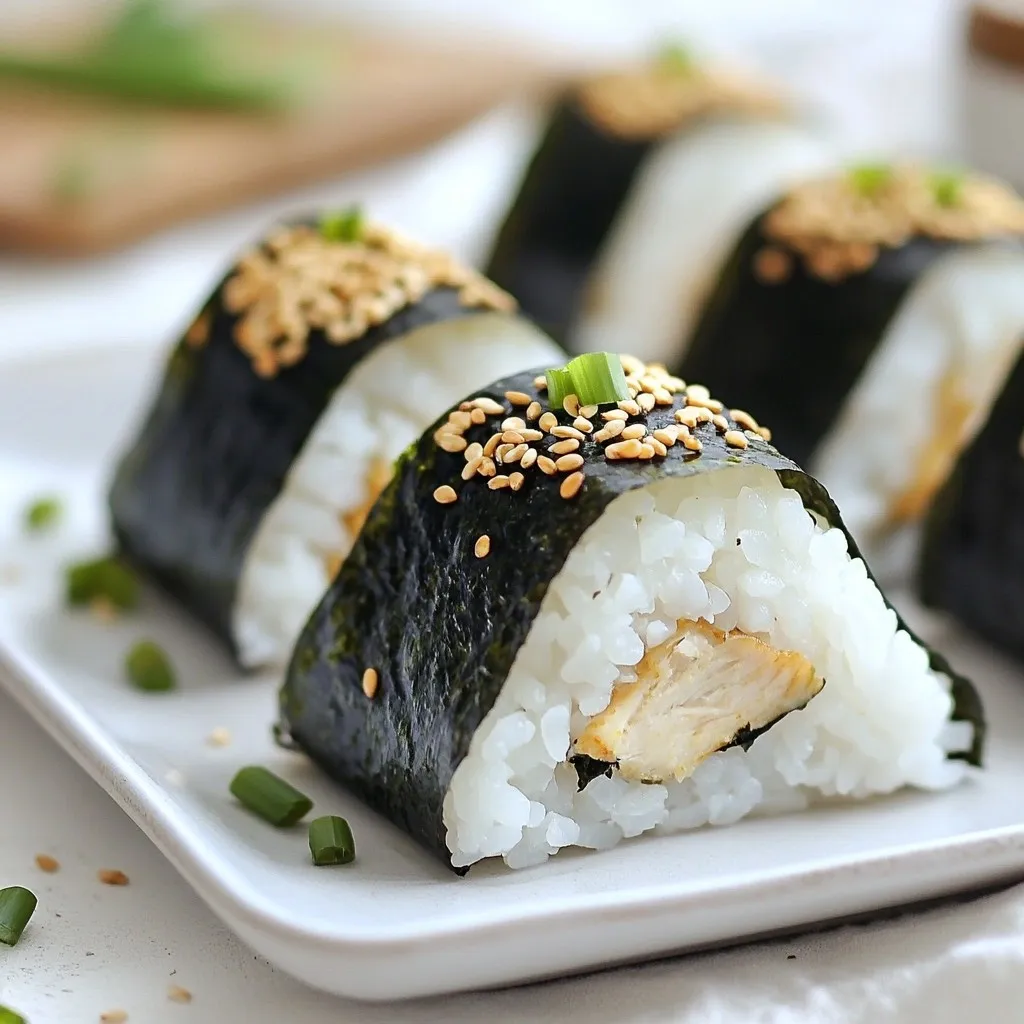
Chicken Onigiri Flavorsome and Easy Rice Dish
If you want a simple, tasty meal, chicken onigiri is your answer! This easy rice dish combines sushi rice, savory chicken, and nori for a
Easy Air Fryer Zucchini Parmesan Tasty and Simple Dish
Looking for a simple and delicious way to cook zucchini? You’ll love this Easy Air Fryer Zucchini Parmesan recipe! It combines crispy, golden zucchini with