Appetizers
Homemade Salsa Recipe Fresh and Flavorful Delight
Are you ready to spice up your meals? My Homemade Salsa Recipe is your go-to for a fresh and tasty delight. With simple ingredients and
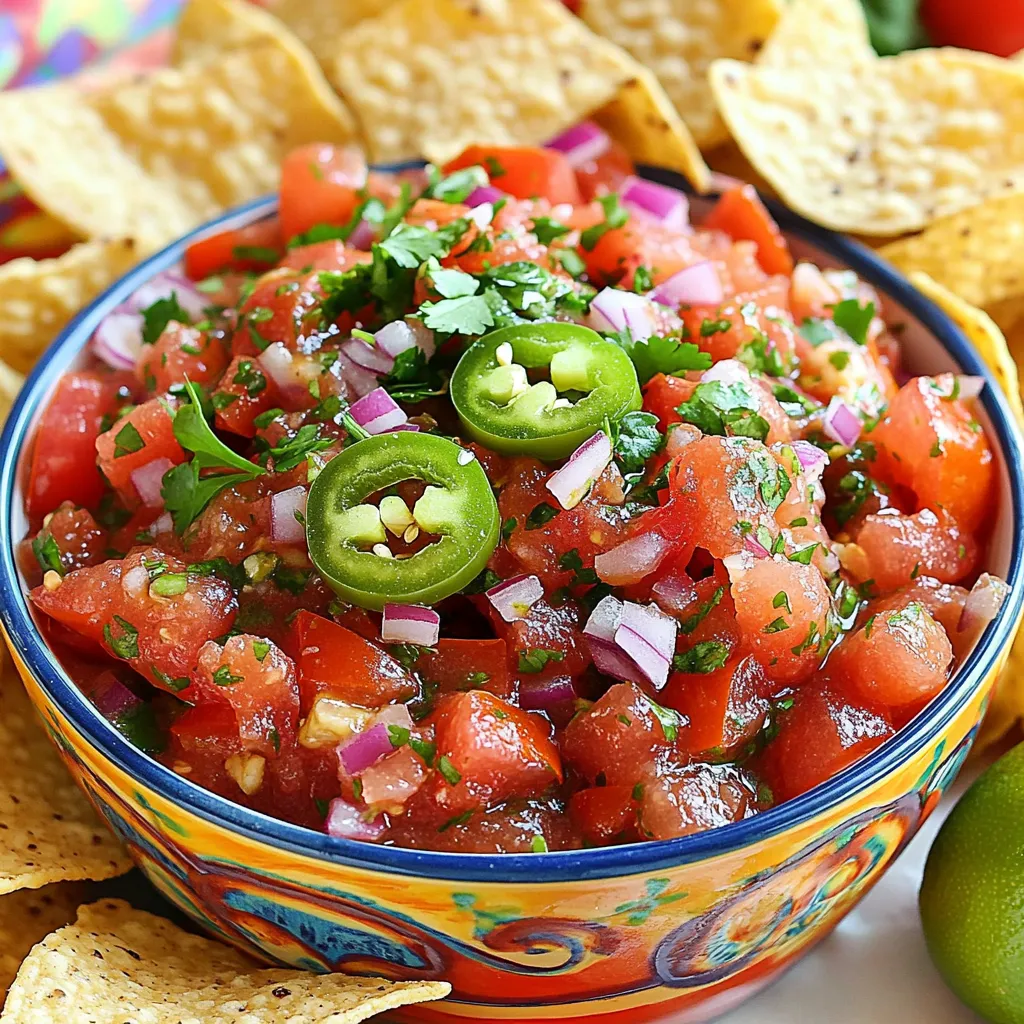
Fresh Salsa Recipe Zesty and Flavorful Delight
Are you ready to bring a burst of flavor to your meals? My fresh salsa recipe delivers a zesty and colorful delight that’s simple to
![To make a tasty green chile bean dip, gather these main ingredients: - 1 can (15 oz) black beans, drained and rinsed - 1 can (4 oz) diced green chiles - 1 cup cream cheese, softened - 1 cup shredded cheddar cheese - 1/2 cup sour cream - 1/4 cup chopped fresh cilantro - 1 teaspoon ground cumin - 1/2 teaspoon garlic powder - Salt and pepper to taste - Tortilla chips, for serving These ingredients create a creamy and flavorful dip. The black beans give it a hearty base. The green chiles add a nice kick. You can boost the flavor with these optional ingredients: - Jalapeños for extra heat - Lime juice for a fresh zing - Avocado for creaminess - Different cheese types like Monterey Jack Adding these extras can make your dip unique. You can adjust the heat and creaminess based on your taste. Let’s break down the nutritional value of some key ingredients: - Black beans: These are high in protein and fiber. They help keep you full. - Cream cheese: Adds richness but is higher in calories. Use in moderation. - Cheddar cheese: Provides calcium and protein, but watch the portion. - Cilantro: Offers vitamins A, C, and K. It's low in calories and adds freshness. Understanding the nutritional value helps you make healthier choices. You can enjoy this dip while still meeting your dietary needs. For the full recipe, check out [Full Recipe]. To start, gather your ingredients. You need black beans, diced green chiles, cream cheese, cheddar cheese, sour cream, cilantro, cumin, garlic powder, salt, and pepper. In a mixing bowl, add the drained black beans and diced green chiles. Use a fork to mash the beans slightly. This gives a nice, chunky base. Next, add the softened cream cheese, shredded cheddar cheese, and sour cream. Mix until all ingredients blend well and become creamy. Then, stir in the cilantro, cumin, and garlic powder. Season with salt and pepper to taste. Mix again until everything is evenly combined. Now, it's time to bake! Transfer the mixture to an oven-safe dish. Spread it out evenly for a nice, even bake. Preheat your oven to 350°F (175°C). Once it’s ready, place the dish in the oven. Bake for about 15 to 20 minutes. Look for a bubbly top that is slightly golden. This shows it’s perfectly baked. After baking, let the dip cool for a few minutes. This helps it set. Serve it warm with tortilla chips for dipping. You can also add extra toppings, like more cilantro or diced tomatoes. This adds freshness and color. If you want, serve it with veggies too! This dip is great for parties or game day. Enjoy your flavorful green chile bean dip! For the full recipe, check out the earlier section. To make the dip creamier, I suggest using full-fat cream cheese. It adds richness. You can also blend the ingredients in a food processor. This will create a smooth texture. If you want more creaminess, add more sour cream. You can even mix in a little milk for extra softness. Store leftovers in an airtight container. This keeps the dip fresh for longer. Place it in the fridge if you have any left. It should stay good for about three days. When you’re ready to eat it again, warm it up in the oven. This will help regain its creamy texture. One common mistake is not mashing the beans enough. If you leave them whole, the dip will be less creamy. Another mistake is overbaking. Keep an eye on the dip while it’s in the oven. You want it bubbly, not burnt. Lastly, don’t skip the salt and pepper. They make a big difference in flavor. Enjoy making this zesty dip! For the full recipe, check out the cooking section. {{image_2}} You can spice up your green chile bean dip easily. Add fresh jalapeños for heat. You can also use hot diced green chiles instead of mild ones. If you love a smoky flavor, try adding smoked paprika. This gives your dip a nice depth. Another option is to mix in some diced chipotle peppers. They add a tasty kick and will impress your friends. Making this dip vegetarian is simple. Just use plant-based cream cheese and sour cream. For a vegan option, swap the cheddar cheese for a vegan cheese alternative. You can also add nutritional yeast for a cheesy flavor. Adding extra spices, like chili powder, can really boost the taste while keeping it vegan. If you need to go gluten-free, make sure your tortilla chips are labeled gluten-free. You can also serve the dip with fresh veggies instead. For those watching calories, you can cut back on cheese and sour cream. Use Greek yogurt instead to keep it creamy but lighter. Adjusting the recipe helps everyone enjoy it! For the full recipe, check out the Zesty Green Chile Bean Dip section. To keep your green chile bean dip fresh, place it in an airtight container. This helps prevent air from getting in and drying it out. Make sure to cool it down first before sealing. Store it in the fridge for up to three days. If you have leftovers, a good seal will keep its flavors intact. When you want to enjoy your dip again, reheat it carefully. You can use a microwave or an oven. If using a microwave, heat it in short bursts, about 30 seconds at a time. Stir between each burst for even heat. If you prefer the oven, set it to 350°F (175°C). Heat it for 15 minutes, or until it's warm and bubbly again. You can also freeze this dip for longer storage. Use a freezer-safe container and make sure it’s tightly sealed. It can last for up to two months in the freezer. When ready to eat, let it thaw in the fridge overnight. Reheat it as mentioned before. This way, you can enjoy your dip at any time. For the full recipe, check out the previous section! Yes, you can use many types of beans. Pinto beans, white beans, or kidney beans work well too. Each type gives a unique taste and texture. If you want a creamier dip, use refried beans. This makes the dip smooth and easy to scoop. Experiment with your favorite beans to find what you like best. Making this dip in a slow cooker is simple. Start by mixing all the ingredients in the slow cooker bowl. Set the cooker on low for about 2 to 3 hours. Stir the mix every hour to keep it smooth. The heat will blend the flavors and make everything creamy. When it’s ready, serve it warm with chips for the best taste. I love serving this dip with crispy tortilla chips. You can also use veggie sticks like carrots and bell peppers. They add a nice crunch and freshness. For a fun twist, try it on nachos or in tacos. This dip pairs well with drinks too. Enjoy it at parties, game days, or family dinners. For the full recipe, check out the earlier section! Green Chile Bean Dip is easy to make and fun to serve. We covered the key ingredients that bring flavor and nutrition. You learned simple steps to prepare and bake the dip for the perfect texture. I also shared tips to enhance creaminess and store leftovers. You can even explore tasty variations for spice lovers and those with dietary needs. Now, you’re ready to impress friends and family with a delicious dip. Enjoy making and sharing this tasty recipe!](https://therecipehatch.com/wp-content/uploads/2025/07/613f32e0-aaa2-4dc5-8576-72f74cfb6450.webp)
Green Chile Bean Dip Flavorful and Easy Delight
Ready to spice up your snack time? My Green Chile Bean Dip is both flavorful and easy to make! With just a few simple ingredients,

Hawaiian Roll Grilled Cheese Simple and Tasty Treat
Are you ready to take your grilled cheese game to the next level? I’m excited to share my recipe for Hawaiian Roll Grilled Cheese, a
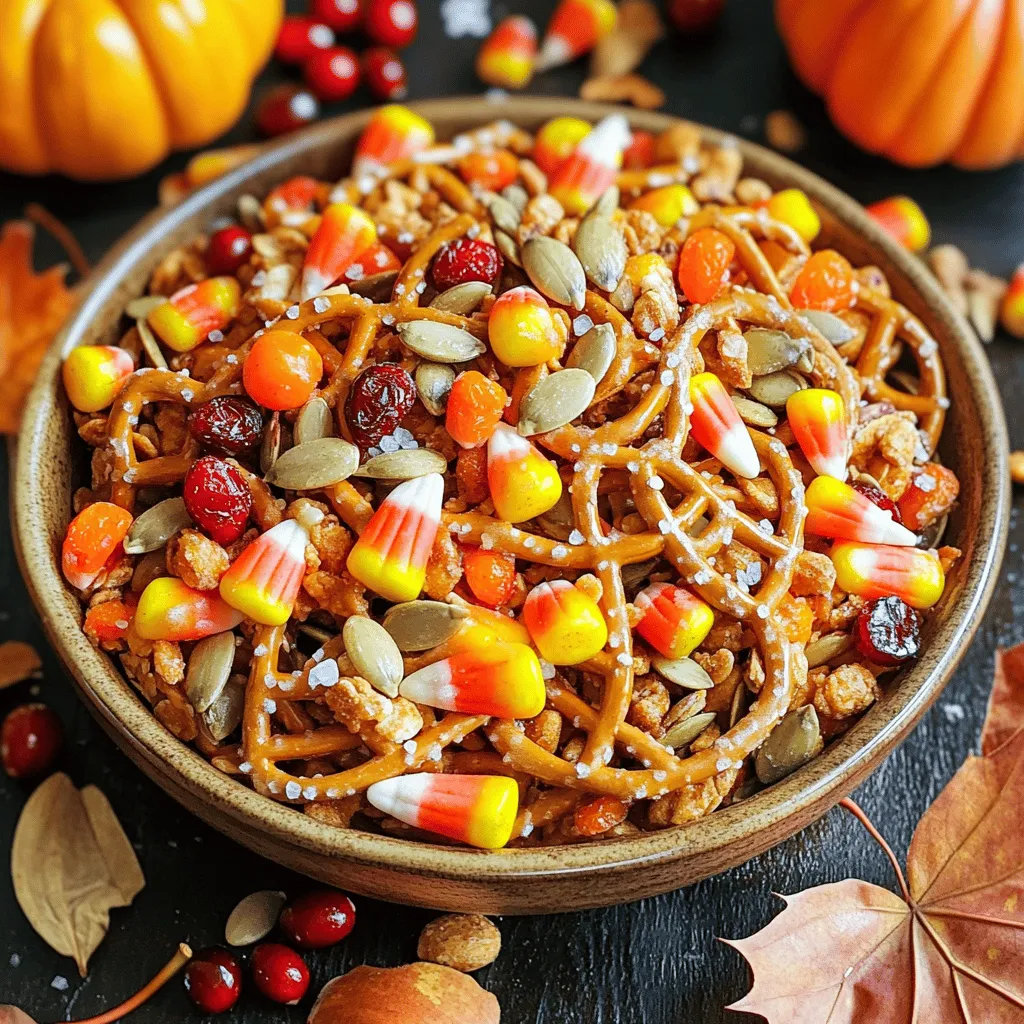
Fall Snack Mix Crunchy and Flavorful Delight
As the leaves turn and the air cools, it’s the perfect time to indulge in a delicious Fall Snack Mix. Imagine crunchy nuts, sweet dried
![To make Easy Fiesta Roll Ups, gather the following items: - 4 large flour tortillas - 1 cup cream cheese, softened - 1 teaspoon taco seasoning - 1 cup shredded cheddar cheese - 1 cup cooked black beans, drained and rinsed - 1 medium bell pepper, finely chopped - 1 cup fresh spinach, chopped - ½ cup salsa - Fresh cilantro leaves for garnish These ingredients create a tasty blend. The cream cheese adds smoothness, while the taco seasoning gives it a fun twist. The black beans and veggies boost the nutrition. You can use any bell pepper color you like. Fresh spinach adds a nice crunch. The salsa ties everything together with flavor. For a complete guide, check the [Full Recipe]. This mix of flavors makes every bite enjoyable. - In a bowl, combine the softened cream cheese and taco seasoning. Mix until smooth. - Spread an even layer of the cream cheese mixture over each flour tortilla. - Sprinkle shredded cheddar cheese on top of the cream cheese on each tortilla. - Layer cooked black beans, chopped bell pepper, and fresh spinach over the cheese. - Drizzle salsa over the fillings on each tortilla, spreading it out slightly. - Carefully roll each tortilla tightly from one end to the other. Make sure the fillings stay inside. - Once rolled, place them seam-side down and wrap each in plastic wrap. Chill in the refrigerator for at least 30 minutes to set. - After chilling, unwrap the roll-ups and slice them into bite-sized pieces, about 1-2 inches wide. - Arrange on a serving platter and garnish with fresh cilantro leaves before serving. This simple method makes your Easy Fiesta Roll Ups a fun snack. Enjoy making these with family! For the full recipe, refer to the earlier section. - Pair with fresh salsa or guacamole. - Serve with tortilla chips for added crunch. These roll-ups shine when you add some dips. Fresh salsa adds zest. Guacamole gives a creamy touch. Tortilla chips bring in a nice crunch. Each bite gets even better! - Substitute ingredients for dietary needs (e.g., dairy-free cream cheese). - Use whole wheat or corn tortillas for variation. You can switch things up based on your diet. If you need a dairy-free option, use dairy-free cream cheese. Whole wheat or corn tortillas can add unique flavors. Experiment and find what you love best! {{image_2}} You can make your Easy Fiesta Roll Ups more exciting with a few tweaks. If you crave heat, add diced jalapeños. They give a nice kick to each bite. If you like cheese, switch to pepper jack. This cheese adds a creamy texture and a spicy flavor. Feel free to swap some ingredients for fun. Try hummus instead of cream cheese for a lighter option. Hummus adds flavor and keeps things fresh. You can also change up the veggies. Use zucchini or carrots to add crunch and color. These swaps let you customize your roll ups to fit your taste. To keep your Easy Fiesta Roll Ups fresh, store them in the fridge. Wrap each roll-up tightly in plastic wrap. This keeps them moist and tasty. Use an airtight container for added protection. This helps prevent any odors from other foods. Leftovers can last up to three days in the fridge. Just make sure they are sealed well. You can freeze your roll-ups if you have extra. First, wrap each roll-up in plastic wrap. Then, place them in a freezer-safe bag. Squeeze out as much air as you can. This helps prevent freezer burn. Your roll-ups will stay good for up to three months. When you are ready to eat them, take the roll-ups out of the freezer. Let them thaw in the fridge overnight. If you're in a hurry, you can also thaw them on the counter for a few hours. After thawing, you can eat them cold or warm them in the microwave. Just heat them for about 30 seconds to 1 minute. This makes them soft and tasty again. Enjoy your Easy Fiesta Roll Ups! To make these roll-ups healthier, you can swap some ingredients. Here are some easy changes: - Use whole wheat tortillas instead of regular flour tortillas. - Replace cream cheese with Greek yogurt for fewer calories. - Choose low-fat cheese or skip the cheese for a lighter option. - Add more veggies like zucchini or carrots for extra nutrients. These swaps keep the flavor while making the dish more nutritious. Yes, you can make Easy Fiesta Roll Ups ahead of time. Here’s how to do it: - Prepare the roll-ups and wrap each one tightly in plastic wrap. - Place them in the fridge for up to 24 hours before serving. - This helps the flavors blend and makes slicing easier. Just remember to slice them right before serving for the best look. You can serve many tasty dishes with Easy Fiesta Roll Ups. Here are some fun ideas: - Fresh salsa for dipping adds great flavor. - Guacamole gives a creamy contrast. - Tortilla chips add a nice crunch. - A light salad can balance the meal. - Refreshing drinks like lemonade or iced tea work well, too. These pairings will make your fiesta even more festive! You now have all you need to make tasty Easy Fiesta Roll Ups. We covered the ingredients, step-by-step instructions, helpful tips, and tasty variations. Remember, you can mix and match ingredients based on your taste. Store leftovers for later or freeze them for a quick snack. These roll-ups are fun for any gathering. Enjoy creating these simple and delicious treats! Share them with friends and family, and celebrate every bite.](https://therecipehatch.com/wp-content/uploads/2025/07/5398f719-de71-4cec-98de-c5615cb3248e.webp)
Easy Fiesta Roll Ups Delicious and Simple Snack Recipe
Are you ready to spice up snack time? These Easy Fiesta Roll Ups are a fun and tasty treat! With just a few simple ingredients,

Pepperoni Pizza Quesadillas Tasty and Quick Meal
If you love pizza and easy meals, you’re in for a treat! Pepperoni Pizza Quesadillas combine two classic favorites into a fun, quick dish. In

Savory Empanadas with Cheese Ideal for Every Meal
Craving a tasty treat? You’ll love these savory empanadas with cheese! Perfect for breakfast, lunch, or dinner, they offer a warm, gooey filling inside a

Herb & Garlic Swirl Rolls Freshly Baked Delight
Are you ready to bake something special? Herb & Garlic Swirl Rolls are a game-changer for your meals. Their warm, rich flavors will make your

Grilled Cheese Roll-Ups Tasty and Easy Comfort Food
Craving a simple yet delicious snack? Grilled cheese roll-ups are the answer! These tasty bites are easy to make and perfect for any meal. You