Appetizers
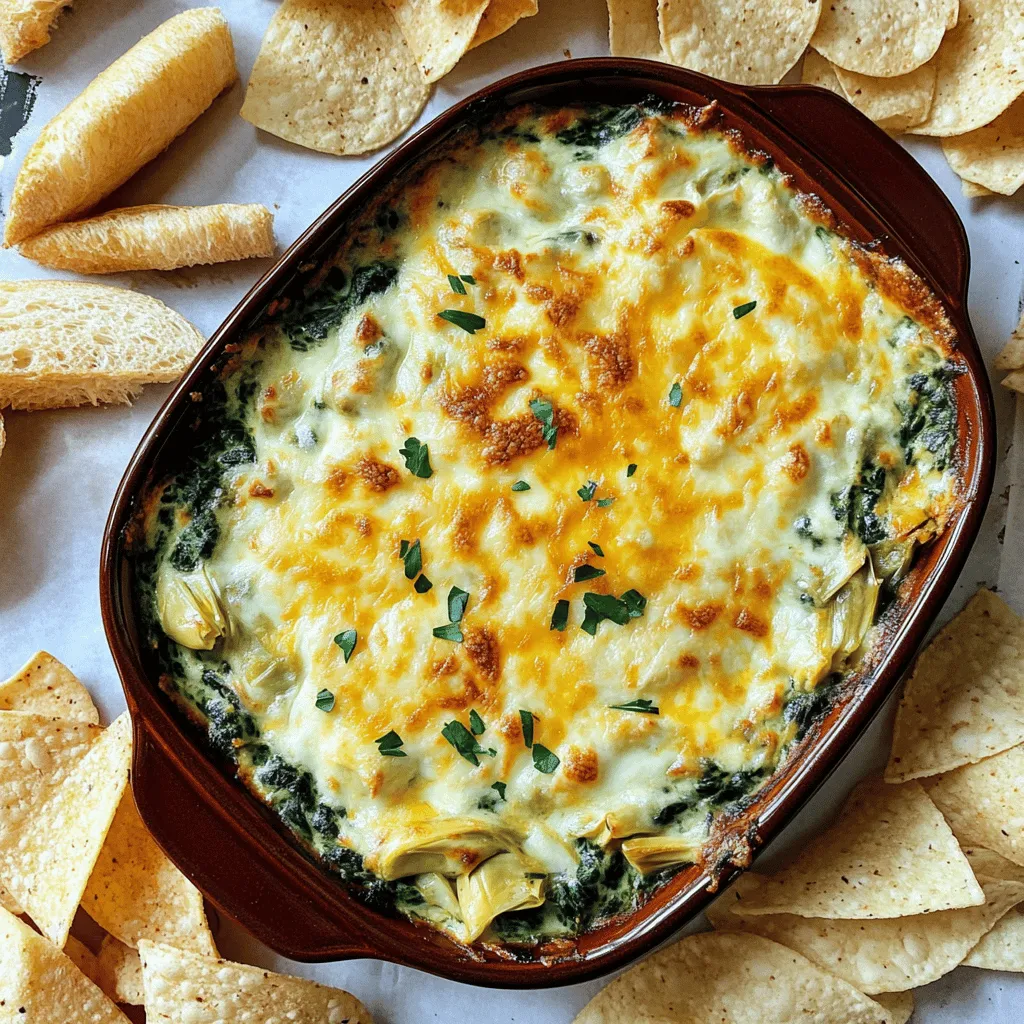
Cheesy Spinach Artichoke Dip Delicious and Simple Recipe
Are you ready to impress your friends with a warm and cheesy delight? This Cheesy Spinach Artichoke Dip is a crowd-pleaser that’s both delicious and
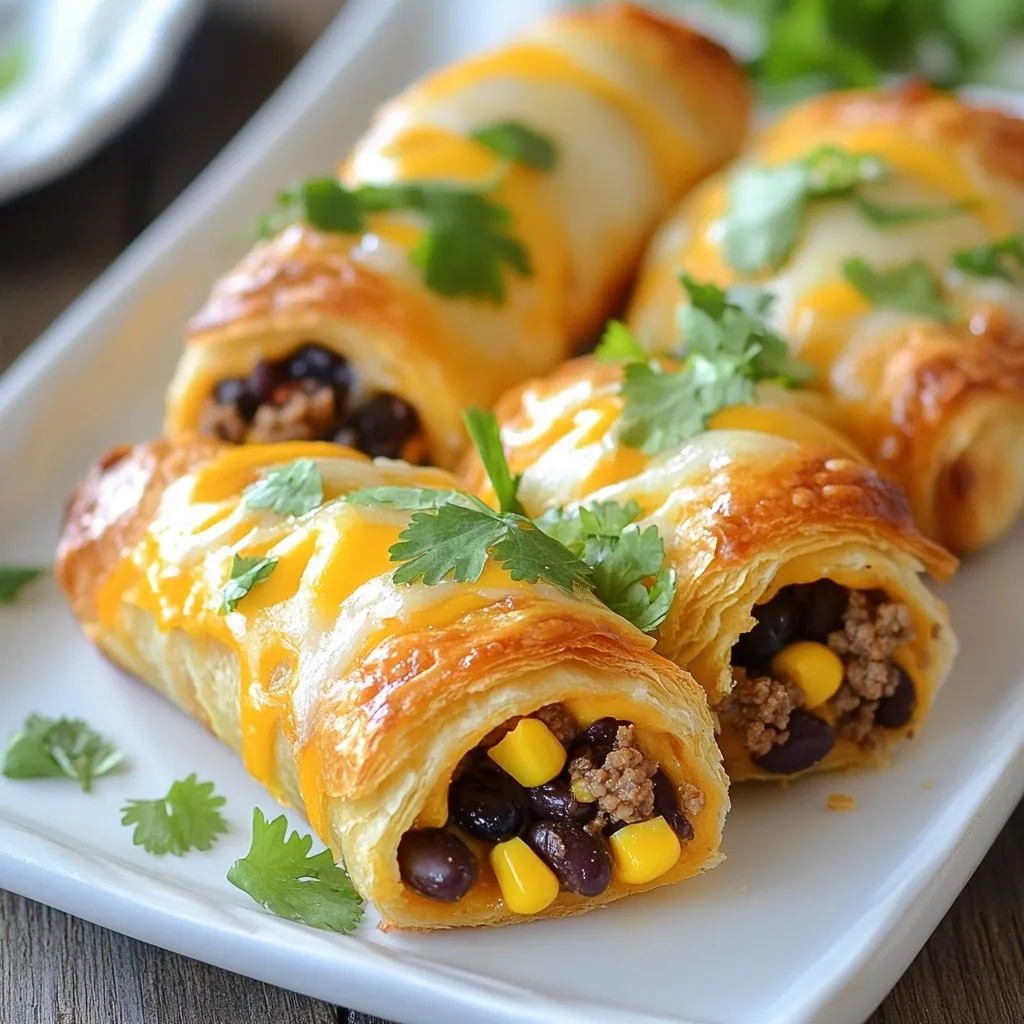
Cheesy Taco Sticks Flavorful and Easy Snack Recipe
Ready for a snack that’s both fun and delicious? These Cheesy Taco Sticks are the answer! With simple ingredients like pizza dough, cheddar cheese, and
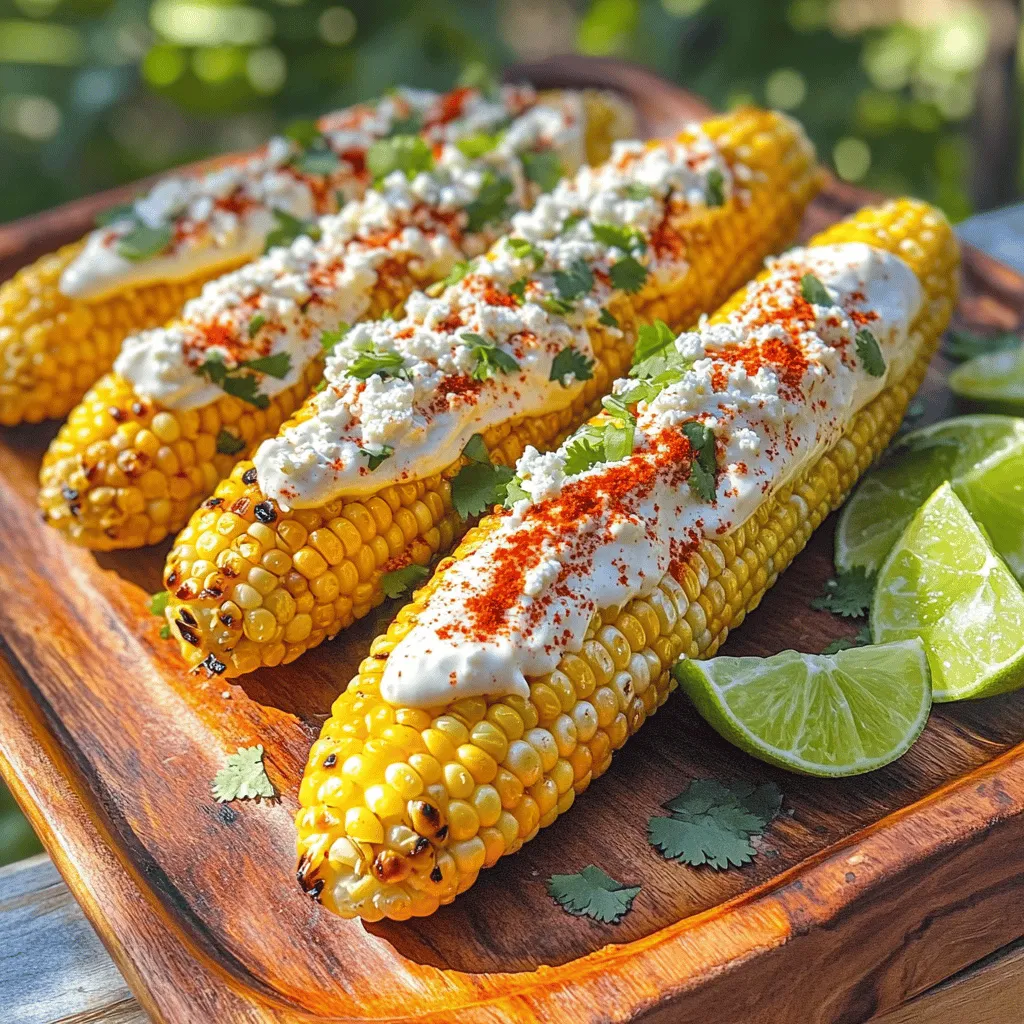
Elote Mexican Street Corn Flavorful and Easy Recipe
Are you ready to elevate your summer cookouts with the bold flavors of Elote? This delightful Mexican street corn is packed with taste and easy
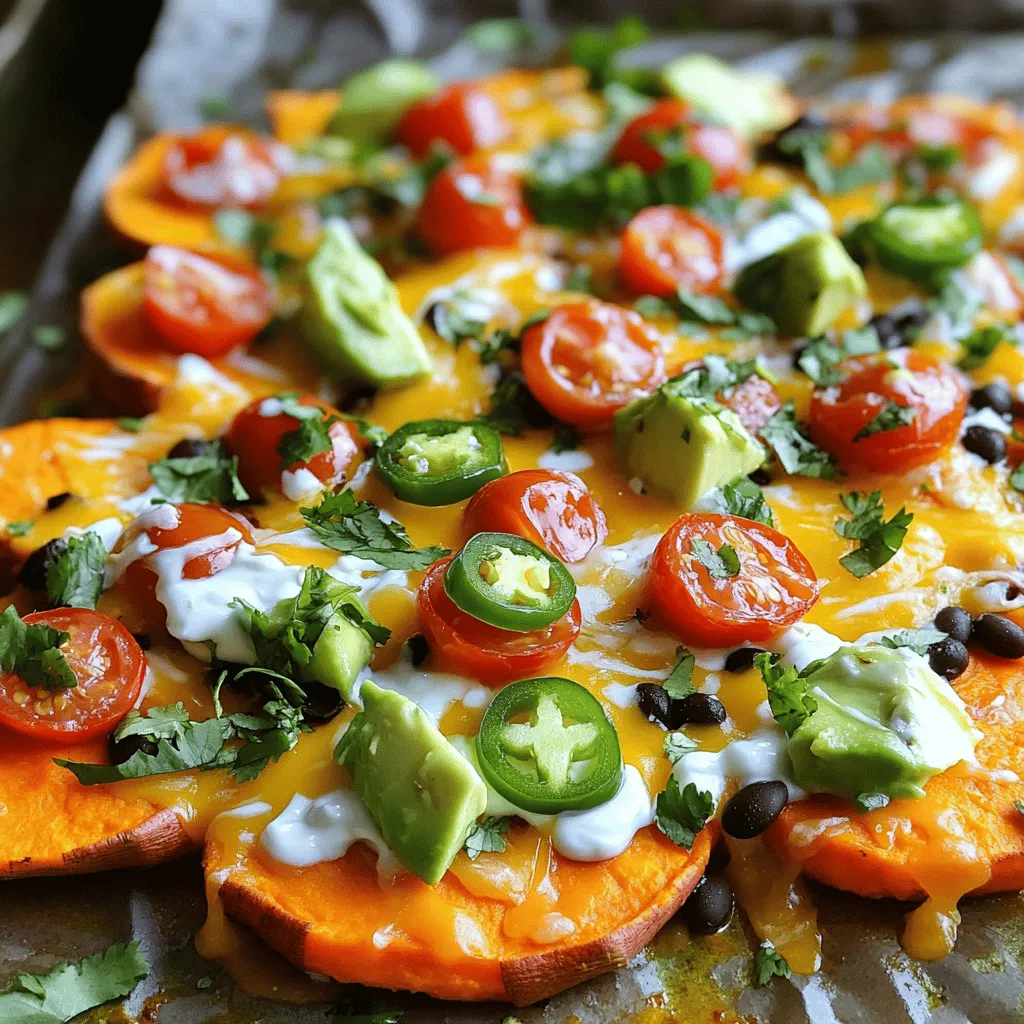
Loaded Sweet Potato Nachos Flavorful and Filling Snack
Are you ready to elevate your snack game? Loaded Sweet Potato Nachos are here to impress! With sweet potatoes as the perfect base, you can
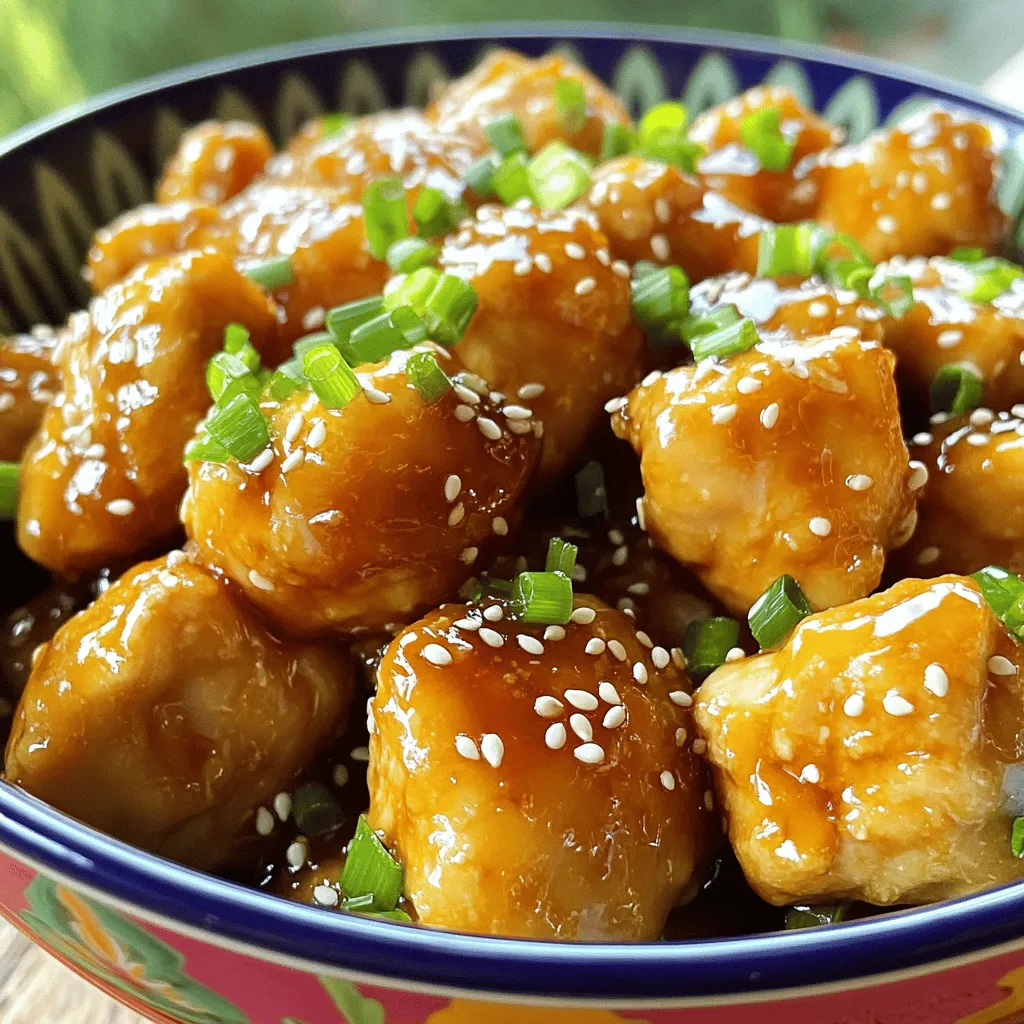
Honey Garlic Chicken Bites Savory and Simple Recipe
If you’re craving a dish that’s both savory and simple, you’ve hit the jackpot! My Honey Garlic Chicken Bites are perfect for a busy weeknight
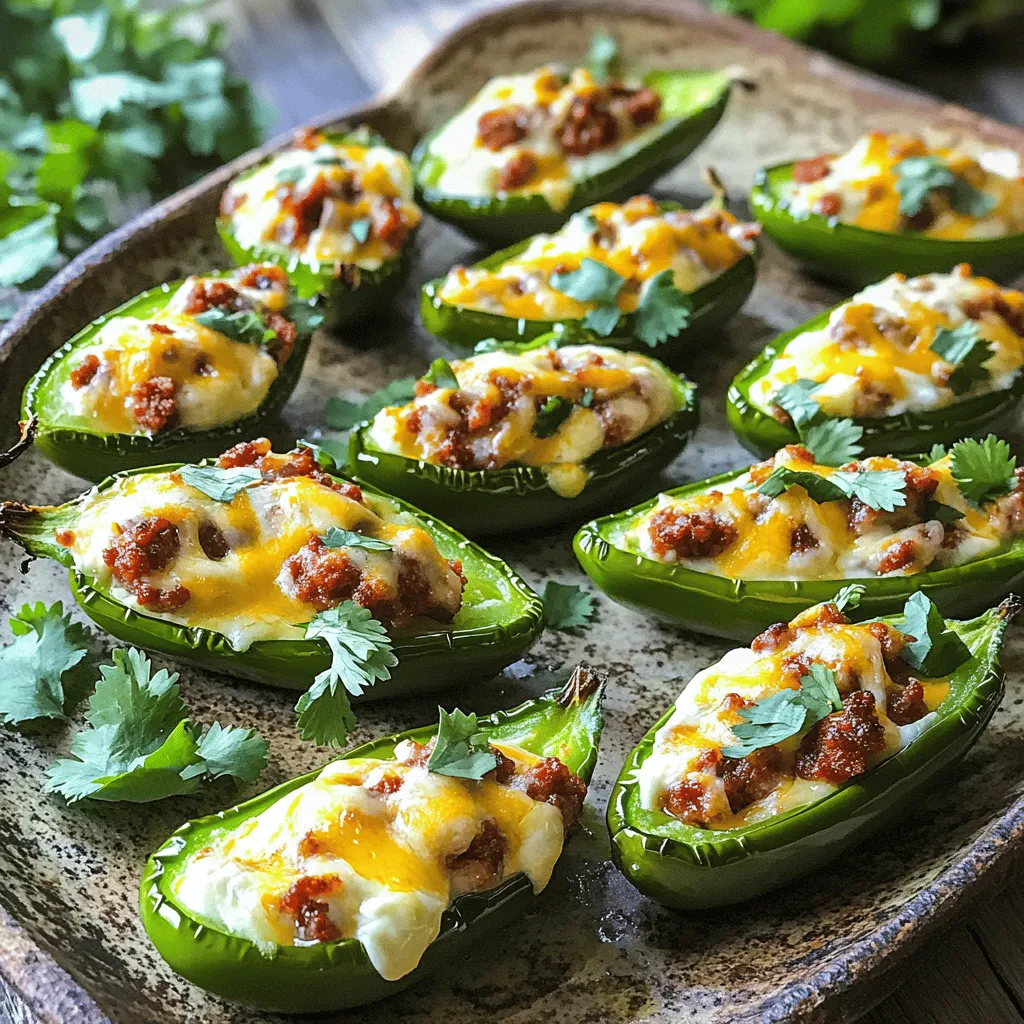
Cheese and Chorizo Stuffed Jalapeños Delightful Snack
If you’re craving a snack that packs a punch, look no further! Cheese and chorizo stuffed jalapeños are the perfect blend of spicy and cheesy.

Elote Mexican Street Corn Flavorful and Easy Recipe
Are you ready to bring the vibrant taste of Mexico to your kitchen? This Elote Mexican Street Corn recipe is easy to make and bursting

Air Fryer Honey Garlic Chicken Wings Crispy Delight
Craving a crispy treat that bursts with flavor? Let’s dive into making Air Fryer Honey Garlic Chicken Wings! These wings are sticky, sweet, and loaded
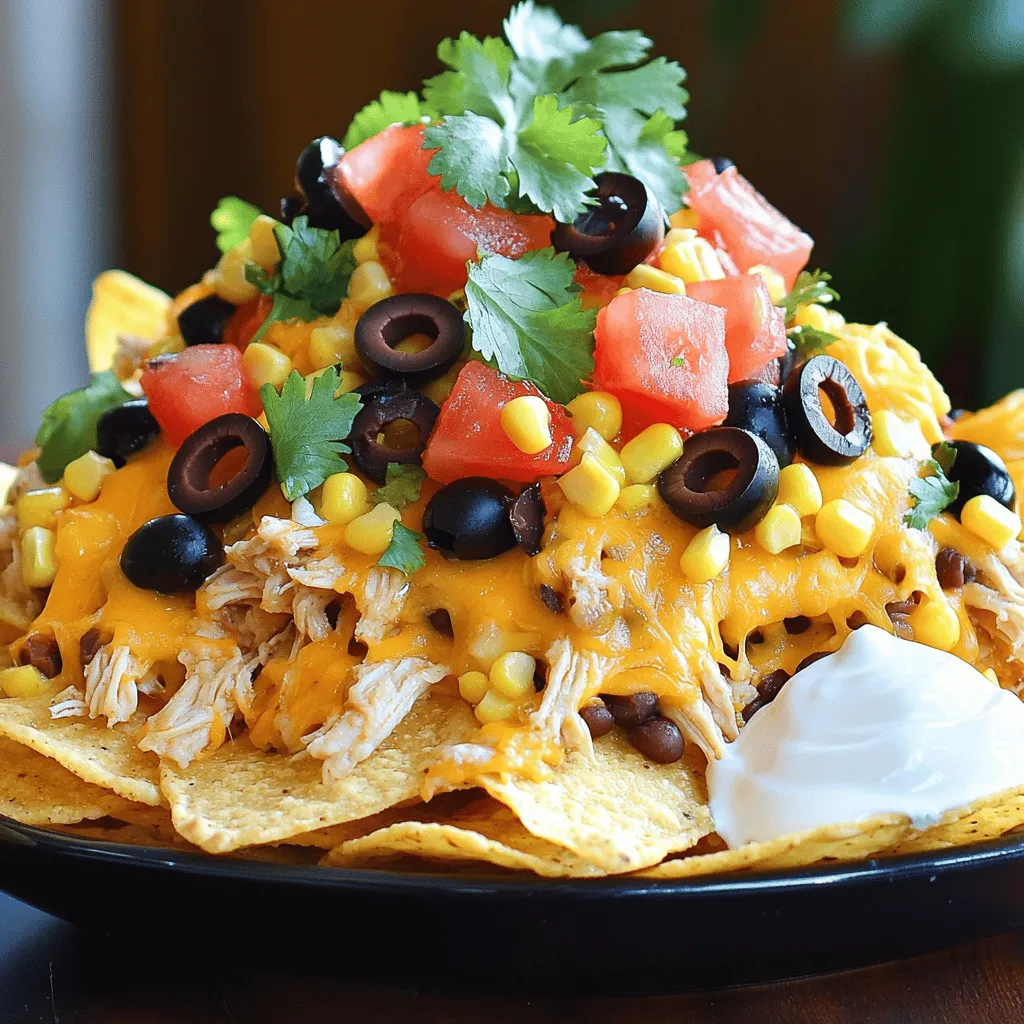
Crockpot Taco Chicken Nachos Easy Family Delight
Get ready for a fun dinner with my Crockpot Taco Chicken Nachos! This easy recipe is perfect for the whole family. You’ll love how juicy
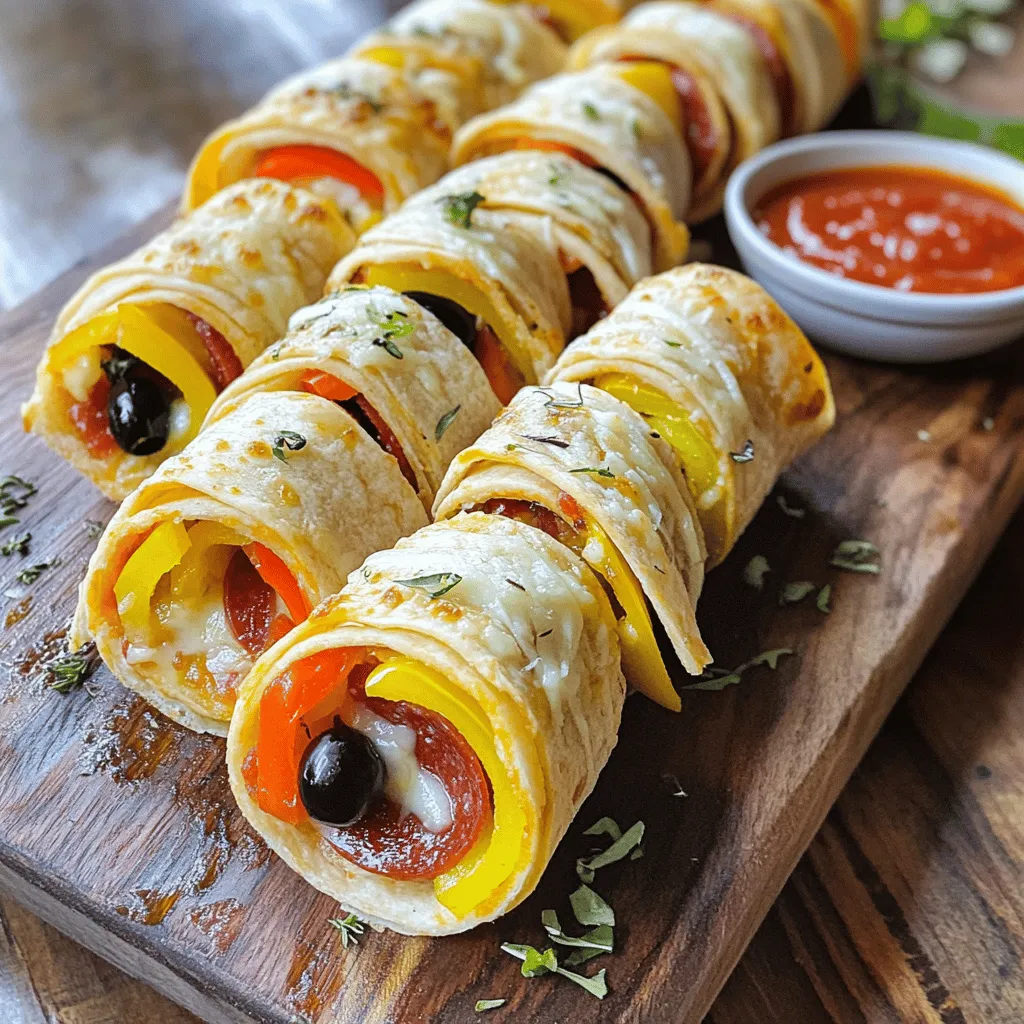
Tortilla Pizza Rolls Delicious and Easy Snack Idea
Are you craving a quick and delicious snack? Tortilla Pizza Rolls are the answer! With just a few simple ingredients, you can whip up an