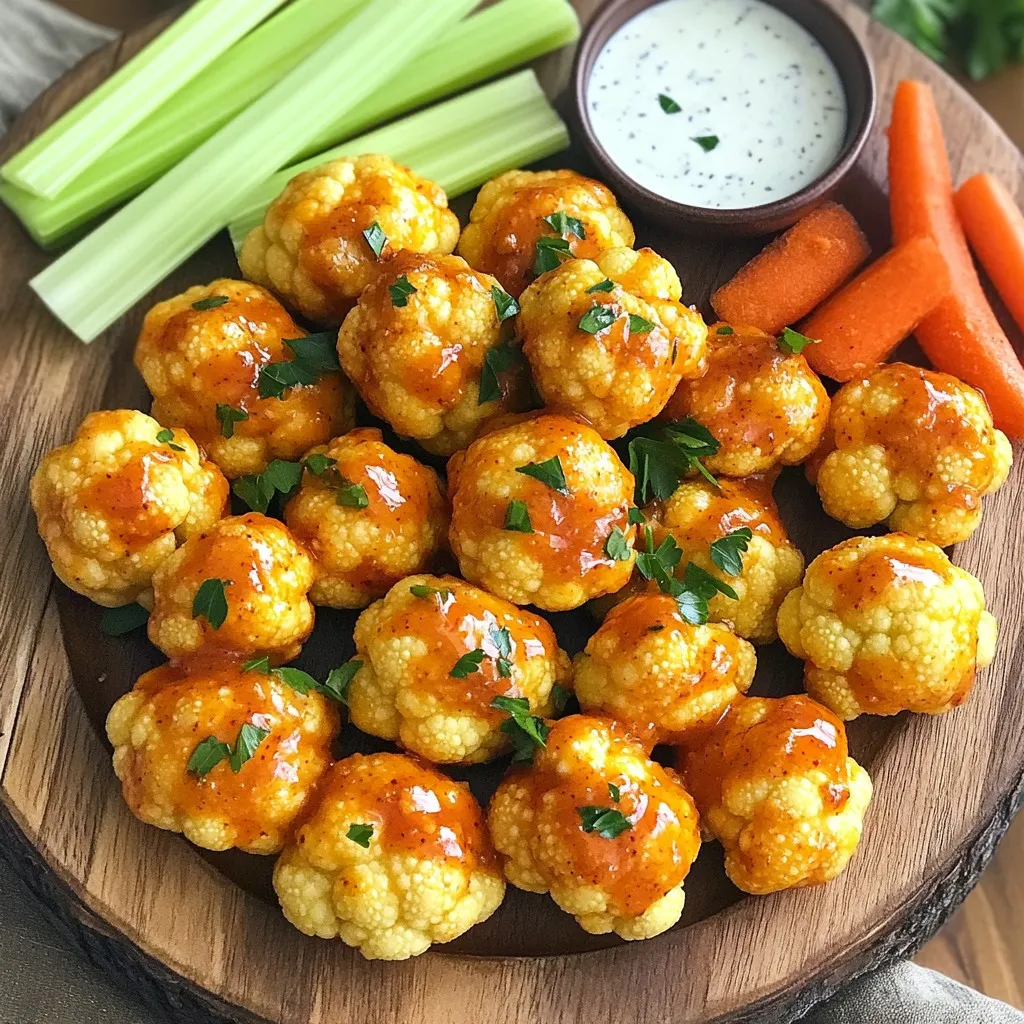
Appetizers

- 1 medium head of cauliflower, cut into bite-sized florets - 1 cup all-purpose flour - 1 cup water (or non-dairy milk) - 1 teaspoon garlic powder - 1 teaspoon onion powder - ½ teaspoon smoked paprika - ½ teaspoon salt - ¼ teaspoon black pepper - 1 cup breadcrumbs (preferably panko) The cauliflower is the star here. You want good, fresh florets. The flour, water, and spices mix to create the batter. This batter clings nicely to the cauliflower. The breadcrumbs add crunch and texture when baked. - ½ cup honey - 4 cloves garlic, minced - 2 tablespoons soy sauce (low sodium) - 1 tablespoon sesame oil (optional) The honey gives a sweet touch to the sauce. Garlic adds that rich flavor we crave. Soy sauce provides depth and saltiness. If you choose to add sesame oil, it brings a nutty note. - Chopped green onions for garnish - Sesame seeds for garnish The green onions add color and a fresh taste. Sesame seeds give a nice crunch and look great on top. These simple garnishes make your bites even more appealing. First, take one medium head of cauliflower. Cut it into small, bite-sized florets. Make sure the pieces are even in size. This helps them cook at the same rate. Rinse the florets under cold water to remove any dirt. Pat them dry with a clean towel. Dry cauliflower will help the batter stick better. In a large mixing bowl, add 1 cup of all-purpose flour. Pour in 1 cup of water or non-dairy milk. Add 1 teaspoon of garlic powder and 1 teaspoon of onion powder. Sprinkle in ½ teaspoon of smoked paprika, ½ teaspoon of salt, and ¼ teaspoon of black pepper. Whisk everything together until you have a smooth batter. This batter will coat the cauliflower and add flavor. Now, dip each cauliflower floret into the batter. Let the excess batter drip off. Next, coat each floret with 1 cup of breadcrumbs, preferably panko. Place the coated florets on a lined baking sheet. Make sure they are spaced apart to allow air to flow. Preheat your oven to 425°F (220°C). Bake for 25 to 30 minutes. Flip them halfway through for even cooking. They should be crispy and golden brown when done. While the cauliflower bakes, make the honey garlic sauce. In a small saucepan, combine ½ cup of honey, 4 minced garlic cloves, 2 tablespoons of low sodium soy sauce, and 1 tablespoon of sesame oil if you choose to use it. Heat the mixture over medium heat. Whisk it together and let it simmer for about 5 minutes. This will thicken the sauce slightly. Once the cauliflower bites are crispy, take them out of the oven. Transfer them to a large bowl. Pour the honey garlic sauce over the hot cauliflower. Toss gently to coat each piece well. For a beautiful presentation, serve the bites in a wooden bowl. Garnish with chopped green onions and sesame seeds. Enjoy these tasty bites right away! To make your cauliflower bites extra crispy, start by using panko breadcrumbs. These larger crumbs create a great crunch. Also, make sure your batter is not too thick; a smooth batter helps the coating stick better. Baking at a high temperature, like 425°F, will give the bites a nice golden color and a crispy texture. Don't forget to flip them halfway through baking to ensure even crispiness on all sides. When coating the cauliflower florets, dip each piece into the batter first. Let the extra batter drip off before rolling it in the breadcrumbs. This way, you avoid clumps and ensure an even coat. Press the breadcrumbs firmly onto the florets to help them stick. This method gives a better crunch when baked. Make sure to space them out on the baking sheet, so they cook evenly and do not steam each other. You can swap all-purpose flour for gluten-free flour. This works well if you need a gluten-free option. Instead of honey, maple syrup can be a great vegan substitute for sweetness. For the soy sauce, use tamari for a gluten-free alternative. If you don’t have sesame oil, you can skip it or replace it with olive oil. Each substitution can change the flavor slightly, but it's fun to experiment! {{image_2}} Want to add heat? Mix in Sriracha! After making the batter, add 1-2 tablespoons of Sriracha. This gives the cauliflower bites a spicy kick. Adjust the amount based on your taste. After baking, toss them in the honey garlic sauce mixed with Sriracha. You’ll love the sweet and spicy flavor! You can make this dish vegan easily. Replace honey with maple syrup. Use non-dairy milk for the batter. Choose plant-based breadcrumbs, too. Check the labels to ensure they’re vegan. These changes keep the dish delicious and cruelty-free. You’ll still enjoy that crispy texture and rich flavor! If you need gluten-free bites, swap the flour. Use almond flour or rice flour instead. Make sure your breadcrumbs are gluten-free as well. Many brands offer great options. For the sauce, confirm that the soy sauce is gluten-free. With these swaps, you’ll still enjoy tasty cauliflower bites without gluten! To store your crispy honey garlic cauliflower bites, first let them cool. Place the bites in an airtight container. You can keep them in the fridge for up to three days. Make sure to separate layers with parchment paper to prevent sticking. This way, they stay fresh and tasty. When you’re ready to enjoy the leftovers, the oven is the best choice. Preheat the oven to 350°F (175°C). Spread the cauliflower bites on a baking sheet. Heat them for about 10 to 15 minutes. This method keeps them crispy. Avoid using the microwave, as it can make them soggy. If you want to save some bites for later, freezing is a great option. Place the cooled cauliflower bites on a baking sheet in a single layer. Freeze them for about an hour until solid. Then, transfer them to a freezer-safe bag or container. You can freeze them for up to three months. When ready, thaw them in the fridge overnight before reheating. Yes, you can make these cauliflower bites ahead of time. Prepare them up to the baking step. Store them in the fridge for a day or two. When you’re ready, just bake them. This saves time and makes dinner easier. These bites pair well with many dishes. You can serve them with rice or noodles for a full meal. They also taste great with a fresh salad. If you want a snack, try them with dipping sauces like ranch or sriracha. To spice up the sauce, add red pepper flakes or sriracha. Start with a little, then taste it. You can always add more if needed. This gives the sweet sauce a nice kick and balances the flavors. Yes, cauliflower is very healthy! It is low in calories but high in nutrients. It has fiber, vitamins C and K, and antioxidants. Eating cauliflower can support digestion and boost your immune system. Plus, it is a great low-carb substitute in meals. Cauliflower bites are easy and fun to make. You learned about the main ingredients, how to prepare them, and the tasty honey garlic sauce. I shared tips for crispiness and ways to switch up flavors. You also got storage info to keep leftovers fresh. These bites are a healthy snack or side dish. Enjoy experimenting with different flavors and serving them with your favorite dips. Try making them today for a tasty treat!
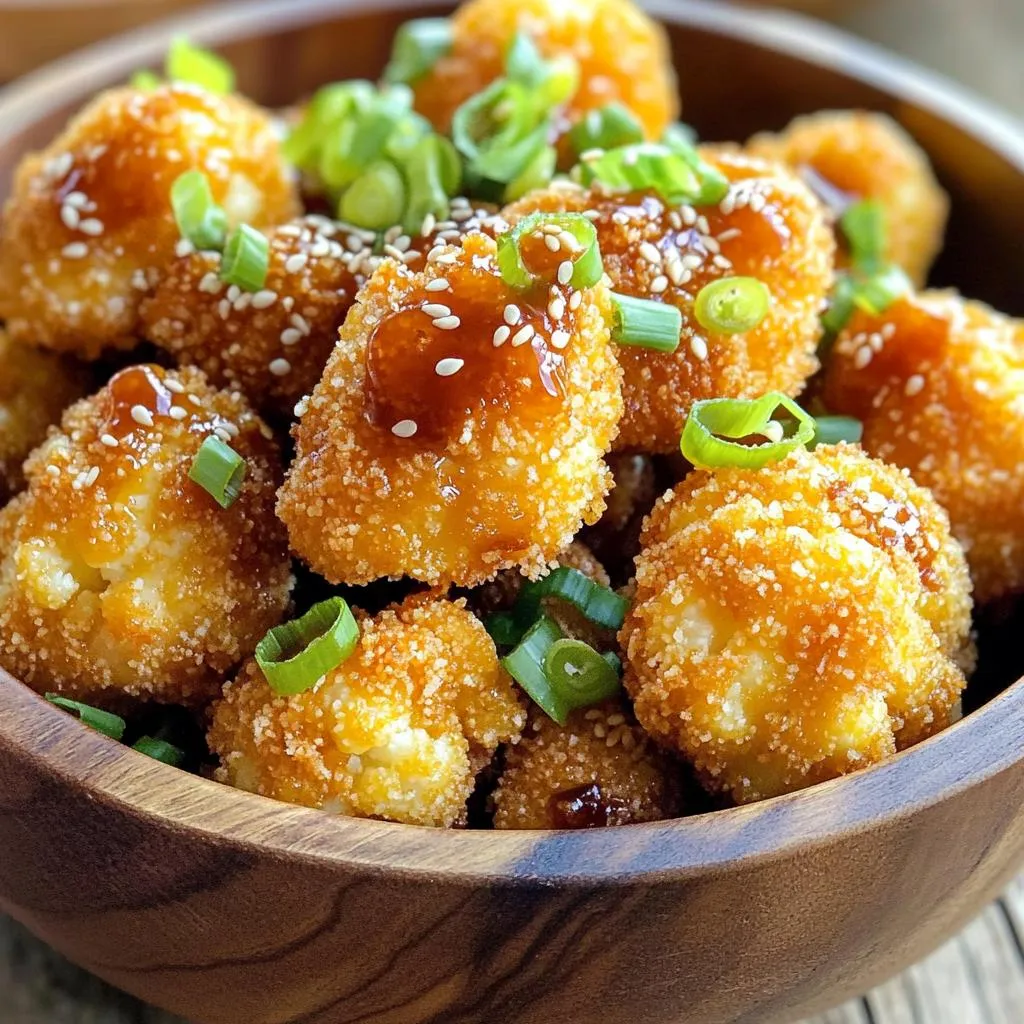
Crispy Honey Garlic Cauliflower Bites for Snacks
If you’re craving a snack that’s both delicious and healthy, you’ve found it! Crispy Honey Garlic Cauliflower Bites are your perfect solution. This tasty treat
- 4 medium-sized russet potatoes, washed and cut into wedges - 3 tablespoons olive oil - 4 cloves garlic, minced - 1 teaspoon dried oregano - 1 teaspoon onion powder - 1 teaspoon smoked paprika - ½ cup grated Parmesan cheese - Salt and pepper to taste - Fresh parsley, chopped for garnish (optional) Start with fresh russet potatoes. They give the best texture. Wash them well to remove dirt. Cut them into wedges, making sure they are even. This helps them cook evenly. Use a large bowl for mixing. This gives you space to toss the ingredients well. Mince the garlic finely to spread the flavor. Use good quality olive oil for better taste. Always measure out your spices to keep flavors balanced. If you want a twist, try sweet potatoes. They add a nice sweetness. For a dairy-free option, skip the Parmesan. You can use nutritional yeast for a cheesy flavor. If you like heat, add cayenne pepper to the mix. Fresh herbs like thyme or rosemary can replace oregano for a different taste. First, set your air fryer to 400°F (200°C). Let it preheat for about 5 minutes. This step helps the potato wedges cook evenly. A hot air fryer gives a nice, crispy finish. Wash 4 medium-sized russet potatoes well. Cut them into wedges, aiming for uniform sizes. In a large bowl, combine the wedges with 3 tablespoons of olive oil. Toss them so every wedge gets coated. Next, add 4 minced garlic cloves, 1 teaspoon of dried oregano, 1 teaspoon of onion powder, and 1 teaspoon of smoked paprika. Sprinkle in salt and pepper to taste. Mix everything until the wedges are fully seasoned. Finally, sprinkle ½ cup of grated Parmesan cheese over the seasoned wedges and mix gently. Place the seasoned potato wedges in the air fryer basket. Make sure they are in a single layer for best results. If your air fryer is small, cook in batches. Set the timer for 15 to 20 minutes. Halfway through, shake the basket to cook all sides evenly. When done, the wedges should be golden brown and crispy. Let them cool for a couple of minutes. If you like, garnish with fresh chopped parsley before serving. Enjoy your crispy delight! To get that nice crunch, preheat your air fryer to 400°F (200°C). This step is key. It helps the potato wedges cook evenly and turn golden brown. Make sure to coat the wedges well with olive oil. This oil gives them flavor and helps with crispiness. Shake the basket halfway through cooking. This ensures every side gets crispy. If your air fryer is small, cook in batches. This keeps the heat steady. While garlic and Parmesan are delicious, you can mix things up. Try adding chili flakes for a spicy kick. You can use fresh herbs like rosemary or thyme for a fresh taste. Swap the Parmesan for cheddar cheese if you want a different flavor. You can even add lemon zest for a bright twist. The options are endless! Experiment to find your favorite mix. One mistake is overcrowding the air fryer. If you pile the wedges too high, they won’t crisp up. Always lay them in a single layer. Another mistake is not seasoning enough. Taste is key! Always add salt and pepper for balance. Don't skip the preheating step, as it helps achieve that perfect texture. Lastly, let the wedges cool for a few minutes after cooking. This helps them firm up and makes them easier to eat. {{image_2}} To kick up the heat, add some spice to your wedges. Start with the same ingredients. Then, mix in 1 teaspoon of cayenne pepper or red pepper flakes. This adds a fiery kick. You can adjust the spice level to suit your taste. Pair these spicy wedges with a cooling dip, like ranch or yogurt sauce. For a creamy twist, sprinkle extra cheese on top of your wedges. Use a mix of mozzarella and cheddar instead of just Parmesan. Add 1 tablespoon of fresh herbs like thyme or rosemary to the mix. These herbs will add a lovely aroma and flavor. This variation is perfect for cheese lovers. If you crave something sweeter, swap russet potatoes for sweet potatoes. Cut them into wedges and follow the same steps. The sweetness pairs well with garlic and Parmesan. You may want to reduce the cooking time by a few minutes, as sweet potatoes cook faster. Enjoy a healthier twist that’s still delicious! After cooking your Air Fryer Garlic Parmesan Potato Wedges, let them cool. Place them in a sealed container. Store in the fridge for up to three days. Make sure they cool down before sealing. This keeps them crispy longer. Avoid stacking them while they cool. This helps prevent sogginess. When you're ready to enjoy leftovers, you have a few options. The best way is to use the air fryer. Set it to 350°F (175°C). Heat for about 5 to 7 minutes. This brings back the crispiness. You can also use an oven. Preheat to 375°F (190°C) and bake for 10-12 minutes. Microwave reheating is not recommended. It makes them soft and chewy. If you want to freeze your wedges, it’s simple. First, let them cool completely. Place them in a single layer on a baking sheet. Freeze for about 1 hour. Once they are firm, transfer them to a freezer bag. They can last up to three months. When you're ready to eat, cook them from frozen in the air fryer. This ensures they stay crispy. Cook the potato wedges for 15 to 20 minutes at 400°F (200°C). Check them halfway through. Shake the basket to mix the wedges. They should be golden brown and crispy when done. If you like them extra crispy, add a few more minutes. Keep an eye on them to avoid burning. Yes, you can use other potatoes! Yukon gold or sweet potatoes work well. Each type adds a different flavor. Russet potatoes give a classic taste and texture. Sweet potatoes offer a hint of sweetness. Just remember to adjust cooking times if needed, based on the size of your wedges. Garlic Parmesan potato wedges pair well with many dishes. Try them with grilled chicken or burgers. They also go great with dipping sauces like ranch or ketchup. For a full meal, serve them alongside a fresh salad. You can even enjoy them as a tasty snack on their own! This blog post shared how to make tasty air fryer potato wedges. We covered the right ingredients, prep tips, and cooking steps. I also shared tips for a perfect crisp and tasty seasoning. You learned about different wedge variations and how to store them well. With these simple steps, you can make delicious potato wedges that everyone will love. Enjoy creating these snacks and share them with friends and family!
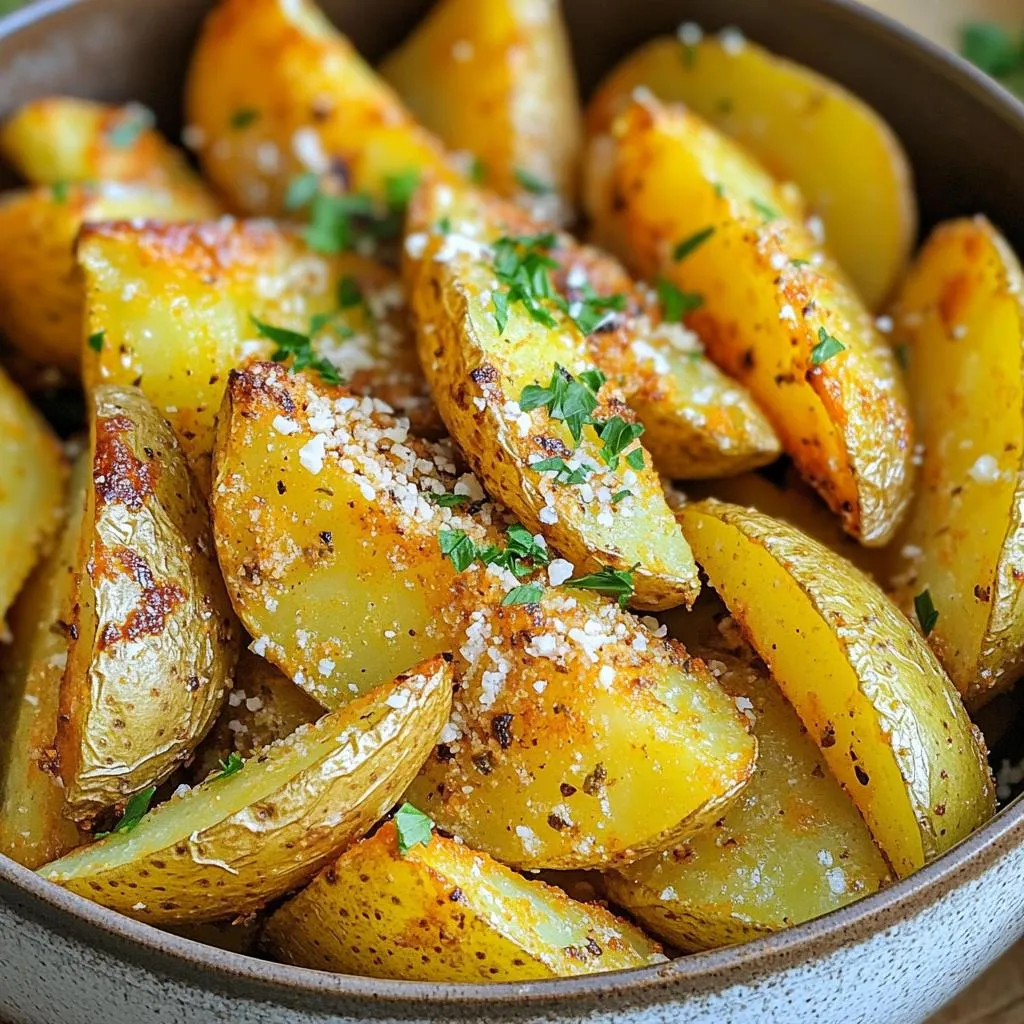
Air Fryer Garlic Parmesan Potato Wedges Crispy Delight
Are you ready to enjoy crispy, flavorful Garlic Parmesan potato wedges? Using an air fryer makes this dish a breeze! I’ll guide you through each
- 1 medium head of cauliflower, cut into bite-sized florets - 1 cup all-purpose flour (or gluten-free flour) - 1 cup water - 1 teaspoon garlic powder - 1 teaspoon onion powder - 1 teaspoon paprika - Salt and pepper to taste - 1 cup buffalo wing sauce - 2 tablespoons olive oil - Fresh parsley, chopped (for garnish) You can swap the all-purpose flour with gluten-free flour for a gluten-free option. If you want less heat, use a mild sauce instead of buffalo wing sauce. You can also use coconut flour or almond flour, but you may need to adjust the water to get the right batter consistency. For the best flavor, use fresh cauliflower. Look for firm florets with no brown spots. Choose a buffalo sauce you love; this will impact the taste of your bites. When buying spices, check the freshness date to ensure they pack a punch. Quality ingredients make a big difference in your dish! First, you need to prep the cauliflower. Start by rinsing the cauliflower florets under cold water. Once rinsed, pat them dry with a clean towel. This step is key. It helps the batter stick better to the florets. If they are wet, the batter won't cling as well, and you want that nice coating. Next, it's time to make the batter. In a mixing bowl, combine 1 cup of all-purpose flour, 1 teaspoon of garlic powder, 1 teaspoon of onion powder, and 1 teaspoon of paprika. Add salt and pepper to taste. Now, gradually whisk in 1 cup of water. Keep whisking until the batter is smooth. It should not be too thick or too runny. You want it just right to coat the florets. Now, let’s cook the cauliflower bites. Preheat your air fryer to 400°F (200°C) for about 5 minutes. While it heats, dip each cauliflower floret into the batter. Make sure they are well coated, then shake off any extra batter. Lightly spray the air fryer basket with cooking spray. Place the coated cauliflower in a single layer in the basket. Air fry them for 10 minutes, shaking the basket halfway through. After that, it’s time for the buffalo sauce bath. In a separate bowl, mix the cooked cauliflower bites with 1 cup of buffalo wing sauce. Make sure they are evenly coated. Then, return them to the air fryer basket. Air fry for another 5 minutes. This will make them crispy and golden. Finally, remove the bites, drizzle with 2 tablespoons of olive oil, and garnish with fresh parsley. Enjoy your tasty buffalo cauliflower bites! To get those perfect, crispy bites, follow these steps. First, make sure to coat each cauliflower floret well in the batter. This layer helps create that crunchy exterior. You should also preheat your air fryer to 400°F (200°C). This step is key for even cooking. When placing the florets in the basket, keep them in a single layer. Overcrowding leads to steaming, not crisping. Lastly, remember to shake the basket halfway through. This action helps ensure all sides get that golden-brown finish. A few common mistakes can ruin your cauliflower bites. First, don’t skip drying the cauliflower. Moisture can lead to soggy bites. Second, use the right amount of batter. Too much can make them heavy and greasy. Another mistake is not letting the air fryer preheat. This step is crucial for getting that initial crisp. Lastly, avoid skipping the final air fry after the buffalo sauce dip. This step helps seal in the flavor while keeping the crunch. These buffalo cauliflower bites are great on their own. However, you can elevate them with tasty sides. Try serving them with celery sticks and a cool ranch or blue cheese dip. This contrast of flavors works wonders. You can also sprinkle some chopped parsley on top for a fresh touch. For a fun twist, pair them with a side of sweet potato fries. They add a sweet balance to the spicy bites. Enjoy them during game day or as a tasty snack! {{image_2}} If you want more heat, try adding cayenne pepper. Mix in half a teaspoon for a spicy kick. You can also use hot wing sauce instead of regular buffalo sauce. This change gives a stronger flavor. Adjust the heat to fit your taste. To make this dish vegan, substitute the all-purpose flour with chickpea flour. Mix equal parts of chickpea flour and water. This creates a nice batter without dairy. Make sure to choose a vegan buffalo sauce. There are many brands out there that taste great! Get creative with your sauces! Instead of buffalo sauce, try BBQ sauce or teriyaki sauce. You can also add spices like cumin or chili powder for a different taste. Experiment with garlic or ranch seasoning too. These twists keep the dish fun and fresh. To store your leftover buffalo cauliflower bites, place them in an airtight container. Let them cool down first. Store them in the fridge for up to three days. Keeping them sealed helps keep them fresh. If you want to enjoy them later, it’s best to store them as soon as they cool. Reheating is simple. Preheat your air fryer to 350°F (175°C). Place the cauliflower bites in the basket. Heat them for about 5 to 7 minutes. This method keeps them crispy. You can also use a microwave, but they may lose some crunch. If using a microwave, heat in short bursts to avoid sogginess. If you want to freeze your cauliflower bites, do it before adding sauce. Freeze them in a single layer on a baking sheet first. Once frozen, transfer to a freezer bag. They can last up to three months. When ready to eat, air fry them straight from the freezer. Adjust cooking time for the best results. Yes, you can use frozen cauliflower. Just thaw it first. Pat it dry with a towel. This helps the batter stick better. The cooking time may change a bit. Check for doneness sooner than the recipe states. To make the bites less spicy, use less buffalo sauce. You can mix in some ranch or blue cheese dressing. This will cut the heat. You can also add honey to the sauce for a sweet touch. Adjust to your taste and enjoy! Buffalo cauliflower bites pair well with many sides. Try serving them with celery sticks or carrot sticks. You can also add a cool dip like ranch or blue cheese. They make a great snack for game day or a fun party dish! In this post, we covered key ingredients for buffalo cauliflower bites, including options and tips for quality. I outlined step-by-step instructions on preparing and cooking the bites for perfect results. Tips and tricks help you achieve crispiness and avoid common mistakes. We also shared tasty variations for every palate, along with storage and reheating advice. Eat these delicious bites fresh or as leftovers. Enjoy experimenting with flavors. You’ll impress your friends with this simple, flavorful snack.
Air Fryer Buffalo Cauliflower Bites Tasty and Simple
Looking for a tasty snack that’s easy to make? You’ve come to the right place! In this blog post, I’ll show you how to whip
- 10 fresh jalapeños, halved and seeded - 1 cup cream cheese, softened - 1/2 cup sharp cheddar cheese, shredded - 1/4 cup green onions, finely chopped - 1 teaspoon garlic powder - 1/2 teaspoon smoked paprika - 1 cup panko breadcrumbs - 1 tablespoon olive oil - Salt and pepper to taste You can swap cream cheese with Greek yogurt for a lighter option. Use any cheese you like, such as Monterey Jack or pepper jack. If you don’t have green onions, regular onions work too. For gluten-free bites, try gluten-free breadcrumbs. You can also change smoked paprika to regular paprika for less flavor. When choosing jalapeños, look for firm ones with smooth skin. They should be bright green and free of blemishes. Check the stems; they should be fresh and green, not brown. A little shine means they are fresh. If you want more heat, pick smaller ones, as they tend to be spicier. First, grab ten fresh jalapeños. Cut each one in half and remove the seeds. This step reduces the heat. If you like spice, leave a few seeds. Rinse the jalapeños under cold water to clean them. Pat them dry with a towel. Set them aside on a plate while you make the filling. In a mixing bowl, add one cup of softened cream cheese. Then, mix in half a cup of shredded sharp cheddar cheese. Add a quarter cup of finely chopped green onions to give it a fresh taste. Sprinkle in one teaspoon of garlic powder and half a teaspoon of smoked paprika. Season with salt and pepper to taste. Use a fork to blend everything until smooth. It should look creamy and well mixed. Next, take each jalapeño half and fill it with the cheese mixture. Use a spoon to pack the filling in well. In a separate bowl, pour one cup of panko breadcrumbs. Drizzle one tablespoon of olive oil over the breadcrumbs. Mix until the breadcrumbs are coated with oil. Now, dip each filled jalapeño half into the breadcrumb mix. Press gently so the breadcrumbs stick. Arrange the poppers in a single layer in your air fryer basket. Avoid crowding them; it’s best to cook them in batches. Set your air fryer to 375°F (190°C) and air fry for 8 to 10 minutes. Look for a golden brown color and a crispy texture. Once done, carefully take them out. Let them cool for a minute before serving. Enjoy your tasty jalapeño popper bites! To get a nice crunch on your jalapeño popper bites, use panko breadcrumbs. They are lighter and crispier than regular breadcrumbs. Make sure to coat them well with olive oil. This adds flavor and helps them brown nicely. Spread the poppers in a single layer in the air fryer. If you overcrowd, they won’t crisp up as much. Cook in batches if needed for best results. If you want your poppers milder, remove all the seeds and membranes from the jalapeños. This part holds most of the heat. For extra spice, leave some seeds in or add a pinch of cayenne pepper to your cheese mix. You can also use spicy cheese, like pepper jack, for more kick. Tailor the heat to fit your taste! These crispy bites pair well with a variety of dips. Creamy ranch or cool sour cream works great. You can also serve them with a zesty salsa or guacamole for extra flavor. A dash of lime juice can brighten up the dish. Arrange your poppers on a platter for sharing. They make a fun snack for parties or game days! {{image_2}} Do you love bacon? Wrapping bacon around each jalapeño bite adds flavor and crunch. Start by cutting your bacon strips in half. Wrap each stuffed jalapeño with a piece of bacon. Secure it with a toothpick if needed. Air fry them as usual. The bacon will get crispy, and the flavors will mix beautifully. Want a meat-free version? Use black beans instead of bacon for texture. You can also add corn for sweetness. Replace the cream cheese with a plant-based version. This keeps the creamy feel while being vegetarian. These options are perfect for anyone who wants to enjoy the poppers without meat. Experimenting with cheese can change the whole taste! Try using pepper jack for a spicy kick. Or, go for mozzarella for a milder flavor. Mixing different cheeses, like gouda and cheddar, can create a unique taste. Just make sure to keep the cheese creamy for that perfect popper experience. After you enjoy your Air Fryer Crispy Jalapeño Popper Bites, store any leftovers in an airtight container. Keep them in the fridge. They stay fresh for about 3 to 4 days. Make sure the bites are completely cool before you store them. This helps prevent sogginess. When you are ready to eat the leftovers, reheating is easy. Preheat your air fryer to 350°F (175°C). Place the jalapeño popper bites in the basket in a single layer. Heat them for about 4 to 5 minutes. This will make them crispy again. You can also use an oven for reheating. Set it to 350°F (175°C) and bake for about 10 minutes. If you want to save some for later, you can freeze the poppers. First, let them cool completely. Then, lay them on a baking sheet in a single layer. Freeze them for about 1 to 2 hours. Once frozen, transfer them to a freezer-safe bag or container. They will keep in the freezer for up to 3 months. When you’re ready to cook them, no need to thaw. Just air fry them at 375°F (190°C) for about 10-12 minutes. Enjoy your tasty treat! Yes, you can prepare jalapeño popper bites ahead of time. Just fill the jalapeños with the cheese mixture and coat them with breadcrumbs. Place them on a baking tray and cover with plastic wrap. You can store them in the fridge for up to 24 hours. When you're ready to cook, air fry them straight from the fridge. This saves time when you have guests or want a quick snack. You can make these bites healthier with a few easy swaps. Use low-fat cream cheese instead of regular cream cheese. You can also replace sharp cheddar with a lighter cheese. Instead of panko, try whole wheat breadcrumbs. For a lower-calorie option, use less oil when coating the breadcrumbs. This way, you still enjoy the flavor but cut back on extra calories. Many dipping sauces pair well with jalapeño popper bites. Here are some great options: - Ranch dressing - Sour cream - Creamy avocado dip - Spicy salsa - Honey mustard Each sauce adds a different flavor. Try a few to see which one you like best! In this article, we explored tasty jalapeño poppers. You learned about key ingredients, substitutions, and how to choose fresh jalapeños. We covered step-by-step instructions to prepare, fill, and air fry your poppers. You also discovered tips for crispiness and adjusting spice levels. We shared fun variations and storage tips to keep your snacks fresh. Jalapeño poppers are versatile and easy to make. Now, you can enjoy or share them anytime!
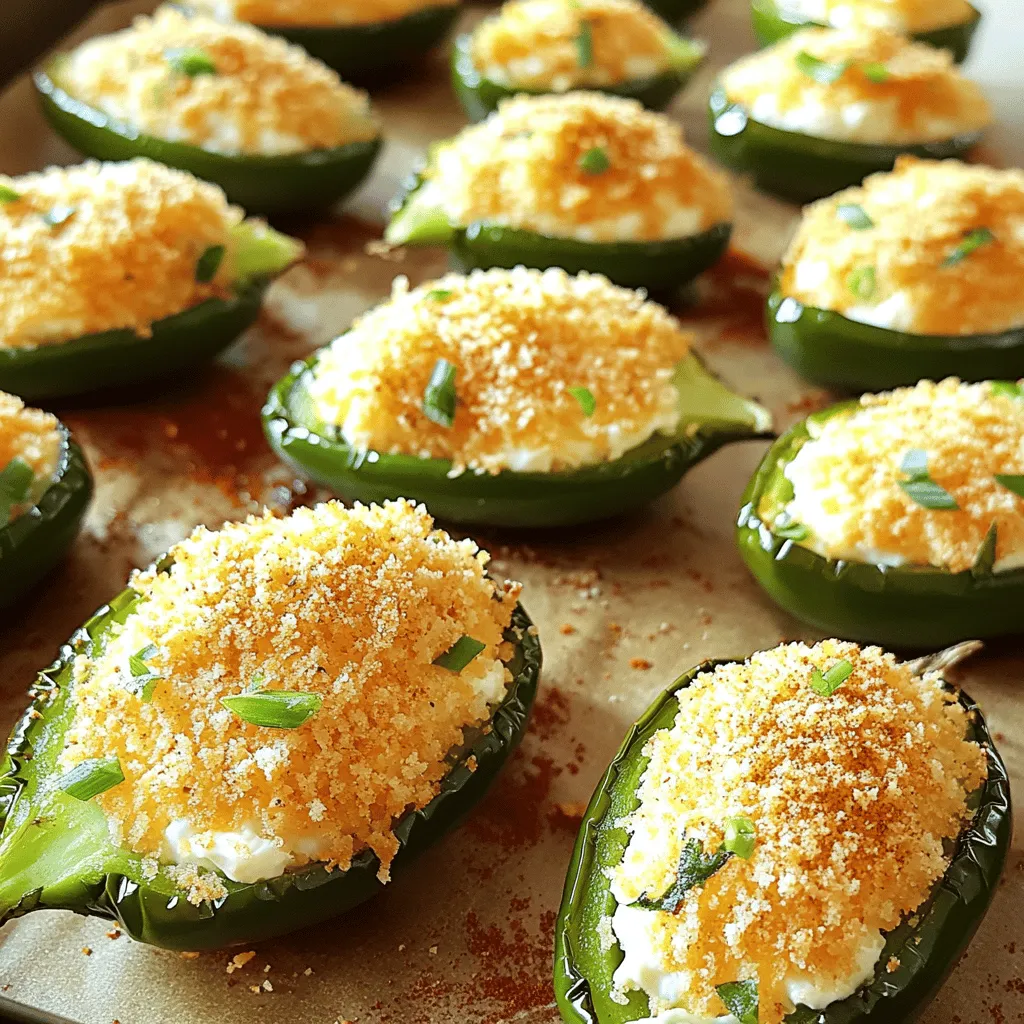
Air Fryer Crispy Jalapeño Popper Bites Recipe
Are you ready to spice up your snack game? My Air Fryer Crispy Jalapeño Popper Bites take crispy goodness to a whole new level! With
To make Air Fryer Parmesan Cauliflower Bites, gather these items: - 1 medium head of cauliflower, cut into bite-sized florets - 1/2 cup grated Parmesan cheese - 1/2 cup breadcrumbs (preferably whole grain or panko) - 2 tablespoons olive oil - 1 teaspoon garlic powder - 1 teaspoon onion powder - 1/2 teaspoon smoked paprika - Salt and pepper to taste - Fresh parsley, chopped for garnish (optional) Using good-quality ingredients makes a big difference. I recommend: - Parmesan Cheese: Grana Padano or Parmigiano Reggiano for rich flavor. - Breadcrumbs: Use panko for extra crunch. Brands like Kikkoman are great. - Olive Oil: Extra virgin olive oil enhances taste. Look for brands like Colavita or California Olive Ranch. These bites are tasty and can fit into many diets. Here’s a basic breakdown: - Serving Size: About 1 cup (approx. 4 bites) - Calories: Around 250 - Protein: 10 grams - Carbohydrates: 20 grams - Fat: 15 grams - Fiber: 2 grams This snack is a good source of protein and fiber. Plus, it has healthy fats from olive oil. Enjoy these bites as a fun snack or side dish! Start with a medium head of cauliflower. Cut it into bite-sized florets. This helps them cook evenly. Rinse the florets under cold water. Pat them dry with a clean towel. This step is key. It helps the coating stick well. In a mixing bowl, add 1/2 cup of grated Parmesan cheese. Then, mix in 1/2 cup of breadcrumbs. I like to use whole grain or panko for extra crunch. Next, add 1 teaspoon of garlic powder, 1 teaspoon of onion powder, and 1/2 teaspoon of smoked paprika. Don't forget to add salt and pepper to taste. Mix everything until it looks even. In another bowl, toss the cauliflower florets with 2 tablespoons of olive oil. Ensure they are well coated. Now, take a few cauliflower florets at a time and dip them into the breadcrumb mix. Make sure each piece is fully covered. Repeat this until all florets are coated. Preheat the air fryer to 400°F (200°C). Place the coated cauliflower bites in a single layer in the basket. Avoid overcrowding to ensure crispiness. Air fry for 12-15 minutes. Shake the basket halfway through cooking. This helps them brown evenly. When they are golden and crispy, remove them carefully. If you have a large batch, you may need to repeat the process. Serve them hot, and feel free to garnish with fresh parsley if you like! I like to pick a medium head of cauliflower for this recipe. Look for florets that are firm and bright white. Avoid any brown spots or soft areas. Fresh cauliflower gives the best taste and texture. You can also choose organic cauliflower if you prefer. It often has a richer flavor and fewer chemicals. To get crispy bites, make sure to coat each floret well. The key is to toss the cauliflower with olive oil first. This helps the breadcrumbs stick better. Use panko breadcrumbs for extra crunch. When you place the florets in the air fryer, don’t overcrowd them. Give them room to breathe. This will help them crisp up nicely on all sides. You can prep these cauliflower bites ahead of time. Coat the florets and place them in the fridge for a few hours. Just remember to take them out about 30 minutes before cooking. This helps them cook evenly. If you want to cook them later, you can freeze them too. Just be sure to thaw them before air frying. This makes for a quick snack when you need it! {{image_2}} You can change the flavors in this recipe easily. Try adding different spices to the breadcrumb mix. For a kick, use cayenne pepper or chili powder. If you love herbs, mix in dried oregano or thyme. You can also add lemon zest for a fresh twist. The options are endless! If you want a different taste, switch the cheese. Use sharp cheddar for a bolder flavor. Goat cheese adds creaminess, while nutritional yeast keeps it vegan. Each cheese brings a unique taste to the bites. Explore these choices based on your craving! For a healthier snack, use gluten-free breadcrumbs. You can also use crushed nuts, like almonds or pecans. They add crunch and flavor. If you want fewer carbs, skip the breadcrumbs. Toss the florets in spices and cheese only. These small changes keep the bites tasty and healthy! After making your Air Fryer Parmesan Cauliflower Bites, let them cool. Place them on a wire rack. This keeps air flowing and stops them from getting soggy. If they sit in a pile, moisture builds up. Allow at least 15 minutes for cooling. Store leftover cauliflower bites in an airtight container. Use wax paper or parchment paper to separate layers. This helps keep them crispy. They can last in the fridge for up to 3 days. If you want to keep them longer, freeze them. Just place them in a freezer-safe bag. Make sure to squeeze out as much air as possible. To reheat, use your air fryer again. Set it to 350°F (175°C). Place the bites in the basket and heat for about 5 to 7 minutes. This will help regain the crispy texture. You can also use an oven. Preheat to 350°F (175°C) and bake for about 10 minutes. Enjoy your tasty snack warm! Yes, you can use frozen cauliflower. Just thaw it first. Drain any excess water. This helps the coating stick better. Air fry the bites for a couple of extra minutes. Check for crispiness to ensure they cook well. The cauliflower bites are done when they are golden brown and crispy. You can shake the basket halfway through cooking. This helps them cook evenly. If they look crispy and smell great, it’s time to take them out. These bites pair well with many dips. Try marinara sauce, ranch, or garlic aioli. You can also serve them with a fresh salad for a light meal. They make a great snack for parties or game day, too! This blog post covered how to make delicious air fryer Parmesan cauliflower bites. You learned about the key ingredients and their quality. The step-by-step instructions show you how to prep, coat, and air fry your bites for the best results. We shared tips to choose the right cauliflower and ensure crispiness. You can also explore variations to suit your taste. Finally, we discussed storage methods and answered common questions. Enjoy making this tasty snack that’s simple and satisfying.
Air Fryer Parmesan Cauliflower Bites Tasty Snack Idea
Looking for a tasty snack that’s easy to make? You’re in luck! My Air Fryer Parmesan Cauliflower Bites are crispy, cheesy, and full of flavor.
- 1 ½ cups warm water (110°F) - 1 packet active dry yeast (2 ¼ teaspoons) - 4 cups all-purpose flour - 1 cup sharp cheddar cheese, shredded - 2 jalapeños, seeds removed and finely chopped - Coarse sea salt for topping - 1 tablespoon sugar - Air fryer - Mixing bowl - Baking soda for the soaking solution When making air fryer jalapeño cheddar pretzel bites, you need specific items. The main ingredients start with warm water. This helps activate the yeast. Active dry yeast is key for that fluffy texture. Next, use all-purpose flour. It provides the structure for the dough. Sharp cheddar cheese adds rich flavor. For flavor, chop two jalapeños finely. They bring a nice kick to the bites. Coarse sea salt adds that perfect finish. You will also need sugar to balance the flavors. Gather essential tools too. An air fryer cooks these bites to a golden crisp. A mixing bowl is needed for combining ingredients. Lastly, use baking soda for the soaking solution. This step gives the pretzel bites their signature taste. These ingredients and tools are simple yet vital. They help create the perfect snack that your friends and family will love. First, grab a large mixing bowl. Pour in 1 ½ cups of warm water. Add 1 tablespoon of sugar and 1 packet of active dry yeast. Mix it gently and let it sit for about 5 minutes. You want it to get bubbly. Then, mix in 4 cups of all-purpose flour and 1 teaspoon of salt. Knead the dough until it feels soft and smooth. This is key for a good texture. Now comes the fun part! Add 1 cup of shredded sharp cheddar cheese and 2 finely chopped jalapeños into the dough. Mix it well until the cheese and jalapeños are evenly spread throughout. This gives each bite a nice kick and cheesy flavor. Cover your bowl with a damp cloth. Let the dough rise in a warm place for 30 minutes. It should double in size. After it has risen, punch it down gently to release air. Divide the dough into small pieces, about the size of a marble. Roll each piece into a small log. Twist the ends to make a pretzel shape or keep it as a simple bite. Next, let's prepare the baking soda bath. In a large bowl, dissolve ½ cup of baking soda in a cup of hot water. Dip each pretzel bite into this solution for about 30 seconds. After that, place them on a lightly greased surface. Brush each bite with a beaten egg and sprinkle with coarse sea salt. Preheat your air fryer to 375°F. Place the pretzel bites in a single layer in the basket. Air fry for 8-10 minutes until they are golden brown and cooked through. Enjoy your tasty bites! To make great pretzel bites, you must activate the yeast properly. Mix warm water, sugar, and yeast. Let it sit for about five minutes. You should see bubbles forming. This shows your yeast is active. If not, start again with fresh yeast. Kneading is key for a soft dough. Knead the dough for about five minutes. You want it smooth and elastic. If it feels too sticky, sprinkle a bit of flour. Just don’t add too much. Adjusting the jalapeño amount helps control the spice. If you like it hot, use more jalapeños. For milder bites, reduce the amount. Remember, removing the seeds also lowers the heat. Different cheese blends can also change the taste. Sharp cheddar gives a strong flavor. Try pepper jack for a spicy kick or gouda for a rich taste. Mix cheeses if you want more depth. Avoid overcrowding the air fryer basket. Place the bites in a single layer. This helps them cook evenly. You may need to air fry in batches. For even cooking, preheat the air fryer. Set it to 375°F (190°C). This helps the bites cook quickly and become golden brown all around. Check them halfway through and shake the basket for best results. {{image_2}} You can easily switch up the cheese in these pretzel bites. Instead of sharp cheddar, try pepper jack for a spicy kick. Gouda adds a nice creaminess. Mixing in different cheeses gives you a fun flavor twist. You can even combine them for a gourmet bite. Want more heat? Add crushed red pepper flakes to the dough. This simple step boosts the spice level. You can also mix in a few dashes of hot sauce for extra flavor. Adjust the spice to your taste. This way, you can make them mild or fiery. If you need a gluten-free option, use gluten-free flour. Many brands work well as a substitute. Just make sure to follow the package instructions for best results. Your pretzel bites will still be soft and tasty. Enjoy all the flavor without the gluten! To store your leftover Air Fryer Jalapeño Cheddar Pretzel Bites, place them in an airtight container. This keeps them fresh and prevents them from drying out. Store them in the fridge for up to three days. Before eating, you can warm them up in the air fryer for a few minutes to regain that crispy texture. If you want to save your pretzel bites for later, freezing is the way to go. Place cooled pretzel bites in a freezer-safe bag or container. Make sure to remove as much air as possible before sealing. They can last in the freezer for up to three months. To reheat, simply pop them back in the air fryer at 375°F for about 5-7 minutes. This helps maintain their crunch while warming them through. These tasty bites are best enjoyed fresh but can last up to three days in the fridge. After cooking, they lose some crispness but still taste great. If you freeze them, they keep their flavor and texture well for about three months. Always check for any signs of spoilage before eating, especially if stored for longer periods. Yes, you can make these pretzel bites ahead of time. First, prepare the dough and shape your pretzel bites. After shaping, place them on a baking sheet lined with parchment paper. Then, cover them with plastic wrap and refrigerate. This keeps them fresh for up to 24 hours. When you are ready to eat, take them out, let them sit at room temperature for about 30 minutes, and then air fry them. To reheat your pretzel bites, set your air fryer to 350°F. Place the bites in the basket in a single layer. Reheat for about 3-5 minutes. This method keeps them crispy and warm. You can also use an oven at 350°F. Just place them on a baking sheet and heat for 5-10 minutes. Pretzel bites taste great with many dipping sauces. Here are some popular choices: - Cheese sauce - Spicy mustard - Honey mustard - Ranch dressing - Sriracha mayo Choose what you love best for a fun flavor boost! Yes, you can! If you don't have an air fryer, you can bake these pretzel bites in the oven. Preheat your oven to 425°F. After dipping the bites in the baking soda solution, place them on a greased baking sheet. Bake for 12-15 minutes or until they are golden brown. In this post, we explored how to make delicious air fryer pretzel bites. We covered the ingredients, including warm water, yeast, flour, cheddar cheese, and jalapeños. You learned step-by-step instructions from dough prep to air frying. We discussed tips to perfect the dough and variations for flavor. Lastly, I shared storage tips to keep your bites fresh. Enjoy making these tasty snacks! They’re fun to prepare and sure to please everyone. Try them with your favorite dipping sauce for a treat.
Air Fryer Jalapeño Cheddar Pretzel Bites Delight
Get ready to experience a crunchy, cheesy delight! My Air Fryer Jalapeño Cheddar Pretzel Bites are the perfect snack for parties or cozy nights at
- 1 large head of cauliflower, cut into bite-sized florets - 1 cup all-purpose flour - 1 teaspoon garlic powder - 1 teaspoon onion powder - 1 teaspoon smoked paprika - 1/2 teaspoon cayenne pepper - 1 cup plant-based milk (or regular milk) - 1 cup breadcrumbs (preferably panko for extra crunch) - 1 cup buffalo sauce (store-bought or homemade) - 2 tablespoons olive oil - Salt and pepper to taste The main ingredients in Spicy Buffalo Cauliflower Bites create the perfect blend of flavors and textures. Cauliflower florets serve as the base. They absorb flavors well and get crispy when baked. The flour and spices form a tasty batter, giving the bites their crunch. I love using panko breadcrumbs for that extra crispiness. The buffalo sauce is the star, adding the spicy kick we crave. - Chopped fresh parsley - Dipping sauces (e.g., ranch or blue cheese dressing) Garnishes bring your dish to life. Fresh parsley adds a pop of green and a hint of freshness. Dipping sauces let you customize each bite. I recommend creamy ranch or tangy blue cheese dressing for a perfect match. 1. Preheat your oven to 450°F (230°C). This heat is perfect for getting a crispy texture on your bites. 2. Prepare your baking sheet by lining it with parchment paper. This helps prevent sticking and makes cleanup easier. 3. In a mixing bowl, combine 1 cup of flour with 1 teaspoon each of garlic powder, onion powder, and smoked paprika. Add 1/2 teaspoon of cayenne pepper, plus salt and pepper to taste. Mix these dry ingredients well. 4. Gradually whisk in 1 cup of plant-based milk (or regular milk) until your batter is smooth and clump-free. This will give your cauliflower a tasty coating. 1. Dip each cauliflower floret into the batter. Let the excess batter drip off; you want a nice layer, but not too thick. 2. Roll the batter-coated florets in 1 cup of breadcrumbs, preferably panko for that extra crunch. Make sure each piece is fully coated. 3. Place the coated florets on your prepared baking sheet. 4. Drizzle 2 tablespoons of olive oil over the florets. This step is key for achieving that crispy result. 5. Bake in the preheated oven for 25-30 minutes. Remember to turn them halfway through cooking. You want them golden brown and crispy. 1. In a separate bowl, toss your baked cauliflower bites with 1 cup of buffalo sauce. Ensure each piece is evenly coated. 2. Return the sauced cauliflower back to the baking sheet and bake for an additional 10 minutes. This step locks in the flavor and adds a bit more crunch. 3. Remove from the oven and let cool for a couple of minutes before serving. Serve your spicy buffalo cauliflower bites in a colorful bowl, and don't forget to add some chopped fresh parsley for a nice touch! Enjoy your crispy flavor boost! To make your cauliflower bites crispy, you must coat them evenly. First, dip each floret into the batter, letting the extra batter drip off. Then, roll them in breadcrumbs. Panko breadcrumbs give the best crunch. For baking, preheat your oven to 450°F (230°C). Line a baking sheet with parchment paper. Drizzle olive oil over the coated florets before baking. This helps them crisp up nicely. Bake for 25-30 minutes. Turn them halfway through for even cooking. The bites should be golden brown and crunchy. You can easily adjust the spice levels in your bites. If you like heat, add more cayenne pepper to the batter. For milder bites, reduce the cayenne. Don't limit yourself to buffalo sauce. You can try other sauces too. BBQ sauce or sweet chili sauce can add a fun twist. Experiment with different flavors to find your favorite! {{image_2}} You can easily make this dish vegan. Just swap out the regular milk for plant-based milk. Almond, soy, or oat milk work well. You can also use a vegan buffalo sauce. Many brands offer tasty options. This keeps the same spicy flavor without animal products. If you need a gluten-free version, you have some great choices. Replace all-purpose flour with a gluten-free flour blend. Look for one that works well for baking. Also, use gluten-free breadcrumbs, like crushed rice crackers or cornmeal. This way, you can still enjoy crispy bites without gluten. Want to change up the flavor? Add extra spices to the batter. Try smoked paprika for a deeper flavor. You can also mix in some cumin or chili powder for a kick. Fresh herbs like thyme or oregano can add a nice touch too. Experiment and find what you like best! To keep your spicy buffalo cauliflower bites fresh, store them in an airtight container. Place them in the fridge within two hours of cooking. Make sure they cool down first. They can last up to three days this way. If you want to keep them for longer, freezing is a great option. To reheat and keep the bites crispy, use your oven. Preheat it to 375°F (190°C). Spread the bites on a baking sheet. Bake for about 10-15 minutes. This method helps regain that crunchy texture. You can also use an air fryer for about 5-7 minutes at 350°F (175°C). This keeps them hot and crispy. To freeze, let the bites cool completely. Then, place them in a single layer on a baking sheet. Freeze them for a couple of hours until solid. After that, transfer the bites to a freezer bag. Remove as much air as you can. They can stay frozen for up to three months. When ready to eat, thaw them overnight in the fridge before reheating. Can I use frozen cauliflower instead of fresh? Yes, you can use frozen cauliflower. Just thaw and drain it well. This helps avoid excess moisture. Frozen florets may not be as crisp as fresh, but they still taste great. How do I make the bites spicier? To boost the heat, add more cayenne pepper to the batter. You can also mix in some hot sauce with the buffalo sauce. If you want extra spice, sprinkle crushed red pepper on top before serving. What goes well with Spicy Buffalo Cauliflower Bites? These bites pair well with ranch or blue cheese dressing for dipping. Fresh veggies like carrot and celery sticks add crunch. You can also serve them with a light salad for balance. Can I serve these as a main dish? Absolutely! These bites can shine as a main dish, especially with sides. Serve them with rice, quinoa, or a hearty grain salad. They make a filling and tasty meal. Are these bites healthy? Yes, they can be a healthy choice. Cauliflower is low in calories and high in fiber. The batter and sauce add flavor but keep moderation in mind if you're watching calories. What’s the calorie count per serving? Each serving, which is about four bites, contains around 150 calories. Keep in mind that the exact count can change based on the type of buffalo sauce you use. These spicy buffalo cauliflower bites are easy to make and full of flavor. We covered the main ingredients, step-by-step instructions, and tips for the best results. You learned how to customize flavors and make vegan and gluten-free versions. I shared the best ways to store and reheat leftovers, too. These bites can be a tasty snack or a fun main dish. Enjoy making them your own, and share them with friends! You’ll love the crunch and spice!
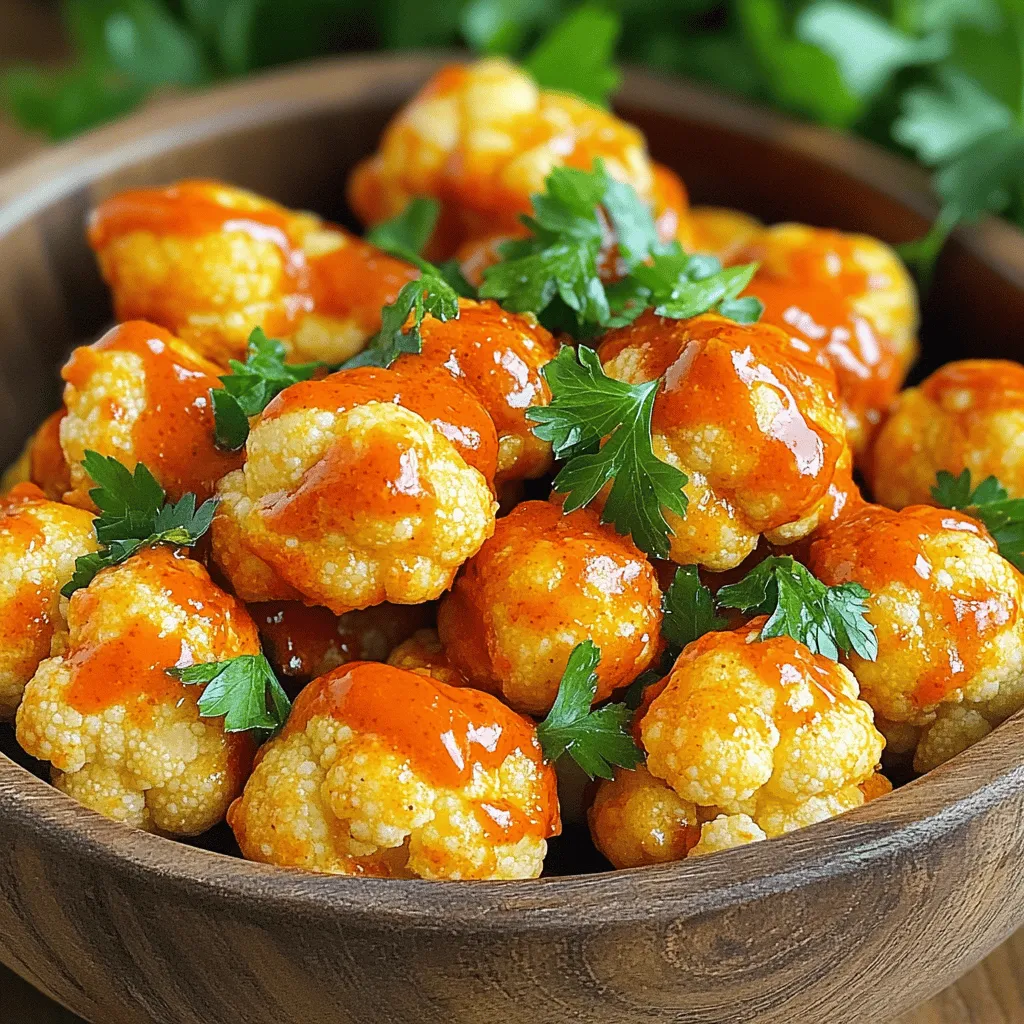
Spicy Buffalo Cauliflower Bites Crispy Flavor Boost
Get ready to spice up your snack game with my Spicy Buffalo Cauliflower Bites! These crispy and flavorful bites are a fun twist on traditional
- 2 cups cooked chicken, shredded - 1/2 cup buffalo sauce - 1/2 cup ranch dressing - 1 cup shredded lettuce - 1/2 cup diced tomatoes - 1/2 cup shredded cheddar cheese - 4 large flour tortillas - 1/4 cup chopped green onions - Salt and pepper to taste These ingredients form the base of your Buffalo Ranch Chicken Wraps. The chicken adds protein and texture. The buffalo sauce gives it a spicy kick. The ranch dressing cools the heat, balancing the flavors. Fresh lettuce and tomatoes add crunch and color. Cheddar cheese brings a creamy element. You can make your wraps even better with some extra seasonings. Try adding garlic powder or onion powder for depth. A splash of lime juice adds a fresh zing. If you love heat, add more buffalo sauce. You can also use different dressings, like blue cheese or honey mustard. Experiment with spices to find your perfect mix! For these wraps, I suggest using large flour tortillas. They are soft and easy to roll. You can also choose whole wheat tortillas for a healthier option. Corn tortillas work too, but they may crack when rolling. If you want something different, try spinach or tomato basil tortillas for extra flavor. Choose the one you like best! First, grab a medium bowl. Add 2 cups of shredded chicken. Pour in 1/2 cup of buffalo sauce. Mix well until the chicken is evenly coated. Taste it! If you want more flavor, add salt and pepper. Next, in another bowl, combine 1/2 cup of ranch dressing with a tablespoon of buffalo sauce. This makes the ranch taste even better. Now, lay out 4 large flour tortillas on a flat surface. Spread a generous tablespoon of the ranch mixture in the center of each tortilla. Next, divide the buffalo chicken mixture among the tortillas. On top of the chicken, add 1 cup of shredded lettuce, 1/2 cup of diced tomatoes, and a sprinkle of 1/2 cup of shredded cheddar cheese. For a fresh kick, sprinkle chopped green onions over the filling. Fold the sides of each tortilla in, then roll tightly from the bottom up. Make sure everything stays in! If you want a crispy wrap, heat a skillet over medium heat. Place the wraps seam-side down on the skillet. Grill for 2-3 minutes until they turn golden brown and crispy. This step adds a nice texture. Slice each wrap in half diagonally for easy serving. Enjoy your Buffalo Ranch Chicken Wraps! To make sure your tortillas stay crisp, follow these steps: - Use fresh tortillas. Older tortillas tend to be soggy. - Warm tortillas in a skillet. Heat each side for about 30 seconds. - If desired, grill the wrapped tortilla. This adds a nice crunch. - Avoid overfilling. Too much filling can make them soggy. Want to boost the flavor? Here are some ideas: - Mix a bit of buffalo sauce into the ranch dressing. This adds a kick. - Try adding spices like garlic powder or smoked paprika for extra flavor. - Include fresh herbs like cilantro or parsley. They add freshness and color. - Let the chicken marinate in buffalo sauce for an hour before use. This deepens the taste. If you have dietary needs, here are some swaps: - Use grilled tofu or tempeh instead of chicken for a plant-based option. - Swap ranch dressing with a dairy-free version or yogurt. - Choose gluten-free tortillas if needed. They work just as well. - For a low-carb option, use lettuce wraps instead of tortillas. They keep it light. {{image_2}} You can take your wraps up a notch by adding veggies. Try mixing in diced bell peppers or cucumbers for crunch. Spinach or arugula also adds fresh flavor. You can even swap out lettuce for a nice twist. The extra veggies bring color and nutrients to your meal. If you love heat, this version is for you. Add more buffalo sauce to the chicken mix for a kick. You can also use jalapeños or hot pepper flakes. These spices will make your wraps extra zesty. Just be careful to balance the heat so it’s still tasty! For low-carb or gluten-free wraps, choose lettuce leaves instead of tortillas. Romaine or butter lettuce works well. You can also find gluten-free tortillas at the store. These options let you enjoy the same great taste while keeping things light. To keep your leftover wraps fresh, wrap them tightly in plastic wrap or foil. You can also place them in an airtight container. Store them in the fridge for up to three days. This helps maintain the flavor and texture. To reheat, you can use a skillet or microwave. If using a skillet, heat it on medium. Place the wrap seam-side down and cook for about 2-3 minutes per side. This will make the wrap crispy again. If using a microwave, place the wrap on a plate. Heat it for 30 seconds, then check to see if it's hot. You can freeze the wraps for later use. Wrap each one in plastic wrap, then put them in a freezer bag. They can last up to two months in the freezer. When you're ready to eat, thaw them in the fridge overnight. Reheat them using the instructions above for best results. Yes, you can make these wraps ahead of time. Prepare the chicken mixture and the ranch sauce. Store them separately in the fridge. When ready to eat, just assemble the wraps. This keeps the tortillas fresh and prevents sogginess. If you want a different flavor, try blue cheese dressing. You can also use yogurt or sour cream mixed with herbs. This gives a creamy texture without using ranch. Yes, you can make a lighter buffalo sauce. Mix hot sauce with a little olive oil. You can also use a low-sodium hot sauce to cut back on salt. This way, you still get that spicy kick without as many calories. You can easily adjust the filling. Use cooked turkey or tofu instead of chicken. Add more veggies like cucumbers or bell peppers. For kids, you can skip the spicy sauce and use a mild flavor. Buffalo Ranch Chicken Wraps are easy to make and full of flavor. We covered the main ingredients, optional seasonings, and types of tortillas. I shared step-by-step instructions for preparing the chicken and assembling the wraps. Don’t forget the tips for crisp tortillas and ingredient swaps. You can even explore tasty variations for different diets. Store leftovers properly for a quick meal later. These wraps offer endless ways to customize your meal, making them fun for everyone. Enjoy your cooking!
Buffalo Ranch Chicken Wraps Flavorful and Easy Recipe
Craving a meal that’s both tasty and simple? Let’s dive into Buffalo Ranch Chicken Wraps! This easy recipe combines spicy buffalo sauce with creamy ranch
You need one sheet of puff pastry for this recipe. Make sure it is thawed before using. Puff pastry creates a light and flaky texture. You can find it in the freezer section of most grocery stores. I recommend using a large Granny Smith or Honeycrisp apple. These apples are tart and sweet. They hold their shape well when baked. Peel and thinly slice the apple for the best results. Using one cup of shredded sharp cheddar cheese adds a rich flavor. The sharpness of the cheese balances the sweetness of the apples. You can also try other cheeses like gouda or cream cheese for different tastes. Add one tablespoon of brown sugar to sweeten the apples. A teaspoon of cinnamon enhances the flavor beautifully. You can also include a pinch of salt to balance the sweetness. For a crunchy texture, mix in chopped walnuts or pecans if you like. First, set your oven to 400°F (200°C). This heat helps the puff pastry puff up nicely. Line a baking sheet with parchment paper. This keeps the pinwheels from sticking. Next, take your thawed puff pastry. Place it on a lightly floured surface. Roll it out gently to remove any creases. You want it slightly larger to hold more filling. Now, grab a mixing bowl. Add the thinly sliced apple, brown sugar, cinnamon, and a pinch of salt. Stir these together until the apples are coated well. This mix brings out the sweet and spicy flavors. Spread the shredded cheddar cheese evenly over the puff pastry. Leave a small margin around the edges. Then, layer the apple mixture over the cheese. If you like, sprinkle some chopped walnuts or pecans for a crunch. Starting from one edge, roll the puff pastry tightly into a log. Keep the filling inside as you roll. Once rolled, use a sharp knife to slice the log into 1-inch pinwheels. Place these cut-side up on the prepared baking sheet with space in between. Brush the tops of each pinwheel with the beaten egg for a golden finish. Bake in the oven for 15-20 minutes. Look for them to puff up and turn golden brown. Once done, remove them from the oven and let them cool for a few minutes before serving. For these pinwheels, I love using Granny Smith or Honeycrisp apples. Granny Smith has a tart flavor that pairs well with cheese. Honeycrisp is sweet and crunchy, adding a nice texture. Both types hold their shape during baking. Choose apples that are firm and fresh for the best taste. To get a nice golden color, brush the tops with beaten egg before baking. The egg wash helps them brown beautifully. Bake at 400°F (200°C) for 15-20 minutes. Keep an eye on them. Once they puff up and turn golden, they are ready to come out. When rolling the puff pastry, start at one edge and roll tightly. Make sure the filling stays inside as you roll. If the pastry tears, gently pinch it back together. Slice the log into 1-inch pinwheels with a sharp knife. This keeps them even and helps them bake uniformly. Serve these pinwheels warm for the best experience. Arrange them on a rustic wooden board. Garnish with fresh apple slices and a sprinkle of cinnamon. You can also pair them with a sweet dip like honey or a savory one like ranch. These add extra flavor and fun! {{image_2}} You can add some nuts for extra crunch. Walnuts and pecans work well. Chop them up and sprinkle them over the apples. This adds a nice texture and flavor. Nuts pair well with both apple and cheese. They bring a delightful twist to this treat. Try mixing in some nuts next time you make these pinwheels. If you want a change, try different cheeses. Gouda has a rich, creamy taste. It melts nicely and gives a unique flavor. Cream cheese offers a tangy twist and makes the pinwheels extra creamy. Spread it thinly on the puff pastry for a smooth base. Both choices can elevate your pinwheel game. For a sweeter touch, consider adding caramel or honey. Drizzle caramel over the apples for a rich, sweet layer. Honey adds natural sweetness and pairs well with apples and cheese. You can brush a little honey on top before baking. This will create a glossy finish and enhance the flavor. Sweet additions make these pinwheels even more delightful. To keep your apple cheddar puff pastry pinwheels fresh, place them in an airtight container. You can store them in the fridge for up to three days. Make sure they cool completely before sealing. This helps prevent sogginess. For best taste, enjoy them within two days. You can freeze the pinwheels for a later treat. First, let them cool completely. Then, place them in a single layer on a baking sheet. Freeze until solid, about one hour. Once frozen, transfer them to a freezer bag. They can stay in the freezer for up to three months. When ready to eat, thaw them overnight in the fridge. Reheat your pinwheels for the best taste. Preheat your oven to 375°F (190°C). Place them on a baking sheet. Heat for about 10 minutes or until warm. This helps restore the crispiness of the pastry. Avoid using the microwave, as it may make them soggy. Enjoy your tasty treat warm! Yes, you can use store-bought apple filling. It saves time and still tastes great. Choose a filling that has good flavor without too much liquid. This helps keep the pinwheels crisp. You can prepare the pinwheels and store them in the fridge. Just roll them, slice them, and place them on a baking sheet. Cover them with plastic wrap. Bake them when you’re ready. They stay fresh for a day. Apple Cheddar Puff Pastry Pinwheels taste good with many dips. Try a honey mustard sauce for a sweet kick. A creamy ranch dip also works well. You could even serve them with a warm caramel sauce for dessert. Yes, you can make these pinwheels gluten-free. Use gluten-free puff pastry instead of regular. Check the label to ensure it fits your needs. The filling remains the same, so enjoy those yummy flavors! These apple cheddar puff pastry pinwheels are tasty and fun to make. We explored the key ingredients, from puff pastry to apple varieties and cheese. I gave you simple steps for prep and baking. You learned tips for making the best pinwheels and how to store leftovers, too. Feel free to try different flavors and share them with friends. Enjoy experimenting in the kitchen!
Apple Cheddar Puff Pastry Pinwheels Delightful Treat
Get ready to impress your friends and family with Apple Cheddar Puff Pastry Pinwheels! These delightful treats combine sweet, crisp apples and rich cheddar cheese,
- 2 lbs chicken wings - 2 tablespoons baking powder - 1 tablespoon lemon pepper seasoning - 1 teaspoon garlic powder - 1 teaspoon onion powder - 1 teaspoon salt - ½ teaspoon black pepper - 1 tablespoon olive oil - Zest of 1 lemon - Fresh parsley, chopped (for garnish) The main ingredients for crispy lemon pepper air fryer wings are simple yet powerful. Chicken wings are the star of the dish. Baking powder helps create that crispy texture we all love. Lemon pepper seasoning adds bright flavor. Garlic and onion powders deepen the taste. Salt and black pepper enhance all the flavors. Olive oil gives moisture and helps the seasoning stick. Lemon zest adds a fresh kick. Finally, fresh parsley brightens the dish as a garnish. If you want to mix things up, there are great alternatives. - Alternative seasonings: You can use Cajun spice for a kick. Or try a simple blend of paprika, cayenne, and lemon zest. - Recommended oils: Instead of olive oil, you can use avocado oil. It has a high smoke point and works well in air fryers. These substitutions let you customize the flavor while keeping the wings crispy and delicious. First, you need to pat the chicken wings dry with paper towels. This step is key to getting that perfect crispiness. Removing excess moisture helps the skin become crunchy in the air fryer. If you skip this, your wings might turn out soggy. Next, let’s focus on the seasoning. In a large bowl, mix together the baking powder, lemon pepper seasoning, garlic powder, onion powder, salt, and black pepper. This blend gives the wings their amazing flavor. Then, add the chicken wings to the bowl. Drizzle them with olive oil and lemon zest. Toss everything well to coat the wings evenly. Every bite should burst with flavor! Now, it’s time to air fry your wings. Preheat your air fryer to 375°F (190°C) for about 5 minutes. This step ensures your wings cook evenly. Place the wings in a single layer in the air fryer basket. Avoid overcrowding, as this can affect crispiness. Cook the wings for 25 to 30 minutes. Make sure to flip them halfway through cooking. This helps both sides get that golden brown color. To make your wings super crispy, baking powder is key. It helps dry out the wings and adds crunch. Make sure to sprinkle it evenly during seasoning. This will make a big difference! Airflow is also important when using the air fryer. Arrange the wings in a single layer. If they overlap, they won’t crisp up. Give them space to breathe! Dipping sauces can elevate your crispy lemon pepper wings. Try ranch, blue cheese, or a spicy mayo. Each adds a tasty twist that complements the lemon flavor. For side dishes, consider celery sticks or a fresh salad. They balance the rich wings well. You can also serve with crispy fries or onion rings for a hearty meal. One common mistake is overcrowding the air fryer basket. This can lead to uneven cooking and soggy wings. Always ensure the wings have space. Another mistake is not patting the wings dry enough. Removing excess moisture is crucial for crispiness. Take a moment to dry them thoroughly with paper towels before seasoning. {{image_2}} You can spice up your crispy lemon pepper air fryer wings in fun ways. - Spicy Lemon Pepper Wings: Add heat with cayenne pepper or hot sauce. Mix it into your seasoning blend. This will give your wings a nice kick. - Garlic Parmesan Version: Swap lemon pepper for garlic and parmesan cheese. Toss cooked wings in melted butter, garlic, and parmesan for a rich flavor. Not everyone has an air fryer, and that's okay! - Oven-Baked Version for Crispy Wings: Preheat your oven to 425°F (220°C). Place wings on a baking tray lined with foil. Bake for 40-45 minutes, flipping halfway. This will give you crispy wings without an air fryer. - Grilling for a Smoky Flavor: Marinate wings with your seasoning and grill over medium heat. Cook for about 20-25 minutes, turning often. This adds a nice smoky flavor to your wings. You can easily adjust this recipe to fit your diet. - Gluten-Free Adjustments: Make sure your lemon pepper seasoning is gluten-free. Check labels to avoid hidden gluten in store-bought mixes. - Low-Carb Options: Use a low-carb seasoning blend. You can skip the baking powder if you're avoiding carbs. This keeps your wings tasty and fits your diet. After enjoying your crispy lemon pepper wings, let them cool down. This helps keep their texture. Place the wings in a shallow dish. Use airtight containers to keep them fresh. Glass or plastic containers work great. You can also use heavy-duty freezer bags. Just make sure to squeeze out air before sealing. To reheat, you have two choices: microwave or air fryer. The air fryer gives the wings a crispier texture. Preheat your air fryer to 350°F (175°C). Heat the wings for about 5-8 minutes. Flip them halfway for even heating. If you use a microwave, place the wings on a microwave-safe plate. Heat them for 1-2 minutes. Check to avoid overheating, which makes them tough. To freeze wings, wrap them tightly in plastic wrap. Then, put them in a freezer bag. Label the bag with the date. Frozen wings can last up to three months. To thaw, place them in the fridge overnight. For quick thawing, you can use the microwave. After thawing, reheat in the air fryer for best results. This keeps the wings crispy and tasty. To make air fryer wings crispy, start by drying them well. Moisture creates steam, which makes wings soggy. Use paper towels to pat them dry. Next, coat the wings with a mix of baking powder, salt, and seasonings. Baking powder helps crisp the skin. Avoid overcrowding the air fryer basket. Give each wing space to cook evenly. Flip the wings halfway through cooking. This ensures both sides get that golden crunch. Yes, you can use frozen chicken wings. However, there are a few adjustments. First, you must increase the cooking time. Instead of 25-30 minutes, cook for about 35-40 minutes. Also, do not thaw the wings before cooking. They can go straight from the freezer to the air fryer. This may affect the crispiness, so make sure to follow the same drying and seasoning steps. Lemon pepper wings go well with many sides. Try serving them with crispy fries or a fresh salad. Coleslaw adds a nice crunch and tang. You can also offer dipping sauces like ranch or blue cheese. These flavors complement the lemon pepper nicely. For a fun twist, add some celery and carrot sticks. They are perfect for dipping too! Cooked wings last about 3-4 days in the fridge. To store them, let them cool first. Place the wings in an airtight container or cover them tightly with plastic wrap. This keeps them fresh and prevents drying out. If you want to keep them longer, consider freezing them. Cooked wings can last up to 2-6 months in the freezer when stored properly. You can make perfect lemon pepper chicken wings with just a few steps. We covered essential ingredients, key preparation tips, and air frying methods to ensure crispiness. Remember to avoid common mistakes, like overcrowding the basket or skipping seasoning. Variations can keep your meals exciting, from spicy wings to gluten-free options. With proper storage tips, your leftovers will stay delicious. Enjoy experimenting with flavors and techniques for tasty results every time. Make your next gathering fun and flavorful with these wings!
Crispy Lemon Pepper Air Fryer Wings Recipe Delight
Are you ready to impress your friends with a finger-licking appetizer? In this blog post, I’ll guide you through making crispy lemon pepper air fryer