Appetizers

Tomato Basil Pastries Flavorful and Simple Delight
Looking for a tasty treat that’s both flavorful and simple to make? You’re in the right place! Tomato basil pastries offer a perfect blend of
Air Fryer Okra Crispy and Flavorful Snack Idea
Are you looking for a tasty snack that’s easy to make? Air fryer okra is your answer! This crispy and flavorful treat is fun to
![- 4 medium bell peppers (any color) - 1 cup apple cider vinegar - 1 cup water - 3 tablespoons granulated sugar - 1 tablespoon salt - 1 teaspoon garlic powder - 1 teaspoon black peppercorns - 1 teaspoon crushed red pepper flakes (optional) - 2 cloves garlic, smashed - Fresh herbs for garnish (dill or thyme) In this recipe, the bell peppers are the star. They add crunch and color to your dish. You can use any color of bell pepper you like. Each one brings a unique taste. The apple cider vinegar gives a tangy kick. It balances the sweetness from the sugar. The sugar helps to create a nice balance with the salt. The garlic powder adds depth to the flavor. Black peppercorns give a subtle heat. If you want more spice, add crushed red pepper flakes. The smashed garlic cloves will infuse the mix with more flavor as it sits. Fresh herbs like dill or thyme make a lovely garnish. They add freshness and a pop of color. Using these ingredients, you can create quick pickled peppers in no time. The process is easy and fun. You will find that they are perfect for snacks, sandwiches, or salads. For the complete guide, check the Full Recipe. - Wash and slice the bell peppers into thin rings. - Remove the seeds and stems carefully. First, wash your bell peppers under cool water. This step helps remove any dirt or residue. Next, slice them into thin rings. I prefer about a quarter-inch thickness. Make sure to cut off the stems and scoop out the seeds. This helps the peppers stay crisp and flavorful. - Combine vinegar, water, sugar, salt, and spices in a saucepan. - Heat until sugar and salt dissolve. To create the pickling liquid, grab a medium saucepan. Add the apple cider vinegar, water, sugar, salt, garlic powder, black peppercorns, and optional crushed red pepper flakes. Heat this mixture over medium heat. Stir occasionally. Once the sugar and salt dissolve, remove it from the heat. Let it cool for a bit before using. - Layer peppers and garlic in a mason jar. - Pour pickling liquid over peppers and seal. - Refrigerate for a minimum of 1 hour, preferably overnight. Now it’s time to assemble everything! Take a clean mason jar and start layering in the sliced peppers. I like to add a few smashed garlic cloves for extra flavor. Once you fill the jar, pour the warm pickling liquid over the peppers. Make sure they are fully submerged. Seal the jar tightly. Place it in the fridge for at least one hour. However, for the best taste, refrigerate overnight. This waiting time allows the flavors to blend well. For the full recipe, check out the [Full Recipe]. To make your pickled peppers pop, let them marinate longer. If you wait overnight, the flavors deepen. I often find that one hour is good, but two or more hours work even better. Try using different pepper varieties too. Mix sweet bell peppers with spicy jalapeños or banana peppers. This mix adds various flavors and heat levels. You can also experiment with colors. Red, yellow, and green peppers look great together. The way you slice your peppers can change their crunch. Try cutting them thinner for a crisp texture. You can also go thicker if you want more bite. Each thickness gives a different feel in your mouth. Think about adding other vegetables too. Carrots and cucumbers are nice choices. They soak up the brine well and add more color and taste. These pickled peppers make a great sandwich topping. They add a zesty kick to any sandwich. Try them on burgers or deli meats for extra flavor. You can also toss them into salads or antipasto platters. They add bright colors and a tangy taste. They pair well with olives and cheese for a more exciting dish. For the full recipe, check out the complete instructions. Enjoy your pickled peppers! {{image_2}} You can change the flavor of your pickled peppers by using different vinegars. - White vinegar gives a clean taste and bright flavor. - Red wine vinegar adds a rich, fruity note and deep color. Both options work well, so feel free to try them! Each vinegar brings its own unique twist to the recipe. Spices can transform your pickled peppers. Adding unique spices can make them stand out. - Adding mustard seeds gives a nice crunch and tangy flavor. - Including fresh herbs like thyme adds a fragrant touch and brightens the taste. Mix and match spices to find your perfect blend! Do you like your peppers spicy? Adjusting the heat level is easy! - Adding jalapeños can bring a fiery kick. Slice them thin and mix them in. - If you prefer mild flavors, omit red pepper flakes for a gentle taste. These adjustments allow you to create pickled peppers that fit your palate. Enjoy experimenting! To keep your pickled peppers fresh, store them in an airtight container. This prevents air from spoiling the flavor. I recommend using a mason jar with a tight lid. Once sealed, place the jar in the fridge. For the best taste, let the peppers sit for at least one hour. However, letting them chill overnight allows the flavors to grow even more. Quick refrigerator pickled peppers can last about two weeks in the fridge. Look for signs of spoilage to ensure safety. If you see mold, an off smell, or the peppers have changed color, it’s best to toss them. Freshness is key for enjoying these zesty bites. You can reuse the pickling liquid for fresh peppers. However, this liquid may lose some flavor after the first use. When reusing, ensure the liquid is clean and free from any bits of old peppers. Strain it before adding new peppers. This way, you keep the taste sharp and vibrant. Quick refrigerator pickled peppers can last about two to four weeks in the fridge. They stay fresh as long as you keep them sealed in a clean, airtight jar. Over time, the peppers may become softer but still taste great. Always check for signs of spoilage, like off smells or mold. When you notice these signs, it’s best to toss them out. You can use frozen peppers, but the texture will change. Freezing makes peppers softer. When you thaw them, they lose their crispness. This means your pickles might not have the crunch you want. If you do use frozen peppers, consider using them in dishes where texture is less important. If you find you don’t have enough pickling liquid, don’t worry! You can easily make more. Just mix equal parts of vinegar and water, then add some sugar and salt to taste. Make sure to heat it until the sugar dissolves. Pour this new liquid over the peppers, ensuring they are fully covered. Adjust the spices if you want more flavor! Quick pickled peppers are simple to make and full of flavor. We explored key ingredients like bell peppers, vinegar, and spices. I provided step-by-step instructions so you can create your own in no time. Remember, marination time boosts taste. Try different spices and herbs for a unique touch. Store them right, and they'll last in your fridge. With just a few basic steps, you can enjoy pickled peppers on sandwiches or salads. Experiment and find your perfect blend today!](https://therecipehatch.com/wp-content/uploads/2025/06/23b07b28-bcbd-4178-8577-01f16e0b4c63.webp)
Quick Refrigerator Pickled Peppers Easy and Flavorful
Are you ready to transform your meals with a burst of flavor? Quick refrigerator pickled peppers are the answer! In just a few simple steps,
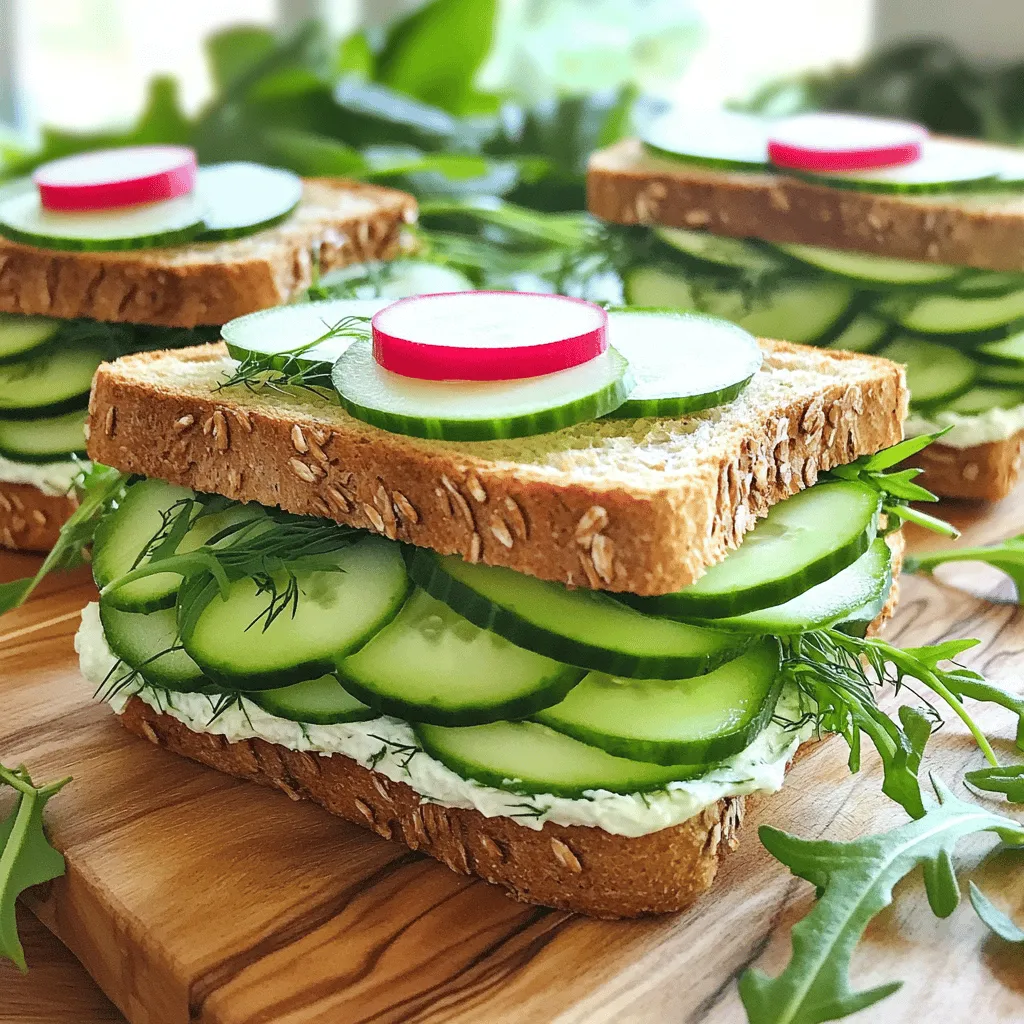
Cucumber Sandwiches Fresh and Flavorful Delight
Cucumber sandwiches are a simple yet delicious treat that can brighten any meal. With just a few fresh ingredients, you can create a flavorful delight
![To make crispy baked chicken tenders, you will need these key ingredients: - 1 lb chicken breast, cut into strips - 1 cup buttermilk - 1 cup all-purpose flour - 1 cup Panko breadcrumbs - 1 teaspoon garlic powder - 1 teaspoon onion powder - 1 teaspoon smoked paprika - 1/2 teaspoon cayenne pepper (optional for heat) - Salt and pepper to taste - Cooking spray or olive oil for drizzling You can swap some ingredients if needed. Here are a few options: - Instead of buttermilk, use plain yogurt or milk with a bit of lemon juice. - Use whole wheat flour in place of all-purpose flour for a healthier option. - If you don’t have Panko breadcrumbs, regular breadcrumbs work too but may be less crunchy. - For a spicy kick, add more cayenne pepper or use a different spice blend like chili powder. When selecting chicken, freshness is key. Here’s how to ensure you get the best: - Look for chicken with a pink color and no dark spots. - Check the sell-by date to ensure it’s fresh. - Choose chicken that feels firm to the touch. - Avoid chicken that has a strong odor; this can indicate spoilage. - If possible, buy chicken from a local butcher or trusted source for quality and taste. By using these tips and ingredients, you set yourself up for success in making crispy baked chicken tenders. Start by cutting your chicken breast into strips. Aim for uniform sizes to cook evenly. Place the strips in a bowl and cover them with buttermilk. Make sure they’re fully submerged. This step adds flavor and tenderness. Let the chicken marinate in the fridge for at least 30 minutes. If you have time, overnight soaking works best for deep flavor. For the breading, you need three bowls. In the first bowl, mix flour with garlic powder, onion powder, smoked paprika, salt, and pepper. This blend gives a nice taste. In the second bowl, pour in the Panko breadcrumbs. Panko adds crunch, making your chicken extra crispy. Remove the chicken from the buttermilk. Let the excess drip off. First, coat each strip in the flour mix. Then, dip it in Panko, pressing down to help it stick. Place the coated strips on a baking sheet lined with parchment paper. Preheat your oven to 400°F (200°C). This temperature helps the chicken cook fast and get crisp. Lightly spray or drizzle the top of the tenders with cooking spray or olive oil. This adds even more crunch. Bake for 15-20 minutes, flipping halfway through. Check that they turn golden brown and reach an internal temperature of 165°F (75°C). Let them cool for a minute before serving. This ensures they stay crispy. For the full recipe, check out the instructions earlier. To get that perfect crunch, use Panko breadcrumbs. They are lighter and crispier than regular breadcrumbs. You should also coat the tenders well. Make sure to press the breadcrumbs onto the chicken. This way, they stick better and give you a nice texture when baked. For the best results, use cooking spray or olive oil. I recommend using an oil spray for a fine mist. This helps the tenders get crispy without soaking them in oil. If you prefer, drizzle a little olive oil on top. Just don’t overdo it; too much oil can lead to greasy chicken. To avoid soggy tenders, keep the chicken strips spaced out on the baking sheet. If they touch, steam builds up and makes them soggy. Also, bake them on parchment paper to allow airflow. This keeps the bottoms nice and dry. Lastly, flipping them halfway through ensures even crispiness all around. {{image_2}} You can elevate your crispy baked chicken tenders with fun flavors. Try adding herbs or spices to the breading mix. Here are some ideas: - Italian Twist: Add dried oregano, basil, and Parmesan cheese to the Panko. - Buffalo Kick: Mix hot sauce into the buttermilk for a spicy soak. - Sweet and Spicy: Blend honey and sriracha for a tasty glaze. These additions can make your tenders stand out. Experiment to find what you love best! If you need gluten-free chicken tenders, I have you covered. Substitute all-purpose flour with almond flour or a gluten-free blend. Use gluten-free Panko breadcrumbs instead of regular ones. This way, you can still enjoy crispy tenders without the gluten. You can cook chicken tenders in an air fryer or oven. Both methods work well, but they give different results. - Air Fryer: This method cooks faster and gives a crispier texture. Set it to 400°F (200°C) and cook for 10-15 minutes. Flip halfway for even browning. - Oven: Baking is simple and perfect for larger batches. Preheat to 400°F (200°C) and bake for 15-20 minutes. Flip them halfway for great color. Choose the method that suits your kitchen setup and time. Both ways will yield delicious chicken tenders. For the complete recipe, check out the [Full Recipe]. You can store leftover chicken tenders easily. Let them cool down first. Place them in an airtight container. Keep them in the fridge for up to three days. Make sure to cover them well to avoid moisture loss. This helps keep the tenders crispy for your next meal. To reheat your chicken tenders, use an oven for best results. Preheat your oven to 375°F (190°C). Place the tenders on a baking sheet. Bake for about 10 minutes or until they are hot. This keeps them crispy. You can also use a microwave, but the tenders may get soggy. If you choose the microwave, heat them for 1-2 minutes, checking often. If you want to save the chicken tenders for later, freezing works great. First, let them cool completely. Then, wrap each tender in plastic wrap. Place the wrapped tenders in a freezer bag. Squeeze out any air before sealing. They can stay in the freezer for up to three months. When you are ready to eat, thaw them in the fridge overnight. Then reheat as mentioned above for a tasty meal. For the full recipe, check the earlier section. Yes, you can use chicken thighs. They have more fat, which adds flavor. Thighs stay juicy and tender while cooking. Cut them into strips, just like breasts. Adjust cooking time slightly if needed, as thighs may take a minute longer to cook through. To keep the coating on, follow a few steps. First, marinate the chicken in buttermilk. This helps the coating stick. Next, press the breadcrumbs firmly onto the chicken. Finally, avoid flipping the tenders too soon while baking. Let them cook until golden brown for the best hold. Many sauces go great with chicken tenders. Here are some tasty options: - Honey mustard - BBQ sauce - Ranch dressing - Sweet and sour sauce - Buffalo sauce Each sauce adds a unique flavor. Try different ones to find your favorite! For the full recipe, check out the detailed instructions above. In this blog post, I covered key aspects of making chicken tenders. We explored the best ingredients, how to prep and bake them for crispiness, and tips for flavor. I also shared storage ideas and answered common questions. Remember, choosing fresh chicken and using the right cooking method can make a big difference. Experiment with flavors and cooking options to find what you love. With these steps, you’ll enjoy tender, crunchy chicken every time.](https://therecipehatch.com/wp-content/uploads/2025/06/a3c19570-4025-40c0-a01f-0cd3feee943d.webp)
Crispy Baked Chicken Tenders Easy and Fast Recipe
Are you ready to make crispy baked chicken tenders that will wow your taste buds? I’ve got an easy and fast recipe that’s perfect for

Homemade Chicken Nuggets Crunchy and Simple Recipe
Are you craving crispy, homemade chicken nuggets that are easy to make? You’re in just the right place! I’ll guide you through a simple recipe
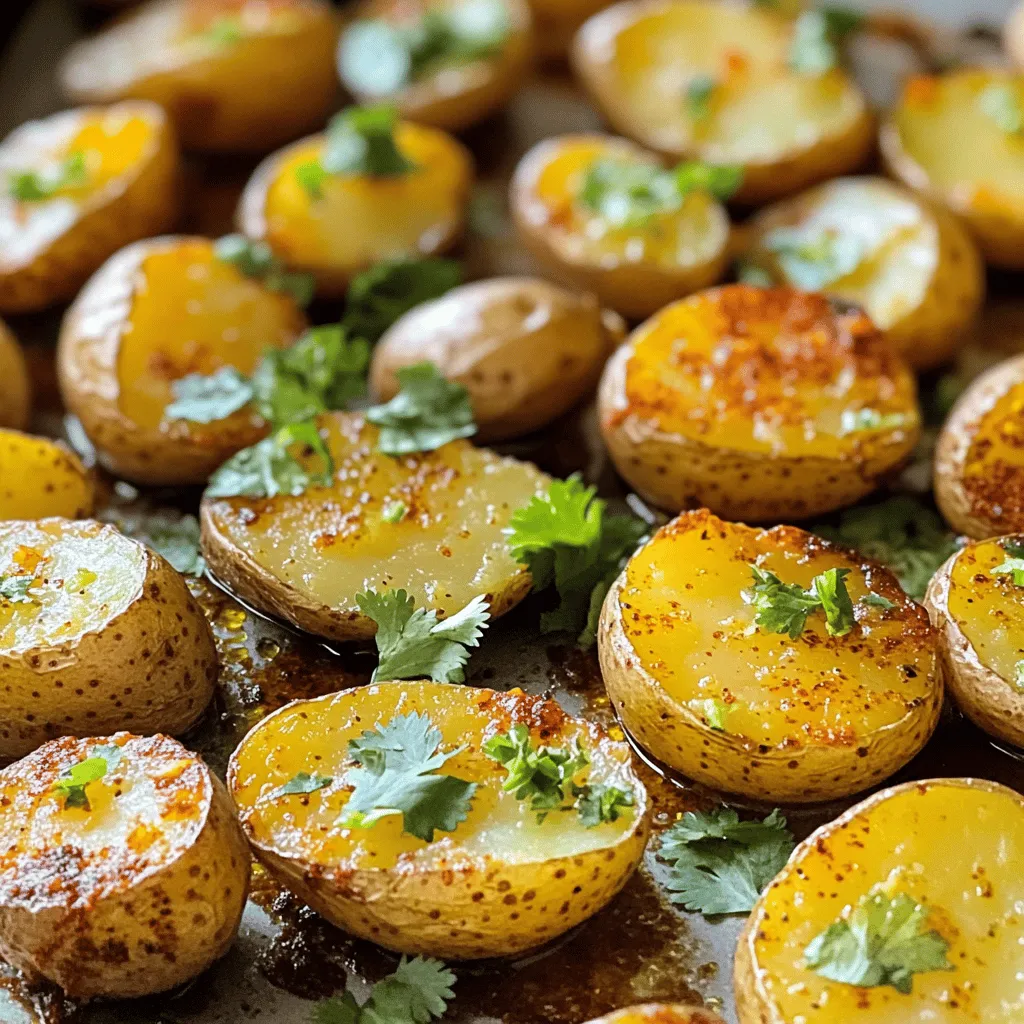
Easy Mojo Potatoes Flavorful and Simple Recipe
Are you ready to elevate your potato game? Easy Mojo Potatoes will make your taste buds dance! This simple recipe packs a punch of flavor
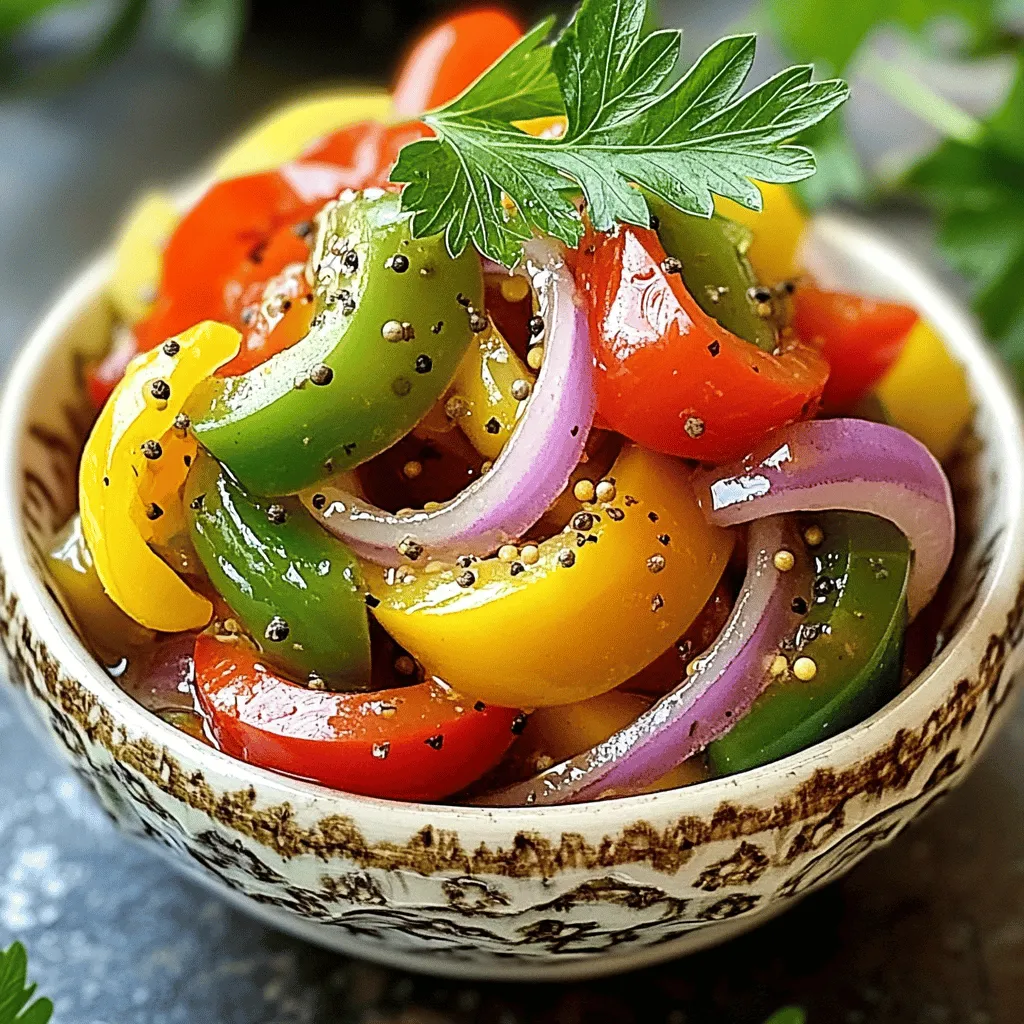
Tangy Pickled Pepper & Onion Relish Flavor Boosting Tips
Looking to add a zesty kick to your meals? My Tangy Pickled Pepper & Onion Relish is the perfect solution! In this guide, I’ll share
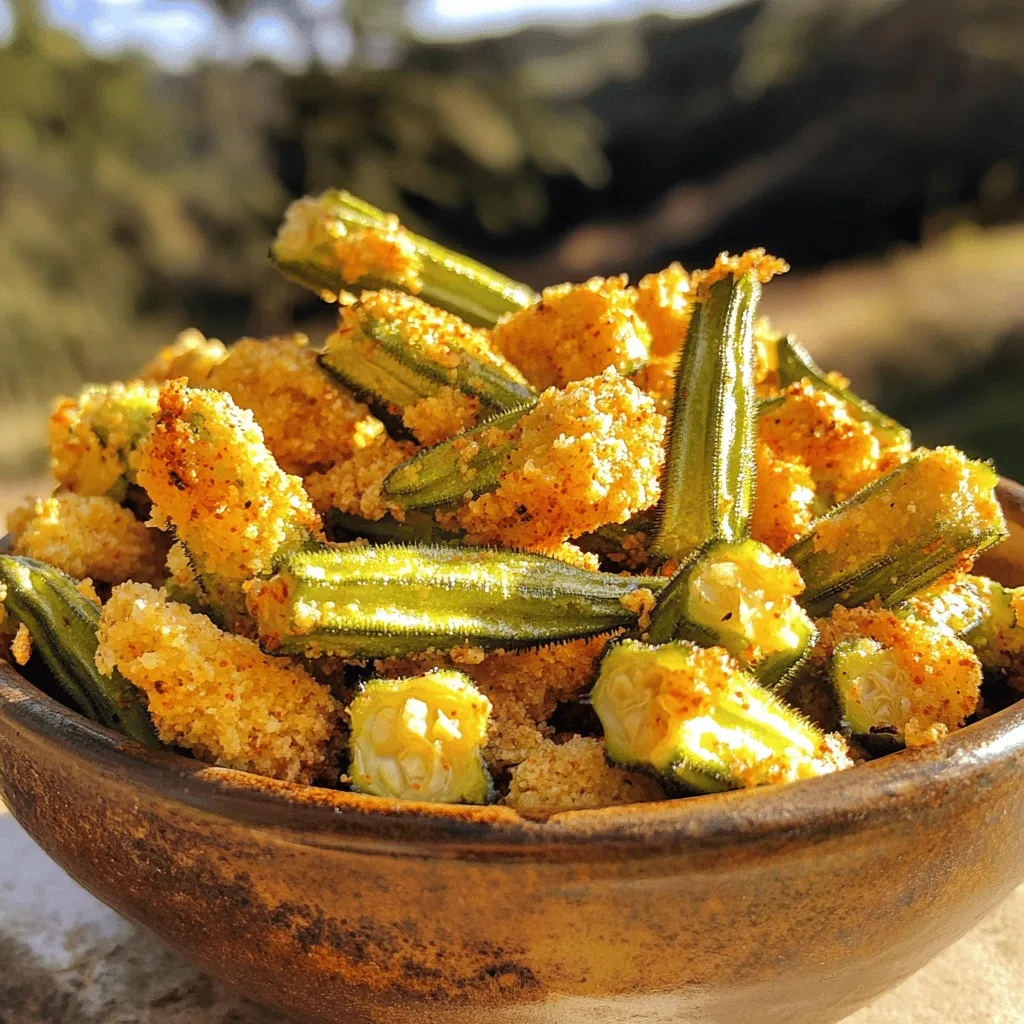
![To make quick refrigerator pickled okra, you need fresh okra and some basic items from your pantry. Here’s what you will need: - 1 pound fresh okra, stems trimmed - 1 cup white vinegar - 1 cup water - 2 tablespoons sea salt - 1 tablespoon sugar Fresh okra gives your pickles a crunchy texture. The vinegar adds the tangy flavor that makes pickles pop. Water helps dilute the vinegar so it's not too strong. Seasoning is key to making flavorful pickled okra. Here are the extras you will need to enhance the taste: - 4 cloves garlic, peeled and crushed - 1 teaspoon black mustard seeds - 1 teaspoon dill seeds - 1 teaspoon red pepper flakes (adjust for spice level) - 1 bay leaf Garlic adds a nice depth of flavor. Mustard seeds and dill seeds bring a delightful crunch and aroma. Red pepper flakes let you control the heat level. The bay leaf rounds out the taste, making each bite savory. Using these ingredients, you create a tangy and crunchy snack. You can find the full recipe in the link provided. First, choose clean jars with lids. Glass jars work best because they don’t react with the brine. You can use one large jar or multiple small jars, depending on your preference. Make sure the jars are sterilized. To do this, wash them in hot, soapy water. Rinse well and then place them in a hot oven for about 10 minutes. This step keeps your pickled okra safe and fresh. Now, let’s make the brine. In a medium saucepan, combine one cup of white vinegar, one cup of water, two tablespoons of sea salt, and one tablespoon of sugar. Stir these ingredients well. Turn the heat to medium and bring the mixture to a boil. Once it boils, keep stirring until the salt and sugar dissolve. Remove the pan from the heat. Allow the brine to cool for about five to ten minutes. This cooling time is important for the okra’s crunch. While the brine cools, prepare the okra. Take one pound of fresh okra and trim the stems. Stand the okra upright in your prepared jar. This helps them pickle evenly. Next, add the crushed garlic, black mustard seeds, dill seeds, red pepper flakes, and a bay leaf. You can adjust the red pepper flakes to make it spicier or milder. Once everything is in the jar, carefully pour the warm brine over the okra. Make sure they are fully submerged. If needed, add a bit more vinegar or water to cover the okra completely. Seal the jar tightly with its lid. Let it cool to room temperature before putting it in the fridge. For the best taste, wait at least 24 hours before enjoying your crunchy pickled okra. For the full recipe, check out the [Full Recipe]. To make your pickled okra stand out, try adding a few extra flavors. You can use fresh herbs like dill or thyme. A splash of lemon juice adds brightness. If you love heat, add more red pepper flakes. Experiment with spices too. Try coriander seeds or cumin for a unique twist. Each addition changes the taste, so enjoy the fun of mixing flavors. Crunchy okra is key to a great snack. Here are some tips to keep them crisp. First, use fresh okra that is firm and bright green. Avoid soft or bruised pods. When you pack the jar, stand the okra upright. This helps them stay crunchy as they soak in the brine. Make sure the brine covers the okra completely. If not, add more vinegar or water. Avoid a few common pitfalls when making your pickled okra. First, don't skip the sterilization step. Clean jars prevent bacteria. Also, be careful with the salt. Too much can make the okra too salty. Follow the recipe closely to keep the balance. Finally, don’t rush the pickling process. Let them sit in the fridge for at least 24 hours. This time helps the flavors develop fully. For the full recipe, click here. {{image_2}} Want to kick up the heat? Add more red pepper flakes! You can use up to two teaspoons. If you love spice, try adding sliced jalapeños or habaneros to the jar. This will give your pickles a fiery twist. The spice mixes well with the tangy brine. It’s a great way to enjoy a crunchy snack with a kick! Herbs can add a fresh flavor to your pickled okra. Try adding fresh dill or cilantro to your jar. You can also use thyme or oregano. Simply place a few sprigs among the okra before adding the brine. The herbs will infuse their taste into the okra over time. This makes for a unique and tasty snack! Don’t stop at okra! Many veggies can be pickled for a tasty treat. Try cucumbers, carrots, or radishes. Cauliflower and bell peppers also work well. The same brine recipe will work for these veggies. Just adjust the pickling time based on their size. This way, you can enjoy a rainbow of crunchy, tangy snacks! For the full recipe, check out Quick and Zesty Refrigerator Pickled Okra. Each variation allows you to explore new flavors while keeping the process simple and fun! Store your pickled okra in the fridge. Use a clean, airtight jar. Keep it whole and packed tight. This way, the okra stays fresh and crunchy. Always use a clean utensil when taking some out. This helps avoid germs and keeps your snack safe. Refrigerator pickled okra can last up to 3 months. The flavors get better over time. Try to eat it within this time for the best taste. If you notice any changes, check for signs of spoilage. Check your pickled okra for any off smells. If it smells bad, throw it away. Look for any cloudiness in the jar or a change in color. If the okra is slimy or mushy, it’s time to toss it. Always trust your senses. When in doubt, don’t eat it. It takes at least 24 hours to pickle okra. The longer you wait, the more flavor you get. If you want a quick taste, you can eat them after just a few hours. However, I recommend waiting for the best crunch and tang. Yes, you can reuse the brine for another batch of pickles. Just strain it to remove any bits. Make sure it is still fresh and not cloudy. If it looks off, it’s best to make a new batch. This way, you save time and reduce waste. Pickled okra adds a zing to many dishes. It pairs great with sandwiches and salads. You can also serve it as a snack with cheese and crackers. For a fun twist, add it to tacos or burgers. The tangy flavor makes every bite better. Check out the Full Recipe for more ideas! We covered how to pickle okra, from ingredients to storage. You learned about using fresh okra and pantry staples, plus seasonings for extra flavor. I shared tips to achieve crunch and avoid common mistakes. We explored spicy variations and other veggies you can pickle. Proper storage ensures your pickles last, and I answered key questions about the process. Pickling okra can be fun and tasty. Enjoy the process and the delicious results!](https://therecipehatch.com/wp-content/uploads/2025/06/e8df0f33-cf54-4251-8cd7-da4bae15a940.webp)
Quick Refrigerator Pickled Okra Crunchy and Tangy Snack
Looking for a fun, crunchy snack? Quick Refrigerator Pickled Okra brings a burst of flavor to your plate! This easy recipe transforms fresh okra into
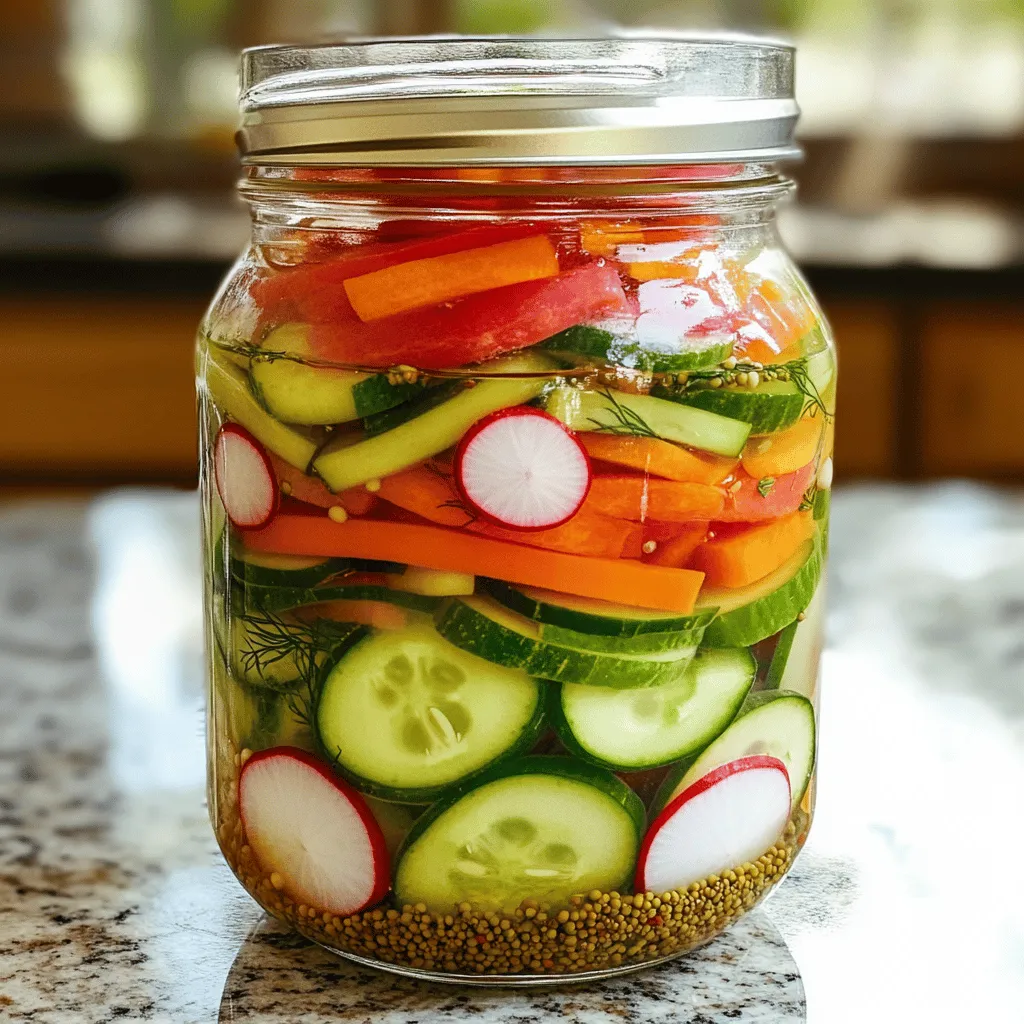
Easy Refrigerator Pickled Vegetables Quick and Tasty
Looking for a quick and easy way to spice up your meals? Easy refrigerator pickled vegetables are the answer! I’ll show you how to turn