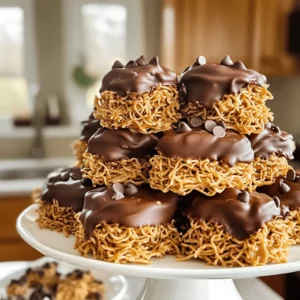
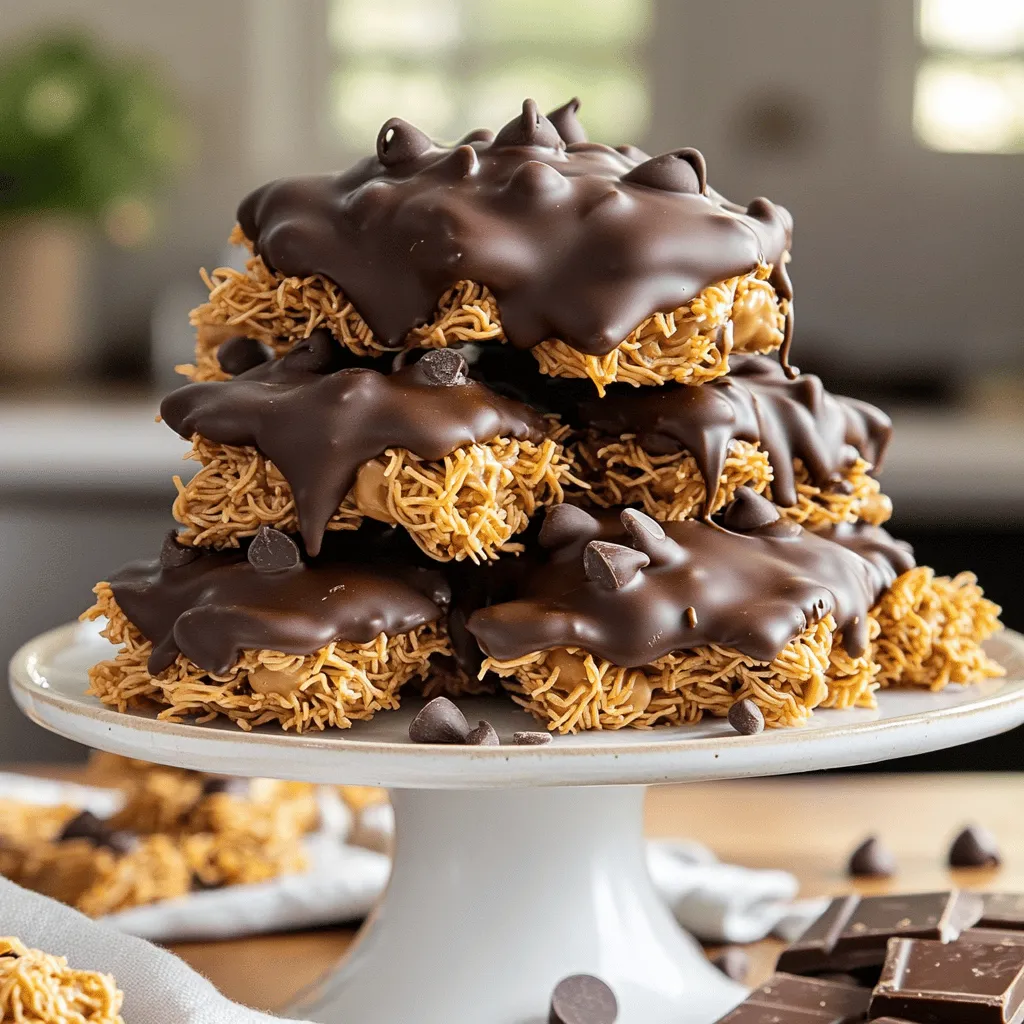
Looking for a quick treat that’s both easy and delicious? You’re in the right spot! My Best Easy No-Bake Peanut Butter Haystacks Delight combines creamy peanut butter, chocolate, and crunchy noodles for a snack you can’t resist. Perfect for busy days or unexpected guests, this recipe requires just a few simple ingredients and no baking. Let’s dive into how you can whip up these yummy haystacks in no time!
Ingredients
List of Ingredients
– 1 cup peanut butter (creamy or crunchy)
– 1 cup granulated sugar
– 2 cups semi-sweet chocolate chips
– 3 cups chow mein noodles
– 1 teaspoon vanilla extract
– Pinch of salt
To create the best easy no-bake peanut butter haystacks, gather these simple ingredients. You need peanut butter, sugar, and chocolate chips. The chow mein noodles add crunch, while vanilla gives a nice flavor boost. A pinch of salt balances the sweetness, making every bite delightful.
I love using creamy peanut butter for a smooth texture. However, crunchy peanut butter adds a fun twist. The choice is yours! The sugar helps the haystacks hold together. Chocolate chips coat the mixture and bring sweetness. Chow mein noodles create that unique haystack shape.
Make sure to have all these items on hand before starting. Trust me, you will want to enjoy these yummy treats! If you want to see the full recipe, check out the recipe section for all the steps.
Step-by-Step Instructions
To make best easy no-bake peanut butter haystacks, follow these steps. Each step is simple and fun.
– Step 1: Combine peanut butter and sugar in a saucepan. Use low heat. Stir until smooth, about 2-3 minutes.
– Step 2: Remove the saucepan from heat. Stir in vanilla extract and a pinch of salt. This adds flavor.
– Step 3: Fold in chow mein noodles. Make sure every noodle is coated. This is where the fun begins!
– Step 4: Melt chocolate chips in a separate bowl. Use the microwave in 30-second intervals. Stir in between until smooth.
– Step 5: Pour the melted chocolate over the peanut butter mixture. Stir gently until everything is well mixed. Chocolate makes it extra yummy!
– Step 6: Scoop out small portions onto a parchment-lined baking sheet. Form haystack shapes. They don’t need to be perfect!
– Step 7: Chill in the fridge for about 30 minutes. This helps them set and become firm.
Now, you have a delightful treat! For the full recipe, check out the details above.
Tips & Tricks
Perfecting Your Haystacks
To make the best haystacks, pick the right peanut butter. Creamy peanut butter gives a smooth texture. Crunchy peanut butter adds a fun crunch. Try both to see which you like best!
Melting chocolate can be tricky. The key is to use low heat. I melt the chocolate chips in the microwave. Heat them in 30-second bursts. Stir in between to keep it smooth and avoid burns.
Shaping your haystacks can be fun! Use a spoon or your hands to scoop the mixture. Wetting your hands can help prevent sticking. Aim for small, rounded shapes for a neat look.
Enhancing Flavor
To make your haystacks pop, add a sprinkle of sea salt. This gives a sweet-salty taste that’s hard to resist. When you bite in, the flavors dance on your tongue!
You can also try other nut butters. Almond or cashew butter can add a new twist. Feel free to mix in extras like mini marshmallows or dried fruit. These add-ins can make your haystacks even more special.
For the full recipe, check the previous section.
Variations
Alternative Ingredients
You can easily change up the recipe to suit your tastes. One fun swap is to replace chow mein noodles with granola or pretzels. Granola adds a chewy texture, while pretzels bring a nice crunch and saltiness. Both options still taste great with the peanut butter and chocolate.
Another way to customize your haystacks is by using different types of chocolate. You can try dark chocolate for a richer taste, white chocolate for a sweeter flavor, or even a mix of all three! Each choice gives your haystacks a unique twist.
Themed Haystacks
Get creative with your presentation by making themed haystacks! For holidays, add festive sprinkles to make them more fun. You can use red and green for Christmas or pastel colors for Easter. These little touches can make your treats stand out at any gathering.
Chocolate drizzles are another way to enhance your haystacks. After forming your haystacks, melt some extra chocolate and drizzle it over the top. This adds a touch of elegance and extra flavor. Plus, it makes them look even more delicious! For the full recipe, check out the detailed steps in the earlier sections.
Storage Info
Best Practices for Storing
To keep your haystacks fresh, store them in the fridge. The cool air helps maintain their shape and flavor. You can also store them at room temperature in a cool, dry place. If you choose this method, use an airtight container. These treats stay good for about one week when chilled. At room temp, they last about three to four days.
Freezing Instructions
If you want to save them for later, freezing is a great option. To freeze, place the haystacks in a single layer on a baking sheet. Once frozen, transfer them to a freezer-safe bag. They can stay in the freezer for up to three months.
To thaw, just move them to the fridge for a few hours. This keeps their texture nice and smooth. Avoid thawing at room temperature, as this can make them too soft. For the best taste, enjoy them after they have thawed completely.
FAQs
Common Questions
Can I use other nut butters?
Yes, you can! Almond butter or cashew butter works great. Each nut butter adds a unique taste.
Is there a vegan option for this recipe?
Absolutely! Use a plant-based butter and dairy-free chocolate chips. This keeps it vegan-friendly.
How can I make these gluten-free?
Chow mein noodles are typically gluten-free, but check the label. You can also use gluten-free pretzels or granola.
Troubleshooting Issues
What to do if the mixture is too sticky?
If the mixture sticks, chill it for a few minutes. You can also add a touch more peanut butter to help.
How to prevent haystacks from melting at room temperature?
Store them in the fridge until you’re ready to serve. Use a cool spot or insulated container to keep them firm.
You learned how to make tasty haystacks using simple ingredients. We covered each step clearly, from mixing peanut butter and sugar to shaping the treats. I shared tips for perfecting your haystacks and ways to customize flavors.
Feel free to experiment with different ingredients and storage methods. Enjoy these sweet snacks anytime. With the right care, they’ll last longer and taste great. These treats are fun to make and share!