Dill Pickle Chicken Salad Tasty and Fresh Delight
![- 2 cups cooked chicken, shredded - 1 cup dill pickles, finely chopped - 1/2 cup Greek yogurt or mayonnaise - 1/4 cup red onion, finely diced - 1/4 cup celery, finely diced - 2 tablespoons fresh dill, chopped - 1 tablespoon Dijon mustard - Salt and pepper to taste - Optional: 1 tablespoon lemon juice When making Dill Pickle Chicken Salad, you need fresh ingredients. Start with cooked chicken. I often use rotisserie chicken for flavor and ease. Shredding it gives a nice texture. Next, chop up dill pickles. They bring a tangy crunch that makes this salad pop. For creaminess, I like Greek yogurt, but mayonnaise works too. The creaminess balances the pickles. Then, add red onion and celery for a bit of crunch. They brighten the salad and add freshness. Fresh dill is key for that herby taste we love in this dish. To kick it up a notch, mix in Dijon mustard. It adds depth and a bit of spice. Don't forget to season with salt and pepper. You can add lemon juice if you want extra zing. All these ingredients come together to create a tasty and fresh delight. For the full recipe, check out the [Full Recipe]. Start by combining the chicken and pickles. In a large mixing bowl, add 2 cups of shredded chicken. I like using rotisserie chicken for its great taste. Next, chop 1 cup of dill pickles finely and mix them in with the chicken. This adds a nice crunch and tang. Now, let’s add some vegetables. Dice 1/4 cup of red onion and 1/4 cup of celery. Toss these in the bowl. Stir them well so all the ingredients mix together. Next, we’ll make the dressing. In a small bowl, combine 1/2 cup of Greek yogurt or mayonnaise. You can pick whichever you prefer based on your taste. Add in 2 tablespoons of chopped fresh dill and 1 tablespoon of Dijon mustard. If you want a bit more zing, add 1 tablespoon of lemon juice. Mix all these together until smooth. This dressing will bring all the flavors together. Now, pour this yogurt mixture over the chicken and veggie blend. Gently fold it in. Make sure everything gets nicely coated. Season to taste. Add salt and pepper as you like. You can adjust any ingredients to fit your taste. Now, refrigerate the salad. Let it chill for at least 30 minutes. This helps all the flavors meld together. Enjoy your Dill Pickle Chicken Salad! For more details, check the Full Recipe. To make the best dill pickle chicken salad, start with chicken. You can use rotisserie chicken for ease. It adds great flavor and saves time. If you prefer, poach your chicken for a fresh touch. This gives you control over the taste and texture. Adjusting the ingredient ratios is easy. If you love pickles, add more! If you want less tang, reduce the pickles. You can also play with the yogurt or mayo. Some like it creamier, while others prefer it lighter. Taste as you go to find your perfect mix. Pair your dill pickle chicken salad with sides like crackers or fresh veggies. These add crunch and freshness to your meal. You can serve it on a bed of lettuce for a light option. Another fun idea is to put it in a sandwich or wrap. This turns it into a tasty lunch on the go. Get creative with how you enjoy the salad. You can add it to a grain bowl or serve it with tortilla chips. The options are endless! To add more crunch, consider incorporating nuts or seeds. Chopped walnuts or sunflower seeds work great. They add a nice texture and healthy fats. For extra zest, try adding spices. A bit of cayenne pepper or paprika can elevate the flavor. You could also squeeze in some lemon juice for brightness. Small changes can make a big difference in taste! Remember, these tips will make your dill pickle chicken salad unique and delicious! For the full recipe, check out the detailed instructions above. {{image_2}} You can change the base of your salad. Greek yogurt is a great swap for mayonnaise. It adds creaminess and a tangy taste. If you want a richer flavor, keep the mayonnaise. You can also switch up your pickles. Bread and butter pickles add sweetness. Dill pickles give that classic taste. You can even try spicy pickles for a kick. Fresh herbs can change the flavor too. Basil or parsley can bring a new twist. If you want a low-carb or keto version, use shredded chicken and skip the yogurt or mayonnaise. Instead, try an avocado mash. It adds creaminess without carbs. For a vegan option, replace chicken with chickpeas. They add protein and texture. Use vegan mayonnaise for the dressing. This makes a delicious plant-based salad. Adding fruits can make your salad sweet. Diced apples or grapes can create a nice balance. They add crunch and taste. You can also play with dressings. A ranch or honey mustard dressing can change the flavor. Just mix it in with the other ingredients. Experiment to find what you love best. This recipe allows for so much creativity! To keep your Dill Pickle Chicken Salad fresh, store it in an airtight container. This helps lock in flavors and moisture. Refrigerate the salad right after serving. It stays good for about 3 to 4 days. Always check for any signs of spoilage before eating. If it looks or smells off, throw it away. You can freeze chicken salad, but it may change the texture. Freezing can make the chicken and vegetables mushy. If you want to freeze it, follow these steps: 1. Place the salad in a freezer-safe container. 2. Leave some space on top for expansion. 3. Seal it tightly and label with the date. When you’re ready to eat it, thaw it in the fridge overnight. Dill Pickle Chicken Salad is best served cold. If you want to enjoy it warm, gently heat it in a pan. Aim for a temperature of about 165°F to ensure it's safe to eat. However, I recommend enjoying it chilled for the best taste and crunch. You can enjoy Dill Pickle Chicken Salad with many side dishes. Here are some great options: - Fresh garden salad - Crispy potato chips - Soft bread rolls - Crackers for crunch - Veggie sticks like carrots or cucumbers These sides complement the salad's tangy flavor. They also add variety to your meal. Dill Pickle Chicken Salad stays fresh for about 3 to 5 days in the fridge. Store it in a tight container. This keeps it cool and tasty. If you notice any change in smell or color, it’s best to toss it out. Yes, using leftover rotisserie chicken is a great idea! Rotisserie chicken saves time and adds flavor. The spices on the chicken enhance the salad's taste. Plus, it makes the dish even easier to prepare. Dill Pickle Chicken Salad can be quite healthy. It offers protein from the chicken and probiotics if you use Greek yogurt. Pickles add crunch and a burst of flavor, too. Just watch the amount of mayonnaise you use. This helps keep it lighter and healthier. Absolutely! You can add a few spices to kick up the heat. Try adding: - A pinch of cayenne pepper - Some diced jalapeños - A splash of hot sauce These options will give your salad a nice spicy twist without losing its freshness. For the full recipe, including step-by-step instructions, check out the [Full Recipe]. Dill pickle chicken salad is a tasty twist on a classic dish. Using cooked chicken, pickles, and yogurt creates a creamy blend. You can boost flavors with onion, celery, and fresh dill. Don’t forget to season it well. Try swapping ingredients to suit your taste. Whether you prefer it low-carb or vegan, there's a version for you. Store leftovers properly to enjoy later. This salad is not just simple; it's also a crowd-pleaser that you can make your own.](https://therecipehatch.com/wp-content/uploads/2025/06/a90925a9-5784-4012-8a32-634f38360870.webp)
Are you ready to whip up a refreshing dish that combines tangy flavors and tasty chicken? This Dill Pickle Chicken Salad is a delightful treat you won’t want to miss! …
Are you ready to whip up a refreshing dish that combines tangy flavors and tasty chicken? This Dill Pickle Chicken Salad is a delightful treat you won’t want to miss! …
. Enjoy your delicious Garlic Parmesan Cheeseburger Bombs! - Ensuring flavor balance with seasonings: Use the right amount of salt and pepper. This enhances the beef and cheese flavors. Adding garlic and onion powder gives the bombs extra depth. Taste your beef mix before cooking. Adjust as needed. - Preventing leaking of the filling during baking: Seal the dough tightly around the filling. Press the edges well after folding. If you spot any holes, pinch them closed. This stops the cheese and beef from leaking out. - Recommended temperature and timing adjustments: Bake at 375°F (190°C) for 12-15 minutes. Keep an eye on them to avoid burning. If you want a crispier top, increase the oven temperature for the last few minutes. - Best sides to serve with cheeseburger bombs: Serve with fresh salad or crispy fries. They add color and crunch. You can also try a side of pickles for a tangy touch. - Presentation ideas for an appealing dish: Arrange the bombs on a large platter. You can stack them for a fun look. Use parchment paper to add a rustic feel. - Garnishing techniques using fresh herbs: Top the bombs with chopped parsley right before serving. This adds a pop of color and freshness. You can also try chives or basil for a different taste. {{image_2}} You can switch up the cheese in this recipe. Try using mozzarella or gouda for a different taste. For proteins, ground turkey or chicken work well too. If you want to make it vegetarian, use black beans or lentils instead of beef. You can also add mushrooms for extra flavor. Seasonings can change the whole dish. Try adding smoked paprika for a hint of smokiness. Or, use cumin for a warm touch. Each change can make your bombs unique and tasty. To change the flavor, think about adding new ingredients. Chopped jalapeños can add a spicy kick. Or, mix in some diced pickles for a tangy twist. For a fun international flair, add taco seasoning for a Mexican vibe. Experiment with sauces too! A drizzle of sriracha or BBQ sauce can take these bombs to the next level. You could also try a garlic aioli for a creamy touch. Each sauce gives a fresh angle to this classic treat. For the full recipe, check out the details above and enjoy making these fun bombs! To store leftover Garlic Parmesan Cheeseburger Bombs, let them cool first. Place them in an airtight container. They will stay fresh in the fridge for up to three days. For longer storage, you can freeze them. Wrap each bomb in plastic wrap and place them in a freezer bag. They can last up to three months in the freezer. When you want to reheat them, the oven works best. Preheat your oven to 350°F (175°C). Place the bombs on a baking sheet and cover them with foil. Heat for about 15-20 minutes. This helps keep them moist and warm throughout. You can also use a microwave, but they might not stay crispy. To enjoy leftover bombs, it’s best to heat them as mentioned above. You can also slice them in half and serve with dipping sauces. This adds fun and flavor. When storing food, always check for signs of spoilage. If they smell bad or look strange, it’s safer to throw them away. Enjoy your tasty treats without worries! What are Garlic Parmesan Cheeseburger Bombs? Garlic Parmesan Cheeseburger Bombs are tasty bites. They combine ground beef with cheese, garlic, and spices. Wrapped in soft crescent dough, they are baked until golden. These bombs are perfect for parties or a fun snack. Can I prepare the bombs ahead of time? Yes, you can make these bombs ahead. Prepare the filling and wrap them in dough. Store them in the fridge for up to 24 hours. When ready, bake them as usual. This saves time and makes serving easy. How do I know if they are cooked properly? To check if they are cooked, look for a golden brown color. You can also use a meat thermometer. The internal temperature should reach 160°F (71°C) for the beef to be safe. Let them cool a bit before taking a bite. What sides pair well with this dish? Many sides go well with these bombs. You can serve them with a fresh salad or crispy fries. Veggie sticks with dip also make a great choice. Try pairing with a tangy dipping sauce for extra flavor. Are there nut-free or gluten-free options available? Yes, you can make these bombs nut-free easily. For gluten-free, use gluten-free crescent dough. Check labels to ensure all ingredients are safe. This way, everyone can enjoy this tasty treat. How to make Garlic Parmesan Cheeseburger Bombs spicier? To add spice, mix in some hot sauce or cayenne pepper. You can also use pepper jack cheese for heat. Adding jalapeños or crushed red pepper flakes works too. Adjust the spice to fit your taste. In this post, we explored the tasty Garlic Parmesan Cheeseburger Bombs. You learned about the key ingredients, prep steps, and cooking methods. I shared tips to make your dish even better and offered some fun variations to try. Remember, these bombs are easy to customize and perfect for sharing. Use the storage tips to keep leftovers fresh. Have fun experimenting with flavors and serving ideas. Try these bombs for your next meal, and enjoy every bite!](https://therecipehatch.com/wp-content/uploads/2025/06/497658e4-8bee-4878-8813-43cb6d0611fd.webp)
Get ready to impress your family and friends with Garlic Parmesan Cheeseburger Bombs! These tasty treats combine juicy beef, tangy cheese, and a hint of garlic, all wrapped in flaky …
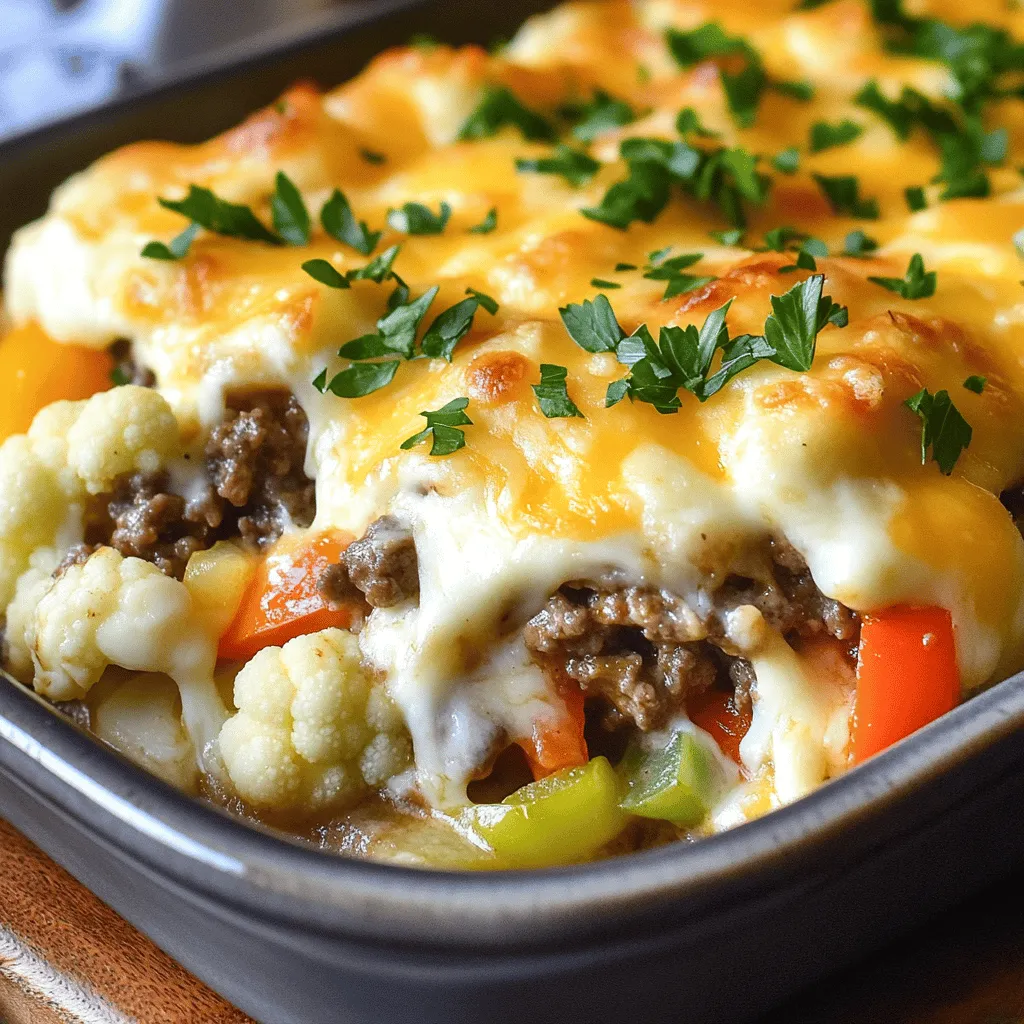
If you’re craving that rich flavor of a Philly cheesesteak without the carbs, I’ve got the perfect solution: Cheesy Low Carb Philly Cheesesteak Casserole! This dish combines savory ground beef, …
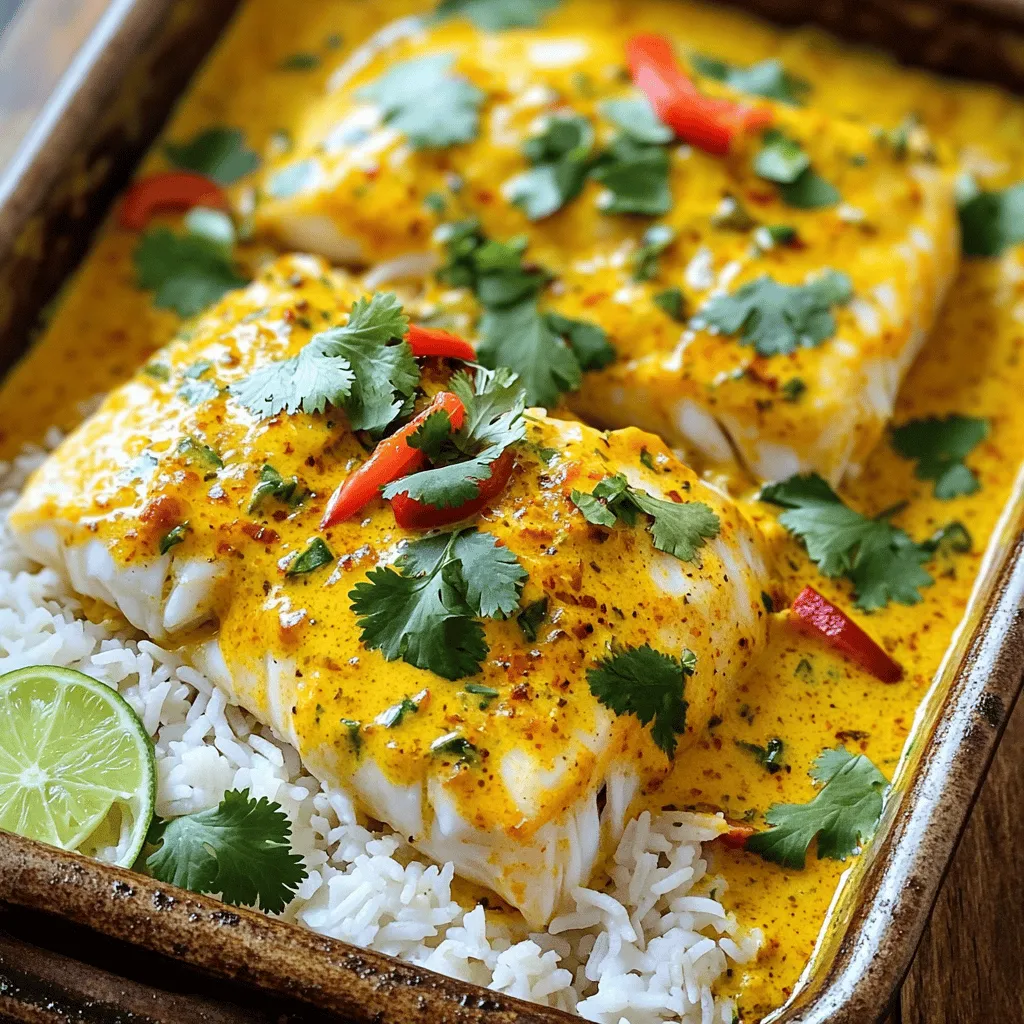
If you’re searching for a quick and tasty weeknight meal, look no further! Coconut Curry Baked Cod combines fresh cod fillets with rich coconut milk and vibrant red curry paste. …
![- 1.5 lbs boneless, skinless chicken breasts - Assorted bell peppers (red, yellow, green) - 1 red onion You start with fresh chicken breasts. They should be boneless and skinless. This makes them easy to cook and eat. Next, gather some colorful bell peppers. I love using red, yellow, and green for a vibrant dish. They add great flavor and crunch. Don't forget a red onion. It gives a nice sweetness when cooked. - Olive oil - 2 teaspoons chili powder - 1 teaspoon cumin - 1 teaspoon smoked paprika - 1/2 teaspoon garlic powder - Salt and pepper to taste - Juice of 1 lime Now, let’s talk about flavor! Olive oil keeps everything moist. You need chili powder for heat and color. Cumin adds a warm, earthy taste. Smoked paprika gives it a subtle smokiness. Garlic powder enhances the overall flavor. For seasoning, use salt and pepper. Finally, squeeze in lime juice for a zesty kick that brightens everything. - Fresh cilantro for garnish - Tortillas for serving Once the chicken and veggies are ready, add fresh cilantro on top. It brings a fresh burst of flavor. Serve the fajitas with warm tortillas. You can wrap them up or serve them open-faced. This makes for a fun meal with family or friends. For the full recipe, check out the details above! - Preheat your oven to 425°F (220°C). - Line a large baking sheet with parchment paper for easy cleanup. - In a big bowl, mix the sliced chicken, bell peppers, and red onion. - Drizzle olive oil over the chicken and veggies. - Add chili powder, cumin, smoked paprika, garlic powder, salt, and pepper. - Squeeze the lime juice over everything. - Spread the mixture evenly on the baking sheet. - Bake for 20 minutes. - Check that the chicken is cooked through and the veggies are tender. This recipe is quick and full of flavor, making it perfect for busy nights. For the full recipe, check the earlier section. Enjoy your fajitas! To get the best results, avoid overcrowding the baking sheet. When you pile too much on, the chicken and veggies steam instead of roast. This can make them soggy. Spread the mixture out in a single layer. This helps everything cook evenly and gives you a nice char. To check if the chicken is done, use a meat thermometer. The internal temperature should reach 165°F (75°C). If you don’t have a thermometer, cut a piece of chicken in half. It should be white inside with no pink. For extra flavor, try adding spices. Some great options include cayenne pepper for heat or oregano for earthiness. You can also squeeze in more lime juice for brightness. Adjust the spices to fit your taste. If you love heat, add more chili powder or fresh jalapeños. When serving, think about style. You can serve the fajitas right on the sheet pan for a fun look. Or, fill warm tortillas with the chicken and veggies. Top with fresh cilantro, salsa, or avocado for added flavor. For sides, consider rice or beans. They pair well and make the meal more filling. You can also serve a fresh salad for a crunchy contrast. For the full recipe, check this [Full Recipe]. {{image_2}} You can switch up the protein in your fajitas. Try using beef, shrimp, or tofu. - Beef: Use skirt steak or flank steak. Slice it thinly against the grain for best results. - Shrimp: Shrimp cooks quickly and adds a nice touch. Peel and devein them, then follow the same steps. - Tofu: For a plant-based option, use firm tofu. Press it to remove excess water and cut it into strips. Each of these options offers a unique flavor and texture. Enjoy experimenting! Adding more vegetables can boost flavor and nutrition. Consider these great options: - Zucchini: Slice it into half-moons and toss it in. - Mushrooms: Use sliced bellas or button mushrooms for an earthy taste. - Corn: Sweet corn adds a pop of flavor and color. Add frozen corn directly to the mix. Feel free to mix and match your favorites. The more, the merrier! Adjust the spice level to fit your taste. Here are some ideas: - Mild: Use less chili powder and add more garlic powder. - Medium: Stick with the original spices for balanced heat. - Spicy: Add cayenne pepper or crushed red pepper flakes for a kick. You can also include fresh jalapeños for an extra burst of heat. Enjoy finding your perfect spice level! To keep your chicken fajitas fresh, store leftovers in the fridge. Use an airtight container. This helps prevent moisture loss and keeps flavors intact. You can store them for up to three days. Let the fajitas cool down before sealing the container. This avoids condensation that can make them soggy. To reheat, use a skillet over medium heat. This method retains the taste and texture. Add a splash of water or broth to keep them moist. Stir often for even heating. You can also use the microwave. Place the fajitas in a microwave-safe dish. Cover them with a damp paper towel to trap steam and heat for 1-2 minutes. Check to ensure they are warm throughout. If you want to save some for later, freezing is a great option. First, let the fajitas cool completely. Then, place them in a freezer-friendly bag or container. Remove excess air to prevent freezer burn. Label the bag with the date. You can freeze them for up to three months. To thaw, place them in the fridge overnight before reheating. This keeps them safe and tasty. For the full recipe, check the complete details above. You can make chicken fajitas spicier by adding jalapeños or hot sauce. Start by slicing fresh jalapeños and mixing them with your chicken and veggies. For a quick kick, drizzle your favorite hot sauce over the dish before serving. This boosts the heat without changing the recipe too much. You can also use spicy seasoning blends for added flavor. Yes, you can use frozen chicken for this recipe. However, you need to adjust cooking time. First, thaw the chicken completely before slicing. You can use the microwave or place it in cold water. If you cook it from frozen, add more time in the oven. Make sure the chicken reaches an internal temperature of 165°F (75°C) for safety. The best tortillas depend on your taste. Flour tortillas are soft and chewy, great for holding fillings. They are also easy to fold. On the other hand, corn tortillas are gluten-free and have a nice crunch. They add a distinct flavor to your fajitas. Try both to find your favorite! Feel free to explore the full recipe to make these delicious fajitas today! This article covered how to make tasty chicken fajitas. You learned about the main ingredients, seasonings, and garnishes. We discussed step-by-step instructions for cooking them perfectly. I shared tips for flavor and fun variations. Lastly, I provided storage tips for leftovers and answered common questions. Now you can enjoy making great fajitas anytime. Feel free to mix things up and make them your own. Cooking should be fun and delicious!](https://therecipehatch.com/wp-content/uploads/2025/06/79b30954-1b7e-4e03-8940-454e34ac5682.webp)
If you’re craving a quick, delicious dinner, my 30-Minute Sheet Pan Chicken Fajitas recipe is for you! This simple dish brings together juicy chicken and vibrant veggies with minimal effort. …
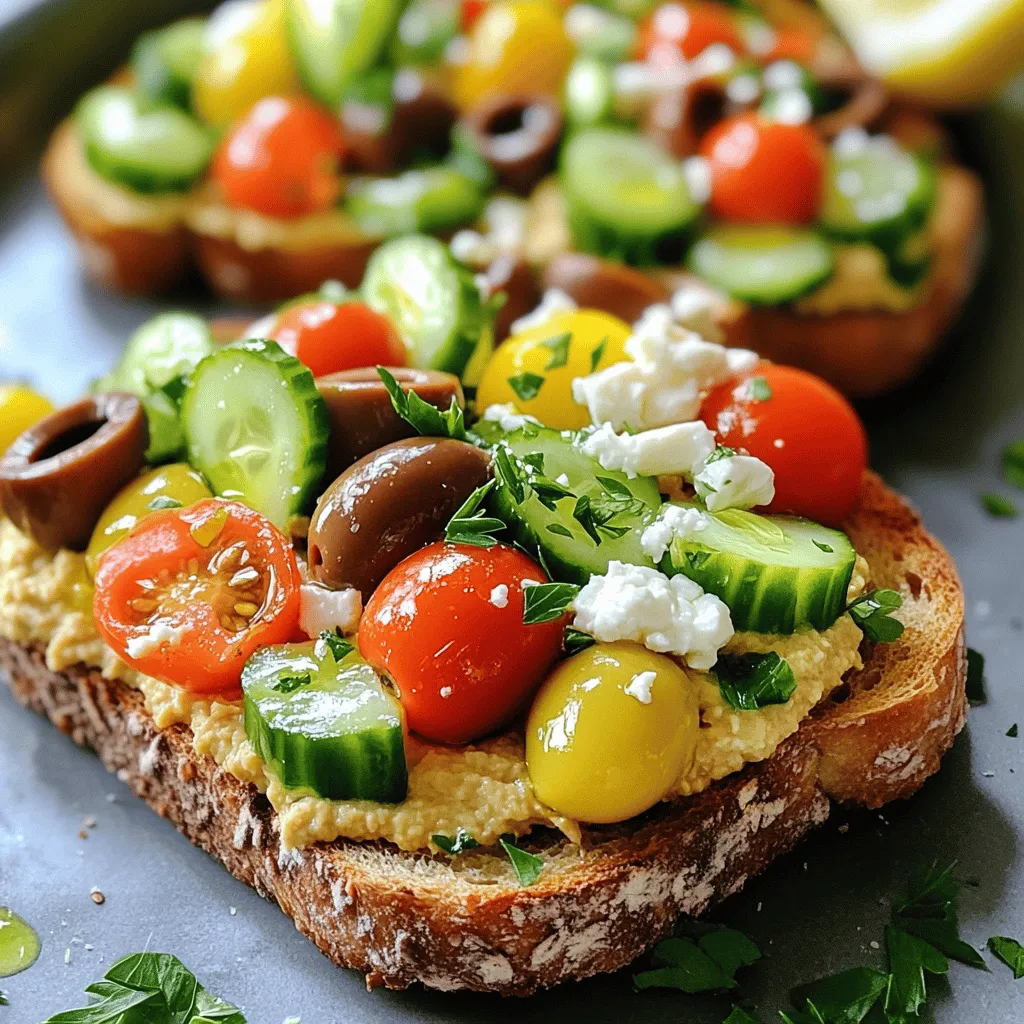
Looking for a quick and tasty snack? Mediterranean Hummus Toast is your answer. This fresh dish is packed with flavor and healthy ingredients. I’ll guide you through choosing the best …
![- 2 lbs boneless, skinless chicken breasts - 1 can (15 oz) black beans, drained and rinsed - 1 can (15 oz) corn, drained - 1 medium onion, diced - 2 cloves garlic, minced - 1 cup diced tomatoes (fresh or canned) The main ingredients create a tasty base for these tacos. The chicken gives protein, while black beans and corn add fiber and texture. Diced onion and garlic bring flavor that makes your meal more exciting. Fresh or canned tomatoes offer a juicy element that balances the dish. - 1 tablespoon chili powder - 1 teaspoon cumin - 1 teaspoon smoked paprika - Salt and pepper to taste The spices and seasonings are key to vibrant flavors. Chili powder adds heat, while cumin gives depth. Smoked paprika introduces a subtle smokiness. Salt and pepper bring all these flavors together, making them pop. - Tortillas (whole wheat or corn) for serving - Toppings: chopped cilantro, diced avocado, shredded lettuce, lime wedges, salsa These tacos are best served in warm tortillas. Whole wheat or corn tortillas add unique tastes. Toppings like cilantro, avocado, and lime wedges enhance freshness. A dollop of salsa adds zest, making each bite a fiesta. For the full recipe, check the details above. - Layering the Chicken Start by placing the chicken breasts at the bottom of the crockpot. This helps keep the chicken moist as it cooks. - Mixing the Vegetables and Spices In a separate bowl, add the black beans, corn, diced onion, minced garlic, and diced tomatoes. Mix them well. Then, sprinkle in the chili powder, cumin, smoked paprika, olive oil, salt, and pepper. Stir until all the veggies are coated with the spices. - Setting the Crockpot Temperature Cover the crockpot and set it to low or high. Cooking on low lets the flavors blend better, but high works if you're short on time. - Cooking Time Recommendations Cook on low for 6-8 hours or on high for 3-4 hours. Check that the chicken is fully cooked and tender before moving on. - Shredding the Chicken Once the chicken is cooked, use two forks to shred it right in the crockpot. This keeps it juicy and flavorful. - Combining Ingredients Mix everything in the crockpot to ensure the chicken and veggies are well combined. This adds depth to each bite. Serve the taco filling in warm tortillas, and add your favorite toppings for a tasty meal. Enjoy! For the complete recipe, see the [Full Recipe]. - Ensuring Tender Chicken To get tender chicken, use boneless, skinless breasts. Cook on low heat for 6-8 hours. High heat works too, but it cooks faster in 3-4 hours. Shred the chicken when done. This lets it soak in all the tasty juices. - Flavor Enhancements Add spices like chili powder, cumin, and smoked paprika. They bring warmth and depth to your dish. Fresh garlic and onion also boost flavor. For more zing, add lime juice just before serving. - Best Tortilla Choices Whole wheat tortillas are a great choice for health. They add fiber and taste. Corn tortillas are another option if you prefer a gluten-free meal. Warm them up before serving for a better bite. - Recommended Toppings Top your tacos with fresh cilantro, diced avocado, and shredded lettuce. A squeeze of lime brightens the flavors. Salsa adds a nice kick. Mix and match toppings to suit your taste. - Low-Calorie Modifications Use skinless chicken and low-sodium beans to cut calories. You can swap regular tortillas for whole wheat or corn. This keeps the meal light but still filling. - Nutritional Enhancements Add extra veggies like bell peppers or spinach for more vitamins. You can also use Greek yogurt instead of sour cream. This adds creaminess with less fat. Enjoy your Healthy Crockpot Chicken Tacos with these smart swaps! For the full recipe, check the detailed instructions above. {{image_2}} Gluten-Free Options To make healthy crockpot chicken tacos gluten-free, use corn tortillas. They add a nice crunch. Always check labels on other ingredients, like canned goods. Look for gluten-free versions of salsa or spices. Vegetarian Alternatives For a vegetarian twist, replace chicken with chickpeas or lentils. Cook them just like the chicken. You can also add more beans or vegetables. This keeps the dish filling and tasty. Adding Different Vegetables Feel free to mix in extra veggies. Bell peppers, zucchini, or spinach work well. You can add them with the other ingredients. This boosts nutrition and makes each bite colorful. Experimenting with Spices Try new spices for different flavors. Add cayenne for heat or oregano for an earthy taste. You can also mix in taco seasoning for a twist. This keeps the recipe fresh every time. Unique Topping Ideas Get creative with toppings! Try pickled onions or crumbled feta. You can also use jalapeños for a kick. Each topping adds a new layer of flavor. Side Dish Pairings Serve these tacos with brown rice or a fresh salad. A side of guacamole pairs well too. These sides balance the meal and keep it light. Enjoy your healthy crockpot chicken tacos with your chosen sides and toppings! To store leftovers from your Healthy Crockpot Chicken Tacos, place the filling in an airtight container. Make sure it cools down first. You can keep it in the fridge for up to four days. When you want to enjoy it again, reheat in the microwave or on the stove. Heat to at least 165°F to ensure it's safe. If you want to save some taco filling for later, freezing works great. Let the filling cool completely. Then, transfer it to a freezer-safe bag or container. Squeeze out as much air as you can before sealing. The taco filling can last in the freezer for three months. When you're ready to eat, thaw it overnight in the fridge. For faster thawing, you can use the microwave. Just make sure to stir it often while reheating. How long can you keep it? In the fridge, the taco filling lasts about four days. In the freezer, it can last up to three months. Always check for signs of spoilage. If you see mold or if it smells off, it's best to toss it out. Storing your food correctly helps keep it fresh and tasty for your next meal! Can I use frozen chicken? Yes, you can use frozen chicken. Just add an extra hour to the cooking time. It will still be juicy and tender. How do I make these tacos spicier? To add spice, mix in jalapeños or cayenne pepper. You can also use a spicy salsa as a topping. What can I substitute for black beans? You can use pinto beans or kidney beans. Lentils also work well for a different taste and texture. Are these tacos low in calories? Yes, these tacos are low in calories. You can enjoy a satisfying meal without guilt. Can I add more vegetables? Absolutely! You can add bell peppers, zucchini, or spinach. More veggies boost nutrition and flavor. Can this recipe be doubled? Yes, this recipe can be doubled. Just use a larger crockpot and adjust the cooking time if needed. What can I serve with these tacos? You can serve them with a side of rice or a fresh salad. Guacamole and chips also make a great pair. For the full recipe, check out the Healthy Crockpot Chicken Tacos section above. This blog post covered a fun and tasty recipe for healthy crockpot chicken tacos. We talked about the key ingredients, spices, and serving ideas. You learned how to prepare, cook, and enhance the dish. Plus, I shared tips for storage and variations to fit your needs. With these steps, you can make delicious tacos that are easy to enjoy. Cooking can be fun, and these tacos meet your health goals, too. Now, you're ready to impress your friends and family with your cooking skills!](https://therecipehatch.com/wp-content/uploads/2025/06/9c2c0dd2-2cec-4234-8396-cb2e280787ca.webp)
Looking for a simple and tasty dinner? My Healthy Crockpot Chicken Tacos are just what you need! Using fresh ingredients and easy spices, you can whip up a meal that’s …
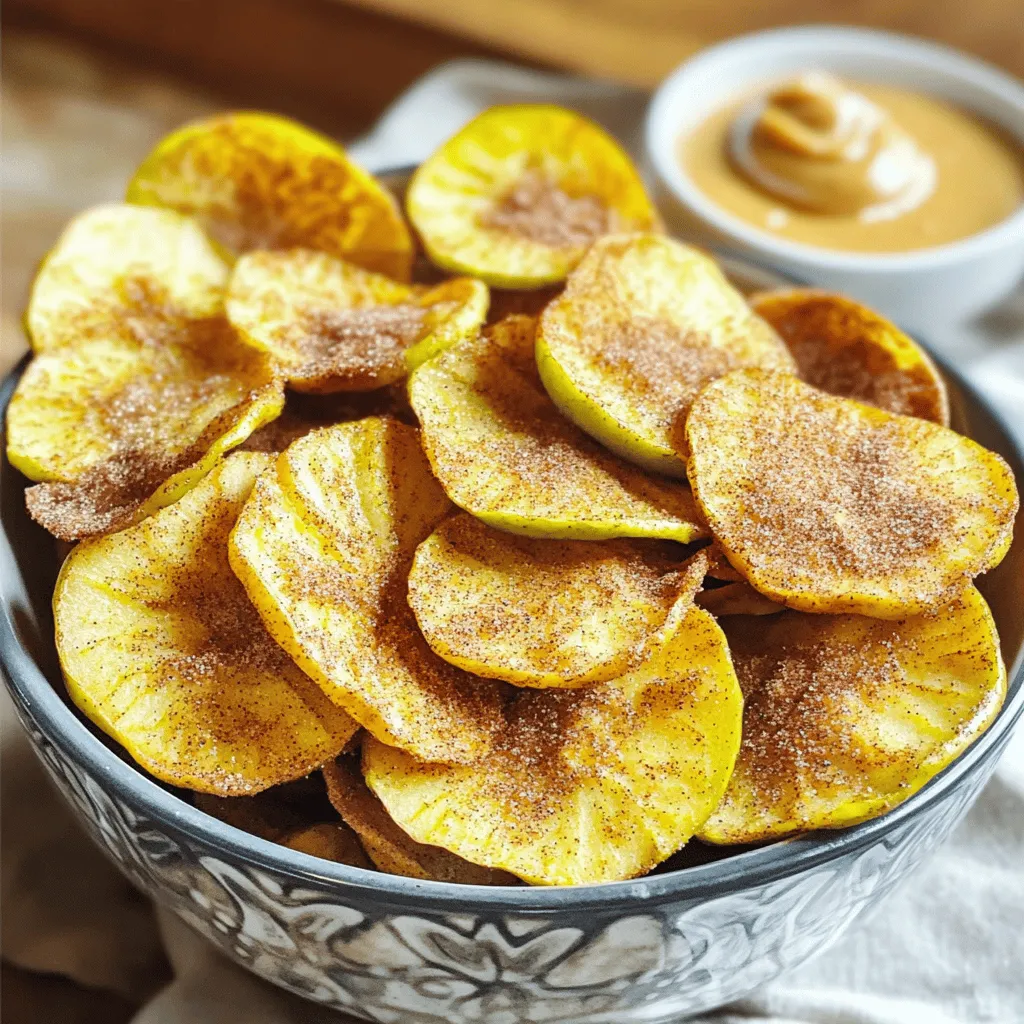
Are you ready for a crunchy snack that’s both simple and delicious? Today, I’ll show you how to make Air Fryer Cinnamon Apple Chips that will wow your taste buds! …
![- Fresh salmon fillet (1 pound, skinless) - Cornstarch (1 cup) - Mayonnaise (1 cup) - Garlic powder (1 teaspoon) - Paprika (1 teaspoon) - Salt (1/2 teaspoon) - Black pepper (1/2 teaspoon) - Sweet chili sauce (2 tablespoons) - Sriracha (1 tablespoon, adjust for spice preference) - Lime juice (1 tablespoon) - Garnishes: Chopped green onions, sesame seeds When it comes to making Bang Bang Salmon Bites, I focus on high-quality ingredients. Start with a fresh salmon fillet. The skinless piece is best for this dish. It cooks evenly and absorbs flavors well. Next, cornstarch plays a key role. This ingredient creates a nice, crispy coating when baked. Use it generously to coat the salmon pieces. Mayonnaise serves as the base for the sauce. It adds creaminess and helps bind the other flavors. For seasoning, garlic powder and paprika bring depth. Salt and black pepper add balance. These simple spices elevate the dish without overwhelming it. The sauce is where the magic happens. Sweet chili sauce gives a sweet kick. Sriracha adds heat, but feel free to adjust it. Lime juice brightens everything up. Finally, don't forget the garnishes. Chopped green onions and sesame seeds make the dish pop. They add color and crunch. For the full recipe with detailed steps, check out [Full Recipe]. - Preheat the oven to 400°F (200°C). - In a bowl, mix 1 cup of cornstarch, 1 teaspoon of garlic powder, 1 teaspoon of paprika, 1/2 teaspoon of salt, and 1/2 teaspoon of black pepper. This will be your coating. - Cut 1 pound of fresh salmon fillet into bite-sized pieces. - Dip each salmon piece into the cornstarch mixture. Make sure each piece is fully coated. Shake off any extra coating. - Line a baking sheet with parchment paper. - Arrange the coated salmon bites on the baking sheet. Space them out to allow even cooking. - Bake in the oven for 12-15 minutes. The bites should be crispy and cooked through. - While the salmon bakes, make the bang bang sauce. - In a bowl, combine 1 cup of mayonnaise, 2 tablespoons of sweet chili sauce, 1 tablespoon of sriracha, and 1 tablespoon of lime juice. - Mix well. Adjust the spice level to your taste by adding more sriracha if you like it hot. These steps will guide you to create tasty Bang Bang Salmon Bites. For the complete details, check the Full Recipe. For crispy Bang Bang Salmon Bites, coat each piece of fish evenly. This ensures every bite has that crunch you crave. Watch the baking time closely. Salmon cooks quickly, and overcooking can make it dry. You can easily change the heat level in the sauce. Start with one tablespoon of sriracha. If you like more heat, add a bit more. Serve extra bang bang sauce on the side for your guests. This way, everyone can adjust to their taste. The way you present your dish matters. Serve the salmon bites on a rustic wooden board or a clean white platter for a nice contrast. Add garnishes like chopped green onions and sesame seeds right before serving. This keeps them fresh and vibrant. {{image_2}} You can switch up the main protein in this recipe. Use shrimp or chicken for a different flavor. Both options cook quickly and absorb the sauce well. If you want a vegetarian choice, try using tofu. Make sure to press it well to remove excess water. This way, it will soak up all that tasty sauce. The bang bang sauce is delicious, but you can try some variations. For a healthier version, use yogurt-based sauces instead of mayonnaise. This gives you a lighter option without losing flavor. You can also play with spices. Adding chipotle can give your sauce a nice smoky kick. Don't be afraid to experiment! Bang Bang Salmon Bites are very versatile. You can pair them with rice or a fresh salad for a full meal. This makes it easy to balance flavors and textures. They also work great as appetizers or party snacks. Serve them on a platter with extra sauce for dipping. This makes them fun for sharing! For the complete recipe, check the Full Recipe section. To keep your Bang Bang Salmon Bites fresh, store them in an airtight container. They stay good in the fridge for up to 2 days. When you want to enjoy them again, reheat in the oven for the best texture. This method helps keep the bites crispy. You can freeze uncooked salmon bites for later. This makes meal prep easy! Just make sure you seal them properly. Proper sealing prevents freezer burn and keeps the salmon fresh. For the best crunch, reheat your salmon bites in the oven or on a skillet. This method keeps them crispy and delicious. Avoid using the microwave, as it can make them soggy. Enjoy your tasty bites! Yes, just ensure it's thawed completely before coating and baking. Frozen salmon works well if you follow this step. Just remember to pat it dry before using. This helps the coating stick better. Increase the amount of sriracha or add chili flakes to taste. You can start with a little extra sriracha. If you want more heat, add a pinch of chili flakes. Taste as you go to find your perfect spice level. Yes, prepare the salmon bites and sauce beforehand and bake just before serving. You can coat the salmon and store it in the fridge. Make the sauce too and keep it separate. It saves time when you are ready to eat. Use gluten-free cornstarch and ensure all sauces are gluten-free certified. Many brands offer gluten-free sauces now. Always check labels to make sure they meet your needs. This way, everyone can enjoy the dish! These Bang Bang Salmon Bites are easy to make and full of flavor. We covered the key ingredients, step-by-step instructions, and creative ways to customize this dish. Remember, you can adjust spice levels and try different proteins for variety. Storing leftovers is simple, and you can even prepare bites in advance. Explore these tips to make your cooking fun and successful. Enjoy the delicious results of your hard work in the kitchen. Happy cooking!](https://therecipehatch.com/wp-content/uploads/2025/06/0cded4de-3d97-4341-9b1e-96059a9a105e.webp)
Are you ready to make a splash in your kitchen? My Bang Bang Salmon Bites recipe is the perfect blend of fun, flavor, and ease. With just a few fresh …
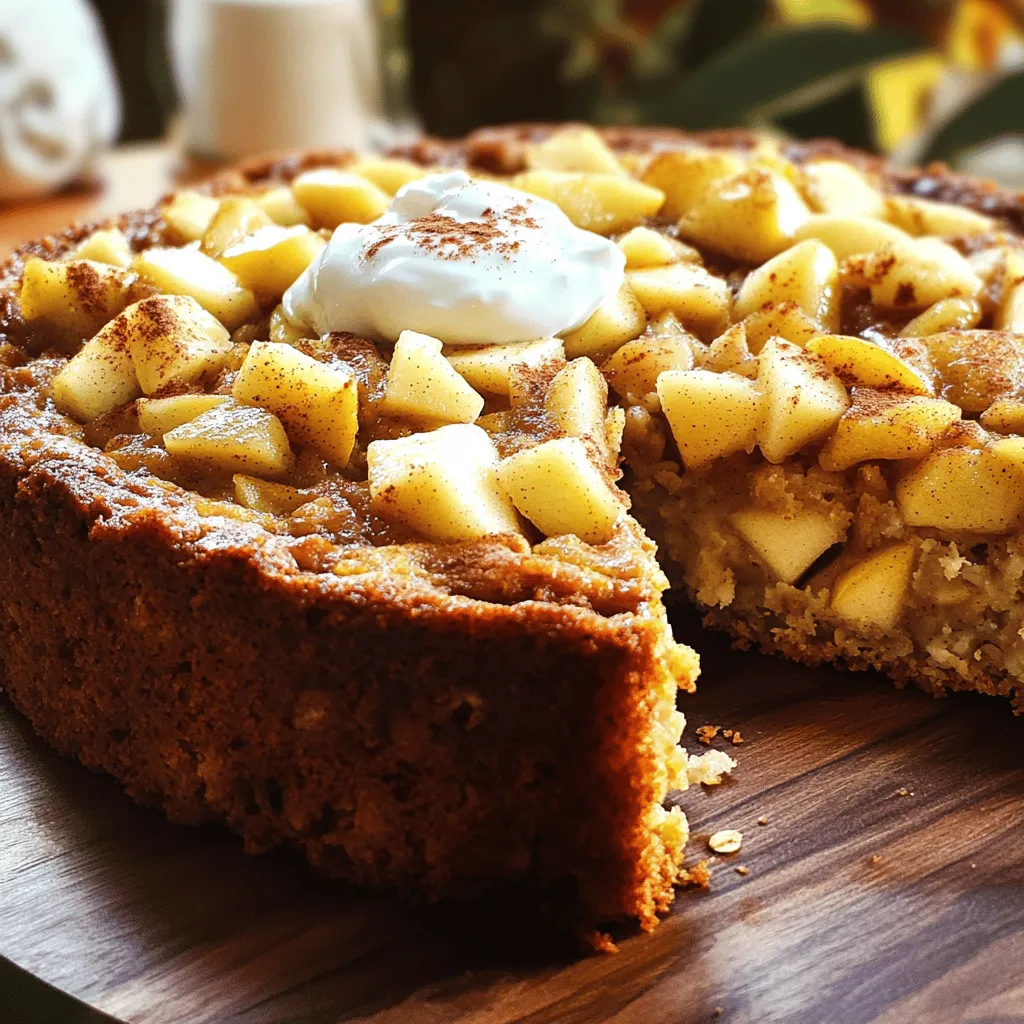
Start your day with a burst of energy from my Healthy Breakfast Oatmeal Apple Cake! This delicious treat combines wholesome oats, fresh apples, and just the right amount of sweetness. …