Amish-Style Apple Cinnamon Baked Oatmeal Delight
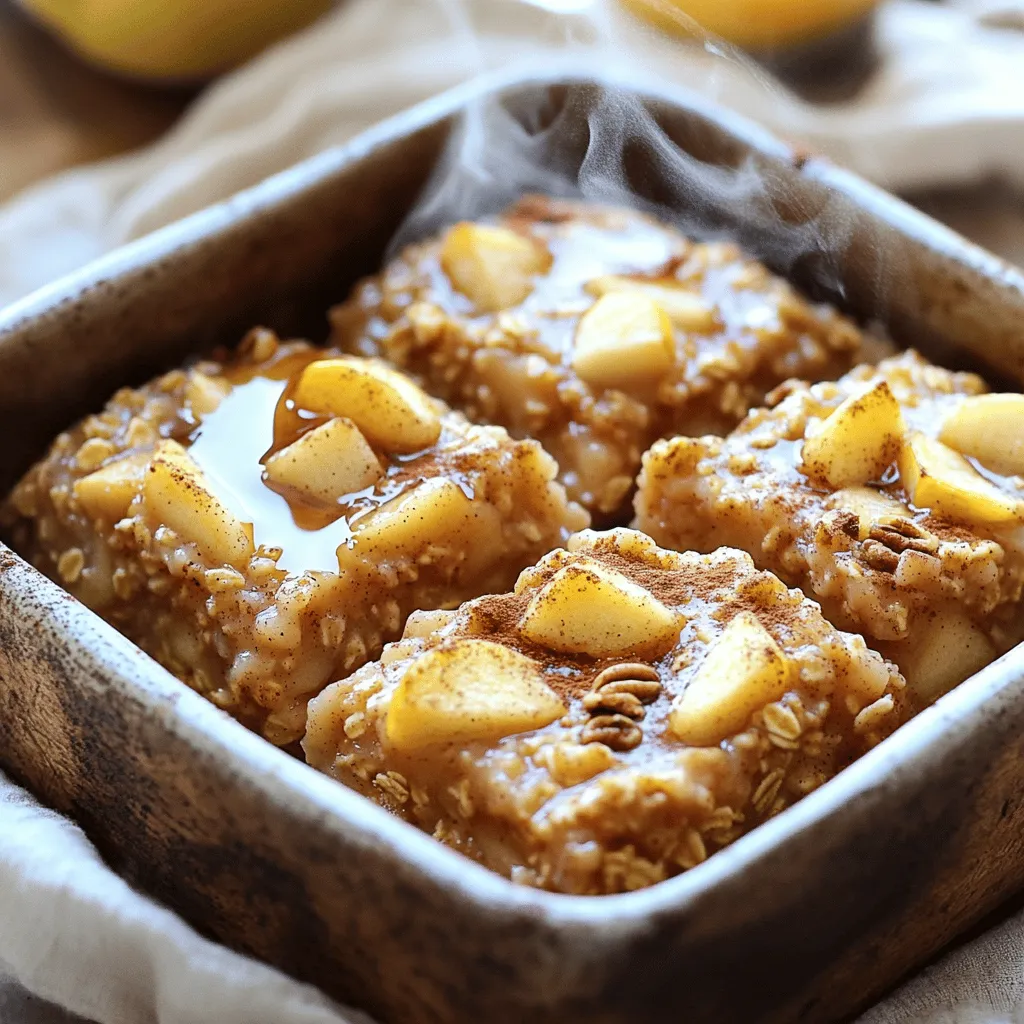
Are you ready to savor a comforting treat that warms the heart? Amish-Style Apple Cinnamon Baked Oatmeal is just what you need! This delightful dish combines sweet apples and aromatic …
Are you ready to savor a comforting treat that warms the heart? Amish-Style Apple Cinnamon Baked Oatmeal is just what you need! This delightful dish combines sweet apples and aromatic …
![- 4 white fish fillets (like tilapia or snapper) - 2 tablespoons jerk seasoning - 2 tablespoons olive oil - 1 lime, juiced - 1/2 cup red cabbage, shredded - 1 avocado, sliced - 1/4 cup fresh cilantro, chopped - Mango salsa (1 cup) for topping - Grill or grill pan - Mixing bowl - Tongs When you make jerk fish, you need fresh ingredients. The white fish fillets bring a mild taste. Jerk seasoning adds a spicy kick. This blend has herbs and spices like allspice and thyme. Olive oil helps the fish stay moist. Lime juice adds a bright flavor. For toppings, red cabbage gives crunch. Avocado brings creaminess. Fresh cilantro adds a burst of flavor. Mango salsa balances the spice. It’s sweet and tangy. You'll need a grill or grill pan. A mixing bowl is perfect for marinating. Tongs help flip the fish without breaking it. This simple list of ingredients makes a delicious meal. You can find the full recipe for these tasty jerk fish tacos easily. Enjoy every bite! To start, you need to marinate the fish fillets. In a bowl, mix olive oil, jerk seasoning, lime juice, and a pinch of salt. Coat the fish fillets well in this mixture. Let them sit for at least 30 minutes. This step is key. The longer the fish marinates, the better the flavors blend. Next, preheat your grill or grill pan over medium-high heat. Once it’s hot, carefully place the marinated fish fillets on the grill. Cook them for about 3 to 4 minutes on each side. You want the fish to become opaque and flake easily with a fork. This ensures a juicy and tender texture. While the fish rests, warm the corn tortillas on the grill. Heat them for about 30 seconds on each side until they are soft and pliable. Now, it's time to assemble. Place a piece of cooked fish on each tortilla. Top with shredded red cabbage, avocado slices, and fresh cilantro. For a sweet kick, add a generous spoonful of mango salsa on top. Enjoy the burst of flavors in each bite! For the full recipe, check the details above. To get great jerk flavor, you have two choices: homemade or store-bought jerk seasoning. I prefer homemade because I can control the heat. Use spices like allspice, thyme, and Scotch bonnet peppers. If you choose store-bought, look for a brand that has a good mix of spices and flavor. Marinate your fish for at least 30 minutes. This lets the fish soak up the jerk spices. For even more flavor, you can marinate it overnight in the fridge. Just make sure to cover it well. Fish can stick to the grill, which can be a pain. To avoid this, make sure to oil the grill grates before adding the fish. You can also oil the fish lightly. This keeps it from sticking and helps with browning. Check for doneness by using a fork. If the fish flakes easily, it is ready. Don’t overcook it! Aim for about 3-4 minutes on each side. The fish should be opaque all the way through. Jerk Fish pairs well with sides like rice and peas or a fresh green salad. These dishes balance the spicy flavors. You can also serve it with grilled vegetables for a colorful plate. For drinks, try tropical beverages. A cold beer or a fruity cocktail complements the spices. You can also offer fresh limeade or coconut water for a refreshing touch. For the full recipe, check out the Spicy Jerk Fish Tacos. It’s a delight! {{image_2}} You can use many types of fish for jerk fish tacos. While tilapia and snapper are popular, other white fish work well too. Cod and haddock are excellent choices. They are mild and soak up flavor well. If you want a bolder taste, try salmon or mahi-mahi. These types add a rich flavor to your dish. You can also use shrimp or scallops for a fun twist. Both options bring unique textures and flavors. If you prefer a plant-based option, there are great substitutes. You can use cauliflower or eggplant instead of fish. They both absorb flavors like a sponge. For cauliflower, cut it into thick steaks. For eggplant, slice it into rounds. You can still use jerk seasoning to keep the taste authentic. If you want a protein boost, try chickpeas or tofu. Marinate them just like the fish for the best flavor. To add more flavor, consider different sauces or seasonings. Try adding a spicy mango sauce or a creamy cilantro sauce. Both add a nice kick and balance the heat. You can also sprinkle on some toasted coconut for a tropical touch. For extra texture, add toppings like crunchy pickled onions or sliced radishes. These toppings give your tacos a fresh, crisp bite. You can mix and match to create your perfect jerk fish taco. For the complete recipe, check out the [Full Recipe]. To keep leftover Jerk Fish tacos fresh, store them in the fridge. Wrap each taco in plastic wrap or foil. For best results, use an airtight container. This helps keep the fish moist and the toppings crisp. You should eat leftovers within three days for the best taste. If you want to save Jerk Fish for later, freezing is a great option. First, wrap the cooked fish tightly in plastic wrap. Then put it in a freezer bag or container. For tacos, freeze the fish and toppings separately. When you're ready to eat, thaw the fish overnight in the fridge. Reheat it in the oven or on a grill to maintain flavor. Avoid microwaving, as it can make the fish rubbery. The shelf life of cooked Jerk Fish is about three to four days in the fridge. After freezing, it lasts up to three months. Check for signs that the fish is bad. If it smells sour or has a slimy texture, toss it out. Toppings like avocado and cabbage should be fresh. If they look brown or wilted, it's time to let them go. Enjoy your Jerk Fish tacos at their best! Jerk Fish is a dish that comes from Jamaica. It uses jerk seasoning, a mix of spices. This mix often includes allspice, thyme, and Scotch bonnet peppers. The dish has roots in the Maroons, African slaves who escaped to the mountains. They learned to cook with local spices and created this unique flavor. Jerk Fish is not just food; it’s part of Jamaican culture and heritage. You can taste the history in every bite. Yes, you can use frozen fish fillets for this recipe. First, thaw the fish in the fridge overnight. If you are short on time, you can use cold water. Just place the fish in a sealed bag and submerge it in cold water for about an hour. After thawing, follow the marinating steps in the Full Recipe. Cooking time may be the same, but always check for doneness. The fish should be opaque and flake easily with a fork. The spice level of Jerk Fish can vary. Traditional jerk seasoning can be hot, especially with Scotch bonnet peppers. If you prefer a milder taste, you can adjust the heat. Try using less jerk seasoning or omitting the hotter peppers. You can also add a touch of honey or sugar to balance the heat. Experiment until you find the right spice level for your taste buds. Jerk Fish tacos pair well with many sides. Here are some ideas: - Rice and peas for a classic combo. - Grilled corn on the cob for a sweet touch. - A fresh salad with lime vinaigrette to balance the flavors. - Tropical fruit salad adds a refreshing contrast. - For drinks, try coconut water or a light beer. These will enhance the meal without overpowering it. Jerk Fish tacos are simple to make and full of flavor. Remember to marinate your fish well for that perfect taste. Grilling gives it a nice texture, and toppings like mango salsa add nice freshness. You can even switch up the fish or try vegetarian options. Store leftovers properly, and you can enjoy them later. Enjoy making this dish and sharing it with friends. You’ll love the burst of flavors and the fun of grilling!](https://therecipehatch.com/wp-content/uploads/2025/06/a2aa73af-5f81-4b04-b67d-cb8d71747be5.webp)
Ready to spice up your dinner table? My Jerk Fish recipe is simple and bursting with flavor. With just a few ingredients and easy steps, you can create a dish …
 for ideas to use up ingredients! The best ways to cook chicken for salad are grilling and poaching. Grilling adds a nice smoky flavor. I often marinate the chicken for an hour before grilling. Poaching keeps the chicken moist and tender. Just simmer the chicken in water or broth until cooked through. Yes, chicken salad can be made ahead of time. I suggest making it up to a day before serving. Just keep it in the fridge. If you add avocado, wait until just before serving to keep it fresh. Chicken salad can be healthy. It has protein from the chicken and nutrients from the veggies. A typical serving has around 300-400 calories. You can adjust the dressing to lower the calories if needed. Adding more greens helps boost fiber too. For a party, serve chicken salad in a large bowl or in individual cups. You can scoop it onto crackers or lettuce leaves. To make it pretty, garnish with herbs, citrus slices, or nuts. This adds color and makes it look nice. Chicken salad pairs well with many sides. Popular choices include fresh fruit, chips, or a light soup. A crisp white wine or iced tea also makes a great drink choice. Try serving it with a side of crusty bread for a full meal. This article covered everything you need for chicken salad. We explored key ingredients and their benefits. You learned about substitutions and delicious dressings. I provided steps for prep and storage tips, too. Use the tips for flavor and presentation to make your dish shine. With these insights, you're ready to create a chicken salad everyone will love. Enjoy experimenting and making it your own!](https://therecipehatch.com/wp-content/uploads/2025/06/ad2e51f1-33f9-4711-b4c2-a4607b22211a.webp)
Are you ready to whip up a savory chicken salad that’s both easy and delicious? This recipe will help you create a dish packed with flavor and nutrition, perfect for …
![- 4 salmon fillets (about 6 ounces each) - 1 large mango, diced - 1 small red onion, finely chopped - 2 tablespoons olive oil - 1 teaspoon garlic powder - 1 teaspoon smoked paprika - Salt and pepper to taste - 1 jalapeño, minced (seeds removed for less heat) - 1/4 cup chopped fresh cilantro - Juice of 1 lime - 1/2 avocado, diced (optional) When making this dish, you want fresh and good-quality ingredients. The salmon fillets should feel firm and moist. Look for bright, vibrant mango that gives slightly when pressed. A small red onion adds a nice crunch and sweetness. Olive oil is key for seasoning, giving a rich flavor to your salmon. Garlic powder and smoked paprika add depth and warmth to the dish. For spice lovers, the jalapeño adds some heat. If you prefer milder flavors, skip it or remove the seeds. Fresh cilantro gives a bright taste and color. Lime juice adds a tangy kick that balances the salsa. Lastly, if you want to make it creamier, add diced avocado. It adds a smooth texture and flavor to the dish. All these ingredients come together to create a vibrant and tasty meal that you will love. You can find the full recipe for this salmon delight with tropical mango salsa in the section above. - Preheat your grill or oven to medium-high heat (about 375°F/190°C). - Mix olive oil, garlic powder, smoked paprika, salt, and pepper in a small bowl. - Rub the olive oil mixture over the salmon fillets evenly. - Place the salmon fillets on the grill or a baking sheet. Cook for 5-7 minutes on each side. If you use the oven, cook for 12-15 minutes. Salmon is done when it flakes easily with a fork. - Combine diced mango, red onion, jalapeño, cilantro, lime juice, and avocado in a bowl. Toss gently to mix. - Ensure salmon is at room temperature before cooking for even cooking. - Use a meat thermometer for perfect doneness (internal temp: 145°F/63°C). Before you cook, take the salmon out of the fridge. Let it sit for about 15 minutes to warm up. This step helps it cook evenly. A meat thermometer is a great tool. It tells you when your salmon is done. Insert it into the thickest part of the fish. When it reads 145°F, your salmon is perfect! - Let mango salsa sit for at least 10 minutes before serving to enhance flavors. - Adjust spiciness by controlling the amount of jalapeño used. After you mix the salsa, let it rest. This waiting time allows the flavors to blend. If you prefer less heat, use less jalapeño. You can always add more later if needed. - Pair with quinoa or rice for a complete meal. - Serve with lime wedges for extra zest. This dish pairs well with quinoa or rice. Both add a nice texture and balance the flavors. Serve some lime wedges on the side. A little squeeze of lime brightens the whole meal. For the full recipe, check out the detailed cooking steps and tips! {{image_2}} You can swap salmon for other proteins. Grilled chicken works well and is tasty. Shrimp also makes a great choice. If you want something different, try firm white fish. Cod or tilapia pair nicely with mango salsa too. These options give you a chance to mix things up. Mango salsa is fun to change. You can add diced pineapple for a sweet twist. Bell peppers also add crunch and color. If you want a new flavor, try mint instead of cilantro. Mint gives a fresh taste that brightens the dish. These simple swaps keep the salsa exciting. Cooking salmon can be done in different ways. For a crispy skin, use the pan-sear method. This method gives a nice texture. You can also bake the salmon wrapped in foil. This keeps it moist and tender. Both methods are easy and delicious. Enjoy exploring these options with the Full Recipe! Store leftover salmon and mango salsa in airtight containers. Keep them in the fridge. Eat them within 2-3 days for the best taste and quality. Freshness is key to enjoying your dish. You can freeze cooked salmon for up to 2 months. When ready to eat, defrost it in the fridge overnight. This helps keep the flavor intact. Mango salsa tastes best fresh. If you have extra mango, consider freezing it for future recipes. To reheat salmon, place it in the oven at 350°F/175°C. Heat until warmed through. This method helps retain the salmon's flavor and texture. Avoid microwaving the salsa. This keeps it fresh and maintains its crunch. Enjoy your delicious dish! For the full recipe, check out the [Full Recipe]. Salmon is done when it flakes easily with a fork or reaches an internal temperature of 145°F (63°C). To check this, use a fork to gently poke the salmon. If it separates easily, it is ready. Cooking salmon just right ensures it stays moist and flavorful. Yes, but thaw it completely before cooking for even results. Place frozen salmon in the fridge overnight. If you're short on time, you can run it under cold water for quicker thawing. This helps avoid uneven cooking and enhances the texture. Marinate the salmon in lemon or lime juice for 30 minutes before seasoning and cooking. This simple step brightens the flavor and adds a nice tang. You can also add herbs or spices to the marinade for an extra kick. Consider serving with a light salad, roasted vegetables, or cilantro-lime rice for a well-rounded meal. These sides complement the fresh flavors of the salmon and mango salsa. You can mix and match to suit your taste and make each meal unique. For the complete process of making this dish, check out the Full Recipe. In this blog post, we explored a tasty salmon and mango salsa recipe. You saw how to prepare the salmon with simple seasonings and how to make a fresh mango salsa. We also shared tips for cooking, storing leftovers, and variations to suit your taste. This recipe is easy to make and full of flavor. It’s perfect for any meal. Enjoy this dish, and don’t be afraid to experiment with your ingredients. Happy cooking!](https://therecipehatch.com/wp-content/uploads/2025/06/4f4b5d45-2024-4524-9965-dd82bb5e8c20.webp)
Are you ready to take your dinner up a notch? This Savory Salmon with Fresh Mango Salsa Delight pairs rich salmon with vibrant mango salsa. It’s simple, fresh, and bursting …
![For these no bake s’mores cookie dough bites, you will need: - 1 cup almond flour - 1/2 cup peanut butter (or any nut butter of choice) - 1/4 cup pure maple syrup - 1 teaspoon vanilla extract - 1/2 cup mini chocolate chips - 1/2 cup mini marshmallows - 1/4 cup crushed graham crackers (plus more for rolling) Choose almond flour that feels soft and fresh. It should smell nutty, not stale. When picking nut butter, look for options with few ingredients. Pure maple syrup should be dark and rich. This adds great flavor. For chocolate chips, use mini ones for a perfect bite. The marshmallows should be fluffy and white. Always get fresh graham crackers for the best crunch. If you have nut allergies, use sunflower seed butter instead of peanut butter. This swap keeps the recipe tasty and safe. You can use coconut flour as a gluten-free option instead of almond flour. If you want to avoid dairy, make sure the chocolate chips are dairy-free. Always check labels to ensure they fit your needs. To make No Bake S’mores Cookie Dough Bites, follow these easy steps. 1. Mix the Base: In a large bowl, combine 1 cup of almond flour with 1/2 cup of peanut butter. Stir until you get a crumbly texture. This mix is the base of your cookie dough. 2. Add Sweetness: Pour in 1/4 cup of pure maple syrup and 1 teaspoon of vanilla extract. Mix until the dough sticks together. This step makes your bites sweet and flavorful. 3. Fold in Fun: Gently add 1/2 cup of mini chocolate chips, 1/2 cup of mini marshmallows, and 1/4 cup of crushed graham crackers. Make sure everything is mixed well. This gives you that classic s’mores flavor. 4. Shape the Bites: Use your hands to scoop out small amounts of dough. Roll them into bite-sized balls. This part is fun and lets you control the size. 5. Coat for Crunch: Roll each dough ball in more crushed graham crackers. This adds a nice crunchy texture to the outside. 6. Chill Out: Place the cookie dough bites on a parchment-lined baking sheet. Refrigerate for about 30 minutes. This helps them firm up and makes them easier to eat. For a better understanding, look for images or videos showing each step. Seeing the process can help you feel more confident. You can find helpful content on cooking websites or social media platforms. - Don’t Overmix: Mixing too much can make the dough tough. Mix just until combined. - Use Fresh Ingredients: Fresh peanut butter and chocolate chips give the best flavor. - Chill Properly: Make sure to chill the bites long enough. This helps them hold their shape. Following these steps will help you create delicious No Bake S’mores Cookie Dough Bites. Enjoy making this easy treat! For the complete recipe, check out the [Full Recipe]. When making no bake s'mores cookie dough bites, a few mistakes can ruin the fun. First, do not skip the chilling step. This helps the bites firm up. If you skip this, they may fall apart. Second, don't add too much liquid. Too much maple syrup can make the dough too sticky. Lastly, ensure you mix well. If you don't mix enough, you may get bites that have uneven flavors. You can easily change the flavors in these bites. Try using almond butter instead of peanut butter. You can also swap in dark chocolate chips for a richer taste. If you want a fruity twist, add dried cranberries or cherries. For a nutty crunch, toss in some chopped nuts. This recipe is flexible, so have fun with it! How you serve these bites can make them even more fun. Arrange them on a pretty plate or in a jar. You can also sprinkle extra crushed graham crackers on top for a nice touch. If you want, use cupcake liners for each bite. They look cute and are easy to grab. These little details can make your treat stand out! For the full recipe, check out the details above. {{image_2}} You can change the flavors by picking different nut butters. Try almond butter for a nutty twist. Cashew butter gives a creamy taste, while sunflower seed butter is perfect for nut-free options. Each nut butter adds its own flavor, making every batch unique. Add seasonal flavors to your cookie dough bites. For fall, mix in pumpkin spice. Use cinnamon, nutmeg, and cloves for a warm taste. In winter, try peppermint extract for a refreshing twist. You can also add holiday sprinkles to make them festive. These twists keep things fun all year round. You can easily make these bites vegan. Use almond flour, which is already vegan. Swap peanut butter for any nut butter or sun butter. Replace maple syrup with agave syrup. Make sure the mini chocolate chips are dairy-free. With these changes, everyone can enjoy these tasty treats. For the full recipe, refer to the provided link. To keep your no-bake S’mores cookie dough bites fresh, store them in an airtight container. A glass or plastic container works well. Place parchment paper between layers if you stack them. This helps stop them from sticking together. Keep the container in the fridge for the best taste and texture. These cookie dough bites can last up to one week in the fridge. If you want to keep them longer, freezing is a great option. When stored in the freezer, they can last up to three months. Just remember to wrap each bite in plastic wrap before placing them in a freezer bag. This keeps them fresh and safe from freezer burn. To thaw frozen cookie dough bites, take them out of the freezer. Place them in the fridge for a few hours or overnight. You can also let them sit at room temperature for about 30 minutes. This will help them soften up. Enjoy them cold for a refreshing treat or let them warm slightly for a different texture. For the full recipe, check out the details in the article. These no-bake S’mores cookie dough bites can last up to one week in the fridge. Keep them in an airtight container. If you freeze them, they can last for three months. Just remember to separate layers with parchment paper to avoid sticking. Yes, you can use other flours. Oat flour or coconut flour work well too. Each flour may change the taste and texture slightly. Always check if a flour needs any extra moisture or binding to hold together. These bites are best served cold or at room temperature. You can plate them with extra crushed graham crackers for a nice look. Pair them with a glass of milk or hot chocolate for a fun treat. Absolutely! Use almond flour, as shown in the recipe, which is naturally gluten-free. Ensure that any other ingredients, like your nut butter and chocolate chips, are labeled gluten-free too. This way, everyone can enjoy them without worry. This post covered key ingredients and tips for making cookie dough bites. I shared steps for preparation, common mistakes, and ways to customize flavors. We explored variations and storage info to keep your treats fresh. Remember, the joy of cooking lies in experimenting. Use this guide as a foundation. Try new flavors or tweak ingredients. You can create something truly special! Enjoy your cookie dough bites and happy cooking!](https://therecipehatch.com/wp-content/uploads/2025/06/ebbcac34-206c-4f1a-8dbf-3250d389c738.webp)
Craving a sweet treat without the oven? I’ve got just the thing! My No Bake S’mores Cookie Dough Bites are not only easy to make, but they’re also the perfect …
![- Shrimp: Use 1 pound of medium or large shrimp, peeled and deveined. Fresh shrimp enhances flavor. - Avocados: Choose 2 ripe avocados. Look for ones that yield slightly when pressed. - Quinoa: For a tasty base, use 1 cup of cooked quinoa. You can swap quinoa with brown rice or farro for different textures. - Red Bell Pepper: One diced red bell pepper adds sweetness and crunch. - Cherry Tomatoes: Use 1 cup of halved cherry tomatoes for freshness. - Olive Oil: 2 tablespoons of olive oil help sauté the shrimp. - Lime Juice: Add 1 tablespoon of lime juice for a zesty kick. - Garlic Powder: 1 teaspoon of garlic powder gives depth of flavor. - Salt and Pepper: Use salt and pepper to taste for seasoning. - Fresh Cilantro: Garnish with cilantro for a pop of color and flavor. - Lime Wedges: Serve lime wedges on the side for extra zest. - Calories per Serving: Each serving has about 400 calories. - Macronutrient Breakdown: This dish has 25g of protein, 20g of fat, and 40g of carbs. - Health Benefits: Shrimp is low in calories and high in protein. Avocados add healthy fats and fiber. Together, they create a balanced meal. To start, marinate your shrimp with simple seasonings. Use olive oil, garlic powder, salt, and pepper. Mix these in a bowl, then add the shrimp. Coat each piece well. Let the shrimp sit for about 10 minutes. This helps the flavors soak in. Now, let’s cook the shrimp perfectly. Heat a skillet over medium-high heat. Once hot, add the shrimp. Cook them for 2-3 minutes on each side. They should turn pink and opaque. Remove them from heat and set aside. Perfectly cooked shrimp should be tender, not rubbery. Next, it’s time to layer your bowl. Start with the cooked quinoa at the bottom. This base adds texture and protein. After that, layer the diced avocados, cherry tomatoes, and red bell pepper. Each layer adds color and flavor. The order matters. It not only impacts taste but also visual appeal. A well-layered bowl looks inviting and delicious. Use a clear bowl to show off those vibrant colors. Now for the final touches! Drizzle fresh lime juice over the top. This brightens the flavors and adds zest. Lime juice also helps keep the avocado fresh. For garnishing, sprinkle chopped cilantro on top. This adds a lovely pop of color and a fresh taste. Serve with lime wedges on the side. This gives everyone an extra kick of flavor. For the complete recipe, check out the [Full Recipe]. To make the perfect shrimp, avoid overcooking. Shrimp cook fast. Aim for 2-3 minutes per side in a hot skillet. Once they turn pink and opaque, they’re done. Keep an eye on them. If you cook too long, they get rubbery. Remove them from heat right away. For avocados, freshness is key. Choose ripe ones that yield slightly to gentle pressure. If you want to keep them bright, use lime juice. A quick squeeze helps prevent browning. Store any cut avocados in an airtight container. Add a bit of onion to absorb air and keep them fresh. Serve Shrimp and Avocado Bowls in clear glass bowls. This showcases the colors. Layer the quinoa at the bottom for a nice base. Then, add diced avocados and vibrant cherry tomatoes. Top with shrimp for a beautiful finish. When you assemble, think about height. Stack ingredients instead of just mixing. Add fresh cilantro on top for a pop of green. Lime wedges on the side add a fun touch. Your guests will love the look of these bowls! {{image_2}} If you can't find shrimp or want to try something new, consider these options: - Chicken: Use diced, cooked chicken thighs or breasts for a hearty alternative. - Tofu: For a plant-based choice, try extra-firm tofu. Press it, then cube and cook. You can also switch up the veggies in your bowl. Seasonal favorites include: - Zucchini: Grate or slice it thin for a fresh crunch. - Corn: Add sweet corn for a pop of color and flavor. - Spinach: Toss in some fresh spinach for added nutrients. Want to spice things up? Here are some ideas: - Jalapeños: Chop fresh jalapeños and mix them in for heat. You can also drizzle hot sauce on top. - Feta Cheese: Crumble feta cheese over your bowl for a tangy, Mediterranean twist. Feel free to explore these variations. They can turn a simple dish into a flavorful feast! For the complete recipe, check out the Full Recipe section. To keep your shrimp and avocado bowl fresh, store leftovers in the fridge. Place them in airtight containers, which helps keep moisture in and air out. If you have extra shrimp, separate it from the avocado. This way, the avocado stays fresh longer. Use containers that are safe for the fridge and easy to stack. Glass containers work well since they don't stain or absorb odors. To reheat your shrimp, do it gently. Use a pan over low heat. This keeps the shrimp tender and juicy. Avoid the microwave if you can, as it can make shrimp rubbery. For the avocado, use lemon or lime juice to keep it from browning. Just a little squeeze before serving helps a lot. You can mix it with the other ingredients right before you eat for a fresh taste. Want the full recipe? Check out the Shrimp and Avocado Bowls recipe above! You can mix in many tasty ingredients! Try adding grains like brown rice or farro. They add a nice texture. If you want more protein, consider black beans or grilled chicken. Feel free to toss in more veggies, too. Corn, cucumbers, or even radishes can brighten up your bowl. These options boost flavor and nutrition. Yes, you can! Instead of quinoa, use cauliflower rice. It has fewer carbs and still tastes great. You can also skip the grains altogether and load up on more veggies. Zucchini noodles or shredded lettuce work well as a base. This way, you keep it light and fresh. Look for avocados that feel slightly soft when you press them gently. The skin should be dark green or black. Avoid any that have large dark spots or are too mushy. Choosing ripe avocados makes your Shrimp and Avocado Bowls creamy and delicious. For the best flavor, buy them a few days before you plan to use them. In this article, we explored how to make flavorful shrimp and avocado bowls. We covered the best ingredients, cooking tips, presentation ideas, and even variations to try. Remember, using fresh shrimp and ripe avocados makes a big difference. Personalize your bowl with your favorite flavors and enjoy the health benefits. Lastly, follow our storage tips to keep leftovers fresh. You now have the tools to impress your friends and family with a delicious dish that is sure to satisfy!](https://therecipehatch.com/wp-content/uploads/2025/06/d37f8f7e-7867-4f17-b7bc-5b306f95faf2.webp)
Are you ready to dive into a fresh and tasty experience? Shrimp and avocado bowls are a perfect blend of flavor, nutrition, and joy. In this article, I’ll guide you …
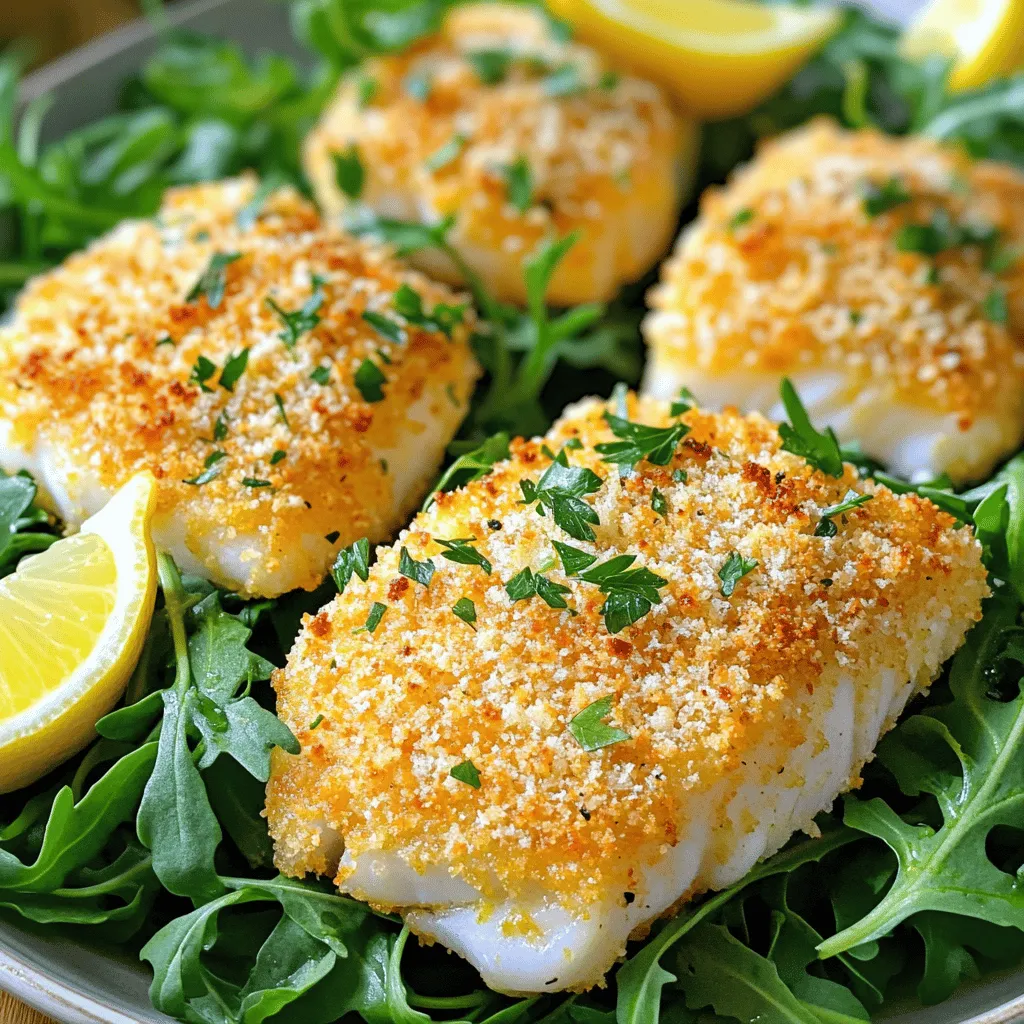
Are you ready to savor a dish that’s both crispy and full of flavor? In this guide, I’ll show you how to make delicious Air Fryer Cod that’s sure to …
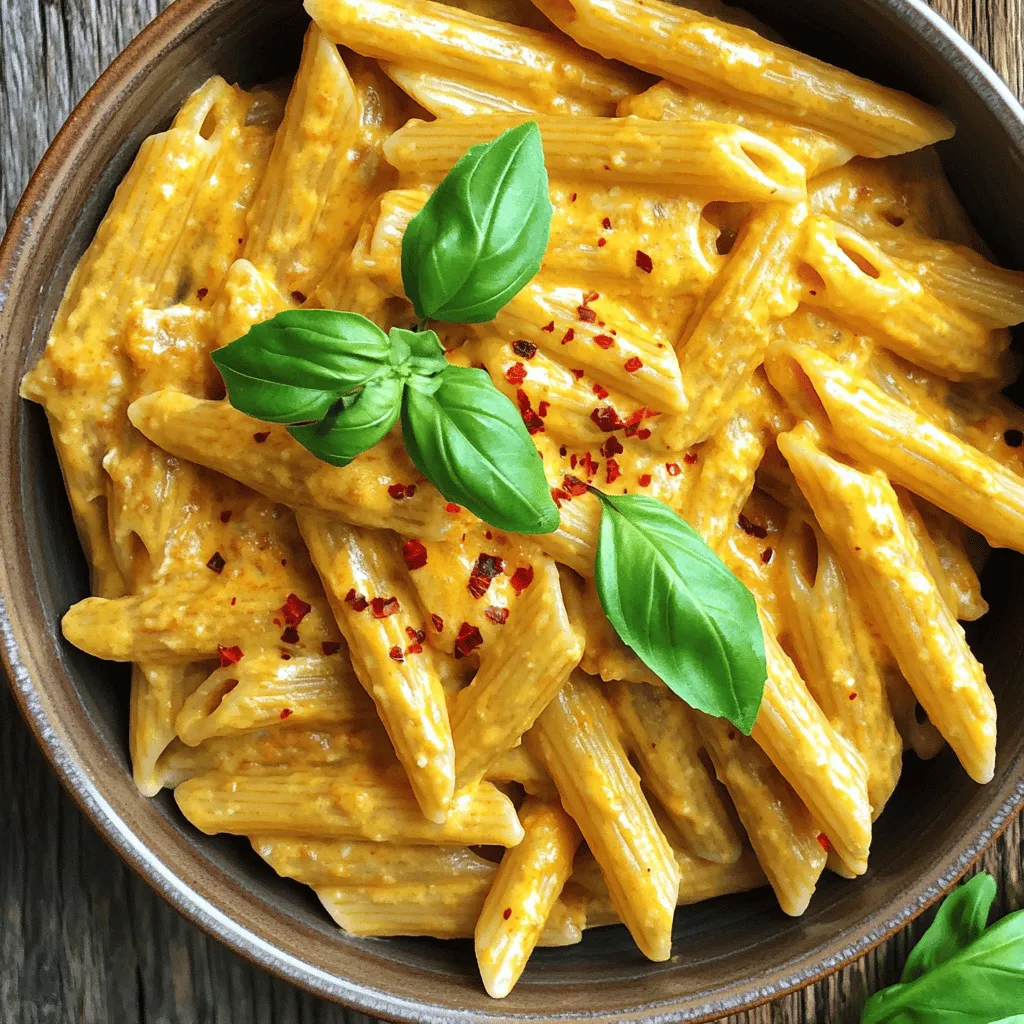
Looking for a delicious way to boost your protein intake? Dive into my recipe for High Protein Creamy Roasted Red Pepper Pasta Delight! This dish combines high-protein pasta with rich …

Are you ready to bake a simple and tasty treat that will impress everyone? These Chocolate Chip Banana Bars combine the sweet goodness of ripe bananas with rich chocolate, creating …
![- 2 ripe bananas, mashed - 1 cup rolled oats - 1/2 cup almond butter (or any nut butter) - 1/4 cup honey or maple syrup - 1/4 cup chia seeds - 1/2 teaspoon ground cinnamon - 1/4 teaspoon salt - 1/2 teaspoon vanilla extract - 1/4 cup chocolate chips (optional) - 1/4 cup chopped walnuts or pecans (optional) Bananas give you quick energy and potassium, which is good for your heart. Oats are rich in fiber, helping you feel full longer. Almond butter adds healthy fats and protein, which fuels your body. Honey or maple syrup provides natural sweetness and energy. Chia seeds are packed with omega-3s and fiber, boosting heart health. Ground cinnamon adds flavor and may help with blood sugar levels. Salt enhances taste and balances flavors. Vanilla extract brings warmth and sweetness. Optional chocolate chips add a fun treat, while nuts add crunch and protein. You can swap ripe bananas for applesauce if you're out of bananas. Use quick oats if you don't have rolled oats; they work just as well. Any nut butter can replace almond butter, like peanut or cashew. For a vegan option, replace honey with agave syrup. If you need gluten-free, ensure your oats are certified gluten-free. You can also use sunflower seed butter for a nut-free version. To start, gather your ingredients. You need ripe bananas, rolled oats, almond butter, and honey. Mix these together in a large bowl. Use a fork to mash the bananas well. This makes it easier to blend the flavors. Add the almond butter, honey, and vanilla extract next. Stir everything until it is smooth and creamy. Now, it’s time to mix in the dry ingredients. Add the rolled oats, chia seeds, ground cinnamon, and salt. Stir until everything is evenly combined. If you want extra flavor and crunch, fold in chocolate chips and nuts. After mixing, cover the bowl with plastic wrap. Place it in the fridge for about 30 minutes. This helps the mixture firm up, making it easier to shape. When the time is up, take it out and use your hands to form small balls. Each should be about one inch in diameter. Place the energy bites on a baking sheet lined with parchment paper. If you like, roll some in chia seeds or crushed nuts for added texture. This step adds a nice crunch and makes them look great. Return the bites to the fridge for another 10-15 minutes to set completely. This helps them hold their shape. You can enjoy them right away, or store them for later. Keep them in an airtight container in the fridge. They will stay fresh for up to a week. These bites make a perfect snack for busy days. Whether you need a quick energy boost before work or a sweet treat after school, they fit the bill. For the full recipe, check the earlier section. To make the best Chia Banana Bread Energy Bites, start with ripe bananas. They add natural sweetness and moisture. Mash them well to avoid lumps. Use rolled oats for a hearty texture. Choose creamy nut butter for a smooth mix. Honey or maple syrup provides the right touch of sweetness. Don't skip the chia seeds; they add nutrition and help bind the bites. Always mix until everything is well combined. Chill the mixture for at least 30 minutes. This helps the bites hold their shape. One common mistake is using unripe bananas. They lack the natural sweetness needed. Another mistake is not chilling the mixture long enough. If it's too soft, your bites won't hold. Avoid over-mixing the dough. This can make the bites dense and tough. Also, be careful with added flavors. Too much cinnamon can overpower the taste. Lastly, don’t forget to measure ingredients carefully. Exact measurements ensure the right balance for flavor and texture. You can enhance your energy bites easily. Try adding spices like nutmeg or ginger for a warm flavor. A splash of almond or coconut extract can add depth. For a crunchier texture, mix in seeds like pumpkin or sunflower. Dried fruits also work well; try raisins or cranberries for sweetness. If you like more chocolate, increase the chocolate chips. You can even roll the bites in crushed nuts or extra chia seeds for a fun twist. For the complete recipe, check out the [Full Recipe]. {{image_2}} You can change the nut butter for fun. Almond butter is tasty, but peanut butter also works. Cashew butter adds a creamy touch. Sunflower seed butter is a great choice for nut-free diets. Each one gives the energy bites a new twist. Adding spices and extracts makes your energy bites unique. Try a pinch of nutmeg for warmth. You can also add cocoa powder for a chocolatey version. A splash of almond or coconut extract can bring a lovely aroma. If you want a fruity kick, mix in some dried fruits like raisins or cranberries. Making these bites gluten-free is easy. Just use certified gluten-free oats. For a vegan version, replace honey with maple syrup. This keeps it sweet and plant-based. You can enjoy these bites without worry about gluten or animal products. For the full recipe, check out the detailed steps to make these yummy treats! To keep your chia banana bread energy bites fresh, store them in an airtight container. This helps lock in moisture and flavor. Place the bites in the fridge right after they set. They stay fresh for about a week. If you notice any changes in smell or texture, it’s best to toss them. You can freeze these energy bites for longer storage. First, let them cool completely. Then, place them in a single layer on a baking sheet. Freeze them for about an hour. Once firm, transfer the bites to a freezer-safe bag. Label the bag with the date and use them within three months for the best taste. These energy bites have a good shelf life. In the fridge, they last up to a week. If you freeze them, they can last for three months. To check for freshness, look for any off smells or changes in texture. If they seem dry or hard, it’s time to make a new batch. Enjoy these tasty bites anytime you need a quick snack boost! For the full recipe, check the earlier section. Chia Banana Bread Energy Bites are small, tasty snacks. They mix ripe bananas, oats, nut butter, and chia seeds. These bites are packed with nutrients. They give you energy and keep you full. You can enjoy them as a quick snack or breakfast on the go. Yes, you can skip the sweetener. The bananas add natural sweetness. If you prefer less sugar, use fewer bananas. Just keep in mind, the flavor will change a bit. You might want to add spices like cinnamon to boost taste. Each energy bite has about 70 calories. This can vary based on the ingredients you use. If you add chocolate chips or nuts, the calories may go up. They are still a healthy snack option, great for when you need a quick boost. These energy bites stay fresh for up to one week. Store them in an airtight container in the fridge. If you want to keep them longer, you can freeze them. Just let them thaw before you eat. Yes, you can use other seeds. Flaxseeds or hemp seeds are good choices. They will change the texture slightly, but the bites will still be nutritious. Just make sure to adjust the recipe to maintain balance. You can enjoy these bites as is. Pair them with yogurt or a smoothie for breakfast. They also make a great snack for kids. Try them in lunch boxes or after school. These bites are perfect for any time you need a pick-me-up. For the full recipe, refer to the earlier section. In this article, we explored the tasty world of Chia Banana Bread Energy Bites. We covered the best ingredients and their health perks. You saw how to make these bites step by step. I shared tips to avoid mistakes and ways to add flair. Don’t forget about storage to keep them fresh. These bites are simple to make and enjoy. I hope you’re excited to try them!](https://therecipehatch.com/wp-content/uploads/2025/06/6a29394f-3838-46fc-8b27-d75390a57e92.webp)
Looking for a quick, healthy snack? Chia Banana Bread Energy Bites are your answer! Packed with tasty ingredients, these little bites give you energy and keep hunger at bay. I’ll …