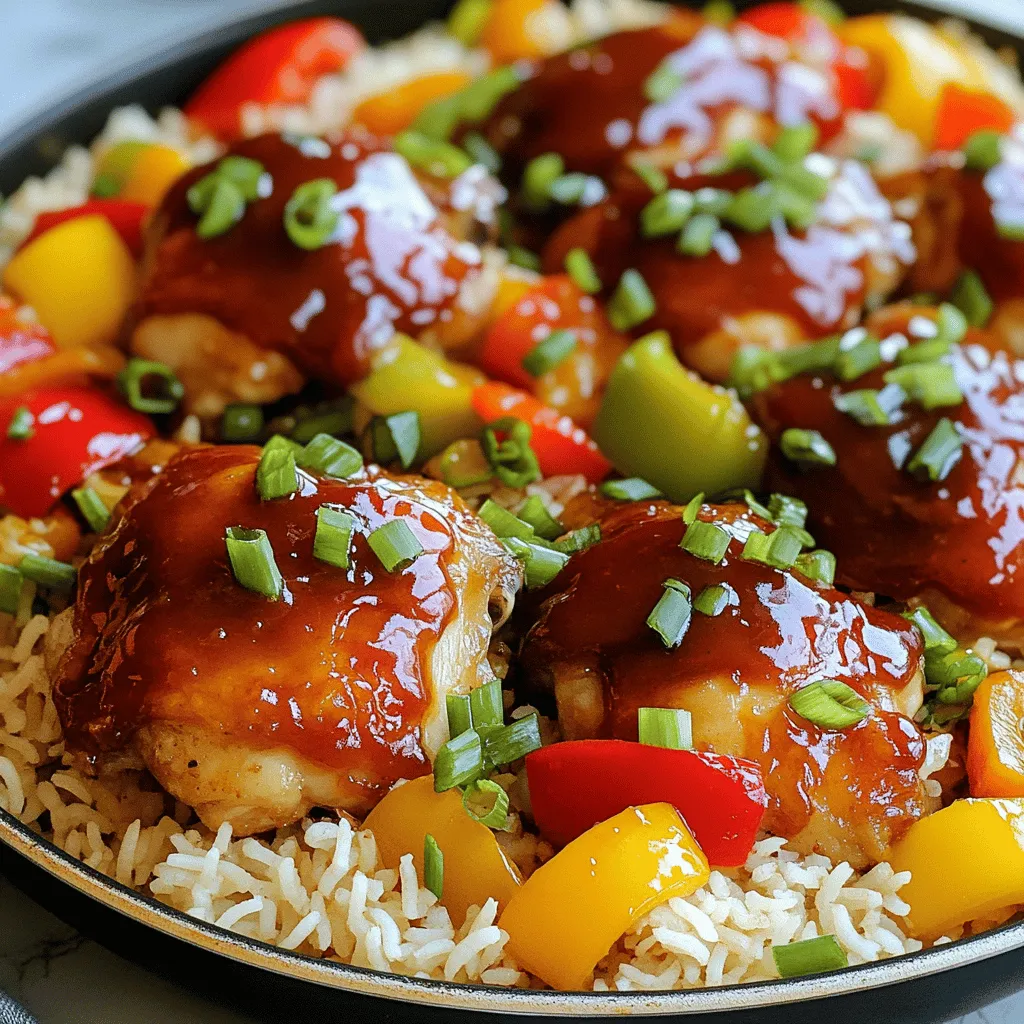
Barbecue Meatball Bowls Savory and Satisfying Meal
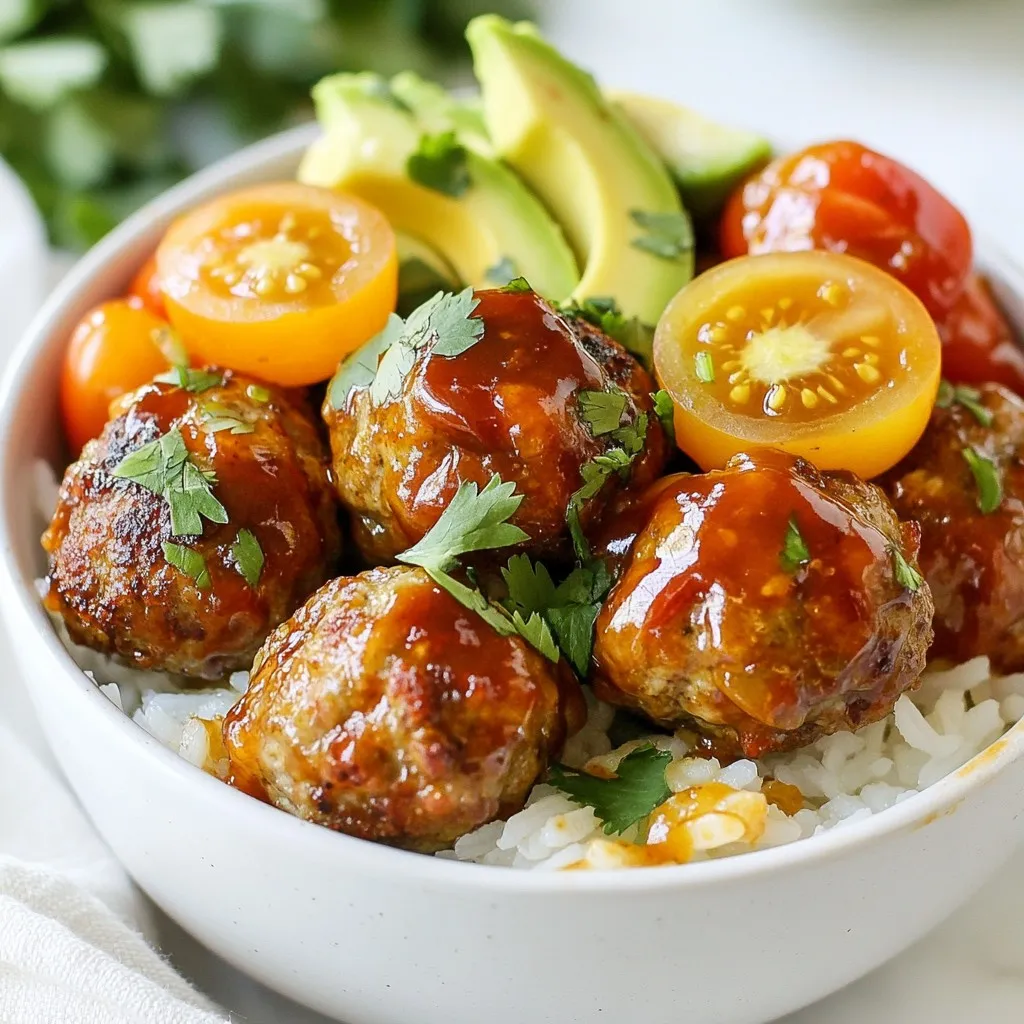
Craving a dish that’s both hearty and delicious? Barbecue Meatball Bowls are the answer! Packed with juicy meatballs, savory barbecue sauce, and fresh toppings, this meal will satisfy your hunger. …

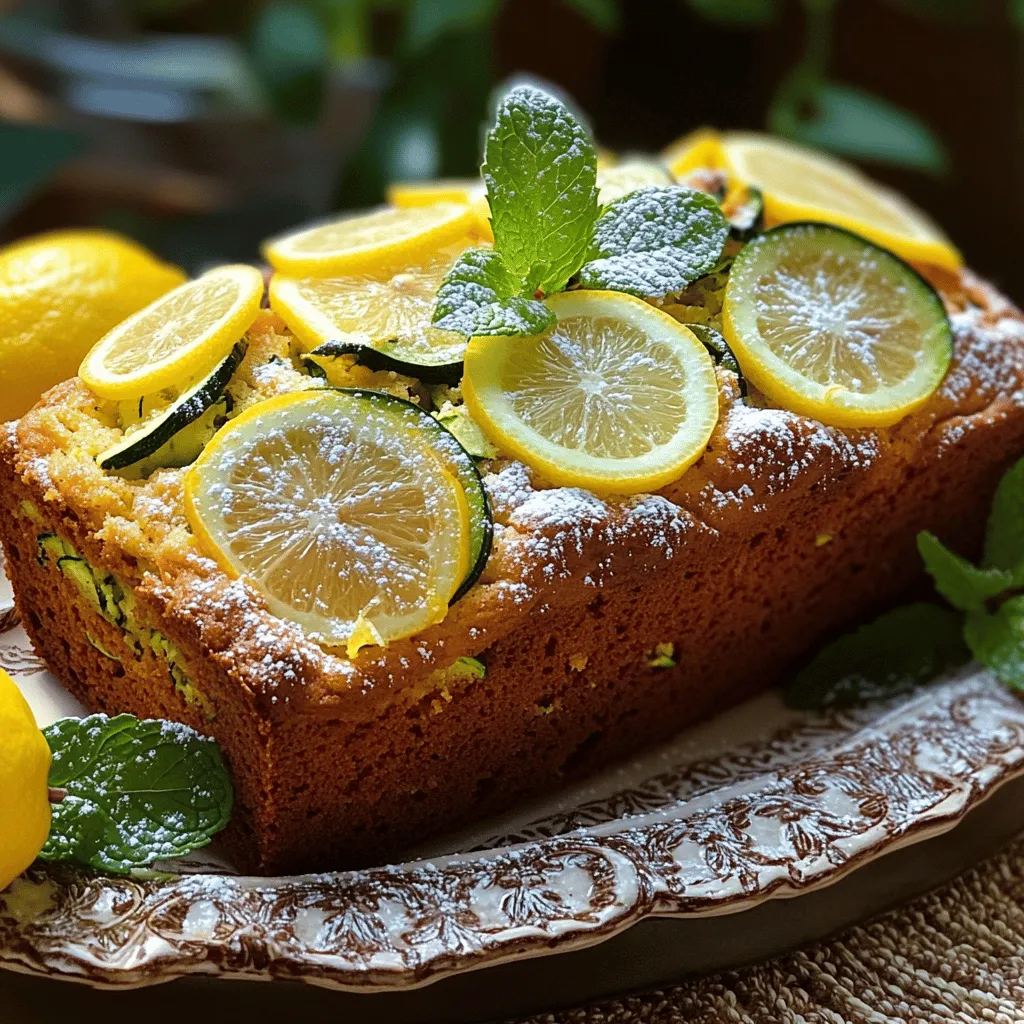
. {{image_2}} You can change up the taste of your muffins easily. A fun way is to add cocoa powder. This gives a rich chocolate twist that blends well with the banana and zucchini. Just mix in about 1/4 cup of cocoa powder with your dry ingredients. Another idea is to use flavored extracts. Coconut or almond extracts can add a new taste to your muffins. Just a teaspoon of either can brighten the flavors. Mix it in with the wet ingredients for the best results. If you want to make your muffins gluten-free, swap all-purpose flour for a gluten-free blend. Look for a mix that works well in baking. This way, you can enjoy tasty muffins without the gluten. For those who follow a vegan diet, you can replace the eggs with flax eggs. Mix 1 tablespoon of ground flaxseed with 2.5 tablespoons of water. Let it sit for a few minutes until it thickens. You can also use maple syrup instead of sugar. You can serve these muffins in different ways. Muffin tops are a fun option. Just fill the muffin cups less full, about halfway. This way, you get those crunchy tops that everyone loves. Mini muffins are another great idea. They are perfect for a quick snack or for kids. Simply reduce the baking time to about 10-12 minutes. You’ll have bite-sized treats in no time! For the full recipe, check the earlier sections. Enjoy creating your own variations! After baking your banana zucchini muffins, let them cool. Place the cool muffins in an airtight container. This keeps them fresh. You can store them at room temperature for up to three days. If you want them to last longer, keep them in the fridge. They stay good for about a week in the fridge. Freezing muffins is a great way to keep them fresh. First, let the muffins cool completely. This step is key to avoiding ice crystals. Wrap each muffin in plastic wrap tightly. Then, place them in a freezer bag. Make sure to remove as much air as possible. You can freeze them for up to three months. When you want to enjoy one, take it out and let it thaw at room temperature. You can also microwave it for a quick treat. To reheat your muffins, you have a few options. The oven gives the best results. Preheat it to 350°F (175°C). Place the muffins on a baking sheet and heat for about 10 minutes. This keeps them moist. If you’re in a hurry, use the microwave. Heat for about 15-20 seconds. To keep the muffins moist, cover them with a damp paper towel. This tip helps avoid dryness. Enjoy your muffins warm for the best taste! You can reduce sugar by using less brown and granulated sugar. Try using just a third cup of each instead of half. Use applesauce or mashed avocado to cut down on oil. This adds moisture without extra fat. You can also swap half of the all-purpose flour for whole wheat flour. This boosts fiber and nutrients. Yes, you can easily replace eggs in this recipe. Use 1/4 cup of unsweetened applesauce for each egg. You can also use flaxseed meal. Mix one tablespoon of flaxseed meal with three tablespoons of water. Let it sit for five minutes before adding. This creates a great binding agent for your muffins. Homemade muffins last about three to five days at room temperature. Store them in an airtight container to keep them fresh. You can also keep them in the fridge, where they will last about a week. If you want to keep them longer, consider freezing them. Yes, you can make these muffins ahead of time. Bake them, let them cool, and store them in an airtight container. They freeze well too. To reheat, simply microwave them for about 20 seconds. You’ll enjoy warm muffins without much fuss. These muffins are great on their own, but pair well with yogurt or fruit. Serve with a drizzle of honey or a sprinkle of cinnamon. You can also enjoy them with a cup of tea or coffee. They make a great breakfast or snack! You can make delicious banana zucchini muffins with simple, easy steps. Start with ripe bananas and grated zucchini, mix them well, and follow the instructions provided. I shared tips to perfect the texture and enhance flavors. Feel free to try variations, like adding chocolate or using gluten-free flour. Remember to store your muffins properly for the best taste. With these easy methods, you can enjoy fresh muffins anytime. Experiment, have fun, and share these tasty treats that everyone will love!](https://therecipehatch.com/wp-content/uploads/2025/06/d9adc430-0146-45e1-a420-7c7a244c700e.webp)
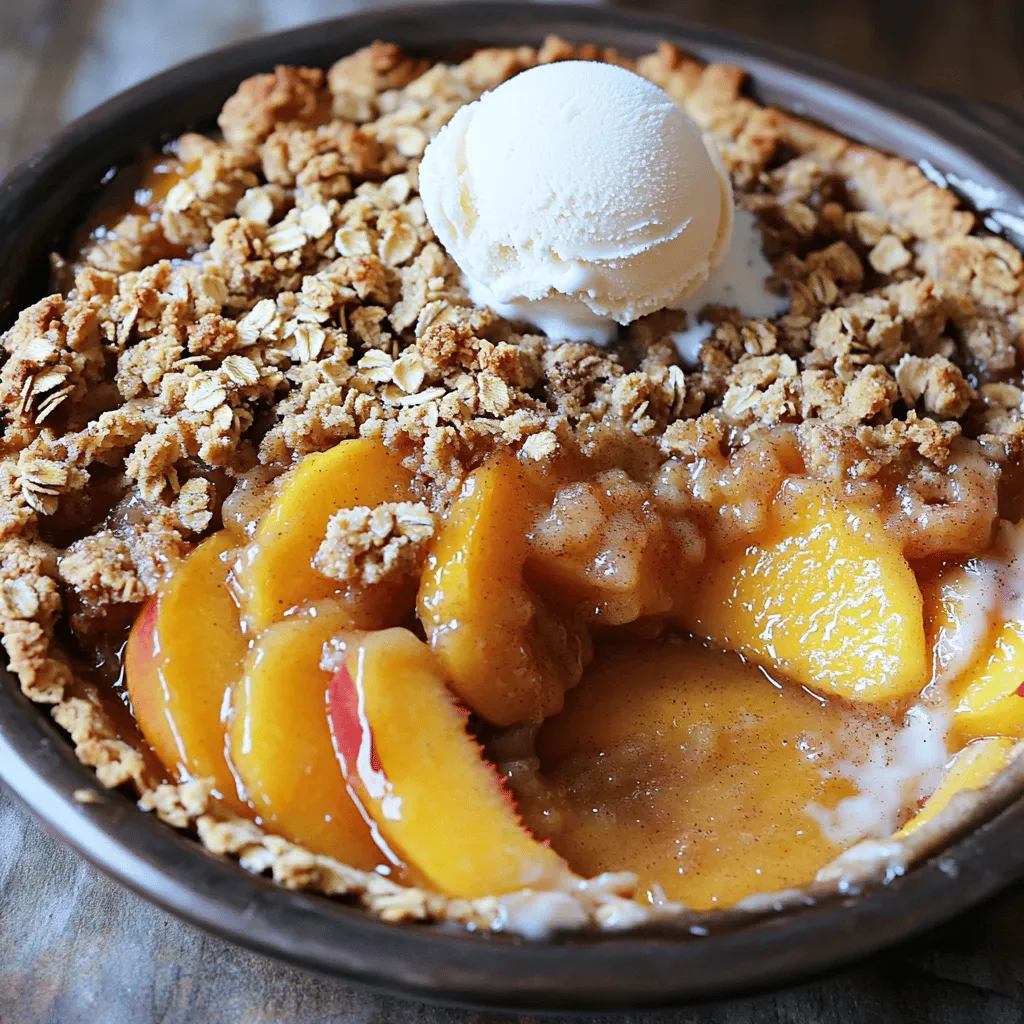
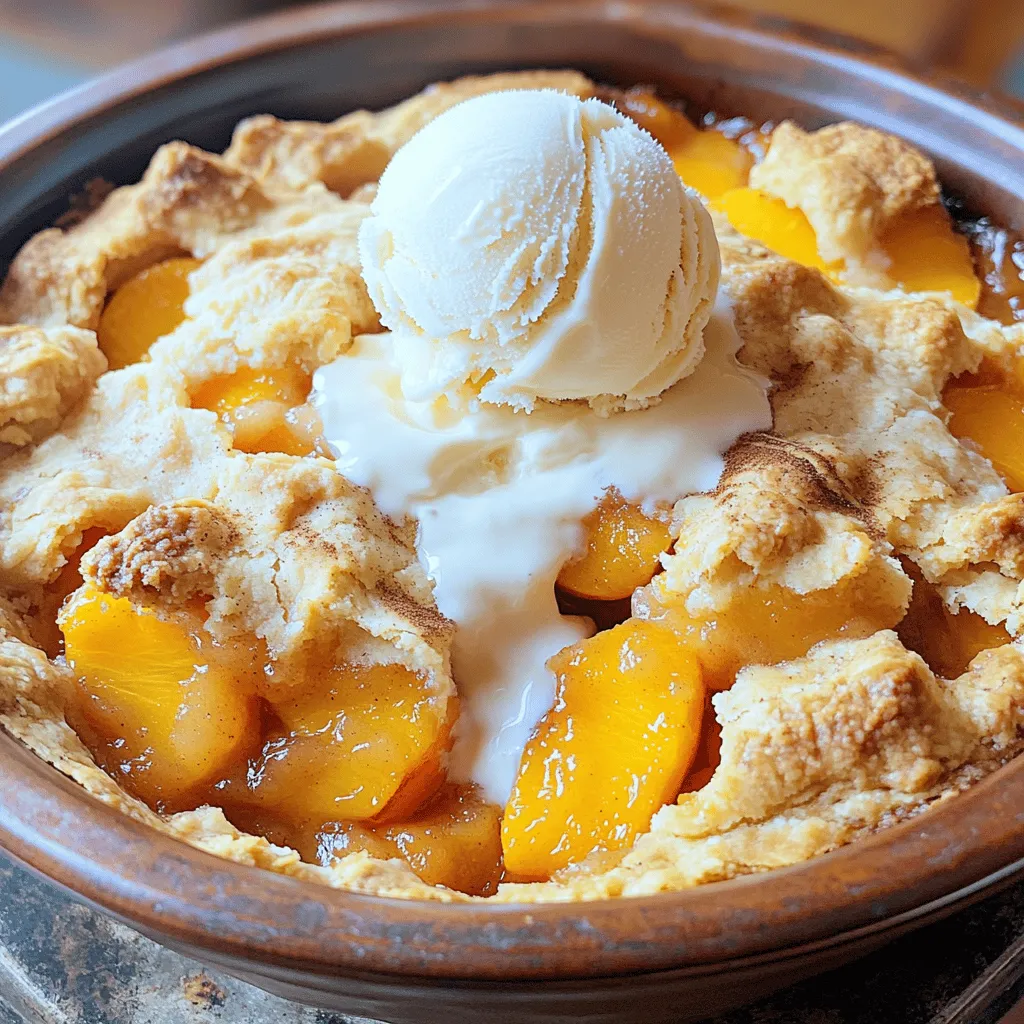
![To make the best Southern peach cobbler in a cast iron skillet, you need fresh and simple ingredients. Here’s what you will need: - 4 ripe peaches, peeled and sliced - 1 cup granulated sugar - 2 teaspoons lemon juice - 1 tablespoon cornstarch - 1 teaspoon vanilla extract - 1 cup all-purpose flour - 1 tablespoon baking powder - 1/2 teaspoon salt - 1/2 cup unsalted butter, melted - 1 cup milk - 1 teaspoon ground cinnamon - 1 teaspoon nutmeg These ingredients come together to create a warm, sweet dessert that is a joy to share. The peaches bring a fresh flavor, while the sugar and spices add warmth. Using a cast iron skillet gives the cobbler a beautiful golden crust. Make sure your peaches are ripe for the best taste. You can find them at local markets or grocery stores. When you slice your peaches, be careful not to bruise them. The lemon juice helps to enhance the peach flavor and keeps them fresh. For the best texture, measure your ingredients carefully. The right balance of flour, baking powder, and milk makes the batter fluffy. The sugar will sweeten the peaches, while the cornstarch helps to thicken the filling. Once you gather these ingredients, you can dive into making this delightful dessert. Check out the [Full Recipe] for step-by-step instructions. Enjoy the process and the wonderful smells in your kitchen! 1. Preheat the oven to 350°F (175°C). This step ensures the cobbler cooks evenly. 2. Marinate peaches. In a bowl, mix sliced peaches with 1/2 cup sugar, lemon juice, cornstarch, and vanilla. Let this sit for about 10 minutes. This brings out the peach flavor. 3. Prepare batter. In another bowl, whisk flour, baking powder, salt, and the remaining 1/2 cup sugar. Add melted butter and milk. Stir until just mixed; a few lumps are okay. 1. Combine ingredients in the skillet. Grease your cast iron skillet with butter. Pour the batter into the skillet evenly. 2. Layer peach mixture. Spoon the marinated peaches on top of the batter. Spread them out well for even cooking. 3. Bake and check for doneness. Place the skillet in the oven. Bake for 30-40 minutes until golden brown. Use a toothpick to check if it comes out clean. 1. Allow to cool. Let the cobbler sit for a few minutes after baking. This helps it set up. 2. Best served warm with ice cream. Scoop some vanilla ice cream on top. Drizzle caramel sauce over it, and add fresh mint leaves for a lovely touch. For the complete recipe, check the [Full Recipe]. Enjoy this delicious treat! To make a great peach cobbler, avoid overmixing the batter. When you mix, stir just until the dry and wet ingredients come together. This keeps the cobbler soft and fluffy. Also, ensure even peach distribution. Spread the marinated peaches evenly over the batter. This will help each bite be just as sweet and juicy as the last. Want to take your cobbler to the next level? Add spices like cinnamon or nutmeg. A dash of vanilla extract can also deepen the flavor. If you feel adventurous, experiment with different fruits. Berries, apples, or even pears can add a new twist. When serving, warm the cobbler and top it with ice cream. The cold ice cream melts into the warm cobbler, creating a great mix. For a pretty touch, garnish with mint leaves. This adds color and a hint of freshness to each serving. For the full recipe, check out the Cozy Southern Peach Cobbler in a Cast Iron Skillet. {{image_2}} You can switch up the peaches for other fruits. Berries like blueberries or blackberries work great. Apples also make a tasty choice. Just remember to adjust the sugar based on the fruit's natural sweetness. Mixing in other seasonal fruits is fun too. Think about pears or cherries for a twist. Each fruit brings a unique taste to the cobbler. If you want to make a healthier cobbler, consider some easy swaps. Replace granulated sugar with honey or maple syrup. You can also use coconut oil instead of butter. For those with gluten issues, almond flour or oat flour works well. These changes keep the flavor rich while making the dessert lighter. Adding extra flavors can take your cobbler to the next level. Try mixing in some chopped nuts like pecans or walnuts for crunch. A bit of chocolate can also be a fun addition. Dark chocolate chips melt into gooey pockets. Don't forget about spices! A touch of cardamom or ginger can add warmth. Experiment with these ideas to find your perfect blend. You can find the full recipe above to create your own Southern Peach Cobbler in a Cast Iron Skillet. To store your peach cobbler in the refrigerator, let it cool first. Then, cover it tightly with plastic wrap or foil. It keeps well for about 3 to 4 days. If you want to freeze it, cut it into pieces. Place the pieces in an airtight container or freezer bag. This way, it lasts for about 2 to 3 months. Just remember to label the bag with the date. When reheating, you can use either a microwave or an oven. The microwave is faster but may make the cobbler soggy. To reheat in the oven, preheat it to 350°F (175°C). Place the cobbler in a baking dish and cover it with foil. Heat for about 15 to 20 minutes. This method keeps the crust crisp and the flavors bright. Your peach cobbler lasts about 3 to 4 days in the fridge. Check for signs of spoilage. If you see mold or it smells off, it’s best to discard it. If you freeze it, check for freezer burn. That can change the taste and texture. Always trust your senses when deciding whether to eat leftovers. Yes, you can use canned peaches for this recipe. However, they differ in texture and flavor. Canned peaches are softer and sweeter. They may also have added syrup, which can make your cobbler too sweet. If you choose canned peaches, drain them well. This will help reduce excess moisture in your cobbler. To slice peaches, first, wash them under cool water. Cut around the pit to slice them easily. Twist the two halves apart to remove the pit. Use a gentle hand to avoid bruising the fruit. This keeps the slices firm and pretty for your cobbler. Yes, you can prep this recipe in advance. Slice the peaches and mix them with sugar and lemon juice. Cover and store them in the fridge for up to 24 hours. You can also prepare the batter ahead. Just keep it in the fridge until you are ready to bake. The cobbler is done when the top is golden brown. You can check it with a toothpick. Insert it into the center of the cobbler. If it comes out clean, it’s ready. You can also look for bubbling around the edges. This means the filling is hot and cooked through. This blog post covered how to make a delicious peach cobbler. You learned about the ingredients and how to prepare them step by step. We shared tips to enhance flavor and presentation, plus ways to use different fruits. You also got storage tips and answers to common questions. Overall, making this cobbler is simple and fun. With these tips, you will impress your family and friends with your baking skills. Enjoy your tasty creation warm, maybe with ice cream!](https://therecipehatch.com/wp-content/uploads/2025/06/aeca81e9-5024-4267-8b79-7b445645089d.webp)