Oven-Roasted Corn on the Cob Savory and Simple Recipe
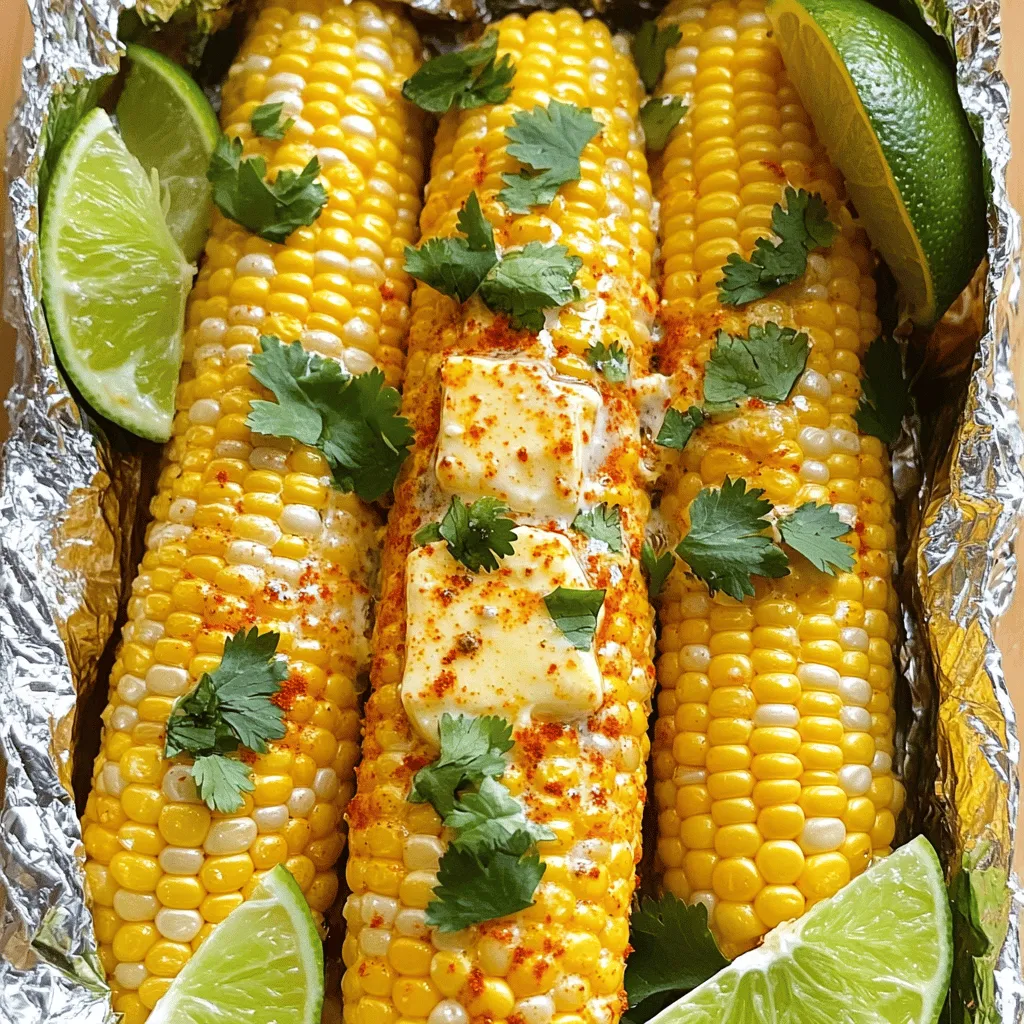
Are you ready to enjoy sweet, juicy corn on the cob without the grill? Oven-roasting corn is a game-changer! With just a few simple steps, you can make this flavorful …
Are you ready to enjoy sweet, juicy corn on the cob without the grill? Oven-roasting corn is a game-changer! With just a few simple steps, you can make this flavorful …

Are you ready to master the art of fried chicken? In my guide, “Easy Fried Chicken: Crispy and Flavorful Delight,” I’ll share simple steps and tips for a mouthwatering meal. …
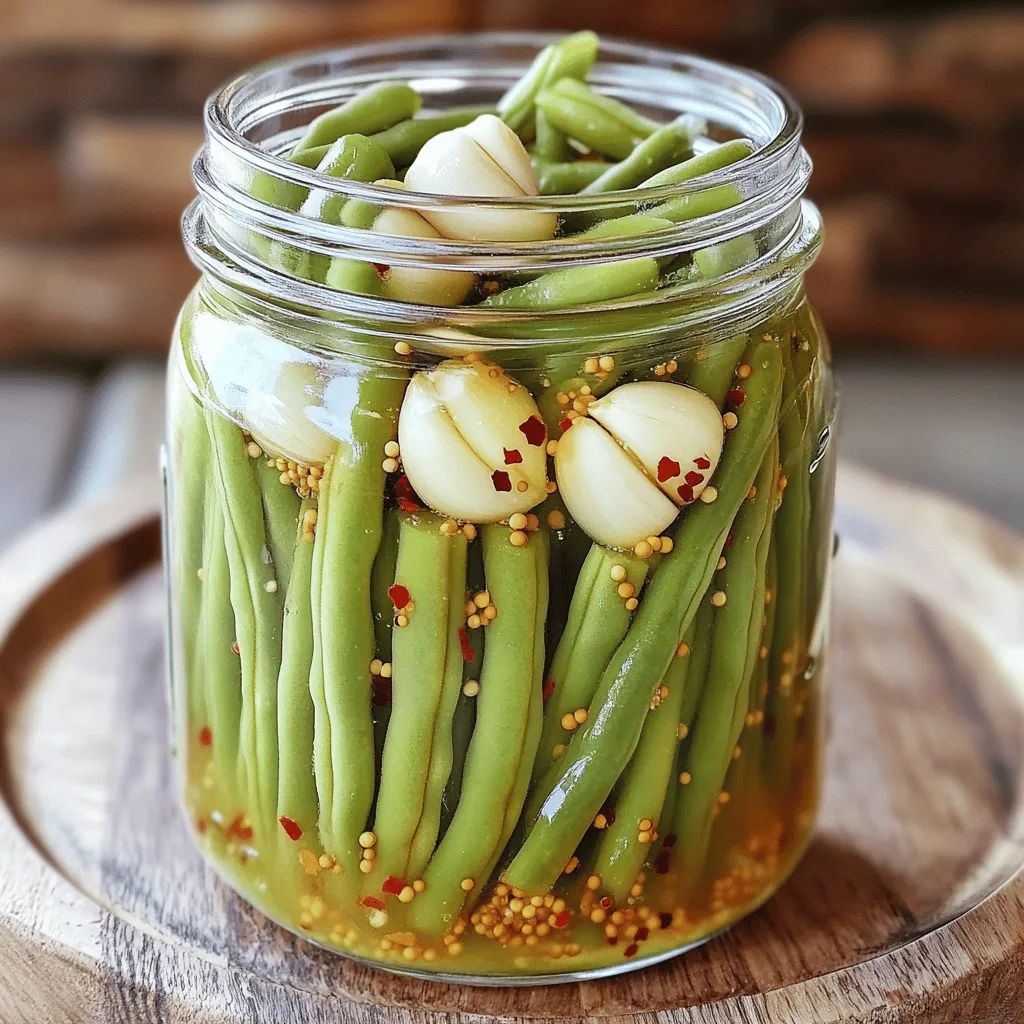
Looking for a quick and tasty way to enjoy green beans? My Quick Pickled Green Beans recipe brings vibrant flavor and crunch to your table in minutes! With just a …

Looking for a delicious and easy breakfast option? Try my flavorful arugula frittata! It’s packed with fresh greens, eggs, and rich feta cheese. This dish combines tasty ingredients to create …

Are you ready to impress your family with a delicious dinner? This Honey Soy Chicken Thighs recipe is both simple and tasty! With just a few ingredients, you can create …
![To create a tasty Paleo Potato Breakfast Frittata, you will need the following simple ingredients: - 4 large eggs - 1 medium sweet potato, grated - 1 small zucchini, grated - 1/2 cup red bell pepper, diced - 1/2 onion, finely chopped - 1 clove garlic, minced - 2 tablespoons olive oil - Salt and pepper to taste - Fresh parsley, chopped (for garnish) These ingredients bring together fresh flavors and a satisfying texture. The sweet potato adds natural sweetness, while the zucchini and bell pepper provide a nice crunch. Eggs serve as the perfect base, binding everything together. I love how easy it is to find these ingredients, and they work well for breakfast, lunch, or dinner. When you prepare this dish, make sure to choose fresh veggies. Freshness enhances the taste and makes your frittata shine. If you want to explore more, check the Full Recipe for detailed instructions on how to bring your frittata to life! - Preheat the oven to 375°F (190°C). - In a large oven-safe skillet, heat 2 tablespoons of olive oil over medium heat. - Add 1/2 onion, finely chopped, and sauté until it is translucent, about 3-4 minutes. - Stir in 1 clove of minced garlic and 1/2 cup of diced red bell pepper. Cook for another 2-3 minutes until the pepper softens. - Now, add 1 medium sweet potato, grated, and 1 small zucchini, grated, to the skillet. - Season with salt and pepper to taste, and cook, stirring for about 5-7 minutes until the veggies are tender. - In a bowl, whisk together 4 large eggs and a pinch of salt and pepper. Pour this egg mixture over the sautéed vegetables in the skillet. - Allow the frittata to cook on the stovetop for about 4 minutes until the edges start to set. - Transfer the skillet to the preheated oven and bake for 15-20 minutes or until the center is set and the frittata is lightly golden on top. - Remove the skillet from the oven and let it cool for a few minutes. Garnish with chopped fresh parsley before serving. For the complete guide, check out the Full Recipe. To avoid a soggy frittata, make sure to cook the veggies well. This helps release moisture before adding the eggs. I usually sauté them until tender and slightly caramelized. This adds flavor and keeps the frittata from getting too wet. For even cooking, use a heavy skillet. I prefer cast iron or stainless steel. These materials hold heat well and cook the frittata evenly. Also, be sure to spread the egg mixture evenly over the veggies. This ensures every bite has a good balance. If you want to mix things up, try different vegetables. Spinach, mushrooms, or broccoli work great in this frittata. They add color and nutrients. You can even switch the sweet potato for regular potatoes if you like. For egg substitutes, use flaxseed meal or chia seeds. Mix one tablespoon of either with three tablespoons of water. Let it sit for a few minutes to thicken. This works well for vegans or those with egg allergies. Don't hesitate to change the seasonings, too. Add herbs like thyme or basil for fresh flavors. You can also spice it up with red pepper flakes or smoked paprika. This adds a nice kick to your dish. For the full recipe, check out the Paleo Potato Breakfast Frittata section. {{image_2}} You can change the frittata to fit your taste. - Protein options: Add bacon or sausage for a heartier meal. Both add great flavor. If you prefer meat, try diced chicken or turkey as well. - Cheese recommendations: If you’re not strict about Paleo, cheese adds creaminess. Feta or goat cheese works well here. Just sprinkle it on top before baking. - Spice levels and flavor enhancements: Want more kick? Add red pepper flakes or jalapeños. Herbs like oregano or thyme can elevate the taste. Pair your frittata with fresh sides. A simple salad brings a nice crunch. You can also serve it with fruits like berries or sliced oranges for a sweet touch. This frittata is perfect for breakfast or brunch. It looks lovely on a table. You can slice it into wedges for easy serving. Make it ahead for busy mornings. Just store it in the fridge. Reheat slices for a quick meal on the go. Try the [Full Recipe] to explore more about this dish! To keep your frittata fresh, use airtight containers. Glass or plastic containers work well. Make sure they seal tightly to keep out air. Store the frittata in the fridge. It stays good for about 3-4 days. You can reheat the frittata in different ways. The oven is a great option. Preheat it to 350°F (175°C). Place the frittata on a baking sheet and heat for about 10-15 minutes. You can also use the microwave. Heat slices for 30-60 seconds until warm. If you want to save some for later, you can freeze the frittata. Cut it into slices and wrap each piece in plastic wrap. Place the wrapped slices in a freezer bag. They stay good for up to 2-3 months. To thaw, place the wrapped slices in the fridge overnight. Then reheat as usual. For the full recipe of the Paleo Potato Breakfast Frittata, check the full recipe section above. - Is the Paleo Potato Breakfast Frittata suitable for meal prep? Yes, this frittata is great for meal prep. You can make it in advance and store it in the fridge. It keeps well for up to four days. Just slice it into portions for easy serving. - Can I make this recipe ahead of time? You can make this frittata ahead of time. Bake it, let it cool, and then store it in an airtight container. Reheat slices in the microwave or oven for a quick breakfast. - What can I use instead of potatoes? If you want a substitute for potatoes, try using cauliflower or butternut squash. Both options add flavor and texture. You can also use other veggies like mushrooms or spinach. - Nutritional benefits of sweet potatoes Sweet potatoes are rich in vitamins A and C. They also provide fiber, which is good for digestion. Their natural sweetness makes them a tasty choice in dishes. - Understanding the Paleo diet principles The Paleo diet focuses on whole foods. It avoids processed items and emphasizes fruits, vegetables, nuts, and lean meats. This diet aims to mimic what early humans ate. - Exploring other egg-based recipes Eggs are versatile and can be used in many dishes. You can try egg muffins, shakshuka, or a classic omelet. Each offers unique flavors and textures. In this post, we covered how to make a delicious Paleo Potato Breakfast Frittata. We started with the ingredients, like eggs, sweet potatoes, and zucchini. Then we walked through each step, from prep to cooking. I provided tips for perfecting your frittata and easy ingredient swaps. You can customize it with add-ins and store leftovers properly. This recipe is great for busy mornings or any meal. Enjoy making your frittata. It's a tasty way to eat healthy!](https://therecipehatch.com/wp-content/uploads/2025/06/06bce33c-fb7d-4d16-a639-fce2408d6339.webp)
Looking for a delicious and healthy breakfast? The Paleo Potato Breakfast Frittata is a perfect choice. Packed with fresh veggies and eggs, this dish satisfies without guilt. It’s easy to …
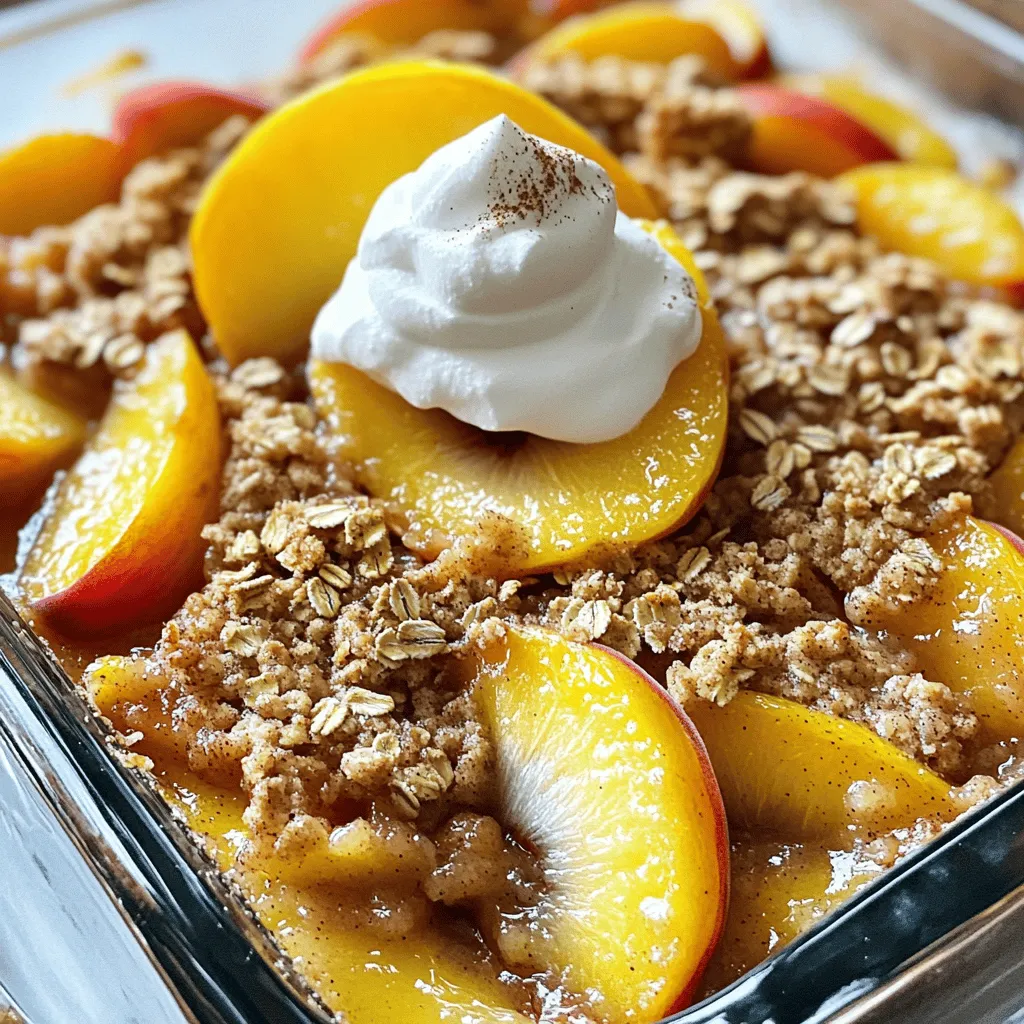
Are you ready for a sweet treat that’s quick and easy to make? In this post, I’ll guide you through creating a Fresh Peach Crisp that’s bursting with flavor. With …
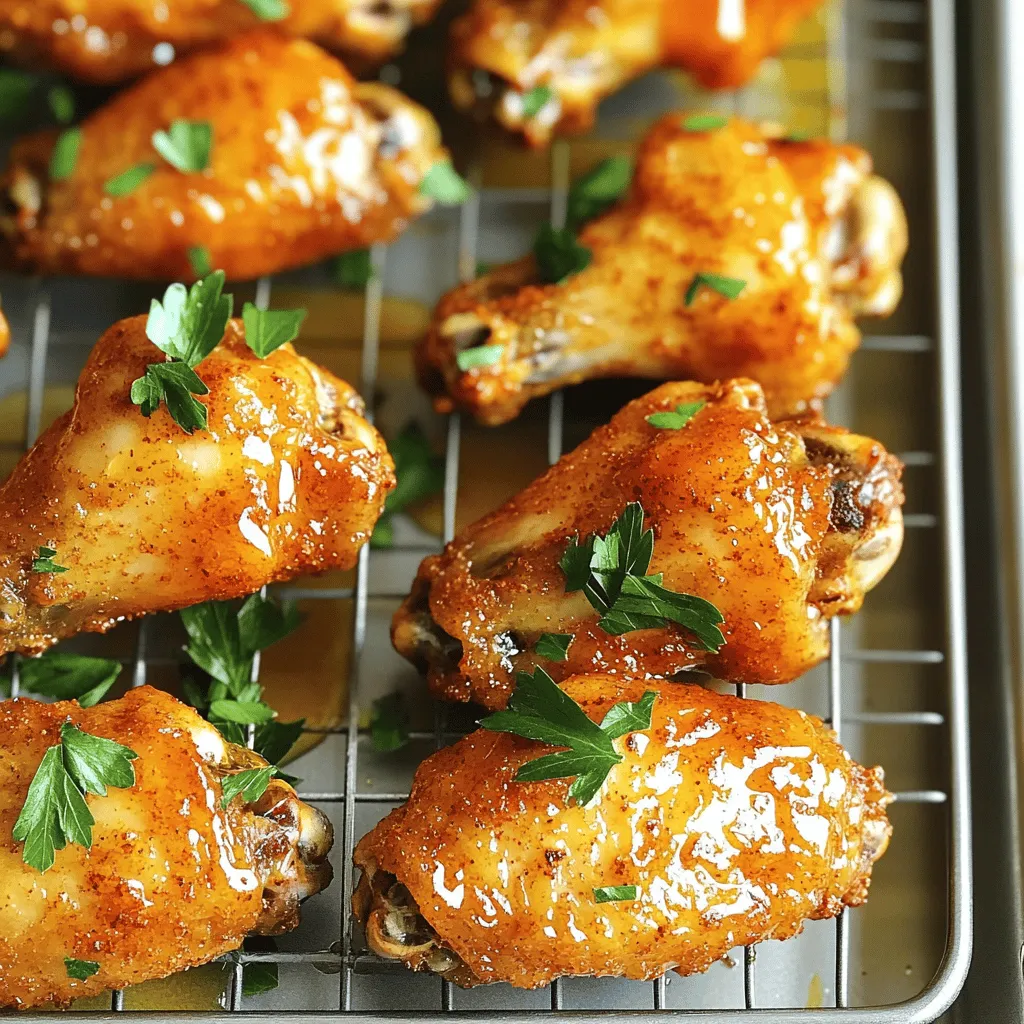
Are you ready to spice up your game day? Dive into the world of Cajun spiced chicken wings, where each bite bursts with flavor and crispiness. I’ll guide you step-by-step …
![- 4 cups fresh peaches, peeled and sliced - 1 cup granulated sugar, divided - 1 tablespoon lemon juice - 1 teaspoon vanilla extract - 1 teaspoon ground cinnamon - 1 ½ cups all-purpose flour - 2 teaspoons baking powder - ½ teaspoon salt - ¾ cup milk - ½ cup unsalted butter, melted - 1 teaspoon almond extract (optional) - Vanilla ice cream, for serving (optional) To make a great peach cobbler, start with fresh peaches. You want them ripe and juicy for the best flavor. Peeling and slicing them makes the cobbler even better. You will also need sugar to sweeten the peaches. The lemon juice adds brightness that really enhances the dish. Vanilla extract and ground cinnamon give warm flavors that blend well with peaches. The flour, baking powder, and salt make up the batter that creates a lovely crust. Milk and melted butter make this batter smooth and rich. If you like, add almond extract for a unique twist. - Other fruit combinations (e.g., berries, apples) - Spices (e.g., nutmeg, allspice) You can play with flavors by adding other fruits like berries or apples. Mixing different fruits can create fun new tastes. Adding spices like nutmeg or allspice can also deepen the flavor. Try these options to make your peach cobbler even more special. For the full recipe, check the section above. 1. Preheat your oven to 350°F (175°C). This helps the cobbler bake evenly. 2. In a large bowl, mix the sliced peaches with ½ cup of sugar, lemon juice, vanilla extract, and cinnamon. Toss the peaches well to coat them. 3. Pour this mixture into a greased 9x13 inch baking dish. Make sure it covers the bottom well. 1. In another bowl, combine the flour, baking powder, salt, and the remaining ½ cup of sugar. Mix these dry ingredients well. 2. Add the milk and melted butter to the dry mix. Stir until just combined. 3. If you want a hint of extra flavor, add almond extract at this stage. 1. Pour the batter over the peach mixture. Do not stir; the batter will float. 2. Bake in the preheated oven for about 45-50 minutes. Watch for the top to turn golden brown. 3. To check if it is done, insert a toothpick. If it comes out clean, it's ready. 4. Once done, remove it from the oven. Let it cool slightly before serving. For the full recipe, check out the details provided earlier. Enjoy your delicious homemade peach cobbler! - Choosing ripe and juicy peaches for maximum flavor. Look for peaches that are soft to the touch and smell fragrant. These will provide the best taste in your cobbler. If you can, use fresh peaches in season, as they shine in this dish. - Alternate baking temperatures for different ovens. Not all ovens work the same. If your cobbler is browning too fast, lower the temperature by 25°F. If it’s not browning enough, raise it by 25°F. Keep an eye on it to get that perfect golden top. - Overmixing the batter. When combining wet and dry ingredients, mix just until combined. If you mix too much, the cobbler can turn out tough instead of soft and fluffy. - Not allowing the cobbler to cool properly before serving. Patience is key! Letting it cool for about 10-15 minutes helps the filling set. This makes serving easier and improves the flavor. For the complete recipe, check [Full Recipe]. {{image_2}} You can easily switch up the fruit in your peach cobbler. Fresh blueberries or cherries make great choices. Just swap the peaches for your favorite fruit. You can also mix fruits for a tropical twist. Try adding mangoes, pineapples, or even strawberries. This adds a fun twist and new flavors to your dish! If you need a gluten-free option, no problem! You can replace regular flour with gluten-free flour. Look for blends that work well in baking. These blends usually mix rice flour, tapioca starch, and potato starch. This will keep your cobbler light and tasty. You can make your peach cobbler healthier too. For a low-sugar option, use sugar substitutes like stevia or monk fruit. They will sweeten your dish without the extra calories. If you want a vegan option, substitute dairy ingredients. Use almond milk instead of regular milk and coconut oil instead of butter. This way, everyone can enjoy this yummy dessert! For the full recipe, check out the Delightful Peach Cobbler section! To keep your peach cobbler fresh, store it in the fridge. Let it cool completely first. Then, cover it tightly with plastic wrap or foil. You can also use an airtight container. This helps to keep it moist and tasty. Leftover cobbler usually lasts about 3 to 4 days in the fridge. If you want to enjoy it later, freezing is a great option. To freeze peach cobbler, first, make sure it’s cool. Cut it into serving pieces. Place the pieces in a single layer on a baking sheet. This prevents them from sticking together. Freeze them for about 1 to 2 hours until firm. After that, transfer the pieces into a freezer-safe bag or container. They will stay good for up to 3 months. When you’re ready to enjoy, take the pieces out of the freezer. Thaw them in the fridge overnight. Reheat them in the oven at 350°F (175°C) for about 15 to 20 minutes. This will make the cobbler warm and delicious again. You can also use the microwave if you’re in a hurry. Just heat in short bursts to avoid hot spots. Enjoy your peach cobbler like it’s fresh from the oven! You can tell your peach cobbler is done by checking the top. It should be golden brown. Insert a toothpick into the batter. If it comes out clean, it is ready. The edges will bubble with the peach mixture, showing it is cooked well. Yes, you can make peach cobbler ahead of time. Prepare it a day before, then cover it tightly. Store it in the fridge. When you are ready to serve, bake it in the oven to warm it up. This adds a fresh touch. Peach cobbler pairs well with many treats. Vanilla ice cream is a classic choice. You could also serve it with whipped cream or custard. For a twist, try it with yogurt or a drizzle of caramel sauce. Yes, you can use canned or frozen peaches. If using canned, drain them well to avoid extra liquid. For frozen peaches, let them thaw and drain some juice. This keeps your cobbler from being soggy. Both options can taste delicious in your cobbler. For the full recipe, you can check the Delightful Peach Cobbler section. This blog post explored how to make a delicious peach cobbler. We covered the key ingredients, like fresh peaches and sugar, and detailed easy step-by-step instructions. I shared helpful tips to avoid common mistakes and offered variations for different diets. Remember, the right peaches make all the difference. Enjoy making this dessert, and don’t forget to store any leftovers properly! It’s perfect warm with ice cream. Now, it’s your turn to try this sweet treat and impress your friends and family. Happy baking!](https://therecipehatch.com/wp-content/uploads/2025/06/2c19cc80-1ad6-42aa-904a-73ba872ea43d.webp)
Are you ready to enjoy a warm slice of homemade peach cobbler? This easy recipe brings together fresh peaches and simple ingredients for a delightful dessert. I’ll share how to …

Are you ready to add crisp, tangy flavor to your meals? Quick pickled vegetables are a fast and fun way to elevate your dishes. In this easy recipe, I’ll guide …