Air Fryer Zucchini Crispy and Flavorful Recipe

Are you ready to elevate your snacking game? My Air Fryer Zucchini Crispy and Flavorful Recipe delivers perfectly crispy fries without the extra oil. With just a few simple ingredients …
Are you ready to elevate your snacking game? My Air Fryer Zucchini Crispy and Flavorful Recipe delivers perfectly crispy fries without the extra oil. With just a few simple ingredients …
![- 3 ripe bananas, mashed - 2 large eggs - 1/4 cup unsweetened almond milk - 1/2 cup peanut butter or almond butter - 1/4 cup honey or maple syrup - 1 teaspoon vanilla extract - 1 cup whole wheat flour - 1/2 cup protein powder (chocolate or vanilla) - 1/2 teaspoon baking soda - 1/2 teaspoon baking powder - 1/4 teaspoon salt - 1/2 cup dark chocolate chips Gather these ingredients before you start. Each one plays a key role in making this bread tasty and high in protein. Ripe bananas give natural sweetness. Eggs help with binding, while almond milk keeps it moist. Peanut butter or almond butter adds richness. Honey or maple syrup sweetens it up. The whole wheat flour gives a nice texture, and the protein powder boosts the protein content. Baking soda and baking powder make it rise. Salt enhances the flavors, and dark chocolate chips add a delightful touch. You can find the Full Recipe [here]. This bread is not just delicious; it's also nutritious. Each serving packs around 10 grams of protein. The caloric breakdown is approximately 200 calories per slice. You will get good amounts of healthy fats from the nut butter. Whole wheat flour adds fiber, making this a wholesome treat. The macronutrient profile keeps you full and satisfied. The balance of carbs, fats, and proteins makes it a great snack or breakfast option. Enjoy knowing you are treating yourself well with this High Protein Chocolate Banana Bread! First, preheat your oven to 350°F (175°C). This step warms the oven for even baking. Next, prepare your loaf pan. You can grease it or line it with parchment paper. This helps the bread come out easily after baking. Now, let’s mix our wet ingredients. In a large bowl, combine: - 3 ripe bananas, mashed - 2 large eggs - 1/4 cup unsweetened almond milk - 1/2 cup peanut butter or almond butter - 1/4 cup honey or maple syrup - 1 teaspoon vanilla extract Whisk these together until you have a smooth mixture. In another bowl, mix your dry ingredients. Combine: - 1 cup whole wheat flour - 1/2 cup protein powder (chocolate or vanilla) - 1/2 teaspoon baking soda - 1/2 teaspoon baking powder - 1/4 teaspoon salt Stir these until they are well mixed. Now it’s time to bring the wet and dry ingredients together. Gradually add the dry mix to the wet mix. Stir gently until just combined. Be careful not to overmix. Overmixing can make your bread tough. Next, let’s add the chocolate chips. Gently fold in: - 1/2 cup dark chocolate chips This way, you spread the chocolate evenly without breaking the batter. Pour the batter into your prepared loaf pan. Smooth the top with a spatula. Now, bake it in your preheated oven for 50-60 minutes. To check if it's done, insert a toothpick into the center. It should come out clean. Once baked, let the bread cool in the pan for about 10 minutes. After that, transfer it to a wire rack to cool completely. This cooling step helps the bread set and makes slicing easier. Enjoy your high protein chocolate banana bread! For the full recipe, refer to the earlier section. To get the best texture, mix your batter gently. Overmixing can make the bread tough. Aim for a smooth mix, then stop. Set your oven to 350°F (175°C). Bake for 50 to 60 minutes. Check with a toothpick; it should come out clean when done. If you want to skip eggs, use flaxseed meal. Mix one tablespoon of flaxseed with three tablespoons of water. Wait a few minutes until it thickens. For sweeteners, maple syrup works great. You can use agave as well. If you need a nut-free option, try sunbutter instead of peanut butter. For a dairy-free twist, almond milk is perfect. To boost protein even more, add chia seeds or hemp seeds. They mix well and add a nice crunch. For extra flavor, try a bit of cinnamon or nutmeg. Vanilla extract adds warmth too. You can even swap in almond extract for a unique taste. {{image_2}} You can make this banana bread even more fun by adding nuts or seeds. Chopped walnuts or pecans give a nice crunch. Sunflower seeds or pumpkin seeds add a unique twist. Try mixing in different fruits too. Fresh blueberries, raspberries, or even diced apples can brighten the flavor. Each choice makes the bread more exciting! If you want a low-carb or keto-friendly version, swap the flour for almond flour or coconut flour. This keeps the bread light and tasty. For a gluten-free option, use gluten-free flour blends. They work well and still taste great. These changes let everyone enjoy this treat. You don’t have to bake just one big loaf. You can make mini loaves or muffins instead! This cuts the bake time down to about 20-25 minutes. Just check with a toothpick to be sure they are done. Adjusting the bake time helps you create the perfect size for any occasion. Enjoy testing out these variations for a new take on a classic! To keep your High Protein Chocolate Banana Bread fresh, store it in an airtight container. You can keep it at room temperature for up to three days. If you want to extend its life, refrigerate it. Make sure to wrap it well to avoid drying out. You can also place parchment paper between slices to help maintain moisture. For longer storage, freeze your banana bread. Slice it into portions before freezing. Wrap each slice tightly in plastic wrap. Then place the wrapped slices in a freezer bag or container. This way, you can grab just what you need later. To thaw, leave it at room temperature for a few hours. If you want it warm, pop it in the toaster or microwave for a few seconds. When stored properly, your banana bread lasts about five days in the fridge. If you freeze it, it can last for up to three months. Watch for signs that it is going bad, like mold or a sour smell. If it feels dry or crumbly, it’s best to toss it. Enjoy your delicious bread while it is fresh! How to make High Protein Chocolate Banana Bread without protein powder? You can skip the protein powder by using more whole wheat flour. Add 1/2 cup more flour. You can also use Greek yogurt or cottage cheese. Both will add protein and moisture. Can I use ripe frozen bananas for the recipe? Yes, you can use ripe frozen bananas. Just thaw them and drain any extra liquid. They work great in this recipe and add natural sweetness. What other ingredients can I add to increase protein content? You can add nuts or seeds to boost protein. Chopped walnuts or chia seeds are great options. You can also use more nut butter. Solutions for dense or dry bread If your bread is dense, try using less flour. Overmixing can also cause density. For dry bread, add a bit more banana or almond milk to the mix. Adjustments for high-altitude baking At high altitudes, reduce sugar by 1 to 2 tablespoons. You may also need to add more liquid. Increase the oven temperature by 15°F to help maintain moisture. Pairing ideas for breakfast or snacks This banana bread pairs well with yogurt or a smoothie. You can also enjoy it with a nice cup of coffee or tea. Creative uses for leftover banana bread Use leftover banana bread in French toast. Slice it and dip in egg mix, then cook in a pan. You can also make banana bread pudding for a fun dessert. In this blog post, we covered how to make High Protein Chocolate Banana Bread. We explored the essential ingredients and provided clear, step-by-step instructions. You learned valuable tips for baking and creative variations to try. Whether you want to boost your protein intake or enjoy a tasty treat, this recipe suits all. Try it out, and enjoy a delicious slice that's both nutritious and satisfying. Keep experimenting with flavors and enhancements to make it your own. Happy baking!](https://therecipehatch.com/wp-content/uploads/2025/07/52872a71-e761-4652-bc94-789778263be4.webp)
Are you ready to indulge in a healthy treat? My High Protein Chocolate Banana Bread is your answer! This easy recipe combines ripe bananas, creamy nut butter, and rich chocolate, …
![Here is what you need for Zucchini Noodles with Tomato and Basil: - 4 medium zucchinis - 2 cups cherry tomatoes, halved - 1 cup fresh basil leaves, roughly chopped - 3 cloves garlic, minced - 2 tablespoons olive oil - 1 teaspoon red pepper flakes (optional) - Salt and pepper to taste - 1/4 cup grated parmesan cheese (optional) Gathering these ingredients is easy. Zucchini is the star. It gives a fresh taste and light texture. Cherry tomatoes add sweetness and color. Fresh basil brings a lovely aroma. Garlic adds depth to the dish. Olive oil helps bring everything together. If you like a bit of heat, add red pepper flakes. Adjust salt and pepper to suit your taste. Lastly, parmesan cheese can be a nice touch for creaminess. You can find the full recipe in the earlier section. Enjoy the process as you prepare this simple, tasty dish! To start, you need to create your noodles. You can use a spiralizer for this task. If you don’t have one, grab a vegetable peeler. Simply peel the zucchini into long strips. After you make your noodles, place them in a colander. Sprinkle a pinch of salt over them and let them sit for 15 minutes. This draws out extra moisture, making them crispier. Next, let’s cook the garlic. Heat olive oil in a large skillet over medium heat. Add minced garlic and red pepper flakes, if you like a bit of spice. Sauté for about one minute. Keep a close eye to avoid burning the garlic. Now, add the halved cherry tomatoes to the skillet. Cook them for 5 to 7 minutes. You want them to soften and burst, releasing their juices. Stir them occasionally to keep them from sticking. Now it's time to bring everything together. Gently fold the zucchini noodles into the skillet with the cooked tomatoes. Cook for an additional 2 to 3 minutes. Be careful not to overcook the noodles; you want them warm but still firm. After that, remove the skillet from the heat. Stir in the fresh basil and season with salt and pepper to taste. If you want, sprinkle on some grated parmesan cheese. This will add a creamy finish to your dish. You can find the complete recipe in the [Full Recipe]. To make great zucchini noodles, you need to avoid sogginess. Here are key tips: - Salt the noodles: After spiralizing, sprinkle salt on the zucchini noodles. Let them sit in a colander for 15 minutes. This draws out excess moisture. - Choose firm zucchinis: Select zucchinis that feel firm and heavy. Avoid soft or wrinkled ones for the best texture. You can brighten the taste of your dish easily. Here’s how: - Add lemon juice: A splash of fresh lemon juice lifts the flavor. It adds brightness that complements the tomatoes. - Explore herbs and spices: Consider using oregano, thyme, or crushed red pepper. These can add depth to your dish. How you serve your zucchini noodles can make a difference. Here are ideas: - Pair with protein: Serve the noodles with grilled chicken or shrimp. This adds a hearty touch. - Think about presentation: Use a large bowl to show off the vibrant colors. Top with extra basil and parmesan for a beautiful finish. For a complete guide on making this dish, refer to the Full Recipe. {{image_2}} You can switch zucchini for other veggies. Try using squash, carrots, or sweet potatoes. These options add unique flavors and colors. Spiralize them just like zucchini for fun shapes. Each veggie brings its own taste and texture. This makes your dish more vibrant and exciting. You can enjoy this dish without cheese or animal products. Just skip the parmesan in the recipe. Use nutritional yeast for a cheesy flavor. It’s vegan and gluten-free. Pair it with a squeeze of lemon for extra zest. This keeps the dish light and fresh while still being tasty. For a heartier meal, add shrimp, chicken, or beans. These proteins boost flavor and nutrition. Cook them in the pan before adding the zucchini noodles. This way, they absorb all the tasty juices. Mix and match to find your favorite combo. You can make this dish your own with these easy add-ins. To keep your zesty zucchini noodles fresh, first refrigerate them. Place leftovers in an airtight container. This keeps moisture in and helps the flavors last. Eat them within three days for the best taste. You can also freeze zucchini noodles. Start by blanching them in boiling water for two minutes. This process helps to preserve the texture. After blanching, drain them and cool them in ice water. Once cooled, pack the noodles in freezer bags. Remember to remove as much air as possible. Frozen zucchini noodles last up to three months. When it's time to reheat, the stovetop method works best. Heat a skillet on medium-low. Add a splash of olive oil to keep the noodles moist. Stir the noodles gently until they warm up. This way, they maintain their texture. If you want to get creative, repurpose your leftovers. Toss the noodles into a salad for a fresh crunch. You can also mix them with eggs for a healthy breakfast scramble. The flavors of the tomato and basil will shine through in new ways. For the full recipe and more ideas, check out the [Full Recipe]. Zucchini noodles last about 3 to 5 days in the fridge. Store them in an airtight container. If you notice extra water, drain it. Yes, you can freeze zucchini noodles. Blanch them for 1 to 2 minutes before freezing. This helps keep their color and texture. Place them in freezer bags, removing as much air as you can. You can use a vegetable peeler. Peel long strips from the zucchini. Keep peeling until you reach the seeds. Another option is a box grater; just grate the zucchini lengthwise. Yes, zucchini noodles are healthier than regular pasta. They have fewer carbs and calories. They also provide more vitamins and fiber. Plus, they can help you feel full with fewer calories. Zucchini noodles are a tasty, healthy choice. You learned how to prepare them and combine fresh flavors. We've covered ways to enhance taste and texture while offering creative serving ideas. Don't forget the variations and easy add-ins for more options. Store your leftovers properly for a fresh taste later. Enjoy your cooking journey with zucchini noodles!](https://therecipehatch.com/wp-content/uploads/2025/07/a5c16e47-fde2-40eb-a01e-4d85d4197c2a.webp)
Are you ready to make a colorful and tasty dish? Zucchini noodles with tomato and basil are easy and fun to prepare! This simple recipe uses fresh ingredients like juicy …

Are you ready to elevate your dinner game? This Savory Garlic Parmesan Chicken is juicy and flavorful, making it a perfect dish for any night of the week. With just …

Looking for a quick side dish that’s tasty and easy to make? Try my flavorful make-ahead zucchini side! This dish is perfect for busy weeknights and adds a healthy touch …
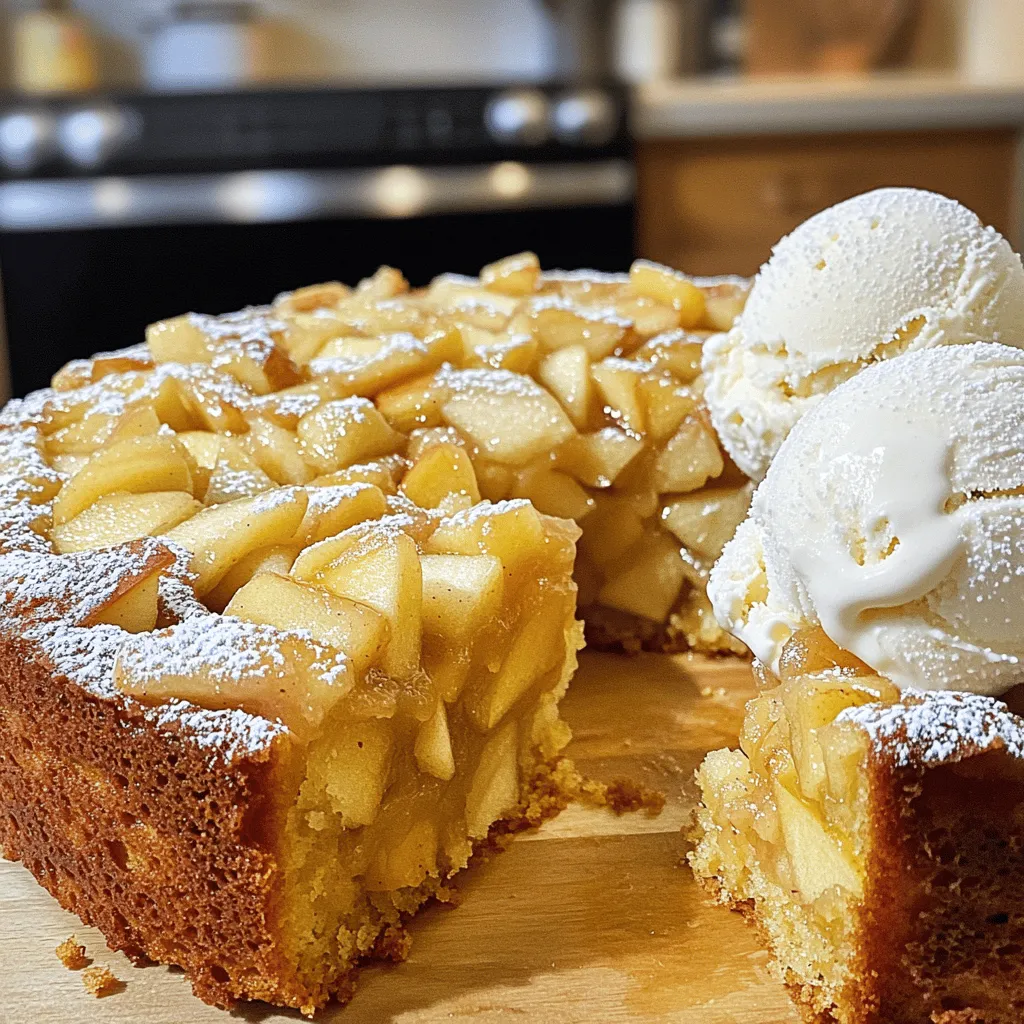
Looking for a quick and easy dessert that bursts with flavor? This 3 Ingredient Apple Cake is your perfect solution! With just three simple items, you can create a delicious …
![Amish Applesauce Cake is simple to make and delicious. Here is what you need: - 2 cups unsweetened applesauce - 1 cup granulated sugar - 1/2 cup brown sugar, packed - 1/2 cup vegetable oil - 2 large eggs - 2 cups all-purpose flour - 1 teaspoon baking soda - 1 teaspoon baking powder - 1 teaspoon ground cinnamon - 1/2 teaspoon ground nutmeg - 1/2 teaspoon salt - 1 teaspoon vanilla extract - 1 cup chopped walnuts (optional) - 1/2 cup raisins (optional) These ingredients blend together to create a moist and flavorful cake. The applesauce gives it a sweet, fruity taste and keeps it soft. The spices like cinnamon and nutmeg add warmth. You can use walnuts and raisins for extra texture and flavor. If you love a richer taste, add these options. The Full Recipe provides exact steps to make this delightful cake. Enjoy baking! - Preheat your oven to 350°F (175°C). - Grease a 9x13-inch baking pan or line it with parchment paper. - In a large bowl, combine the applesauce, granulated sugar, brown sugar, vegetable oil, and eggs. Mix well until smooth. - In a separate bowl, whisk together flour, baking soda, baking powder, cinnamon, nutmeg, and salt. - Gradually add the dry mixture to the wet mixture. Stir gently until just combined. - Be careful not to overmix, as this can make the cake dense. - Fold in the vanilla extract, walnuts, and raisins if you like. Mix until evenly distributed. - Pour the batter into your prepared pan, spreading it evenly with a spatula. - Bake for 30-35 minutes. To check for doneness, insert a toothpick in the center. It should come out clean. - How to avoid a dense cake: To keep your cake light, don't overmix the batter. Mix until just combined. The less you mix, the fluffier your cake will be. Also, make sure your baking powder and baking soda are fresh. Old leavening agents won’t rise the cake well. - Best practices for measuring ingredients: Always use dry measuring cups for flour and sugar. Scoop the flour lightly, then level it off with a straight edge. This way, you avoid packing it down. For liquids, use clear measuring cups with measurement marks. Pour the liquid until it hits the right mark. - Ideal accompaniments for Amish Applesauce Cake: This cake shines on its own but tastes great with a dollop of whipped cream. A scoop of vanilla ice cream pairs well too. For a bit of tang, try serving it with a side of yogurt or cream cheese frosting. - Presentation ideas for serving: Dust the cooled cake with powdered sugar for a clean look. You can also add a sprinkle of cinnamon on top for color. Serve slices on a pretty plate, or place them in cupcake liners for a fun twist. - What to do if it’s too dry or too moist: If your cake turns out dry, it may have baked too long. Next time, check it a few minutes early. If it’s too moist, it might need more flour or less applesauce. Adjust gradually for the next bake. - Tips for adjusting sweetness: To make the cake less sweet, cut down on both sugars. Try using half a cup each of granulated and brown sugar instead of a full cup. For more sweetness, add a bit of honey or maple syrup. Just remember to adjust the liquid ingredients slightly. For the full recipe, check out the detailed instructions above! {{image_2}} You can change the applesauce to add a twist. Try using cinnamon applesauce for a spiced flavor. Or use unsweetened fruit puree like pear or peach. If you need gluten-free options, swap regular flour for almond or coconut flour. For a vegan cake, replace the eggs with flaxseed meal mixed with water. To boost the cake’s taste, add spices like ginger or allspice. Vanilla extract can enhance the flavor, too. You can also add seasonal ingredients like pumpkin puree in fall or fresh berries in summer. These tweaks can make your cake unique and fun. Serve the Amish Applesauce Cake warm with a scoop of vanilla ice cream. You can also drizzle a homemade caramel sauce on top. For a lovely touch, sprinkle powdered sugar for a sweet finish. Enjoying it with whipped cream adds a creamy contrast to the cake's moist texture. For the full recipe, check out [Full Recipe]. To keep your leftover Amish Applesauce Cake fresh, wrap it well in plastic wrap. You can also use an airtight container. This will help it stay moist. The cake lasts about 3 to 4 days at room temperature. Make sure it is stored in a cool, dry place away from direct sunlight. If you want to save your cake for later, freezing is a great option. First, let the cake cool completely. Then, wrap it tightly in plastic wrap and foil. It can stay in the freezer for up to 3 months. When you are ready to eat it, thaw the cake in the fridge overnight. To reheat, place it in a preheated oven at 350°F (175°C) for about 10-15 minutes. This will help bring back its lovely texture. Check your cake for signs of spoilage before eating. If you see mold, it has gone bad. Also, if the cake has a strange smell or tastes off, it’s best to toss it. For proper disposal, seal any spoiled cake in a bag before throwing it away. This keeps your kitchen clean and safe from unwanted pests. Amish Applesauce Cake comes from the Amish community in the United States. It reflects their simple, hearty cooking style. The cake uses applesauce for moisture and flavor. This makes it a great dessert for family meals. The dish is easy to make and uses common pantry items. Yes, you can use homemade applesauce! It adds a fresh taste to the cake. Just make sure your applesauce is unsweetened. This keeps the cake from being too sweet. Also, blend the applesauce until smooth for best results. If you make smaller portions, reduce the cooking time. Check the cake at 20 minutes. Use a toothpick to see if it comes out clean. Smaller pans may bake faster, so keep an eye on it. Yes, you can make Amish Applesauce Cake ahead of time. The flavors deepen as it sits. After it cools, wrap the cake well. Store it at room temperature for up to three days. You can also freeze it for longer storage. Just thaw it overnight in the fridge before serving. You can swap out a few ingredients easily. Use brown sugar instead of granulated sugar for a richer taste. If you need a nut-free cake, skip the walnuts. Applesauce can also replace oil for a lower fat option. For a gluten-free cake, choose a gluten-free flour blend. Each change will give you a new twist! For the complete recipe, check out the [Full Recipe]. This Amish Applesauce Cake is a joy to make and share. You need just 20 minutes to prep. The total time, including baking, is about one hour. This cake serves 12 slices, making it perfect for gatherings or family dinners. The beauty of this cake lies in its simplicity. The key ingredient is unsweetened applesauce. It gives the cake a great texture and natural sweetness. Unlike other cakes, you won’t need a lot of sugar. The blend of brown and granulated sugar makes it rich and flavorful. This cake uses basic cooking techniques. You mix wet and dry ingredients separately. This method helps keep the cake light and fluffy. It also has warm spices like cinnamon and nutmeg, which add depth to the flavor. What sets this Amish Applesauce Cake apart is its moistness. The applesauce keeps it tender, even days after baking. For an extra crunch, I love adding walnuts. You can also throw in raisins for a sweet surprise. Try serving it warm or at room temperature. A dusting of powdered sugar or whipped cream makes it even better. Enjoy this delightful recipe and share it with loved ones! In this blog post, I shared a simple recipe for Amish Applesauce Cake. You learned about the key ingredients, how to prepare them, and the steps to bake this cake perfectly. I also provided tips to avoid common issues and creative serving ideas. Remember, the joy of baking is experimenting. Feel free to try variations, like different types of applesauce or spices. This cake will delight your taste buds and warm your home. Happy baking!](https://therecipehatch.com/wp-content/uploads/2025/07/04818ac0-1a01-4420-9f91-108bcb252bd5.webp)
If you’re craving a sweet treat that’s both easy and delicious, then this Amish Applesauce Cake is just what you need. Packed with wholesome flavors and simple ingredients, this cake …

Get ready to delight your taste buds with my simple and tasty Herb and Cheddar Squash Bread recipe! Packed with the warm flavors of butternut squash, fresh herbs, and sharp …

Looking for a tasty snack that’s quick and easy? Air fryer zucchini fries are your answer! Crispy on the outside and soft inside, they’re the perfect guilt-free treat. With just …

Are you ready to spice up your dinner routine? Baked Garlic Lemon Pepper Chicken is a delicious, easy dish that’s bursting with flavor. You only need a few simple ingredients, …