Skip to content
The Recipe Hatch
  • Home
  • Appetizers
  • Desserts
  • Salads
  • Breakfast
  • Dinner
  • Privacy Policy
  • Contact
  • About

Chef Owen

Pumpkin Zucchini Bread Fresh and Flavorful Delight

July 5, 2025 by Chef Owen
To make a great pumpkin zucchini bread, gather these key items: - 1 cup shredded zucchini (about 1 medium zucchini) - 1 cup canned pumpkin puree - 1/2 cup vegetable oil - 1/2 cup brown sugar - 1/2 cup granulated sugar - 2 large eggs - 1 teaspoon vanilla extract - 1 1/2 cups all-purpose flour - 1 teaspoon baking soda - 1/2 teaspoon baking powder - 1 teaspoon ground cinnamon - 1/2 teaspoon ground nutmeg - 1/4 teaspoon ground ginger - 1/2 teaspoon salt These ingredients work together to create a moist, flavorful bread that you’ll love. For extra flavor and texture, consider adding these optional ingredients: - 1/2 cup chopped walnuts or pecans - 1/4 cup mini chocolate chips These add-ins can make your bread even more delightful and special. You can mix and match based on your taste. Measuring your ingredients correctly is vital. Here are some tips: - Use dry measuring cups for flour and sugar. - Pack the brown sugar firmly into the cup. - Grate the zucchini finely for even mixing. Accurate measuring ensures your pumpkin zucchini bread turns out perfect every time. Follow these tips for the best results. For the complete recipe, check the Full Recipe above. Start by gathering your ingredients. You need: - 1 cup shredded zucchini (about 1 medium zucchini) - 1 cup canned pumpkin puree - 1/2 cup vegetable oil - 1/2 cup brown sugar - 1/2 cup granulated sugar - 2 large eggs - 1 teaspoon vanilla extract - 1 1/2 cups all-purpose flour - 1 teaspoon baking soda - 1/2 teaspoon baking powder - 1 teaspoon ground cinnamon - 1/2 teaspoon ground nutmeg - 1/4 teaspoon ground ginger - 1/2 teaspoon salt - 1/2 cup chopped walnuts or pecans (optional) - 1/4 cup mini chocolate chips (optional) Preheat your oven to 350°F (175°C). Grease a 9x5-inch loaf pan or use parchment paper for easy removal. In a large bowl, whisk the shredded zucchini, pumpkin puree, oil, brown sugar, granulated sugar, eggs, and vanilla until mixed well. In another bowl, sift together the flour, baking soda, baking powder, and spices. Slowly add the dry mix to the wet mix. Stir gently until combined. If you want, fold in nuts or chocolate chips for extra flavor. Pour the batter into your loaf pan. Spread it evenly with a spatula. Place the pan in the oven and bake for 55-65 minutes. Check doneness by inserting a toothpick into the center. It should come out clean. If it’s not done, give it a few more minutes. When your bread is done, take it out of the oven. Let it cool in the pan for about 10 minutes. After that, transfer the bread to a wire rack. This lets it cool completely. If you slice it too soon, it might fall apart. Once cool, enjoy your tasty Pumpkin Zucchini Bread! For the full recipe, you can refer back to the ingredients section. To keep your pumpkin zucchini bread moist, use fresh zucchini. Shred it right before mixing. The moisture from the zucchini helps the bread stay soft. Also, do not overmix the batter. Mixing too much can make the bread dry. Use a toothpick to check for doneness. If it comes out clean, your bread is ready. One common mistake is using too much flour. Always spoon flour into your measuring cup. Then level it off with a knife. If you pack the flour, your bread can become dense. Another mistake is not letting the bread cool properly. Cooling helps the flavors develop. Do not rush this step, as it can lead to a gummy texture. Use a sturdy mixing bowl for combining ingredients. A whisk is great for mixing wet ingredients. For dry ingredients, a sifter will help avoid lumps. A loaf pan lined with parchment paper helps with easy removal. Also, have a reliable toothpick on hand for testing doneness. These tools make the process smoother and more enjoyable. For the full recipe, refer to the section above. {{image_2}} You can make this pumpkin zucchini bread lighter. Use applesauce instead of oil. This swap cuts fat but keeps moisture. You can also use whole wheat flour. It adds fiber and nutrition. If you want less sugar, try using maple syrup or honey. Just remember to adjust the liquid in your recipe. Want to spice things up? Add a pinch of ground cloves or allspice. These add warmth and depth to the bread. You can also mix in dried fruits like cranberries or raisins. They bring a nice chewiness and sweetness. For a chocolate twist, use dark chocolate chips instead of mini ones. This adds richness without being too sweet. Make this bread festive for the holidays! Add chopped fresh cranberries for a tart flavor. You can also use pumpkin pie spice instead of individual spices. This gives a bold pumpkin flavor. Try adding orange zest for a bright, citrus twist. It pairs well with both pumpkin and zucchini. Each of these twists lets you enjoy a new take on the classic recipe. For the full recipe, check out the details above. To keep your pumpkin zucchini bread fresh, store it in an airtight container. This helps it stay moist and flavorful. You can also wrap the bread in plastic wrap. Place it in a cool, dry spot like your kitchen counter. If you want to keep it for a longer time, the fridge is a good choice. Just remember to let it cool completely before wrapping. If you want to save some for later, freezing is a great option. Slice the bread first for easy thawing. Wrap each slice in plastic wrap, then place them in a freezer bag. Be sure to label the bag with the date. This way, you will know how long it has been in the freezer. Pumpkin zucchini bread can last up to three months in the freezer. To enjoy your frozen slices, simply take out what you need. Thaw the bread in the fridge overnight for best results. If you're in a hurry, you can use the microwave. Heat a slice for 15 to 20 seconds. For a crispier texture, pop it in a toaster oven until warm. This will bring back its fresh-baked taste. Yes, you can use fresh zucchini. Just make sure to shred it finely. The moisture from fresh zucchini helps keep the bread moist. If you use larger pieces, the bread may not bake evenly. Pumpkin zucchini bread lasts about 3 to 5 days at room temperature. Keep it in an airtight container. If you want it to last longer, refrigerate it for up to a week. For even longer storage, freeze it. Yes, you can substitute other flours. Whole wheat flour gives a nutty flavor. Almond flour makes it gluten-free. If you use a different flour, adjust the liquid. Some flours absorb more moisture than all-purpose flour. Serve pumpkin zucchini bread warm for the best taste. A pat of butter adds a rich flavor. You can also spread cream cheese on top. For a festive touch, sprinkle cinnamon on it. Enjoy it as a snack or breakfast treat. For the full recipe, refer to Pumpkin Zucchini Delight Bread. To wrap up, we explored the key ingredients and step-by-step instructions for pumpkin zucchini bread. I shared tips on moisture, common mistakes, and tools to enhance your baking. We also discussed fun variations and best practices for storage. With these insights, you can confidently bake delicious pumpkin zucchini bread. Enjoy experimenting with flavors and impressing friends and family with your creations. Happy baking!

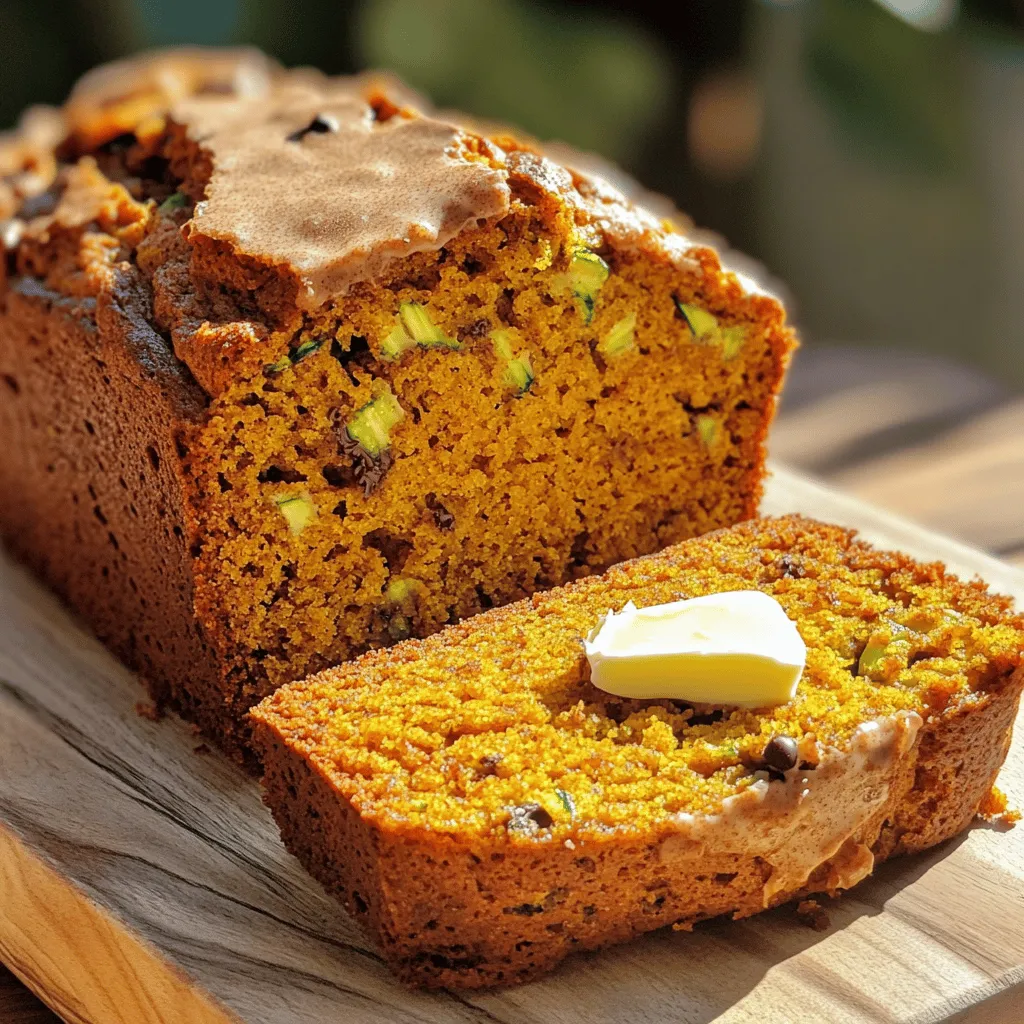
Are you ready to try a fall favorite that’s both healthy and yummy? This Pumpkin Zucchini Bread is a fresh and flavorful delight you won’t want to miss. I’ll guide …

Read more

Categories Desserts

Zucchini Cake with Cream Cheese Frosting Delight

July 5, 2025 by Chef Owen
- 2 cups grated zucchini - 1 cup granulated sugar - 1 cup brown sugar - 1 cup vegetable oil - 4 large eggs - 2 teaspoons vanilla extract - 2 cups all-purpose flour - 1 teaspoon baking powder - 1 teaspoon baking soda - 1 teaspoon cinnamon - 1/2 teaspoon nutmeg - 1/4 teaspoon salt - 8 ounces cream cheese - 1/2 cup unsalted butter - 4 cups powdered sugar - 2 tablespoons milk - 1 teaspoon vanilla extract Gathering the right ingredients is key to a tasty zucchini cake. I love using fresh zucchini because it adds moisture without overpowering the cake. The sugars create a nice sweetness, while the vegetable oil keeps it soft. Four eggs help to bind everything together, giving the cake structure. When it comes to dry ingredients, make sure you use all-purpose flour for the best results. Baking powder and baking soda help the cake rise. Cinnamon and nutmeg add warmth and spice. A touch of salt balances the sweetness perfectly. For the cream cheese frosting, choose full-fat cream cheese for the best flavor and texture. The butter adds richness. Powdered sugar gives a smooth finish, while milk and vanilla extract bring it all together. You can find the full recipe at the end of this article. Happy baking! - Preheat the oven to 350°F (175°C). - Prepare the zucchini by grating and removing excess moisture. Grating zucchini is easy. Use a box grater or a food processor. Once you grate it, place the zucchini in a clean towel. Twist the towel and squeeze out the extra water. This step helps keep your cake from being too wet. - Combine wet ingredients: sugars, oil, eggs, and vanilla extract. - Mix dry ingredients: whisk flour, baking powder, baking soda, cinnamon, nutmeg, and salt. In a large bowl, mix granulated sugar, brown sugar, and vegetable oil. Add the eggs, one at a time, and whisk in the vanilla. In another bowl, whisk the dry ingredients. This includes flour, baking powder, baking soda, cinnamon, nutmeg, and salt. Make sure you mix these well so the flavors blend. - Combine wet and dry ingredients gently. - Divide batter into prepared cake pans and bake for 25-30 minutes. Gently fold the dry ingredients into the wet mixture. Be careful not to over-mix. Finally, fold in the grated zucchini. Divide the batter evenly into two greased cake pans. Bake them in the oven for about 25 to 30 minutes. Check for doneness using a toothpick. It should come out clean from the center. - Beat cream cheese and butter until smooth. - Gradually add powdered sugar, milk, and vanilla extract to make fluffy frosting. For the frosting, beat the softened cream cheese and butter together in a bowl. Mix until it is smooth. Gradually add the powdered sugar, mixing well after each addition. Then stir in the milk and vanilla extract to make it light and fluffy. Once your cake cools completely, you can frost it with this creamy delight. For the full recipe, check the details above. Enjoy your baking! To get the best texture in your cake, you must prepare the zucchini well. Start by grating two medium zucchinis. Then, place the grated zucchini on a clean kitchen towel. Twist the towel to squeeze out excess moisture. Aim to remove as much water as you can. This step is key. If your zucchini is too wet, the cake can turn out soggy. Trust me, nobody wants that! Using room temperature ingredients is crucial for a great cake. When your eggs and oil are at room temperature, they mix better. This helps create a light, fluffy batter. If you forget, place eggs in warm water for a few minutes. You can also take your oil out early. This simple step can make a big difference in your final cake. For the perfect cream cheese frosting, you want a smooth and fluffy texture. Start with softened cream cheese and butter. Beat them together until creamy. Gradually add powdered sugar, mixing well. If the frosting is too thick, add a little milk. This will help achieve a spreadable consistency. You want it to taste rich but not too sweet. Adjust the vanilla extract to enhance the flavor. Follow these steps for a frosting that everyone will love! {{image_2}} You can switch up the frosting to change the cake's flavor. Try using whipped cream for a light touch. It adds a fluffy texture and fresh taste. If you love chocolate, use chocolate frosting instead. This gives a rich, sweet bite that pairs well with zucchini. Both options can create a fun twist on the classic recipe. Want to make your zucchini cake more special? Adding nuts can bring a nice crunch. Walnuts or pecans work great here. You can also mix in chocolate chips for a sweet surprise. Dried fruit like raisins or cranberries can add a chewy texture. These add-ins not only boost flavor but also make each bite unique. Is gluten a concern for you? No problem! You can make a gluten-free zucchini cake. Use almond flour or a gluten-free flour blend instead of all-purpose flour. This keeps the cake moist and delicious. Just remember to check the baking soda and powder for gluten-free labels. You can enjoy this delightful cake without worry! For the full recipe, check out the details above. To keep your leftover zucchini cake fresh, wrap it in plastic wrap. You can also place it in an airtight container. Store it in the fridge for up to five days. If you want to enjoy it later, freezing is a great option. For freezing, slice the zucchini cake first. Wrap each slice in plastic wrap. Then, place the wrapped slices in a freezer bag. This way, you can grab one whenever you want! You can freeze the cream cheese frosting separately, too. Just store it in an airtight container. It lasts up to three months in the freezer. To gently reheat the cake, set your oven to 350°F (175°C). Place the cake on a baking sheet. Cover it with foil to keep it moist. Heat for about 10-15 minutes. Check often so it doesn’t dry out. Enjoy your cake warm, and it will taste fresh again! Yes, you can use frozen zucchini. Just make sure to thaw it first. After thawing, squeeze out any excess liquid using a clean towel. This step is crucial. Too much moisture will make your cake soggy. Once you have squeezed out the water, you can use the zucchini just like fresh. The zucchini cake will stay fresh in the fridge for about five days. Keep it in an airtight container to help retain moisture. If you have frosting on it, the cake may last a bit longer. The cream cheese frosting helps to keep it moist and tasty. Yes, you can make this cake dairy-free. Use dairy-free cream cheese and a dairy-free butter substitute for the frosting. You can also use almond milk or oat milk instead of regular milk. This way, you can enjoy the cake without the dairy. You can serve zucchini cake with a scoop of vanilla ice cream or fresh whipped cream. A side of berries adds a nice touch too. You might also pair it with a cup of coffee or tea for a warm and cozy dessert experience. For an added twist, try drizzling chocolate sauce on top. This will create a delightful contrast with the cream cheese frosting. For the full recipe, check the section above. This zesty zucchini cake combines moistness with cream cheese frosting. You will love its unique flavors! Here is how to make it: Ingredients: - 2 cups grated zucchini (about 2 medium zucchinis) - 1 cup granulated sugar - 1 cup brown sugar, packed - 1 cup vegetable oil - 4 large eggs - 2 teaspoons vanilla extract - 2 cups all-purpose flour - 1 teaspoon baking powder - 1 teaspoon baking soda - 1 teaspoon cinnamon - 1/2 teaspoon nutmeg - 1/4 teaspoon salt For the Cream Cheese Frosting: - 8 ounces cream cheese, softened - 1/2 cup unsalted butter, softened - 4 cups powdered sugar - 2 tablespoons milk - 1 teaspoon vanilla extract Instructions: 1. Preheat your oven to 350°F (175°C). Grease and flour two 9-inch round cake pans. 2. Grate the zucchini. Squeeze out moisture with a clean towel and set aside. 3. In a bowl, mix granulated sugar, brown sugar, and vegetable oil. Add eggs, one by one. Stir in vanilla extract. 4. In another bowl, whisk together flour, baking powder, baking soda, cinnamon, nutmeg, and salt. 5. Gradually add dry ingredients to wet ingredients. Stir gently. Fold in the grated zucchini. 6. Divide batter between cake pans. Bake for 25-30 minutes. Check with a toothpick. 7. Let cakes cool in pans for 10 minutes. Move to wire racks to cool completely. 8. For frosting, beat cream cheese and butter until smooth. Gradually add powdered sugar. Mix in milk and vanilla extract until fluffy. 9. Frost cooled cakes. Place one layer on a plate, spread frosting, and add the second layer. Use remaining frosting to cover. 10. Garnish with cinnamon or lemon zest for flair. Enjoy your delightful zesty zucchini cake! This recipe provides a clear guide for creating a delicious treat. Enjoy cooking! This blog post outlines a delicious zucchini cake recipe. It covers key ingredients, step-by-step instructions, and tasty variations. You learned how to prepare zucchini, mix ingredients, and create the perfect cream cheese frosting. Remember, adding nuts or using different frostings can enhance flavors. Proper storage helps keep your cake fresh for longer. Try this recipe, enjoy the rich taste, and share it with friends. Baking is fun, and this cake will impress everyone. Enjoy your time in the kitchen and happy baking!

Imagine biting into a moist, flavorful slice of zucchini cake topped with creamy frosting. This treat is perfect for family gatherings or a simple dessert at home. Packed with fresh …

Read more

Categories Desserts

Easy Chicken Breast with Zucchini Healthy Dinner Option

July 5, 2025 by Chef Owen
- Chicken and Zucchini Essentials - 2 boneless, skinless chicken breasts - 2 medium zucchinis, sliced into half-moons - Seasonings and Marinade Components - 2 tablespoons olive oil - 1 lemon (zest and juice) - 3 cloves garlic, minced - 1 teaspoon dried oregano - 1 teaspoon paprika - Salt and pepper to taste - Garnishing Ingredients - Fresh parsley, chopped (for garnish) This dish uses simple, fresh ingredients. The chicken and zucchini create a delightful combo. Zucchini adds a light crunch, while chicken brings protein. The marinade gives flavor and moisture. With just a few seasonings, you enhance the dish without fuss. To make it even better, fresh parsley adds a bright touch. This recipe is easy to follow. You can find the full recipe above for step-by-step guidance. Enjoy cooking your healthy dinner! Marinating Chicken Breasts First, gather your chicken breasts. In a small bowl, mix olive oil, lemon zest, lemon juice, minced garlic, dried oregano, paprika, salt, and pepper. This marinade is key. Place the chicken in a baking dish and pour half of the marinade over it. Make sure the chicken is well coated. Let the chicken marinate for at least 15 minutes. This step adds great flavor. Creating the Zucchini Preparation While the chicken marinates, prepare the zucchini. Slice the zucchinis into half-moons. In a separate bowl, toss the zucchini with the remaining marinade. Ensure each piece is coated. This adds a lovely taste and makes the dish colorful. Baking Instructions Preheat your oven to 400°F (200°C). After marinating, arrange the zucchini slices around the chicken in the same baking dish. This helps the flavors mix while cooking. Timing for Perfectly Cooked Chicken Bake the chicken and zucchini in the oven for 20 to 25 minutes. Check the chicken's internal temperature. It should reach 165°F (74°C). This ensures it is safe to eat and juicy. Plating the Dish Once cooked, remove the dish from the oven and let it rest for a few minutes. This helps keep the chicken moist. Serve the chicken alongside the zucchini. Garnish with fresh parsley for a pop of color. Best Accompaniments This dish pairs well with rice, quinoa, or a simple salad. These sides add a nice balance to your meal. For more details, check the Full Recipe. Ensuring Juicy Chicken To keep your chicken juicy, always marinate it. Use my marinade from the Full Recipe. It has lemon juice, olive oil, and spices. These flavors soak into the meat, making it tasty. Let it sit for at least 15 minutes. For best results, marinate for a few hours. Flavor Enhancements with Spices Spices can change your dish. I use dried oregano and paprika. They add depth to flavor. You can also try garlic powder or cayenne for heat. Experiment with spices you like. Don’t be shy to mix and match. Overcooking Chicken Overcooking chicken makes it dry. Always check the internal temperature. It should be 165°F (74°C). Use a meat thermometer for accuracy. If you don’t have one, cut the chicken open. The juices should run clear, not pink. Inadequate Marinating Time Don’t rush the marinating process. Fifteen minutes is the minimum. If you can, let it marinate longer. The chicken will absorb more flavors. This makes every bite delicious. Always plan ahead for the best taste. {{image_2}} Alternative Vegetables to Use If you want to mix things up, try other veggies. Bell peppers add sweetness. Broccoli brings a nice crunch. Asparagus gives a fresh taste. You can also use yellow squash for a colorful plate. Feel free to get creative! Different Marinade Ideas You can change the flavor with different marinades. Try a balsamic glaze for a sweet tang. A soy sauce mix gives an Asian twist. For a spicy kick, add chili flakes to the lemon marinade. Each choice changes the whole dish. How to Spice it Up Want a bit of heat? Add cayenne pepper or red pepper flakes. For a smoky flavor, use smoked paprika instead of regular. You can also try adding fresh herbs like basil or cilantro for a fresh taste. Serving Styles (Grilled, Skillet, etc.) You don’t have to bake this dish. Grill the chicken for that charred flavor. A skillet gives a nice sear and cooks faster. Each method adds a different texture, so pick your favorite! Check out the Full Recipe for more details. To keep your Easy Chicken Breast with Zucchini fresh, store leftovers correctly. Place the chicken and zucchini in an airtight container. This helps lock in moisture and flavor. If you don't have an airtight container, use plastic wrap or aluminum foil to cover the dish well. The shelf life of this dish is about 3 to 4 days in the fridge. After that, the chicken may dry out or lose its taste. Always check for any signs of spoilage before you eat. If it smells off or looks strange, it’s best to toss it. When reheating your leftovers, the best methods are the oven or the stovetop. Both options keep the chicken juicy and the zucchini tender. If you use the oven, set it to 350°F (175°C) and heat for about 15 minutes. Cover it with foil to keep it moist. For stovetop reheating, place the chicken and zucchini in a skillet over medium heat. Add a splash of water or chicken broth. This adds moisture and helps maintain flavor. Stir occasionally to ensure even heating. Enjoy your meal just as you made it with the Full Recipe! What Can I Serve with Easy Chicken Breast with Zucchini? You can serve this dish with many sides. Some great options are: - Quinoa or rice for a filling base. - A fresh salad for a crisp bite. - Roasted potatoes for added texture. These sides work well with the flavors in the chicken and zucchini. They create a balanced meal that is healthy and satisfying. Can I Use Frozen Chicken Breasts? Yes, you can use frozen chicken breasts. Just remember to thaw them before cooking. It’s best to thaw in the fridge overnight. This helps keep the meat juicy. If you need to cook it straight from frozen, you may need to increase the baking time. Always check that the chicken reaches 165°F (74°C) inside. How Long Should I Bake Chicken Breasts? Bake chicken breasts for 20-25 minutes at 400°F (200°C). This time is great for keeping the chicken juicy. Always check the internal temperature to ensure it’s safe to eat. What Are the Best Sides to Pair with Zucchini? Zucchini pairs well with many sides. Here are a few to try: - Couscous for a light and fluffy option. - Steamed green beans for crunch. - Garlic bread for a tasty treat. These options enhance the meal and add more flavor to your plate. For the full recipe, check out the Zesty Lemon Herb Chicken with Zucchini. You now know how to make a tasty chicken dish with zucchini. We covered ingredients, cooking steps, and clever tips. Avoid overcooking and always marinate for the best flavor. Feel free to try variations or swap ingredients based on what you have. Proper storage keeps leftovers fresh. Remember, simple adjustments can change the whole meal. Enjoy your cooking journey and impress your friends and family with this easy recipe!

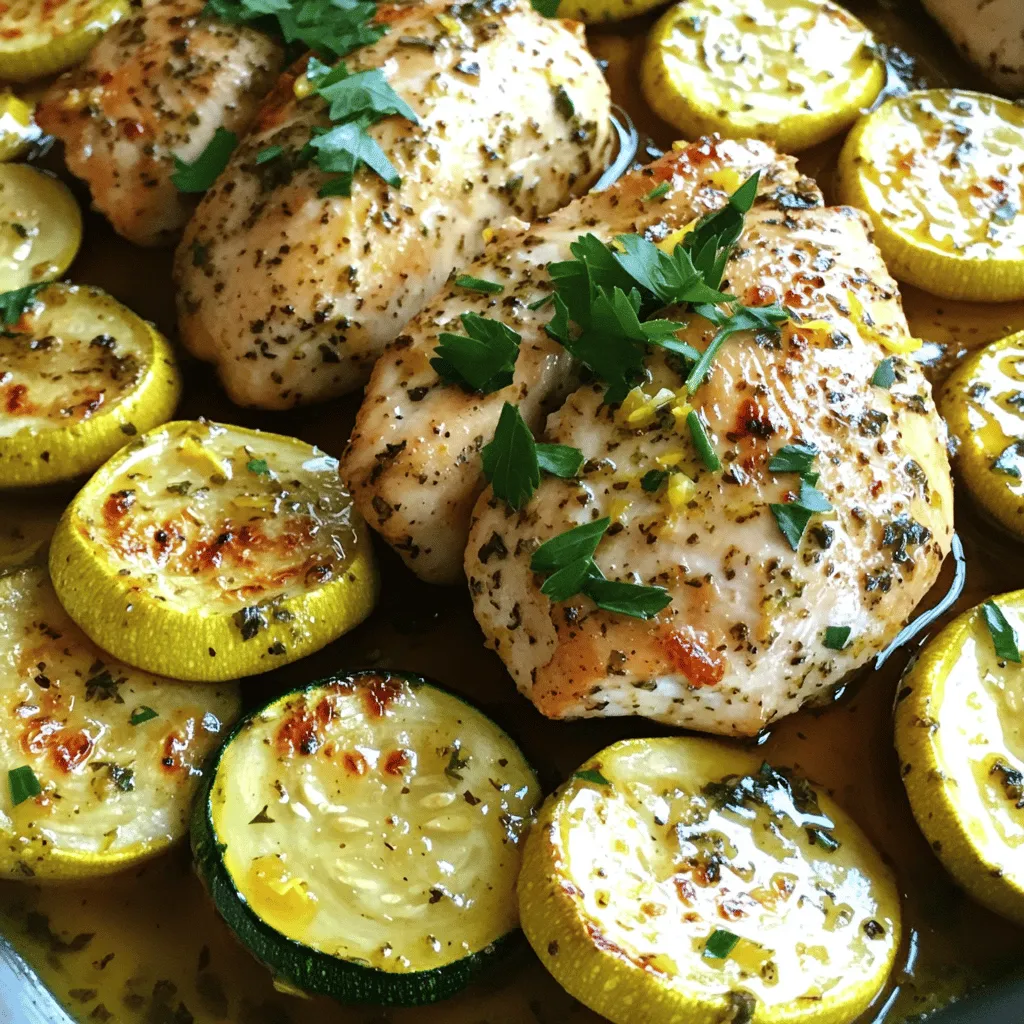
Looking for a healthy dinner option that’s both easy and delicious? Let’s talk about easy chicken breast with zucchini. This dish not only tastes great but also brings a boost …

Read more

Categories Dinner

Creamy Parmesan Zucchini Soup Flavorful Comfort Meal

July 5, 2025 by Chef Owen
- 4 medium zucchinis, chopped - 1 medium onion, diced - 3 cloves garlic, minced - 4 cups vegetable broth The zucchinis give this soup its main flavor. Choose fresh, firm zucchinis for the best taste. The onion adds a sweet base. Garlic brings a rich aroma. The vegetable broth makes the soup hearty and warm. - 1 cup heavy cream (or coconut cream for a dairy-free option) - 1 cup freshly grated Parmesan cheese (or nutritional yeast for a vegan option) Heavy cream creates a rich, velvety texture. Coconut cream is a great dairy-free choice. Parmesan adds a savory punch. Nutritional yeast gives a cheesy flavor without dairy. - 2 tablespoons olive oil - 1 teaspoon dried thyme - Salt and pepper to taste - Fresh parsley for garnish Olive oil adds a nice, smooth taste. Thyme brings out the flavor of zucchini. Salt and pepper enhance all the tastes. Fresh parsley makes a beautiful garnish and adds color. For the full recipe, check out the Full Recipe section. First, heat two tablespoons of olive oil in a large pot over medium heat. Once hot, add one diced onion. Sauté the onion until it turns translucent, about five minutes. This step builds the soup's base flavor. Next, add three minced garlic cloves and one teaspoon of dried thyme. Stir for another minute. This releases the garlic's aroma and the thyme's earthiness. Now, stir in four chopped zucchinis. Cook them for about five to seven minutes until they soften. This helps make the soup creamy later. After that, pour in four cups of vegetable broth. Bring the mixture to a boil and then lower the heat to a simmer. Cook for about fifteen minutes. The zucchini should be very tender by now. Once the zucchini is tender, it’s time to blend. Use an immersion blender or a regular blender. If you use a regular blender, work in batches. Puree until the soup is smooth. After blending, stir in one cup of heavy cream and one cup of freshly grated Parmesan cheese. Mix well until the cheese melts and the soup is creamy. Season with salt and pepper to taste. Heat the soup through for a few minutes. Then, it’s ready to serve! For the full recipe, check the previous section. For a smooth soup, choose the right blender. An immersion blender is great for quick blending right in the pot. It saves time and reduces mess. If you use a regular blender, be careful. Blend in small batches and return the soup to the pot slowly. This helps prevent lumps. To avoid lumps, ensure the zucchini is fully cooked before blending. Soft zucchini blends easily, creating a creamy finish. To make your soup pop, add extra spices or herbs. A pinch of nutmeg gives warmth. Fresh basil or dill can add bright notes. If you want a kick, try a dash of red pepper flakes. For toppings, consider croutons for crunch or a drizzle of olive oil for richness. A sprinkle of fresh parsley on top adds a splash of color and freshness. You can prepare this soup in advance. Just follow the recipe, cool it, and store it in the fridge. It stays fresh for about three days. When ready to eat, reheat on the stove over low heat. Stir often to warm it evenly. If it thickens too much, add a splash of broth or water. This keeps it creamy and delicious. For the best taste, enjoy within a few days. For the full recipe, check back to ensure you have all steps covered. {{image_2}} To make a vegan version of this creamy Parmesan zucchini soup, you can swap out the heavy cream and cheese. Use coconut cream instead of heavy cream; it gives a rich flavor. For cheese, substitute nutritional yeast for the Parmesan. This adds a cheesy taste without dairy. You can also use any unsweetened plant-based milk, like almond or soy milk, to keep the soup creamy. If you want to add protein, try lentils or beans. They blend well with the soup's flavors. Cook lentils in the broth for about 10 minutes before blending. If you prefer chicken, add cooked, shredded chicken to the soup after blending. Always adjust cooking times to ensure proteins are fully cooked and tender. Incorporating seasonal vegetables can give your soup a fun twist. In spring, add fresh peas for a sweet touch. In the fall, use roasted butternut squash for a warm flavor. You can adjust herbs and spices based on the seasons, too. For example, use fresh basil in summer and sage in winter. This keeps the soup exciting all year round. Check out the Full Recipe for more tips and ideas! To store your Creamy Parmesan Zucchini Soup, let it cool first. Place it in an airtight container. This keeps the soup fresh. In the fridge, it lasts for about 3 to 4 days. Always check for any changes in smell or color before eating. You can freeze the soup for later use. First, let it cool completely. Then, pour it into a freezer-safe container. Leave some space at the top for expansion. The soup can stay good for about 2 to 3 months. When ready to eat, thaw it in the fridge overnight. Reheat it on the stove over low heat. Stir well to make it creamy again. For storing soup, glass containers work best. They seal tightly and do not absorb smells. You can also use BPA-free plastic containers. Make sure to label each container. Write the date on the label. This helps you keep track of how long it’s been stored. To make this soup dairy-free, you can swap heavy cream with coconut cream. This gives you a rich texture without dairy. For cheese, use nutritional yeast. It adds a cheesy flavor while being vegan. Both options still keep the soup creamy and delicious. Yes, you can use frozen zucchini. However, it may change the soup's flavor and texture. Frozen zucchini tends to be softer and can release more water. This means your soup might be a bit thinner. If you use frozen, cook it longer to bring out the flavors. This soup pairs well with crisp salads or crusty bread. A simple green salad adds freshness. You can also serve it with garlic bread for a cozy meal. Another great option is a side of roasted vegetables. These sides balance the creamy soup perfectly. The soup is ready when the zucchini is tender. You can check this by piercing it with a fork. If it goes in easily, your soup is done. After blending, heat it until warm. This ensures all flavors meld together before serving. This blog post shows you how to make a creamy Parmesan zucchini soup. We covered the key ingredients, tips, and ways to customize the recipe. In the end, you can adapt this soup to fit your taste. Experiment with flavors and add proteins when you like. Enjoy your cooking and share the soup with friends. You’ll love the fresh taste and warm feel it brings!

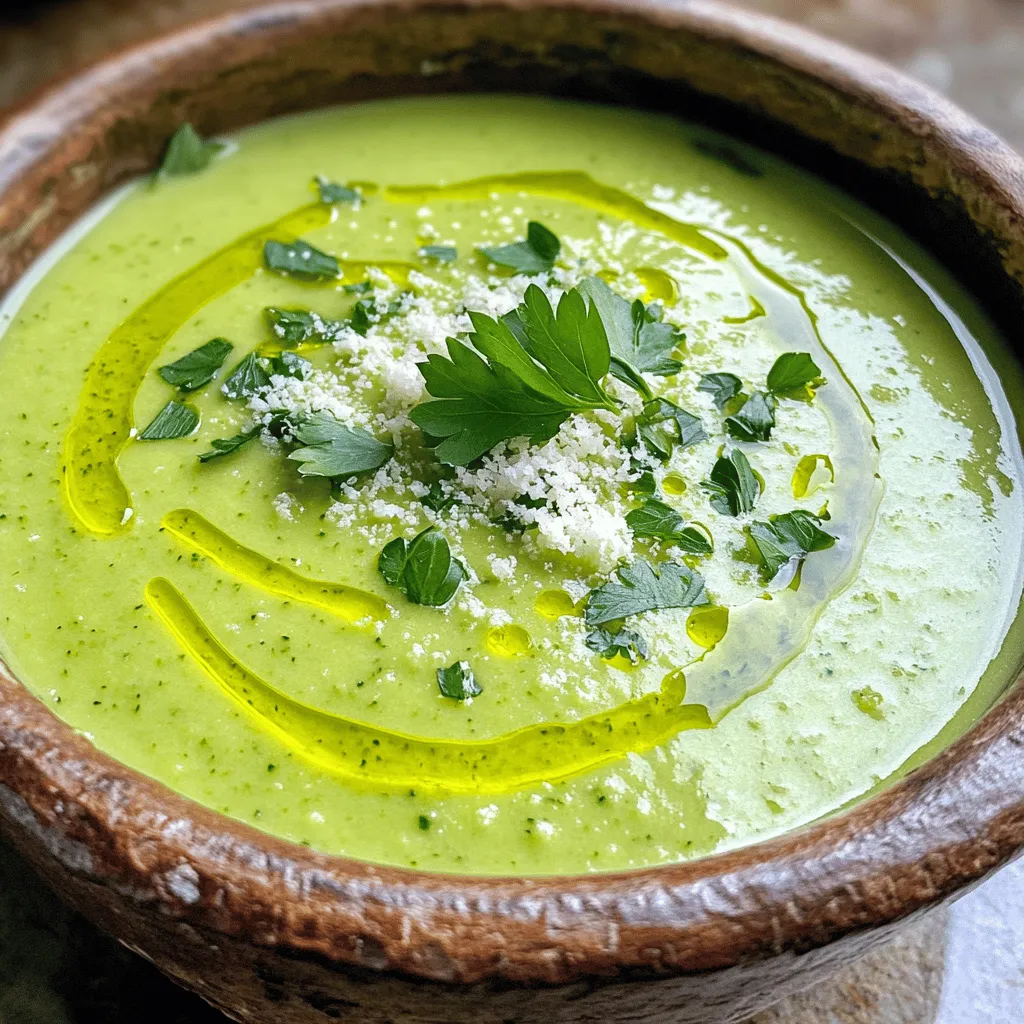
Looking for a warm bowl of comfort? This Creamy Parmesan Zucchini Soup is just the ticket! Packed with fresh zucchini, rich cream, and savory Parmesan, it’s both delicious and easy …

Read more

Categories Dinner

EASY Garlic Parmesan Chicken Bites Mouthwatering Snack

July 5, 2025 by Chef Owen
- 1 lb boneless, skinless chicken breasts - 1/2 cup grated Parmesan cheese - 1/2 cup breadcrumbs - 2 tablespoons garlic powder - 1 teaspoon paprika - 1/2 teaspoon salt - 1/4 teaspoon black pepper - 1/4 cup olive oil - 1 tablespoon fresh parsley Gather these ingredients before you start. The chicken breasts should be fresh and cut into bite-sized cubes. I love using grated Parmesan cheese because it adds rich flavor. For the breadcrumbs, choose seasoned ones if you can; they give an extra kick. For seasoning, garlic powder is key. It brings out the savory taste. Paprika adds a subtle warmth and nice color. Salt and black pepper balance the flavors. Don’t forget the olive oil! It helps the spices stick to the chicken. Lastly, fresh parsley adds a pop of color and freshness when you serve the dish. If you want the full recipe with step-by-step instructions, check out the Easy Garlic Parmesan Chicken Bites recipe. - Preheat your oven to 400°F (200°C). - Line a baking sheet with parchment paper. This makes for easy cleanup. - Cut the chicken into bite-sized cubes. Aim for uniform sizes for even cooking. - In a large bowl, combine the grated Parmesan cheese, breadcrumbs, garlic powder, paprika, salt, and black pepper. - Mix well to evenly distribute the flavors. - In another bowl, drizzle olive oil over the chicken cubes. Toss gently to coat each piece with oil. - Transfer the chicken into the bowl with the breadcrumb mixture. - Toss the chicken until every piece is well-coated. The oil helps the crumbs stick. - Arrange the coated chicken bites in a single layer on the prepared baking sheet. - Make sure they are not crowded to ensure even cooking. - Bake them for about 20-25 minutes. Look for a golden brown color. You can flip them halfway through for even browning. - Once cooked, remove them and let cool for a few minutes. Sprinkle fresh parsley for a pop of color. For the full recipe, check out the Easy Garlic Parmesan Chicken Bites. To get that crispy bite, I highly recommend using seasoned breadcrumbs. They add a lot of flavor. Make sure not to overcrowd the baking sheet. This helps the chicken cook evenly and stay crunchy. Get creative and add herbs like thyme or oregano. These herbs boost the dish's flavor. You can also experiment with different cheeses. Try mixing in some mozzarella or cheddar for a tasty twist. Pair your chicken bites with delicious dipping sauces. Marinara or ranch dressing works great. For a fresh touch, serve them alongside a salad. The crisp greens will balance the richness of the chicken bites. For the full recipe, check out the Easy Garlic Parmesan Chicken Bites recipe. {{image_2}} To make your chicken bites spicy, add cayenne pepper or chili flakes. Start with a pinch and taste. You can always add more heat. This gives a nice kick to the garlic and cheese flavors. If you love fresh herbs, mix them into the breadcrumb mixture. Try using parsley, thyme, or oregano. This adds a fresh taste. It also makes your dish look more colorful and inviting. For a gluten-free version, use gluten-free breadcrumbs and flour. Many brands offer good options. This way, everyone can enjoy the chicken bites. Just make sure to check the labels for any hidden gluten. For the full recipe, you can refer to the Easy Garlic Parmesan Chicken Bites section. To keep your garlic Parmesan chicken bites fresh, store leftovers in an airtight container. This helps lock in flavor and moisture. They will stay good for about three to four days in the fridge. If you want them to last longer, freezing is a great option. Just make sure they are cooled before you store them. When it comes to reheating, you have two main options: the oven or the microwave. The oven gives you crispy bites. Preheat it to 350°F (175°C). Place the chicken bites on a baking sheet and heat for about 10-15 minutes. The microwave is faster but may not keep the crunch. Heat them for about 1-2 minutes, checking often. Freezing is easy! First, cool the chicken bites completely. Then, arrange them in a single layer on a baking sheet. Freeze until solid, then transfer them to a freezer bag. Remove as much air as possible. To thaw, place them in the fridge overnight or heat directly from frozen. Cooking from frozen takes a bit longer, about 25-30 minutes at 400°F (200°C). This way, you can enjoy these tasty snacks anytime! Don't forget to check the Full Recipe for more details. These chicken bites take about 20 to 25 minutes to cook. Preheat your oven to 400°F (200°C). When you place the chicken in the oven, check it after 20 minutes. The coating should be golden brown, and the chicken should be fully cooked. If you want even cooking, flip the bites halfway through baking. Yes, you can use frozen chicken for this recipe. However, you need to thaw it first. Thaw the chicken in the refrigerator overnight or use the microwave. Once thawed, cut it into cubes as the recipe states. This ensures even cooking and great flavor. You can serve these chicken bites with many tasty sides. Try marinara sauce or ranch dressing for dipping. A fresh salad also pairs well. You can even add some crunchy veggies like carrots and celery on the side. These options will round out your meal perfectly! This blog post shared a simple and tasty recipe for chicken bites. We covered main ingredients like chicken, Parmesan cheese, and breadcrumbs. I also detailed the seasoning and steps for baking. Remember, you can add your own twist with spices or herbs. Serve these bites with your favorite dips for added delight. These tasty chicken bites will impress your family and friends!

If you’re looking for a simple snack that packs a delicious punch, you’ll love these EASY Garlic Parmesan Chicken Bites! With just a few ingredients, you’ll create golden, crispy bites …

Read more

Categories Appetizers

Crispy Sesame Chicken with Honey Sauce Delight

January 13, 2026July 5, 2025 by Chef Owen
To make crispy sesame chicken, gather these simple ingredients: - 1 lb (450g) chicken breast, cut into bite-sized pieces - 1 cup buttermilk - 1 cup all-purpose flour - 1/2 cup cornstarch - 1 teaspoon baking powder - 1 teaspoon garlic powder - 1 teaspoon ginger powder - Salt and pepper, to taste - Oil for frying (preferably vegetable or canola) These main ingredients create the base for a juicy chicken with a crunchy coating. For the sweet and sticky honey sauce, you will need: - 1/4 cup honey - 2 tablespoons low-sodium soy sauce - 1 tablespoon rice vinegar - 1 tablespoon sesame oil This sauce adds a delightful flavor that pairs perfectly with the chicken. To elevate your dish, consider these garnishes: - 2 tablespoons toasted sesame seeds - 2 green onions, finely sliced These garnishes not only add flavor but also make the dish look beautiful. {{ingredient_image_2}} First, gather your chicken breast. Cut it into bite-sized pieces. Place the pieces in a medium bowl. Pour in 1 cup of buttermilk, making sure all the chicken is covered. Cover the bowl with plastic wrap. Refrigerate for at least 30 minutes. You can let it sit for up to 2 hours. This step keeps the chicken tender and juicy. While the chicken marinates, you can prepare the coating. In a large mixing bowl, add 1 cup of all-purpose flour. Then, add 1/2 cup of cornstarch, 1 teaspoon of baking powder, and 1 teaspoon of garlic powder. Next, add 1 teaspoon of ginger powder, salt, and pepper to taste. Whisk the dry ingredients well until they are evenly mixed. This mixture will give your chicken that crispy texture we love. Now, it’s time to fry the chicken. Heat oil in a deep skillet or wok to about 350°F (175°C). Pour in enough oil to make it about 2 inches deep. Once hot, take the marinated chicken out of the fridge. Let any extra buttermilk drip off. Dredge each piece in the flour mixture, pressing lightly for an even coat. Carefully place the coated chicken in the hot oil. Fry in batches for 4-5 minutes until golden brown and crispy. Use a slotted spoon to transfer the chicken to a plate lined with paper towels. This helps drain excess oil and leaves you with perfectly crispy chicken. To get the best crispiness, start with marinating the chicken in buttermilk. This step adds moisture and flavor. It also tenderizes the meat. After marinating, coat the chicken well in the flour mixture. Make sure to press the coating onto the chicken. This helps it stick better while frying. Fry at a steady temperature of 350°F (175°C) for even cooking. If the oil is too hot, the outside burns before the inside cooks. If it’s too cool, the chicken absorbs oil and gets soggy. I recommend frying in small batches. This keeps the oil hot and the chicken crispy. You can also try using a deep fryer if you have one. It maintains a steady temperature. Another option is to bake the chicken after coating it. Spray the coated pieces with cooking oil and bake at 400°F (200°C) for about 20-25 minutes. This method is healthier and still gives a nice crunch. Serve the crispy sesame chicken on a large platter for a nice presentation. Drizzle extra honey sauce on top for added flavor. Garnish with toasted sesame seeds and sliced green onions. This not only adds taste but also color. Pair it with steamed rice or stir-fried vegetables for a complete meal. You can also offer some extra sauce on the side for dipping. This makes it fun for everyone to enjoy! Pro Tips Marinate for Maximum Flavor: Allowing the chicken to marinate in buttermilk for at least 30 minutes not only tenderizes the meat but also infuses it with flavor, making every bite deliciously juicy. Double Fry for Extra Crispiness: For an even crispier texture, consider frying the chicken twice. After the first fry, let it rest for a few minutes, then fry again until golden brown. Control Oil Temperature: Use a thermometer to ensure the oil is at the right temperature (350°F or 175°C) before frying. This prevents the chicken from absorbing too much oil and becoming greasy. Customize the Sauce: Feel free to tweak the honey sauce by adding spices like chili flakes for heat or citrus zest for brightness. This allows you to create a flavor profile that suits your taste. {{image_4}} You can change the honey sauce to suit your taste. Try using teriyaki sauce for a sweet and salty twist. If you want some heat, mix in sriracha or chili paste. For a tangy flavor, use orange juice or pineapple juice instead of honey. Each sauce will give your crispy chicken a unique taste. If you prefer, use chicken thighs instead of breasts. Thighs are juicier and add more flavor. You can also use shrimp or tofu for a different protein. Both options work great with the same coating and sauce. Just adjust cooking times accordingly. To make this dish healthier, consider baking the chicken instead of frying. Coat the chicken with the same mixture, then bake at 400°F (200°C) for about 20 minutes. You can also use whole wheat flour instead of all-purpose flour. For a lighter sauce, mix honey with a bit of water or use a sugar substitute. These changes keep the flavor while reducing calories. Once you finish your crispy sesame chicken, let it cool. Place leftovers in an airtight container. This keeps the chicken fresh for about 3 days in the fridge. If you want to keep it longer, freezing is a good option. To reheat, preheat your oven to 375°F (190°C). Place the chicken on a baking sheet. Bake for about 10-15 minutes. This method helps restore the crispiness. If you're in a hurry, you can use a microwave, but the chicken may lose some crunch. To freeze the chicken, ensure it’s completely cooled. Use a freezer-safe container or bag. Label it with the date. You can freeze it for up to 2 months. When ready to eat, thaw it in the fridge overnight before reheating. This keeps it flavorful and safe. Yes, you can use chicken thighs. Thighs are juicier and more flavorful. They stay tender when cooked. If you prefer dark meat, thighs are a great choice. Just cut them into bite-sized pieces like the breasts. If you don't have buttermilk, you can make a simple substitute. Mix one cup of milk with one tablespoon of vinegar or lemon juice. Let it sit for five minutes. This mix will give you a similar tangy flavor. You can also use plain yogurt or sour cream, thinned with a bit of milk. Yes, you can make this dish gluten-free easily. Use gluten-free flour instead of all-purpose flour. You can also swap cornstarch for a gluten-free blend. Just be sure to check labels on all sauces. This way, you can enjoy crispy sesame chicken without worry. Crispy sesame chicken is easy to make with the right ingredients and steps. You learned how to marinate chicken, prepare a tasty honey sauce, and achieve that perfect crispiness. Tips on cooking and serving can help you elevate this dish. Don't forget the fun variations and proper storage. You can enjoy this meal today and later! I hope you feel ready to try it yourself.

Get ready to impress your family with my Crispy Sesame Chicken with Honey Sauce! This dish features juicy chicken, a crunchy coating, and a sweet-tangy sauce that is hard to …

Read more

Categories Dinner

Chicken Onigiri Flavorsome and Easy Rice Dish

January 7, 2026July 5, 2025 by Chef Owen
- 2 cups sushi rice - 2 ½ cups water - 1 teaspoon salt - 1 tablespoon rice vinegar - 1 tablespoon sugar - 1 chicken breast, cooked and shredded - 2 tablespoons soy sauce - 1 teaspoon sesame oil - 1 green onion, finely chopped - 1 sheet nori (seaweed), cut into strips - Optional: sesame seeds for garnish Chicken onigiri is a simple dish that packs a lot of flavor. To start, you need sushi rice. This rice is sticky and perfect for holding its shape. You also need water to cook the rice. Salt adds a bit of flavor. Rice vinegar and sugar give the rice a nice tangy taste. Next, you need chicken. Cook and shred one chicken breast. This will be your filling. Soy sauce adds a savory taste. Sesame oil gives a nice nutty flavor. Finely chopped green onion adds freshness. Don't forget about nori. This seaweed wraps around the onigiri and adds another layer of flavor. Optional sesame seeds can sprinkle on top for a crunchy finish. Each ingredient plays a role in making your chicken onigiri tasty and satisfying. {{ingredient_image_2}} Rinsing the sushi rice Start by rinsing 2 cups of sushi rice. Use a fine-mesh strainer under cold water. Keep rinsing until the water runs clear. This step removes excess starch, making the rice fluffy. Cooking methods (rice cooker vs stovetop) You can cook the rice in two ways. For a rice cooker, add the rinsed rice and 2 ½ cups of water. Follow your cooker’s instructions. For stovetop, combine the rice and water in a pot with 1 teaspoon of salt. Bring it to a boil, then cover and reduce the heat. Let it simmer for about 18 minutes. Seasoning the rice After cooking, mix 1 tablespoon of rice vinegar and 1 tablespoon of sugar in a small bowl. Once the rice is ready, transfer it to a large bowl. Gently fold in the vinegar mix. Use a wooden paddle to avoid mashing the rice. Allow it to cool slightly. Cooking and shredding the chicken If you don’t have cooked chicken, you can boil a chicken breast. Once it’s cooked, let it cool, then shred it using two forks or your hands. Mixing the chicken with sauces In a separate bowl, add the shredded chicken. Mix in 2 tablespoons of soy sauce and 1 teaspoon of sesame oil. Add finely chopped green onion for extra flavor. Stir well until the chicken is coated. Shaping techniques (triangle, oval) To shape the onigiri, dampen your hands with water. Take about 1/3 cup of seasoned rice. Flatten it into a small disc in your palm. Place a spoonful of the chicken filling in the center. Assembling the onigiri Carefully fold the rice around the filling. Shape it into a triangle or an oval. Repeat this with the remaining rice and filling until all are shaped. How to wrap with nori Take a strip of nori and wrap it around the base of each onigiri. This adds flavor and a handy way to hold it. Serving suggestions Serve the onigiri as a snack or a meal. Enjoy them with pickled vegetables for a nice touch. You can even sprinkle sesame seeds on top for added crunch. Rinsing the sushi rice is key. This step removes extra starch. If you skip it, your rice will be sticky. Rinse until the water runs clear. This ensures a fluffy texture. Cooking time matters too. Use a rice cooker for ease. If cooking on the stove, bring water to a boil. Cover and reduce heat. Let it simmer for about 18 minutes. Check for tenderness at the end. Cooling the rice helps too. After cooking, transfer it to a large bowl. Gently fold in rice vinegar and sugar. This adds flavor and helps the rice cool. Let it sit at room temperature. You can change the chicken filling for different flavors. Tofu works well for a vegetarian option. Ground beef or shredded pork is also tasty. To enhance the flavor, add spices or herbs. Try garlic powder or ginger for a kick. Chopped cilantro or basil adds freshness. Mix these into your filling for extra taste. Prevent sticking by wetting your hands. Dampen them slightly before forming the onigiri. This keeps the rice from clinging to your fingers. For storage, place onigiri in an airtight container. This helps keep them fresh. If you plan to eat later, wrap them in plastic wrap. Keep them in the fridge for up to three days. If you want to save them longer, consider freezing. Let them thaw in the fridge overnight when ready to eat. Pro Tips Rinse the Rice: Always rinse sushi rice thoroughly until the water runs clear to achieve a fluffy texture. Perfect Shaping: Wet your hands while forming the onigiri to prevent the rice from sticking to your skin. Flavor Boost: Add a little more soy sauce and sesame oil to the chicken filling for an extra flavor kick. Storage Tips: Keep onigiri wrapped in nori in an airtight container in the fridge for up to 2 days for freshness. {{image_4}} You can customize chicken onigiri with many fillings. For vegetarian options, try using avocado or tofu. These ingredients add a creamy texture and taste. Other popular fillings include salmon and pickled vegetables. Salmon gives a rich flavor, while pickled veggies add a tangy crunch. Explore different fillings to match your taste. Onigiri can come in various shapes. The common triangle shape is easy to make and holds the filling well. However, you can also form them into ovals or balls. Each shape has its own cultural meaning. For uniform shapes, use molds. These molds make onigiri look neat and professional. You can adjust the seasonings to fit your local taste. Some people like spicy onigiri, adding chili flakes or spicy sauce. Others prefer a sweet touch, using a bit of honey or sugar. Garnishes like sesame seeds or chopped herbs can add texture and flavor. Experiment with different seasonings to find your favorite. Store leftover onigiri in the fridge. Use an airtight container. This keeps them fresh. You can also wrap them tightly in plastic wrap. If you want to freeze onigiri, wrap each one well. Use freezer bags to avoid freezer burn. This method helps maintain taste and texture. Onigiri lasts about 3 days in the fridge. In the freezer, they can last up to a month. Always check for signs of spoilage. Look for an off smell or visible mold. If the rice feels hard or dry, it's time to toss it. You can reheat onigiri in the microwave. Place them on a plate and cover with a damp paper towel. Heat for about 30 seconds. For stovetop reheating, place them in a pan with a little water. Cover and heat on low. Keep an eye on them to avoid burning. This helps keep the rice soft and fluffy. Onigiri is a Japanese rice ball filled with tasty ingredients. It often has a triangle or oval shape. This dish is popular for snacks and lunches. Onigiri holds cultural meaning in Japan. People often enjoy it during picnics or festivals. It shows care and love in food preparation. Yes, you can use regular rice, but it changes the texture. Sushi rice is sticky and short-grained. It helps the onigiri hold its shape better. Regular rice might not stick as well. If you use it, make sure to cook it properly. To make onigiri vegan, use plant-based fillings. Try tofu, avocado, or pickled vegetables as fillings. You can also use mushrooms for a savory touch. Replace the chicken with a mix of soy sauce, sesame oil, and veggies. This keeps the flavors rich and satisfying. Onigiri is a great meal prep choice. It stores well and is easy to make in batches. You can fill them with different flavors to keep things interesting. They are easy to grab for lunch or snacks. Just wrap them in nori for added flavor and fun! In this post, we explored how to make delicious onigiri, starting with key ingredients and simple steps. I shared tips for perfecting rice texture and offered various filling options. We discussed creative shapes and how to store leftovers effectively. Onigiri is not only tasty but also flexible for your dietary needs. I hope you feel inspired to try making these rice balls at home. Happy cooking!

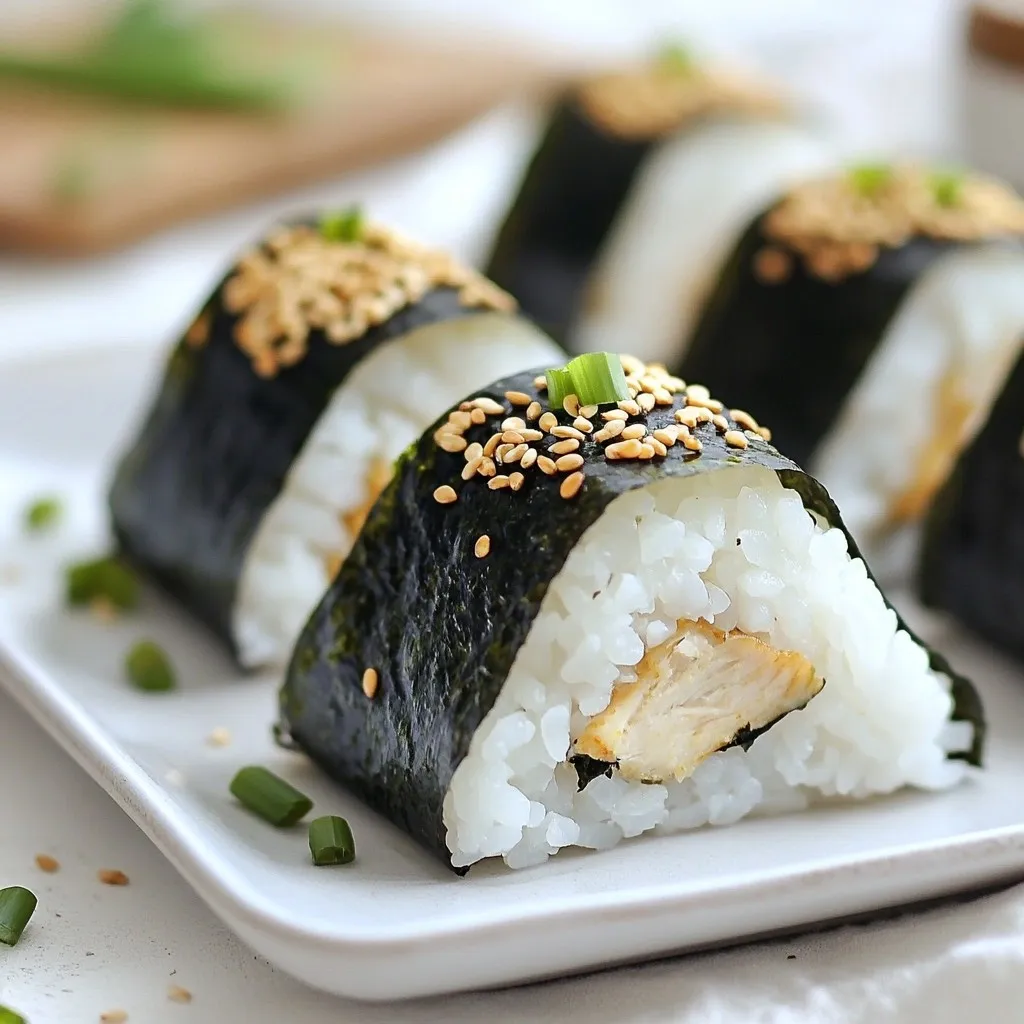
If you want a simple, tasty meal, chicken onigiri is your answer! This easy rice dish combines sushi rice, savory chicken, and nori for a flavor-packed treat. Whether you’re a …

Read more

Categories Appetizers

Roasted Zucchini and Summer Squash Flavorful Dish

July 4, 2025 by Chef Owen
To make this tasty dish, gather these ingredients: - 2 medium zucchinis, sliced into rounds - 2 medium summer squashes, sliced into rounds - 1 red bell pepper, diced - 1 yellow bell pepper, diced - 3 tablespoons olive oil - 1 teaspoon garlic powder - 1 teaspoon onion powder - 1 teaspoon smoked paprika - Salt and pepper to taste - 2 tablespoons fresh parsley, chopped (for garnish) - Zest of 1 lemon - Juice of 1 lemon This dish is healthy and full of flavor. Each serving has about: - 120 calories - 7 grams of fat - 10 grams of carbs - 3 grams of fiber - 2 grams of protein It is low in calories and high in nutrients. The colorful veggies give you vitamins A and C. You will also enjoy some fiber that helps with digestion. When picking fresh zucchini and summer squash, look for these signs: - Choose firm and smooth vegetables. - Check for bright color without spots or bruises. - The ends should feel fresh and moist, not dry. - Ask about local produce at markets for the best flavors. Fresh veggies taste better and make your dish shine. You can use these tips to find the best ingredients for the Full Recipe. Start by washing the zucchinis and summer squashes well. Slice them into rounds about half an inch thick. This size helps them cook evenly. Next, wash the bell peppers. Remove the seeds and stems, then dice them into small pieces. Gather all your sliced veggies in a large mixing bowl. In a small bowl, mix the garlic powder, onion powder, smoked paprika, salt, and pepper. These spices give the dish a nice flavor. Drizzle three tablespoons of olive oil over the veggies in the mixing bowl. Next, sprinkle the spice mix on top. Toss everything together so the vegetables are well coated in oil and spices. Preheat your oven to 425°F (220°C). Spread the veggie mix on a baking sheet lined with parchment paper. Make sure they are not crowded. This helps them roast well. Bake for 20-25 minutes, stirring halfway through for even browning. The veggies should be tender and slightly caramelized when done. When they come out of the oven, sprinkle lemon zest and juice over them. Toss gently to mix. Transfer them to a serving platter and garnish with fresh parsley. For the full recipe, refer to the detailed instructions provided earlier. Roasting zucchini and summer squash is simple. First, always cut your veggies into even pieces. This helps them cook evenly. Make sure to spread them out on the baking sheet. If they pile up, they will steam instead of roast. Preheat your oven to a high temperature, around 425°F (220°C). This gives your veggies a nice golden color. To get the best taste, use good quality olive oil. It adds depth and richness. Don’t skip the lemon zest and juice. They brighten the dish and add freshness. Experiment with herbs like thyme or rosemary for added flavor. Garlic powder and smoked paprika also bring warmth and depth. Toss your veggies well to coat them in oil and spices. This ensures every bite is full of flavor. Once your roasted zucchini and summer squash are ready, serve them hot. They make a great side dish for grilled meats or fish. You can also toss them into salads or pasta. For a light meal, add some cooked quinoa or couscous. Sprinkle fresh parsley on top for color and taste. You can find the full recipe in the article to guide you through this tasty dish. {{image_2}} You can mix in other veggies for more flavor. Try bell peppers, carrots, or eggplant. These veggies roast well and add nice colors. You can also use asparagus or cherry tomatoes. Each new vegetable brings its own taste. To boost flavors, add fresh herbs or spices. Basil, oregano, and thyme work great. You can also try rosemary for a bold taste. For a kick, sprinkle some red pepper flakes. These small changes can make your dish pop with flavor. This dish already fits vegan and gluten-free diets. Just check your spice labels. Some brands may add gluten or dairy. Feel free to add your favorite veggies to make it your own. Enjoy this recipe guilt-free and delicious! For the complete guide, check the Full Recipe. After enjoying your roasted zucchini and summer squash, let the leftovers cool. Place them in an airtight container. Store them in the fridge for up to three days. This keeps them fresh and tasty for your next meal. To reheat, use the oven for the best taste. Preheat your oven to 350°F (175°C). Spread the vegetables on a baking sheet. Heat them for about 10 minutes or until warm. You can also microwave them. Just heat in short bursts to avoid sogginess. If you have more leftovers, freezing is a great option. Cool the veggies completely. Spread them on a baking sheet and freeze for one hour. Once frozen, transfer them to a freezer bag. They can last for up to three months. When you want to use them, thaw overnight in the fridge before reheating. It takes about 20 to 25 minutes to roast zucchini and summer squash. I preheat the oven to 425°F (220°C). Then, I spread the vegetables on a baking sheet. I stir them halfway through for even cooking. The outside should be golden, and the inside should feel soft. Yes, you can use other types of squash. Butternut and acorn squash work well. Just cut them into small, even pieces. This helps them roast at the same rate as zucchini and summer squash. Feel free to mix in your favorites for more flavor. You know the vegetables are done when they are tender and slightly caramelized. A fork should easily pierce them. The edges look golden and crisp. If they look too soft or mushy, they may have cooked too long. Roasted zucchini and summer squash go well with many dishes. They pair nicely with grilled meats, fish, or tofu. You can serve them as a side or toss them into pasta. They also work well in salads or grain bowls. For the full recipe, check out the Zesty Roasted Zucchini & Summer Squash Medley. This guide covered key points on roasting zucchini and summer squash. We discussed ingredients, prep steps, and maximum flavor tips. Remember to choose fresh veggies and explore variations to suit your taste. Proper storage keeps your leftovers tasty. With this knowledge, you can create delicious meals easily. Enjoy your cooking, and share the joy of food with others!

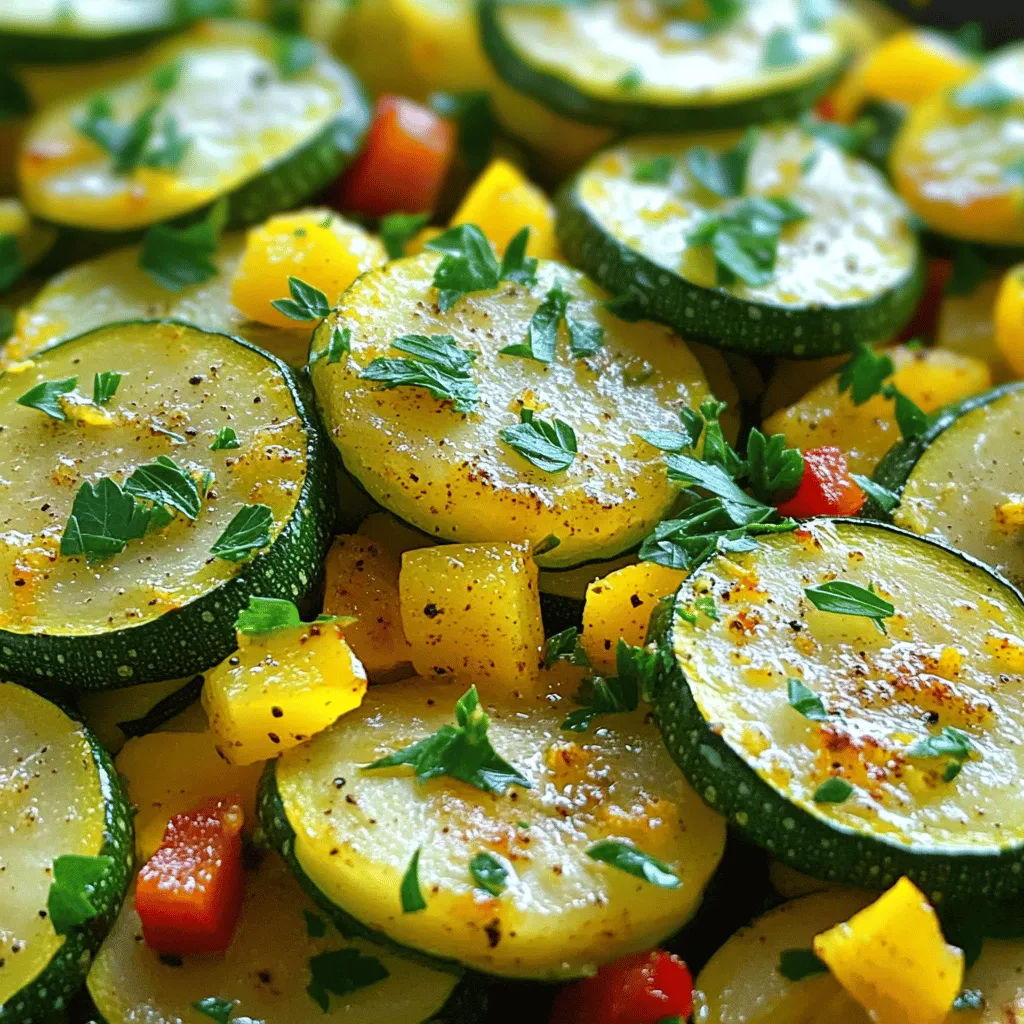
Looking for a tasty way to enjoy zucchini and summer squash? This roasted dish is packed with flavor and super easy to make. You’ll learn the best tips for selecting …

Read more

Categories Salads

Pesto Zucchini Orzo Flavorful and Fresh Dinner Option

July 4, 2025 by Chef Owen
Let's talk about what you need to make this tasty Pesto Zucchini Orzo. This dish is simple, fresh, and packed with flavor. Here’s what you will gather: - 1 cup orzo pasta - 2 medium zucchinis, diced - 1 cup cherry tomatoes, halved - 1/4 cup fresh basil pesto - 1/4 cup Parmesan cheese, grated - 2 tablespoons olive oil - 2 cloves garlic, minced - Salt and pepper to taste - 1/4 cup pine nuts, toasted (for garnish) Each ingredient plays a role in making this meal special. The orzo pasta serves as a great base. Zucchini adds a nice crunch and a healthy touch. Cherry tomatoes bring sweetness and color. The basil pesto ties it all together with a burst of flavor. Olive oil and garlic make the veggies shine, while Parmesan cheese adds creaminess. Don't forget the toasted pine nuts for a lovely finish. You can find the Full Recipe for step-by-step details to create this wonderful dish! To start, bring a large pot of salted water to a boil. This step is key for flavor. Once boiling, add 1 cup of orzo pasta. Cook it according to the package instructions, which usually take about 8 to 10 minutes. You want the orzo to be al dente, so keep an eye on the time. Al dente means it should be firm to the bite. After cooking, drain the orzo and set it aside for later. Next, heat 2 tablespoons of olive oil in a large skillet over medium heat. Once the oil is hot, add 2 minced cloves of garlic. Sauté for about 1 minute until the garlic smells great. Then, toss in 2 diced zucchinis. Cook them for 4 to 5 minutes. You want them tender but still a little crisp. After that, add 1 cup of halved cherry tomatoes. Cook for another 2 to 3 minutes. This will soften the tomatoes just right. Now it's time to mix everything together. Reduce the heat to low and add the cooked orzo to your skillet of veggies. Stir well to combine. Then, pour in 1/4 cup of fresh basil pesto. Toss everything together until the orzo is well coated. Lastly, add salt and pepper to taste. For a cheesy finish, stir in 1/4 cup of grated Parmesan cheese. Serve this dish warm, topped with toasted pine nuts for extra crunch. For the full recipe, check out the detailed cooking instructions shared earlier. Enjoy your meal! To prevent overcooking zucchini, cut it into even pieces. This helps it cook evenly. Cook zucchini just until it is tender and still bright green. This usually takes about 4-5 minutes. Keep an eye on it. For cooking orzo, start by bringing water to a boil. Add salt for flavor. Cook orzo according to the package, usually 8-10 minutes. Drain it and set aside. This keeps the orzo al dente, which adds a nice bite to your dish. For extra flavor, try adding red pepper flakes or a squeeze of lemon. Fresh herbs like parsley or thyme also work well. These spices and herbs can brighten the dish. Using homemade pesto can make a big difference in taste. It will be fresher and richer. Store-bought pesto is fine, but check the label for quality. Look for one with real ingredients and no fillers. Serve Pesto Zucchini Orzo in a shallow bowl. This lets the colors pop. Top it with toasted pine nuts for a nice crunch. You can also add more grated cheese on top. Use a large serving platter for family-style dining. This makes it easy for everyone to help themselves. Pair it with a side salad for a balanced meal. The fresh greens will complement the dish well. You can find the full recipe for Pesto Zucchini Orzo [here](#). {{image_2}} For those who need gluten-free options, try using rice or quinoa instead of orzo. These grains offer a similar texture and taste. If you prefer a vegan dish, you can skip the cheese. Use nutritional yeast for a cheesy flavor without dairy. Adding protein boosts the meal. Grilled chicken or shrimp pairs well with this dish. Just cook the protein in the skillet before adding the veggies. You can also mix in leafy greens like spinach or kale. They add nutrition and a vibrant color to your plate. You can switch up the vegetables based on the season. In summer, add bell peppers or corn. In fall, consider using butternut squash or broccoli. For the pesto, try different herbs. Swap basil for arugula or cilantro for a fresh twist. Each change brings new flavors to the dish. For more details, you can check the [Full Recipe]. To keep your Pesto Zucchini Orzo fresh, store it in an airtight container. This helps prevent air from spoiling your dish. Make sure the orzo cools completely before sealing it up. In the fridge, it stays good for about three to four days. This dish tastes great even after a day or two. When reheating, I recommend using a skillet. Heat it on medium and add a splash of olive oil. This method keeps the orzo and veggies from becoming mushy. You can also add a bit of water or broth to help with moisture. For a fun twist, toss in some extra cherry tomatoes or spinach when you serve it again. It adds color and flavor! Yes, you can freeze Pesto Zucchini Orzo! First, let it cool completely. Then, pack it in a freezer-safe bag or container. Try to remove as much air as possible to avoid freezer burn. When you are ready to eat, thaw it overnight in the fridge. Reheat in a skillet with a bit of oil for the best texture. This way, you can enjoy a quick meal anytime! If you don’t have orzo, you can use other small pasta shapes. Good options include: - Arborio rice: This rice gives a creamy texture. - Quinoa: A healthy grain with a nutty flavor. - Small shells: These shells hold sauce well. - Rice: Use long-grain or jasmine rice for a different twist. Choosing any of these will keep your dish tasty and satisfying. Yes, you can use store-bought pesto. However, homemade pesto often tastes better. It offers fresh flavor and more control over ingredients. Store-bought options save time, but they may lack the bright taste of homemade. If you use store-bought, try to choose one with simple ingredients. This will help maintain the quality of your dish. Pesto Zucchini Orzo is a healthy meal choice. Here’s why: - Zucchini: Low in calories and rich in vitamins. - Orzo: Provides energy from carbohydrates. - Pesto: Contains healthy fats from olive oil and nuts. - Tomatoes: High in antioxidants and vitamins. This dish offers a balance of nutrients, making it a great option for a wholesome meal. To wrap up, we explored a delightful Pesto Zucchini Orzo dish. We covered key ingredients, step-by-step cooking instructions, and tips for the best flavors. You also learned how to store leftovers and sample variations to fit your taste. Whether you want a quick meal or a gourmet touch, this recipe adapts well. Enjoy experimenting with it and making it your own. Your kitchen adventures can start today with this simple and tasty dish.

Looking for a fresh and tasty dinner option? Try Pesto Zucchini Orzo! This dish combines soft orzo pasta, crunchy zucchini, and sweet cherry tomatoes, all mixed with vibrant basil pesto. …

Read more

Categories Dinner

Marinated Zucchini Salad Fresh and Flavorful Dish

July 4, 2025 by Chef Owen
- 3 medium zucchinis, thinly sliced - 1 teaspoon sea salt - 1/4 cup extra virgin olive oil - 1/4 cup red wine vinegar or apple cider vinegar - 1 tablespoon honey or maple syrup - 1 teaspoon garlic powder - 1 teaspoon dried oregano - 1/2 teaspoon black pepper - 1/4 cup fresh parsley, chopped - 1/4 cup cherry tomatoes, halved - 1/4 cup feta cheese, crumbled (optional) To make a great marinated zucchini salad, you need fresh and simple ingredients. Start with three medium zucchinis. Thinly slice them to ensure they soak up all the flavors. The salt helps draw moisture from the zucchini. It makes the texture crisp. You will use one teaspoon of sea salt for this. Next, grab a quarter cup of extra virgin olive oil. This will add a rich flavor to the salad. Use either red wine vinegar or apple cider vinegar, also a quarter cup. Both give a nice tangy taste. For sweetness, one tablespoon of honey works well. If you prefer, you can swap it for maple syrup. For seasoning, add one teaspoon each of garlic powder and dried oregano. These spices bring out the best in the zucchini. Don't forget the half teaspoon of black pepper to add some heat. Finally, for freshness, you will need a quarter cup of chopped parsley and a quarter cup of halved cherry tomatoes. If you like, sprinkle some feta cheese on top for a creamy touch. These ingredients combine to create a vibrant and tasty dish. Check out the Full Recipe for detailed steps on preparation and marination! To start, thinly slice your zucchinis. Use a sharp knife for clean cuts. Place the slices in a colander. Sprinkle one teaspoon of sea salt over the zucchini. This step helps draw out moisture. Let the zucchini sit for about 30 minutes. After that, rinse the slices under cold water. Pat them dry with a paper towel. This keeps your salad crisp and fresh. Now it’s time to make the marinade. In a large mixing bowl, add 1/4 cup of extra virgin olive oil. Next, pour in 1/4 cup of red wine vinegar. You can use apple cider vinegar for a sweeter taste. Add one tablespoon of honey or swap it for maple syrup for a vegan option. Mix in one teaspoon of garlic powder and one teaspoon of dried oregano. Finally, add 1/2 teaspoon of black pepper. Whisk everything together until well combined. Add the dried zucchini slices to the bowl with the marinade. Toss gently to coat each slice well. Let the zucchini marinate for at least 15 minutes at room temperature. If you have time, marinate it in the fridge for up to 2 hours for a stronger flavor. After marinating, add 1/4 cup of chopped parsley and 1/4 cup of halved cherry tomatoes to the zucchini. Gently toss everything together. If you like, sprinkle some crumbled feta cheese on top before serving. This adds a creamy and salty touch. For the full recipe, check out the details above. For the best flavor, I suggest marinating your zucchini for at least 15 minutes. If you have more time, let it sit for up to 2 hours in the fridge. This longer marination brings out bold tastes. To make your salad look great, serve it in a large bowl or on individual plates. Drizzle extra marinade over the top for added flavor. Garnish with fresh parsley for a pop of color. You can also sprinkle some crumbled feta cheese on top if you like. This marinated zucchini salad is light and healthy. One serving has about 150 calories, depending on toppings. Zucchini is low in calories but high in vitamins A and C. It also contains fiber, which is good for digestion. Enjoy this salad for a fresh and nutritious meal! {{image_2}} You can make your marinated zucchini salad even better with different veggies. Try adding bell peppers, cucumbers, or carrots for extra color and crunch. These veggies pair well with zucchini and bring different flavors. If you want it vegan and gluten-free, skip the feta cheese or use a vegan cheese instead. You can also swap honey for maple syrup to keep it plant-based. To boost flavor, consider adding fresh herbs like basil or mint. These herbs add freshness and aroma. You can also try spices like cumin or chili flakes for a kick. For added crunch, toss in some nuts or seeds. Sunflower seeds or slivered almonds work great. They give the salad a nice texture and extra nutrients. Using seasonal fruits and vegetables makes this salad shine throughout the year. In summer, add fresh corn or diced tomatoes. In fall, try thinly sliced apples or pears for a sweet touch. Seasonal ingredients not only taste better but also support local farmers. Always choose what’s fresh and in season to enhance your dish. For the full recipe, check out the preparation steps and enjoy creating a fresh and flavorful dish! To keep your marinated zucchini salad fresh, store it in the fridge. Use an airtight container to prevent air from getting in. This helps the salad stay crisp and tasty. It can last for about 3 to 5 days in the fridge. If you notice any liquid, drain it before serving. This keeps the salad from becoming soggy. You can freeze the salad, but be aware it may lose some texture. If you want to freeze it, do so right after marinating. Place it in a freezer-safe bag or container. Remove as much air as you can before sealing. The salad can last up to 2 months in the freezer. When you are ready to eat, thaw it in the fridge overnight. After storage, your salad may need some love. If it looks a bit sad or watery, try adding fresh ingredients. Chop up some extra parsley or add more cherry tomatoes. A splash of olive oil or vinegar can also help. Mix everything gently, and your salad will taste fresh again. Enjoy the bright flavors! Yes, you can! Feel free to swap in bell peppers, cucumbers, or carrots. These veggies add color and crunch. They also absorb flavors well, just like zucchini. Try mixing different types for a fun twist. Marinated zucchini salad stays fresh for about three days in the fridge. Store it in an airtight container to keep it crisp. After three days, the salad may become soggy. If you see any changes in smell or color, it's best to toss it. Absolutely! Making it a few hours before serving is a great idea. The flavors deepen as it sits. Just remember to keep it in the fridge. If you want to serve it later, add the tomatoes and feta just before serving. Serve it in a large bowl or on individual plates. Drizzle some extra marinade over the top for more flavor. Garnish with fresh parsley for a vibrant touch. You can also serve it as a side dish or a light main course. Check out the Full Recipe for more tips! In this post, we explored how to make a delicious marinated zucchini salad. We covered the ingredients, tools, and step-by-step instructions. Plus, I shared tips on serving and customizing the dish. Marinated zucchini is a great way to enjoy fresh veggies with tasty flavors. Remember, you can mix and match ingredients based on your taste. Preparing this salad is easy and rewarding, whether you eat it right away or store it for later. Enjoy your healthy dish and share it with friends!

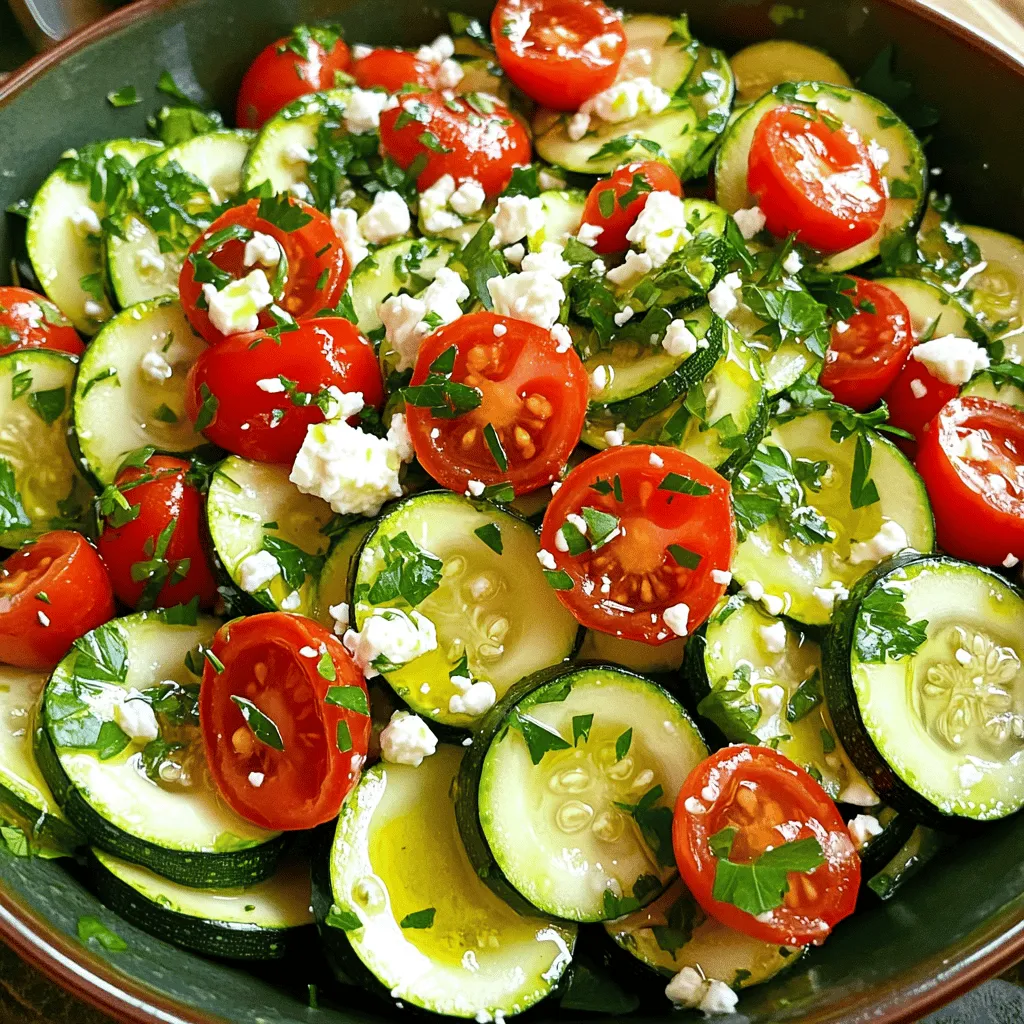
Are you ready for a fresh and tasty dish that bursts with flavor? This Marinated Zucchini Salad is an easy and vibrant addition to any meal. With crisp zucchini, bright …

Read more

Categories Salads
Older posts
Newer posts
← Previous Page1 … Page81 Page82 Page83 … Page125 Next →

THE RECIPE HATCH

Where tasty ideas take flight! 🚀🐣 Fresh, easy recipes hatched daily to make cooking simple and flavorful.

PAGES

Home About Contact Privacy Policy Terms & Conditions Cookie Policy GDPR Policy Copyright Policy Disclaimer

CATEGORIES

Appetizers Desserts Salads Breakfast Dinner

Contact

  • Pinterest
  • Mail
Copyright © 2026 The Recipe Hatch. All rights reserved.