Garlic Butter Baked Chicken Breast Simple Dinner Delight
![- 4 boneless, skinless chicken breasts - 6 tablespoons unsalted butter, melted - 4 cloves garlic, minced For this dish, I love using fresh chicken breasts. They cook evenly and stay juicy. The butter adds richness, while the garlic brings a lovely aroma and flavor. - 1 teaspoon dried thyme - 1 teaspoon dried rosemary - 1 teaspoon paprika - Salt and pepper to taste These herbs and spices are key. Thyme and rosemary give a warm, earthy taste. Paprika adds a hint of color and smokiness. Salt and pepper enhance all the flavors. - Fresh parsley, chopped (for garnish) - Lemon wedges (for serving) Garnishing with parsley gives a fresh look. Lemon wedges add a bright touch when served. A squeeze of lemon juice over the chicken makes it even tastier. This recipe creates a simple dinner delight that is sure to impress. For the full recipe, feel free to check out the complete details. - Preheat the oven to 400°F (200°C). - In a mixing bowl, combine melted butter, minced garlic, dried thyme, dried rosemary, paprika, salt, and pepper. Stir until everything mixes well. - Take the chicken breasts and place them in a baking dish. - Pour the garlic butter mixture over the chicken. Make sure each piece is well coated. - Bake in the preheated oven for 25 to 30 minutes. Check that the internal temperature reaches 165°F (75°C). - Once cooked, remove the chicken from the oven. Let it rest for about 5 minutes. - Garnish with freshly chopped parsley. Serve with lemon wedges on the side. You can drizzle the lemon over the chicken for extra flavor. This simple method makes a delicious meal that feels gourmet. For the full recipe, check out [Full Recipe]. To get the best garlic butter baked chicken, start with chicken breasts that are even in thickness. This helps them cook evenly. A meat thermometer is your best friend here. It tells you when the chicken hits 165°F (75°C), which means it’s safe to eat. Want to take the flavor up a notch? Add a splash of lemon juice to the garlic butter mixture. This gives the chicken a bright and zesty kick. You can also marinate the chicken for a few hours. This adds depth and makes it extra tasty. Use a sturdy baking dish for best results. This helps the chicken cook evenly. Lining your dish with parchment paper makes cleanup a breeze. No one likes scrubbing dishes after a long day! For the full recipe, check out the detailed instructions above. {{image_2}} You can easily change some ingredients. For a juicier option, substitute chicken thighs for the breasts. Chicken thighs have more fat, which keeps them moist and tasty. You can also try different herbs. Use oregano or basil to give your dish a unique twist. These herbs add fresh flavors that can brighten the meal. Grilling is another fun way to prepare this dish. It adds a smoky flavor that many enjoy. If you have an air fryer, you can use that too. Air frying the chicken gives you a quicker and crispier result. Just make sure to adjust the cooking time to keep it juicy. When it’s time to serve, think about your sides. This chicken goes great over rice or pasta. You can also serve it with a fresh salad for a complete meal. Another nice touch is to pair it with roasted vegetables. They add nutrition and color to your plate. For full details, check the [Full Recipe]. Store any leftover garlic butter baked chicken breast in an airtight container. This keeps it fresh and tasty. Enjoy it within 3 to 4 days for the best flavor and texture. You can freeze cooked chicken for easy meals later. Divide it into portioned bags. This makes it easy to grab and go. When you're ready to eat, thaw it in the refrigerator overnight. To reheat, use the oven. This method keeps the chicken juicy and delicious. If you use a microwave, add a bit of water. This helps prevent the chicken from drying out. Bake chicken breasts for 25-30 minutes at 400°F (200°C). This time gives juicy, tender meat. Always check the internal temperature. It should reach 165°F (75°C) to be safe to eat. If your chicken is thicker, it may need extra time. Use a meat thermometer for best results. Yes, you can use frozen chicken breasts. However, adjust your cooking time. Bake them for about 40-50 minutes at 400°F (200°C). Check the internal temperature to ensure it reaches 165°F (75°C). If possible, thaw them in the fridge overnight for even cooking. Many sides pair nicely with garlic butter baked chicken. Here are some tasty suggestions: - Steamed broccoli - Garlic mashed potatoes - Roasted carrots - Fresh green salad - Quinoa or rice with herbs These sides add color, flavor, and nutrition to your meal. Enjoy mixing and matching! For a full recipe of garlic butter baked chicken breast, refer to the earlier section. This recipe for garlic butter baked chicken is straightforward and tasty. We covered the main ingredients, step-by-step instructions, and tips for success. You can also try fun variations or storage methods to enjoy leftovers. Remember, using fresh herbs and proper cooking times makes a big difference. With simple tweaks, you can create a delicious meal every time. Enjoy making this dish and impressing your family or friends!](https://therecipehatch.com/wp-content/uploads/2025/07/d2f19db0-748d-4544-a8e4-86fba747dabf.webp)
Are you ready to elevate your dinner routine? Garlic Butter Baked Chicken Breast is a simple yet delightful dish that brings bold flavors with minimal effort. Using just a few …
Are you ready to elevate your dinner routine? Garlic Butter Baked Chicken Breast is a simple yet delightful dish that brings bold flavors with minimal effort. Using just a few …
![- 2 medium zucchinis, sliced into 1/4-inch rounds - 1 cup grated Parmesan cheese - 1 cup panko breadcrumbs - 1 teaspoon garlic powder - 1 teaspoon onion powder - 1 teaspoon dried oregano - 1/2 teaspoon red pepper flakes (optional) - Salt and pepper to taste - 2 large eggs, beaten - Olive oil spray Gather these ingredients before you start. The zucchini is the star. Choose firm zucchinis for the best texture. Grated Parmesan cheese adds a rich flavor. Panko breadcrumbs give a great crunch. The garlic powder and onion powder add depth to each bite. Dried oregano brings an Italian touch. If you like heat, add red pepper flakes. Don't forget salt and pepper to enhance taste. - Baking sheet - Parchment paper - Mixing bowls - Shallow dish for coating You need a baking sheet to hold the chips. Parchment paper helps prevent sticking. Mixing bowls are for preparing the coating and egg wash. A shallow dish makes coating easier. Having these tools ready makes cooking smooth and fun. - Calories: Approximately 150 per serving - Protein: 6g - Fat: 9g - Carbohydrates: 12g These chips can fit into a balanced diet. They're a great snack option. The recipe serves four, so share with friends or family. Each serving provides good protein and flavor without many carbs. Enjoy knowing you are munching on something healthy! First, preheat your oven to 425°F (220°C). This temperature helps make the chips crispy. While it heats, get a baking sheet and line it with parchment paper. This will stop the chips from sticking. Next, take two medium zucchinis. Slice them into 1/4-inch rounds. Try to keep the slices even. This way, they cook at the same time. Now, let’s mix the coating. In a shallow bowl, combine one cup of panko breadcrumbs, one cup of grated Parmesan cheese, one teaspoon of garlic powder, one teaspoon of onion powder, one teaspoon of dried oregano, and optional red pepper flakes. Add salt and pepper to taste. Mix everything well. In another bowl, whisk two large eggs. This will be our egg wash. Take each zucchini slice and dip it into the egg wash. Let any extra egg drip off. Then, coat it in the breadcrumb mix. Press gently to make sure the coating sticks. This step is key for a tasty crunch. Place the coated zucchini chips in a single layer on the baking sheet. Lightly spray the top with olive oil for extra crunch and flavor. Now it’s time to bake! Put the baking sheet in the oven. Bake the chips for about 20 to 25 minutes. Keep an eye on them. You want them golden brown and crispy. Once done, take them out and let them cool for a few minutes. The chips are now ready for you to enjoy! For the full recipe, check out the link provided. To get that perfect crunch, panko breadcrumbs are key. They are light and airy. This texture creates a great crisp when baked. Regular breadcrumbs can make the chips dense. So, stick with panko for this recipe. Using olive oil spray is also important. It helps the chips brown nicely. Spray lightly on the tops before baking. This step makes a big difference in crispiness. For the best results, set your oven to 425°F (220°C). This temperature helps the chips cook evenly. If your oven runs hot, check them a bit earlier. The thickness of your zucchini slices affects cooking time. If you cut them thinner than 1/4 inch, they may cook faster. Adjust the time as needed to avoid burning. These chips pair well with many dips. Try marinara or ranch for a tasty combo. The flavors of the dips really enhance the chips. For plating, arrange them on a colorful plate. Add some fresh herbs like parsley for a nice touch. This makes your snack look even more inviting. For more ways to enjoy zucchini, check out the Full Recipe! {{image_2}} You can make your baked Parmesan zucchini chips even more fun by trying different spices. Italian herbs work great for a classic taste. You might also enjoy adding smoked paprika for a subtle smoky flavor. Mix and match to find your favorite blend! Different cheese types can also change the game. Cheddar adds a sharp bite, while mozzarella brings a creamy touch. Feel free to experiment with what you have on hand. If you need a gluten-free option, replace panko breadcrumbs with almond flour or crushed gluten-free crackers. Both will still give you that satisfying crunch without the gluten. For those following a vegan diet, you can swap out the eggs. Use a mixture of ground flaxseed and water. This will help the coating stick just like eggs do. Zucchini is just the start! You can use eggplant if you want a meaty chip. Slice it thin, just like the zucchini. Yellow squash is another tasty option, adding a slight sweetness. Why not create a mixed chip platter? Combine zucchini, eggplant, and squash. This colorful mix will impress your guests and add variety to your snack time! For the full recipe, check out the complete guide. To keep your zucchini chips crispy, try these best practices: - Cool Completely: Let the chips cool fully before storing. This step helps reduce moisture. - Use Airtight Containers: Place chips in a container with a tight seal. This keeps air out and maintains crispness. - Avoid Stacking: Layering can cause chips to become soggy. Instead, store them in a single layer if possible. - Store at Room Temperature: Keep in a cool, dry place. Do not refrigerate, as this can introduce moisture. When you want to enjoy your leftover chips, reheating can help restore their crunch. Here are some methods: - Oven Method: Preheat your oven to 350°F (175°C). Spread the chips on a baking sheet. Heat for about 5-10 minutes, watching closely to avoid burning. - Air Fryer Method: If you have an air fryer, this is a great option. Set it to 350°F (175°C) and heat the chips for 3-5 minutes. This method revives the crunch. - Microwave Caution: While you can use a microwave, it may make the chips soft. Use this method only if you have no other choice. Following these tips helps keep your baked Parmesan zucchini chips delicious and crunchy! For the full recipe, check out the earlier sections. Yes, you can prepare zucchini chips in advance. Slice the zucchinis and coat them. Place the chips on a baking sheet, but do not bake them yet. Cover with plastic wrap and refrigerate for up to 24 hours. When you're ready, bake them straight from the fridge. This saves time and keeps them fresh. To reheat your chips, use the oven or an air fryer. Preheat the oven to 350°F (175°C) and bake for about 10 minutes. This helps restore their crispiness. If using an air fryer, heat at 350°F (175°C) for 5-7 minutes. Both methods keep the chips crunchy and tasty. Absolutely! Air frying is a great option. After coating the zucchini, place them in a single layer in your air fryer basket. Set the temperature to 375°F (190°C) and cook for 10-12 minutes. Shake the basket halfway through to ensure even cooking. This method makes the chips super crispy and delicious. Yes, these chips are a healthy snack choice. Zucchini is low in calories and high in vitamins. Each serving has about 120 calories, depending on the amount of cheese used. They provide fiber and essential nutrients, making them a great alternative to regular chips. Enjoy guilt-free snacking with this tasty recipe! For the full recipe, check [Full Recipe]. This blog post laid out how to make baked Parmesan zucchini chips. You saw the key ingredients, tools needed, and the steps to create this tasty snack. I shared tips for achieving the best crunch and suggested fun variations to try. Storing and reheating guidelines help you keep your chips fresh. Enjoy making these easy, fun snacks that can fit many diets and preferences. Don’t hesitate to experiment and find your favorite flavor!](https://therecipehatch.com/wp-content/uploads/2025/07/f8d3b043-937d-4202-b98d-30919e56a3eb.webp)
Want a snack that’s both tasty and healthy? Try my Baked Parmesan Zucchini Chips! These chips are crispy, flavorful, and easy to make. With just a few simple ingredients and …
![To make One Pan Lemon Garlic Chicken, you need simple, fresh ingredients for great flavor. Here's what you'll need: - Chicken and seasoning - 4 chicken thighs, skin-on and bone-in - 2 tablespoons olive oil - 1 teaspoon salt - ½ teaspoon black pepper - Vegetables and aromatics - 4 cloves garlic, minced - 1 cup cherry tomatoes, halved - 1 cup baby spinach - 1 teaspoon dried thyme (or 1 tablespoon fresh thyme) - Liquids and garnishes - Juice and zest of 2 lemons - 1 cup chicken broth - Fresh parsley, chopped (for garnish) These ingredients blend perfectly to create a tasty meal. The chicken thighs bring a juicy base. The lemon and garlic add bright flavors, while the spinach and tomatoes add color and nutrition. You can find the Full Recipe linked above for more details on cooking. - Preparing the chicken thighs: Start with four chicken thighs. Make sure they have skin and bones for flavor. Rinse them under cold water. Pat the chicken dry with paper towels. This helps the skin crisp up later. - Searing the chicken: Heat two tablespoons of olive oil in a large oven-safe skillet. Set the heat to medium-high. Once hot, season the chicken with one teaspoon of salt and half a teaspoon of black pepper. Place the chicken thighs skin side down in the skillet. Sear them for 5 to 7 minutes. Look for a golden brown color. Flip them and cook for another 5 minutes. After that, remove the chicken and set it aside on a plate. - Mixing the sauce: In the same skillet, add four minced garlic cloves. Sauté for about 30 seconds until fragrant. Pour in one cup of chicken broth. Add the juice and zest of two lemons. Stir to mix well. Scrape the brown bits off the skillet's bottom. This adds great flavor to your dish. - Adding vegetables and broth: Next, add one teaspoon of dried thyme, one cup of halved cherry tomatoes, and one cup of baby spinach to the skillet. Stir gently to combine everything. - Final roasting process: Nestle the seared chicken thighs back into the skillet, skin side up. Transfer the skillet to your preheated oven at 400°F (200°C). Roast for 25 to 30 minutes. This will cook the chicken through and keep it juicy. - Checking for doneness: Use a meat thermometer to check the chicken's internal temperature. It should reach 165°F (74°C). If it does, it’s ready! Remove the skillet from the oven and let the chicken rest for 5 minutes. Garnish with fresh parsley before serving. For the complete recipe, you can refer to the [Full Recipe]. - Ensuring the chicken skin is crispy: Start with a dry chicken. Pat it with paper towels to remove moisture. Use medium-high heat to sear the skin for 5-7 minutes. This seals in flavor and gives a nice crunch. - How to avoid overcooking the chicken: Use a meat thermometer. Chicken should reach 165°F (74°C) inside. Remove it from the oven once it hits this temp. Let it rest for 5 minutes before serving. This helps keep it juicy. - Best skillet to use: A large, oven-safe skillet is best. Cast iron or stainless steel works well. These materials heat evenly and retain warmth. This helps cook the chicken just right. - Ideal side dishes to pair: Serve this dish with rice or crusty bread. Both soak up the tasty sauce. You can also add a simple salad for freshness. Roasted vegetables work great too. - Presentation tips: Arrange the chicken thighs on a large platter. Spoon the sauce and veggies over the top. Garnish with fresh parsley for a pop of color. This makes the dish look appealing. - How to reheat leftovers: Place leftovers in a skillet over low heat. Add a splash of chicken broth to keep it moist. Cover with a lid. Heat until warm throughout. This keeps the chicken tender and flavorful. For the full recipe, check out the One Pan Lemon Garlic Chicken. {{image_2}} You can make One Pan Lemon Garlic Chicken even more fun! Here are some ideas: - Adding herbs and spices: Try fresh rosemary or basil for a new twist. A pinch of red pepper flakes adds heat. Experiment with smoked paprika for a smoky flavor. - Utilizing different cuts of chicken: Use chicken breasts if you prefer lean meat. Drumsticks work well, too. Each cut offers a unique taste and texture. - Alternative vegetables: Swap cherry tomatoes for bell peppers or zucchini. Broccoli and asparagus also fit nicely. Mix and match your favorites for variety. You can adjust this dish for different diets. Here’s how: - Making it gluten-free: This recipe is naturally gluten-free! Just use gluten-free broth. Always check ingredient labels to be safe. - Options for paleo or keto dieters: Skip the baby spinach if you're on keto. Instead, add cauliflower rice for a filling side. You can also use coconut aminos instead of broth for a paleo-friendly flavor. - Vegetarian adaptations: You can make a veggie version! Replace the chicken with firm tofu or chickpeas. Use vegetable broth and add more veggies for a hearty meal. For the complete recipe, check out the Full Recipe section. To store leftovers, let the chicken cool down first. Place it in an airtight container. This keeps the chicken fresh and prevents odors. Use parchment paper between layers if stacking. The expected shelf life in the fridge is about 3 to 4 days. Make sure to check for any off smells before eating. To freeze, first cool the chicken completely. Then, wrap it tightly in plastic wrap. Place the wrapped chicken in a freezer-safe bag. This method protects it from freezer burn. You can freeze it for up to 3 months. To reheat frozen portions, thaw them overnight in the fridge. Once thawed, you can reheat the chicken in a skillet over low heat. Ensure the internal temperature reaches 165°F (74°C) for safety. You can also use the oven for reheating if you prefer a crispy skin. How to make One Pan Lemon Garlic Chicken? To make One Pan Lemon Garlic Chicken, start by gathering your ingredients. You need chicken thighs, olive oil, salt, black pepper, garlic, lemons, thyme, chicken broth, cherry tomatoes, baby spinach, and parsley. Preheat your oven to 400°F (200°C). Heat olive oil in an oven-safe skillet. Season the chicken with salt and pepper. Sear the chicken skin side down until it is golden brown. Flip and cook for five more minutes. Remove the chicken from the skillet. Sauté minced garlic for about 30 seconds. Add chicken broth, lemon juice, and zest. Mix in thyme, cherry tomatoes, and spinach. Nestle the chicken back in the skillet. Roast in the oven for 25-30 minutes until fully cooked. This is a simple yet tasty dish. Can I use boneless chicken? Yes, you can use boneless chicken. Boneless thighs or breasts work well. Adjust the cooking time, as boneless cuts cook faster. Keep an eye on the chicken to avoid drying it out. Check the internal temperature to ensure it's safe to eat. It should reach 165°F (74°C). What should I do if the chicken isn’t cooked through? If the chicken isn't cooked through, return it to the oven. Use a meat thermometer to check the temperature. If it’s below 165°F (74°C), cook for an extra 5-10 minutes. You can also cover the skillet with foil to keep moisture in. This helps the chicken cook evenly. Always ensure you check before serving. This blog covered everything you need for making a tasty One Pan Lemon Garlic Chicken. You learned the key ingredients, step-by-step cooking instructions, and helpful tips to get the best results. I shared great flavor and dietary variations, plus how to store and reheat leftovers. In my view, this dish is simple yet delicious. With the right techniques, you can impress anyone. Enjoy cooking and sharing this meal with family and friends.](https://therecipehatch.com/wp-content/uploads/2025/07/e6663c61-11ab-4e92-bfe1-6c731f94b533.webp)
Are you looking for an easy and tasty dinner? One Pan Lemon Garlic Chicken is a simple dish that impresses. With juicy chicken, fresh veggies, and zesty flavors, you’ll love …
![For this dessert, you need fresh peaches. Use about 2 cups, pitted and sliced. The brown sugar adds sweetness, so include 2 tablespoons. A touch of 1 teaspoon cinnamon gives warmth, while 1 tablespoon lemon juice brightens the flavor. The crust starts with 1 1/2 cups of graham cracker crumbs. You will also need 1/4 cup of unsalted butter, melted. Add 1 tablespoon of sugar to make it sweet and crisp. The cheesecake filling uses 3 (8 oz) packages of softened cream cheese. Mix in 1 cup of granulated sugar and 1 teaspoon of vanilla extract. You also need 3 large eggs for richness. Finally, add 1 cup of sour cream to create a creamy texture. For a special touch, you can garnish with whipped cream and peach slices. You can find the full recipe for this delightful treat [Full Recipe]. Preheat your oven to 400°F (200°C). In a bowl, mix sliced peaches with brown sugar, cinnamon, and lemon juice. Toss until the peaches are well coated. Spread the peaches on a lined baking sheet. Roast for 20-25 minutes until they are tender and caramelized. Remove them and let them cool slightly. In a medium bowl, combine graham cracker crumbs, melted butter, and sugar. Mix well until it looks like wet sand. Press this mixture evenly into the bottom of a 9-inch springform pan. Bake for 10 minutes at 350°F (175°C). Remove it from the oven and let it cool. In a large bowl, beat softened cream cheese until it is smooth. Gradually add granulated sugar and vanilla extract. Mix until combined. Add eggs, one at a time, mixing well after each. Fold in sour cream until everything is smooth and creamy. Gently fold in the roasted peaches, saving some to decorate later. Pour the cheesecake mixture over the cooled crust in the springform pan. Bake at 350°F (175°C) for 50-60 minutes. The center should be set but slightly jiggly. Turn off the oven and crack the door. Let the cheesecake cool in the oven for one hour. After an hour, take the cheesecake out and let it cool at room temperature for another hour. Cover it and refrigerate for at least 4 hours, or overnight. When ready to serve, carefully remove it from the springform pan. Slice and top with whipped cream and reserved roasted peaches. Enjoy this delightful treat from the Full Recipe! When picking peaches, look for ripe ones. They should feel slightly soft when you press them. A sweet aroma is a good sign too. Choose peaches with a deep color, as this shows they are ripe. Avoid any peaches with bruises or dark spots. If you find hard peaches, let them sit at room temperature for a few days. They will ripen nicely. A great crust holds your cheesecake together. Use fresh graham cracker crumbs for the best taste. Mix them well with melted butter and sugar. Press this mixture firmly into the bottom of your springform pan. Bake it at 350°F (175°C) for 10 minutes. Let it cool completely before adding the filling. This cool crust keeps the cheesecake from becoming soggy. Overmixing the cheesecake batter can add too much air. This makes your cheesecake crack. Mix just until smooth. Another mistake is baking at a high temperature. Always bake your cheesecake low and slow. It needs time to set properly. Lastly, don’t skip the cooling step. Letting it cool slowly in the oven helps avoid cracks. Following these tips will help you create a perfect roasted peach cobbler cheesecake every time. For the full recipe, check the link. {{image_2}} You can easily swap peaches for other fruits. Try using fresh berries, apples, or pears. Each fruit brings its own flavor and charm. For berries, use strawberries or blueberries. For apples, choose a mix of sweet and tart varieties. This keeps the recipe fresh and fun all year round. While graham cracker crust is classic, feel free to switch it up. Use crushed cookies like Oreos for a chocolate twist. Shortbread cookies add a rich flavor too. You can even make a nut-based crust, using almonds or pecans. Just blend them with butter for a crunchy base. Want to take your cheesecake to the next level? Add spices like nutmeg or ginger for warmth. You can also mix in chocolate chips for added indulgence. Using flavored extracts like almond or coconut can change the taste too. Don't forget to top with caramel or chocolate sauce for a sweet finish. Try these variations to make your roasted peach cobbler cheesecake unique. You can find the full recipe to guide you on this tasty journey. To keep your roasted peach cobbler cheesecake fresh, wrap it tightly in plastic wrap or foil. Place it in the fridge. It stays good for about 5 days. If you want to save it longer, consider freezing it. To freeze your cheesecake, let it cool completely first. Slice the cheesecake into pieces. Wrap each slice in plastic wrap, then place them in a freezer bag. Remove as much air as you can. Your cheesecake can last up to 3 months in the freezer. To reheat cheesecake, avoid the microwave. Instead, preheat your oven to 250°F (120°C). Place the cheesecake in the oven for about 10-15 minutes. This method warms it without drying it out. Enjoy it warm or at room temperature for the best taste. To make roasted peach cobbler cheesecake, you start by roasting fresh peaches. Slice and mix them with brown sugar, cinnamon, and lemon juice. Roast these in a preheated oven at 400°F for 20-25 minutes. While they cool, prepare the crust using graham cracker crumbs, melted butter, and sugar. Press this mix into a springform pan and bake for 10 minutes at 350°F. Next, beat softened cream cheese with sugar and vanilla until smooth. Add eggs one by one and mix well. Fold in the sour cream and roasted peaches. Pour this filling over the crust and bake at 350°F for 50-60 minutes. Cool it in the oven, then chill it for at least 4 hours. You can find the full recipe above. A cheesecake typically needs to chill for at least 4 hours. This helps it set properly and develop a nice texture. For the best result, chill it overnight. This way, the flavors meld well. Yes, you can make this cheesecake in advance. It stores well in the fridge for up to five days. Just cover it tightly with plastic wrap or foil. You can even freeze it for longer storage. Roasted peach cobbler cheesecake pairs well with whipped cream, fresh peach slices, or a drizzle of caramel sauce. A scoop of vanilla ice cream is also a great match. These additions enhance the flavors and make the dessert even more delightful. This guide covered how to make a delicious roasted peach cobbler cheesecake. We discussed essential ingredients like fresh peaches and crust components. I shared step-by-step instructions, tips for picking peaches, and common baking mistakes. You can even try variations with different fruits or crusts. In the end, this cheesecake is a tasty treat. With a little practice, you’ll impress everyone with your skills. Enjoy every bite!](https://therecipehatch.com/wp-content/uploads/2025/07/bfc42322-02ab-4ee4-9823-a9b15898738e.webp)
Are you ready to treat your taste buds? This Roasted Peach Cobbler Cheesecake combines sweet peaches, a buttery crust, and creamy filling for a dessert that’s a real showstopper. Whether …
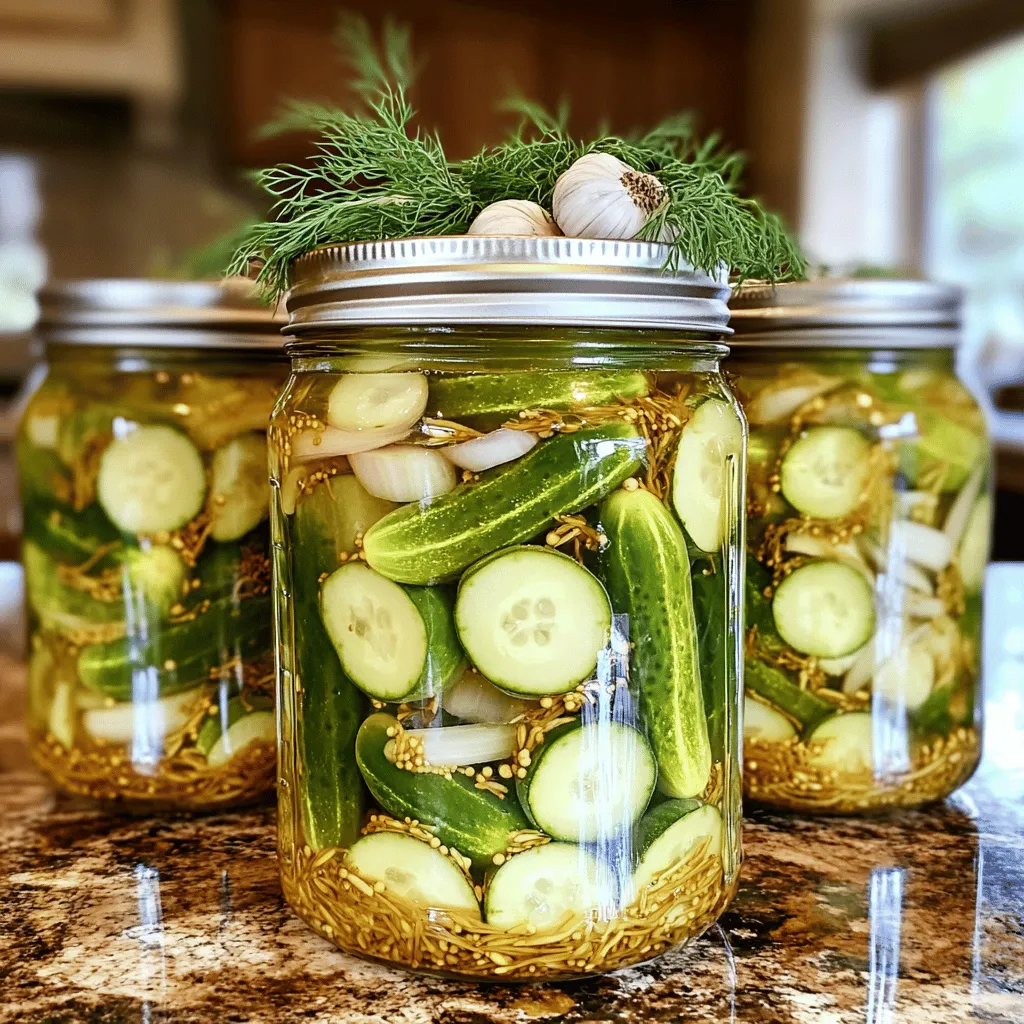
Are you ready to impress your family with the perfect sweet gherkin pickles? In this easy recipe guide, I’ll walk you through every step of preparing these tangy, sweet bites …
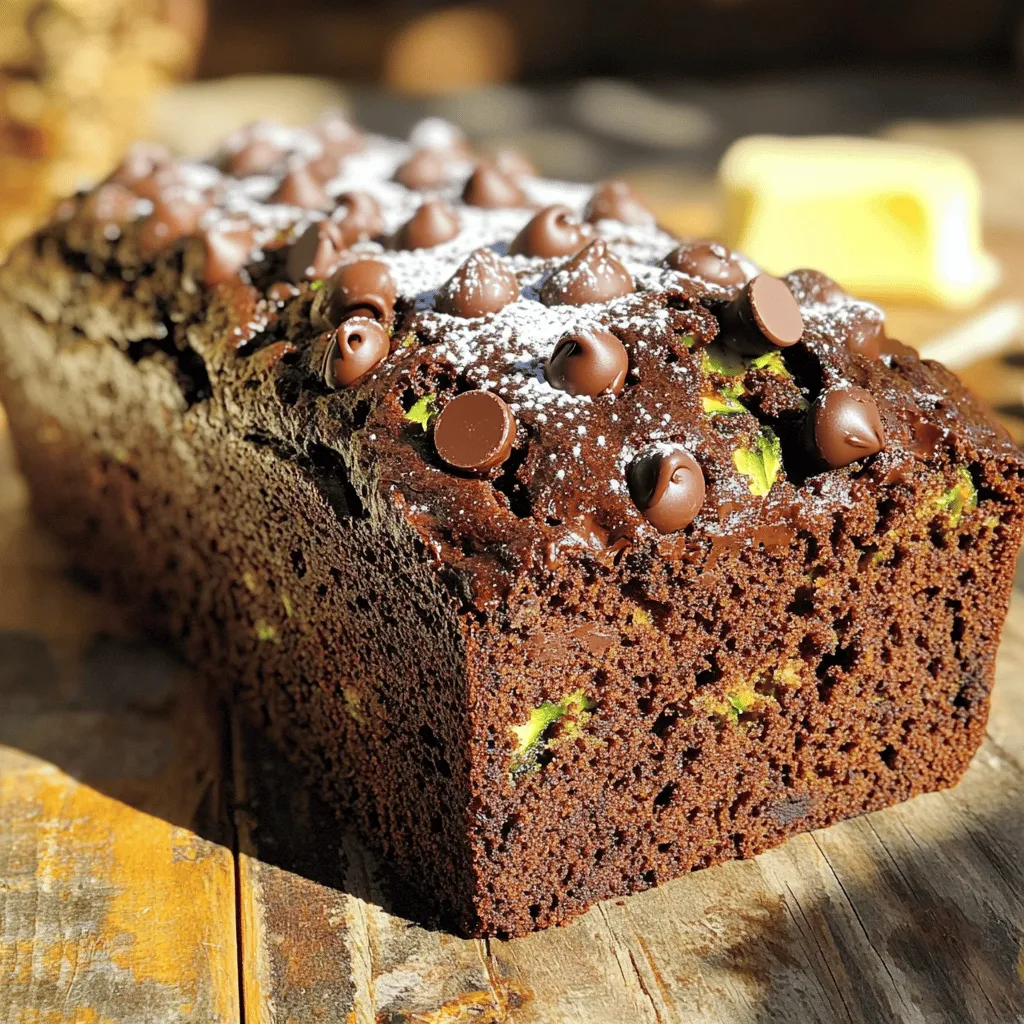
Are you ready to indulge in a sweet treat that doesn’t skimp on flavor? My Decadent Double Chocolate Zucchini Bread is your perfect answer. Packed with rich cocoa and moist …
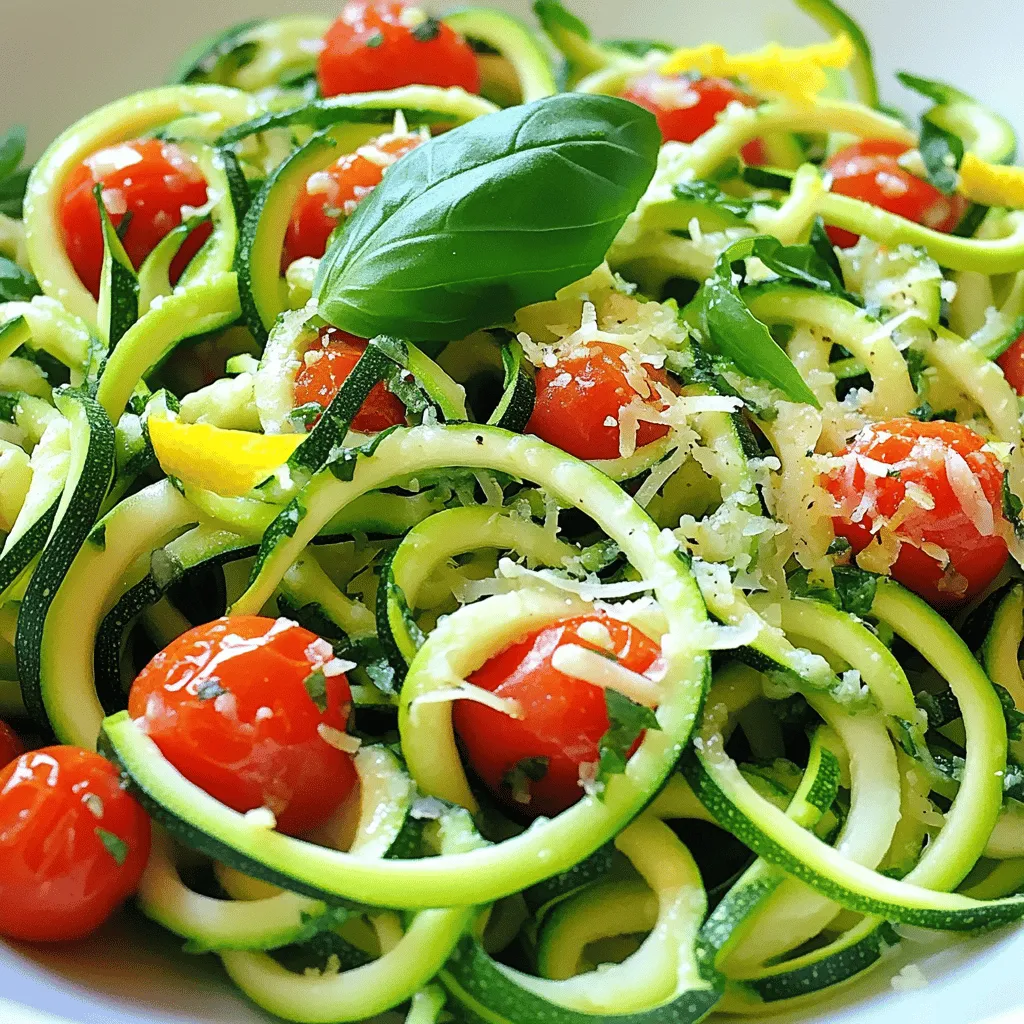
Looking for a quick, tasty meal? Stanley Tucci’s Zucchini Pasta is a fun way to enjoy fresh veggies. This simple recipe is loaded with flavor and takes just minutes to …
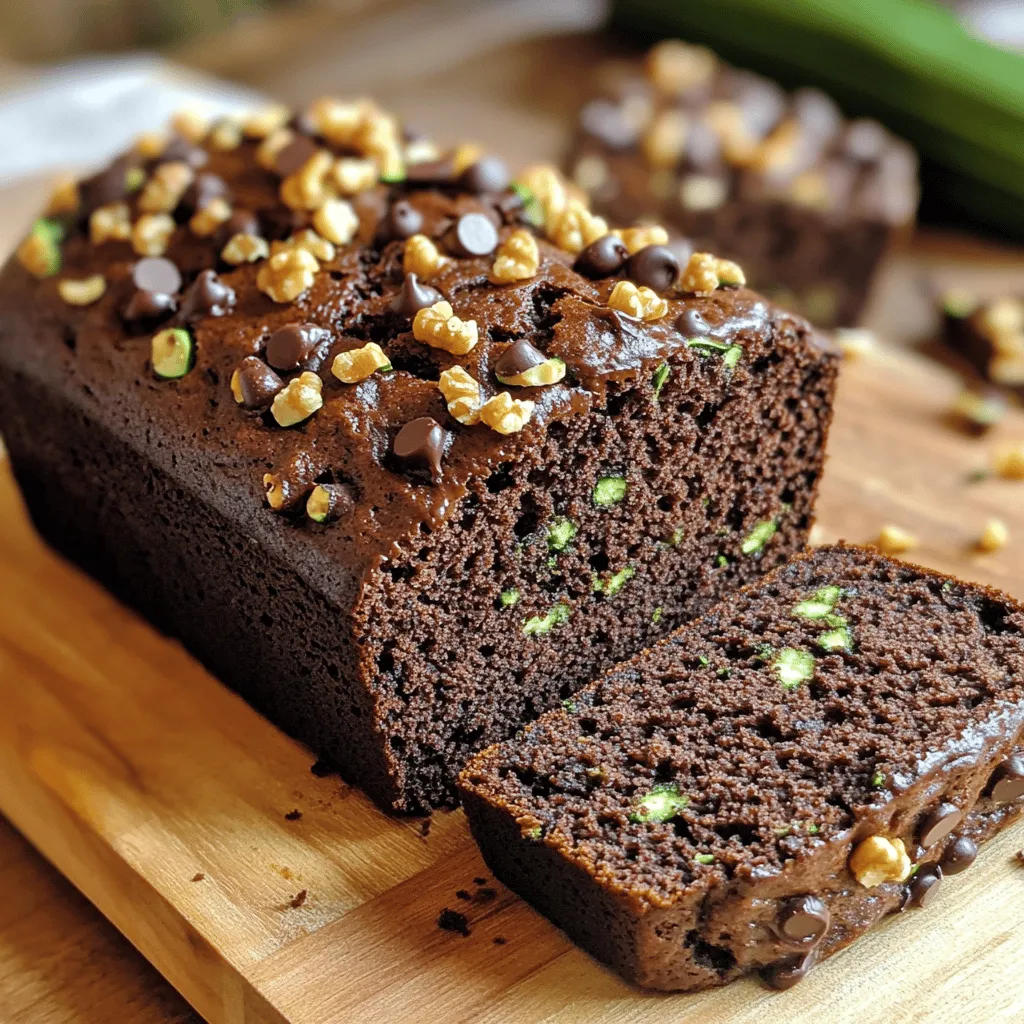
Looking for a delicious and healthy treat? Try my Healthy Chocolate Zucchini Bread! This simple recipe hides the goodness of zucchini in rich, chocolatey goodness. It’s packed with nutrients and …

Are you looking for a dish that combines freshness and comfort? Look no further than my Zucchini Dill Casserole! This hearty and flavorful dish features simple, fresh ingredients like zucchini …
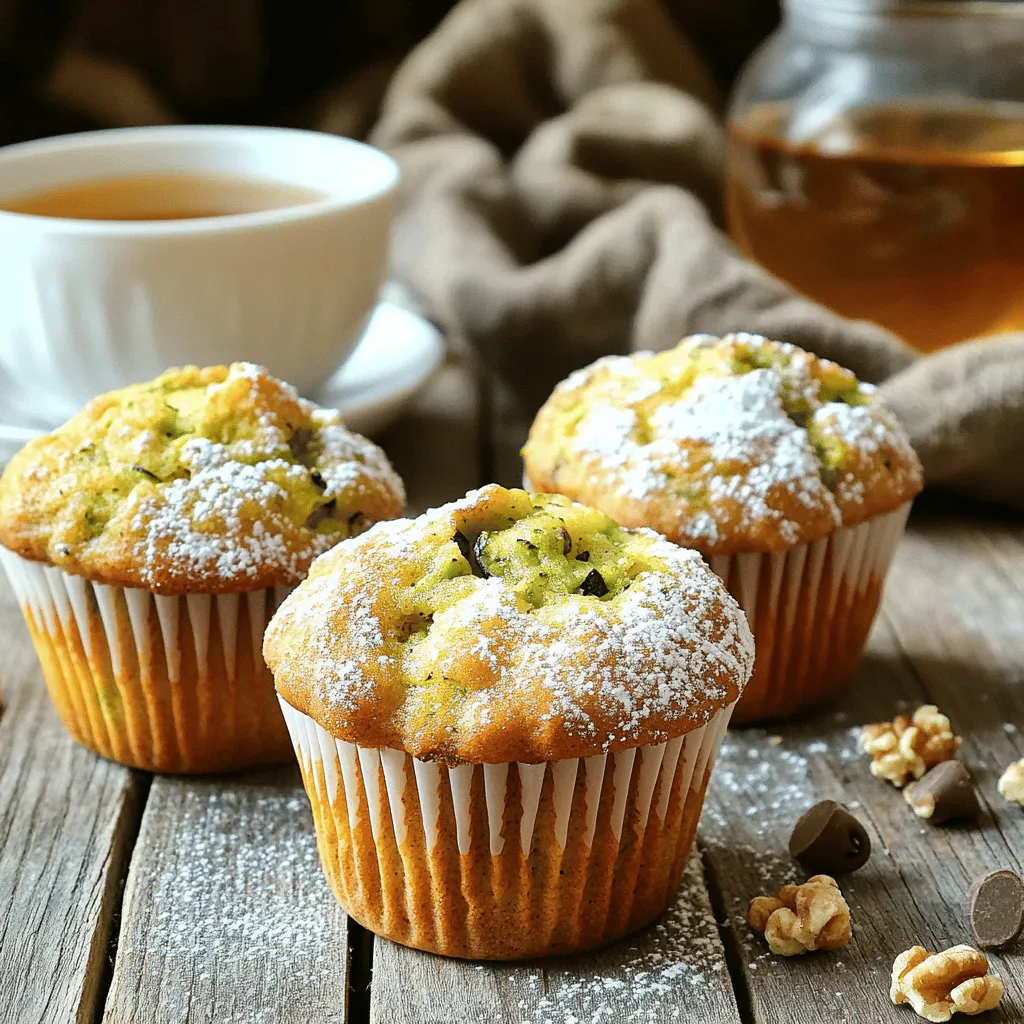
Are you craving a delicious treat that’s healthy and gluten-free? Look no further! I’ll guide you through making tasty gluten-free zucchini muffins that are perfect for breakfast or a snack. …