Homemade Chai Scones with Maple Chai Glaze Delight

Do you crave a warm, spiced treat? Homemade chai scones with a delightful maple chai glaze might be just what you need! This easy recipe combines the fragrant flavors of …
Do you crave a warm, spiced treat? Homemade chai scones with a delightful maple chai glaze might be just what you need! This easy recipe combines the fragrant flavors of …

Are you craving a quick and wholesome snack? Look no further! In this post, I’ll share my easy recipe for Healthy Peanut Butter Banana Muffins. These muffins are not only …
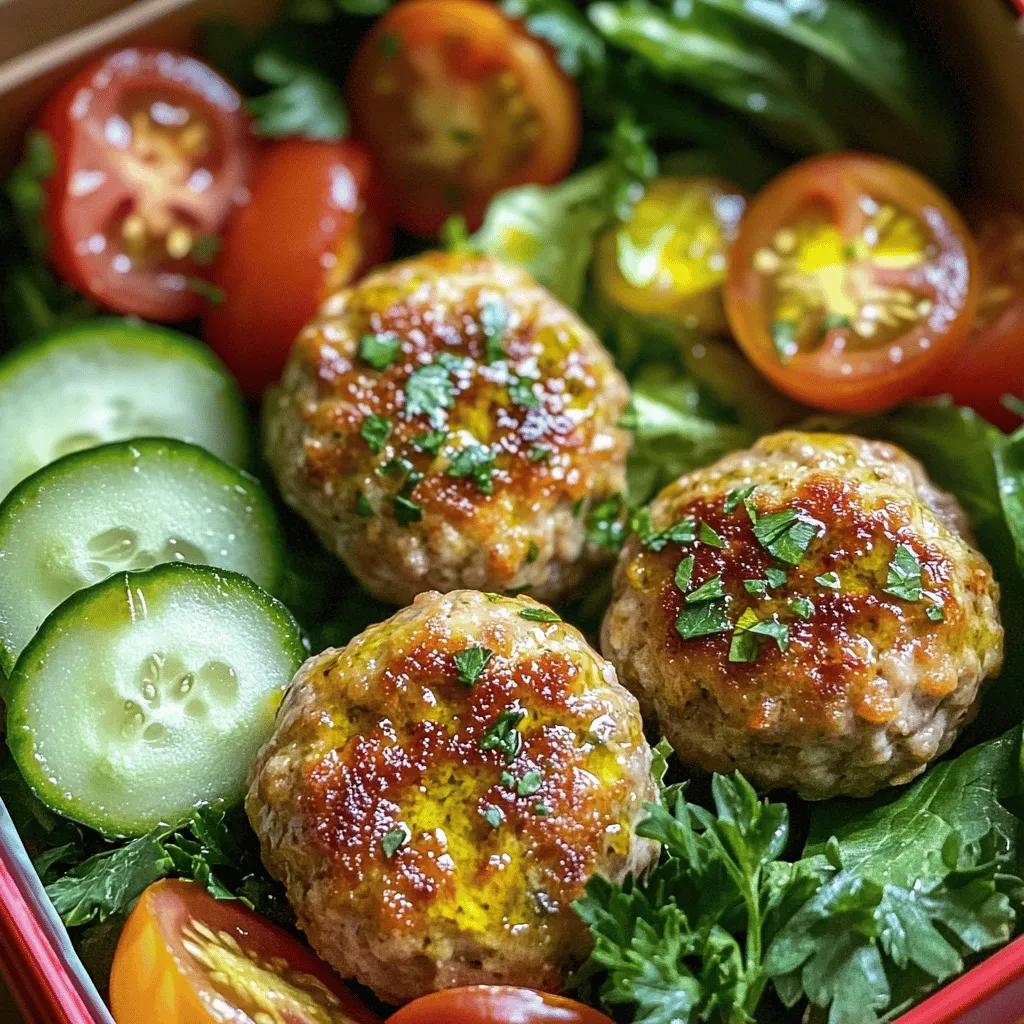
Looking for a fresh and tasty lunch option? You’ll love my Turkey Meatball & Feta Lunchbox! This meal combines juicy turkey meatballs with creamy feta cheese, making a perfect blend …
![For this creamy roasted garlic tomato soup, you will need: - 6 ripe tomatoes, halved - 1 whole bulb of garlic - 1 medium onion, chopped - 2 tablespoons olive oil - 4 cups vegetable broth These fresh ingredients create a rich base. The tomatoes bring sweetness, while the garlic adds depth. To make the soup creamy, add: - 1 cup heavy cream (or coconut milk for a dairy-free version) This creamy component gives the soup a smooth texture. Choose coconut milk for a lighter option. To enhance the flavor, gather: - 1 teaspoon dried basil - 1 teaspoon sugar (optional, to balance acidity) - Salt and pepper to taste - Fresh basil leaves for garnish The dried basil adds an herby touch. Sugar can help cut the acidity of the tomatoes. Fresh basil leaves brighten the dish when serving. Remember to check the [Full Recipe] for more details on preparation! - Preheat the oven: Set your oven to 400°F (200°C). This step is key for roasting. - Prepare the garlic: Cut the top off one whole bulb of garlic. Drizzle it with olive oil. Wrap the bulb in aluminum foil. - Roast tomatoes and onions: On a baking sheet, place the halved tomatoes and chopped onion. Drizzle with olive oil. Sprinkle with salt and pepper. - Roast the garlic: Put the wrapped garlic on the same baking sheet. Roast everything for about 30-35 minutes. The goal is soft, caramelized tomatoes. - Squeeze the garlic: After roasting, let the garlic cool. Squeeze the roasted cloves into a blender or pot. - Blend the soup: Add the roasted tomatoes, onion, vegetable broth, and dried basil to the blender. Blend until the mixture is smooth and creamy. - Heat the soup: Pour the blended soup into a pot over medium heat. Stir in heavy cream or coconut milk. Heat through but do not boil. Season with extra salt and pepper as needed. For the full recipe, check the Complete Recipe section. This method makes a soup that's creamy and full of flavor. Enjoy your cooking! To make the soup creamy, use heavy cream or coconut milk. Coconut milk is great for a dairy-free option. Blend the roasted garlic, tomatoes, and onion until smooth. If it's too thick, add more vegetable broth. To thicken the soup, blend in a bit more roasted garlic. Fresh herbs bring bright flavors. You can use basil, thyme, or parsley. Dried herbs work too, but fresh is best. To add a kick, try spices like red pepper flakes or smoked paprika. A dash of lemon juice can also brighten the taste. Serve the soup in warm bowls. This keeps it hot longer. Add a drizzle of cream on top for style. A sprinkle of fresh basil makes it pop. You can also add croutons for crunch. {{image_2}} You can easily make this soup vegan. First, swap heavy cream with coconut milk. It gives the same creamy texture without dairy. For broth, use a vegetable broth that’s low in sodium. This keeps it light and fresh. Want to make your soup more exciting? Try adding roasted red peppers. They add a sweet, smoky flavor. You can also toss in some chopped carrots. They bring natural sweetness and extra nutrients. Just roast them along with the tomatoes and onions. If you like heat, add chili flakes. Just a pinch will add a nice kick. You can also use infused oils, like spicy olive oil. Drizzle this on top before serving. It gives both flavor and a beautiful finish. For the complete dish, refer to the Full Recipe for more details. To keep your creamy roasted garlic tomato soup fresh, store it in the fridge. Pour the cooled soup into an airtight container. It will stay good for about 4 to 5 days. If you want to save it for longer, you can freeze it. Use freezer-safe containers or bags. Leave some space for the soup to expand as it freezes. It can last up to 3 months in the freezer. When you’re ready to enjoy the soup again, reheat it gently. The best way is to use a pot on the stove. Heat it over medium-low. Stir it often to keep it from burning. You can also use a microwave. Just heat it in short bursts, stirring in between to keep it even. To maintain the flavor and texture, avoid boiling it. The maximum storage duration for this soup is about 5 days in the fridge. Check for signs of spoilage before eating. If the soup smells sour or has a strange color, it’s best to throw it away. Always trust your senses; they guide you well in the kitchen. How to make creamy roasted garlic tomato soup vegan? You can make this soup vegan easily. Replace heavy cream with coconut milk or a cashew cream. Both options give a rich and creamy taste. Can I use canned tomatoes instead of fresh? Yes, you can use canned tomatoes. Choose whole or diced canned tomatoes in juice. They work well and save time. What to serve with tomato soup? Tomato soup pairs nicely with grilled cheese sandwiches. You can also serve it with crusty bread or a fresh salad. How long to roast the garlic? Roast the garlic for about 30-35 minutes. It should be soft and caramelized when done. Can I adjust the spice level in the recipe? Yes, you can adjust the spice level! Add red pepper flakes for heat or more basil for flavor. What can I use instead of heavy cream? You can use coconut milk or cashew cream as a substitute. Both add richness without dairy. Alternatives to vegetable broth? If you don’t have vegetable broth, use water or chicken broth. Both options will still work well in the recipe. This blog post covered how to make a delicious roasted garlic tomato soup. We discussed essential ingredients, including ripe tomatoes, garlic, olive oil, and heavy cream. I shared tips for achieving the right consistency and enhancing flavors with spices and herbs. You also learned about vegan options and creative add-ins. In conclusion, this soup is easy to prepare and versatile. With the right steps, you can enjoy a warm bowl that suits any taste. So gather your ingredients and get cooking!](https://therecipehatch.com/wp-content/uploads/2025/07/1fb7cc33-8c83-4403-95f0-89e70313955d.webp)
Are you ready to delight your taste buds? This Creamy Roasted Garlic Tomato Soup is a simple, comforting dish. With just a few fresh ingredients like ripe tomatoes, a whole …

Are you craving something warm, sweet, and comforting? This easy homemade recipe for irresistible apple cinnamon rolls is sure to satisfy that craving! With just a handful of simple ingredients, …
![- 6 cups Rice Krispies cereal - 4 cups mini marshmallows - 3 tablespoons unsalted butter - 1 teaspoon vanilla extract - 1 cup orange candy melts - 12 green gummy worms - Cooking spray - 6 cups Rice Krispies cereal - 4 cups mini marshmallows - 3 tablespoons unsalted butter - 1 teaspoon vanilla extract - 1 cup orange candy melts - 12 green gummy worms The main ingredients create the base of our treats. Rice Krispies cereal gives them a light, crunchy texture. Mini marshmallows add sweetness and stickiness, while unsalted butter brings richness. Vanilla extract adds a warm flavor that ties everything together. For decorating, orange candy melts give our pumpkins their bright color. They also add a delicious chocolate-like taste. The green gummy worms serve as fun and playful stems for our pumpkin treats. Don't forget the cooking spray! It keeps everything from sticking to your bowls and pans. The key measurements ensure you have just the right amount of each ingredient. Stick to these amounts for perfect Rice Krispie Treat Pumpkins every time. If you want to try something new, you can mix in different treats or flavors, but this classic version is a hit! For the full recipe, check out the detailed instructions. - Prepare the pan: First, spray a large mixing bowl and a 9x13-inch baking dish with cooking spray. This keeps everything from sticking. - Melt the marshmallows: In a large saucepan over low heat, melt the unsalted butter. Once it's melted, add the mini marshmallows. Stir until they are all melted and smooth. Remove from heat and mix in the vanilla extract. - Mix marshmallow with Rice Krispies: Right away, add the Rice Krispies cereal to your melted marshmallow mix. Stir well until every piece is coated. - Shape the pumpkin balls: Transfer the mix to your greased baking dish. Spread it evenly and let it cool for about 10 minutes. Once cool enough, grab large handfuls and shape them into small pumpkin balls. Aim for about 2 inches in diameter. Place these on a parchment-lined baking sheet. - Melt the orange candy: In a microwave-safe bowl, melt the orange candy melts. Follow the package instructions to get a smooth texture. - Coat the pumpkin treats: Dip each Rice Krispie pumpkin into the melted orange candy. Make sure each one is fully coated. Then, set them back on the parchment-lined baking sheet to let the coating harden. - Add gummy worm stems: Once the orange coating is set, insert a green gummy worm into the top of each pumpkin. This gives them a cute, fun stem! These steps guide you through making delightful Rice Krispie Treat Pumpkins. For the full details, refer to the Full Recipe. To make smooth pumpkin shapes, work quickly when shaping the Rice Krispie mixture. Lightly grease your hands with cooking spray. This helps the mixture not stick to your hands. Form each ball gently, pressing the mixture just enough to hold its shape. If you want a more defined pumpkin shape, use your fingers to create small ridges. For the chocolate coating to stick well, ensure your pumpkin balls are slightly warm when you dip them. If they cool too much, the coating may not adhere properly. Dip each pumpkin fully into the melted orange candy and allow the excess to drip back into the bowl. This gives a nice, even coat. To store leftover treats, place them in an airtight container. Layer parchment paper between the pumpkins to keep them from sticking together. This method works well for keeping treats fresh and tasty. Store them in a cool, dry place, away from heat. For best freshness, consume the treats within a week. If you want to keep them longer, you can freeze them. Wrap each pumpkin in plastic wrap, then place them in a freezer-safe bag. They will stay good for up to a month in the freezer. Get creative when you present your treats! Use a festive platter or a pumpkin-shaped dish to add to the fun. You can also place them in small treat bags for kids to take home. Pair your Rice Krispie pumpkins with other Halloween-themed snacks. Consider adding spooky cookies or fruit shaped like ghosts. This variety makes your spread more exciting and colorful for everyone to enjoy! {{image_2}} You can make Rice Krispie Treat Pumpkins in fun shapes. Try shaping them into ghosts, mummies, or bats for Halloween. This adds more fun to your treats! You can use cookie cutters for these designs. Just press the mixture into the cutter for quick shapes. Kids love this part, and it makes your treats special. Want to mix up the flavor? You can add spices like cinnamon or nutmeg for warmth. This gives your treats a nice, cozy taste. Also, consider adding different extracts. Almond or maple extract can change the flavor profile. For a sweet crunch, mix in candies like M&Ms or chocolate chips. This adds color and flavor and makes the treats even more exciting. If you need gluten-free options, use gluten-free Rice Krispies. They work just as well and taste great! For a vegan twist, swap out the butter for coconut oil. You can also use vegan marshmallows instead of regular ones. These changes make your treats suitable for more diets and keep everyone happy. For the full recipe, check out the [Full Recipe]. Rice Krispie Treat Pumpkins are perfect for many fun events. They shine at Halloween parties, bringing smiles to kids and adults alike. Their bright color and fun shapes make them a hit. They also fit well at fall festivals, adding a festive touch to your table. Everyone loves a sweet treat while enjoying the autumn vibes. For a great experience, I suggest one pumpkin per person. These treats are fun and filling. If you host a larger gathering, just multiply the number of pumpkins. For example, if you have 20 guests, make about 20 pumpkins. They are easy to scale, so you can always make more if needed. Make your Rice Krispie Treat Pumpkins stand out on a festive serving platter. You can use colorful plates or even a Halloween-themed tray. For gifts, wrap each pumpkin in clear plastic bags tied with a ribbon. This makes them fun to give and receive. You can also display them in a pumpkin basket for a cute look that fits the season. Rice Krispie Treat Pumpkins last about 3 to 5 days if stored right. Keep them in an airtight container at room temperature. Don’t put them in the fridge; it makes them hard. Enjoy them fresh for the best taste! Yes, you can use any colors of candy melts! Try green for spooky Frankenstein or white for ghosts. Mix and match to make your treats fun and festive. The color choice adds a special touch to your treats. The best way to melt candy melts is in the microwave. Use a microwave-safe bowl and heat in short bursts of 30 seconds. Stir in between each burst until smooth. This method keeps the melts from burning and clumping. To make these treats more festive, add sprinkles or edible glitter on top. You can also use different candies for eyes or other decorations. You might even use mini chocolate chips for added flavor and fun! Yes, you can use regular marshmallows instead of mini ones. Just measure out the same amount by weight. Cut them into smaller pieces for easier melting. This will still give you that sweet, gooey base for your treats. For the full recipe, check out the detailed steps to create these yummy Rice Krispie Treat Pumpkins! In this blog post, we covered how to make fun Rice Krispie Treat Pumpkins. We explored the key ingredients, including Rice Krispies, mini marshmallows, and orange candy melts. I provided clear steps for preparation, combining, coating, and decorating your treats. Tips ensured you create the best pumpkin shapes and store them right. Try different shapes and flavors for variety. These treats are perfect for Halloween parties and other fall events. Enjoy making and sharing these festive snacks with friends and family!](https://therecipehatch.com/wp-content/uploads/2025/07/761e5f00-3c91-4ab5-b0be-94a26e3e4a23.webp)
Are you ready to bake up some fun this fall? My Rice Krispie Treat Pumpkins are a delightful twist on a classic treat. With just a few simple ingredients, you …
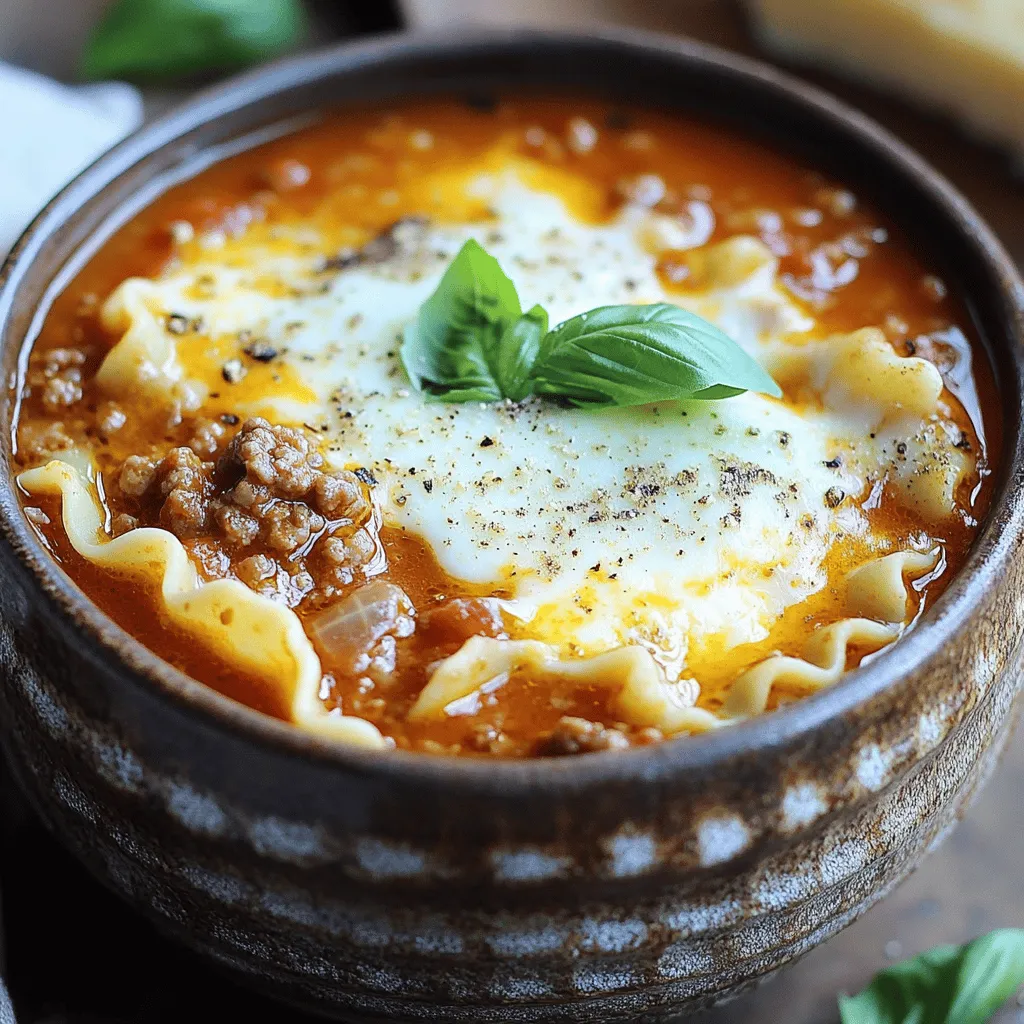
Looking for a cozy meal that warms you up from the inside out? This is the best lasagna soup you’ll ever make. Packed with ground beef, rich tomatoes, and a …

Start your day on a delicious note with pancake mini muffins! These bite-sized treats combine the best of pancakes and muffins into one easy recipe. Whether you’re rushing out the …

Are you ready to indulge in a fun twist on a classic treat? S’mores Cookie Bars are the perfect blend of gooey chocolate, soft marshmallows, and crunchy graham crackers. This …

Craving something sweet? You’re in for a treat! Maple brown sugar cookies are easy to make and packed with flavor. In this post, I’ll guide you through each step, from …