Apple Crisp Cold Brew Latte Tasty Fall Treat
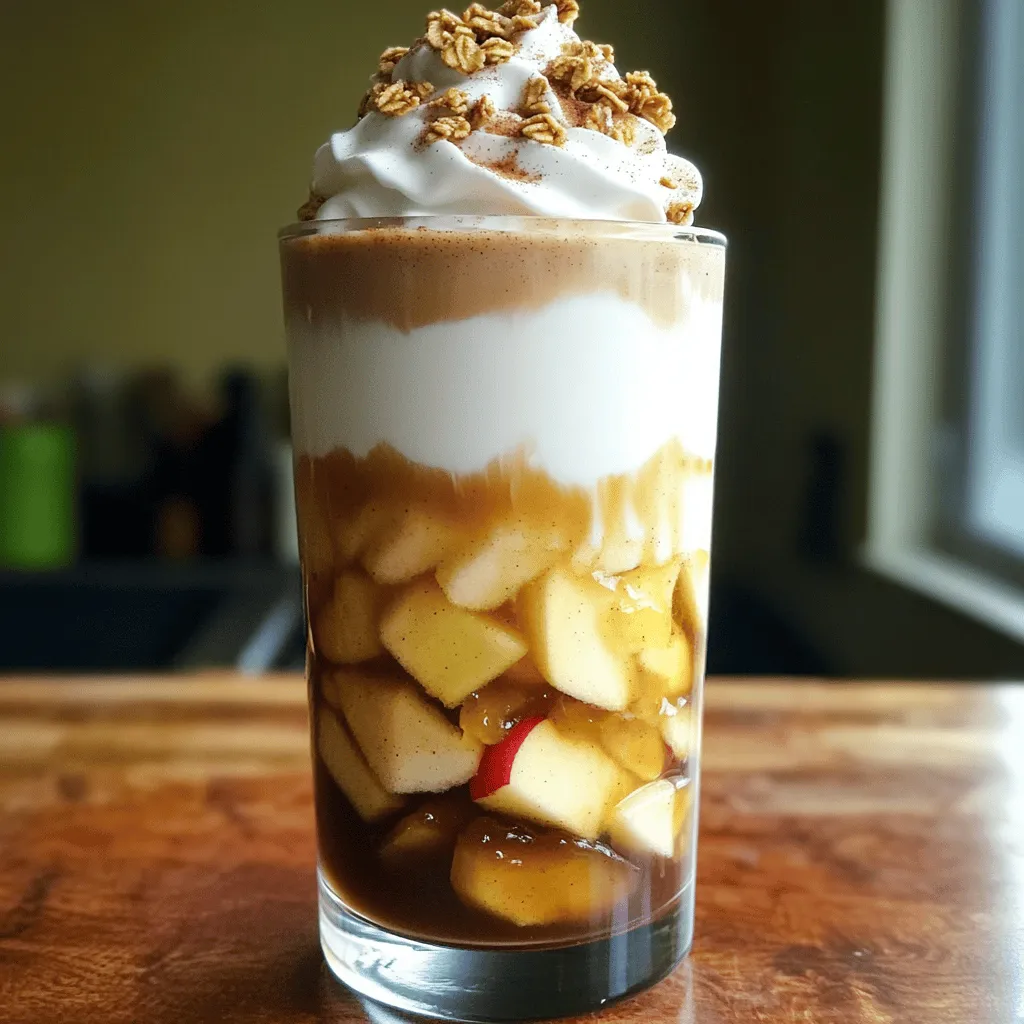
Fall is here, and there’s no better way to embrace the season than with my Apple Crisp Cold Brew Latte! This sweet and spicy drink combines smooth cold brew coffee, …
Fall is here, and there’s no better way to embrace the season than with my Apple Crisp Cold Brew Latte! This sweet and spicy drink combines smooth cold brew coffee, …

Get ready to indulge in a treat that’s both wholesome and delicious! These Sweet Potato Blondies with Maple Syrup Glaze are the perfect blend of sweet and savory. I’ll guide …
![- 2 cups fresh or frozen corn kernels - 1 cup heavy cream - 1/2 cup honey - 3 large eggs - 1 cup grated cheddar cheese - 1 cup crushed cornflakes - 1/4 cup unsalted butter, melted - 1 teaspoon baking powder - Salt and pepper to taste - Optional: Fresh chives for garnish When I create Honey-Glazed Corn Casserole, I focus on using fresh and simple ingredients. The corn gives the dish a sweet and crunchy bite. Heavy cream adds richness, while honey brings a delightful sweetness. The eggs bind everything together, making it fluffy and light. For cheese lovers, I use grated cheddar, which melts beautifully. Cornflakes add a nice crunch on top. The melted butter enriches the flavors, and baking powder helps it rise. Seasoning with salt and pepper is key, so taste as you go! - Alternatives for heavy cream: You can use coconut cream or cashew cream for a lighter option. - Cheese substitutions: If you want a different taste, try mozzarella or pepper jack cheese. - Gluten-free options for cornflakes: Use gluten-free breadcrumbs or crushed nuts for a similar texture. These substitutions allow you to customize the recipe. Each swap can change the flavor and texture. Don’t hesitate to experiment with what you have at home. For the full recipe, check the details above. To start, preheat your oven to 350°F (175°C). This step is key for the perfect bake. While the oven heats, prepare your baking dish. Grease a 9-inch dish with butter or cooking spray. This prevents the casserole from sticking and helps it cook evenly. In a large mixing bowl, combine the corn kernels, heavy cream, honey, and eggs. Whisk them together until smooth. This step blends the flavors well. Next, stir in the grated cheddar cheese, melted butter, baking powder, and add salt and pepper to your taste. Mix again until everything is nicely combined. Finally, gently fold in the crushed cornflakes. This adds crunch to the casserole. Once your mixture is ready, pour it into the greased baking dish. Spread it evenly for uniform cooking. Place the dish in your preheated oven. Bake for 35-40 minutes. You’ll know it’s done when the top is golden brown. A toothpick inserted in the center should come out clean. After baking, let it rest for about 5 minutes. This helps the casserole firm up before serving. For a burst of color, sprinkle fresh chives on top just before plating. Enjoy your honey-glazed corn casserole! If you want the full recipe, check the previous section. To get the ideal crispness in your Honey-Glazed Corn Casserole, bake it for 35 to 40 minutes. This time lets the top brown nicely while keeping the inside moist. For an extra crunch, fold in the crushed cornflakes gently. This way, they stay light and airy, giving your casserole that lovely texture. Seasoning is key to a tasty dish. Use salt and pepper to enhance the flavors. Don’t be shy with the honey! Adding a bit more can deepen the sweet notes. You can also mix in a pinch of cinnamon for a unique twist that pairs well with the honey. To make your casserole shine, garnish it with fresh chives. Their green color adds a nice contrast. You can serve this dish at family dinners or potlucks. Pair it with grilled meats or a fresh salad for a balanced meal. For a festive touch, consider serving it in a colorful dish. Check the [Full Recipe] for more details on making this dish. {{image_2}} You can easily change the recipe to suit your taste. Adding vegetables is a great way to boost nutrition. Try mixing in diced bell peppers, zucchini, or spinach. These veggies add color and vitamins. You can also swap honey for different sweeteners. Maple syrup or agave nectar works well. Each sweetener gives a unique flavor to the dish. If you follow a vegan diet, you can adapt this recipe. Use plant-based cream instead of heavy cream. Replace eggs with flaxseed meal or applesauce. These swaps keep the texture creamy and delicious. For a low-carb version, consider using cauliflower rice instead of corn. This change cuts down on carbs while keeping a similar taste. Adding spices can give your casserole a global twist. Try using cumin or coriander for a Middle Eastern flair. You could add smoked paprika for a hint of Spanish flavor. Another option is to mix in Italian herbs like basil or oregano. These spices will change the way the dish tastes. You can also explore international-style variations. For instance, a Mexican version might include jalapeños and queso fresco. The possibilities are endless! For the full recipe details, check out the references above. To keep your honey-glazed corn casserole fresh, let it cool first. Cover the casserole tightly with plastic wrap or aluminum foil. This helps keep it moist. Store it in the fridge if you plan to eat it in a few days. Use an airtight container for longer storage. Recommended containers include glass or BPA-free plastic. These options prevent any unpleasant smells from mixing with your casserole. They also keep the dish safe from spills. When reheating, you want to preserve its taste and texture. The microwave is quick but may dry it out. To avoid this, cover the dish with a damp paper towel. Heat it in short bursts of 30 seconds, checking often. If you use the oven, preheat it to 350°F (175°C). Place the casserole in an oven-safe dish. Add a splash of cream or water to keep it moist. Reheat for about 20 minutes, or until it's warm throughout. Freezing your corn casserole is easy. Start by cooling it completely. Cut it into portions for easier thawing. Wrap each portion tightly in plastic wrap. Then, place them in a freezer-safe bag. Label your bags with the date. This way, you know how long they have been in the freezer. The casserole can last up to three months. To thaw, move it to the fridge overnight. Reheat as mentioned above when you're ready to enjoy it again. You can prepare the casserole a day ahead. Mix the ingredients and pour them into your baking dish. Cover it tightly with plastic wrap and store it in the fridge. When ready to bake, remove the wrap and bake as usual. This method helps the flavors blend. Yes, you can easily double the recipe. Just double each ingredient and use a larger baking dish. Ensure you adjust the baking time. Check for doneness with a toothpick to ensure it cooks through. This dish pairs well with grilled meats, like chicken or steak. You can also serve it alongside fresh salads or roasted vegetables. It makes a great side for holiday meals or family gatherings. The casserole lasts about three to four days in the fridge. Make sure to store it in an airtight container. Reheat it thoroughly before serving to enjoy its full flavor. Yes, you can use canned corn. Drain it well and rinse under cold water. This step helps reduce excess salt and preserves the dish's flavor. Using canned corn makes the recipe even quicker to prepare. For the full recipe, refer to the earlier section. This blog post covers every step to make a delicious Honey-Glazed Corn Casserole. You learned about key ingredients and possible substitutions, along with clear instructions for preparation and cooking. I shared tips for achieving the best texture and flavor. You even found ideas for variations that suit different diets and tastes. Enjoy the easy storage and reheating methods for leftovers. This dish is perfect for any occasion. Try it out, and make it your own!](https://therecipehatch.com/wp-content/uploads/2025/07/e099479e-a574-4b3c-b80e-7abfe66689ad.webp)
Looking for a dish that combines ease with deliciousness? You’ve found it! My Honey-Glazed Corn Casserole is the perfect blend of sweet and savory flavors. With a rich cream base, …

Craving a cozy meal that warms your soul? Discover the delight of Creamy Sausage and Potato Chowder! This easy recipe combines savory sausage, tender potatoes, and creamy goodness into one …
![To make a tasty green chile bean dip, gather these main ingredients: - 1 can (15 oz) black beans, drained and rinsed - 1 can (4 oz) diced green chiles - 1 cup cream cheese, softened - 1 cup shredded cheddar cheese - 1/2 cup sour cream - 1/4 cup chopped fresh cilantro - 1 teaspoon ground cumin - 1/2 teaspoon garlic powder - Salt and pepper to taste - Tortilla chips, for serving These ingredients create a creamy and flavorful dip. The black beans give it a hearty base. The green chiles add a nice kick. You can boost the flavor with these optional ingredients: - Jalapeños for extra heat - Lime juice for a fresh zing - Avocado for creaminess - Different cheese types like Monterey Jack Adding these extras can make your dip unique. You can adjust the heat and creaminess based on your taste. Let’s break down the nutritional value of some key ingredients: - Black beans: These are high in protein and fiber. They help keep you full. - Cream cheese: Adds richness but is higher in calories. Use in moderation. - Cheddar cheese: Provides calcium and protein, but watch the portion. - Cilantro: Offers vitamins A, C, and K. It's low in calories and adds freshness. Understanding the nutritional value helps you make healthier choices. You can enjoy this dip while still meeting your dietary needs. For the full recipe, check out [Full Recipe]. To start, gather your ingredients. You need black beans, diced green chiles, cream cheese, cheddar cheese, sour cream, cilantro, cumin, garlic powder, salt, and pepper. In a mixing bowl, add the drained black beans and diced green chiles. Use a fork to mash the beans slightly. This gives a nice, chunky base. Next, add the softened cream cheese, shredded cheddar cheese, and sour cream. Mix until all ingredients blend well and become creamy. Then, stir in the cilantro, cumin, and garlic powder. Season with salt and pepper to taste. Mix again until everything is evenly combined. Now, it's time to bake! Transfer the mixture to an oven-safe dish. Spread it out evenly for a nice, even bake. Preheat your oven to 350°F (175°C). Once it’s ready, place the dish in the oven. Bake for about 15 to 20 minutes. Look for a bubbly top that is slightly golden. This shows it’s perfectly baked. After baking, let the dip cool for a few minutes. This helps it set. Serve it warm with tortilla chips for dipping. You can also add extra toppings, like more cilantro or diced tomatoes. This adds freshness and color. If you want, serve it with veggies too! This dip is great for parties or game day. Enjoy your flavorful green chile bean dip! For the full recipe, check out the earlier section. To make the dip creamier, I suggest using full-fat cream cheese. It adds richness. You can also blend the ingredients in a food processor. This will create a smooth texture. If you want more creaminess, add more sour cream. You can even mix in a little milk for extra softness. Store leftovers in an airtight container. This keeps the dip fresh for longer. Place it in the fridge if you have any left. It should stay good for about three days. When you’re ready to eat it again, warm it up in the oven. This will help regain its creamy texture. One common mistake is not mashing the beans enough. If you leave them whole, the dip will be less creamy. Another mistake is overbaking. Keep an eye on the dip while it’s in the oven. You want it bubbly, not burnt. Lastly, don’t skip the salt and pepper. They make a big difference in flavor. Enjoy making this zesty dip! For the full recipe, check out the cooking section. {{image_2}} You can spice up your green chile bean dip easily. Add fresh jalapeños for heat. You can also use hot diced green chiles instead of mild ones. If you love a smoky flavor, try adding smoked paprika. This gives your dip a nice depth. Another option is to mix in some diced chipotle peppers. They add a tasty kick and will impress your friends. Making this dip vegetarian is simple. Just use plant-based cream cheese and sour cream. For a vegan option, swap the cheddar cheese for a vegan cheese alternative. You can also add nutritional yeast for a cheesy flavor. Adding extra spices, like chili powder, can really boost the taste while keeping it vegan. If you need to go gluten-free, make sure your tortilla chips are labeled gluten-free. You can also serve the dip with fresh veggies instead. For those watching calories, you can cut back on cheese and sour cream. Use Greek yogurt instead to keep it creamy but lighter. Adjusting the recipe helps everyone enjoy it! For the full recipe, check out the Zesty Green Chile Bean Dip section. To keep your green chile bean dip fresh, place it in an airtight container. This helps prevent air from getting in and drying it out. Make sure to cool it down first before sealing. Store it in the fridge for up to three days. If you have leftovers, a good seal will keep its flavors intact. When you want to enjoy your dip again, reheat it carefully. You can use a microwave or an oven. If using a microwave, heat it in short bursts, about 30 seconds at a time. Stir between each burst for even heat. If you prefer the oven, set it to 350°F (175°C). Heat it for 15 minutes, or until it's warm and bubbly again. You can also freeze this dip for longer storage. Use a freezer-safe container and make sure it’s tightly sealed. It can last for up to two months in the freezer. When ready to eat, let it thaw in the fridge overnight. Reheat it as mentioned before. This way, you can enjoy your dip at any time. For the full recipe, check out the previous section! Yes, you can use many types of beans. Pinto beans, white beans, or kidney beans work well too. Each type gives a unique taste and texture. If you want a creamier dip, use refried beans. This makes the dip smooth and easy to scoop. Experiment with your favorite beans to find what you like best. Making this dip in a slow cooker is simple. Start by mixing all the ingredients in the slow cooker bowl. Set the cooker on low for about 2 to 3 hours. Stir the mix every hour to keep it smooth. The heat will blend the flavors and make everything creamy. When it’s ready, serve it warm with chips for the best taste. I love serving this dip with crispy tortilla chips. You can also use veggie sticks like carrots and bell peppers. They add a nice crunch and freshness. For a fun twist, try it on nachos or in tacos. This dip pairs well with drinks too. Enjoy it at parties, game days, or family dinners. For the full recipe, check out the earlier section! Green Chile Bean Dip is easy to make and fun to serve. We covered the key ingredients that bring flavor and nutrition. You learned simple steps to prepare and bake the dip for the perfect texture. I also shared tips to enhance creaminess and store leftovers. You can even explore tasty variations for spice lovers and those with dietary needs. Now, you’re ready to impress friends and family with a delicious dip. Enjoy making and sharing this tasty recipe!](https://therecipehatch.com/wp-content/uploads/2025/07/613f32e0-aaa2-4dc5-8576-72f74cfb6450.webp)
Ready to spice up your snack time? My Green Chile Bean Dip is both flavorful and easy to make! With just a few simple ingredients, you can create a crowd-pleasing …
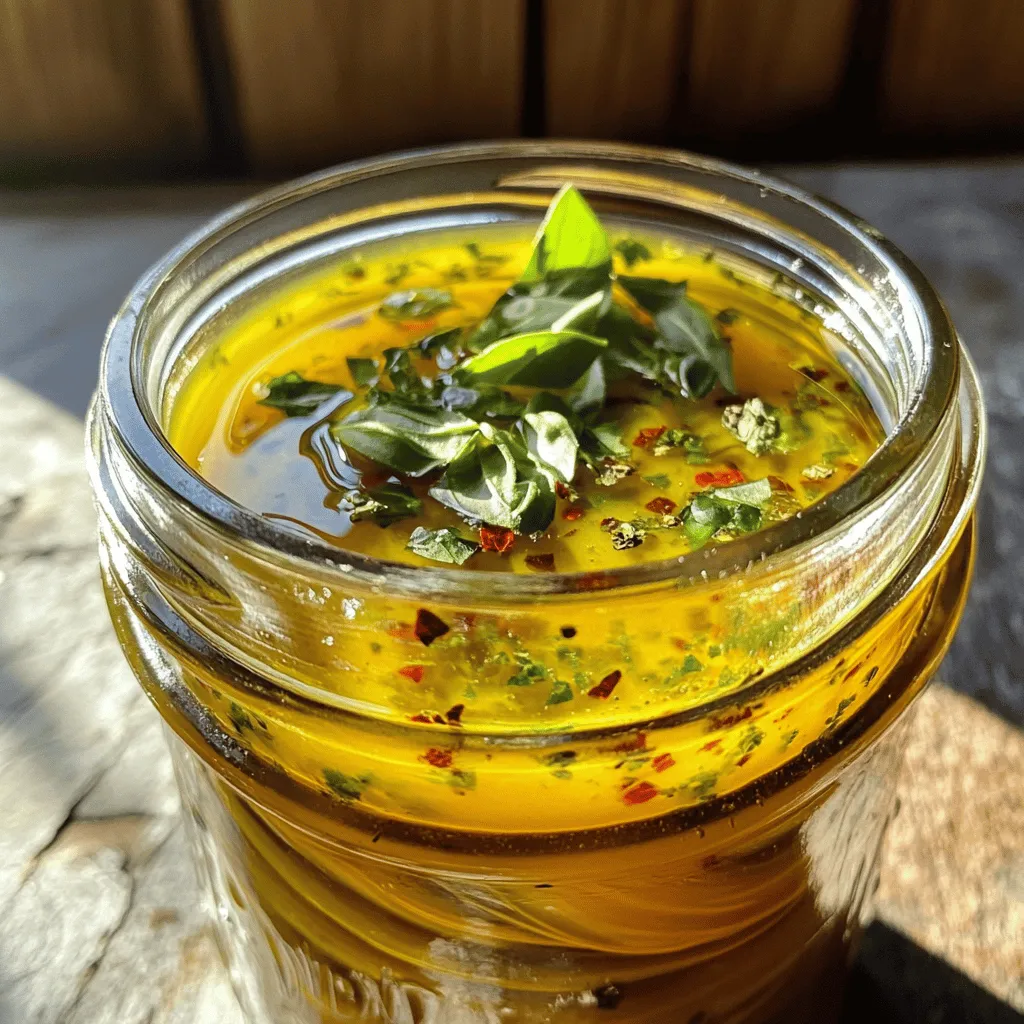
Are you ready to elevate your salads with a burst of flavor? Homemade Italian salad dressing is your answer! This creamy, tangy mix is easy to make and has fresh …
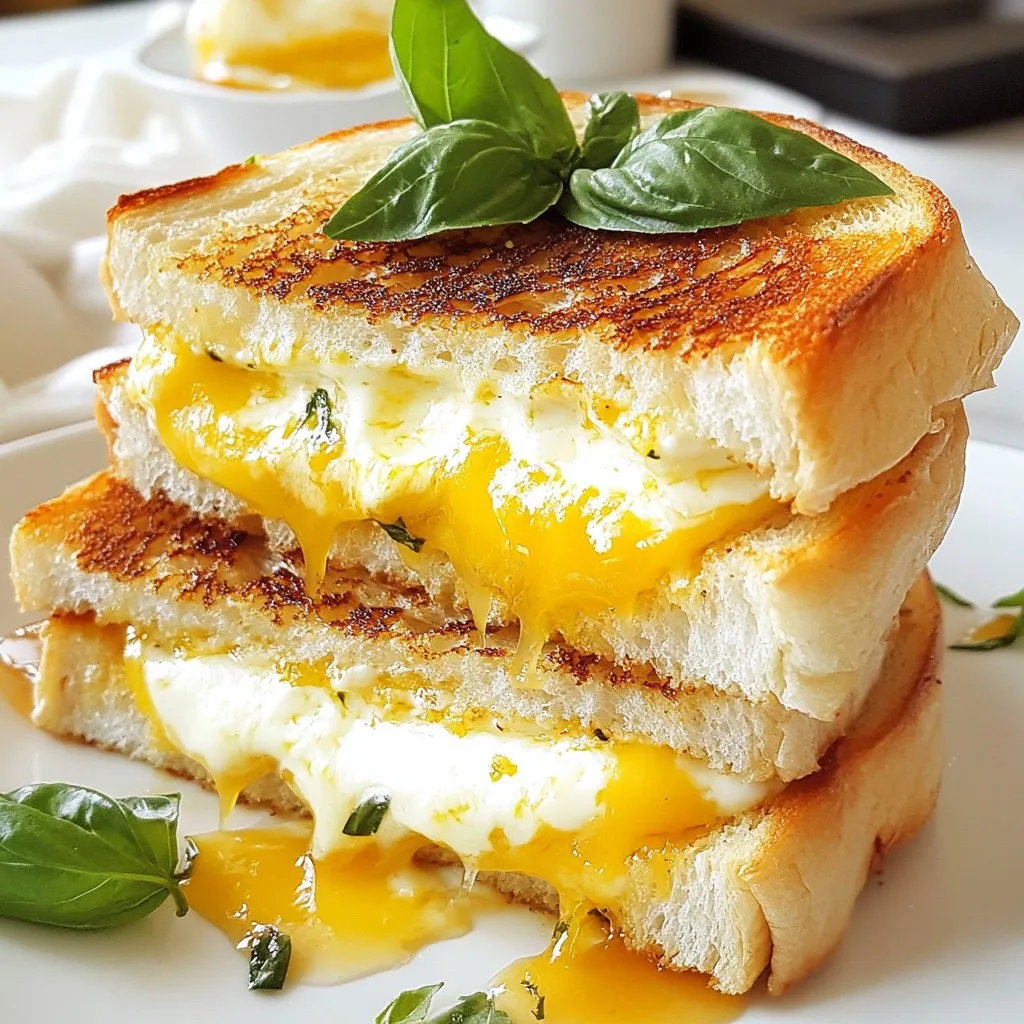
Are you ready to take your grilled cheese game to the next level? I’m excited to share my recipe for Hawaiian Roll Grilled Cheese, a simple and tasty treat you …
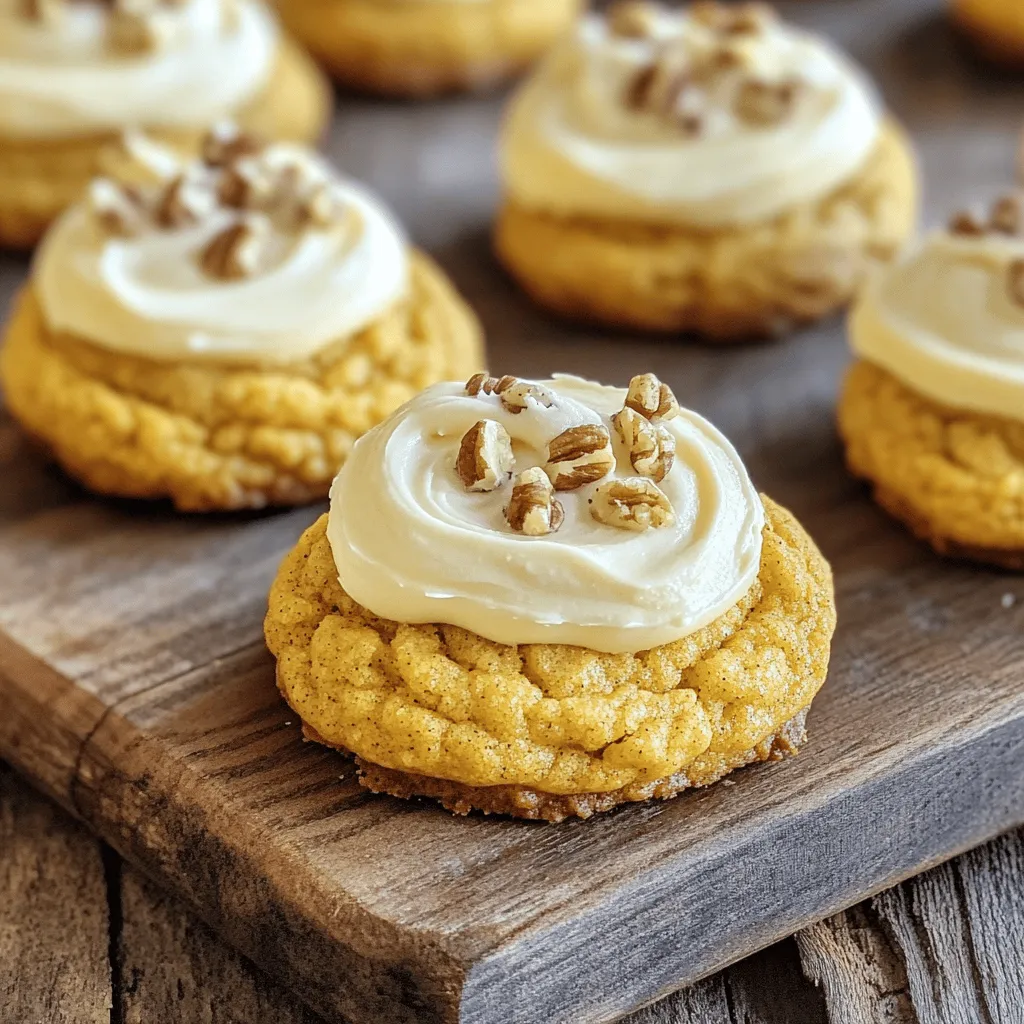
Fall is here, and so is the craving for sweet, spiced treats! If you love pumpkin, you’ll adore these Pumpkin Coffee Cake Cookies. With their soft texture and rich flavor, …
Are you ready to dive into fall flavors with a simple yet delightful treat? This Apple Cider Donut Snack Cake is a must-try! With soft, moist layers packed with the …

If you’re craving a light, fruity treat, this Fresh Lemon-Blueberry Dutch Baby is a must-try! I’ll guide you through each step, from picking ripe blueberries to mastering the art of …