Strawberry Vinaigrette Fresh and Flavorful Dressing
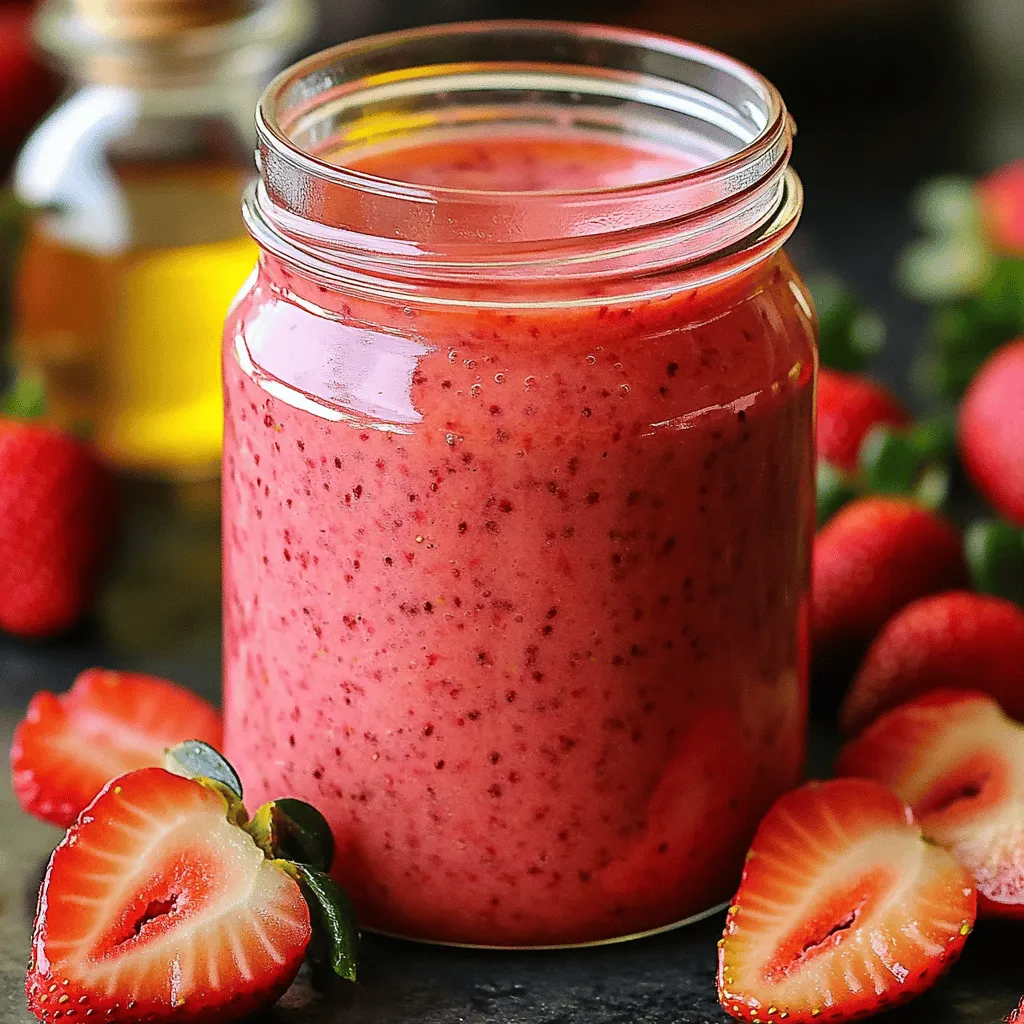
Looking for a fresh and flavorful dressing that brightens up your meals? Strawberry vinaigrette is your answer! This easy recipe uses simple, wholesome ingredients to add a sweet twist to …
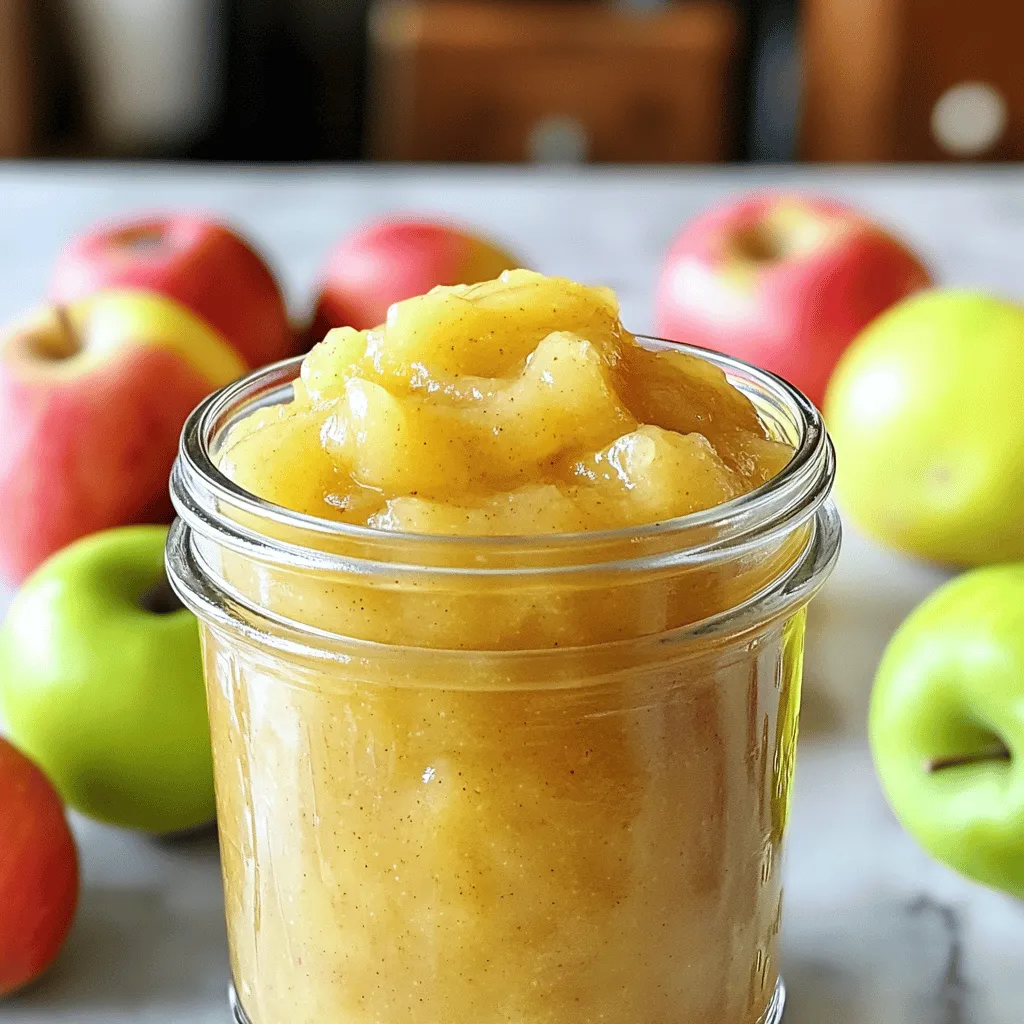
![- 2 cups all-purpose flour - 1 teaspoon baking soda - 1/2 teaspoon salt - 1 teaspoon ground cinnamon - 1/2 cup unsalted butter, softened - 1 cup packed brown sugar - 1/2 cup granulated sugar - 1 large egg - 1 teaspoon vanilla extract - 1 cup diced apple - 1/2 cup caramel bits - 1/2 cup chopped walnuts or pecans (optional) Choosing the right apple variety Use firm apples like Granny Smith or Honeycrisp. They add tartness and crunch. Tart apples balance the sweetness of caramel. Avoid soft apples, as they will turn mushy when baked. The importance of using fresh caramel bits Fresh caramel bits melt well and blend into the dough. If they are stale, they may not melt properly. Check the package date for best results. Possible alternatives for nuts If you have nut allergies, leave them out. You can add seeds like sunflower or pumpkin for crunch. Chocolate chips can also work for a sweet twist. Gluten-free flour options For gluten-free cookies, use a cup-for-cup gluten-free flour blend. This keeps the texture similar. Look for blends with xanthan gum for better structure. This recipe is not just easy; it’s fun! Try the [Full Recipe] to create your own caramel apple cookies from scratch! - Preheat to 350°F (175°C). - Line a baking sheet with parchment paper. This helps the cookies not stick. Make sure the paper covers the whole sheet. - Take a medium bowl. - Whisk together 2 cups of flour, 1 teaspoon of baking soda, 1/2 teaspoon of salt, and 1 teaspoon of ground cinnamon. - Mixing these dry ingredients first gives the cookies a nice rise and flavor. Set this bowl aside for now. - In a large bowl, cream together 1/2 cup of softened butter, 1 cup of brown sugar, and 1/2 cup of granulated sugar. Mix until it feels light and fluffy. - Next, add in 1 large egg and 1 teaspoon of vanilla extract. Beat them into the butter and sugar mix. This step creates a rich base for our cookies. - Slowly add the dry mix to the wet mix. Stir until just combined. Don't overmix, or the cookies may be tough. - Gently fold in 1 cup of diced apple and 1/2 cup of caramel bits. If you like, you can also add 1/2 cup of chopped walnuts or pecans. This gives the cookies a nice crunch. - Use a cookie scoop or tablespoon to drop dough onto the prepared sheet. Space them about 2 inches apart. - Bake in the preheated oven for 12-15 minutes. The edges should look golden. The centers may seem soft. They will firm up as they cool. - Once done, let the cookies cool on the baking sheet for 5 minutes. Then, transfer them to a wire rack to cool completely. - For the best taste, serve them warm. You can drizzle extra caramel sauce on top for a sweet touch. Enjoy your homemade caramel apple cookies! - Avoiding overmixing the dough: Mix just until you see no dry flour. Overmixing makes cookies tough. - Cookie texture adjustments: If you want softer cookies, slightly underbake them. They will firm up as they cool. - Ways to amplify flavor with spices: Try adding nutmeg or ginger for extra warmth. A mix of spices can create a cozy taste profile. - Adding a dash of sea salt on top: A sprinkle of sea salt enhances the sweet caramel flavor. It creates a nice contrast. - Recommended baking tools for better results: Use a sturdy mixing bowl and a good whisk. A quality baking sheet ensures even heat distribution. - The best cookie scoop to use: A medium cookie scoop helps you get even-sized cookies. This keeps baking time consistent for all cookies. For the complete process, check the Full Recipe. {{image_2}} If you want to skip nuts, it’s simple. Just leave them out. You can still add crunch by using seeds. Pumpkin or sunflower seeds work well. They add a nice bite and keep the flavor balanced. To make vegan cookies, you need to swap a few items. Use plant-based butter instead of regular butter. Replace the egg with a flaxseed meal or applesauce. This keeps the cookies moist and chewy. Make sure you choose vegan caramel bits for the sweet touch. Adding chocolate chips can make your cookies richer. Just fold in a cup of chocolate chips along with the apples and caramel. This mix of flavors creates a lovely harmony. The chocolate adds a sweet depth that pairs well with the tart apples. To keep your caramel apple cookies fresh, store them in airtight containers. This helps keep moisture out and keeps the cookies soft. Use a container that fits your cookies snugly, but not too tight. You want them to breathe a little. The cookies stay good for about five days at room temperature. If you want to keep them longer, consider freezing. You can freeze your baked cookies to enjoy later. Let the cookies cool completely first. Then, place them in a single layer on a baking sheet. Freeze them for an hour or until firm. Once frozen, transfer them to a freezer-safe bag or container. They last well for up to three months. When you're ready to eat them, just take out how many you want. Let them thaw at room temperature or warm them in the oven for a few minutes. This brings back their fresh-baked flavor. If you want to save time, you can store unbaked cookie dough. Wrap it tightly in plastic wrap or place it in an airtight container. Dough stored in the fridge lasts about three days. For longer storage, freeze it for up to three months. When you’re ready to bake, you can bake straight from the freezer. Just add a minute or two to the baking time. Each method helps you enjoy these delightful treats whenever you want! For the full recipe, check out the details provided earlier. The best apples for baking cookies are firm and sweet. I recommend using Granny Smith or Honeycrisp apples. They hold their shape well and add a nice balance of tartness and sweetness. The flavor adds depth to your caramel apple cookies. You can use margarine as a substitute for butter, but the taste may change. Butter gives cookies a rich flavor and a better texture. If you choose margarine, opt for a stick form for the best results. Check your cookies after 12 minutes. They should be golden around the edges. The centers might look soft, and that’s okay. They will firm up as they cool. Yes, you can make the dough ahead of time. Chill the dough in the fridge for up to 3 days. You can also freeze it for up to 3 months. Just let it thaw in the fridge before baking. You can chop soft caramel candies if you can’t find caramel bits. Alternatively, you can use a caramel sauce, but it’s best to add it after baking. This keeps the cookies from becoming too soggy. At high altitudes, reduce sugar by 1-2 tablespoons. Add a bit more flour to help the dough set. You may also need to bake a little longer. Keep an eye on your cookies while they bake. - For more baking techniques, check out resources like "The Joy of Baking" or "America's Test Kitchen." In this blog post, we explored a delicious caramel apple cookie recipe. You learned about the key ingredients, from apples to spice options, and how to mix them right. I shared tips for baking success, plus fun variations to try. Remember, baking can be creative and fun. Experiment with flavors, and enjoy every bite. With the right approach, you can make cookies everyone will love. So grab your ingredients, start baking, and savor the sweet results!](https://therecipehatch.com/wp-content/uploads/2025/07/ff91bf4c-f505-476d-ab59-4d956c23916d.webp)
![To make Halloween popcorn, you need some key ingredients. Here’s what you’ll need: - 10 cups popped popcorn (about 1/2 cup unpopped kernels) - 1 cup dark chocolate chips - 1/2 cup white chocolate chips - 1/2 cup candy corn - 1/2 cup mini marshmallows - 1/2 cup crushed Halloween-themed cookies (like Oreos or bat-shaped cookies) - 1 tablespoon coconut oil (for melting chocolate) - Sea salt, to taste - Optional: colorful sprinkles for decoration These ingredients come together to create a fun and spooky treat. The popped popcorn is a light and crunchy base. The dark and white chocolate add sweetness and richness. Candy corn and mini marshmallows give a festive touch, while cookies add crunch. The coconut oil helps the chocolate melt smoothly. You can customize your Halloween popcorn with some optional ingredients. Here are some ideas: - Alternative treats and candies: Consider adding M&M's, gummy worms, or pretzels for an extra twist. - Flavor variations: You can mix in spices like cinnamon for warmth, or use flavored popcorn for a unique taste. - Color-themed additions: Use colored candy melts instead of chocolate. This will make your popcorn pop with fun colors for Halloween. Feel free to get creative! Halloween popcorn is all about having fun and making a treat that looks and tastes delightful. You can find the full recipe in the article to guide you through the steps! To start, you need to pop the popcorn. You can use either an air popper or the stovetop method. Here’s how: - Air Popper: Measure 1/2 cup of unpopped kernels. Follow the popper's instructions. You will get about 10 cups of popped popcorn. - Stovetop: Heat a large pot on medium heat. Add 2-3 tablespoons of oil and 1/2 cup of kernels. Cover the pot, and shake it gently until popping slows down. To achieve perfect popcorn, make sure the oil is hot before adding the kernels. This keeps them from burning. Once popped, place the popcorn in a large bowl and set it aside. Next, it’s time to melt the chocolates. You will need dark and white chocolate chips. Here’s the best way: - Use separate bowls for each type of chocolate. - Add 1/2 tablespoon of coconut oil to each bowl. This helps the chocolate melt smoothly. - Microwave the bowls in 30-second bursts. Stir each time until it becomes smooth. Coconut oil is key. It adds a nice shine and keeps the chocolate from clumping. Now, let’s mix the popcorn with the treats. Follow these steps: 1. Drizzle the melted dark chocolate over the popcorn. Use a spoon to toss it lightly. 2. Repeat with the white chocolate. This gives a fun look and taste. 3. Add in the candy corn, mini marshmallows, and crushed cookies. Fold them in gently until everything is mixed well. To set the popcorn, lightly sprinkle sea salt on top. This adds a great contrast to the sweetness. For a fun touch, you can add colorful sprinkles. Toss everything gently to coat. Finally, let the popcorn cool for about 15-20 minutes. Spread it on a baking sheet lined with parchment paper to speed things up. Once set, break it into clusters and serve. For the full recipe, check out the details above. Enjoy your spooky Halloween treat! To make the best Halloween popcorn, focus on texture and flavor. Start with fresh, popped popcorn. Air-popped kernels are light and crunchy. If you use stove-top popcorn, avoid burning it. This keeps the taste clean and fresh. Next, balance your sweetness and saltiness. Use the right amount of chocolate. I recommend about 1 cup of dark chocolate for rich flavor. Then, add a pinch of sea salt. This enhances the sweetness of the chocolate and the candy. If you want it sweeter, add more candy corn or marshmallows. Decorating your Halloween popcorn makes it fun and festive. Use colorful sprinkles for a pop of color. They add a nice touch and catch the eye. You can also mix in crushed Halloween-themed cookies for added texture. For serving, get creative! Use themed bags or bowls to hold your popcorn. Try pumpkin-shaped containers or spooky-themed bowls. This adds to the Halloween spirit. For a fun twist, let guests create their own popcorn bags. This adds a personal touch to your spooky treat. For the complete recipe, check the [Full Recipe]. {{image_2}} You can mix up your Halloween popcorn with different flavors. Sweet popcorn is fun, but savory options can be great too. For a sweet twist, think about using caramel or peanut butter. You can drizzle caramel on top after melting it. Toss in some finely chopped nuts or pretzels for crunch. For savory popcorn, try adding cheese powder or spices. Sprinkle garlic powder or paprika for an extra kick. You can even use ranch seasoning for a unique flavor. If you want to be fancy, add some herbs like rosemary or thyme. Halloween popcorn is fun, but you can use the same idea for other holidays. For Christmas, use red and green candies. Add peppermint extract to the chocolate for a festive taste. You can even use crushed candy canes for a crunchy topping. For Easter, swap in pastel-colored candies. Try using mini eggs or jellybeans. You can also mix in coconut for a spring feel. If you want to make popcorn for a birthday party, customize it with the birthday person's favorite colors and treats. Use sprinkles that match the party theme for a fun touch. Explore these variations to keep your popcorn exciting and festive for every occasion! For the full recipe, check out the details above. To keep your Halloween popcorn fresh, store it in an airtight container. This helps keep moisture out. You can use glass jars or plastic bins with tight lids. Avoid using paper bags, as they let air in. To avoid sogginess or loss of crunch, don’t store your popcorn in the fridge. The cold air can cause it to lose its crispness. Keep it in a cool, dry place instead. If you need to, you can re-crisp popcorn in the oven. Just place it on a baking sheet at 250°F for about 10 minutes. You should enjoy your Halloween popcorn within three days for the best taste. After that, it may not taste as fresh. If you see any signs of stale popcorn, like a soft texture or bad smell, it's time to toss it. When popcorn loses its crunch or takes on a chewy texture, it's not good to eat anymore. Always trust your senses. If it doesn’t smell or taste right, it’s best to throw it out. I prefer using homemade popcorn. It tastes fresh and is free from unwanted additives. Microwave popcorn can work, but it often has extra butter and salt. This can make your Halloween popcorn too greasy or salty. To pop your own, use an air popper or stovetop method. Both create light and fluffy popcorn that you can season just right. Yes, you can make Halloween popcorn in advance. Just follow these tips for best results. First, allow the popcorn to cool completely before storage. This helps keep it crunchy. Store it in an airtight container. It can sit for up to 3 days without losing flavor. If you want to keep it fresh longer, skip the chocolate drizzle until closer to serving time. Absolutely! You can lower the sugar and make it healthier. Use dark chocolate instead of milk chocolate. This choice adds rich flavor with less sugar. Also, consider using less candy corn and mini marshmallows. You can add nuts or dried fruit for a healthy twist. These options give you a tasty treat without too much guilt. Making Halloween popcorn is fun and easy. You start with the right ingredients like popped popcorn, chocolates, and fun mix-ins. You can customize it with salty, sweet, or spicy flavors and even color it for various themes. Following the steps ensures that your popcorn is crunchy and delicious. Remember to store it well to keep it fresh. Enjoy your creepy creation this Halloween season and impress everyone with your tasty treat!](https://therecipehatch.com/wp-content/uploads/2025/07/10ec22b9-6bd2-4ee6-937a-d09158c1fd01.webp)
![- 1 lb (450g) beef chuck, cut into 1-inch cubes - 8 oz (225g) button mushrooms, sliced - 1 large onion, chopped - 2 carrots, diced - 3 cloves garlic, minced I love using beef chuck for this pie. It’s tender and flavorful. Button mushrooms add a nice texture and earthy taste. Onions and carrots give sweetness. Garlic brings a bold flavor that ties everything together. - 3 tablespoons olive oil - 2 tablespoons all-purpose flour - 2 cups beef broth - 1 tablespoon Worcestershire sauce - 1 teaspoon dried thyme - 1 teaspoon dried rosemary - Salt and pepper to taste Olive oil helps brown the beef and sauté the veggies well. The flour thickens the filling just right. Beef broth adds depth, while Worcestershire sauce gives a savory kick. Thyme and rosemary offer a fragrant boost. Don’t forget to season with salt and pepper. - 1 package (14 oz) refrigerated pie crust (or homemade crust) - 1 egg, beaten for glazing You can use a store-bought crust for ease. A homemade crust can add a personal touch. The egg wash will make your pie shine and create a lovely golden crust. For the full recipe, check out the details provided above. Preheat your oven to 400°F (200°C). This step is key to getting a great crust. While your oven warms, gather your ingredients. You will need beef chuck, button mushrooms, onion, carrots, garlic, olive oil, flour, beef broth, Worcestershire sauce, thyme, rosemary, salt, pepper, pie crust, and an egg for glazing. In a large skillet, heat 2 tablespoons of olive oil over medium-high heat. Add your beef cubes, seasoning them with salt and pepper. Sear the beef until it turns brown on all sides, then remove it and set it aside. Next, in the same skillet, add the remaining tablespoon of olive oil. Toss in your chopped onion and diced carrots. Sauté these for about 5 minutes until they soften. Add the sliced mushrooms and minced garlic, cooking for 3-4 more minutes until the mushrooms become tender. Now, sprinkle the flour over the vegetable mix and stir for about a minute. This helps cook the flour. Gradually pour in the beef broth while stirring to avoid lumps. Add in Worcestershire sauce, thyme, and rosemary. Return the seared beef to the skillet, cooking on low heat for about 15 minutes. This will let the mixture thicken slightly. Don’t forget to taste and adjust the seasoning if needed. Roll out your pie crust and fit it into a 9-inch pie dish. Pour the beef and mushroom filling into the crust, making sure it is evenly spread. Take another pie crust and place it over the filling. Crimp the edges to seal, and then cut a few slits on the top. This allows steam to escape while baking. Brush the top with the beaten egg for a golden finish. Now, place the pie in your preheated oven and bake it for 25-30 minutes. Look for a golden brown crust. After baking, let the pie cool for about 10 minutes before slicing. Enjoy your warm, savory comfort food! For the full recipe, check [Full Recipe]. To get the best flavor in your Epic Beef and Mushroom Pie, start with searing the beef. Use medium-high heat to brown it well. This step locks in juices and adds depth. After searing, sauté your onions and carrots before adding mushrooms and garlic. To avoid a soggy crust, let your filling cool a bit before pouring it into the pie crust. A hot filling can steam the bottom crust. If you want extra crunch, brush the bottom crust with a little olive oil or egg wash before adding the filling. Garnishing can elevate your dish. Fresh chopped parsley adds a nice touch. You can also serve it with a side of green salad or creamy mashed potatoes for a complete meal. For an added pop, sprinkle some paprika on top before serving. Avoid overcooking the filling. If you cook it too long, it can dry out. A thick sauce is good, but it should still be moist. Also, sealing the crust properly is crucial. If you don't crimp the edges well, the filling may leak out during baking. Remember to cut slits in the top crust. This lets steam escape and helps the crust stay crispy. For more details, check out the Full Recipe. {{image_2}} You can change the meat if you want. Try using lamb or pork for a new taste. For a vegetarian option, use lentils or mushrooms alone. Different mushrooms also add unique flavors. Shiitake or portobello mushrooms work great. You can mix them for more depth. Want to boost the flavor? Add a splash of red wine to the filling. It adds richness and depth. Fresh herbs like parsley or basil can brighten the dish. You might also try adding a dash of hot sauce for some heat. Each choice makes the pie more exciting. Pair your pie with sides for a full meal. A crisp green salad adds freshness. Creamy mashed potatoes complement the savory filling. You can also serve it with gravy for extra flavor. For a fun twist, try a side of roasted veggies. They add color and nutrition to your plate. To store leftovers, let the pie cool first. Cover it tightly with plastic wrap or foil. This keeps it fresh. You can store the pie in the fridge for about 3 to 4 days. Always check for any signs of spoilage before eating. If it looks or smells off, throw it away. You can freeze the pie either before or after baking. If you freeze it before baking, wrap it well in plastic wrap. Then, put it in a freezer bag. This will keep it fresh for up to 3 months. When you're ready to bake, let it thaw overnight in the fridge. Bake as normal. If you freeze it after baking, let it cool completely first. Wrap it up tightly and freeze. To reheat, you can bake it straight from the freezer or thaw it first for even heating. To reheat the pie without losing quality, preheat your oven to 350°F (175°C). Cover the pie with foil to keep it from browning too much. Heat it for about 20 to 25 minutes. If it’s frozen, it may take a bit longer. Check that it’s hot throughout before serving. Enjoy your delicious pie! To make a simple pie crust, you need: - 1 1/4 cups all-purpose flour - 1/2 cup unsalted butter, cold and cubed - 1/4 teaspoon salt - 4-5 tablespoons ice water 1. In a bowl, mix the flour and salt. 2. Cut in the butter until it looks like coarse crumbs. 3. Add ice water one tablespoon at a time. 4. Mix until the dough forms. 5. Shape into a disk and wrap it in plastic. 6. Chill in the fridge for at least 30 minutes. This crust is flaky and perfect for your Epic Beef and Mushroom Pie. Roll it out evenly for best results. Yes, you can use different meats. Ground beef, lamb, or pork work well. For a lighter option, consider chicken or turkey. Adjust the cooking time based on the meat you choose. Ground meats cook faster, while larger cuts may need longer to tenderize. The pie lasts about 3-4 days in the fridge. Store it in an airtight container. Look for signs of spoilage like a sour smell or mold. If you notice these, it’s best to throw it away. Enjoy your pie while it's fresh for the best taste! This blog covered how to make a delicious beef and mushroom pie. We explored the key ingredients, from tender beef chuck to flavorful seasonings. I shared tips on cooking, assembling, and avoiding common mistakes. Variations help you adapt the recipe to your taste. Plus, we discussed storage and reheating methods for leftovers. In closing, remember to have fun while cooking. Your pie can impress anyone. Enjoy the process, and savor each bite!](https://therecipehatch.com/wp-content/uploads/2025/07/7458d1de-992d-4071-8195-6b5055783662.webp)