Cajun Sausage Alfredo Pasta Flavorful and Simple Meal

Are you ready to spice up your dinner routine? Cajun Sausage Alfredo Pasta blends creamy goodness with a kick of flavor. This quick and simple meal is perfect for busy …
Are you ready to spice up your dinner routine? Cajun Sausage Alfredo Pasta blends creamy goodness with a kick of flavor. This quick and simple meal is perfect for busy …

Are you craving a quick and delicious snack? Tortilla Pizza Rolls are the answer! With just a few simple ingredients, you can whip up an easy treat that satisfies both …

Are you craving a delicious snack that’s both easy to make and full of flavor? Look no further! These Pepperoni Pizza Muffins are your perfect go-to treat. With just a …

Are you ready to bake something truly special? Gordon Ramsay’s Carrot Cake is not only delicious, but it’s also easy to make! In this guide, I will share every detail …
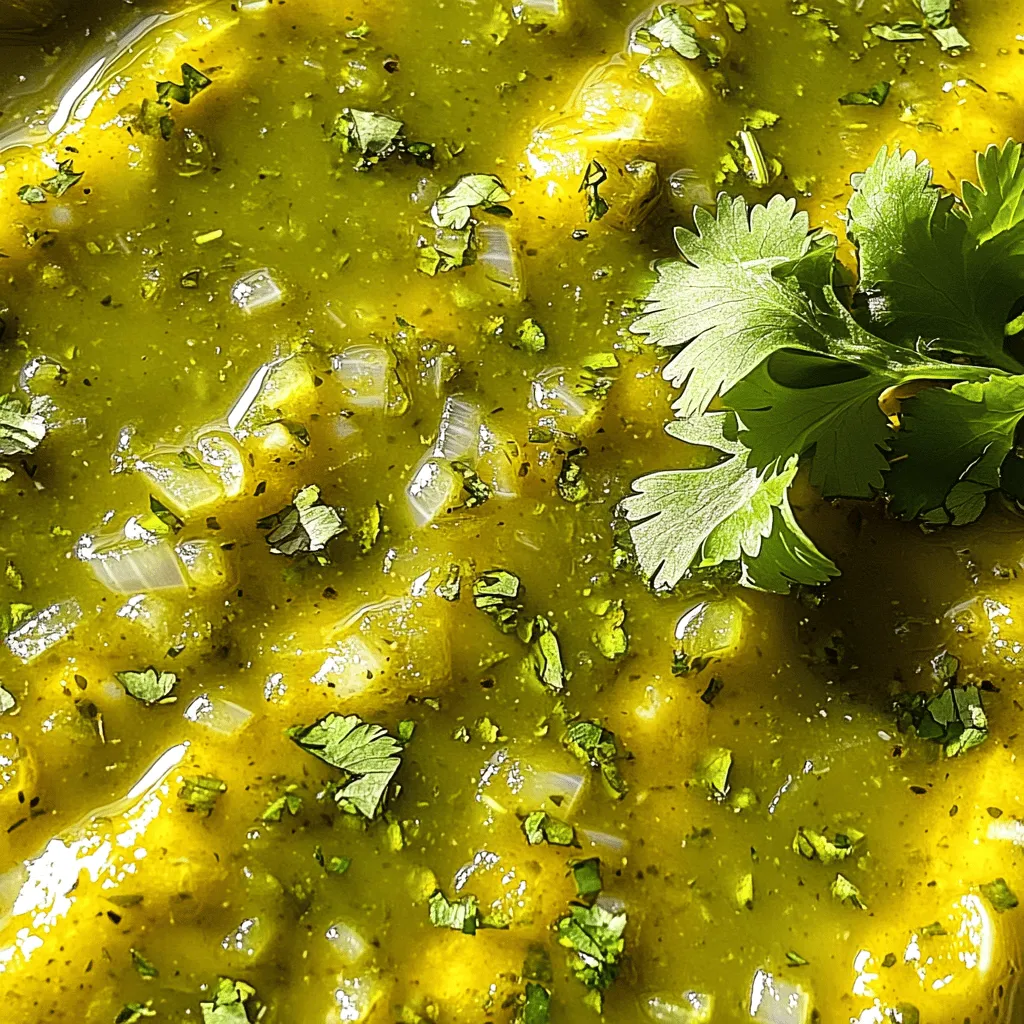
Looking for a simple yet delicious way to spice up your meals? You’re in the right place! This Quick & Easy Hatch Chile Enchilada Sauce brings bold flavors to your …
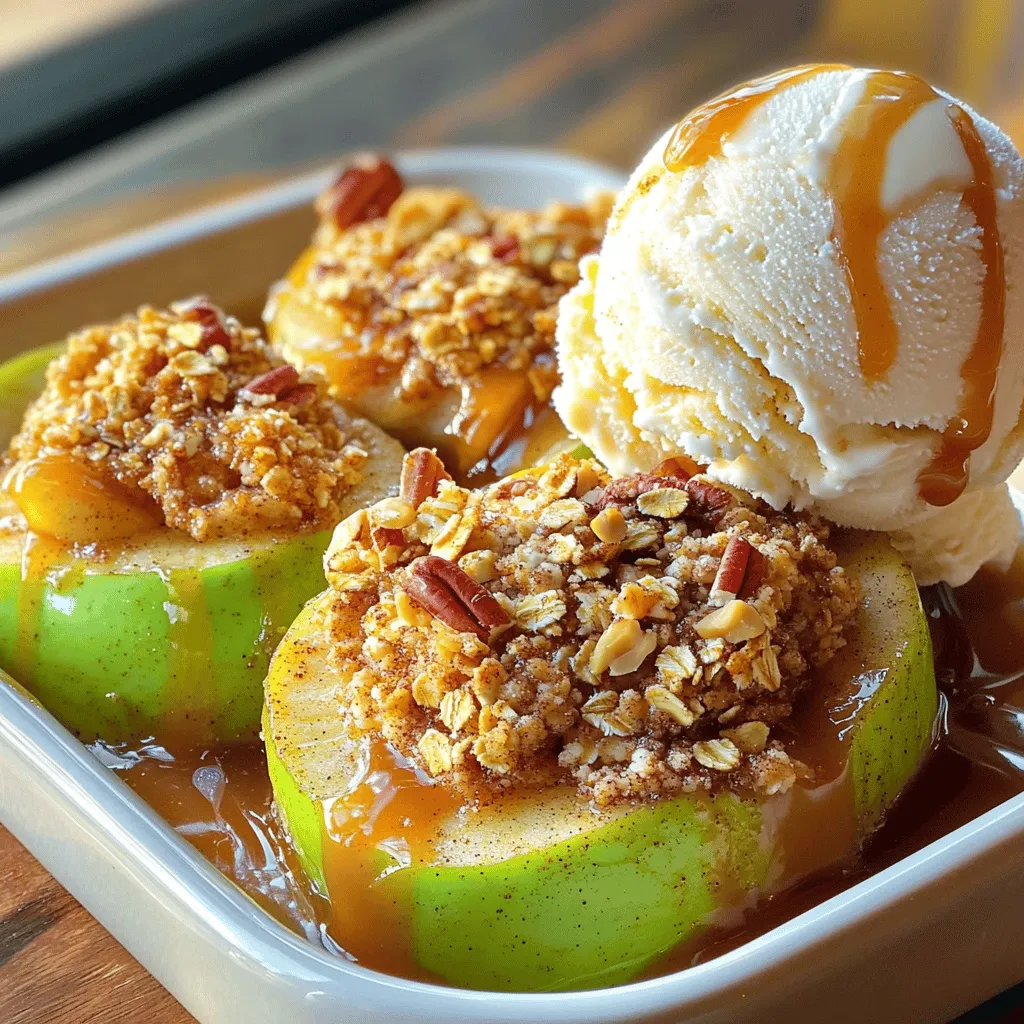
Looking for a sweet and simple dessert that will warm your heart? My Old-Fashioned Baked Apple Slices with Vanilla Ice Cream delivers cozy comfort in every bite. With just a …
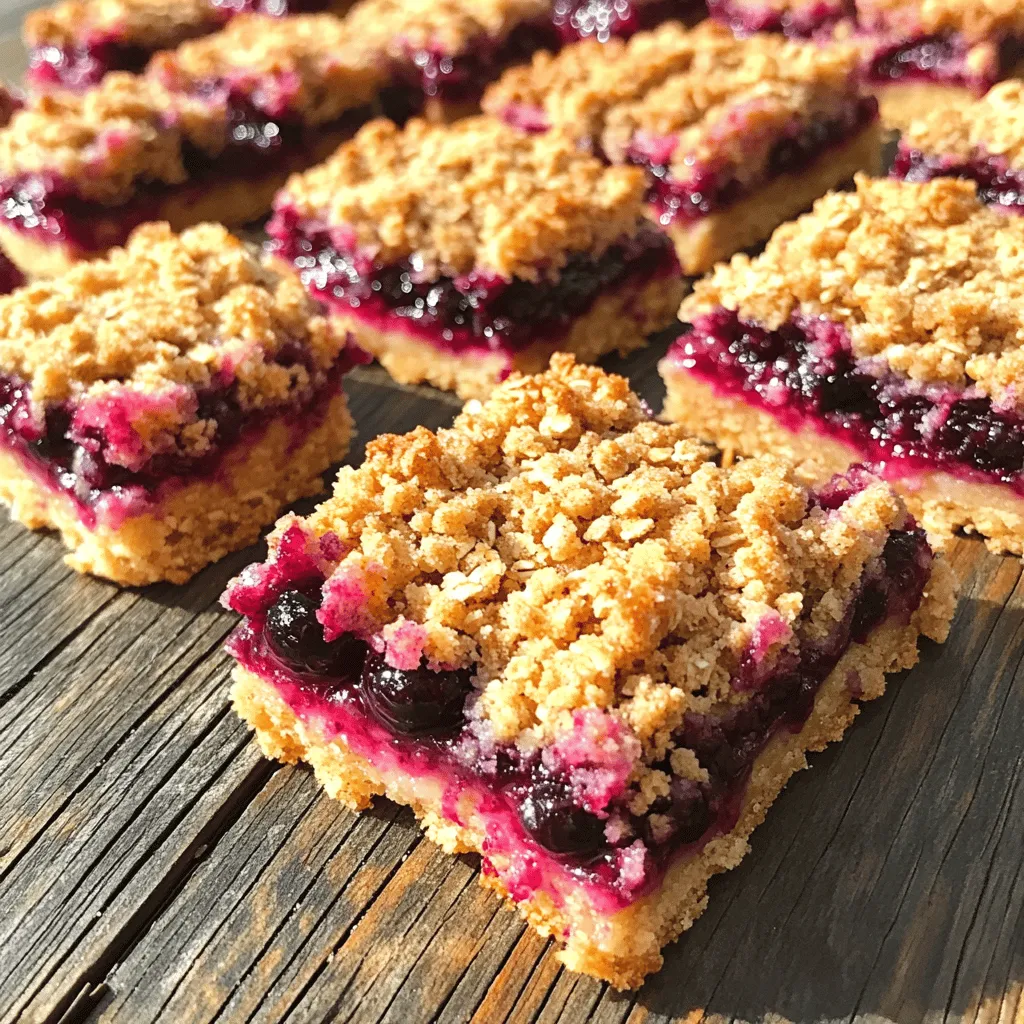
Craving a sweet and fruity treat? Try my Huckleberry Crumb Bars! These simple bars combine the tangy flavor of huckleberries with a crunchy topping, making them perfect for any occasion. …

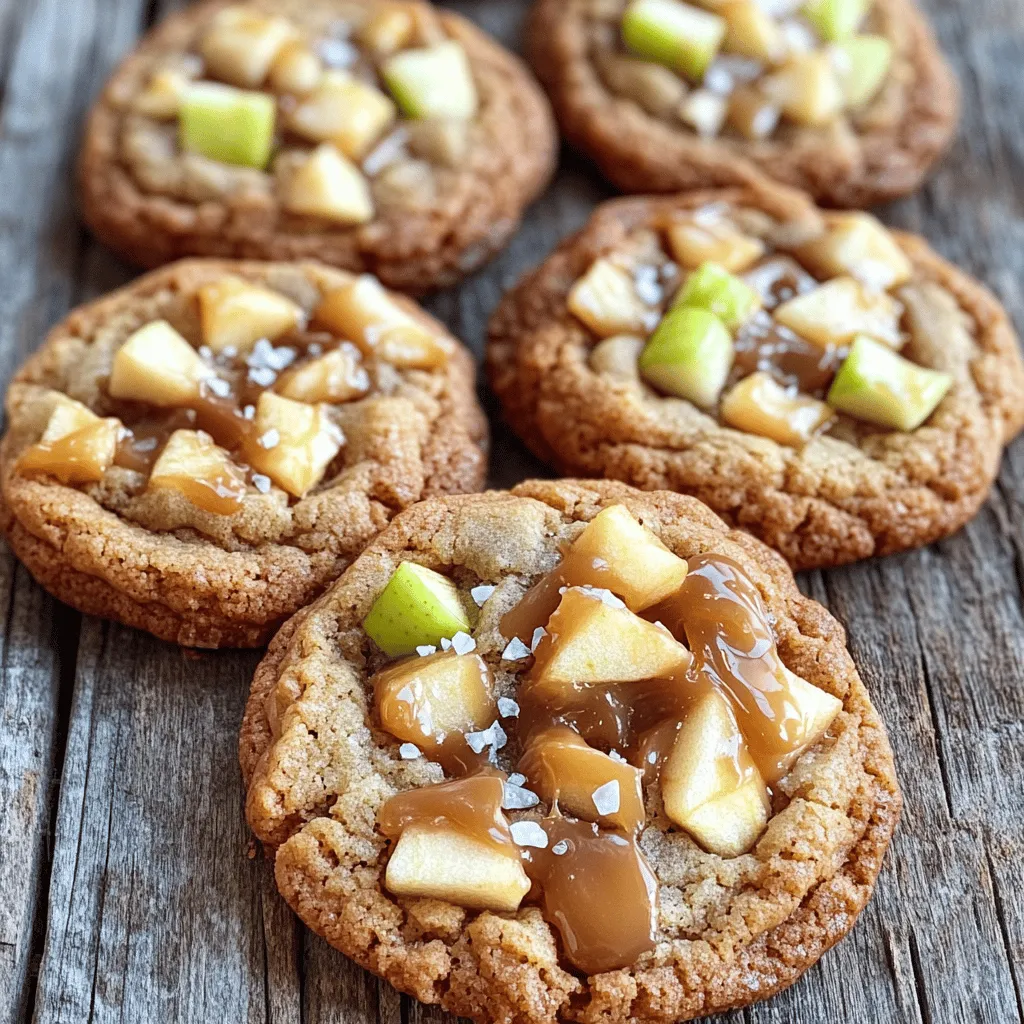
Are you craving the warm, comforting taste of apple pie but want a fun twist? Look no further! I’m excited to share my easy recipe for Perfect Apple Pie Cookies. …

Are you ready to delight your taste buds with warm, flaky pumpkin biscuits? These homemade treats are perfect for fall gatherings or cozy evenings at home. In this post, I’ll …
Get ready to indulge in a sweet treat that combines gooey caramel and crisp apples! In this article, I’ll guide you through making delightful cookies that burst with flavor in …