Cinnamon Apple Bread Delightful and Simple Recipe
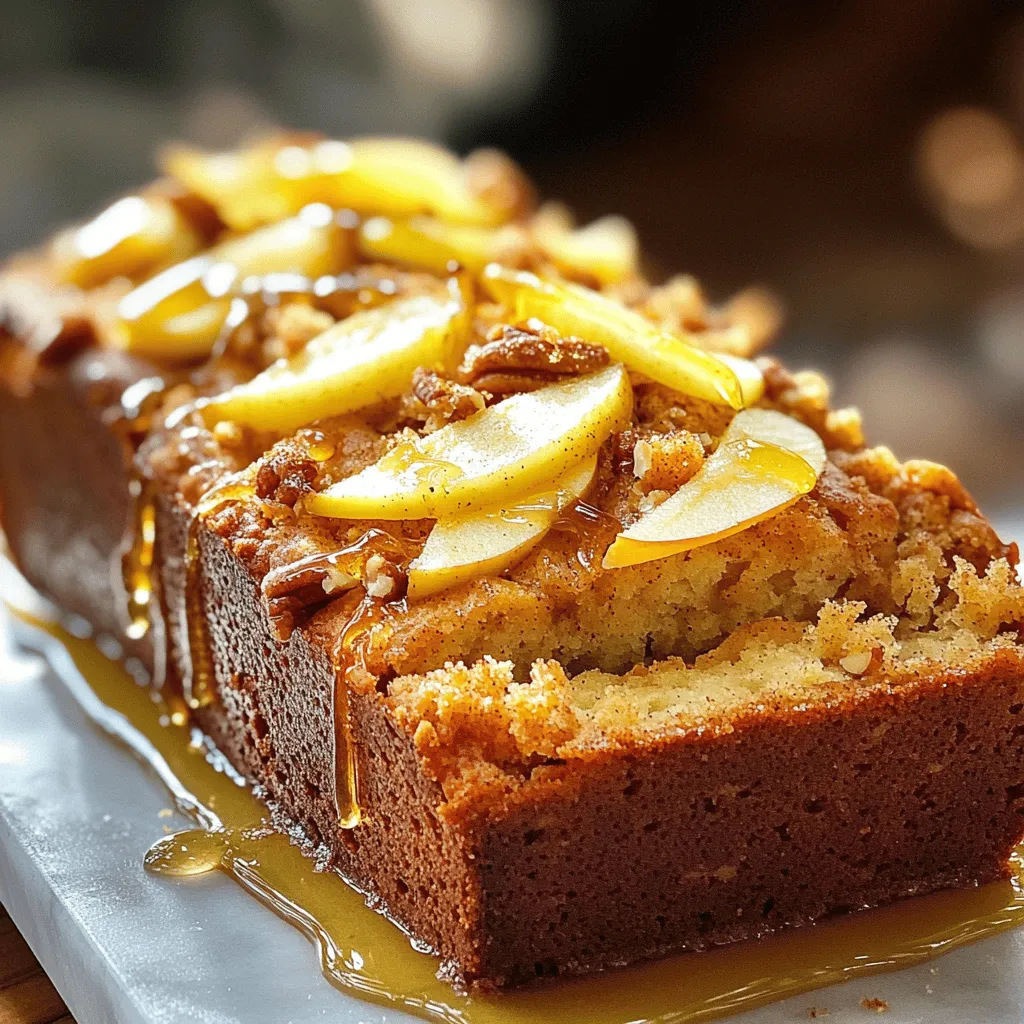
If you crave a warm, sweet treat that fills your kitchen with the scent of fall, look no further! This Cinnamon Apple Bread recipe is simple and oh-so-delicious. With just …
If you crave a warm, sweet treat that fills your kitchen with the scent of fall, look no further! This Cinnamon Apple Bread recipe is simple and oh-so-delicious. With just …

Welcome to the world of Coffee Cake Cookies! If you love the cozy taste of coffee cake but want something easier to snack on, then you’re in for a treat. …
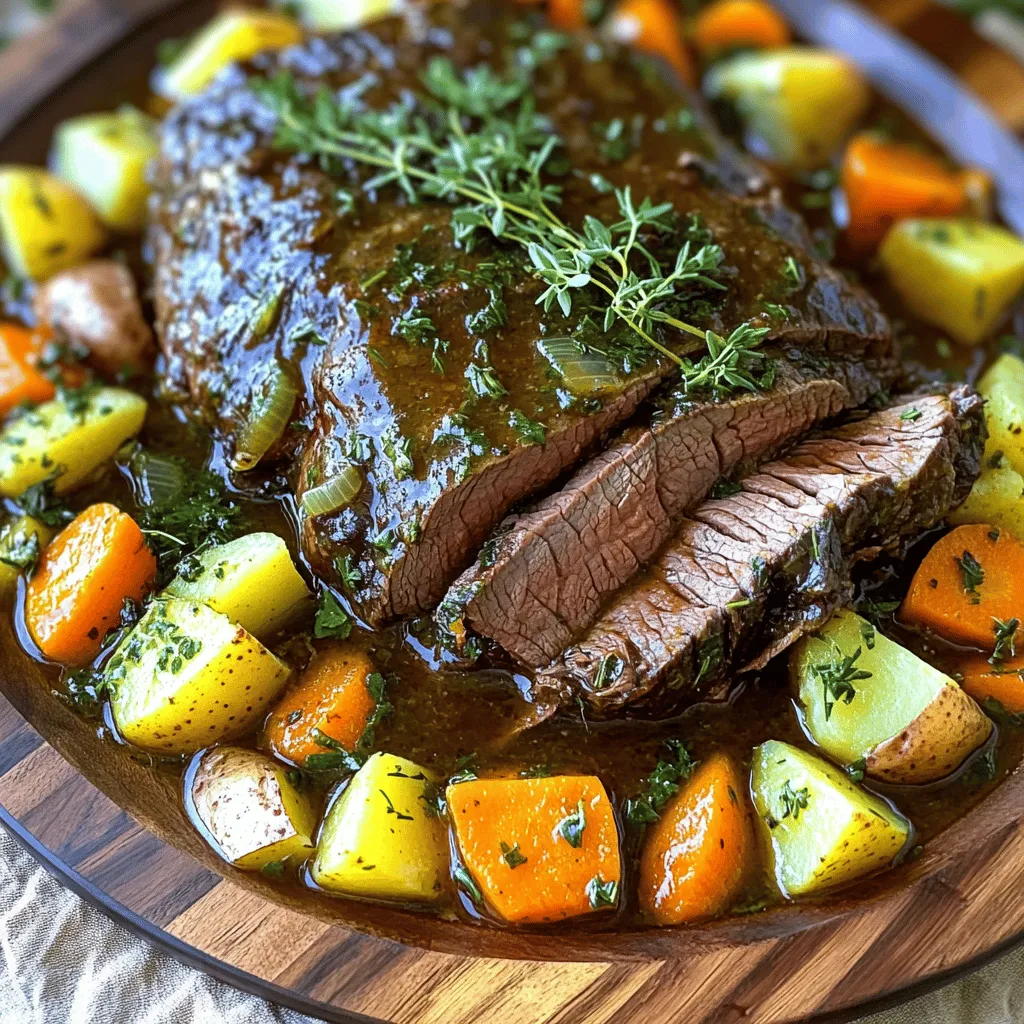
Looking for a simple, flavorful dinner idea? This Crock Pot Roast is your answer! In just a few easy steps, you can create a tender and juicy meal that everyone …
![To make a tasty Summer Veggies Skillet, you need fresh veggies. Here’s what you should use: - 1 medium zucchini, sliced - 1 medium yellow squash, sliced - 1 bell pepper (red or yellow), diced - 1 cup cherry tomatoes, halved - 1 cup fresh corn kernels (from approx. 2 ears of corn) - 1 small red onion, diced Choosing bright, firm vegetables makes a big difference. Look for vibrant colors and avoid any that feel soft or bruised. Fresh veggies give your dish a crisp taste. Spices bring your veggies to life. Here’s what you’ll need: - 2 cloves garlic, minced - 1 teaspoon dried oregano - 1 teaspoon smoked paprika - Salt and pepper to taste These spices add warmth and depth. Use fresh garlic for the best flavor. Smoked paprika adds a nice touch of smokiness that pairs well with the sweetness of the corn and bell pepper. Sometimes, you might want to add extra flavors or textures. Here are some fun ideas: - Cooked protein like chicken or shrimp - A sprinkle of cheese, like feta or Parmesan - Nuts like pine nuts or walnuts for crunch These add-ins can make your skillet a complete meal. They bring new tastes and textures that keep each bite exciting. Feel free to explore and find what you like best! For the complete recipe, check [Full Recipe]. Start by gathering your fresh veggies. Wash and slice the zucchini and yellow squash. Dice the bell pepper and red onion. Halve the cherry tomatoes, and if using fresh corn, cut the kernels off the cob. Mince the garlic. I love to prep everything before cooking. It makes the process smooth and fun. Next, heat 2 tablespoons of olive oil in a large skillet over medium heat. Add the diced red onion and sauté for 3-4 minutes. The onion should turn soft and translucent. Stir in the minced garlic. Cook it for about one minute until it smells amazing. Now, add the sliced zucchini, yellow squash, and diced bell pepper to the skillet. Sauté these for 5-7 minutes. Stir occasionally until the veggies soften. Then, add the fresh corn kernels and halved cherry tomatoes. Sprinkle in 1 teaspoon of dried oregano and 1 teaspoon of smoked paprika. Season with salt and pepper to your liking. Cook everything for another 3-5 minutes. You want all the veggies to be tender and heated through. Once done, remove the skillet from the heat. Garnish your dish with fresh basil leaves. This adds a burst of flavor and color. Your Summer Veggies Skillet is ready to enjoy. You can find the full recipe for more details on serving and variations! For a great Summer Veggies Skillet, start with high heat. This helps the veggies cook fast while keeping them crisp. Use a large skillet for even cooking. Always add the onions first. They need more time to cook. After they turn soft, add garlic next. Garlic cooks quickly, so keep an eye on it. Stir often to avoid burning. Fresh veggies make a big difference. Choose bright-colored zucchini, squash, and bell peppers. They should feel firm to the touch. Check the cherry tomatoes for a nice shine. If you can, buy local or organic produce. This often means better taste. Use the veggies within a few days of buying them for the best flavor. To boost flavor, try different spices. Smoked paprika adds a warm, smoky taste. You can also mix in fresh herbs like basil. Add them at the end to keep their flavor strong. A squeeze of lemon juice brightens the dish too. If you want more heat, sprinkle in some red pepper flakes. This adds a nice kick without overpowering the freshness. For the full recipe, check out the Summer Veggies Skillet. {{image_2}} You can easily add protein to your Summer Veggies Skillet. Chicken, shrimp, or tofu work well. For chicken, cut it into bite-sized pieces. Cook it first in the skillet until golden. Then, add the veggies. For shrimp, add them once the veggies are almost done. They only need a few minutes to cook. If you prefer tofu, use firm tofu. Cube it and sauté until crisp before adding the vegetables. This adds both flavor and nutrients. The beauty of this skillet is its flexibility. You can swap vegetables based on your taste. Try adding eggplant, asparagus, or green beans. Each brings a unique flavor and texture. If you have leftover veggies, toss them in. Just remember to adjust your cooking time. Softer veggies like mushrooms and spinach need less time. This way, you can enjoy a new dish each time. This recipe is already vegan and gluten-free! All the ingredients fit those diets. For extra flavor, add nutritional yeast. It gives a cheesy taste without dairy. You can also toss in some cooked quinoa for added protein. This keeps your meal filling and healthy. Enjoy your fresh and colorful skillet with no worries about allergens! For the full recipe, check out the detailed cooking steps. After cooking your Summer Veggies Skillet, let it cool down. Leave it at room temperature for no more than two hours. This helps prevent bacteria from growing. The quicker you cool it, the better. You can speed up cooling by spreading it in a thin layer on a plate. Choose airtight containers for storing your veggies. Glass or BPA-free plastic works well. If you want to keep it fresh, use a container with a tight seal. Label the container with the date so you remember when you made it. This helps you use it at its best. To reheat your Summer Veggies Skillet, use a skillet or microwave. If using a skillet, add a splash of olive oil. Heat it on medium until warm, stirring often. In the microwave, place it in a microwave-safe bowl. Cover it with a lid or microwave-safe wrap. Heat on high for 1-2 minutes, stirring halfway through. Always check that it's hot all the way through before serving. To boost flavor, add fresh herbs like thyme or rosemary. You can also try a splash of lemon juice or balsamic vinegar. For a spicy kick, sprinkle crushed red pepper flakes. Using fresh, seasonal veggies enhances the dish's taste. Cooking them at high heat caramelizes their natural sugars, adding depth. Don't forget to season with salt and pepper. Experiment with different spices, like cumin or coriander, for a unique twist. Yes, you can use frozen vegetables. They are convenient and save time. Just make sure to thaw them first for even cooking. Drain excess water from thawed veggies to avoid a soggy skillet. Frozen veggies often cook faster, so keep an eye on them. They may not have the same crispness as fresh, but they'll still taste good. You can serve this skillet dish with rice or quinoa for a hearty meal. It pairs well with grilled chicken or fish for extra protein. For a lighter option, serve it alongside a fresh salad. You can also enjoy it as a filling for tacos or wraps. Try it on a bed of greens for a colorful salad. Yes, you can prepare it ahead. Cook the veggies, cool them, and store in the fridge. Reheat when ready to eat. The flavors will meld together nicely. Just be aware that some veggies may lose crispness. To keep them crunchy, sauté close to serving time. Store leftovers in an airtight container. Keep them in the fridge for up to 3 days. For longer storage, freeze the skillet dish. Just remember to label and date the container. When reheating, add a splash of water to prevent drying out. Absolutely! Cheese adds creaminess and flavor. Try feta, goat cheese, or shredded mozzarella. Sprinkle cheese on top just before serving for a melt-in-your-mouth finish. You can also mix it in while cooking for a cheesy blend. Adjust the amount to your taste preference. In this post, we explored how to make a delicious Summer Veggies Skillet. We discussed fresh vegetable selection, spices, and optional add-ins. Then, we outlined step-by-step cooking instructions and shared tips for the best techniques. Finally, we noted storage tips and answered common questions. You now have all the tools to create a tasty dish. Enjoy making it unique with your favorite ingredients!](https://therecipehatch.com/wp-content/uploads/2025/08/0317e569-8fd3-4fae-89eb-a02684b3b280.webp)
Get ready for a burst of flavor with my Savory Summer Veggies Skillet! This dish is a fun way to enjoy fresh veggies and bright seasonings. Whether you are new …
![For this Autumn Gnocchi with Butternut Squash, you will need: - 1 pound potato gnocchi - 1 medium butternut squash, peeled and diced - 2 tablespoons olive oil - 1/2 teaspoon smoked paprika - 1/2 teaspoon ground cinnamon - Salt and pepper to taste - 2 cloves garlic, minced - 1 cup fresh spinach, chopped - 1/2 cup grated Parmesan cheese (or a dairy-free alternative) - 1/4 cup walnuts, chopped (for garnish) - Fresh sage leaves for garnish Each ingredient plays a special role in making this dish flavorful and satisfying. - Potato Gnocchi: You can use store-bought gnocchi for ease or make your own for a fun challenge. If you want a gluten-free option, look for gluten-free gnocchi. - Butternut Squash: If you can’t find butternut squash, try pumpkin or sweet potatoes instead. Both bring a nice sweetness. - Olive Oil: Use extra virgin olive oil for a richer taste, but any cooking oil will work. - Cheese: If you prefer non-dairy, use nutritional yeast or a plant-based cheese. These tips help you adapt the recipe to your taste or what you have on hand. Fresh ingredients make a big difference in flavor. Fresh spinach adds a bright taste, while fresh garlic gives a strong aroma. When it comes to spices, always prefer fresh ground. They pack more flavor than dried ones. Dried ingredients can work in a pinch. If you use dried spinach, add it earlier in the cooking process. This will help rehydrate it. Using fresh vs. dried ingredients is about balance. Fresh brings brightness, while dried gives stability. Always choose what suits your cooking style best. For the full recipe, refer to the [Full Recipe]. First, preheat your oven to 400°F (200°C). This step is key for roasting the squash. Next, take your medium butternut squash and peel it. Dice it into small cubes. Aim for even pieces to ensure they cook well. Spread the diced squash on a baking sheet. Drizzle with 1 tablespoon of olive oil. Add in 1/2 teaspoon of smoked paprika and 1/2 teaspoon of ground cinnamon. Sprinkle salt and pepper to taste. Toss everything together so the squash is well coated. Roast it in the oven for 25 to 30 minutes. You want it to be tender and slightly caramelized for the best flavor. While the squash roasts, get a large pot of salted water and bring it to a boil. Once boiling, add your 1 pound of potato gnocchi. Cook according to the package instructions, which is usually about 2 to 3 minutes. You will know they are done when they float to the surface. This means they are ready! Drain the gnocchi and set them aside. In a large skillet, heat the remaining tablespoon of olive oil over medium heat. Add 2 cloves of minced garlic and sauté them for about 1 minute until fragrant. Then, toss in 1 cup of chopped fresh spinach. Cook until the spinach is wilted, which takes about 2 minutes. Once your butternut squash is done roasting, add it to the skillet with the garlic and spinach. Gently toss in the cooked gnocchi. Make sure everything is well mixed. Adjust the seasoning with salt and pepper as needed. Remove from heat, and stir in half of the grated Parmesan cheese until it melts. Serve the gnocchi in bowls, garnished with the remaining Parmesan, chopped walnuts, and fresh sage leaves for a delicious finish. Enjoy your Autumn Gnocchi with Butternut Squash by following these steps, or check the Full Recipe for more details! Roasting butternut squash brings out its sweet flavor. First, cut the squash into even pieces. This helps them cook at the same rate. I like to use a baking sheet lined with parchment paper. It makes cleanup easy. Drizzle the squash with olive oil. Add your spices to make it tasty. I love using smoked paprika and cinnamon. Toss everything well before roasting. Bake for 25-30 minutes at 400°F. You want the squash tender and golden. Cooking gnocchi is quick and fun. Use a large pot of salted water. Bring it to a rolling boil. Add the gnocchi. Watch for them to float to the top. This usually takes about 2-3 minutes. Floating means they’re ready! Drain them well and set aside. Be gentle so they don’t break. Adding extra flavors makes your dish pop! Sauté garlic in olive oil for a rich aroma. Fresh spinach brings color and nutrients. Don't forget the Parmesan cheese for a creamy touch. I also like to add chopped walnuts for crunch. Try adding fresh herbs like sage for a vibrant finish. These small steps can elevate your gnocchi into a savory delight. For the full recipe, check out the section above. {{image_2}} You can easily make this dish vegetarian or vegan. For a vegetarian version, just use Parmesan cheese. If you prefer vegan, choose a dairy-free cheese. There are many great plant-based options available. You can also skip the cheese altogether. The flavors from the butternut squash and spices will still shine through. You can change up the sauce or toppings to match your taste. A simple sage brown butter sauce adds a rich flavor. Just melt butter in a pan and add fresh sage leaves. If you like a kick, try a spicy marinara sauce. You can also top your gnocchi with pesto for a fresh twist. Feel free to swap out ingredients based on the season. In the fall, you can add roasted Brussels sprouts or mushrooms. In the winter, try kale or roasted carrots. You can also use sweet potatoes instead of butternut squash for a different flavor. Using seasonal ingredients keeps your dish fresh and exciting. For the complete recipe, check out the Full Recipe section. To store leftover gnocchi, allow it to cool completely. After cooling, place it in an airtight container. Make sure to separate layers with parchment paper. This helps prevent sticking. Store the container in the fridge for up to three days. If you want to keep it longer, freezing is a great option. To reheat, start by placing the gnocchi in a skillet over medium heat. Add a splash of water or olive oil to keep it moist. Stir gently until heated through, about 5 to 7 minutes. Alternatively, you can use a microwave. Place the gnocchi in a microwave-safe dish. Heat for one to two minutes, stirring halfway through. If you want to freeze gnocchi, place it in a single layer on a baking sheet. Freeze until firm, about an hour. Transfer to a freezer bag or airtight container. It can be stored in the freezer for up to three months. When you're ready to eat, cook it directly from frozen. Add it to boiling water for about 3 to 5 minutes, or until it floats. Enjoy your Autumn Gnocchi with Butternut Squash any time! For complete steps, check the Full Recipe. Making Autumn Gnocchi with Butternut Squash takes about 50 minutes. This includes 15 minutes of prep time and 35 minutes of cooking time. You will enjoy a warm dish that feels like a cozy hug. Yes, you can use store-bought gnocchi. It saves time and still tastes great. Just follow the cooking instructions on the package. Fresh or frozen gnocchi works well, too. I love serving gnocchi with a simple side salad. A fresh green salad with a light vinaigrette pairs well. You can also try roasted vegetables for extra flavor. Garlic bread is another favorite. It adds a nice crunch and goes perfectly with the gnocchi. This article covered all you need to know about making delicious gnocchi with butternut squash. We discussed key ingredients, how to cook them, and tips for getting the best flavors. I shared variations for special diets and storage tips, so your gnocchi stays fresh. With these techniques and insights, you can create a tasty dish that impresses. Don't forget to experiment with different flavors and ingredients to make this recipe your own! Enjoy your cooking adventure!](https://therecipehatch.com/wp-content/uploads/2025/08/81de7e3a-5e9f-4250-bc58-5c9c185c521c.webp)
Looking for a cozy dish that screams autumn? This Autumn Gnocchi with Butternut Squash is your answer! I’m here to guide you through a simple and tasty recipe packed with …

Are you ready for a fun fall treat? These Pumpkin Oreo Balls are easy to make and perfect for any occasion. With just a few simple ingredients, you can create …
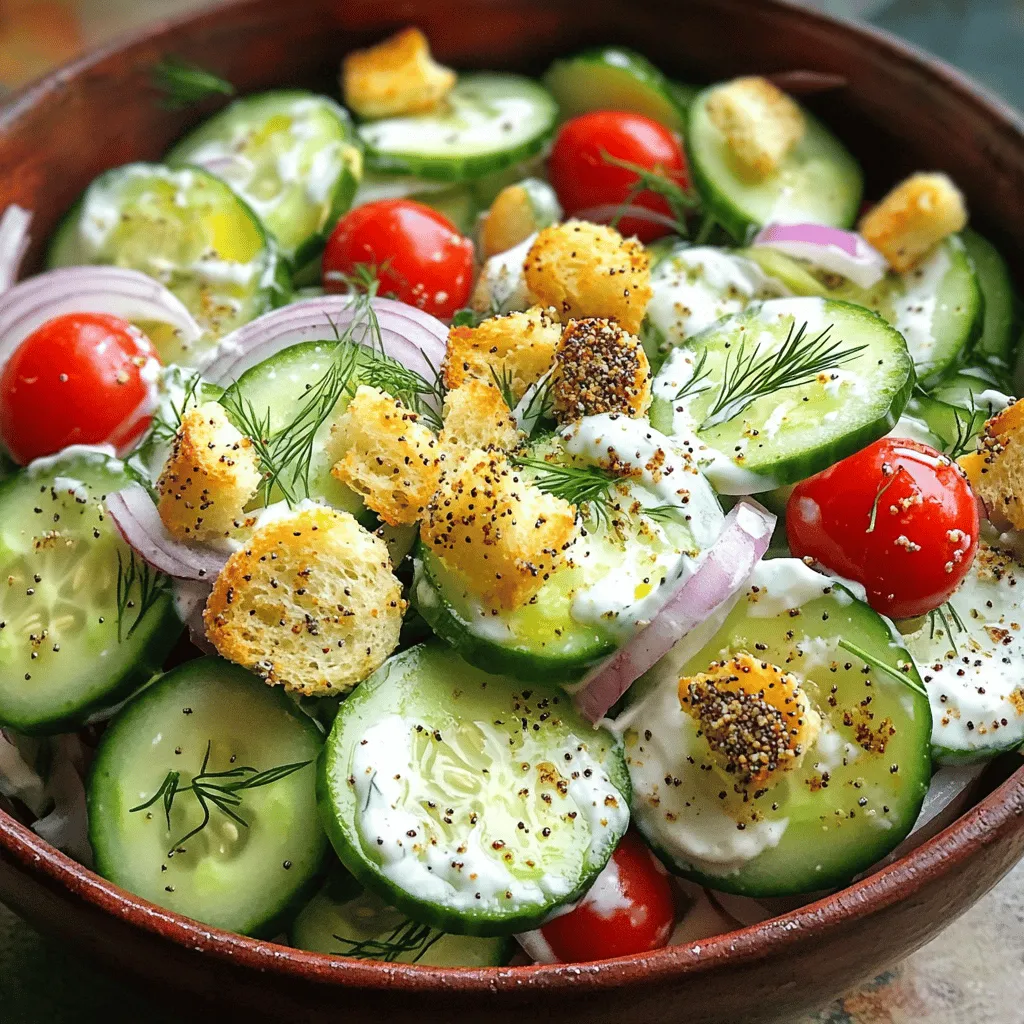
Looking for a fresh twist on your salad game? My Cucumber Everything Bagel Salad is just what you need! It bursts with flavor and uses simple, fresh ingredients. With creamy …
. To keep your cookies soft and chewy, use room temperature butter. Cream it well with sugars until fluffy. This step adds air and helps make them soft. Use fresh pumpkin puree, not the canned pie filling. It gives a rich taste and keeps them moist. Avoid overmixing your dough. Mix just until combined. Overmixing can make the cookies tough. Store your cookies in an airtight container. This keeps them soft and fresh longer. You can add a slice of bread to the container. The bread helps keep the cookies moist. Keep them at room temperature for up to a week. If you want them to last longer, freeze them. Place them in a freezer bag and remove as much air as possible. One common mistake is skipping the chilling step. Chilling the dough for 30 minutes helps the flavors blend. It also makes the cookies less spread out while baking. Another mistake is using old spices. Fresh spices enhance the flavor of your cookies. Lastly, don’t bake them too long. Slightly underbaked cookies will firm up as they cool. Follow the [Full Recipe] for best results! {{image_2}} You can easily change the flavor of these cookies. Add-ins make them fun! Try mixing in dried cranberries or raisins for a fruity twist. You might also add a cup of chopped apples for a fresh crunch. If you like nuts, swap pecans for walnuts. You can even add spices like cardamom for a unique flavor profile. If you’re not a fan of white chocolate, consider dark chocolate or even butterscotch chips. Toppings can elevate your cookie game. A simple glaze made from powdered sugar and milk adds sweetness. Drizzle this over the cooled cookies for a nice touch. You can also sprinkle crushed graham crackers on top for a pie-like texture. For a festive look, add candy corn or fall-themed sprinkles right before baking. This makes each cookie a delight in every bite! These cookies fit any season with a few tweaks. For Halloween, add orange and black sprinkles. For Thanksgiving, top them with a dollop of whipped cream to mimic pumpkin pie. In winter, mix in peppermint extract for a refreshing twist. You can even shape the cookies into festive forms, like leaves or pumpkins, during the fall. Whatever the occasion, these cookies can shine! For more on making these delicious treats, check out the Full Recipe. To keep your cookies fresh, store them in an airtight container. Line the container with a paper towel. This helps absorb moisture and keeps cookies from getting soggy. Place a layer of cookies in the container, then add another paper towel on top. This method helps maintain their soft texture and keeps them tasty for days. You can freeze these cookies for later. First, let them cool completely. Then, place them in a single layer on a baking sheet. Freeze them for about an hour. After that, transfer the cookies to a freezer bag or container. Make sure to remove as much air as possible. They can last up to three months in the freezer. When stored well, the cookies last about one week at room temperature. If you freeze them, they stay good for about three months. Always check for any signs of spoilage. If they look dry or smell off, it’s best to toss them. Enjoy the best Crumbl pumpkin pie cookies fresh for a delightful treat! For the full recipe, check out [Full Recipe]. The Best Crumbl Pumpkin Pie Cookies stand out due to their rich flavor. They have a moist texture thanks to the pumpkin puree. The blend of spices adds warmth and comfort. These cookies also feature white chocolate chips for a sweet touch. This mix of flavors brings the essence of fall into each bite. Yes, you can make these cookies gluten-free! Just swap the all-purpose flour for a gluten-free blend. Make sure the blend has a good texture and flavor. You can also use almond flour or oat flour as alternatives. These options work well and keep the cookies soft and tasty. To get the best texture, cream the butter and sugars well. This helps create air pockets, making the cookies light. Be careful not to overmix the dough when adding dry ingredients. Let the cookies cool on the baking sheet before moving them. This helps them set properly. For a chewy result, slightly underbake them. They will firm up as they cool. For the full recipe, you can check the section above. You now have all you need to bake perfect Crumbl Pumpkin Pie Cookies. Start with the right ingredients and tools, and follow the step-by-step instructions. Remember the tips for soft, chewy cookies and avoid common mistakes. Explore fun variations and toppings to make each batch unique. Store them well so they stay fresh and tasty. With practice, your cookies will impress everyone. Baking can be fun and rewarding, so enjoy the process. Happy baking!](https://therecipehatch.com/wp-content/uploads/2025/08/7ed5b253-5638-49a2-9ba2-94806acd1500.webp)
If you love cookies and pumpkin pie, you’re in for a treat! I’m excited to share my recipe for the best Crumbl pumpkin pie cookies. These soft, chewy delights capture …
![To make a tasty Creamy Chicken Tortilla Soup, you need some fresh veggies and herbs. Here’s a list of the key ingredients: - 2 tablespoons olive oil - 1 medium onion, diced - 3 cloves garlic, minced - 1 bell pepper (red or yellow), diced - 2 medium carrots, diced - 1 jalapeño, minced (optional for spice) - 1 teaspoon ground cumin - 1 teaspoon smoked paprika - 6 cups chicken broth - 2 cups cooked chicken, shredded - 1 cup corn kernels (fresh or frozen) - 1 can (15 oz) black beans, drained and rinsed - 1 cup heavy cream - Salt and pepper to taste - 1 cup cherry tomatoes, halved - 1 cup cilantro, chopped This soup needs chicken and broth for depth. You can use any cooked chicken, like rotisserie. The broth adds warmth and flavor. For the creamy touch, we use heavy cream, which makes it rich and smooth. The spices, ground cumin and smoked paprika, add warmth and complexity. They make the soup more exciting and flavorful. Garnishes can take your soup to the next level. Here are some great options: - Tortilla strips, which add crunch - Slices of avocado for creaminess - Lime wedges for a zesty kick - Fresh cilantro for brightness - You can also add cheese or sour cream if you like These garnishes not only look nice but also enhance the taste. They add different textures and flavors, making each bite delightful. For the full recipe, check out the detailed cooking instructions. To make creamy chicken tortilla soup, start by heating olive oil in a large pot over medium heat. Add diced onion and minced garlic. Sauté them for about 3-4 minutes until the onion turns translucent. This step builds a solid flavor base. Next, stir in the diced bell pepper, carrots, and minced jalapeño if you want some heat. Cook these vegetables for about 5 minutes until they start to soften. This helps all the flavors blend well together. Now, add the ground cumin and smoked paprika. Stir them in for about 30 seconds until you smell their warm scents. Then, pour in 6 cups of chicken broth. Bring the mixture to a boil, then reduce the heat and let it simmer for 10 minutes. This simmering time allows the flavors to mix. After that, add 2 cups of shredded chicken, 1 cup of corn, and 1 can of black beans. Stir everything together and let it simmer for another 10 minutes. This will let the chicken and beans soak up the broth's flavor. Finally, slowly mix in 1 cup of heavy cream while stirring. Let the soup simmer on low for about 5 more minutes. Season it with salt and pepper to your taste. Just before serving, stir in 1 cup of halved cherry tomatoes and 1 cup of chopped cilantro. This adds freshness to the soup. Serve it hot in bowls. For a beautiful presentation, garnish with tortilla strips and avocado slices. Don't forget to add lime wedges on the side. They give a nice zing to each bite! For the full recipe, check out the [Full Recipe]. Enjoy your cooking adventure! To make your creamy chicken tortilla soup even better, think about spice adjustments. You can add more jalapeño if you like heat. For a milder taste, skip the jalapeño or use just half. Try adding a pinch of cayenne for an extra kick. You can also mix in some chili powder or a dash of hot sauce to elevate the flavor. If you're looking for cream substitutes, consider using half-and-half or coconut milk. Both will give you a nice creaminess without the heaviness. You can even try using plain yogurt for a tangy twist. Just stir it in after the soup cools slightly to avoid curdling. While cooking, watch out for overcooking the veggies. You want them tender but not mushy. Pay attention to the cooking times in the recipe to get the best texture. Another mistake is not tasting the soup as you go. Add salt and pepper gradually. Each broth can be different, so adjust to your taste. When combining ingredients, be sure to add the cream slowly. Stir it in gently to keep the soup smooth. If you dump it all in at once, it might not blend well. These tips will help you make a delicious soup that everyone will love! For the full recipe, check out the link above. {{image_2}} You can swap out some ingredients to suit your needs. If you're dairy-free, use coconut cream instead of heavy cream. It adds a nice richness without the dairy. For gluten-free options, look for gluten-free chicken broth. You can also use corn tortillas or crispy rice as a crunchy garnish instead of standard tortilla strips. Want to spice things up? Add more jalapeño or some cayenne pepper. You can also toss in a dash of hot sauce for a kick. If you're looking for a different protein, turkey works great in this soup. For vegetarian options, try using chickpeas or lentils instead of chicken. These choices keep the soup hearty and delicious. By mixing and matching these options, you can create a unique soup every time. Check out the Full Recipe for more ideas! To keep your creamy chicken tortilla soup fresh, use airtight containers. Glass containers work best. They do not stain and are easy to clean. You can also use plastic containers, but ensure they seal tightly. Store your soup in the fridge for up to three days. If you want to keep it longer, freeze it for up to three months. Just make sure to leave some space in the container, as the soup will expand when frozen. When reheating your soup, use the stove for the best flavor. Pour the soup into a pot and heat over medium heat. Stir occasionally to prevent sticking. This method helps keep the flavors rich. You can also use the microwave. Place the soup in a microwave-safe bowl. Heat in short bursts of one minute, stirring in between. This way, it heats evenly. For both methods, add a splash of water or broth if the soup seems too thick. This helps maintain a nice, creamy texture. To thicken your soup, you have a few easy options. - Cornstarch Slurry: Mix equal parts cornstarch and cold water. Stir it into the soup and cook until it thickens. - Flour Roux: Cook equal parts flour and butter in a pan until golden. Add it to the soup for a rich texture. - Mashed Beans: Blend a portion of the black beans before adding them. This adds body and flavor. These methods work well and fit nicely with the creamy taste of the soup. Yes, you can make this soup ahead of time! It actually helps the flavors blend better. - Make-ahead Timing: Cook the soup and let it cool. Store it in the fridge for up to three days. - Reheating: When ready to eat, reheat gently on the stove. Add fresh cream if needed for a creamy finish. Keep in mind, if you add the avocado or tortilla strips early, they might become soggy. Add these right before serving for the best taste. The soup can be as spicy as you want! - Spice Levels: The jalapeño adds heat, but you can skip it if you prefer mild flavors. - Adjusting Spice: If you want more heat, add extra jalapeños or a pinch of cayenne pepper. For less heat, remove seeds from the jalapeño before adding it. This soup is flexible! You can easily adjust the spice to fit your taste. In this blog post, we explored the key ingredients for creamy chicken tortilla soup. We covered fresh veggies, chicken options, and tasty spices. You learned about garnishes that can elevate your dish too. We walked through clear steps for cooking and assembling the soup, plus tips to avoid common mistakes. Finally, we discussed variations, storage, and reheating ideas. Creamy chicken tortilla soup can be fun and easy to make. Try your own twists to make it your favorite! Enjoy cooking!](https://therecipehatch.com/wp-content/uploads/2025/08/968be0a2-a5cc-4545-b9ea-9844b9811b07.webp)
Are you ready to enjoy a bowl of warm, comforting Creamy Chicken Tortilla Soup? This easy recipe is packed with flavor and will quickly become a family favorite. I’ll guide …

Are you ready to make a tasty treat? Air Fryer Apple Pie Bombs are easy and fun! With just a few simple ingredients, you can create warm, gooey bites filled …