Harry Potter Butterbeer Cake Delightful Baking Treat
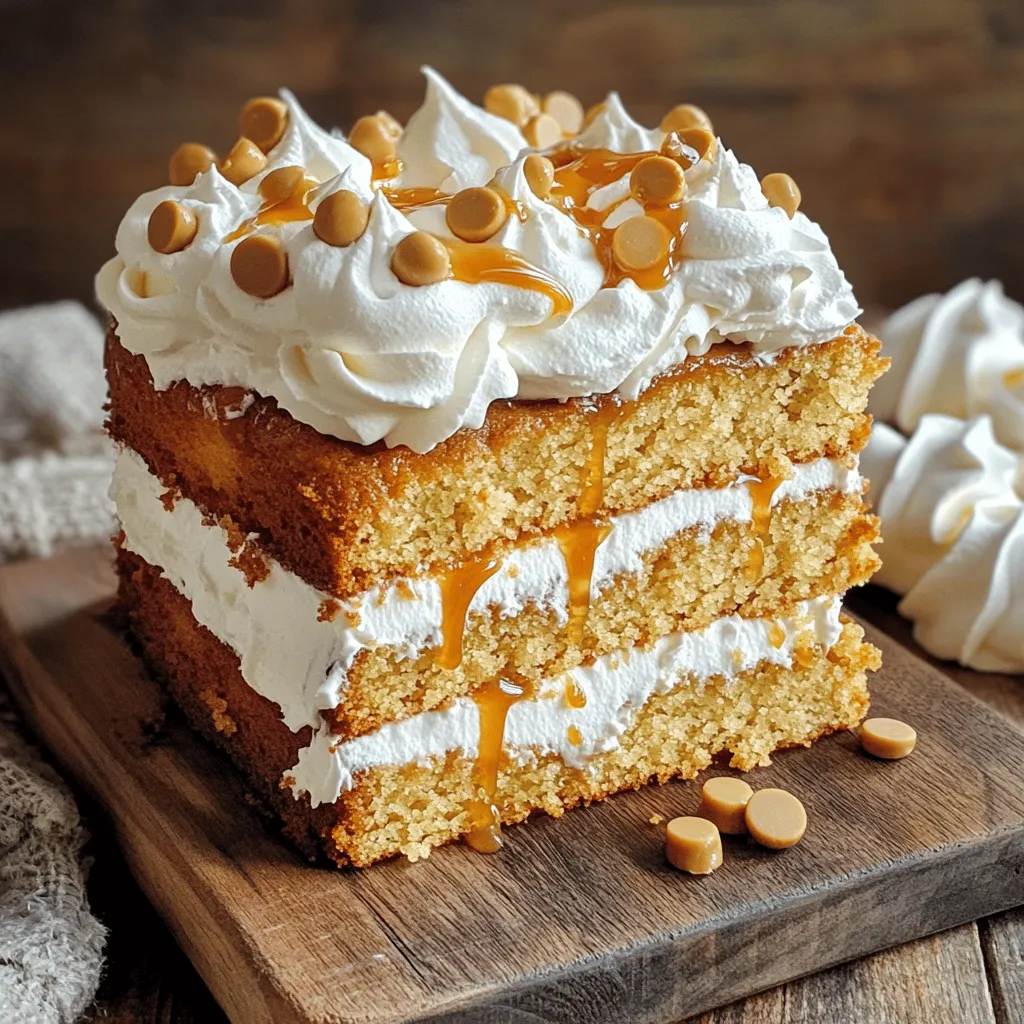
Are you ready to transport your taste buds to the magical world of Harry Potter? This Butterbeer Cake brings the flavors of the famed wizarding beverage right to your kitchen. …
Are you ready to transport your taste buds to the magical world of Harry Potter? This Butterbeer Cake brings the flavors of the famed wizarding beverage right to your kitchen. …
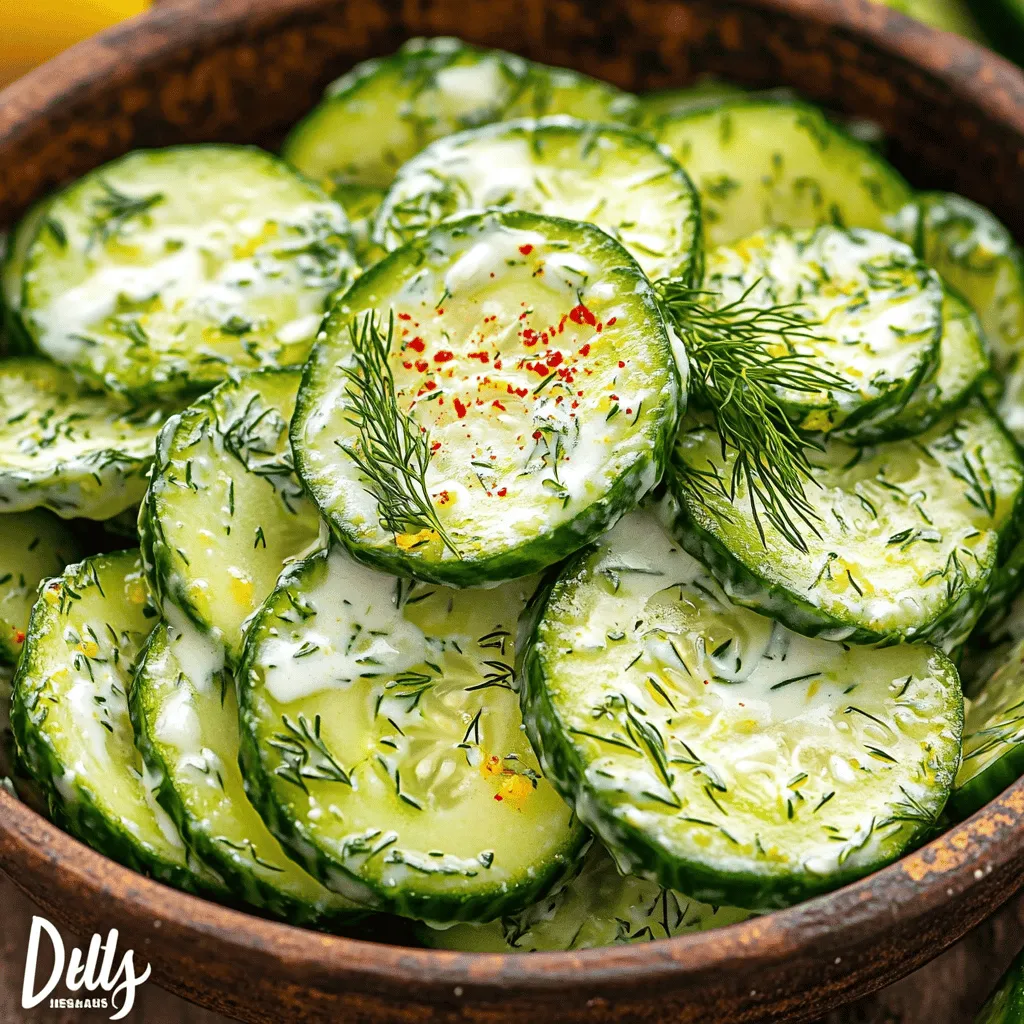
![Tik Tok Korean Cucumber Salad is a fresh and crunchy dish. It is perfect for a light meal or side. This salad uses simple ingredients. They come together to create bold flavors. Let’s dive into what you will need. - 2 medium cucumbers, thinly sliced - 1 teaspoon salt - 2 tablespoons sesame oil - 1 tablespoon soy sauce - 1 tablespoon rice vinegar - 2 teaspoons gochugaru (Korean red pepper flakes) - 1 tablespoon sugar - 1 garlic clove, minced - 2 green onions, chopped - 1 tablespoon sesame seeds These ingredients make the salad bright and tasty. The cucumbers provide crunch, while the dressing adds flavor. I love how easy it is to make this salad. You can enjoy it right away or let it chill for a bit. For the full recipe, check out the detailed instructions. To start, you need to prepare the cucumbers. Take two medium cucumbers and wash them well. Slice them thinly, about a quarter-inch thick. This helps the cucumbers soak up the flavors. Place the cucumber slices in a mixing bowl. Sprinkle one teaspoon of salt over them. Toss well to coat each slice. Let the cucumbers sit for about 30 minutes. This draws out excess moisture and makes them crunchy. After 30 minutes, rinse the cucumbers under cold water. This removes the extra salt. Drain them in a colander and pat them dry with paper towels. Dry cucumbers mix better with the dressing. Now, they are ready for the next steps. Next, let’s make the dressing. In a separate bowl, combine the ingredients. You will need two tablespoons of sesame oil, one tablespoon of soy sauce, and one tablespoon of rice vinegar. Add two teaspoons of gochugaru, one tablespoon of sugar, and one minced garlic clove. Whisk these ingredients together until they blend well. The dressing should smell amazing and have a nice balance of flavors. Now, it’s time to mix everything together. Add the drained cucumbers to the bowl with the dressing. Toss them gently so each slice gets coated. This is where the magic happens! Then add in two chopped green onions and one tablespoon of sesame seeds. Mix gently again to combine. Let the salad sit for at least 10 minutes. This allows the flavors to meld. You can serve it chilled or at room temperature. If you want, garnish with extra sesame seeds for a nice touch. Enjoy your fresh and crunchy Tik Tok Korean Cucumber Salad! For all the steps, check out the [Full Recipe]. To make the Tik Tok Korean cucumber salad just right, adjust the seasoning to fit your taste. If you like it sweeter, add more sugar. Want more heat? Add extra gochugaru. Always taste as you mix. This way, you can find your perfect blend of flavors. Keeping cucumbers crunchy is key. After cutting them, sprinkle salt and let them sit. This draws out water, making them crisp. Rinse them well to remove the salt, then dry them with paper towels. This step ensures a satisfying crunch in every bite. Serving your salad well makes it look tasty. Use a nice bowl for the salad. Add a sprinkle of sesame seeds on top for flair. You might also place sliced green onions around the edge. This adds color and makes the dish pop. For a final touch, a few cucumber ribbons on top can impress your guests. {{image_2}} You can change the flavor of the Tik Tok Korean Cucumber Salad. Try adding different spices. For a zing, use a splash of lime juice. If you want more heat, add more gochugaru. You can also mix in some diced bell pepper for added crunch. Each tweak makes it special. This salad can fit many diets. For a gluten-free option, use tamari instead of soy sauce. To make it vegan, skip the sugar or use agave syrup. You can also replace sesame oil with olive oil for a lighter taste. These changes keep it fresh and tasty for everyone. Add a twist with other Asian flavors. Try adding sliced radish for a crunchy bite. You can also mix in some chopped cilantro for a fresh touch. If you love sesame, add toasted nori strips on top. These additions give your salad a unique flair and show off your creativity. For the full recipe, check out the crispy kickin' Korean cucumber salad. To keep your Tik Tok Korean cucumber salad fresh, store it in an airtight container. Make sure to place it in the fridge right after serving. This helps the salad stay crunchy and tasty. If you have leftovers, use them within a few days for the best taste. The salad stays fresh for about 3 days when stored properly. After this time, cucumbers may become soft and lose their crispness. Always check for any signs of spoilage before eating. This salad is best served cold or at room temperature. If you want to enjoy it warm, you can lightly sauté the cucumbers for a minute. However, this may change the salad's texture. Enjoying it fresh is the way to go. For the full recipe, check out the Crispy Kickin' Korean Cucumber Salad section. Tik Tok Korean Cucumber Salad is a fresh, crunchy side dish. It comes from Korean cuisine and is known for its bright flavors. This salad has become popular on Tik Tok for its quick prep and vibrant taste. The dish showcases cucumbers seasoned with sesame oil, soy sauce, and spices. It’s often enjoyed as a side to many Korean meals. The salad reflects the balance of flavors found in Korean dishes, making it a favorite among food lovers. Yes, you can use different vegetables in this salad. While cucumbers are traditional, you can try radishes or carrots. These veggies can add a nice crunch and a different taste. Just remember, if you use softer vegetables, like tomatoes, the texture may change. Make sure to adjust the salt and dressing to suit your new veggies. This way, you keep the salad's fresh and tasty character. To make your Tik Tok Korean Cucumber Salad spicier, add more gochugaru! This Korean red pepper flakes bring heat and flavor. You can start with an extra teaspoon and taste as you go. If you love heat, try adding sliced fresh chili peppers too. Sriracha is another option for a spicy kick. Just mix it into the dressing. Adjust to your liking and enjoy that perfect spicy crunch! This blog post covered all you need to make delicious Tik Tok Korean Cucumber Salad. You learned about key ingredients and followed easy steps for preparation. I shared tips to enhance flavor and maintain texture. You can even try different variations or make it fit special diets. Lastly, we covered how to store your salad for later. Enjoy creating this tasty dish that’s simple and fun to make!](https://therecipehatch.com/wp-content/uploads/2025/08/82ea7a65-18eb-4680-9f82-4cad52d4e6dc.webp)
Want to make a refreshing dish that bursts with flavor? Let me introduce you to Tik Tok Korean Cucumber Salad! This easy recipe is crunchy, fresh, and perfect for brightening …
![To make these tasty pumpkin brownies, you will need: - 1 cup canned pumpkin puree - 1/2 cup almond butter - 1/2 cup coconut sugar (or brown sugar) - 1/3 cup maple syrup - 2 large eggs - 1 teaspoon vanilla extract - 1 cup whole wheat flour - 1/2 cup unsweetened cocoa powder - 1 teaspoon baking powder - 1 teaspoon pumpkin spice (or a mix of cinnamon, nutmeg, and ginger) - 1/2 teaspoon salt - 1/2 cup chocolate chips (optional) If you don’t have some ingredients, don’t worry! Here are some easy swaps: - Almond butter: You can use peanut butter or sun butter. - Coconut sugar: Brown sugar works well as a substitute. - Maple syrup: Honey or agave syrup can also be used. - Whole wheat flour: All-purpose flour is a good choice if you prefer. - Pumpkin spice: A mix of cinnamon, nutmeg, and ginger gives great flavor. - Chocolate chips: You can skip them or use nuts instead. Each brownie is a treat that balances taste and health. Here’s what you get per serving: - Calories: About 150 - Protein: 3g - Fat: 6g - Carbohydrates: 24g - Fiber: 2g - Sugar: 8g These brownies pack a punch of flavor with less guilt! You can find the full recipe in the article. Enjoy baking! First, preheat your oven to 350°F (175°C). This helps the brownies bake evenly. Next, grab a 9x9-inch baking pan. You can grease it or line it with parchment paper. Lining it makes for easy removal later. In a large mixing bowl, add the following: - 1 cup canned pumpkin puree - 1/2 cup almond butter - 1/2 cup coconut sugar (or brown sugar) - 1/3 cup maple syrup - 2 large eggs - 1 teaspoon vanilla extract Mix these ingredients well until they are smooth. You want a nice, creamy blend. This mixture gives your brownies a rich flavor. Now, take another bowl and whisk together these dry ingredients: - 1 cup whole wheat flour - 1/2 cup unsweetened cocoa powder - 1 teaspoon baking powder - 1 teaspoon pumpkin spice (or a mix of cinnamon, nutmeg, and ginger) - 1/2 teaspoon salt Slowly add the dry mix to the wet mixture. Stir gently until just combined. Don’t overmix, or your brownies might turn out too tough. If you like, fold in 1/2 cup chocolate chips now. They will add a nice touch of sweetness. Pour the brownie batter into your prepared pan. Spread it evenly with a spatula. Place it in the oven and bake for 25-30 minutes. To check if they are done, insert a toothpick in the center. It should come out with a few moist crumbs, not wet batter. Once baked, let them cool in the pan for 10 minutes. After that, move them to a wire rack to cool completely. You can cut them into squares and enjoy your pumpkin brownies! For the complete recipe, check [Full Recipe]. To get that perfect texture in your pumpkin brownies, moisture is key. Use canned pumpkin puree for the best results. It adds moisture and flavor. Mix the wet ingredients well before adding the dry ones. This way, you avoid lumps. Do not overmix your batter. Just stir until everything is combined. Overmixing can lead to tough brownies. You want them soft and fudge-like. Spices bring warmth to your pumpkin brownies. Pumpkin spice is a great start, but you can add more. Try a dash of cinnamon or nutmeg for extra depth. Ginger also works well. You can even mix in a bit of vanilla extract. Each spice adds its own unique taste. Experiment with different combinations to find your favorite. Don't be afraid to play with flavors! Baking can be tricky. One common mistake is not measuring your ingredients correctly. Use measuring cups for accuracy. Too much flour can dry out your brownies. Another mistake is opening the oven door too early. This lets out heat and can ruin your bake. Always check for doneness with a toothpick. A few moist crumbs should stick to it, not wet batter. Follow these tips for a perfect batch. For the complete recipe, check out the Full Recipe section. {{image_2}} You can change the sweeteners in these brownies. Coconut sugar gives a rich taste. It has a lower glycemic index. Maple syrup adds a nice flavor and keeps the brownies moist. If you want a sugar-free option, use stevia or erythritol. These sweeteners can change the texture slightly, but they work well. You can make these brownies even better by adding extras. Chopped nuts like walnuts or pecans add crunch. Chocolate chips give a sweet surprise in every bite. I love using dark chocolate chips for more depth. Dried fruit, such as cranberries or raisins, adds a chewy texture. Feel free to mix and match based on your taste! If you need a gluten-free option, swap the whole wheat flour for almond or coconut flour. Both work great and keep the brownies rich. For a vegan version, use flax eggs instead of regular eggs. Just mix one tablespoon of ground flaxseed with three tablespoons of water. Let it sit for a few minutes to thicken. These changes keep the brownies tasty and satisfying. For the full recipe, check out the delicious pumpkin spice brownies! You can freeze pumpkin brownies to enjoy later. First, let them cool completely. Then, cut them into squares. Wrap each square tightly in plastic wrap. Place them in a freezer-safe bag or container. Make sure to label the bag with the date. They can stay fresh for up to three months in the freezer. To keep your pumpkin brownies fresh, store them in an airtight container. Place a piece of parchment paper between layers to prevent sticking. Keep the container in a cool, dry place. They will last up to five days at room temperature. If you want them to last longer, put them in the fridge. In the fridge, they can stay fresh for up to a week. When you want to enjoy your brownies again, reheating is simple. Preheat your oven to 350°F (175°C). Place the brownies on a baking sheet. Cover them with foil to keep moisture in. Heat for about 10 minutes. You can also use a microwave. Heat a brownie for 10-15 seconds. Be careful not to overheat, or they may dry out. Enjoy your delicious pumpkin brownies! For the full recipe, check out the details above. To check if your brownies are done, insert a toothpick in the center. If it comes out with a few moist crumbs, they’re ready. If it has wet batter on it, bake for a few more minutes. A good bake time is about 25 to 30 minutes at 350°F (175°C). Yes, you can make these brownies ahead of time. They store well for about 3 to 4 days in an airtight container. This makes them perfect for parties or family gatherings. You can also freeze them for up to three months. Just wrap them tightly in plastic wrap before freezing. For clean edges, use a sharp knife. First, let the brownies cool completely. Then, dip the knife in hot water and dry it off. This helps the knife glide through the brownies without sticking. Cut slowly and gently for nice, clean squares. Yes, you can substitute pumpkin puree. Applesauce works well for a lighter texture. Mashed bananas can also be a good choice, adding sweetness. If you want a different flavor, try using sweet potato puree. Each option gives a unique taste to your brownies. For the full recipe, check the complete instructions and enjoy these delightful treats. You now know all about making pumpkin brownies. We discussed the key ingredients and how to swap them if needed. I shared step-by-step guides for mixing and baking. I also covered tips for the best texture and avoiding common blunders. Don't forget the variations you can try, like adding nuts or making them vegan. Lastly, I gave you smart storage ideas. Enjoy these brownies with friends and family. They are sure to impress!](https://therecipehatch.com/wp-content/uploads/2025/08/bca91914-88c5-4c52-a22e-6048dc6a313c.webp)
Nothing says fall like warm, gooey Pumpkin Brownies. In this easy recipe, you’ll learn how to whip up a delicious treat that’s perfect for cozy gatherings. From the right ingredients …
. Start by heating a skillet over medium heat. Add 1 pound of ground beef, 1 chopped onion, and 2 minced garlic cloves. Cook until the beef is brown and the onion is clear. This takes about 5 to 7 minutes. If there is extra fat, drain it. This step adds flavor and keeps your goulash rich. Next, transfer the beef mix to your crock pot. Add 1 diced bell pepper, 1 can of diced tomatoes (with juice), 1 can of tomato sauce, and 2 cups of beef broth. These ingredients bring moisture and taste. Stir in 1 cup of uncooked elbow macaroni, 2 teaspoons of Italian seasoning, 1 teaspoon of paprika, and salt and pepper to taste. Mix well to coat the pasta with sauce. Cover the crock pot. Cook on low for 6 to 8 hours or on high for 3 to 4 hours. The goulash is ready when the pasta is soft. Once cooked, stir gently. Top with 1 cup of shredded cheddar cheese. Let it sit for 5 to 10 minutes to melt the cheese. Serve in bowls and garnish with fresh parsley for a bright touch. For a full recipe, check out the details above. Enjoy your hearty meal! To get pasta just right in your goulash, use elbow macaroni. It cooks well in the slow cooker. Add the uncooked pasta during the last hour of cooking. This way, it will soak up all the tasty flavors. Stir gently to coat every piece. Overcooking will make it mushy, so watch the time. While the basic recipe is great, you can add more flavor. Try adding a bay leaf for depth. A splash of Worcestershire sauce brings a nice umami taste. You can also throw in a pinch of red pepper flakes for some heat. Fresh herbs like basil or oregano can brighten up the dish. Just remember to balance the flavors and taste as you go. One big mistake is not browning the meat first. This step adds a lot of flavor. Also, don’t skip the broth. It keeps everything moist as it cooks. Avoid adding too much pasta at once, as it can soak up all the liquid. Finally, don’t rush the cooking time. Low and slow gives the best results. For the full recipe, check out the details above. {{image_2}} You can make a tasty vegetarian version of goulash. Start by using plant-based ground meat or lentils. Replace the beef broth with vegetable broth. Add more veggies like zucchini, carrots, or mushrooms for texture. This version still keeps the heartiness of the dish while being meat-free. You will enjoy the rich flavors and colors from the fresh produce. For a gluten-free goulash, switch to gluten-free pasta. Many brands offer elbow macaroni made from rice or corn. Ensure your tomato sauce and broth are gluten-free as well. This way, you can enjoy a warm, comforting meal without the gluten. You will find that it still tastes delicious and filling. If you like heat, try adding chili powder or crushed red pepper flakes. You can also mix in diced jalapeños for a fresh kick. For a unique twist, drizzle some hot sauce over the finished dish. Adjust the spice levels to your taste. This spicy version will make your goulash stand out and keep things exciting. Feel free to explore these variations for your own goulash. Each option keeps the spirit of comfort while adding your personal touch. Check out the Full Recipe for more details. To store leftover goulash, let it cool first. Then, transfer it to an airtight container. Make sure to seal it tightly. You can keep it in the fridge for up to three days. This helps keep the flavors fresh and tasty. When you are ready to eat, reheat the goulash gently. You can use the microwave or a pot on the stove. If using a microwave, add a splash of water. This keeps the dish moist. Heat it until it's warm all the way through. Stir it halfway to ensure even heating. Freezing goulash is easy and a great way to save it for later. To freeze, let it cool completely. Then, pack it into freezer-safe bags or containers. Try to remove as much air as possible. Label it with the date before placing it in the freezer. You can enjoy it later, up to three months later. When ready to eat, thaw it in the fridge overnight before reheating. For best results, follow the [Full Recipe] steps when cooking again. Yes, you can use other meats. Ground turkey or chicken work well. You could also use beef stew meat. Just cut it into small pieces. Cooking times may vary a bit, so check for doneness. Crock Pot Goulash pairs well with many sides. You can serve it with crusty bread for dipping. A simple green salad adds freshness too. For a heartier meal, consider serving it with garlic bread. Goulash lasts about 3 to 4 days in the fridge. Make sure to store it in an airtight container. For best taste, eat it within this time frame. Yes, you can make goulash on the stovetop. Just follow the same steps, but cook it in a pot. Use medium heat and stir often. The cooking time will be shorter, about 30 to 40 minutes. To make goulash creamy, add cream cheese or sour cream. Stir it in just before serving. This will give your dish a rich and smooth texture. You can also sprinkle in some cheese while cooking for extra creaminess. Try the Full Recipe for more tips! To make the best Crock Pot goulash, you need a few key ingredients. Here’s what you should gather: - 1 pound ground beef - 1 medium onion, chopped - 2 cloves garlic, minced - 1 bell pepper, diced (any color) - 1 can (15 oz) diced tomatoes (with juice) - 1 can (15 oz) tomato sauce - 2 cups beef broth - 1 cup elbow macaroni (uncooked) - 2 teaspoons Italian seasoning - 1 teaspoon paprika - Salt and pepper to taste - 1 cup shredded cheddar cheese (for topping) - Fresh parsley, chopped (for garnish) Each of these ingredients plays a role. Ground beef provides protein and richness. Onions and garlic add depth of flavor. Bell peppers bring sweetness and color. Tomatoes and broth create a hearty base. Elbow macaroni adds texture and makes it filling. When choosing your ingredients, aim for quality. Fresh vegetables and good beef make a big difference. For the best taste, use low-sodium broth. This helps control the salt in your dish. You can find the full recipe above to ensure you have everything you need. This dish is easy to adapt as well, so don’t be afraid to experiment! Crock Pot goulash combines simple ingredients and steps for a tasty dish. We discussed key ingredients and how to pick quality ones for the best flavor. I shared easy cooking tips, common mistakes to avoid, and fun variations. You can also store leftovers easily to enjoy later. With this guide, you're set to make the best goulash. Happy cooking!](https://therecipehatch.com/wp-content/uploads/2025/08/ecdd954d-4cb9-49b3-bd16-21bce123496f.webp)
If you’re craving a warm, hearty meal that’s easy to make, look no further than Crock Pot goulash. This simple dish blends meat, pasta, and veggies for a comforting feast. …
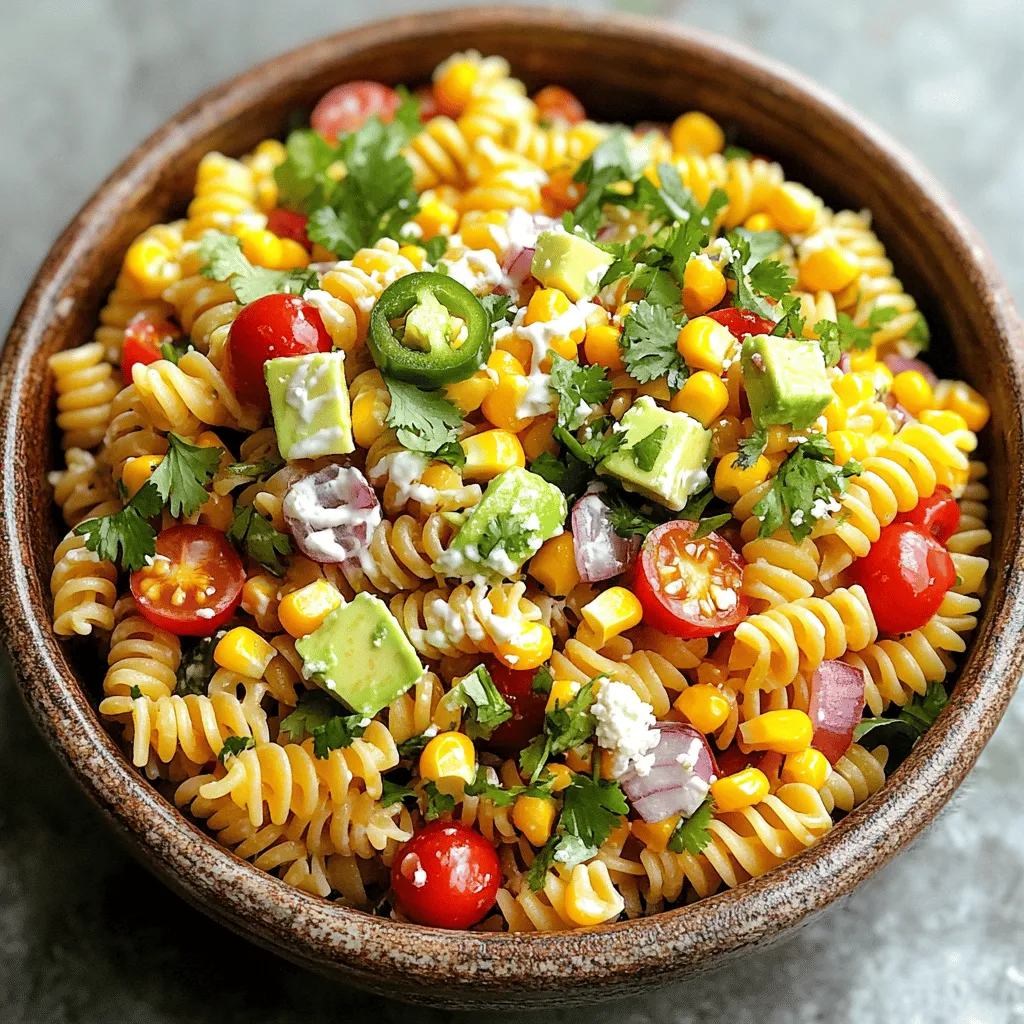
Looking for a fresh and tasty dish that packs a punch? Try my Mexican Street Corn Pasta Salad! This vibrant salad combines sweet corn, colorful veggies, and a creamy dressing, …
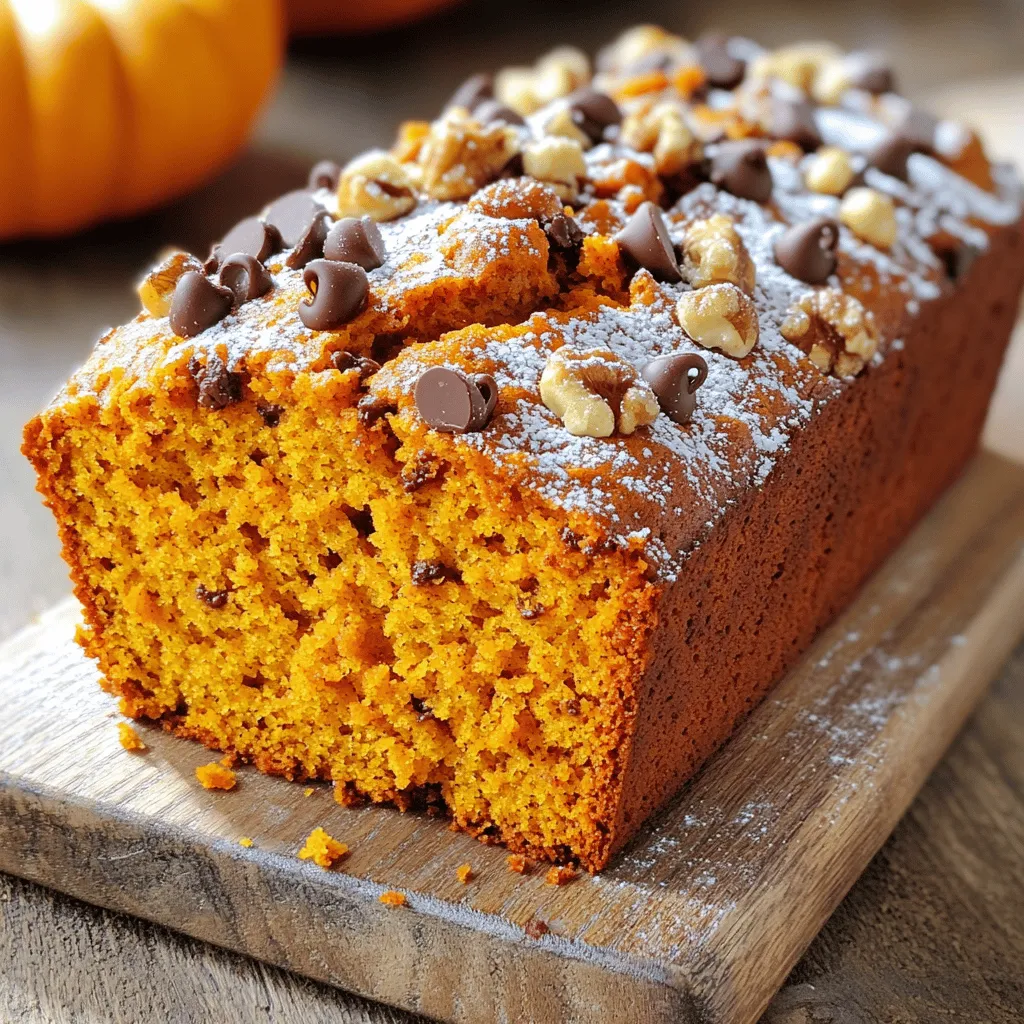
![- Key Ingredients: - 1 cup pure pumpkin puree (canned or fresh) - 1/2 cup unsalted butter, melted - 1 cup brown sugar, packed - 1/2 cup granulated sugar - 2 large eggs - 1 teaspoon vanilla extract - 1 1/2 cups all-purpose flour - 1 teaspoon baking soda - 1/2 teaspoon baking powder - 1 teaspoon ground cinnamon - 1/2 teaspoon ground nutmeg - 1/4 teaspoon ground cloves - 1/2 teaspoon salt - 1 cup semisweet chocolate chips - Optional Add-ins: - 1/2 cup chopped walnuts (optional) Adding walnuts gives a nice crunch to the bread. You may also add spices like ginger or allspice to enhance the flavor. - Measurement Conversions for Common Ingredients: - 1 cup = 240 ml - 1/2 cup = 120 ml - 1 teaspoon = 5 ml - 1 tablespoon = 15 ml These conversions help when you need to adjust the recipe. I always find it useful to keep a conversion chart handy. This way, you can easily switch between measuring systems. For the full recipe, check out Pumpkin Spice Delight Bread. It gives great details on how to make this tasty treat! 1. Prepping Your Oven and Loaf Pan First, set your oven to 350°F (175°C). This is the perfect temperature for baking. Next, take a 9x5-inch loaf pan. Grease it with butter or oil. You can also dust it with flour. This helps the bread come out easily. 2. Creating the Wet Ingredients Mixture In a large mixing bowl, melt 1/2 cup of unsalted butter. Add 1 cup of brown sugar and 1/2 cup of granulated sugar. Use a whisk to mix them well. Then, crack in 2 large eggs. Pour in 1 cup of pure pumpkin puree and 1 teaspoon of vanilla extract. Blend until smooth and creamy. 3. Mixing Dry Ingredients for Optimal Flavor Grab another bowl and whisk together 1 1/2 cups of all-purpose flour, 1 teaspoon of baking soda, and 1/2 teaspoon of baking powder. Add in 1 teaspoon of ground cinnamon, 1/2 teaspoon of ground nutmeg, 1/4 teaspoon of ground cloves, and 1/2 teaspoon of salt. This mix gives your bread great flavor. 1. Combining Wet and Dry Ingredients Slowly add the dry mix to the wet mix. Stir gently until just combined. Be careful not to overmix, as this helps keep the bread soft. 2. Folding in Chocolate Chips and Nuts Now it’s time for the fun part! Fold in 1 cup of semisweet chocolate chips. If you like, you can add 1/2 cup of chopped walnuts for extra crunch. Make sure they are evenly spread through the batter. 3. Baking Time and Testing Doneness Pour the batter into your prepared loaf pan. Smooth the top with a spatula. Place it in the oven and bake for 60-70 minutes. To check if it’s done, insert a toothpick into the center. If it comes out clean, the bread is ready! 1. Cooling Instructions for Perfect Texture Once done, take the bread out of the oven. Let it cool in the pan for about 10 minutes. Then, move it to a wire rack to cool completely. This keeps it from getting soggy. 2. Best Practices for Slicing Bread When it’s cool, slice the bread with a sharp knife. This helps you get clean cuts. Serve it warm, maybe with whipped cream or a sprinkle of powdered sugar. It adds a nice touch! For the complete recipe, refer to [Full Recipe]. Avoiding Overmixing for a Tender Loaf To keep your pumpkin bread soft, mix gently. When you combine wet and dry ingredients, stir just until you see no flour. If you mix too much, the bread gets tough. This is key for a light, fluffy texture. How to Tell When Bread is Fully Baked To check if your bread is done, use a toothpick. Insert it in the center of the loaf. If it comes out clean, your bread is ready. If it has wet batter on it, bake for a few more minutes. Keep an eye on it to avoid overbaking. Recommended Spice Adjustments You can add more spices to boost flavor. Try increasing cinnamon or adding ginger for a warm kick. A pinch of allspice or cardamom can also make it special. Adjusting spices lets you make the bread your own. Ways to Amp Up the Chocolate Flavor To make the chocolate shine, use high-quality chocolate chips. You could also melt some chocolate and swirl it into the batter before baking. This gives you rich chocolate pockets in every bite. For an added twist, try dark chocolate chips for a deeper taste. For more details on making this delicious treat, check the Full Recipe. {{image_2}} For a gluten-free option, use alternative flours. Almond flour, coconut flour, or gluten-free all-purpose flour work well. Each flour has its own texture. Almond flour gives a nutty flavor, while coconut flour adds a light sweetness. When using these flours, you may need to adjust the liquid. Gluten-free flours absorb more moisture. Add a bit more pumpkin puree or a splash of milk to keep the bread moist. You can make a healthier version by swapping sugars with natural sweeteners. Honey, maple syrup, or coconut sugar can replace brown and granulated sugars. These options add flavor while cutting refined sugars. To lower fat, try using applesauce instead of butter. This keeps the bread moist and flavorful. You can also choose Greek yogurt for creaminess without extra fat. Get creative with other flavors! Adding dried fruits like cranberries or raisins brings a nice chew. They add natural sweetness too. You can also mix in citrus zests for a fresh twist. When it comes to chocolate, you have choices. Dark chocolate chips offer a rich taste, while milk chocolate gives a sweeter bite. If you want something unique, try white chocolate for a creamy finish. For more details, check out the Full Recipe. - Short-Term Storage at Room Temperature Keep your pumpkin bread at room temperature for up to three days. Wrap it tightly in plastic wrap or place it in an airtight container. This keeps it moist and tasty. Make sure to store it in a cool, dry place away from direct sunlight. - Long-Term Storage in the Freezer For longer storage, freeze your pumpkin bread. Wrap it well in plastic wrap, then place it in a freezer bag. This helps prevent freezer burn. It can stay fresh for about three months in the freezer. When you want to eat it, just take it out and let it thaw at room temperature. - Methods to Reheat for Optimal Freshness To reheat, you can use an oven or microwave. For the oven, wrap the bread in foil and heat at 350°F (175°C) for about 10-15 minutes. For the microwave, place a slice on a plate and heat for about 15-20 seconds. This keeps the bread soft and warm. - Serving Suggestions after Reheating After reheating, serve your pumpkin bread with a pat of butter or a drizzle of honey. You can also enjoy it with a scoop of vanilla ice cream or a dollop of whipped cream. These toppings add a nice touch to the warm bread. For a fun twist, try adding a sprinkle of cinnamon or a few chocolate chips on top! Can I use fresh pumpkin instead of canned puree? Yes, you can use fresh pumpkin! Just make sure to cook it first. Cut the pumpkin, remove the seeds, and bake it until soft. Then, blend it until smooth. You’ll get great flavor from fresh pumpkin. How can I make sure my bread is moist? To keep your bread moist, do not overmix the batter. Mix until just combined. Also, make sure to measure your ingredients correctly. Adding a bit of extra pumpkin puree can help too. Finally, bake it just until a toothpick comes out clean. What to do if the bread sinks in the middle? If your bread sinks, it may be due to too much liquid or underbaking. Check your oven temperature; it may run too hot. Make sure to measure all ingredients correctly. If you see it sinking, try baking it a bit longer. Why is my pumpkin bread too dry? Dry bread often comes from too much flour or overbaking. Be sure to spoon flour into your measuring cup instead of scooping it directly. Also, check your oven to avoid baking too long. A little extra pumpkin puree can help with moisture. What are the best toppings for pumpkin bread? You can top pumpkin bread with cream cheese frosting, a sprinkle of cinnamon sugar, or even a drizzle of chocolate. A dollop of whipped cream or a scoop of ice cream makes it a real treat! Can I make mini loaves instead of a full loaf? Yes, mini loaves are a fun twist! Just adjust your baking time to about 25-30 minutes. Check for doneness with a toothpick. You’ll have cute, shareable bites that are perfect for gifts or parties. In this post, we covered how to create delicious pumpkin bread. We looked at essential ingredients like pumpkin puree and chocolate chips. You learned how to prep, bake, and cool your bread for the best taste. I shared tips for perfect texture and flavor and even variations for gluten-free or healthier options. Remember, storing and reheating bread properly makes a big difference. With this guide, you can bake great pumpkin bread every time. Enjoy the process and share your tasty creations with others!](https://therecipehatch.com/wp-content/uploads/2025/08/012198c4-45a9-4b60-ac00-02165f703728.webp)
Looking for an easy, comforting treat? This Pumpkin Bread with Chocolate Chips recipe is a game-changer! You get the warm flavors of pumpkin combined with sweet chocolate in every bite. …
Looking for a quick and refreshing snack? This 5-Minute Cucumber Snack is the answer! Packed with flavor and crunch, this treat is perfect for any time of the day. With …

Craving something warm and filling? My Easy Steak & Potato Soup is just what you need. This hearty dish combines tender steak and fluffy potatoes, making it perfect for chilly …

Are you ready to enjoy a treat that combines the warmth of pumpkin and the sweetness of chocolate? Look no further! In this post, I’ll share my favorite Pumpkin Chocolate …
If you’re searching for the ultimate pumpkin bread recipe, you’re in the right place! I’m excited to share my best-kept secret for a perfect loaf that’s moist, delicious, and packed …