Iced Pumpkin Cream Chai Latte Flavorful Autumn Sip
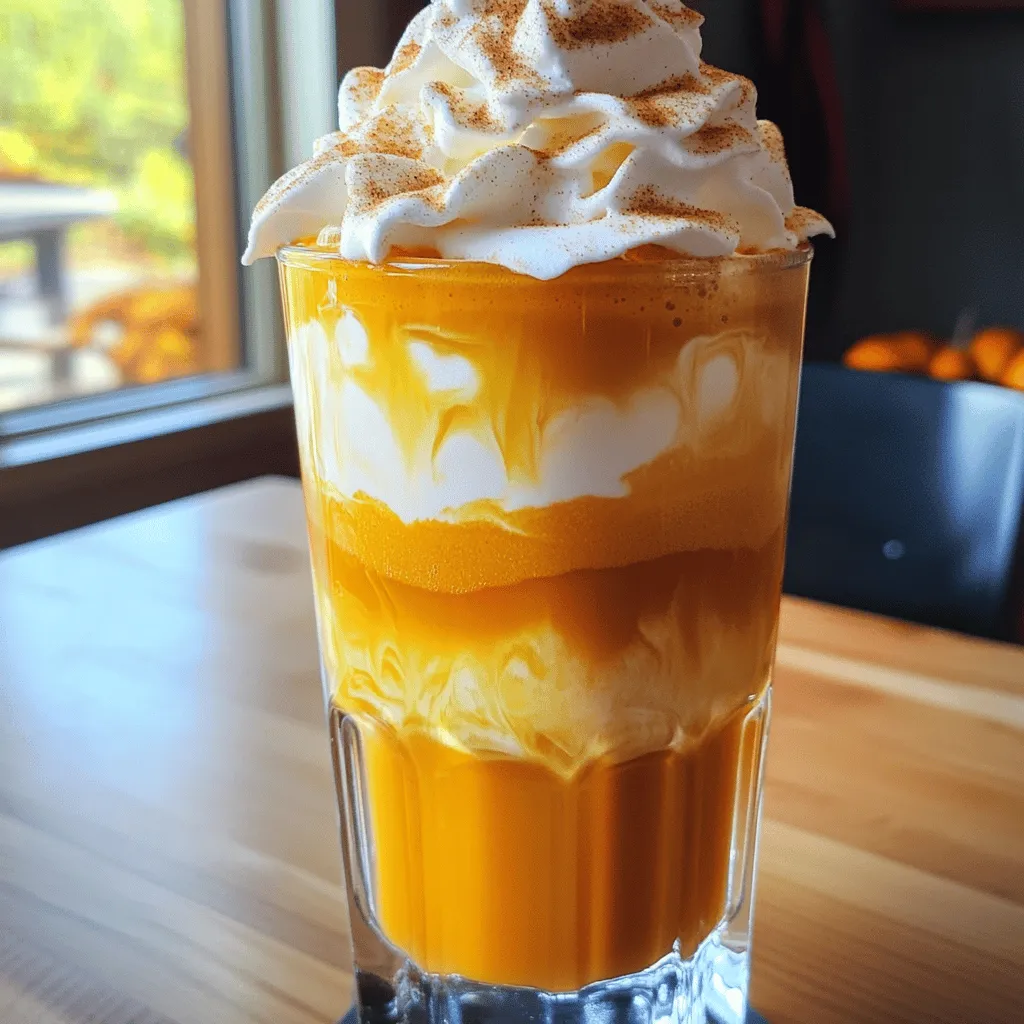
Autumn is here, and so is the time for cozy drinks! The Iced Pumpkin Cream Chai Latte blends warming spices with smooth pumpkin cream for a refreshing sip. I’ll show …
Autumn is here, and so is the time for cozy drinks! The Iced Pumpkin Cream Chai Latte blends warming spices with smooth pumpkin cream for a refreshing sip. I’ll show …
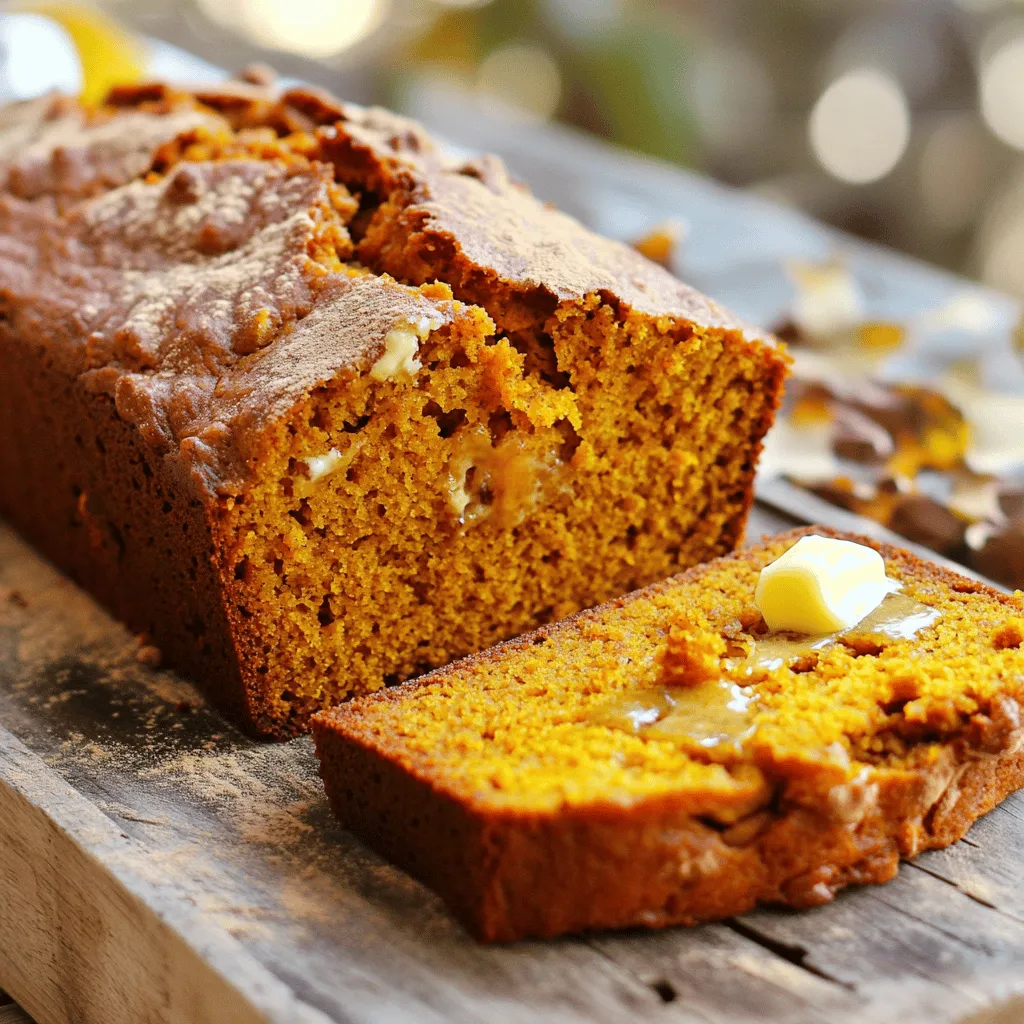
Do you crave that warm, spiced Pumpkin Bread from Starbucks? If you’re like me, you know that smell and flavor makes fall extra special. In this post, I’ll share my …
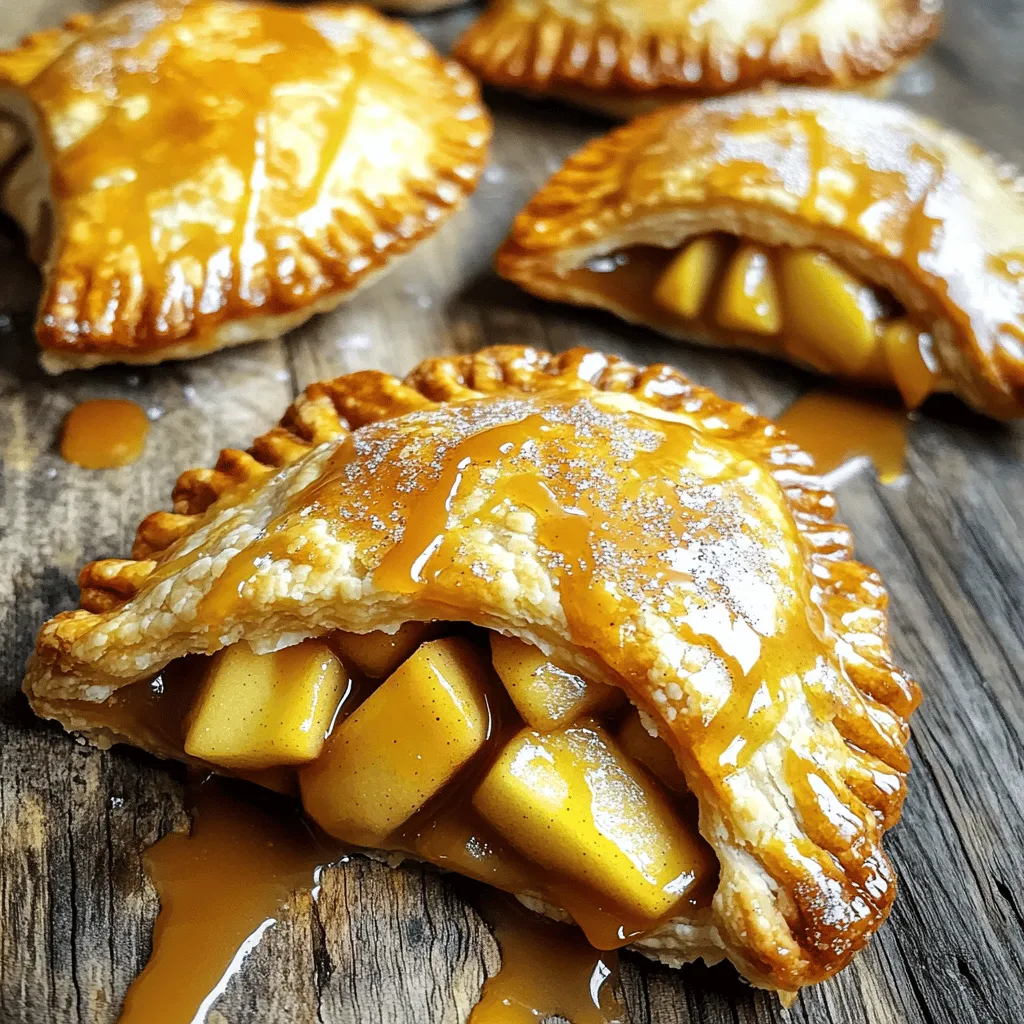
Get ready to indulge in a sweet treat! Caramel Apple Hand Pies are a delightful blend of crisp apples and gooey caramel, all wrapped in a flaky crust. In this …
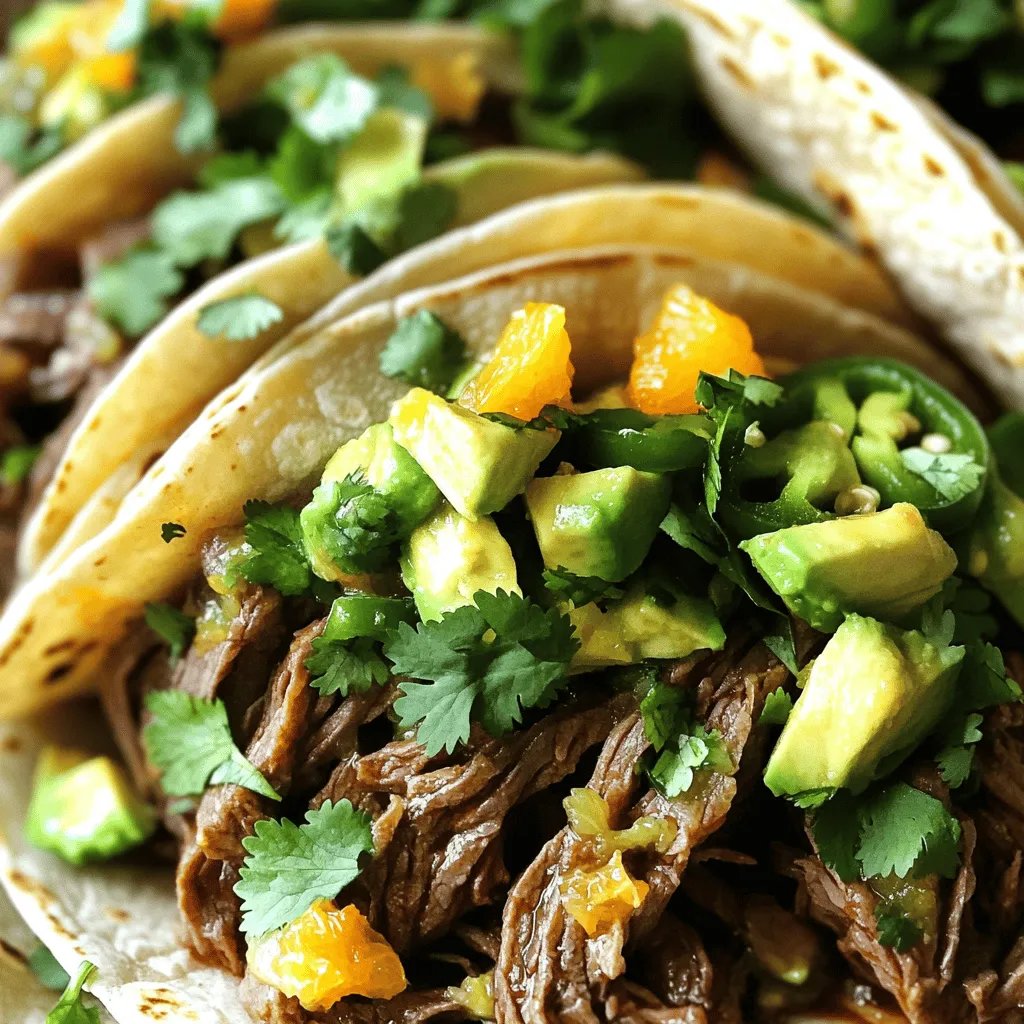
Ready to elevate your meals? This Carne Asada Crockpot Recipe makes it easy to enjoy rich flavors with minimal effort. I’ll guide you through all the steps, from choosing the …
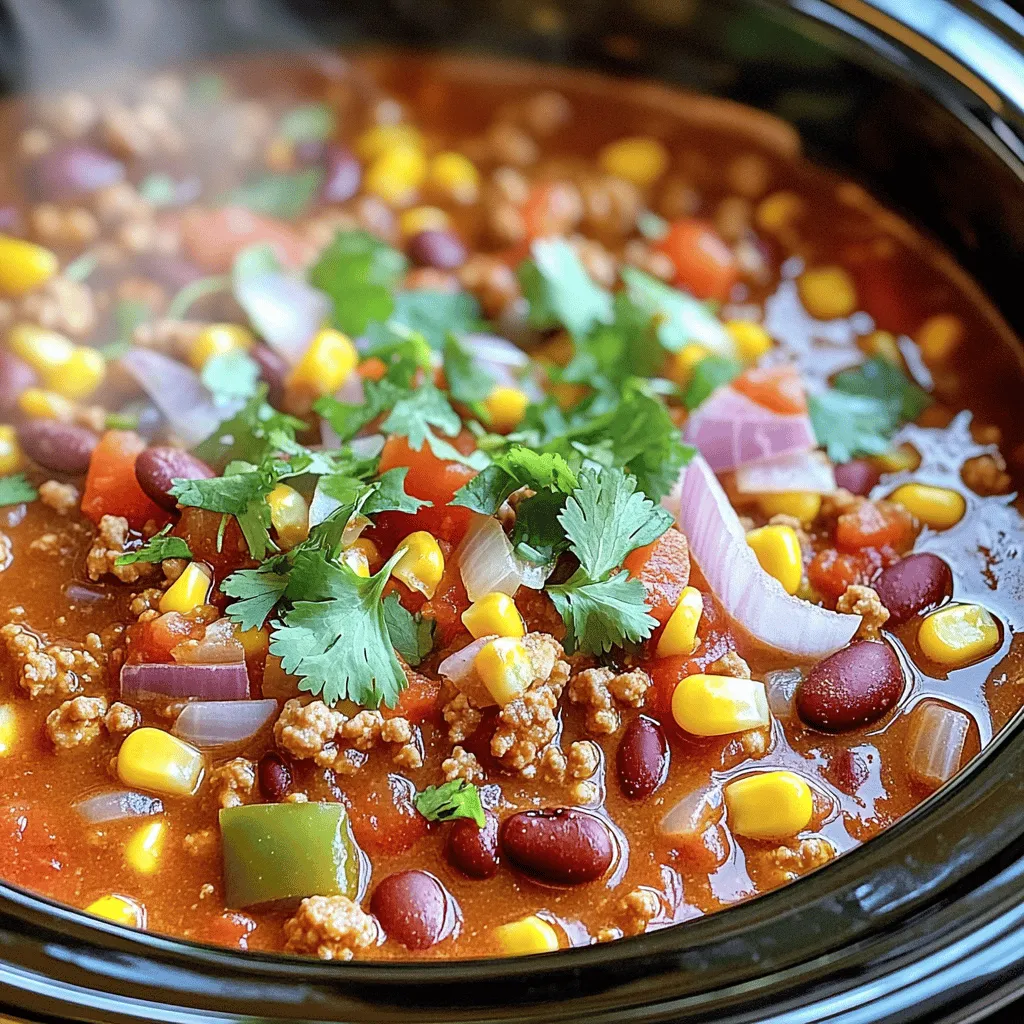
Craving a cozy meal that warms you from the inside out? You’ll love my Best Crockpot Chili recipe! Packed with hearty ingredients like ground meat, beans, and spices, this dish …

Fall is here, and that means it’s time for cozy treats! If you’re craving something warm and comforting, Pumpkin Spice Milk is your answer. This creamy delight combines rich flavors …

Are you ready to spice up your dinner routine? Let’s dive into my Fiesta Lime Chicken with Avocado recipe! This dish combines juicy chicken with zesty lime and creamy avocado, …
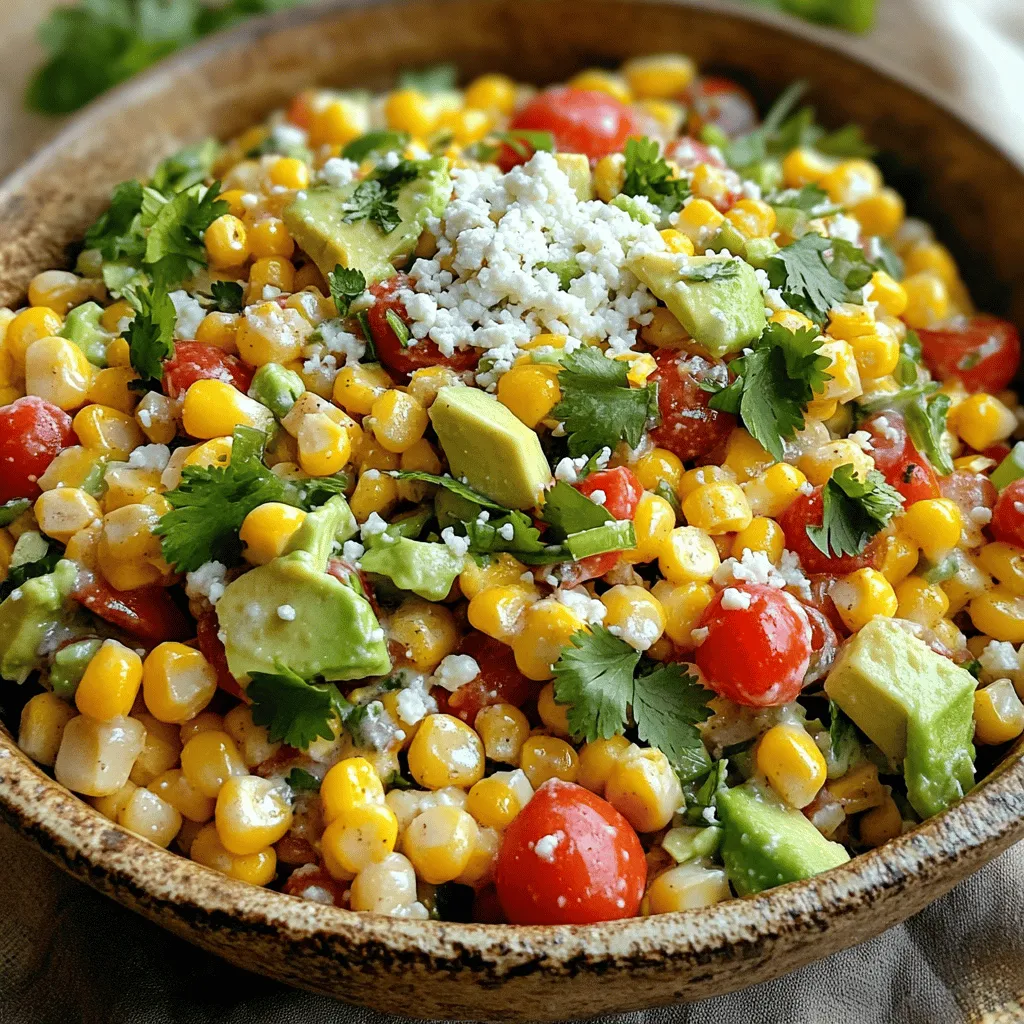
Looking for a fresh and tasty side dish? You’ve found it! This Mexican Corn Salad is easy to whip up and packs a punch with vibrant flavors. With simple ingredients …
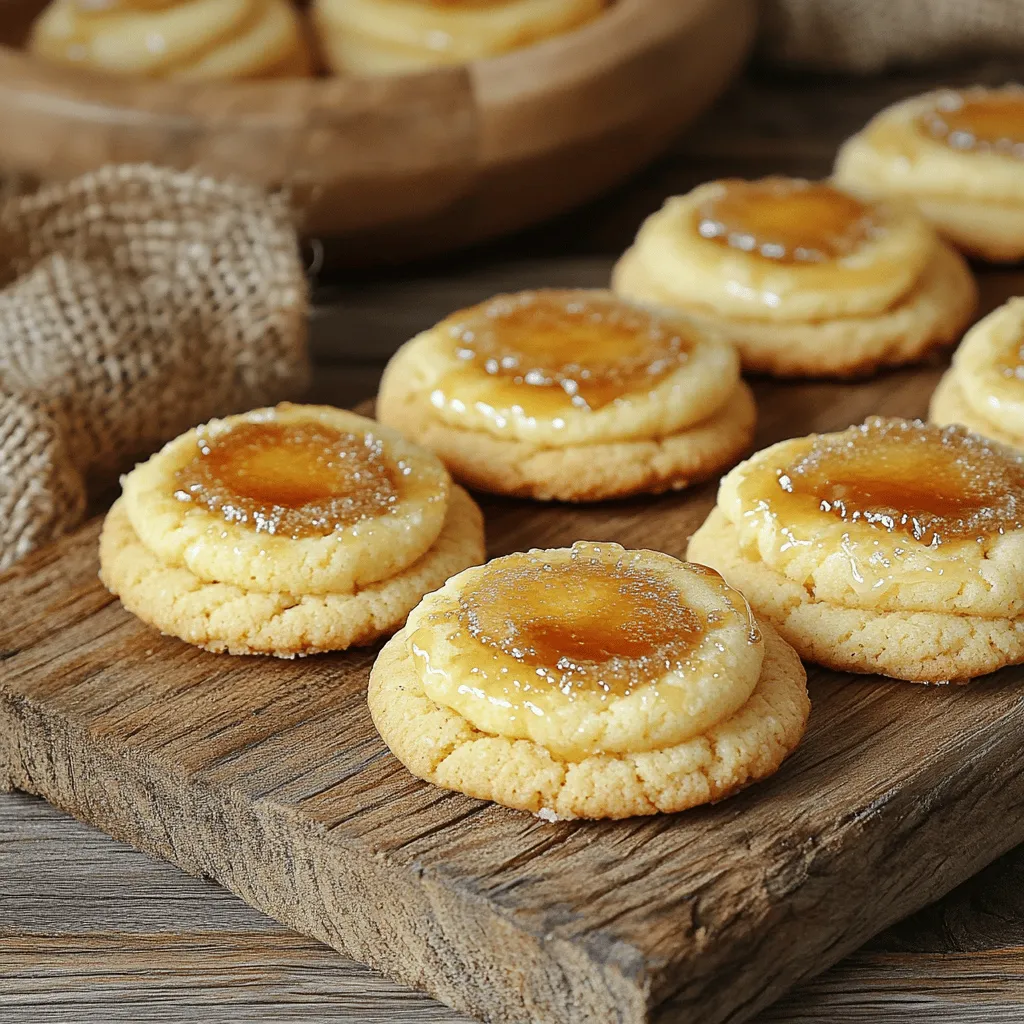
Welcome to the world of Crème Brûlée Cookies! If you love the classic dessert, you’ll adore these cookies. They bring rich, creamy flavor and a sweet, crunchy top. Today, I …
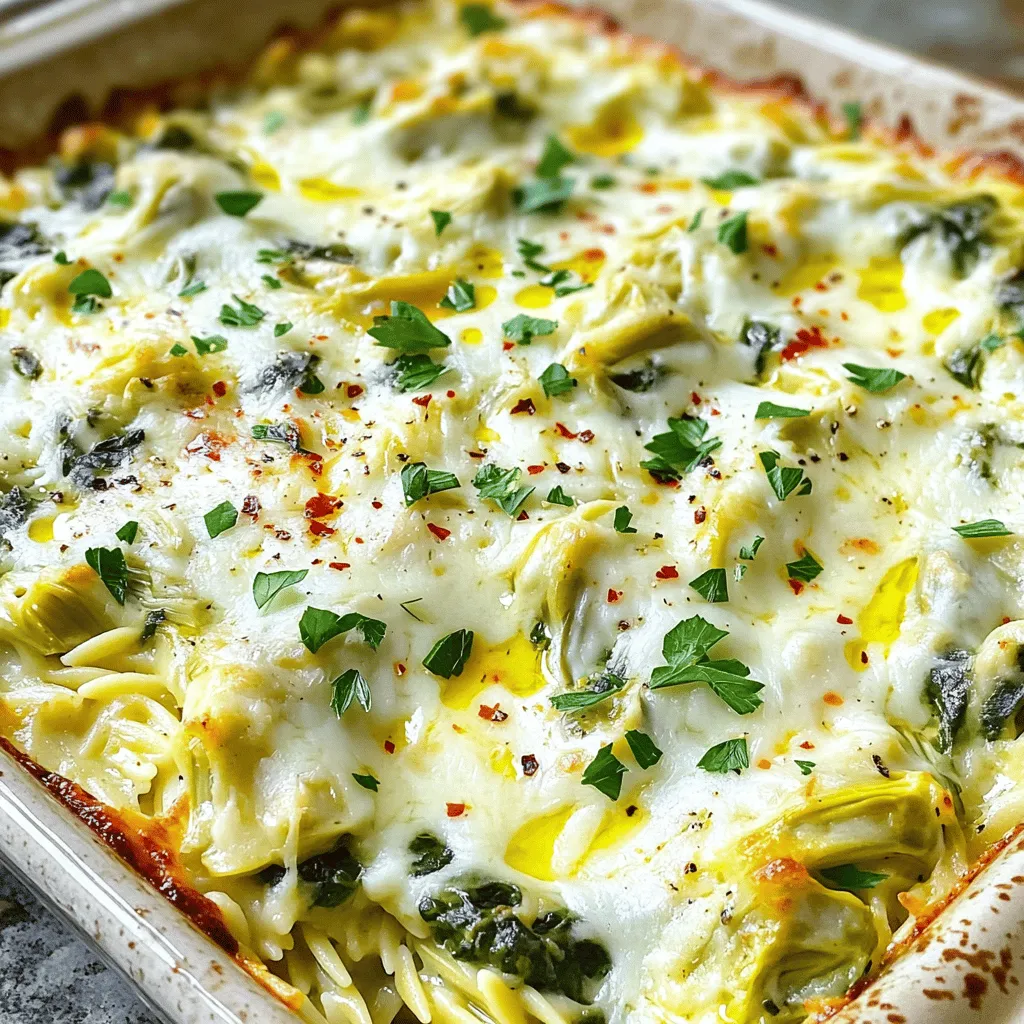
Looking for a cozy dish that packs a cheesy punch? My Cheesy Spinach Artichoke Orzo Bake is the perfect meal for you! This comforting bake combines tender orzo, fresh spinach, …