Toffee Apple Pie with Vanilla Custard Delight
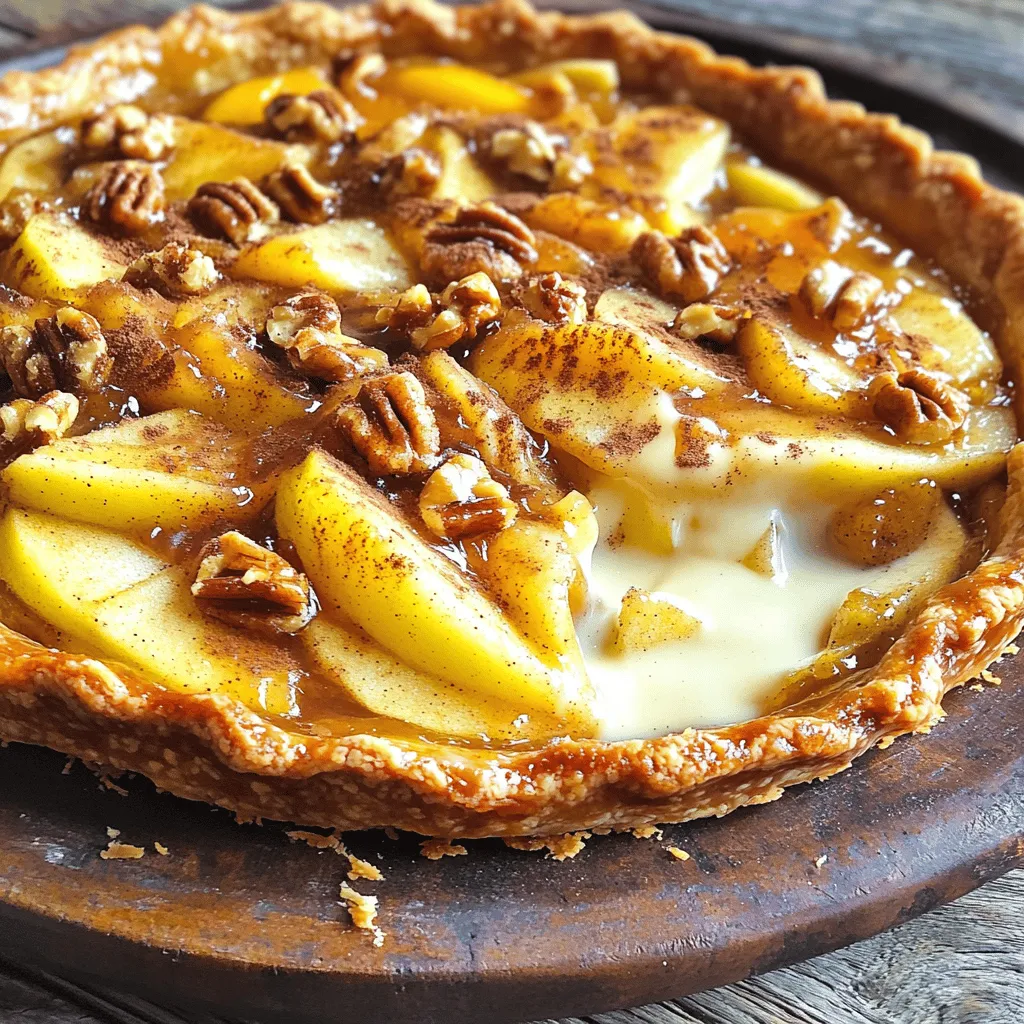
Are you ready to treat yourself to something sweet and cozy? This Toffee Apple Pie with Vanilla Custard Delight combines warm, spiced apples and rich toffee in a crust that …
Are you ready to treat yourself to something sweet and cozy? This Toffee Apple Pie with Vanilla Custard Delight combines warm, spiced apples and rich toffee in a crust that …
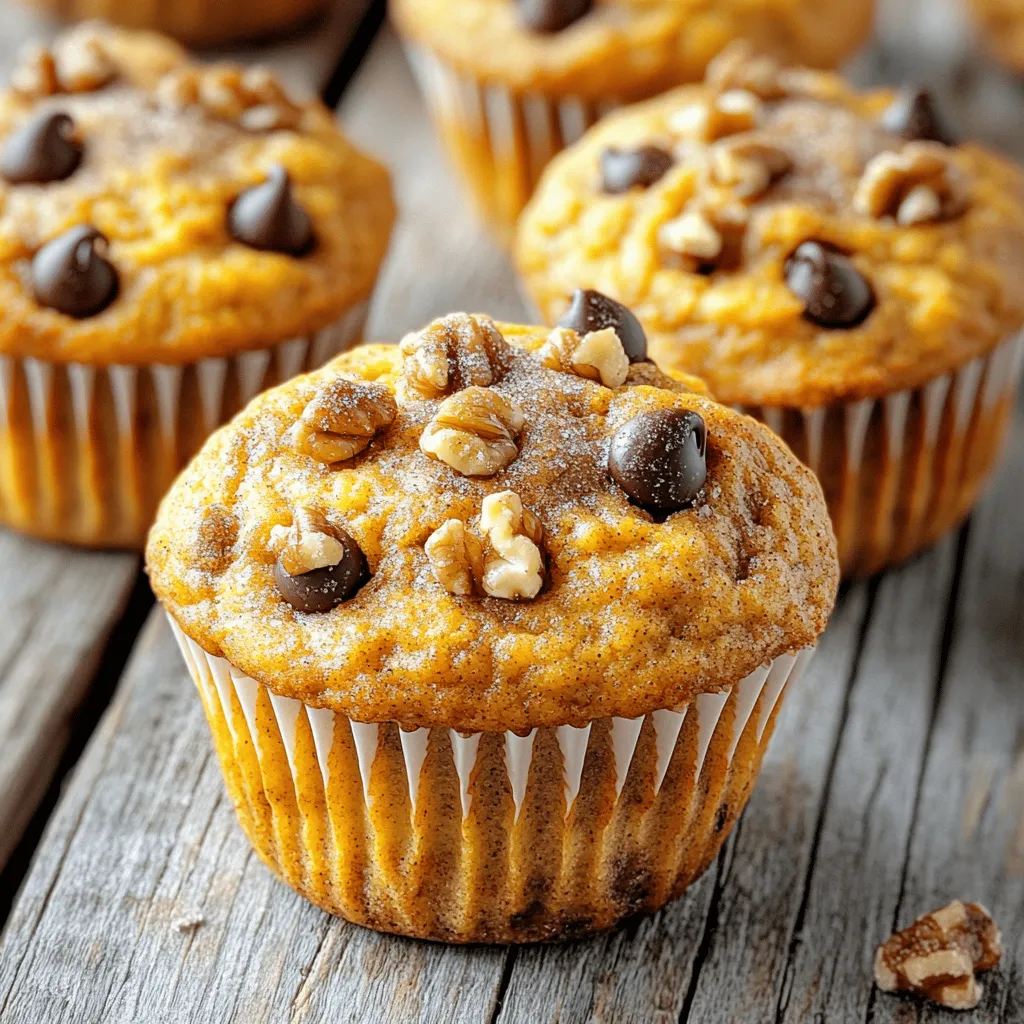
If you love fall flavors, you’ll adore these Pumpkin Spice Cottage Cheese Muffins. This easy recipe blends creamy cottage cheese with pumpkin puree for moisture and richness. You’ll find simple …
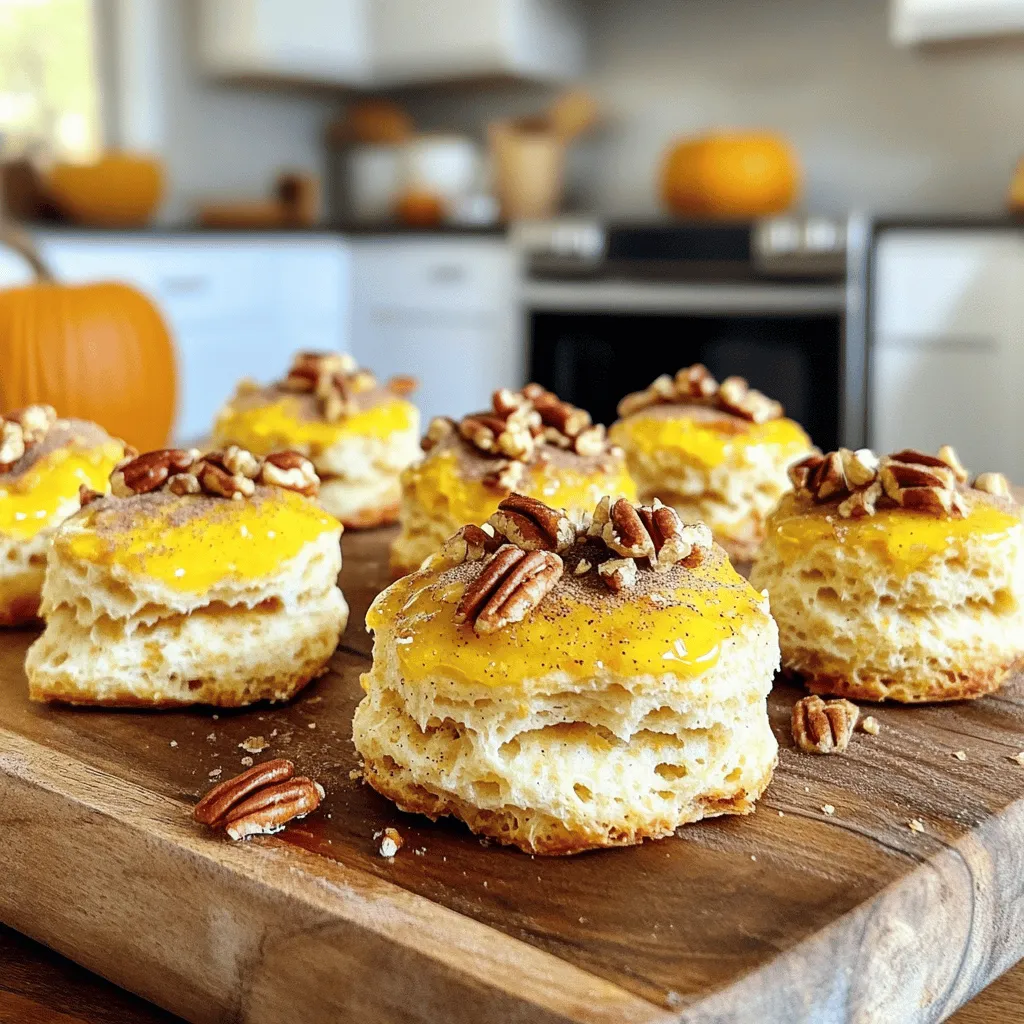
Fall is here, and there’s no better way to celebrate than with small batch pumpkin biscuits! These soft, fluffy treats are easy to make and perfect for cozy mornings or …
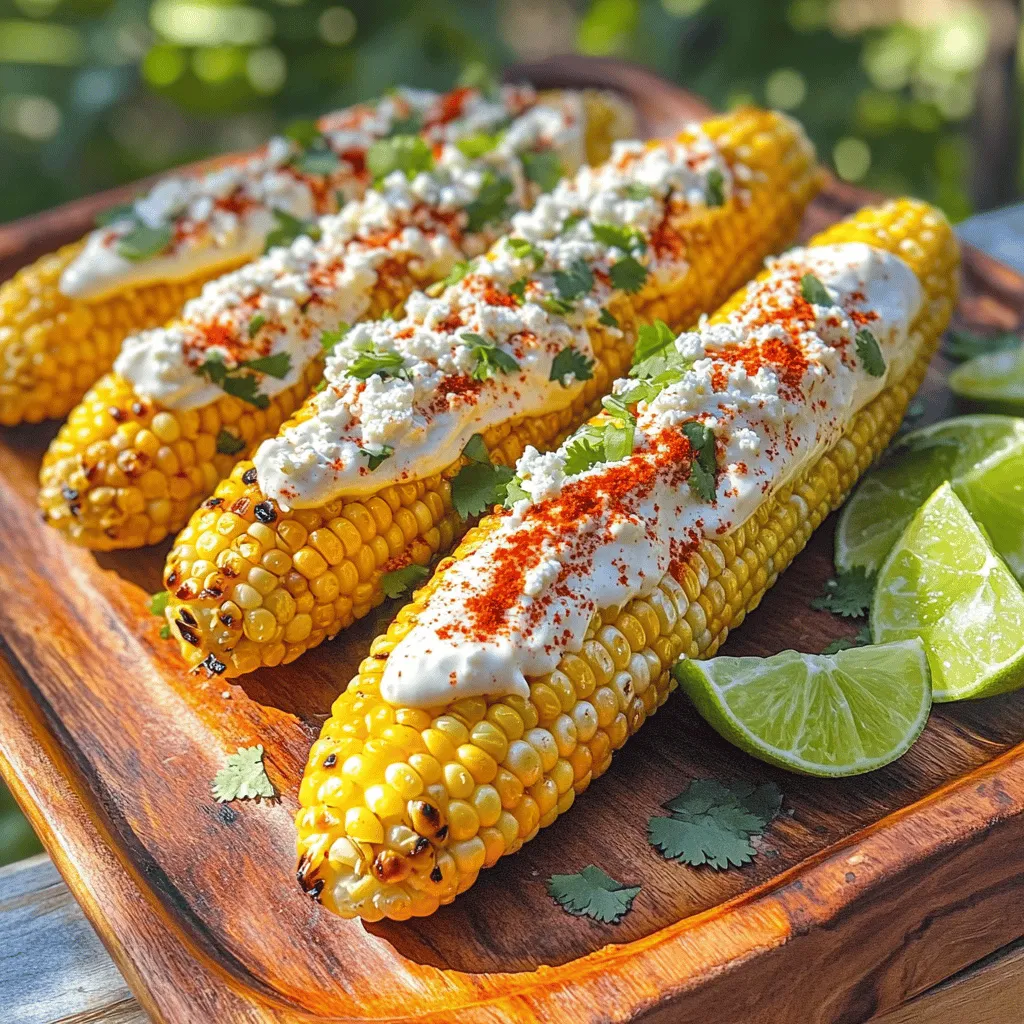
Are you ready to elevate your summer cookouts with the bold flavors of Elote? This delightful Mexican street corn is packed with taste and easy to make. I’ll guide you …
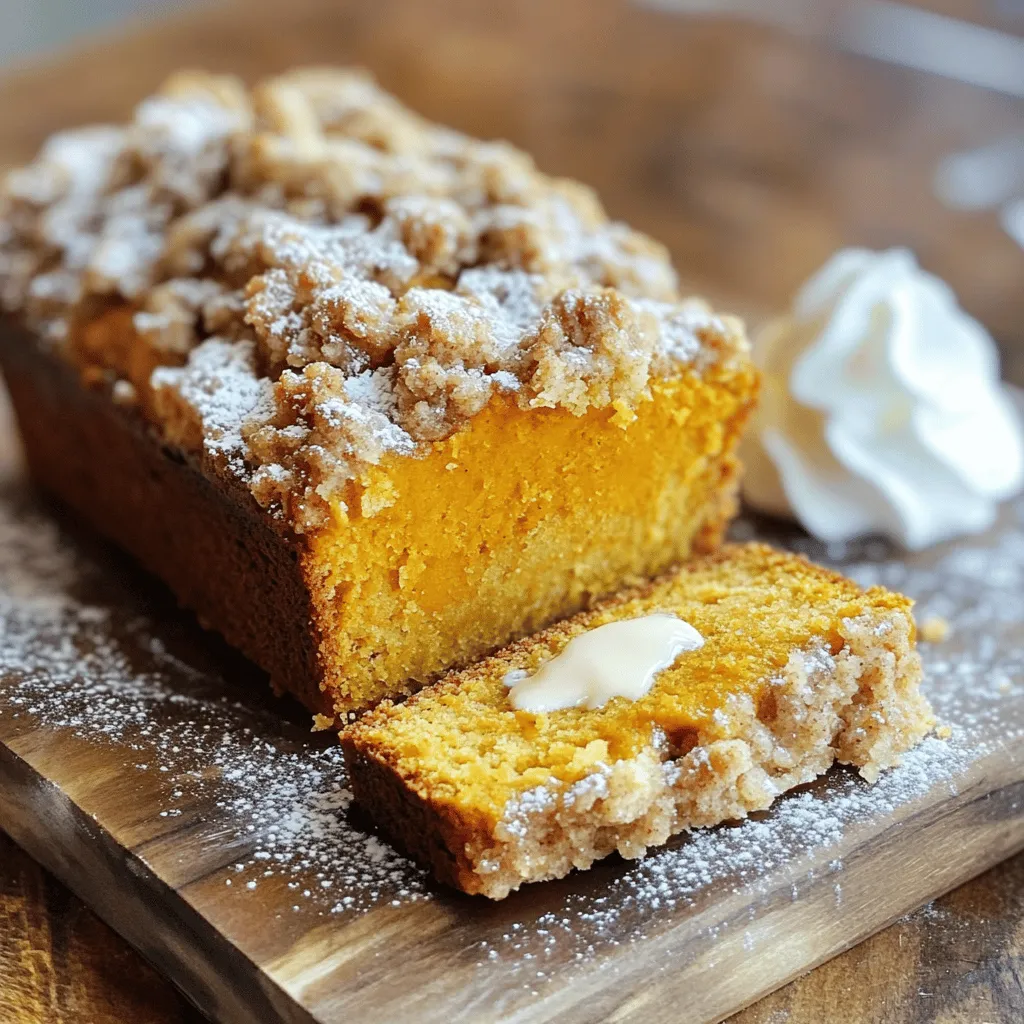
If you love fall flavors, you need to try my Streusel Pumpkin Loaf recipe. This loaf is moist, packed with pumpkin goodness, and topped with a crunchy streusel that makes …
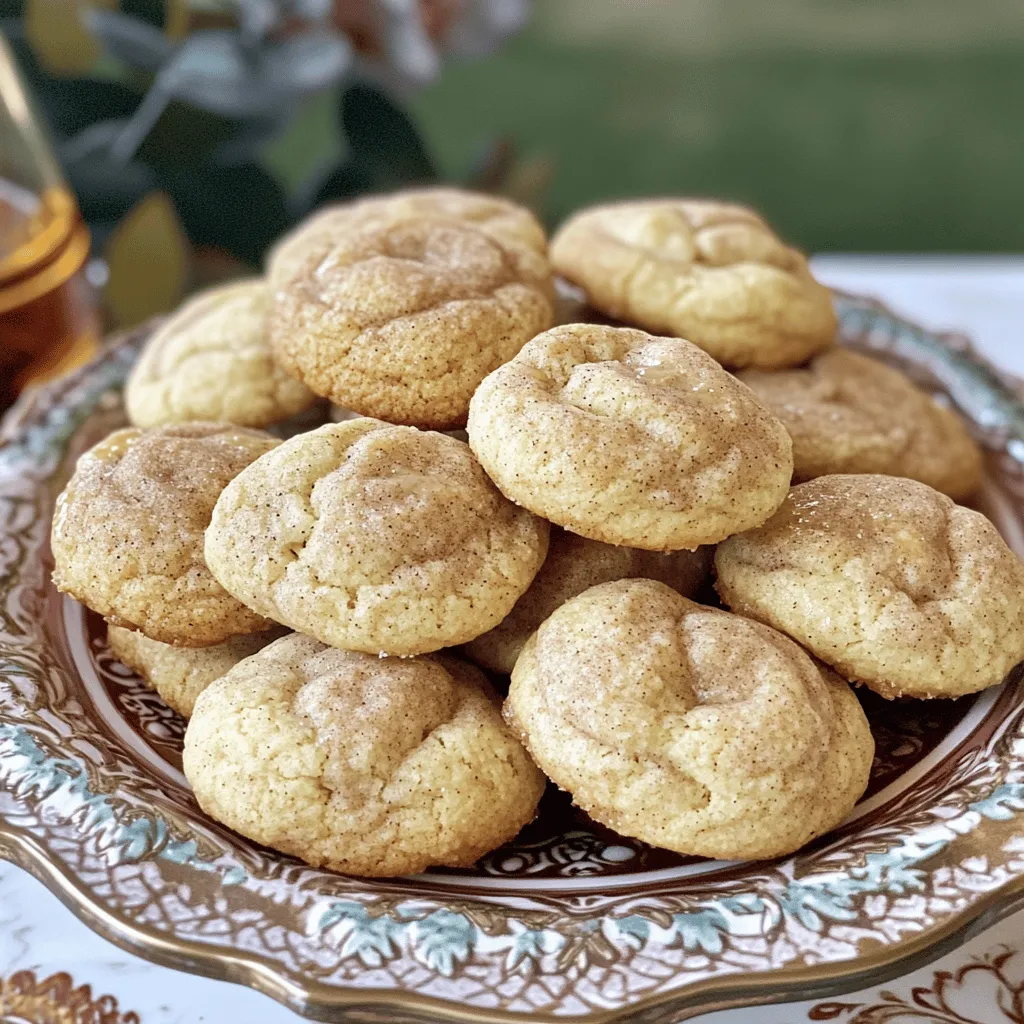
Craving a sweet treat that feels like a warm hug? Maple Snickerdoodles are just the answer! These cookies blend the cozy flavors of maple and cinnamon, creating a delightful comfort …
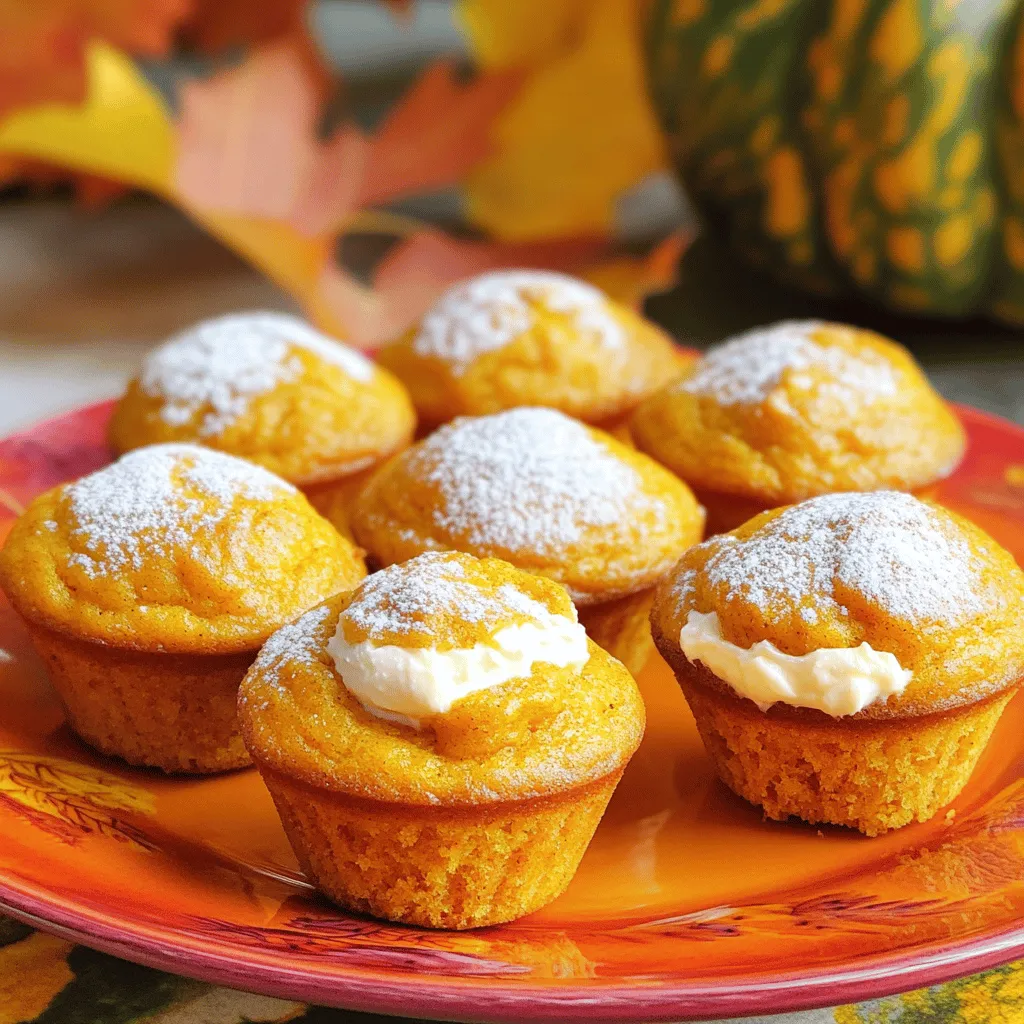
Are you ready to bake a treat that’s perfect for fall? Mini Pumpkin Cream Cheese Muffins are the answer! This easy and tasty recipe mixes the warm flavors of pumpkin …
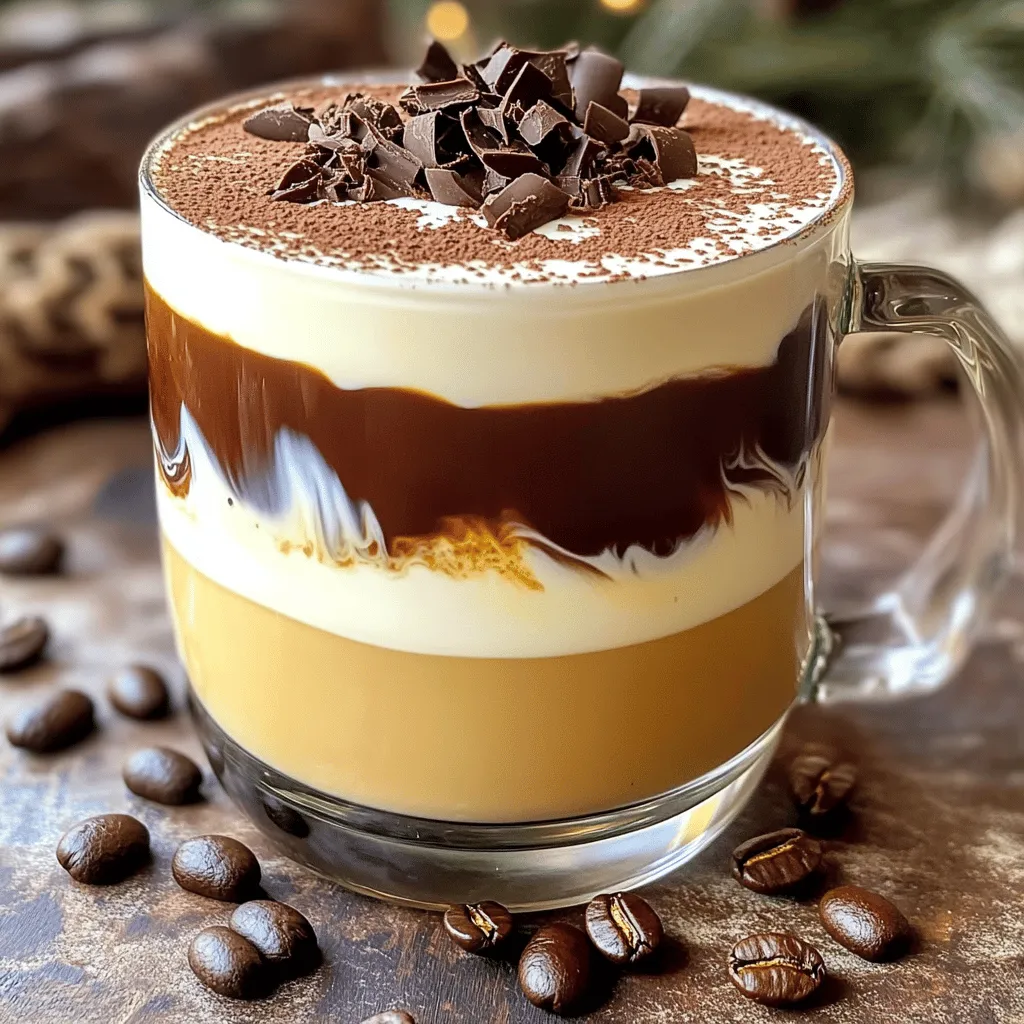
Do you crave a rich, creamy coffee drink that adds a touch of dessert to your routine? The Tiramisu Latte might just be your new favorite! This delightful drink combines …
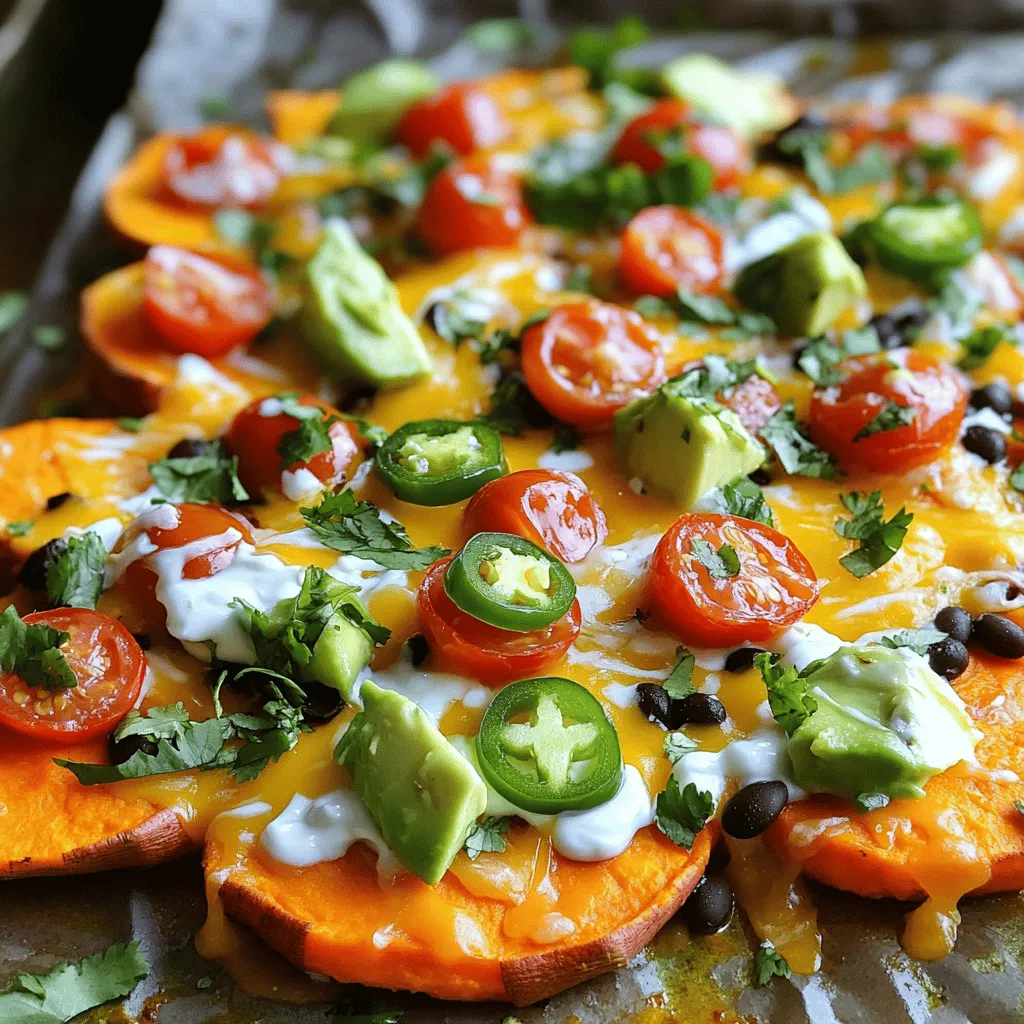
Are you ready to elevate your snack game? Loaded Sweet Potato Nachos are here to impress! With sweet potatoes as the perfect base, you can layer on black beans, fresh …
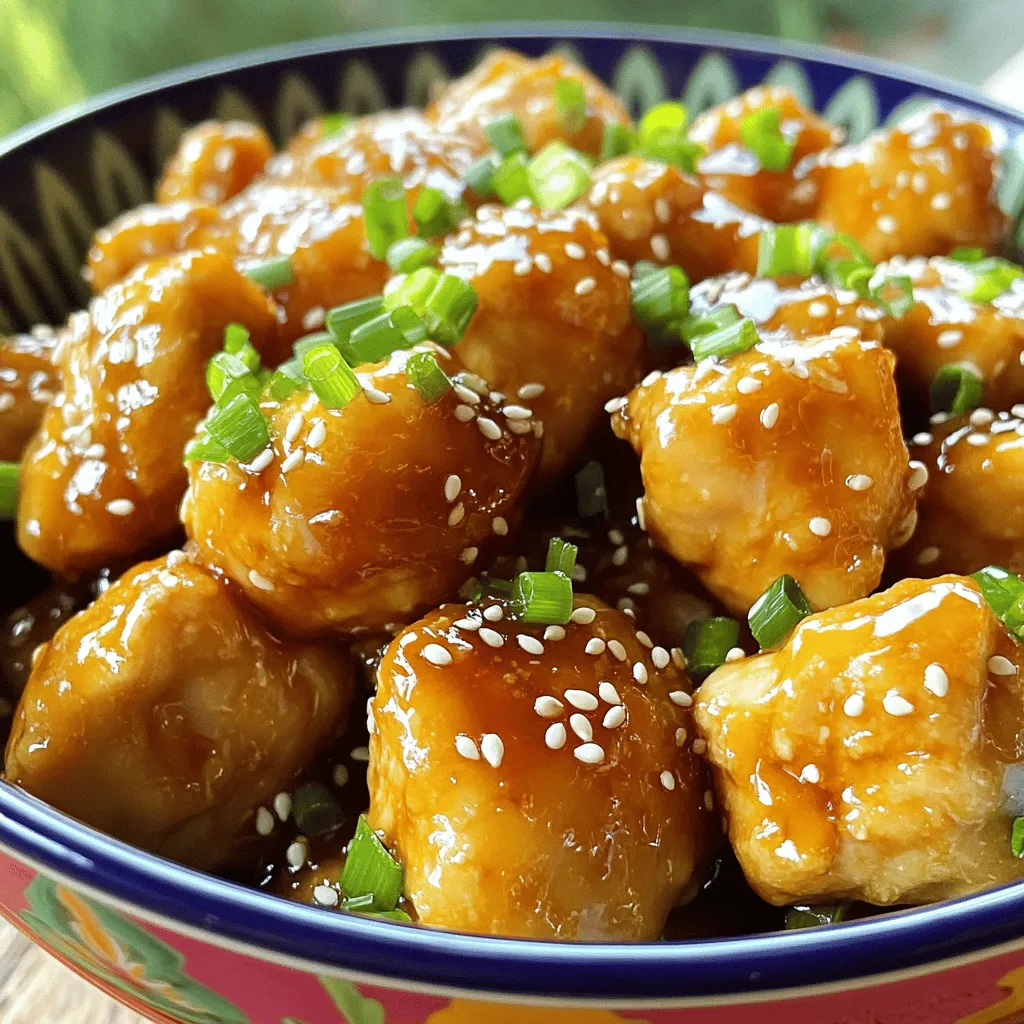
If you’re craving a dish that’s both savory and simple, you’ve hit the jackpot! My Honey Garlic Chicken Bites are perfect for a busy weeknight or a fun weekend treat. …